
Super Administrator
This document is intended for users with the Super Administrator role in the Yanfei Computing Power Scheduling Platform. The Super Administrator is primarily responsible for managing System Administrators, including adding and maintaining their account information.
Login
User Login
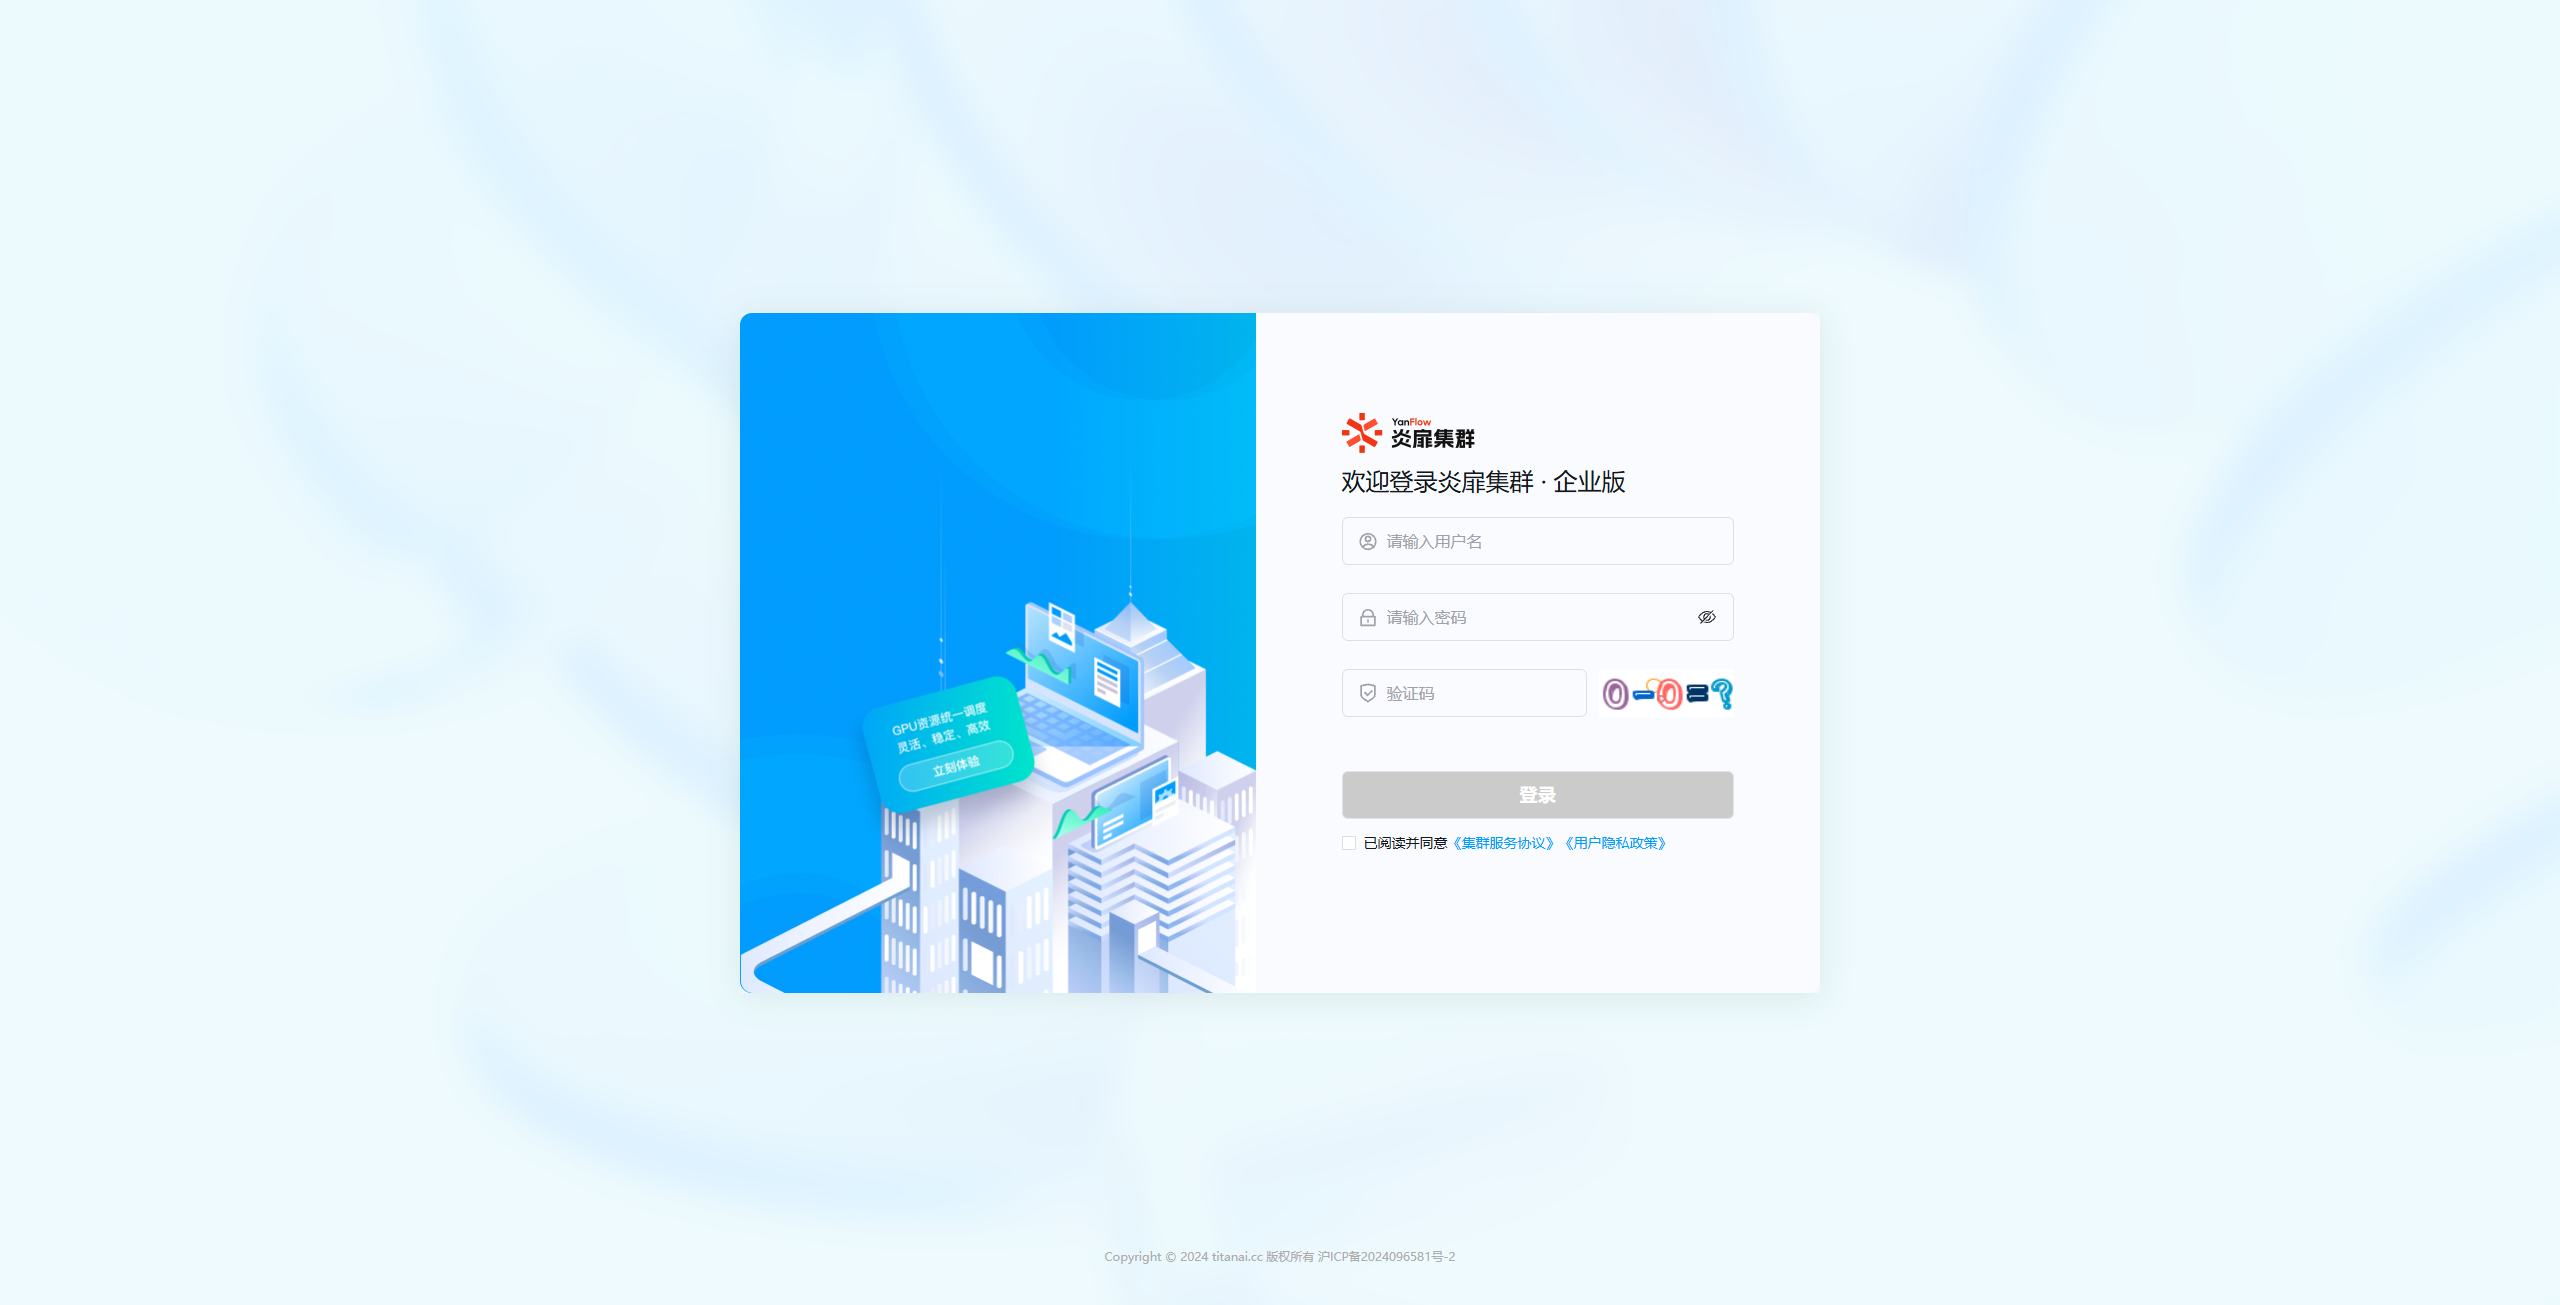
Enter your Username, Password, and Verification Code, check the agreement box, and click Login. Once verified, you will enter the system.
Logout
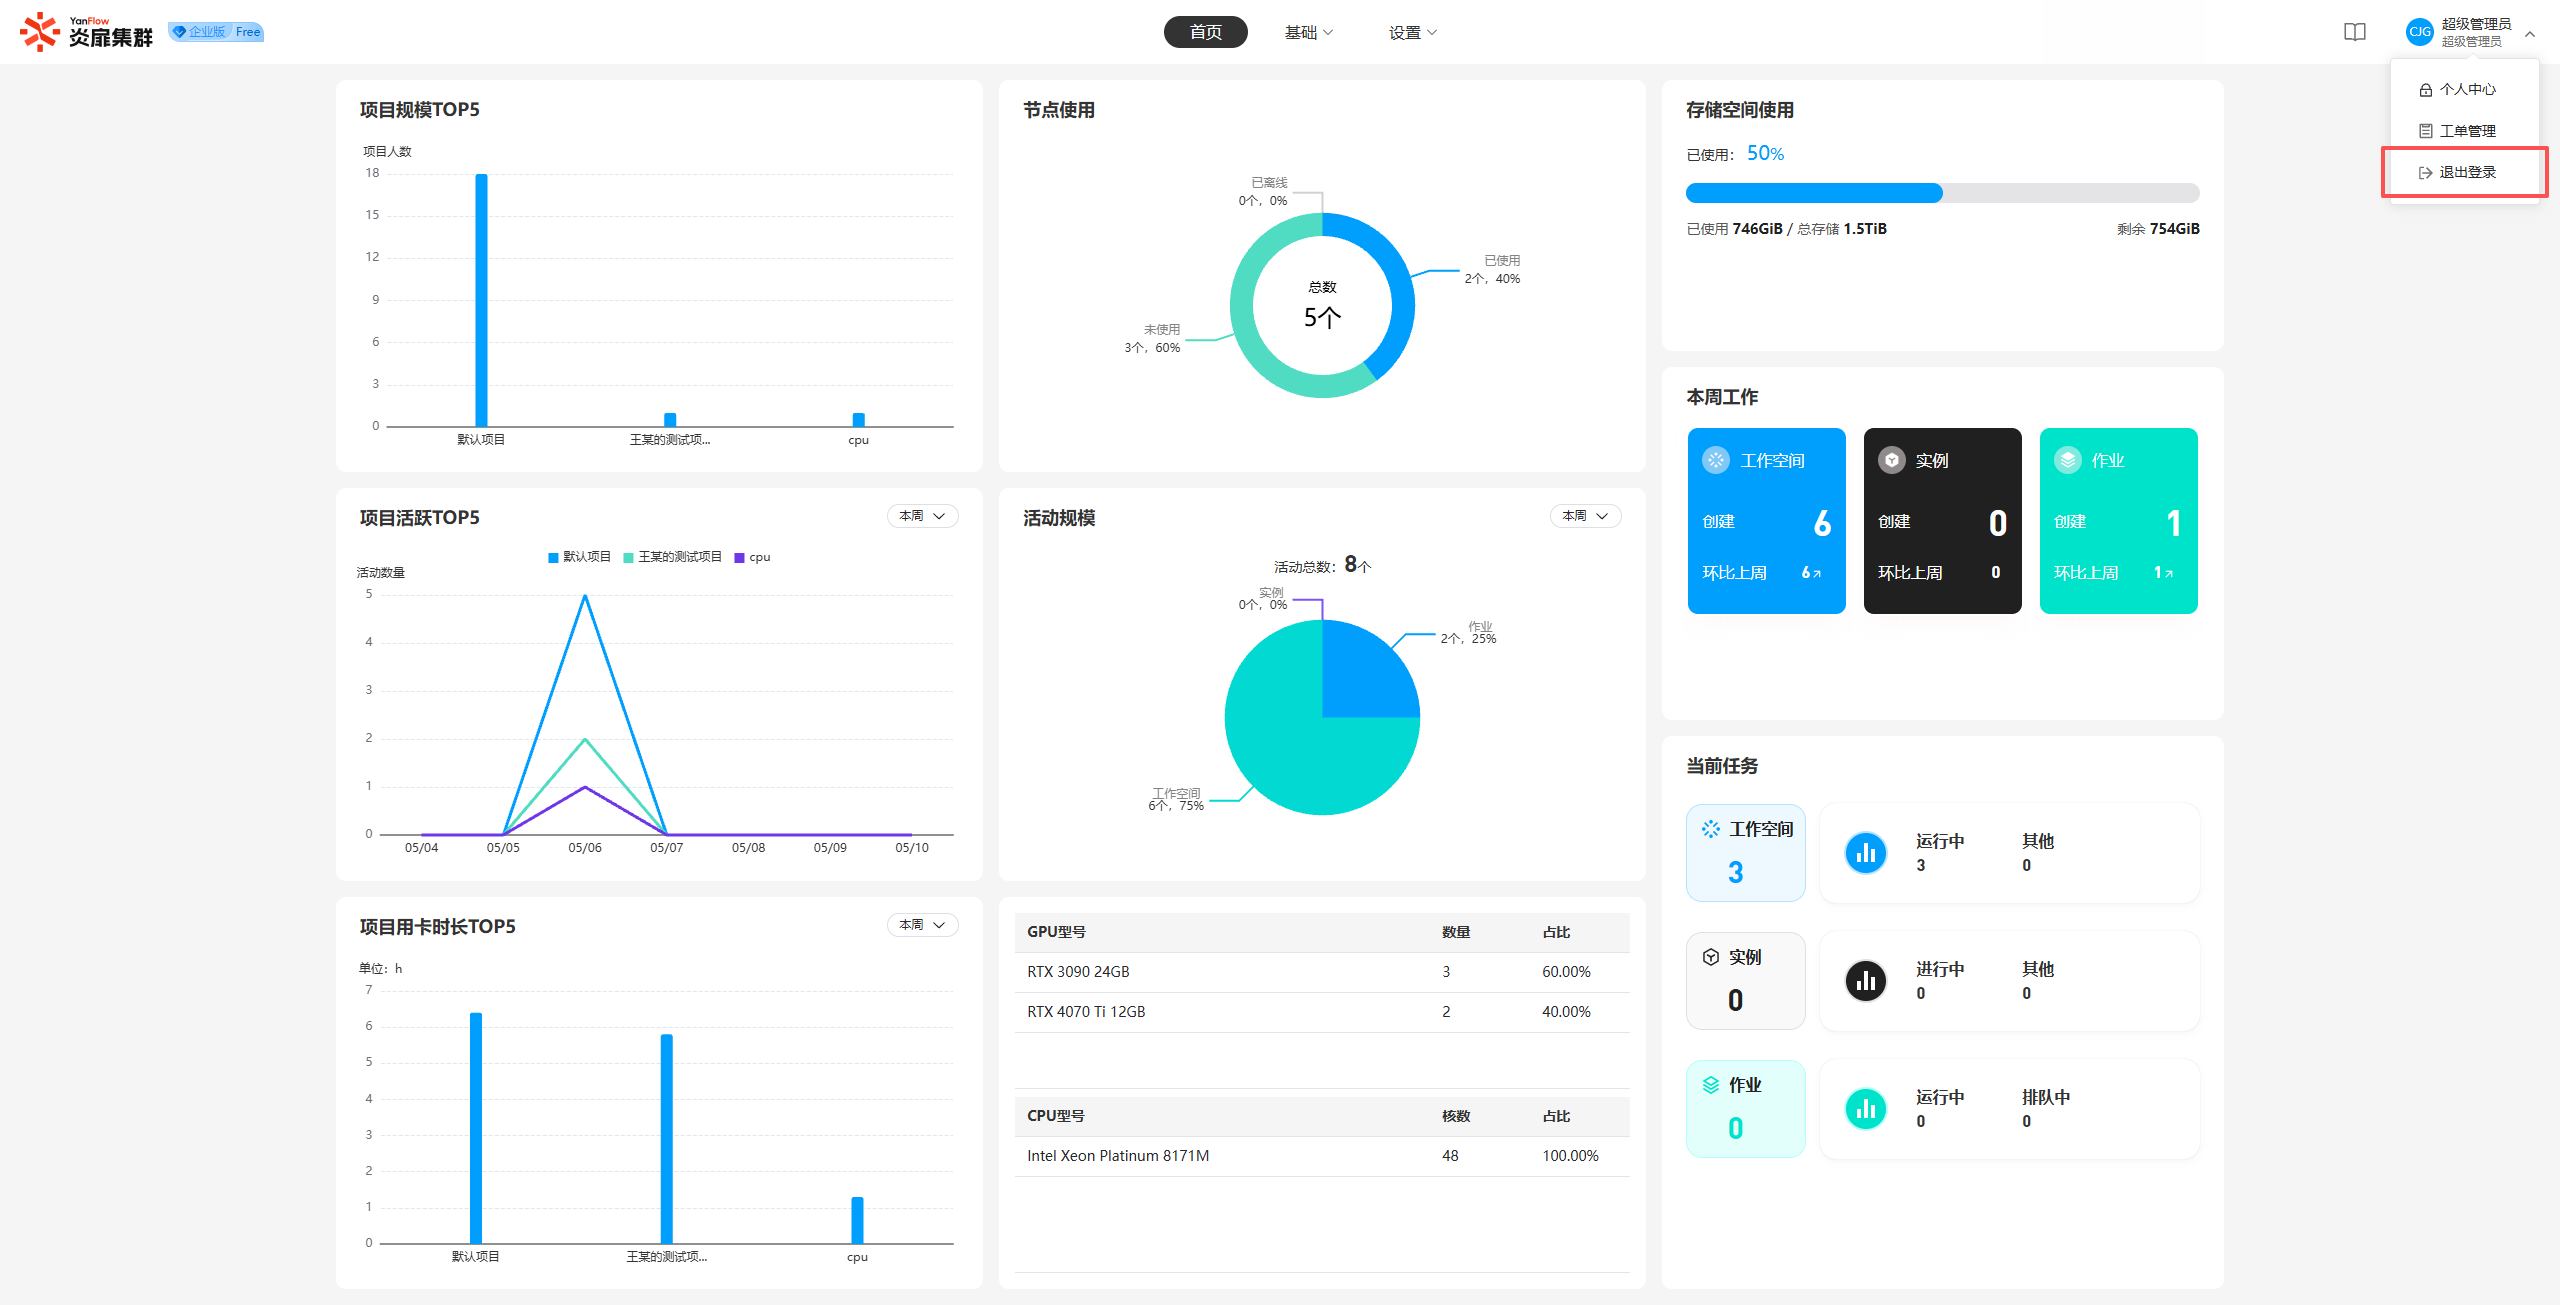
Click on the User Avatar in the top right corner, select Logout, and click Confirm to exit and return to the login page.
Dashboard
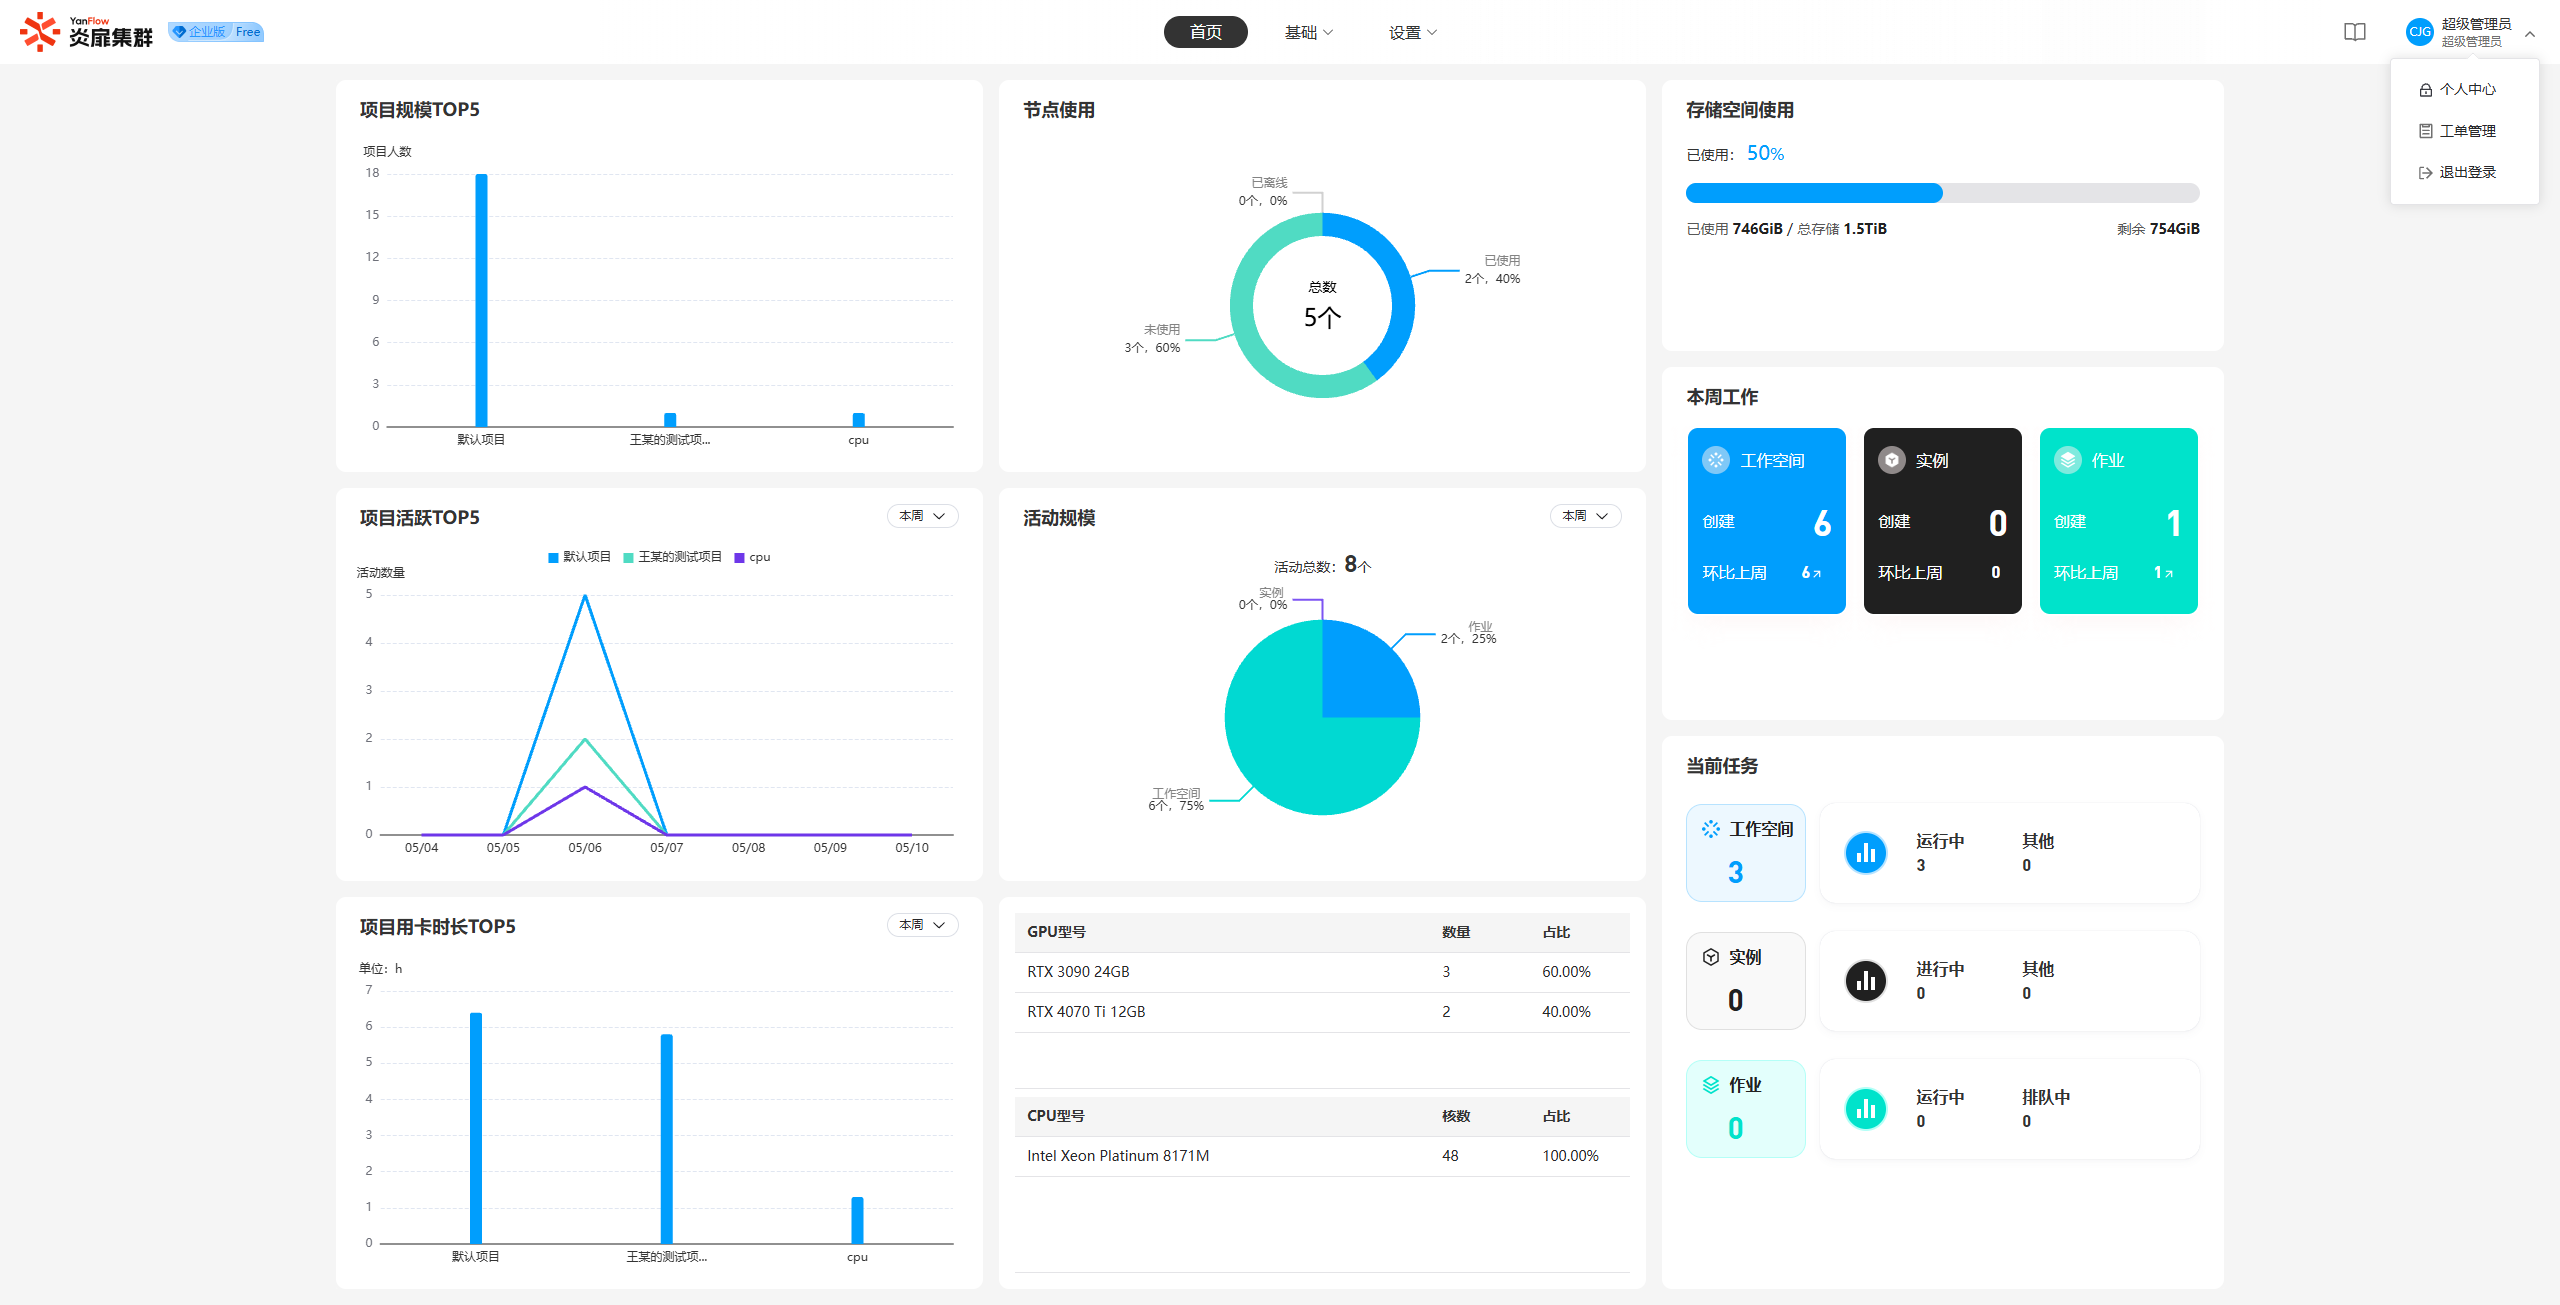
Through the visual dashboard, you can quickly understand the system's operational status and relevant data.
Fundamentals
User Management
User List
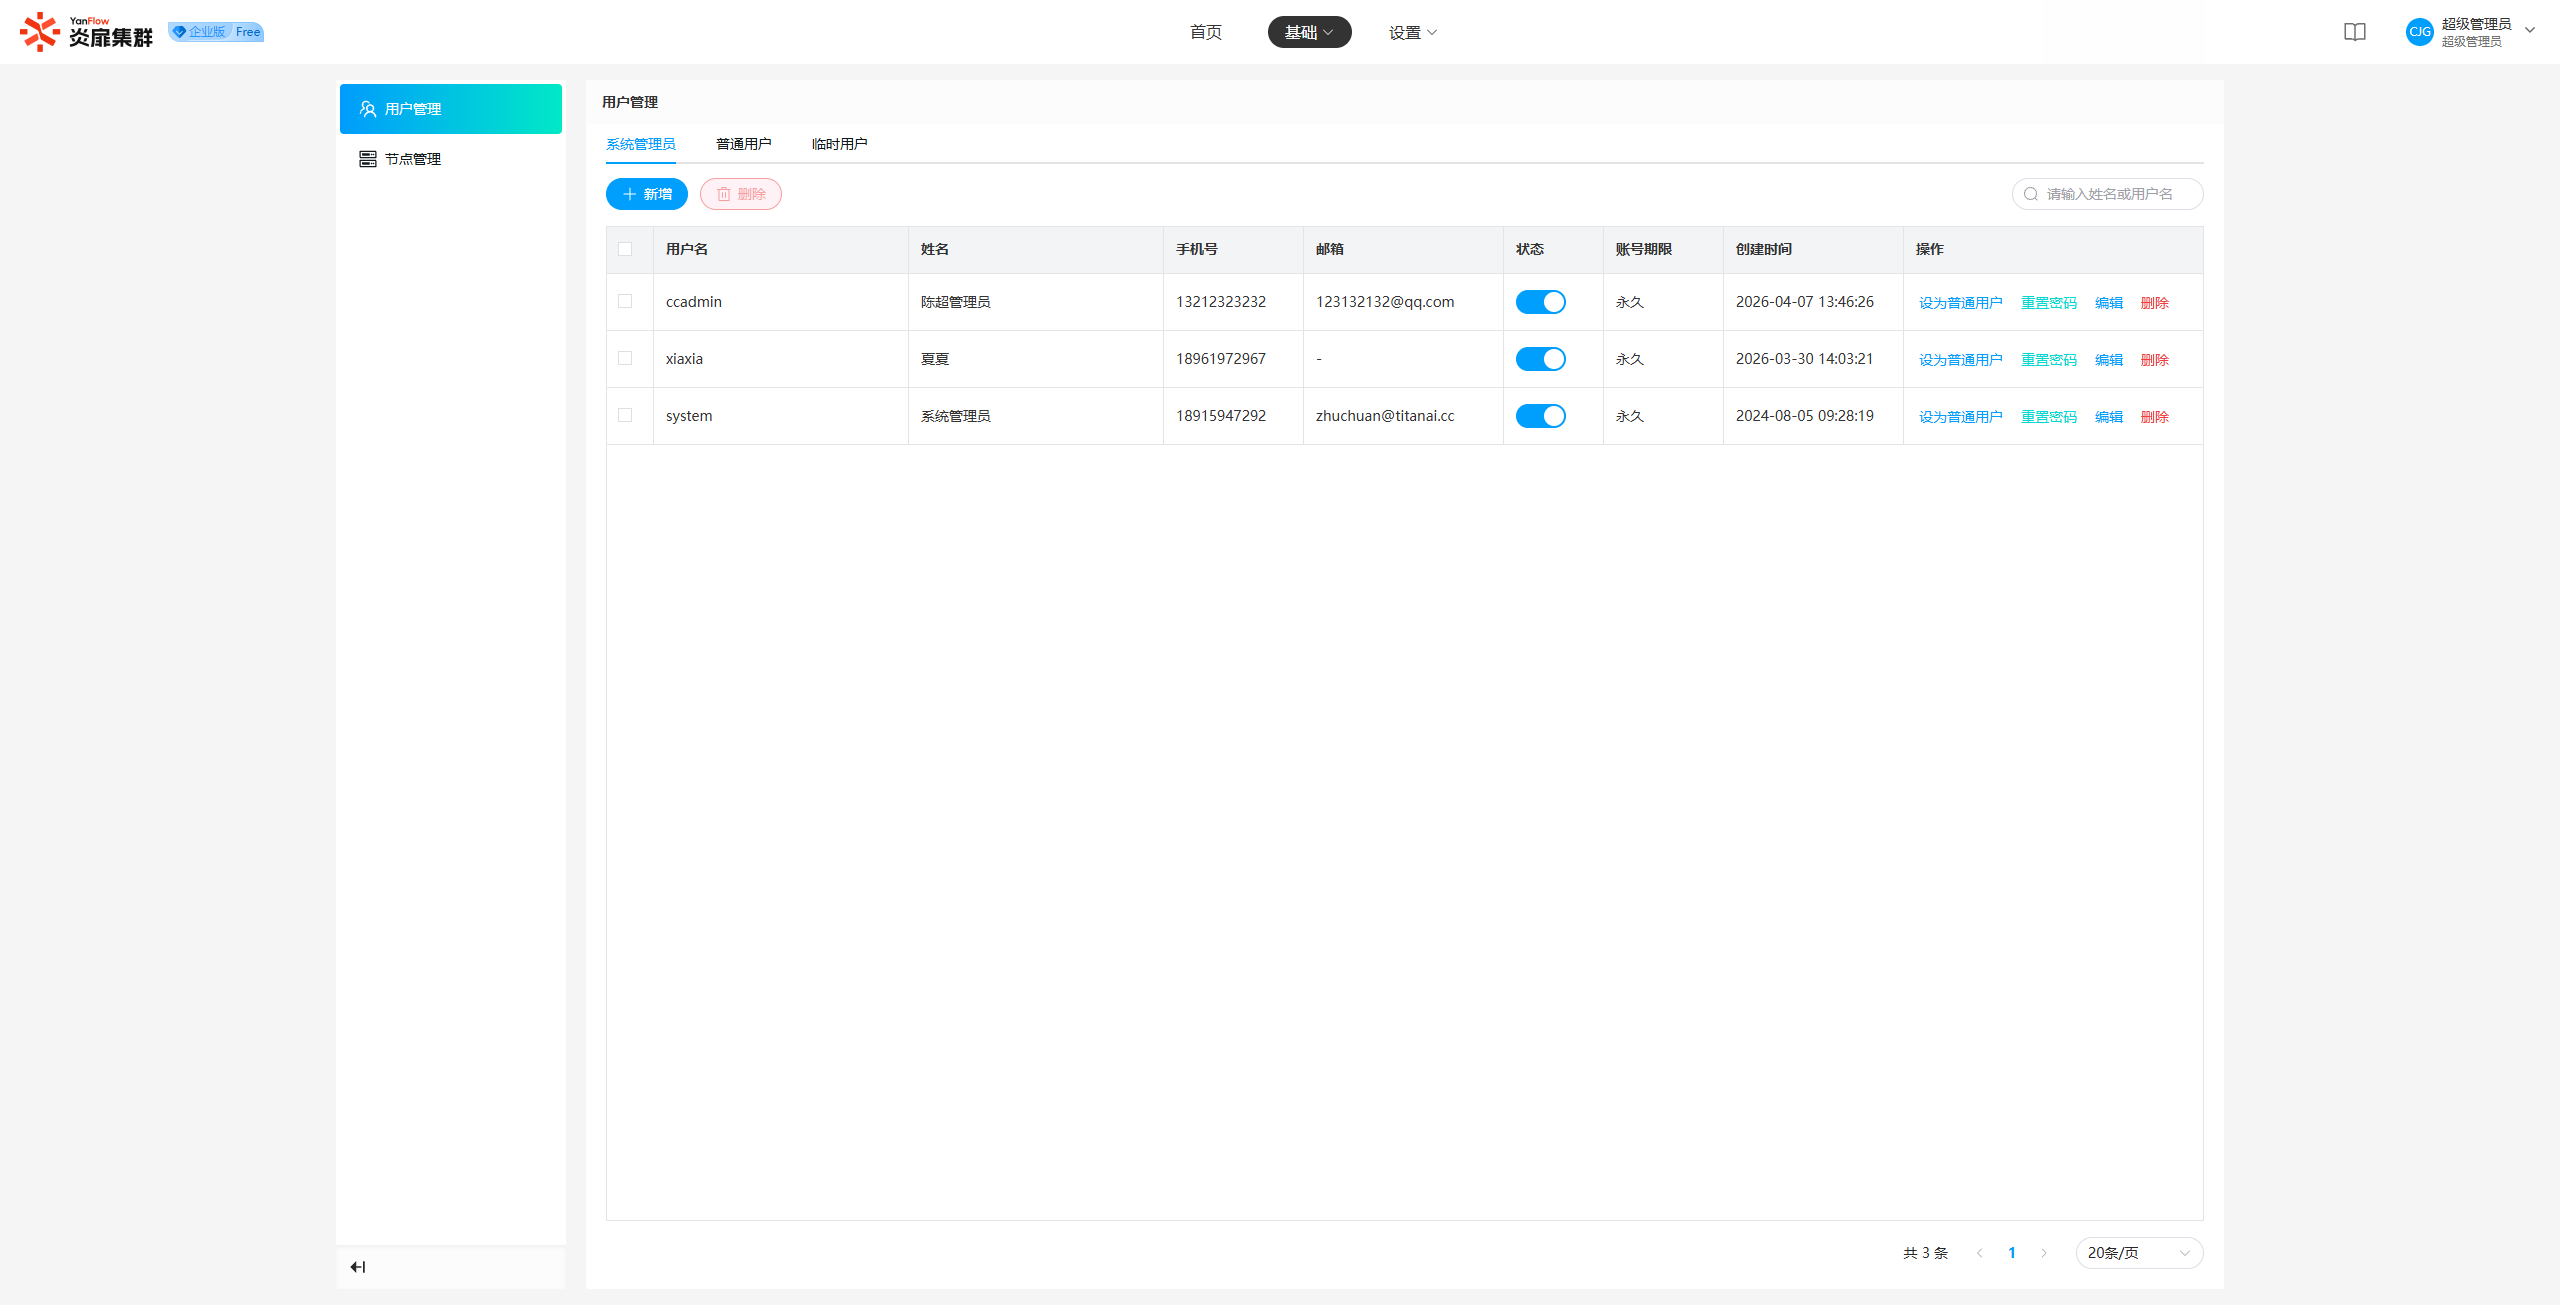
Displays all users in the system, including System Administrators, Regular Users, and Temporary Users. It supports keyword searches by Name or Username.
Add User
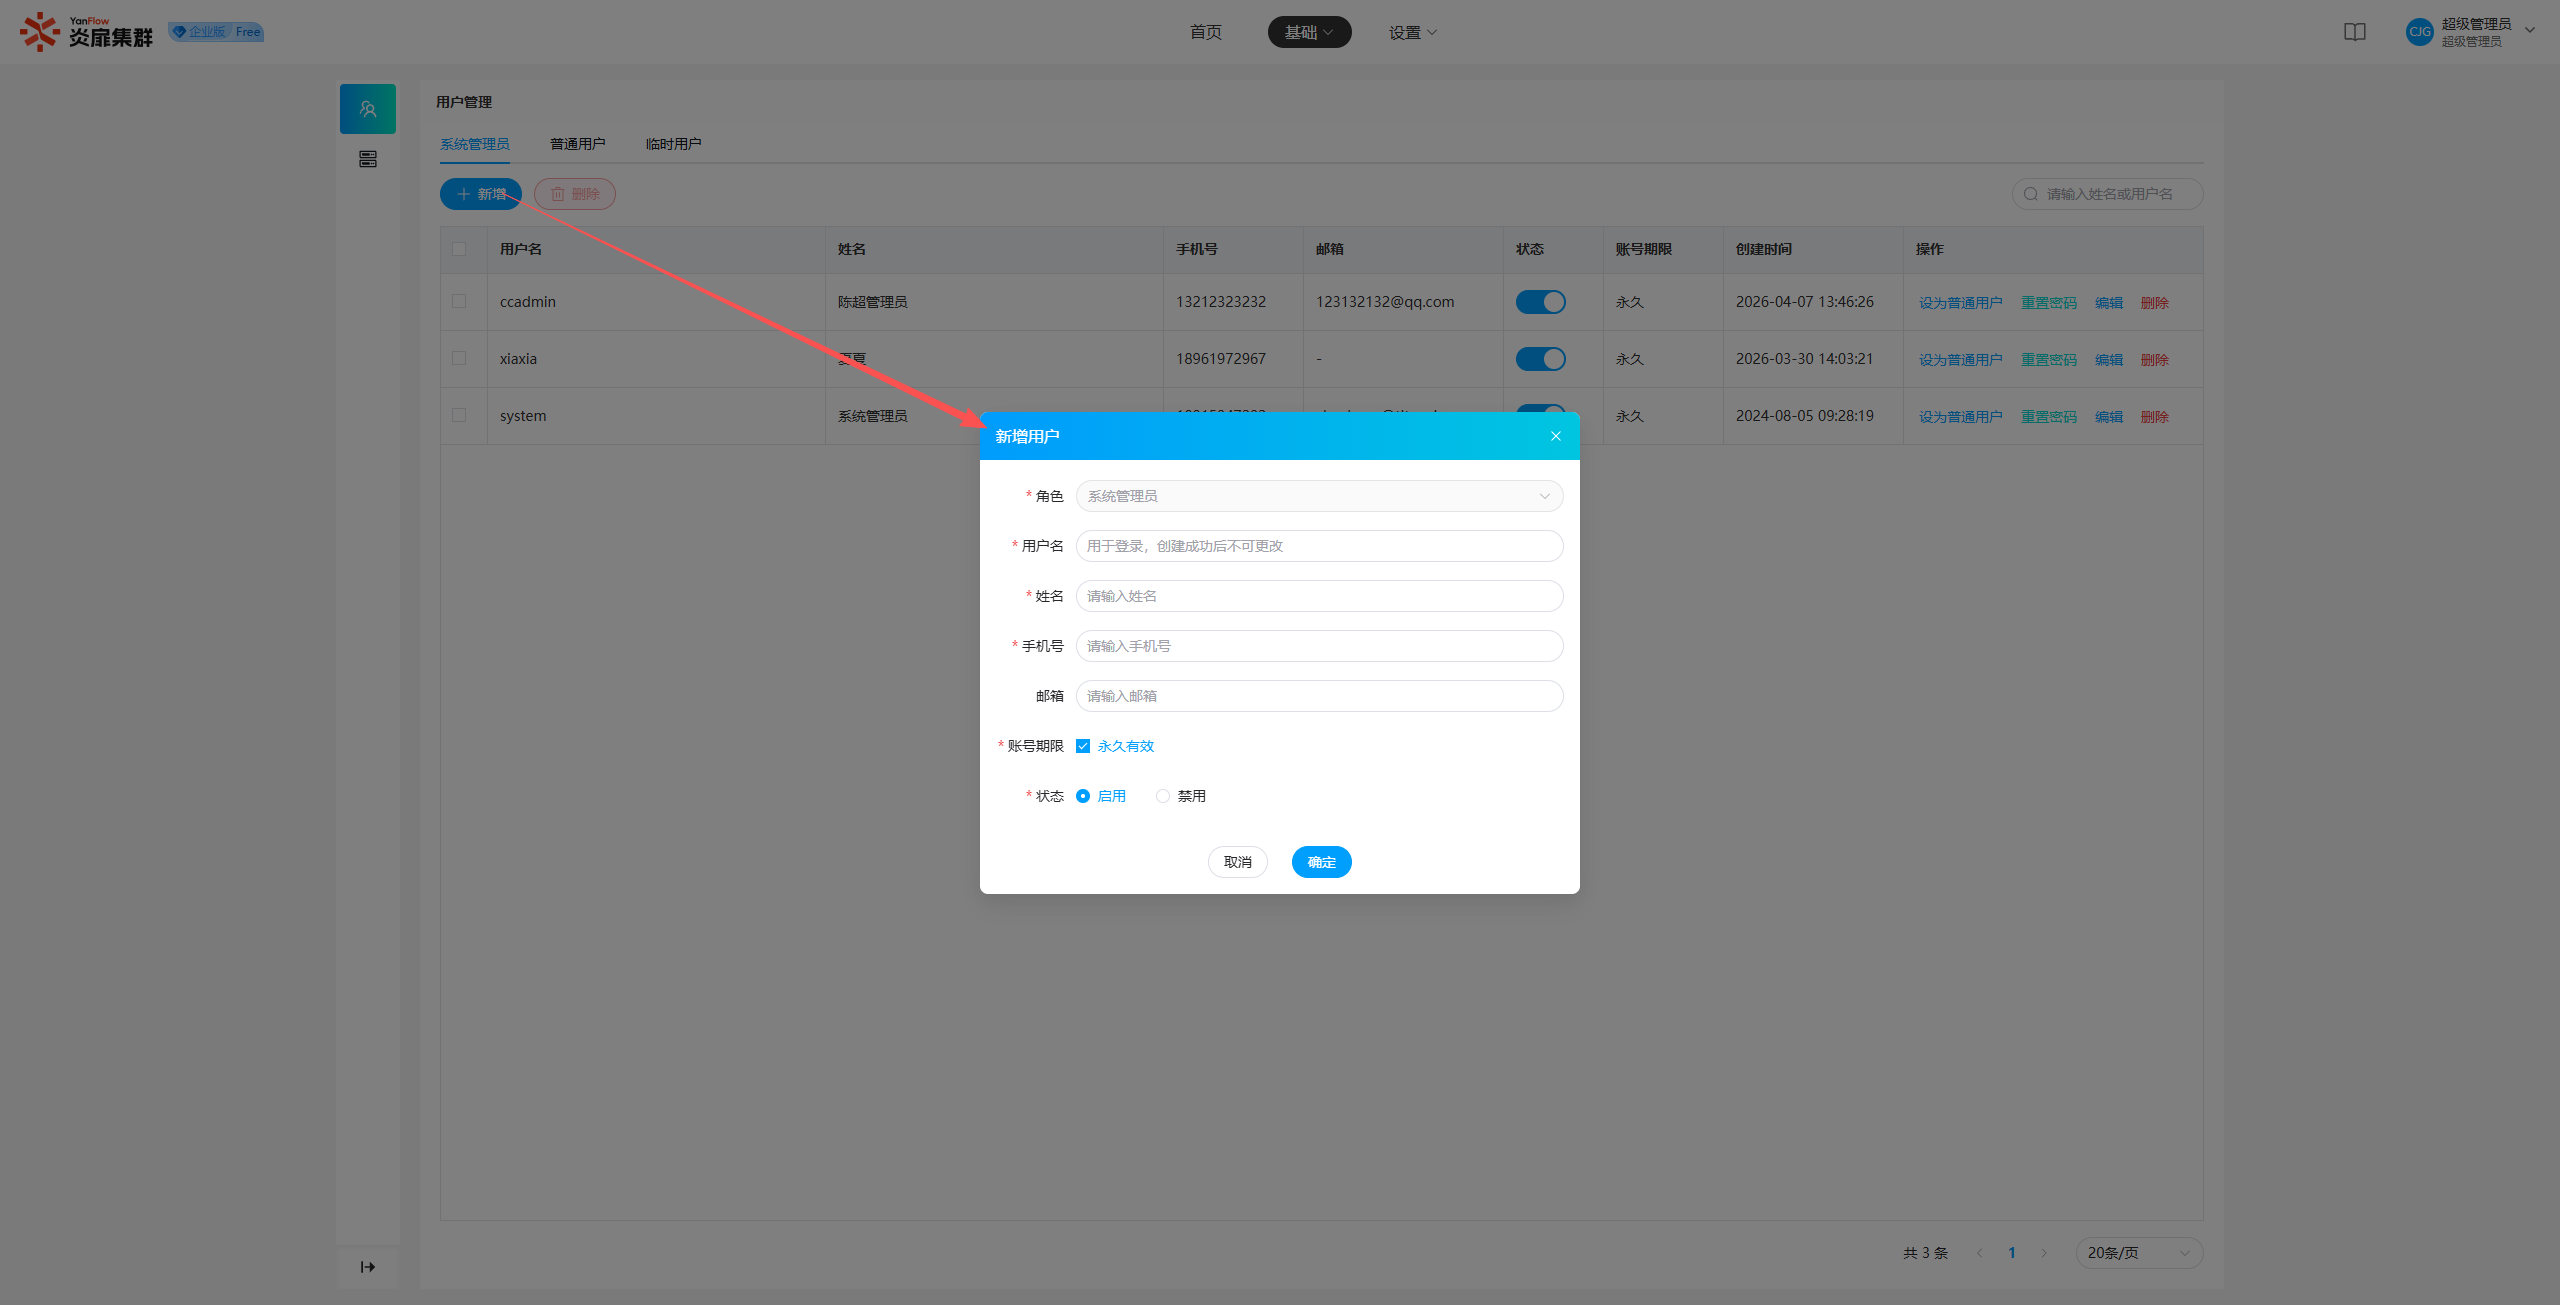
Click Add to open the creation popup. Set the relevant information and click Confirm. Once validated, a new System Administrator user will be created.
Notes:
- Super Administrators can only add System Administrators; they cannot add Regular Users or Temporary Users.
- Once successfully added, the username cannot be changed.
- The account validity period for System Administrators defaults to "Permanent."
- The initial login password for a new user is the reverse order of their creation date (YYYYMMDD). For example, if a user is created on January 01, 2026, the initial password will be 10106202.
Edit User
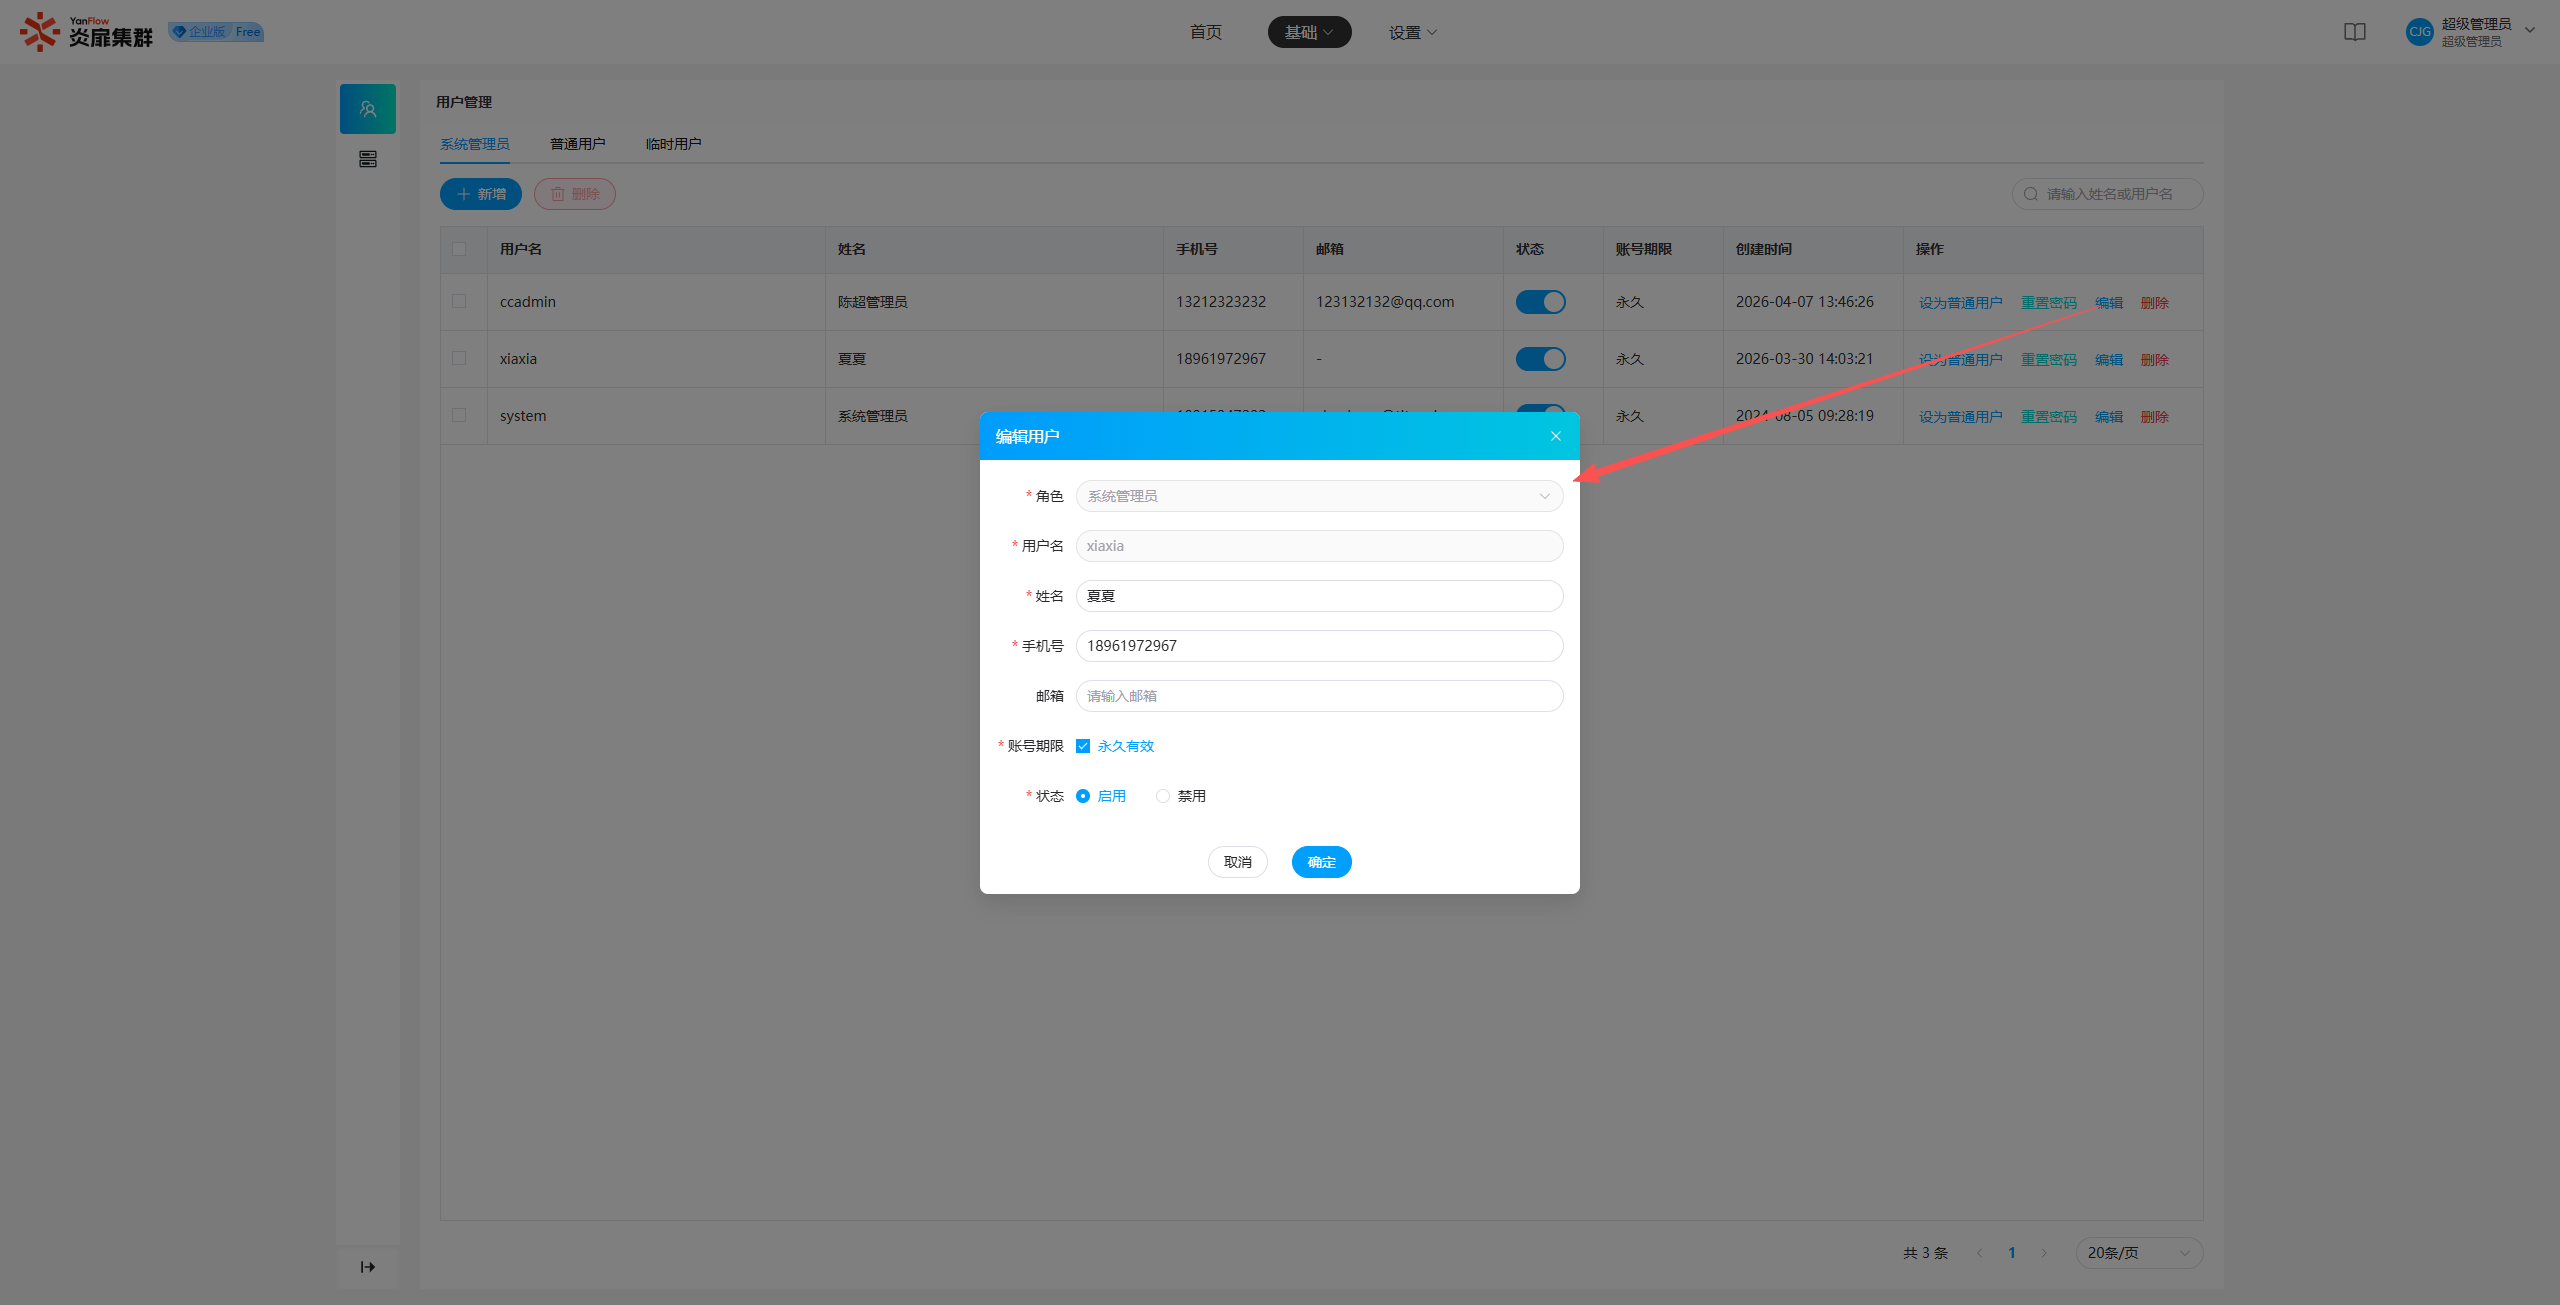
Select a System Administrator and click Edit to open the edit popup. Modify the required information and click Confirm to update the user details.
Notes:
- Super Administrators can only edit System Administrators.
RoleandUsernamecannot be modified.
Delete User
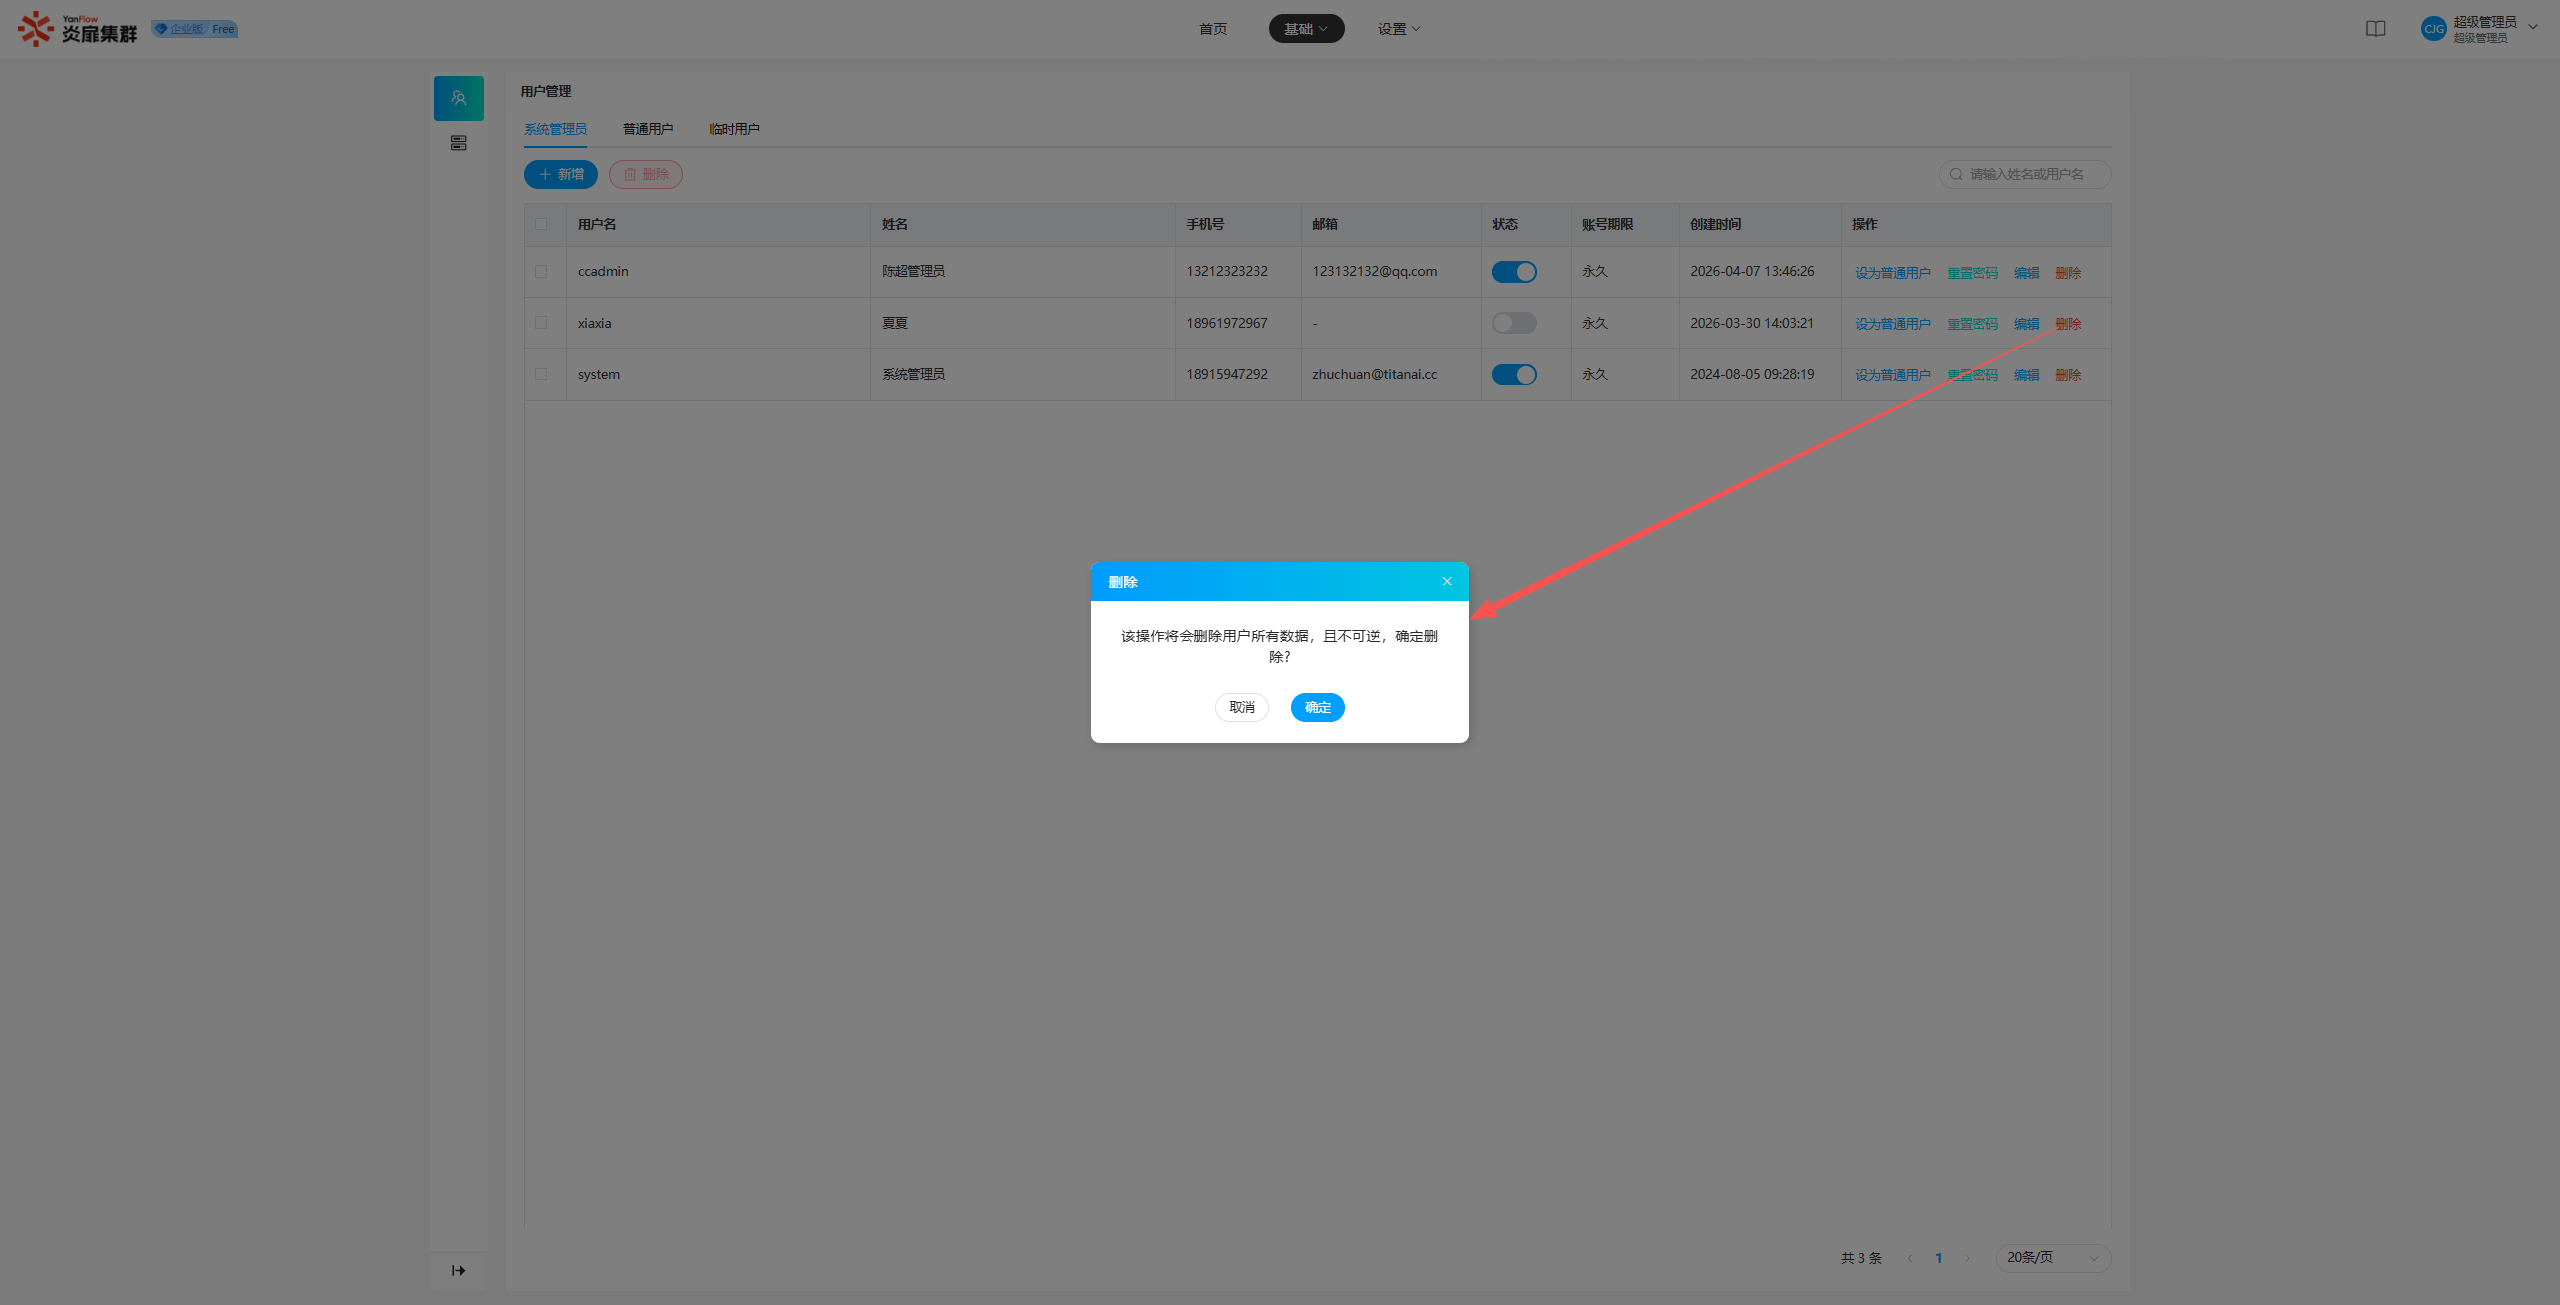
Delete: Select a System Administrator, click Delete, and click Confirm in the prompt popup to delete the user.
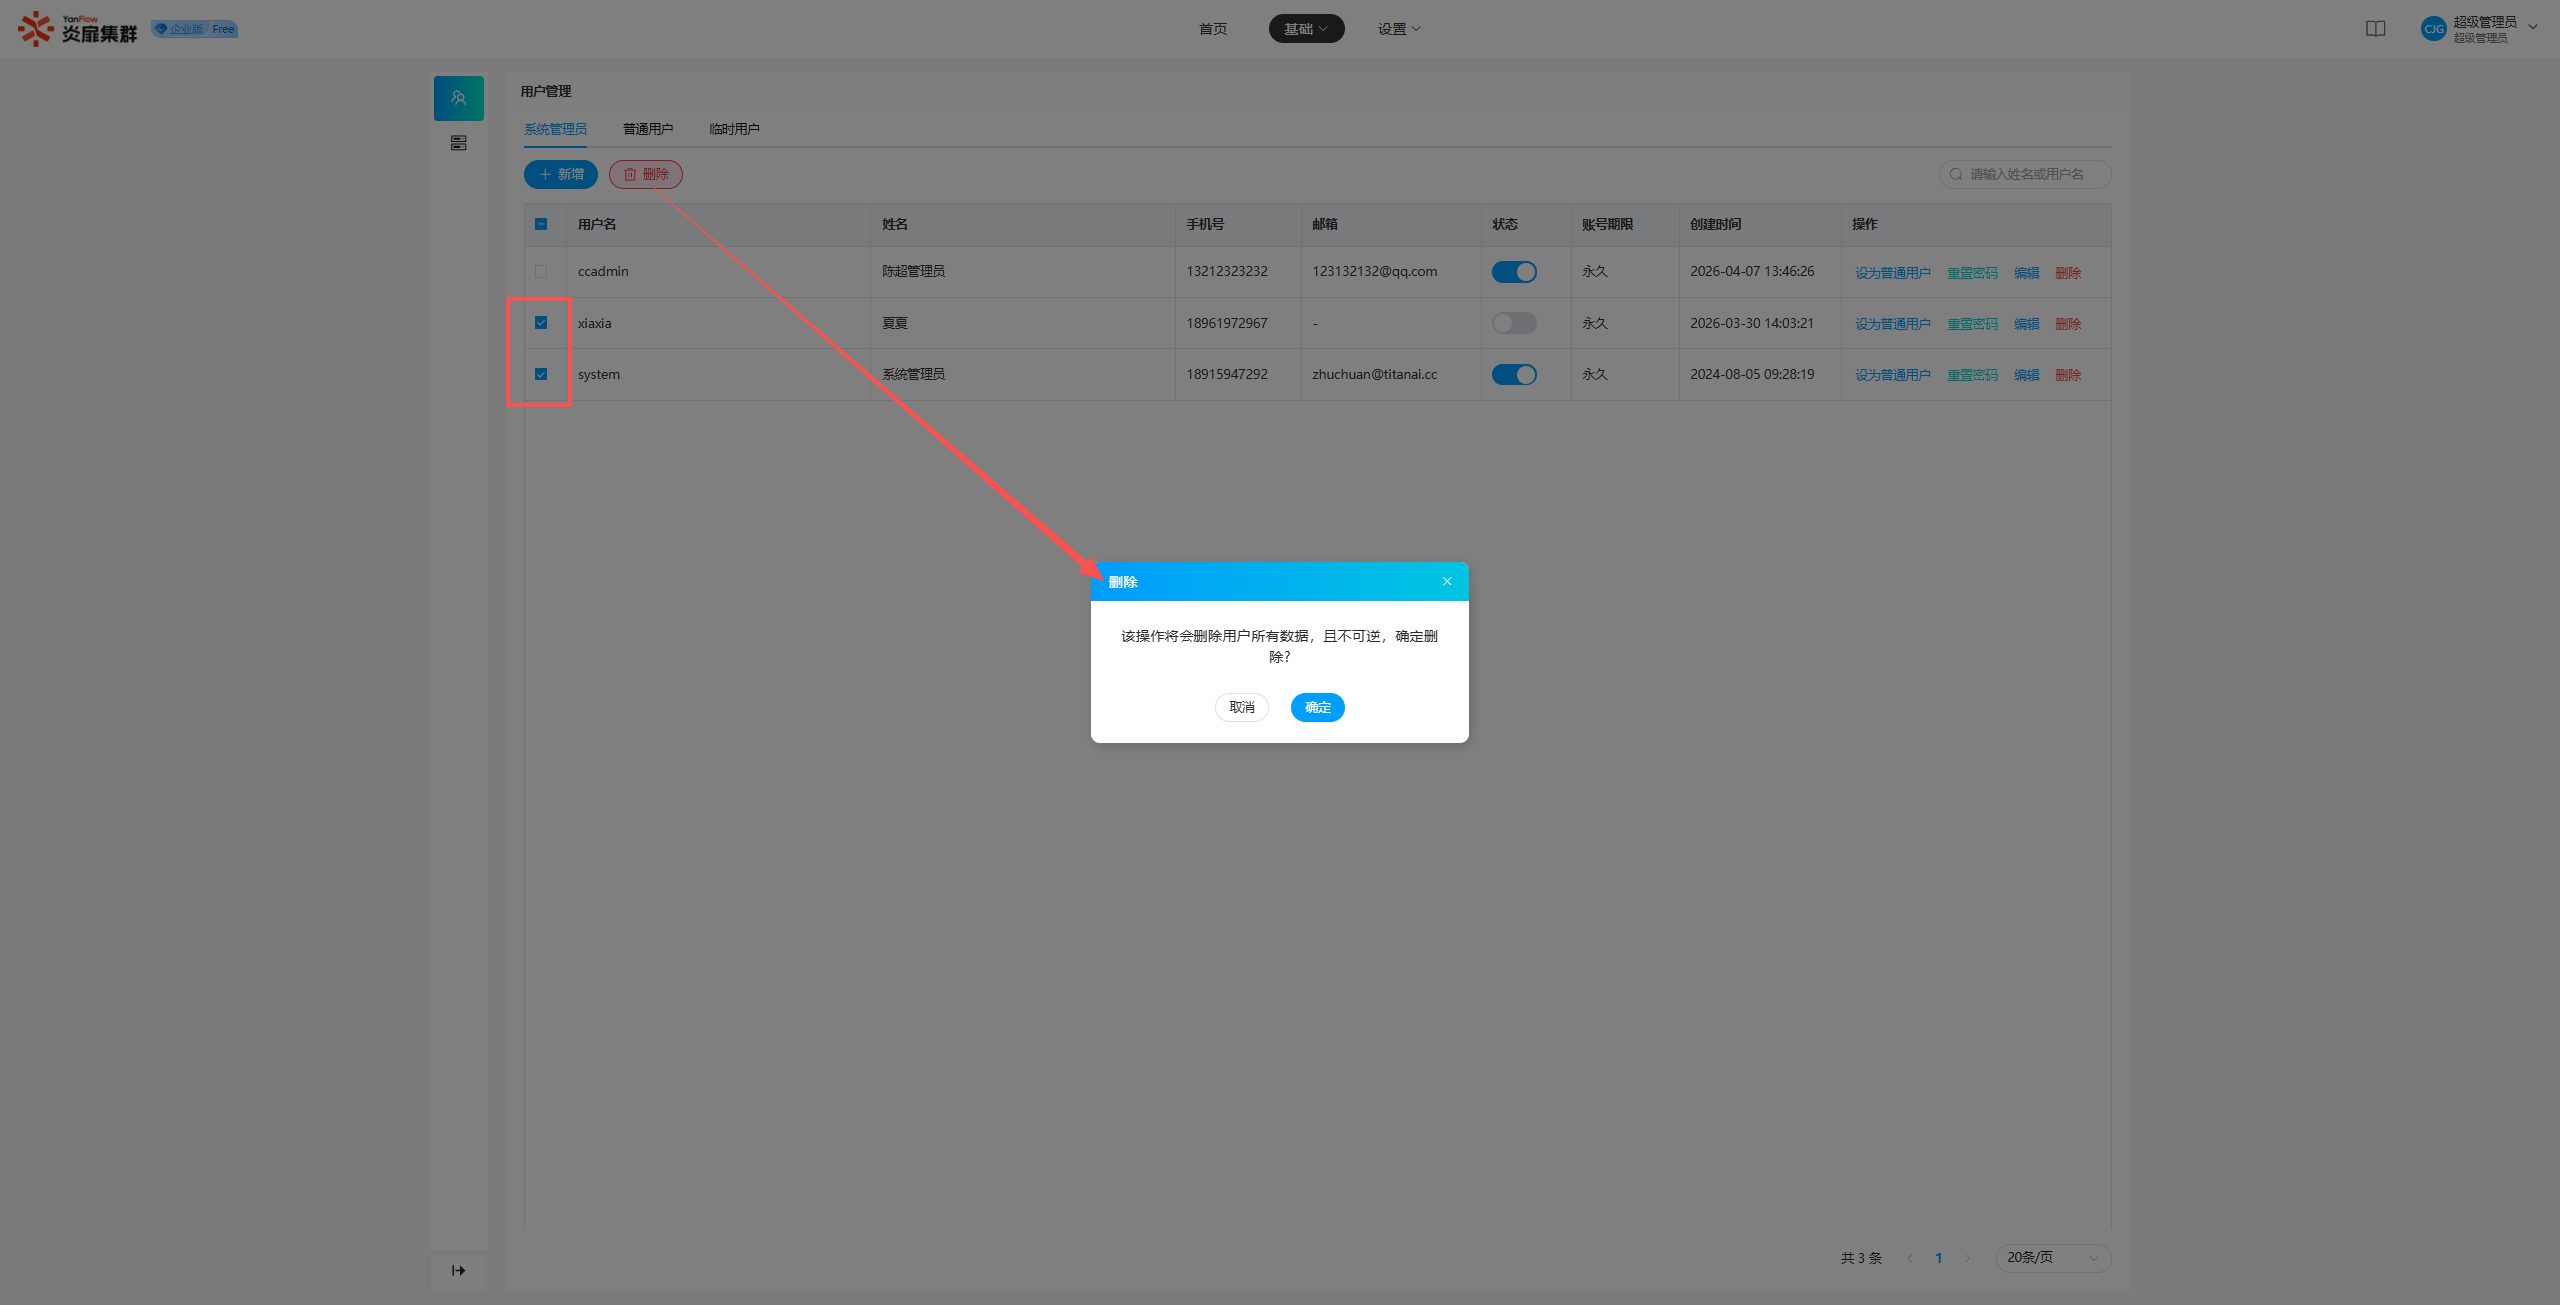
Batch Delete: Check one or more System Administrators and click the Delete button at the top. Click Confirm in the prompt popup to delete the selected users.
Notes:
- Super Administrators can only delete
System Administrators.
Enable/Disable
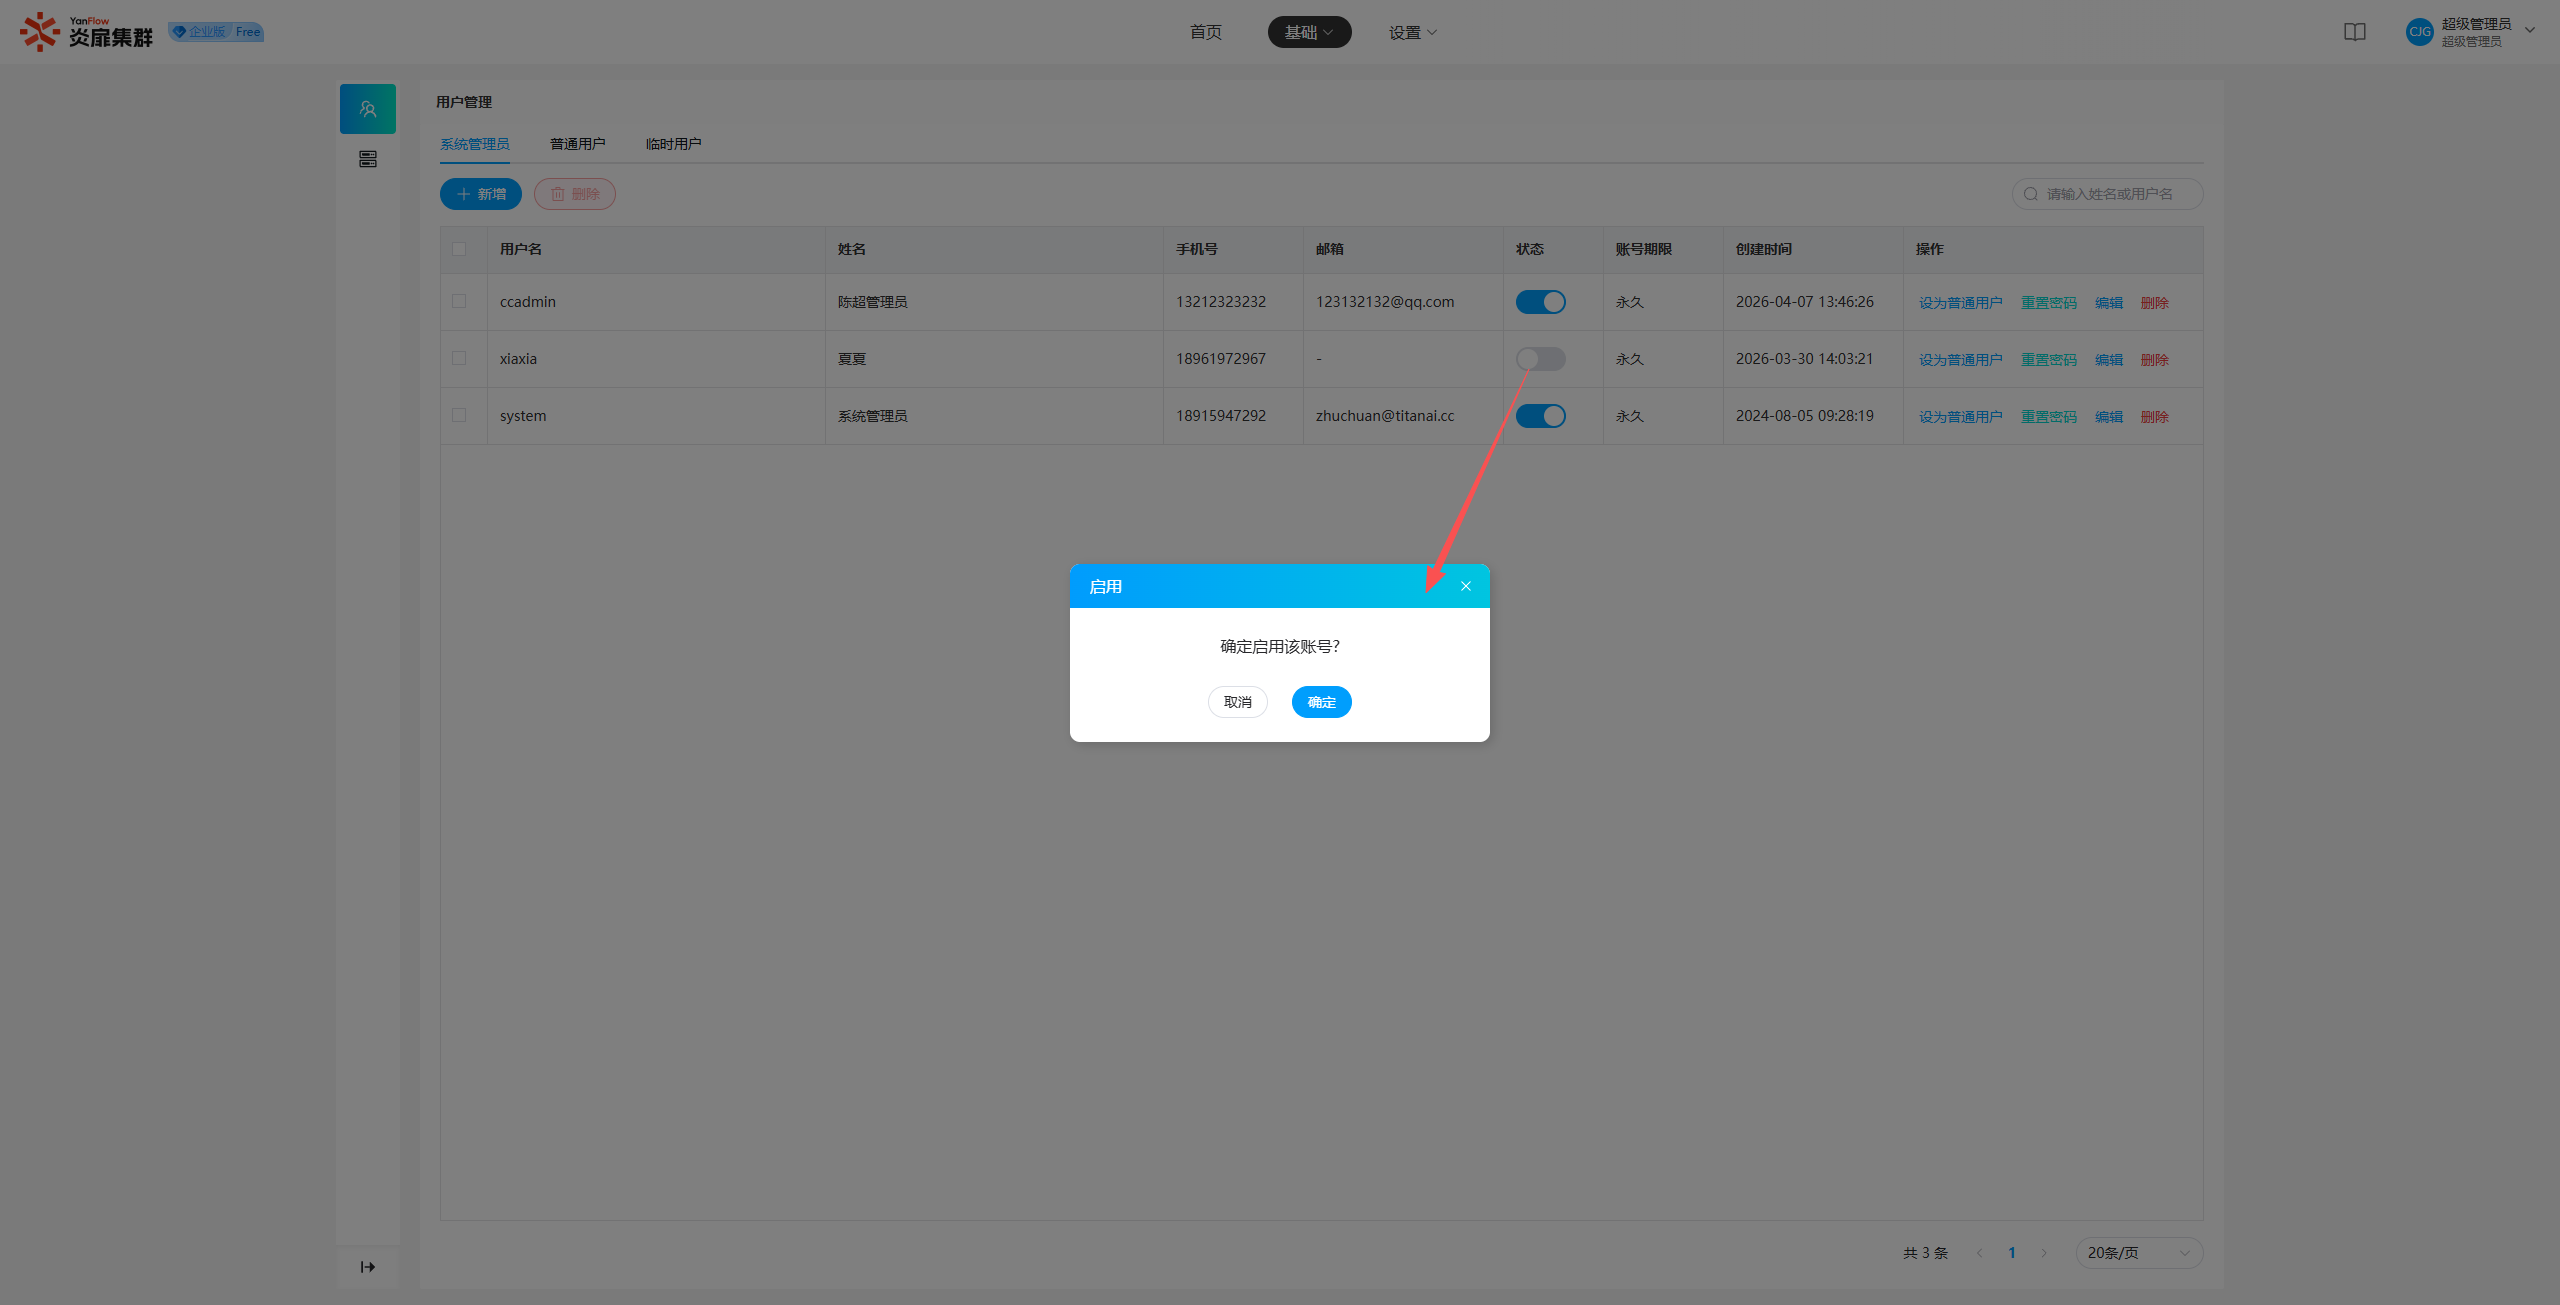
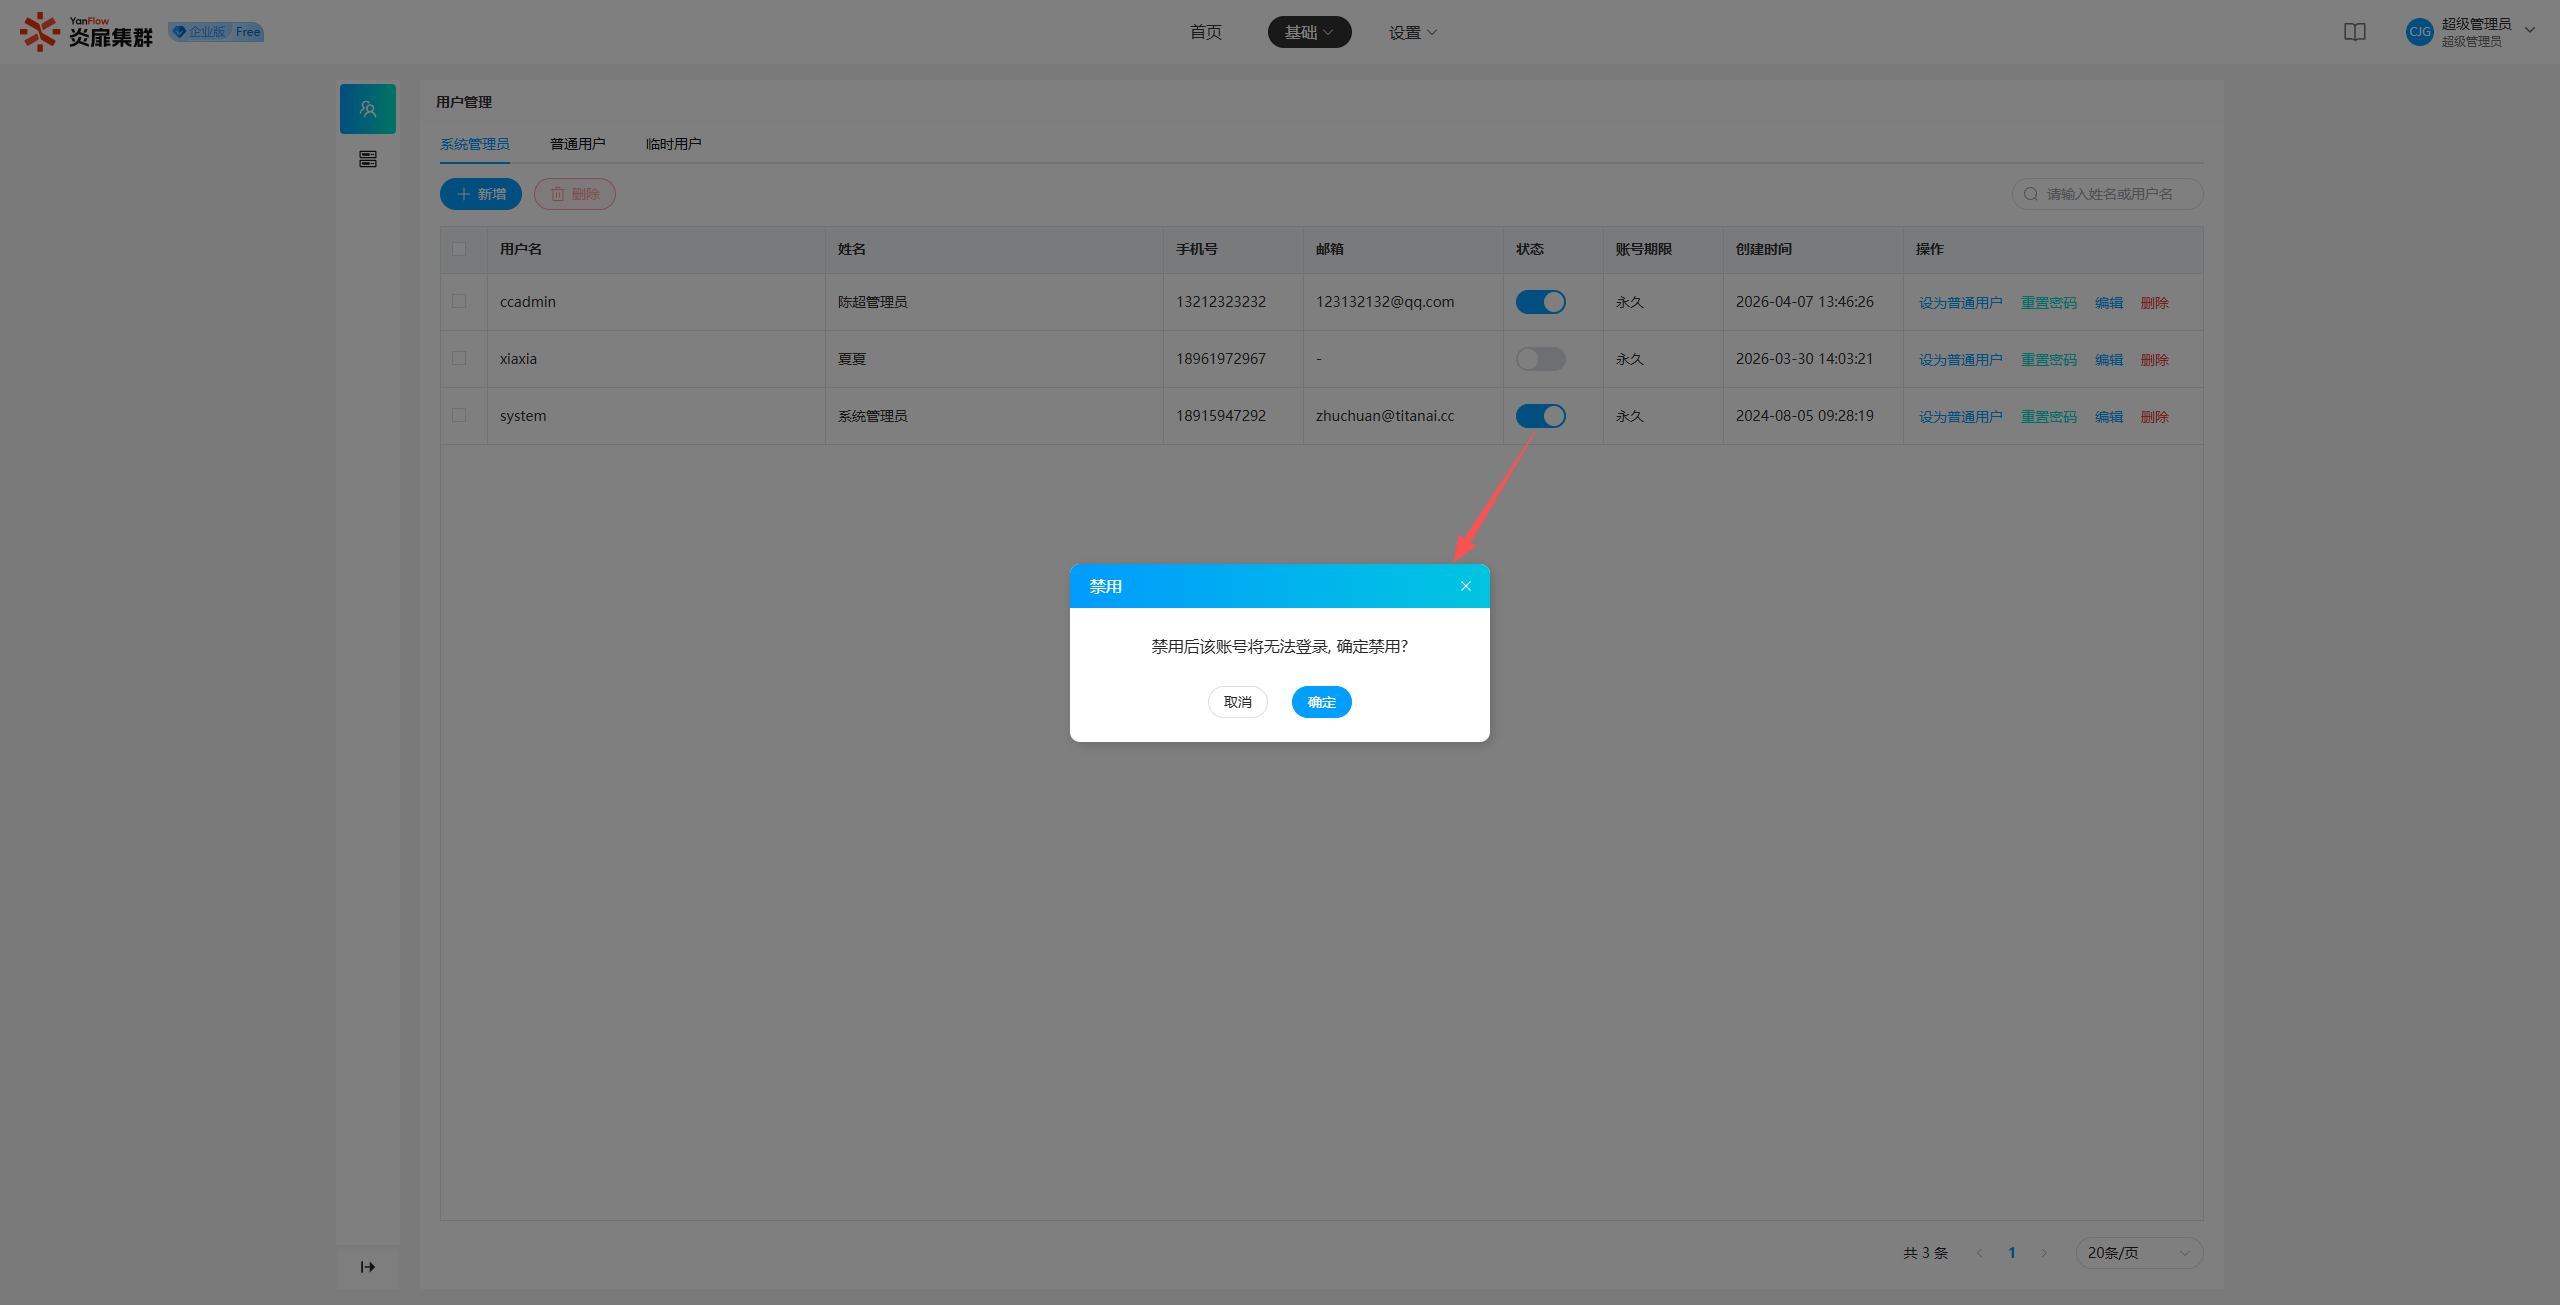
Select a System Administrator, click Enable or Disable, and click Confirm in the prompt popup to change the user's status.
Notes:
- Super Administrators can only enable or disable
System Administrators.- Once disabled, the user account will be unable to log into the system.
Reset Password
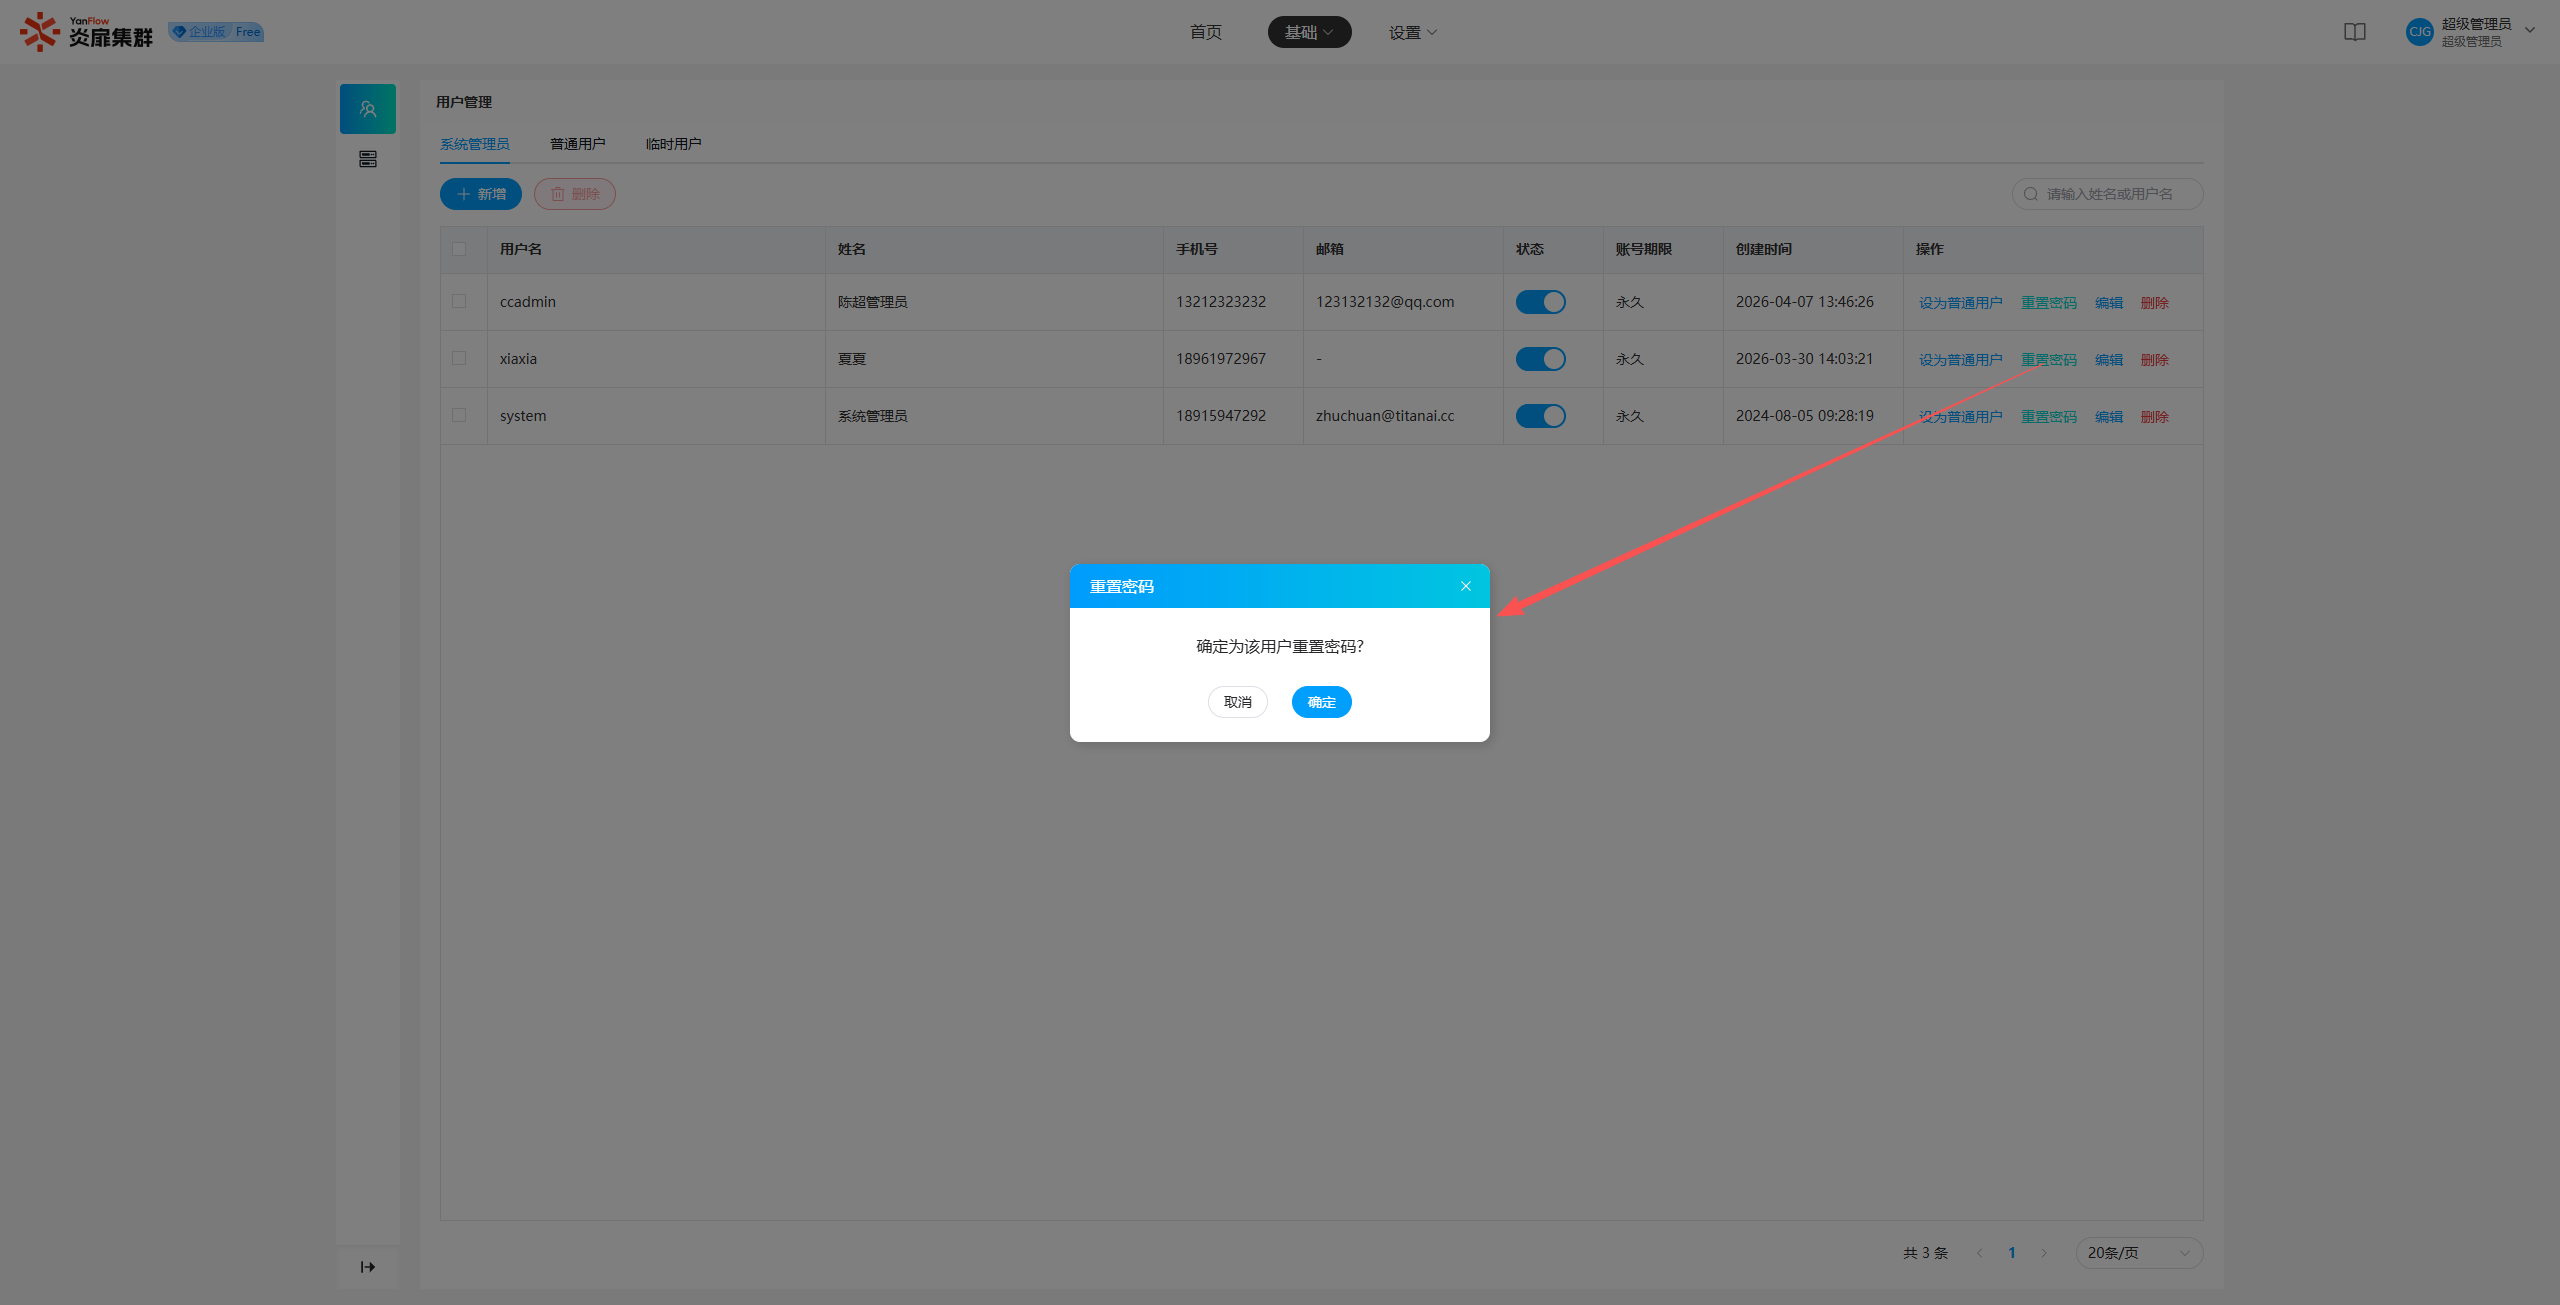
Select a System Administrator, click Reset Password, and click Confirm in the prompt popup to complete the password reset.
Notes:
- The new password after resetting will be the reverse order of the reset time (YYYYMMDD). For example, if the "Reset Password" operation occurs on January 01, 2026, the new password will be 10106202.
Set as Regular User
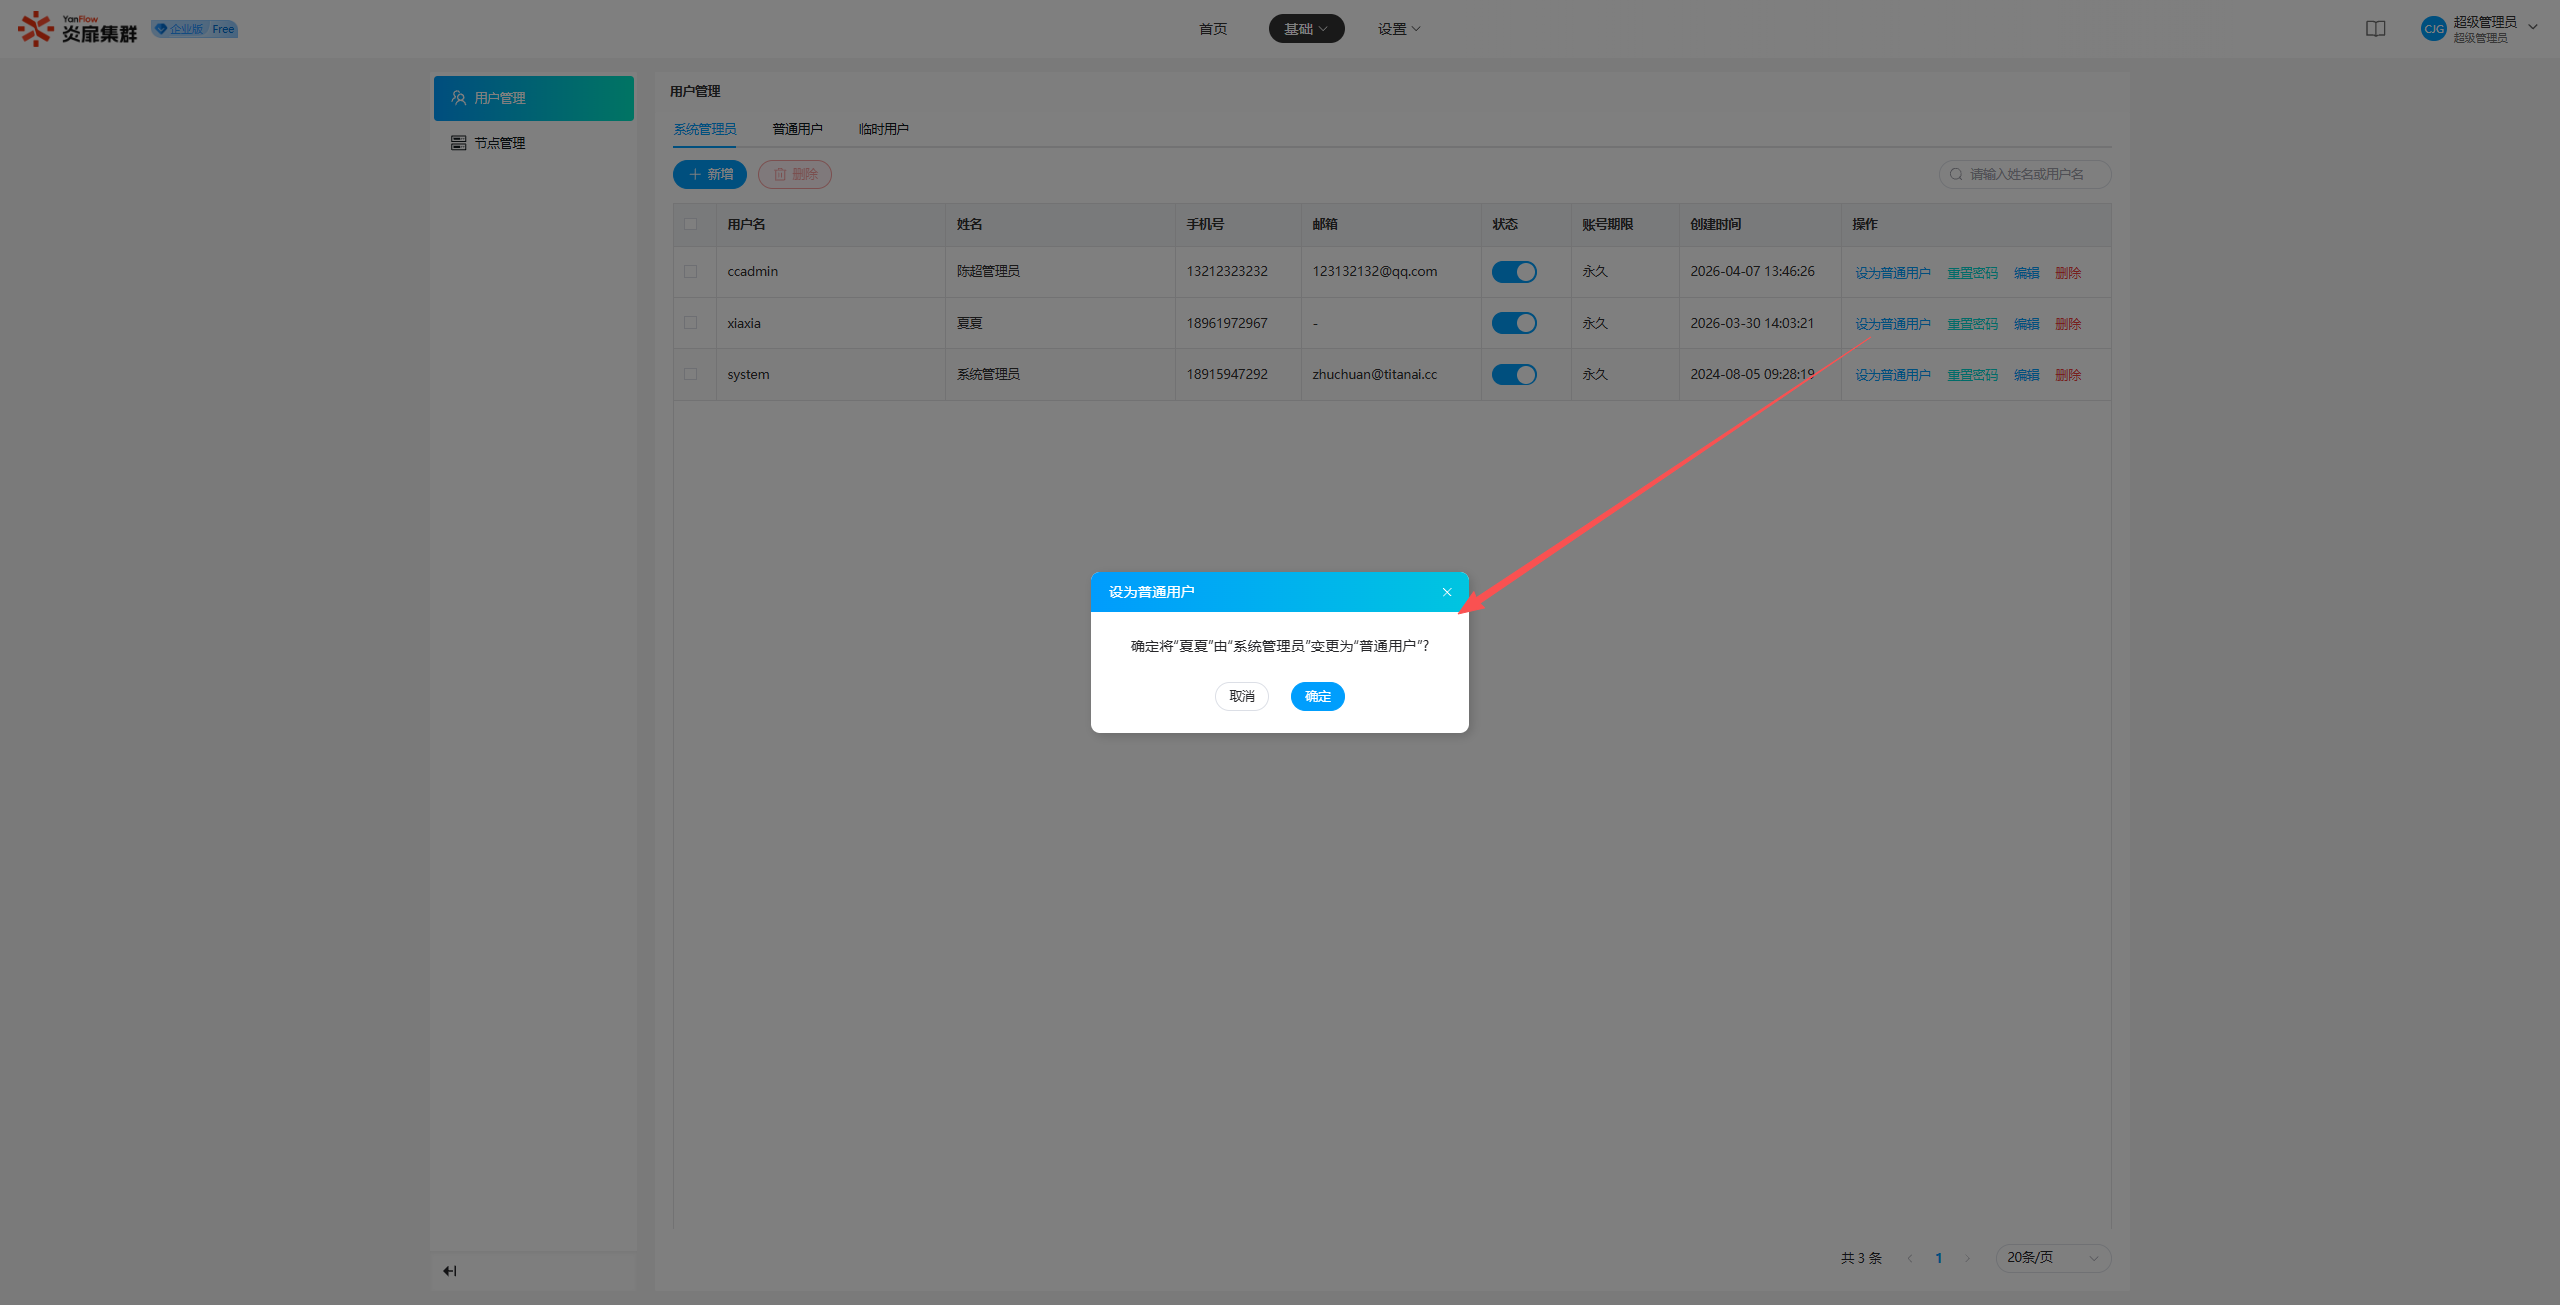
Select a System Administrator, click Set as Regular User, and click Confirm in the prompt popup to complete the setting.
Notes:
- Super Administrators can only change
System Administratorsto Regular Users.- After changing to a Regular User, the account validity period defaults to "1 year," which can be modified by System Administrators.
Set as System Administrator
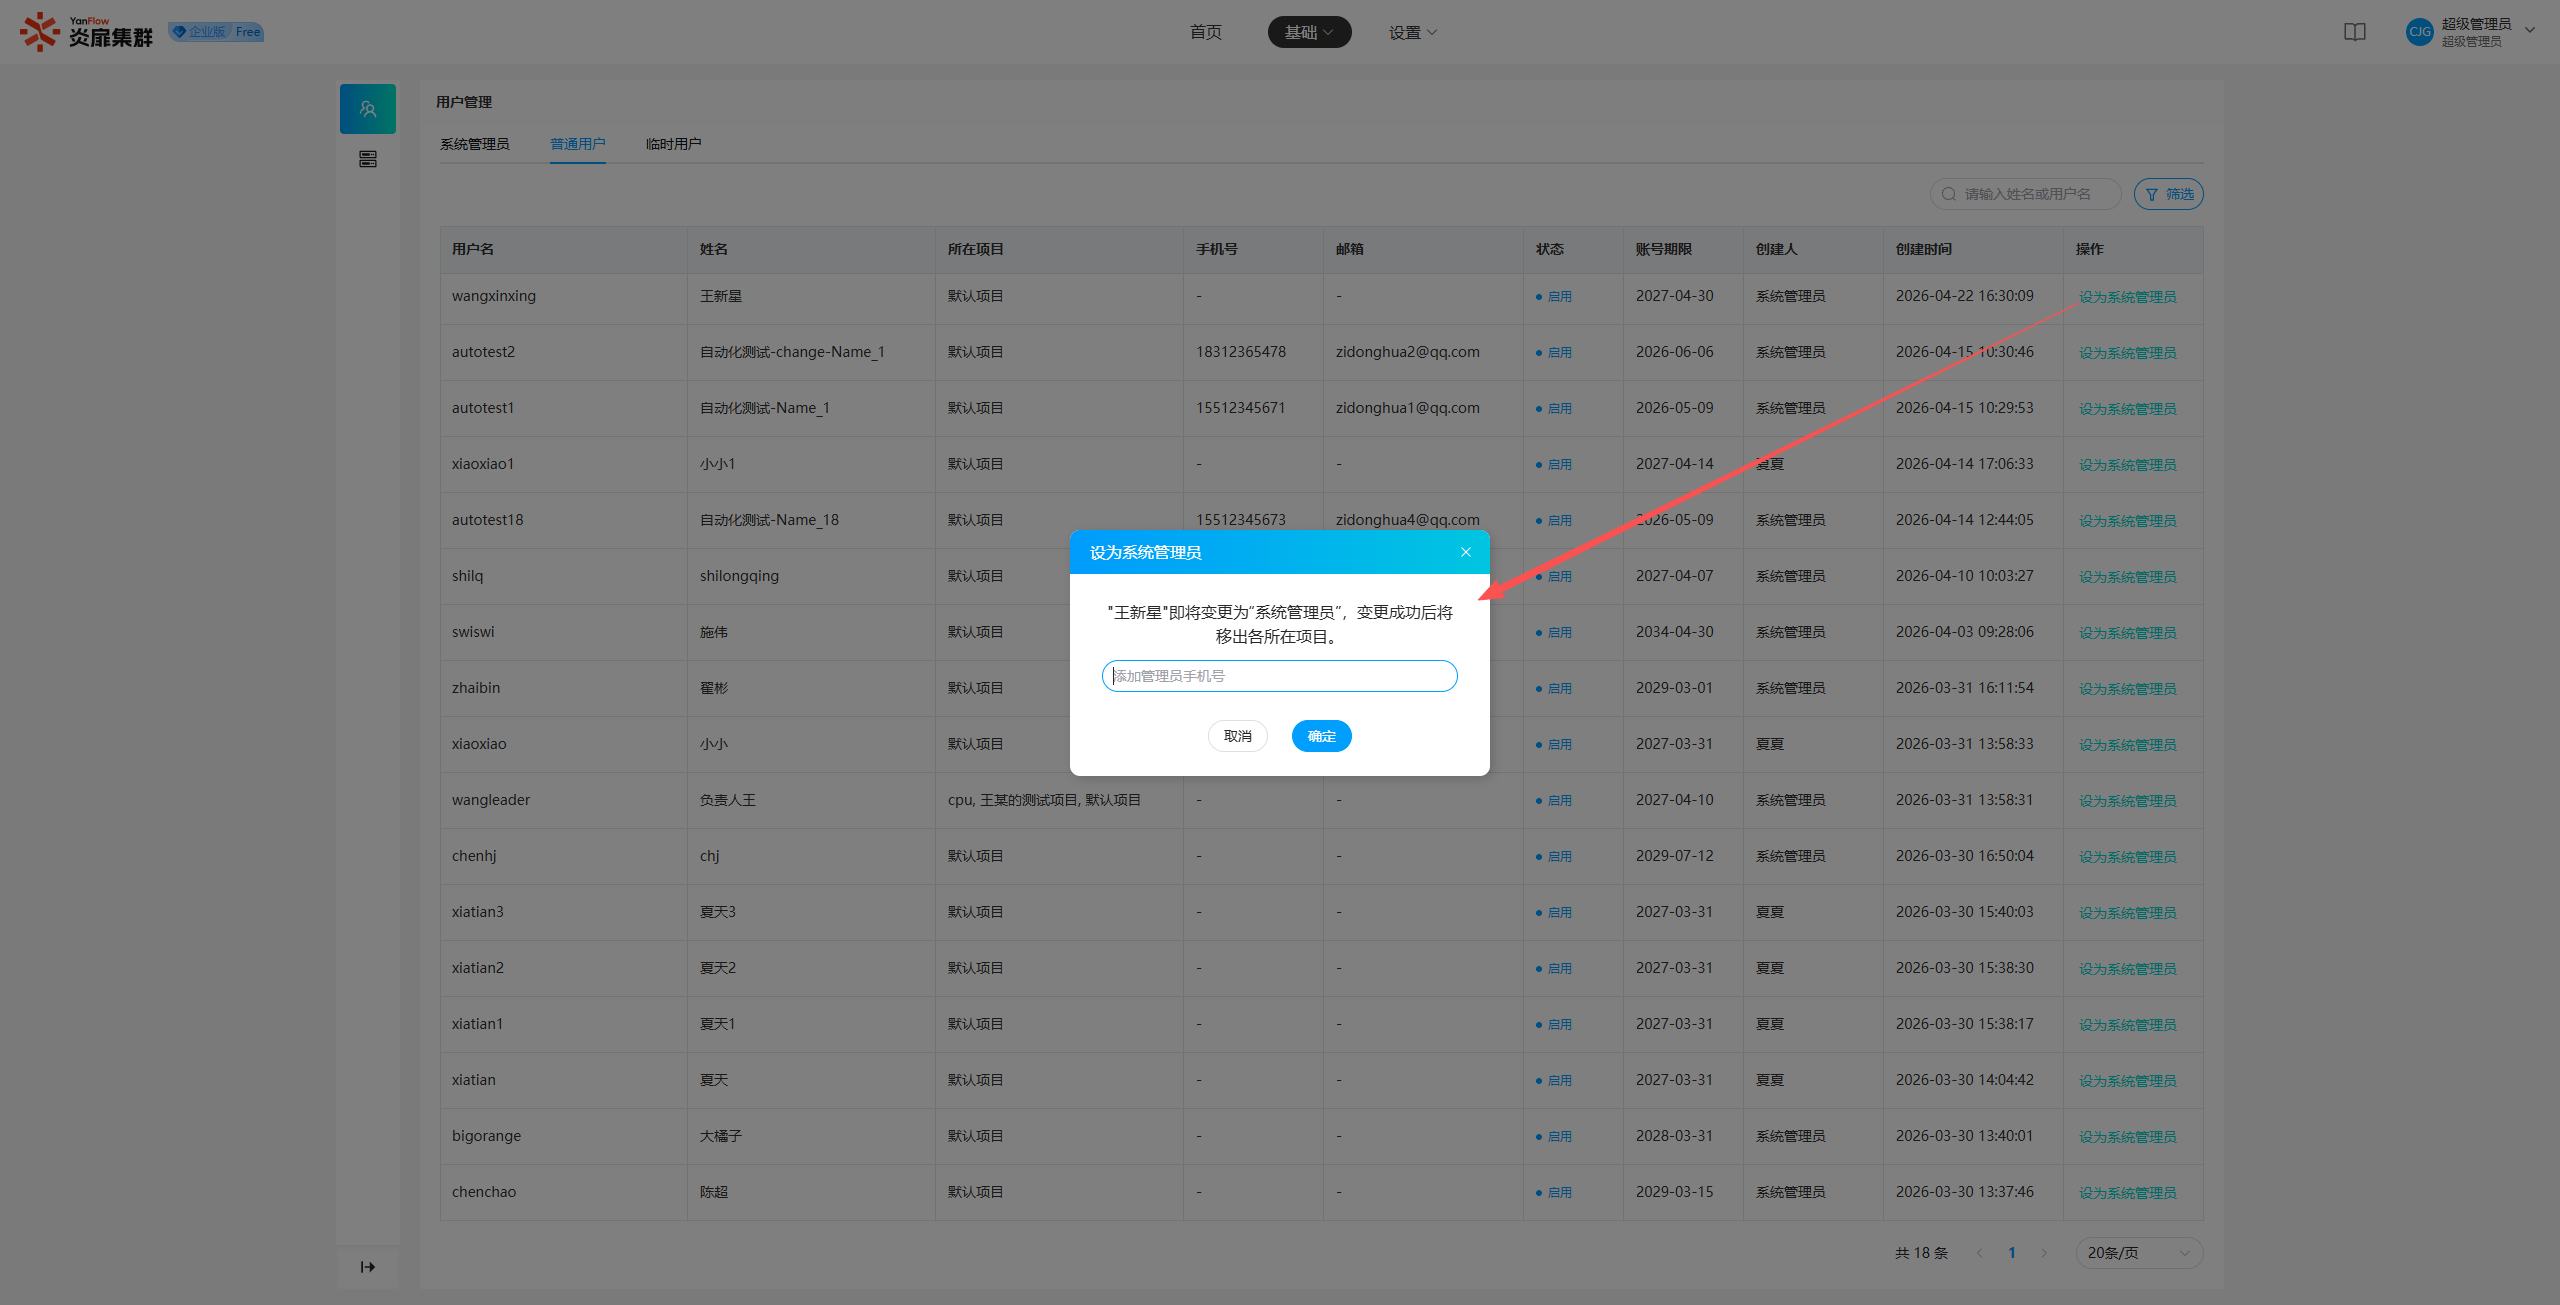
Select a Regular User, click Set as System Administrator, and click Confirm in the prompt popup. If a phone number has not been set, you will be required to add one.
Notes:
- Super Administrators can only change
Regular Usersto System Administrators.- A Regular User can only be promoted if they currently have no active resources.
- Once a Regular User is set as a System Administrator, they will be automatically removed from their previous projects.
Node Management
Node List
Provides two display modes: Card and Table. It shows all nodes in the system categorized by status, including Container Nodes and Virtual Machine Nodes. It supports keyword searches by node name and filtering by node mode, GPU model, or CPU model.
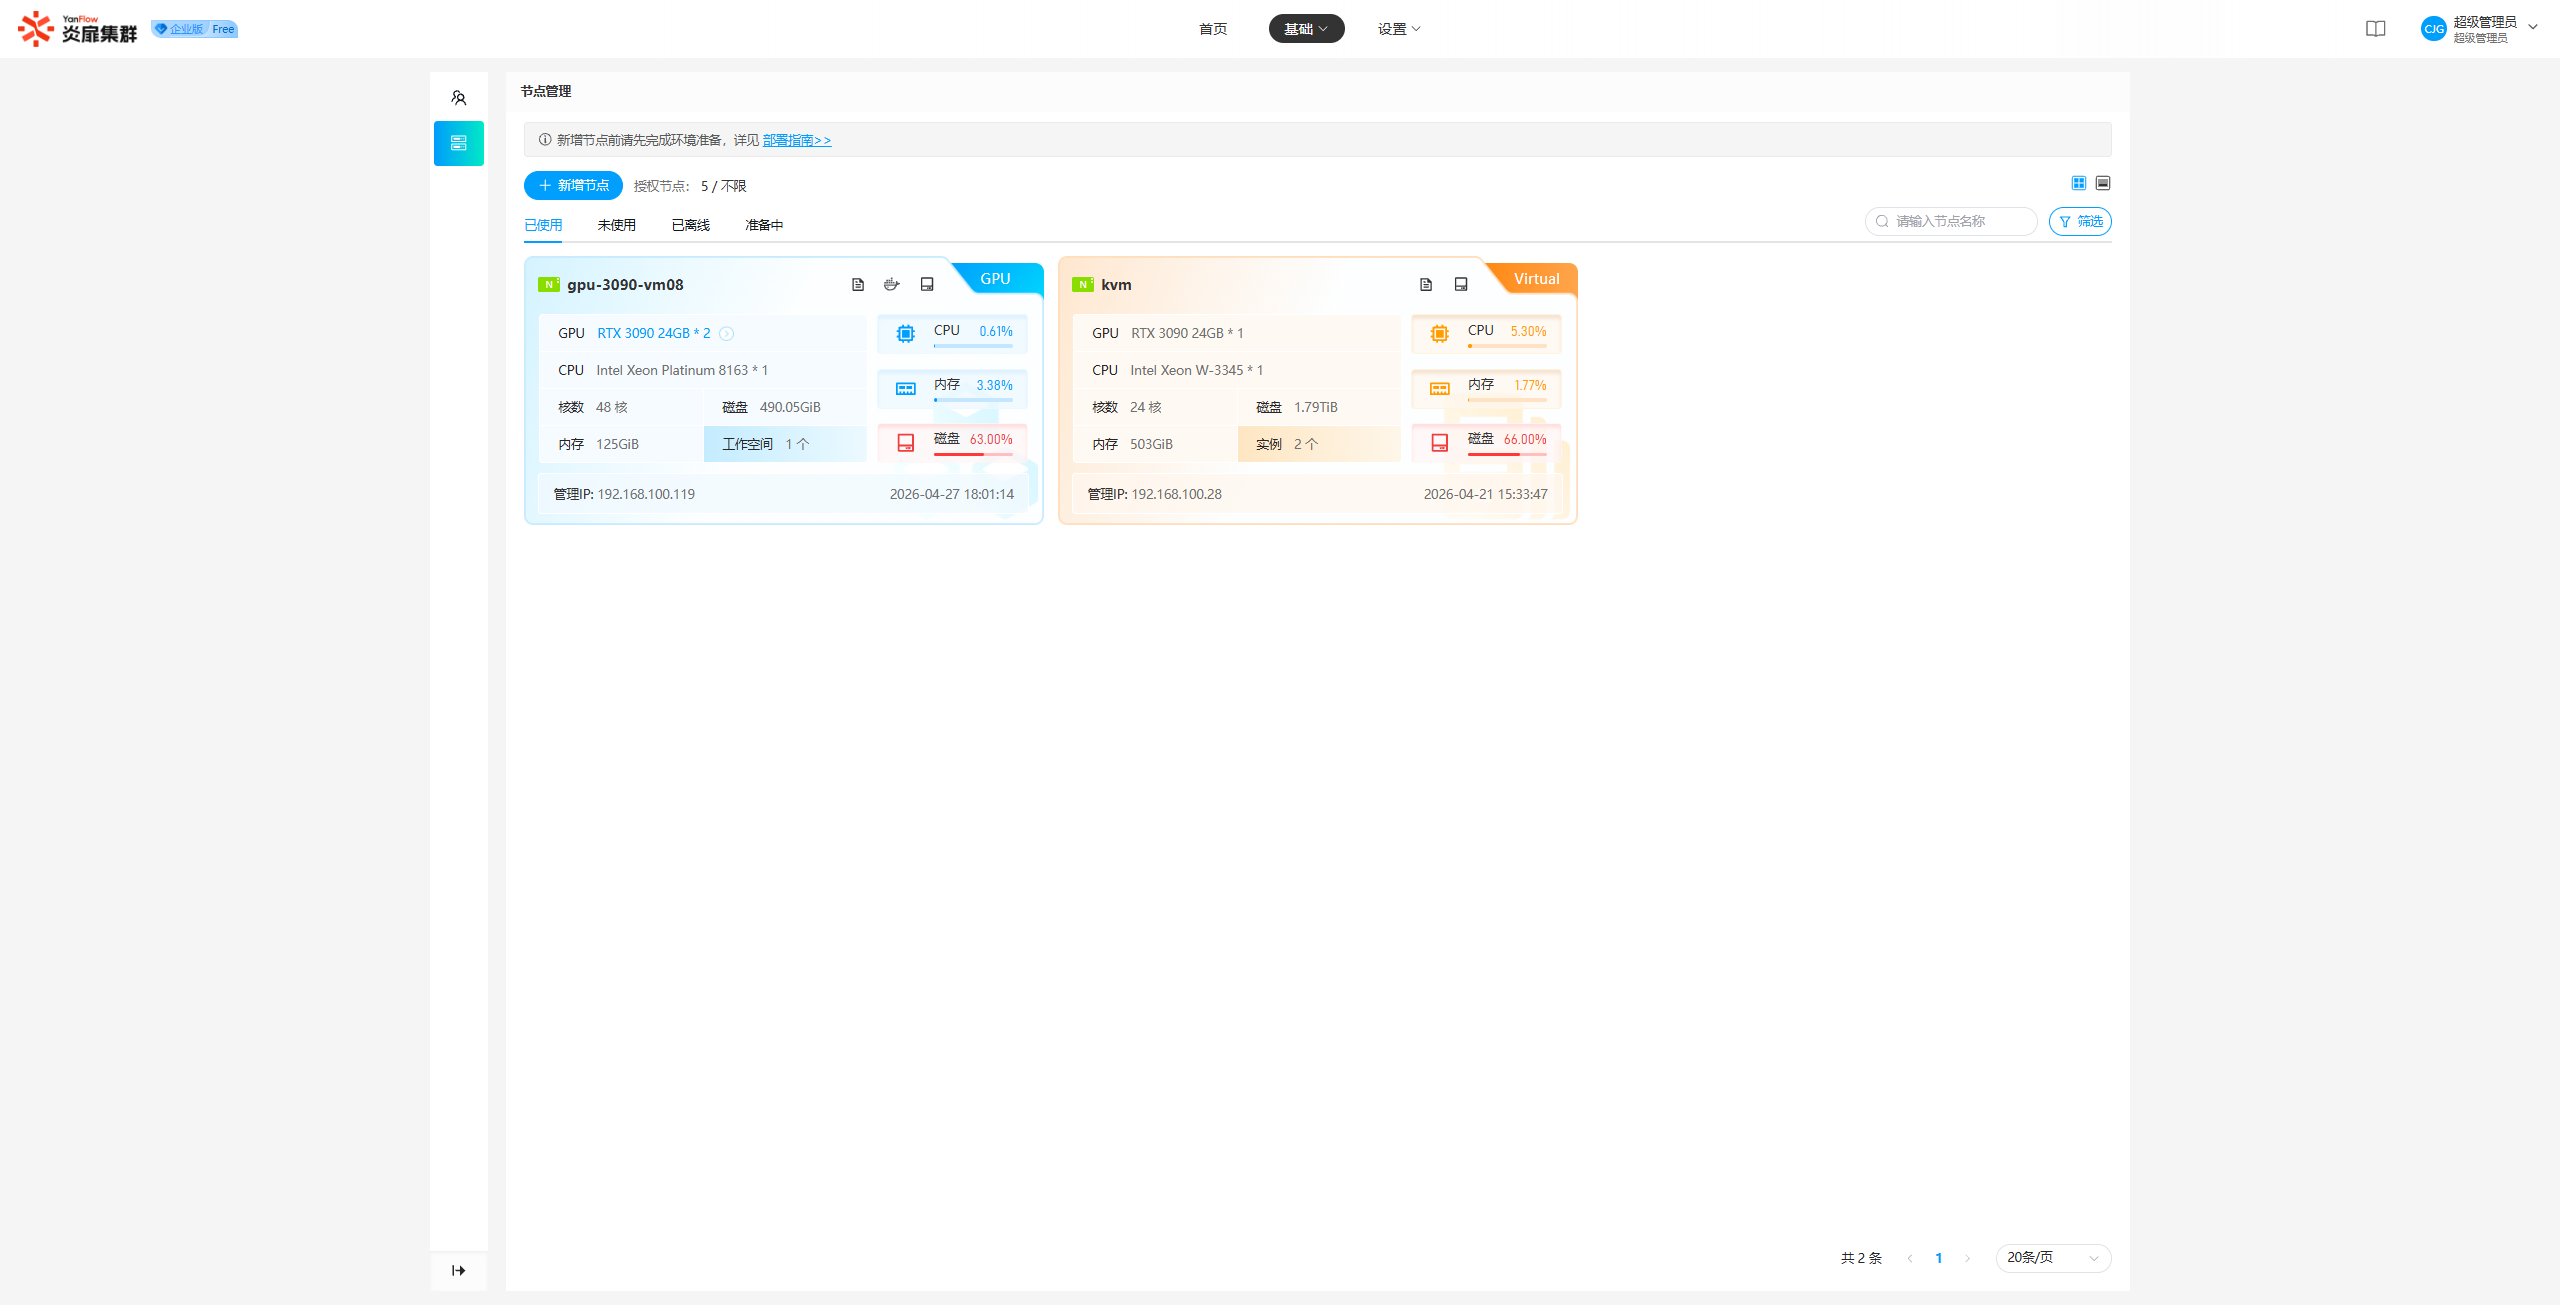
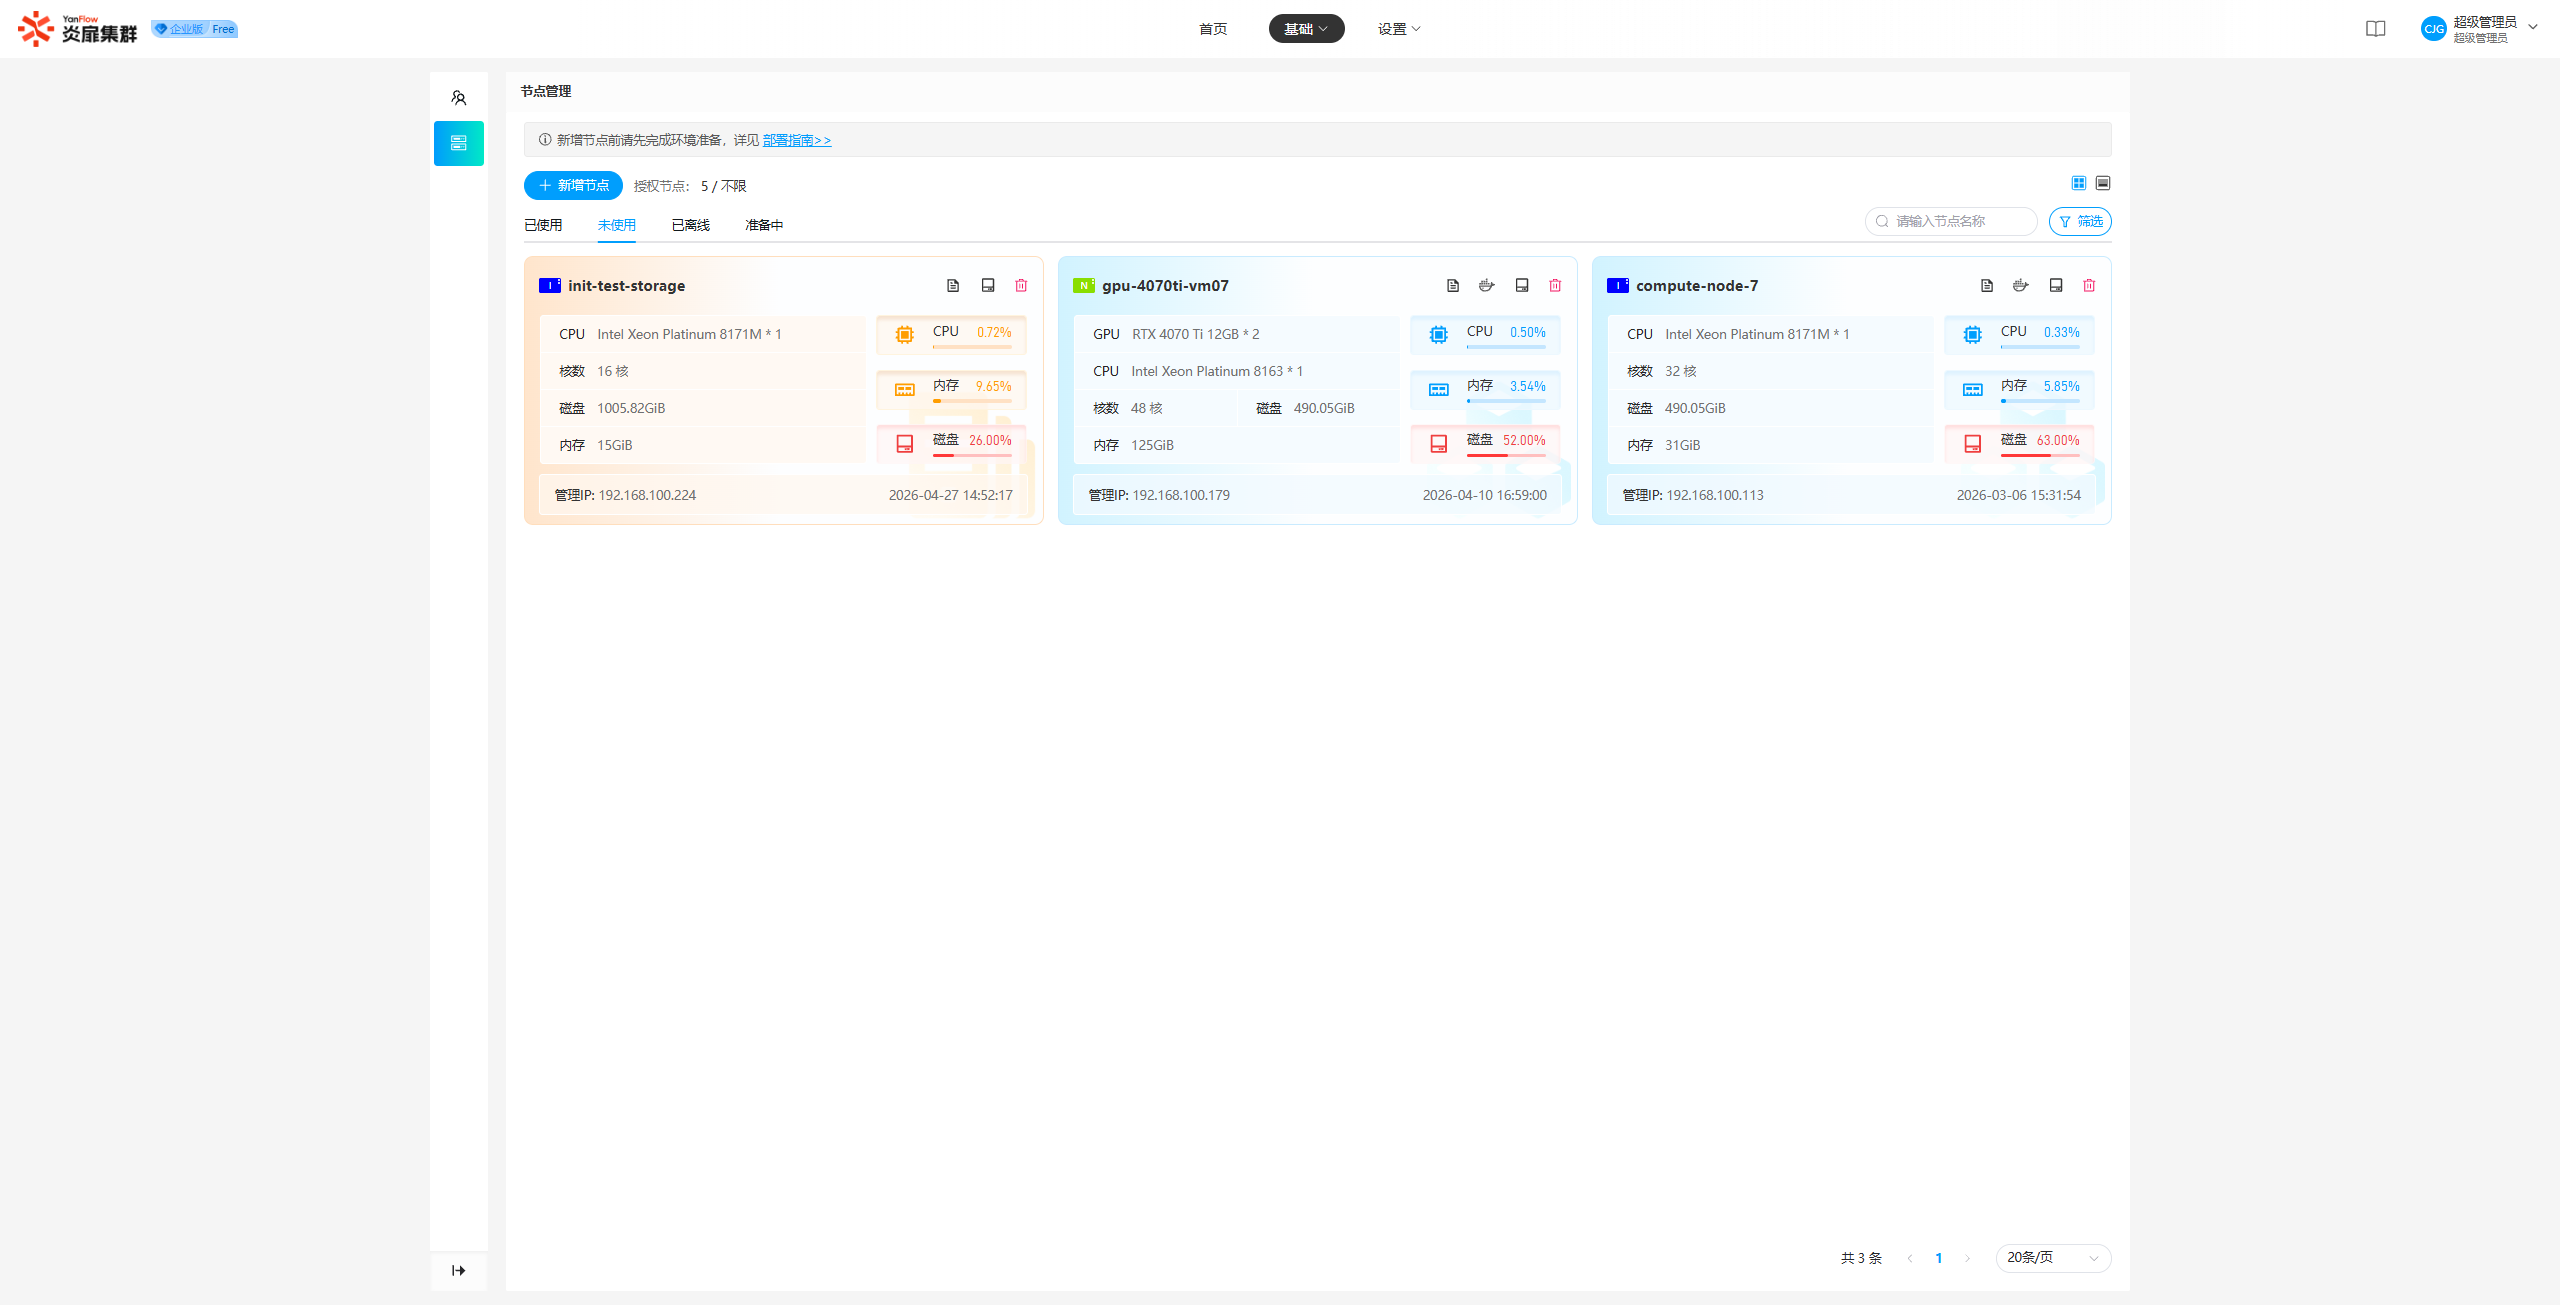
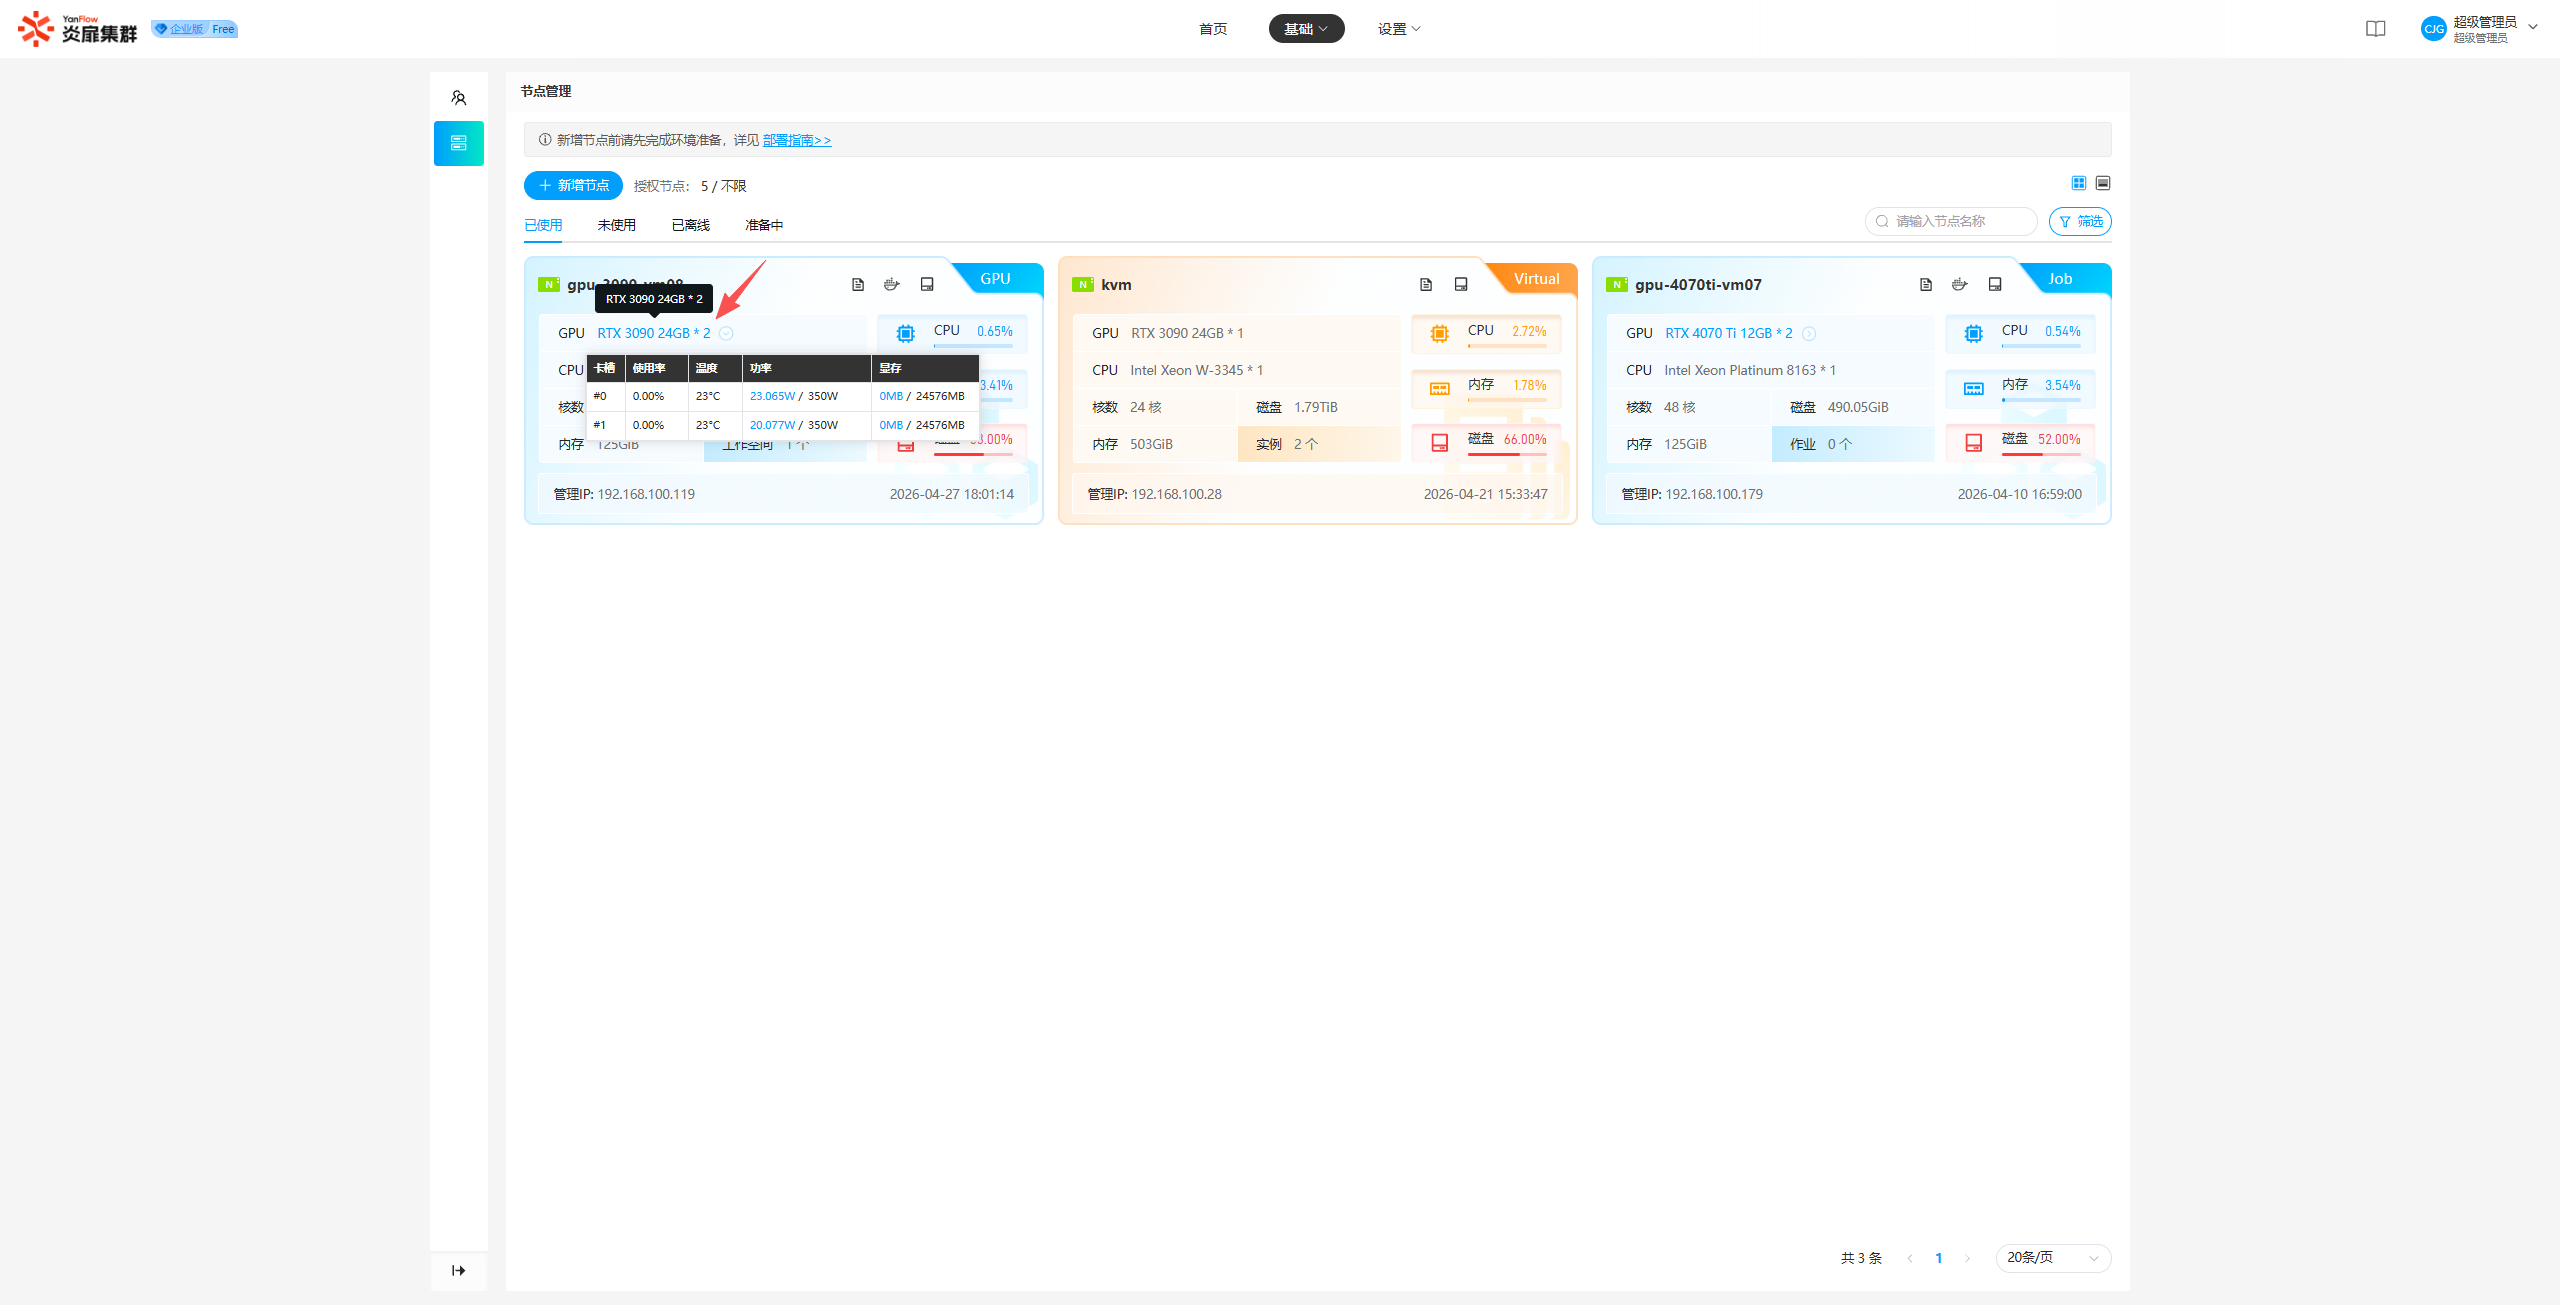
GPU Details: In Card mode, for Container Nodes that are in use, clicking on the GPU Model allows you to view GPU usage data. (This feature is only available for Container Nodes).
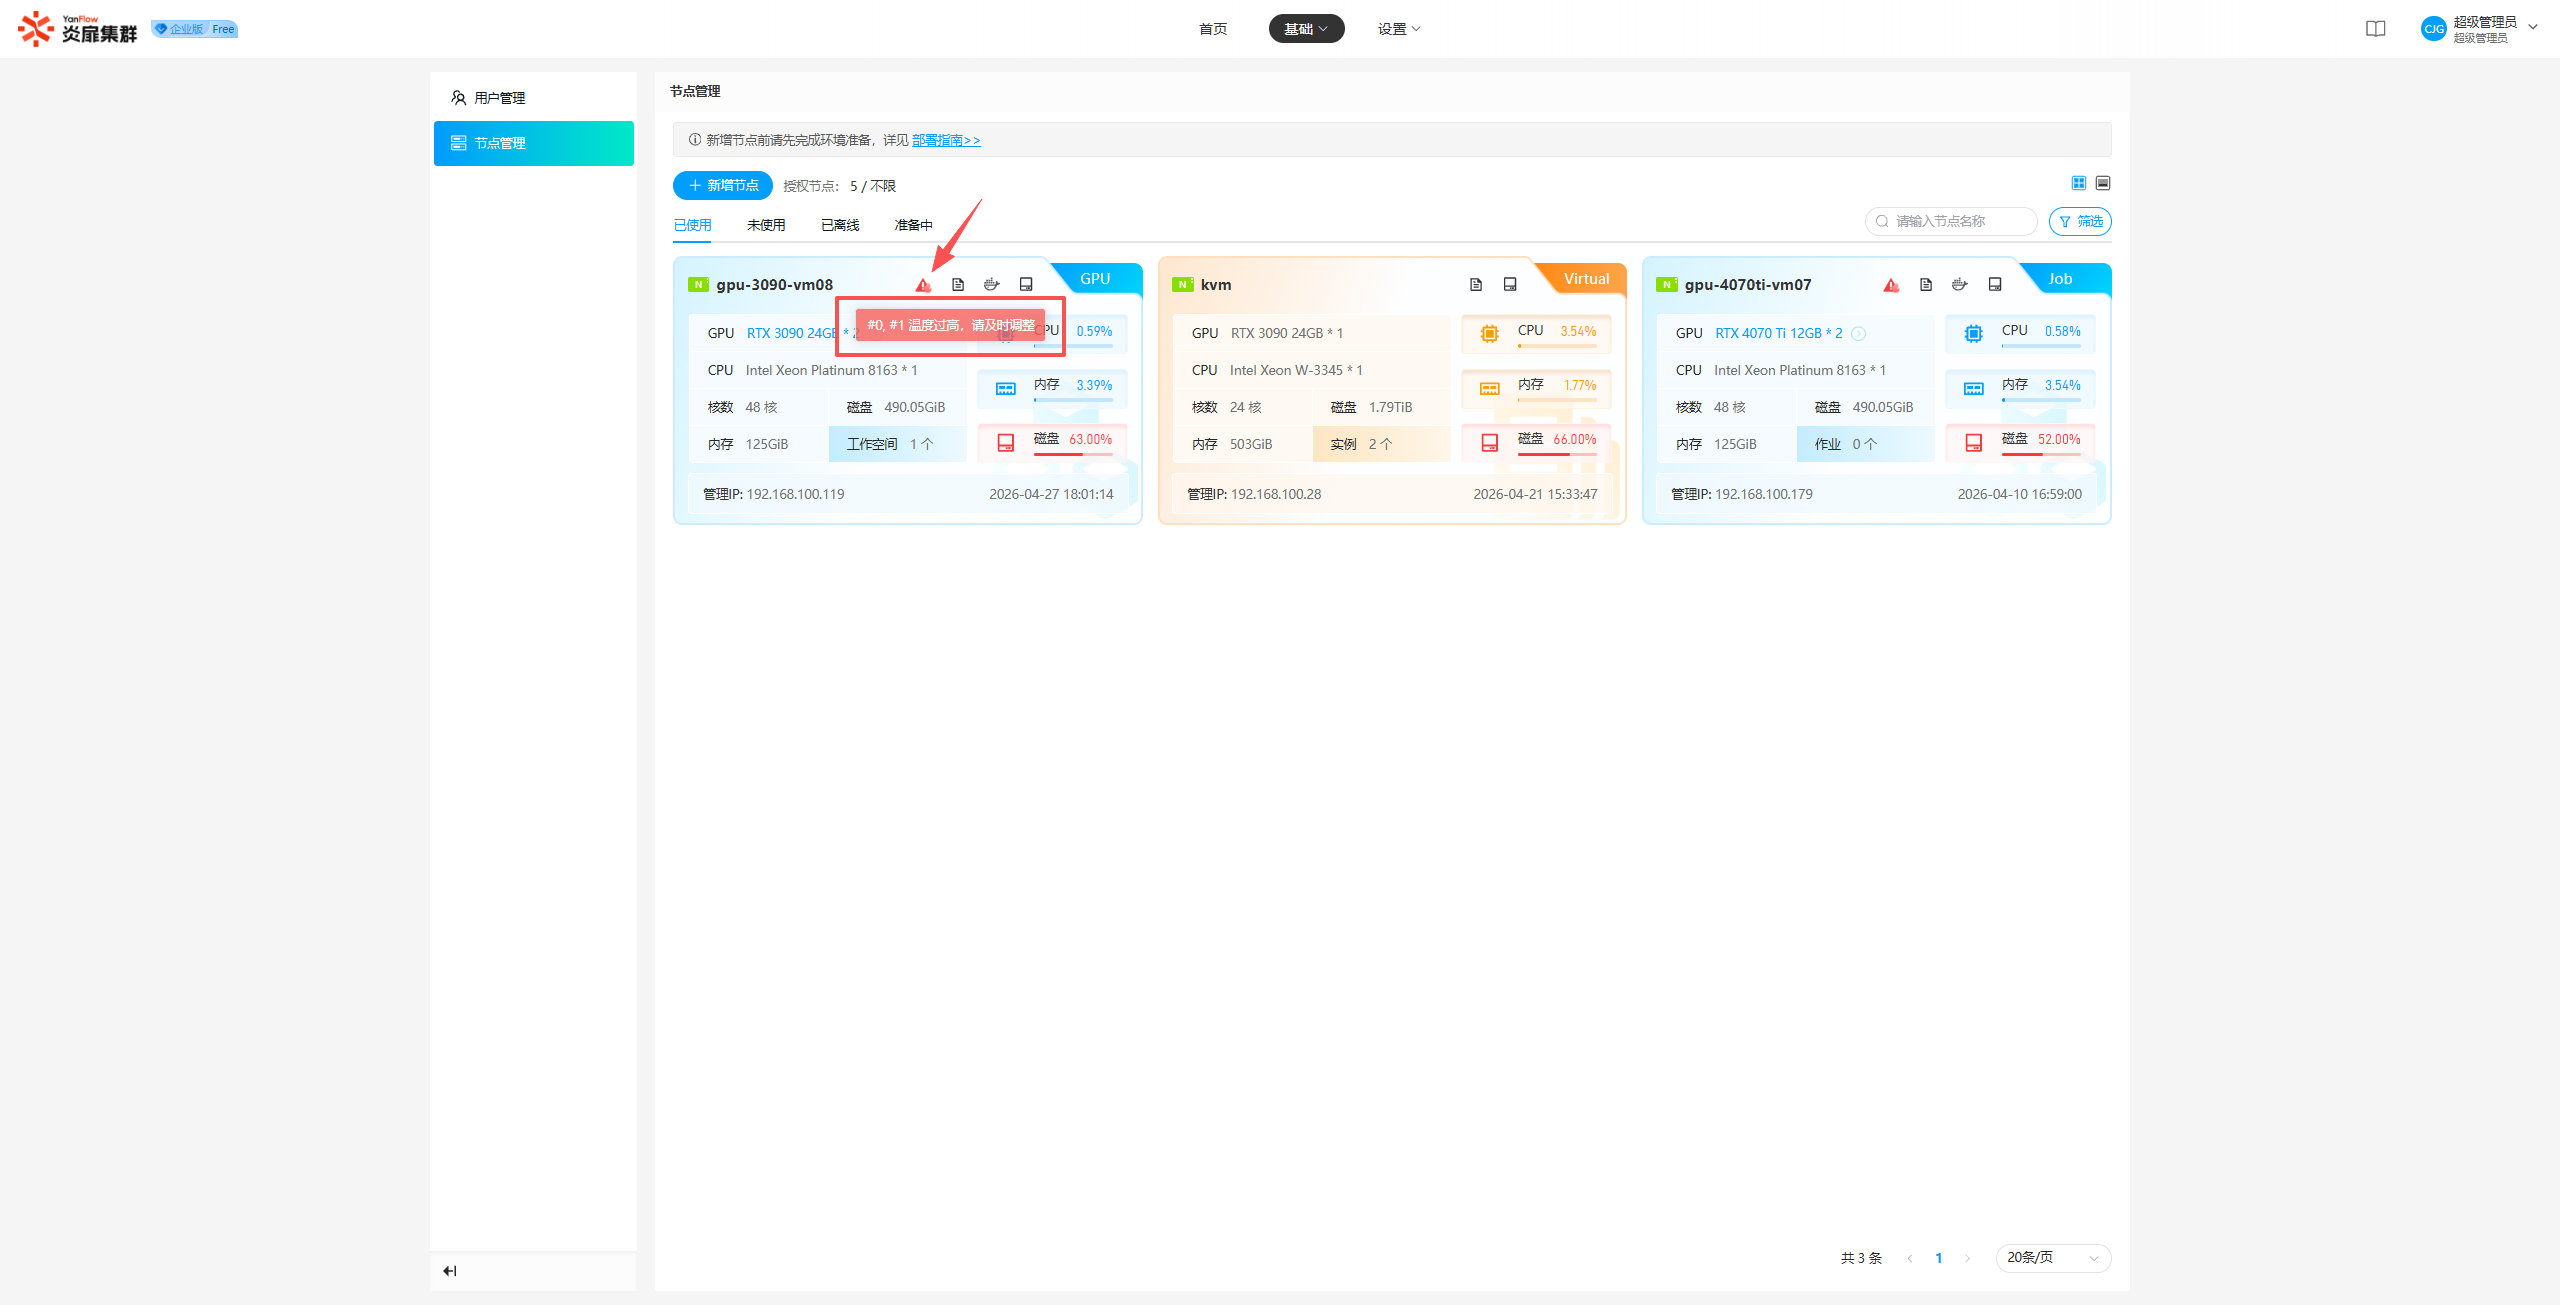
GPU Temperature Alert: If the GPU temperature exceeds the threshold, an alert icon will be displayed on the node in Card mode. Hovering over the icon will show the information for the overheating GPU slot.
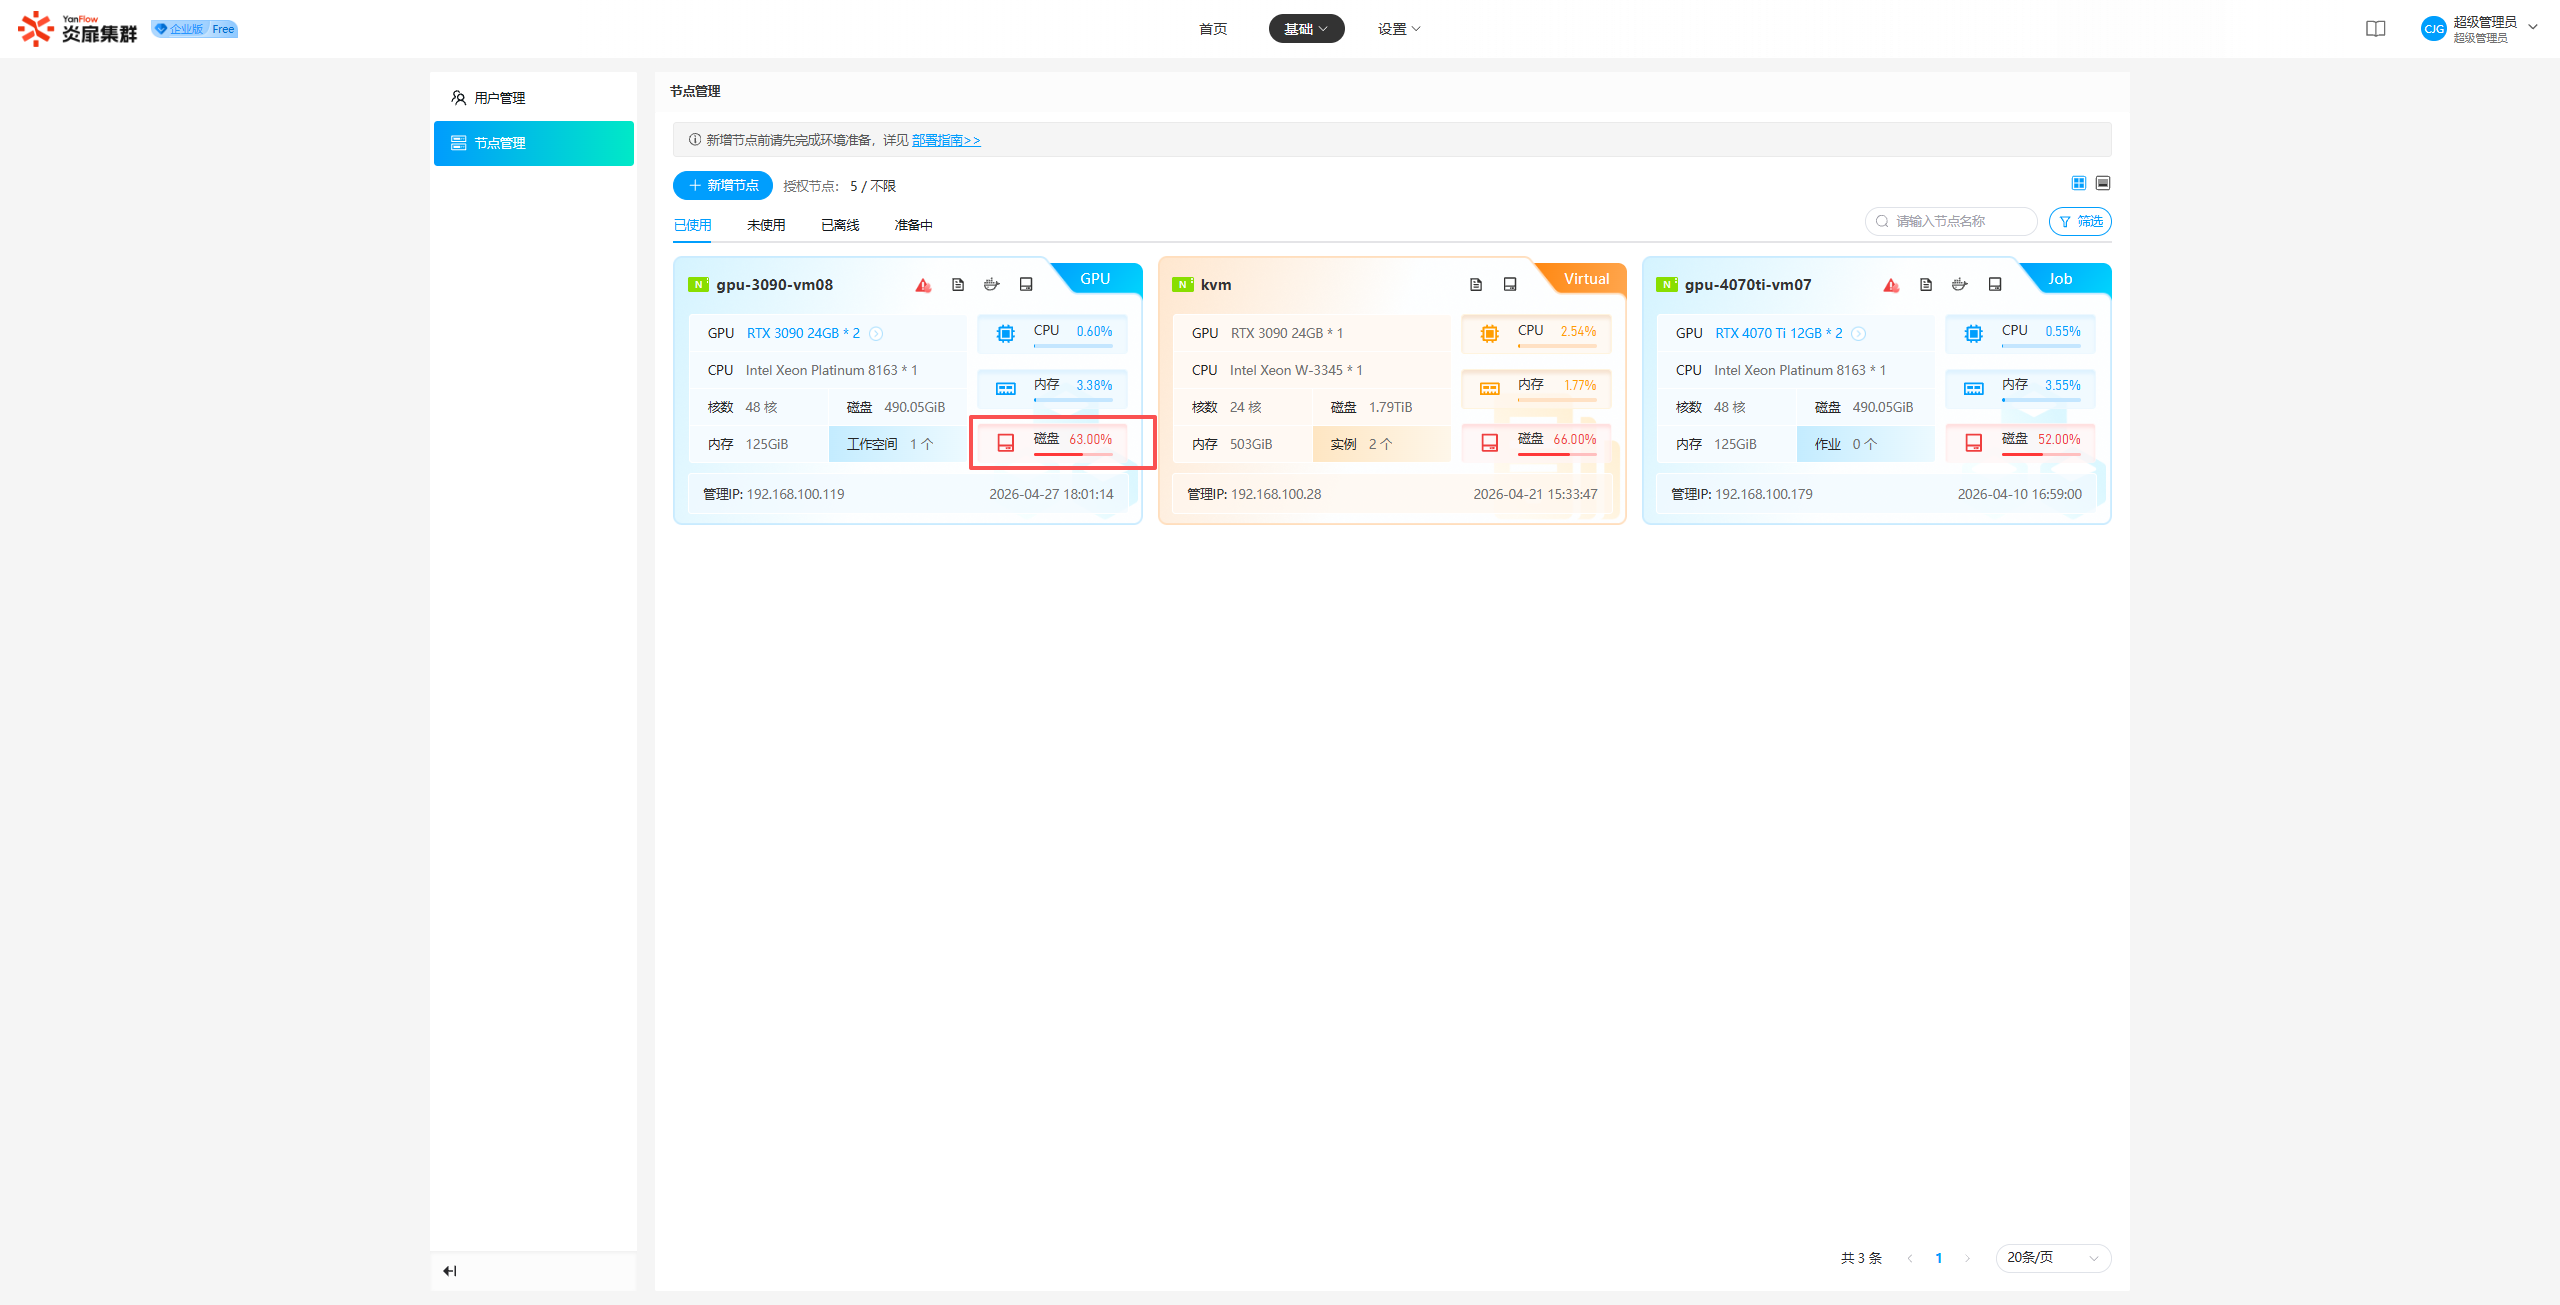
Disk Space Alert: If the node's disk space usage exceeds the threshold, the disk usage value will be highlighted in red in Card mode.
Notes:
- When a node is in use, the system automatically configures its mode, such as
GPU,vGPU,CPU,Job,LLM, orVirtual.- The alert thresholds for GPU temperature and disk space are set by System Administrators in
System Configuration - Threshold Settings.
Add Node
Click Add Node to open the node creation popup. Enter the basic information: Node Type, Resource Type, Node Management IP, Node Storage IP, Port, root password, etc., and click the Node Verification button. Once verification is successful, the node name will be populated.
Click the Get Machine Configuration button to display the machine's current configuration and the system's recommended configuration. Click Confirm Add to execute the addition. Once successful, the node information will refresh.
Notes: If your machine configuration is lower than the recommended requirements, the system still supports adding the node, but it may lead to insufficient performance or operational abnormalities. To ensure the best experience, it is recommended to upgrade your machine to the recommended configuration or higher.
Disk Management
Unused Nodes: Click Disk Management to open the disk management popup.
- If no storage disk has been set: You can follow the steps to configure a storage disk.
- If a storage disk has already been set: All disks under that node will be displayed. Disks marked as in use have been set as storage disks; hover over them to view detailed disk information.
In-use Nodes: Click Disk Management, and the popup will display the information for the disks on that node used for storing data. Hover over them to see detailed information.
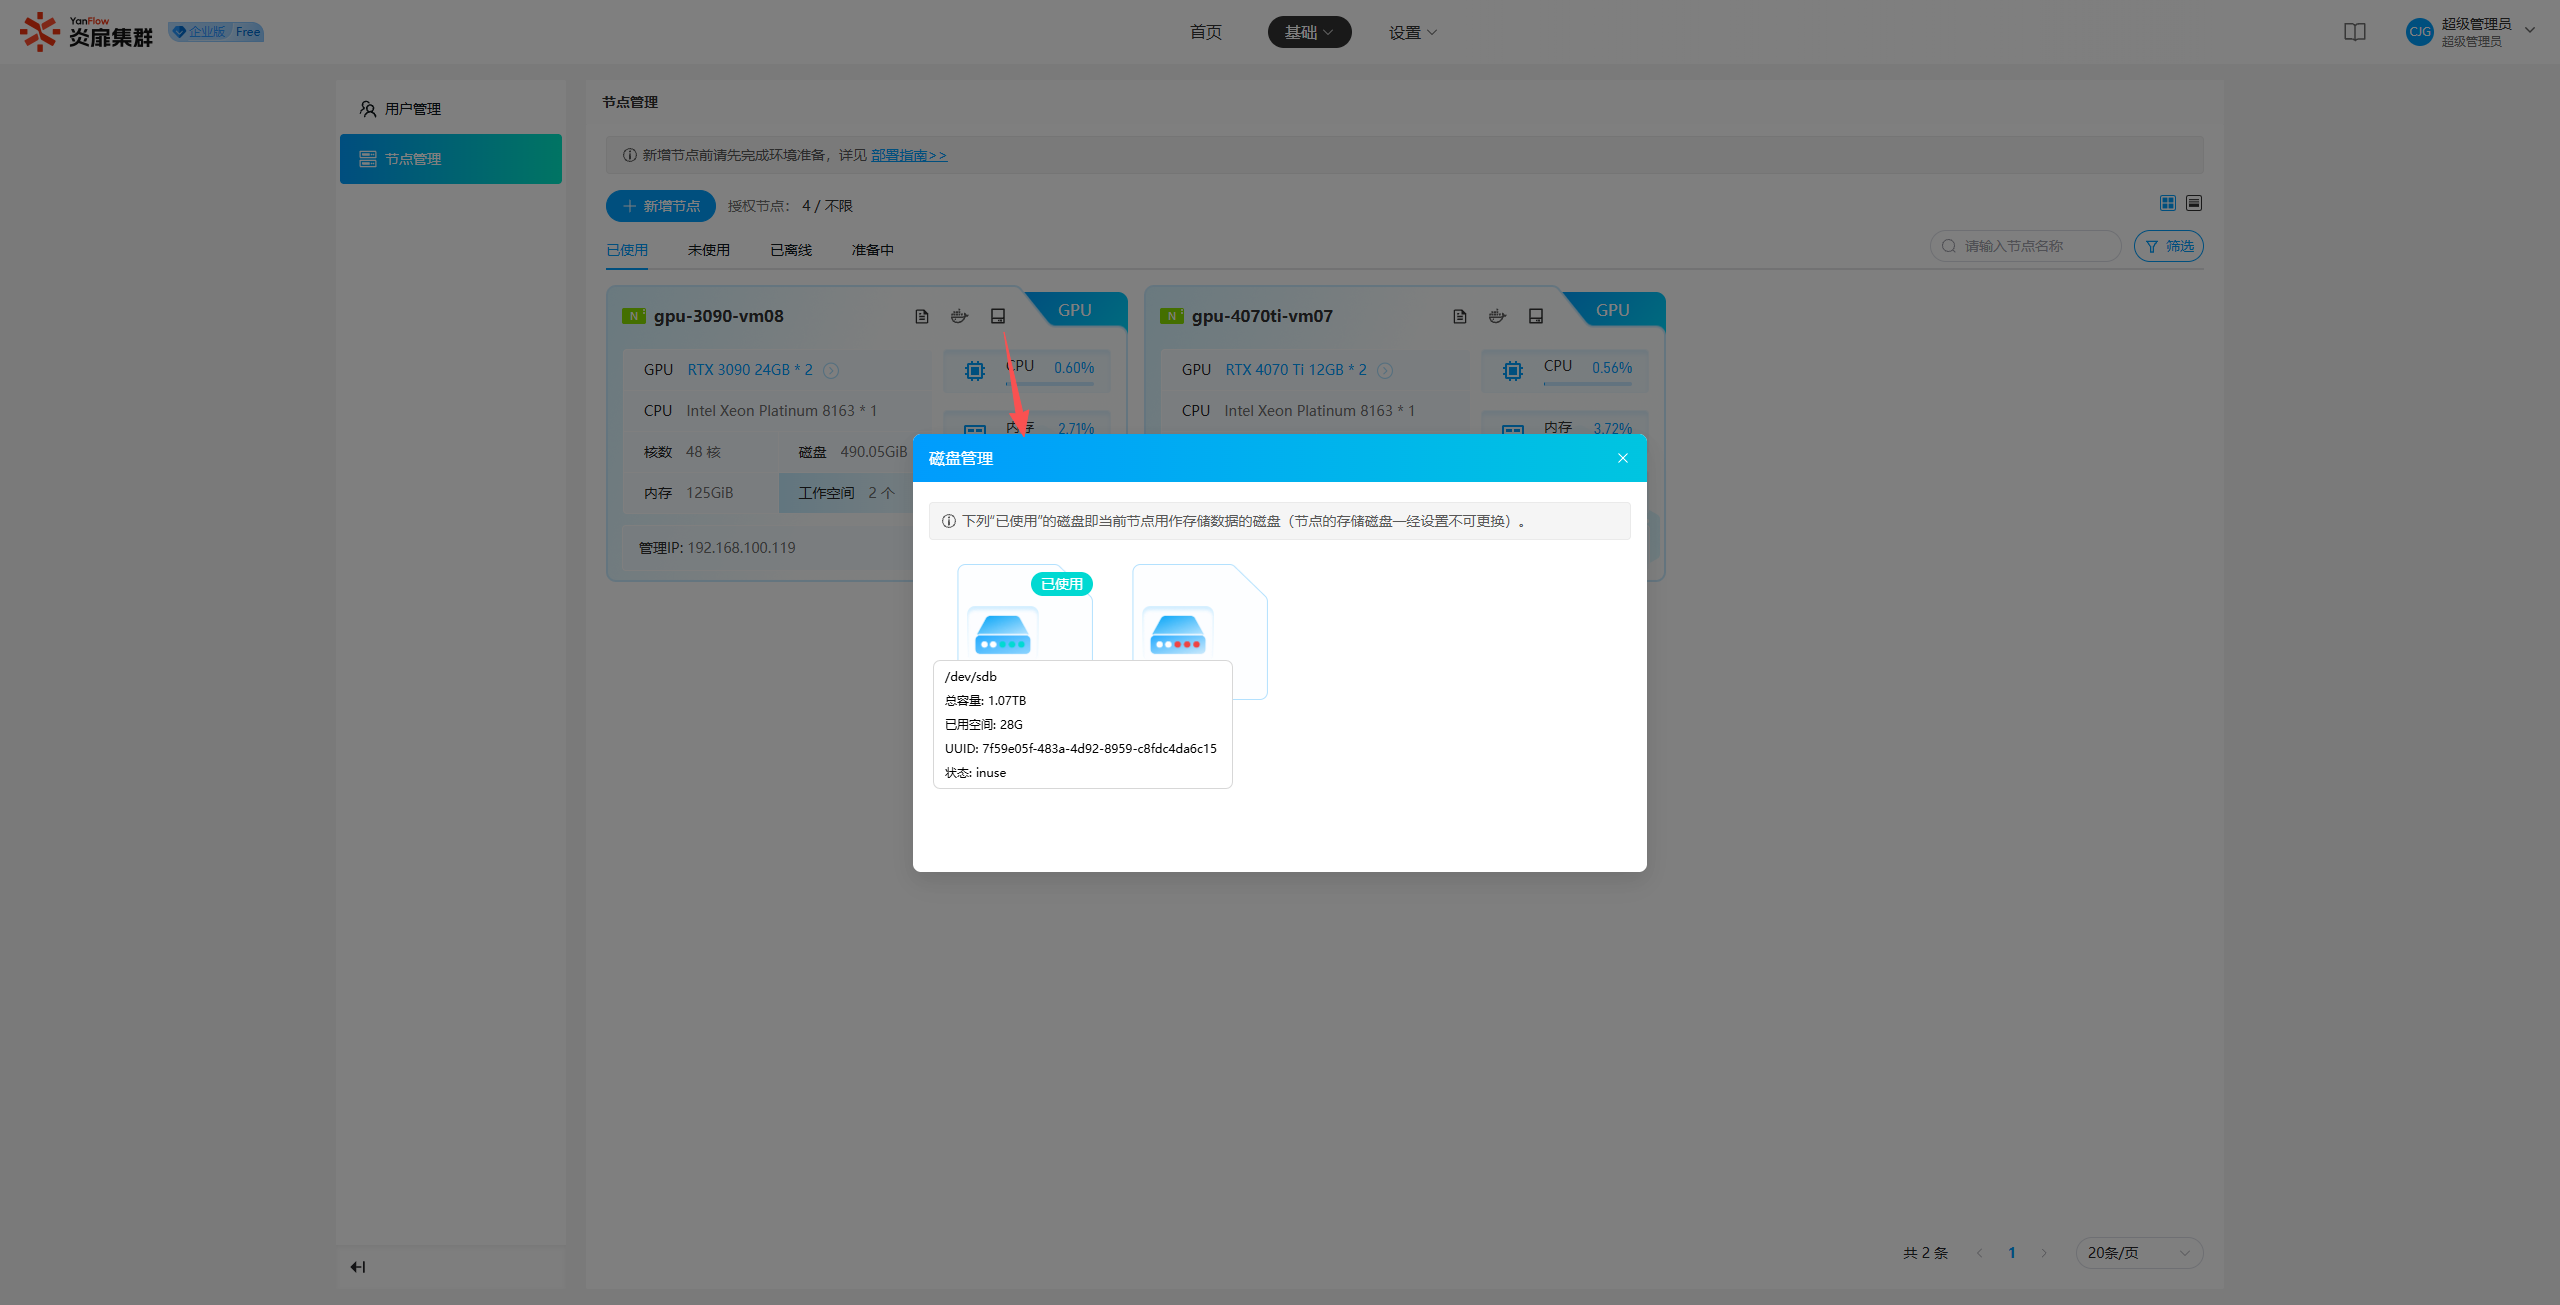
Notes:
- To manage node disks, please ensure the system architecture is Fusion Architecture; this feature is not provided under Professional Architecture.
- Once a node's storage disk is configured, it cannot be changed.
Node Details
Click Details to view the node's detailed information, including basic info, CPU/Memory/Disk usage, workspace info, GPU info, etc.
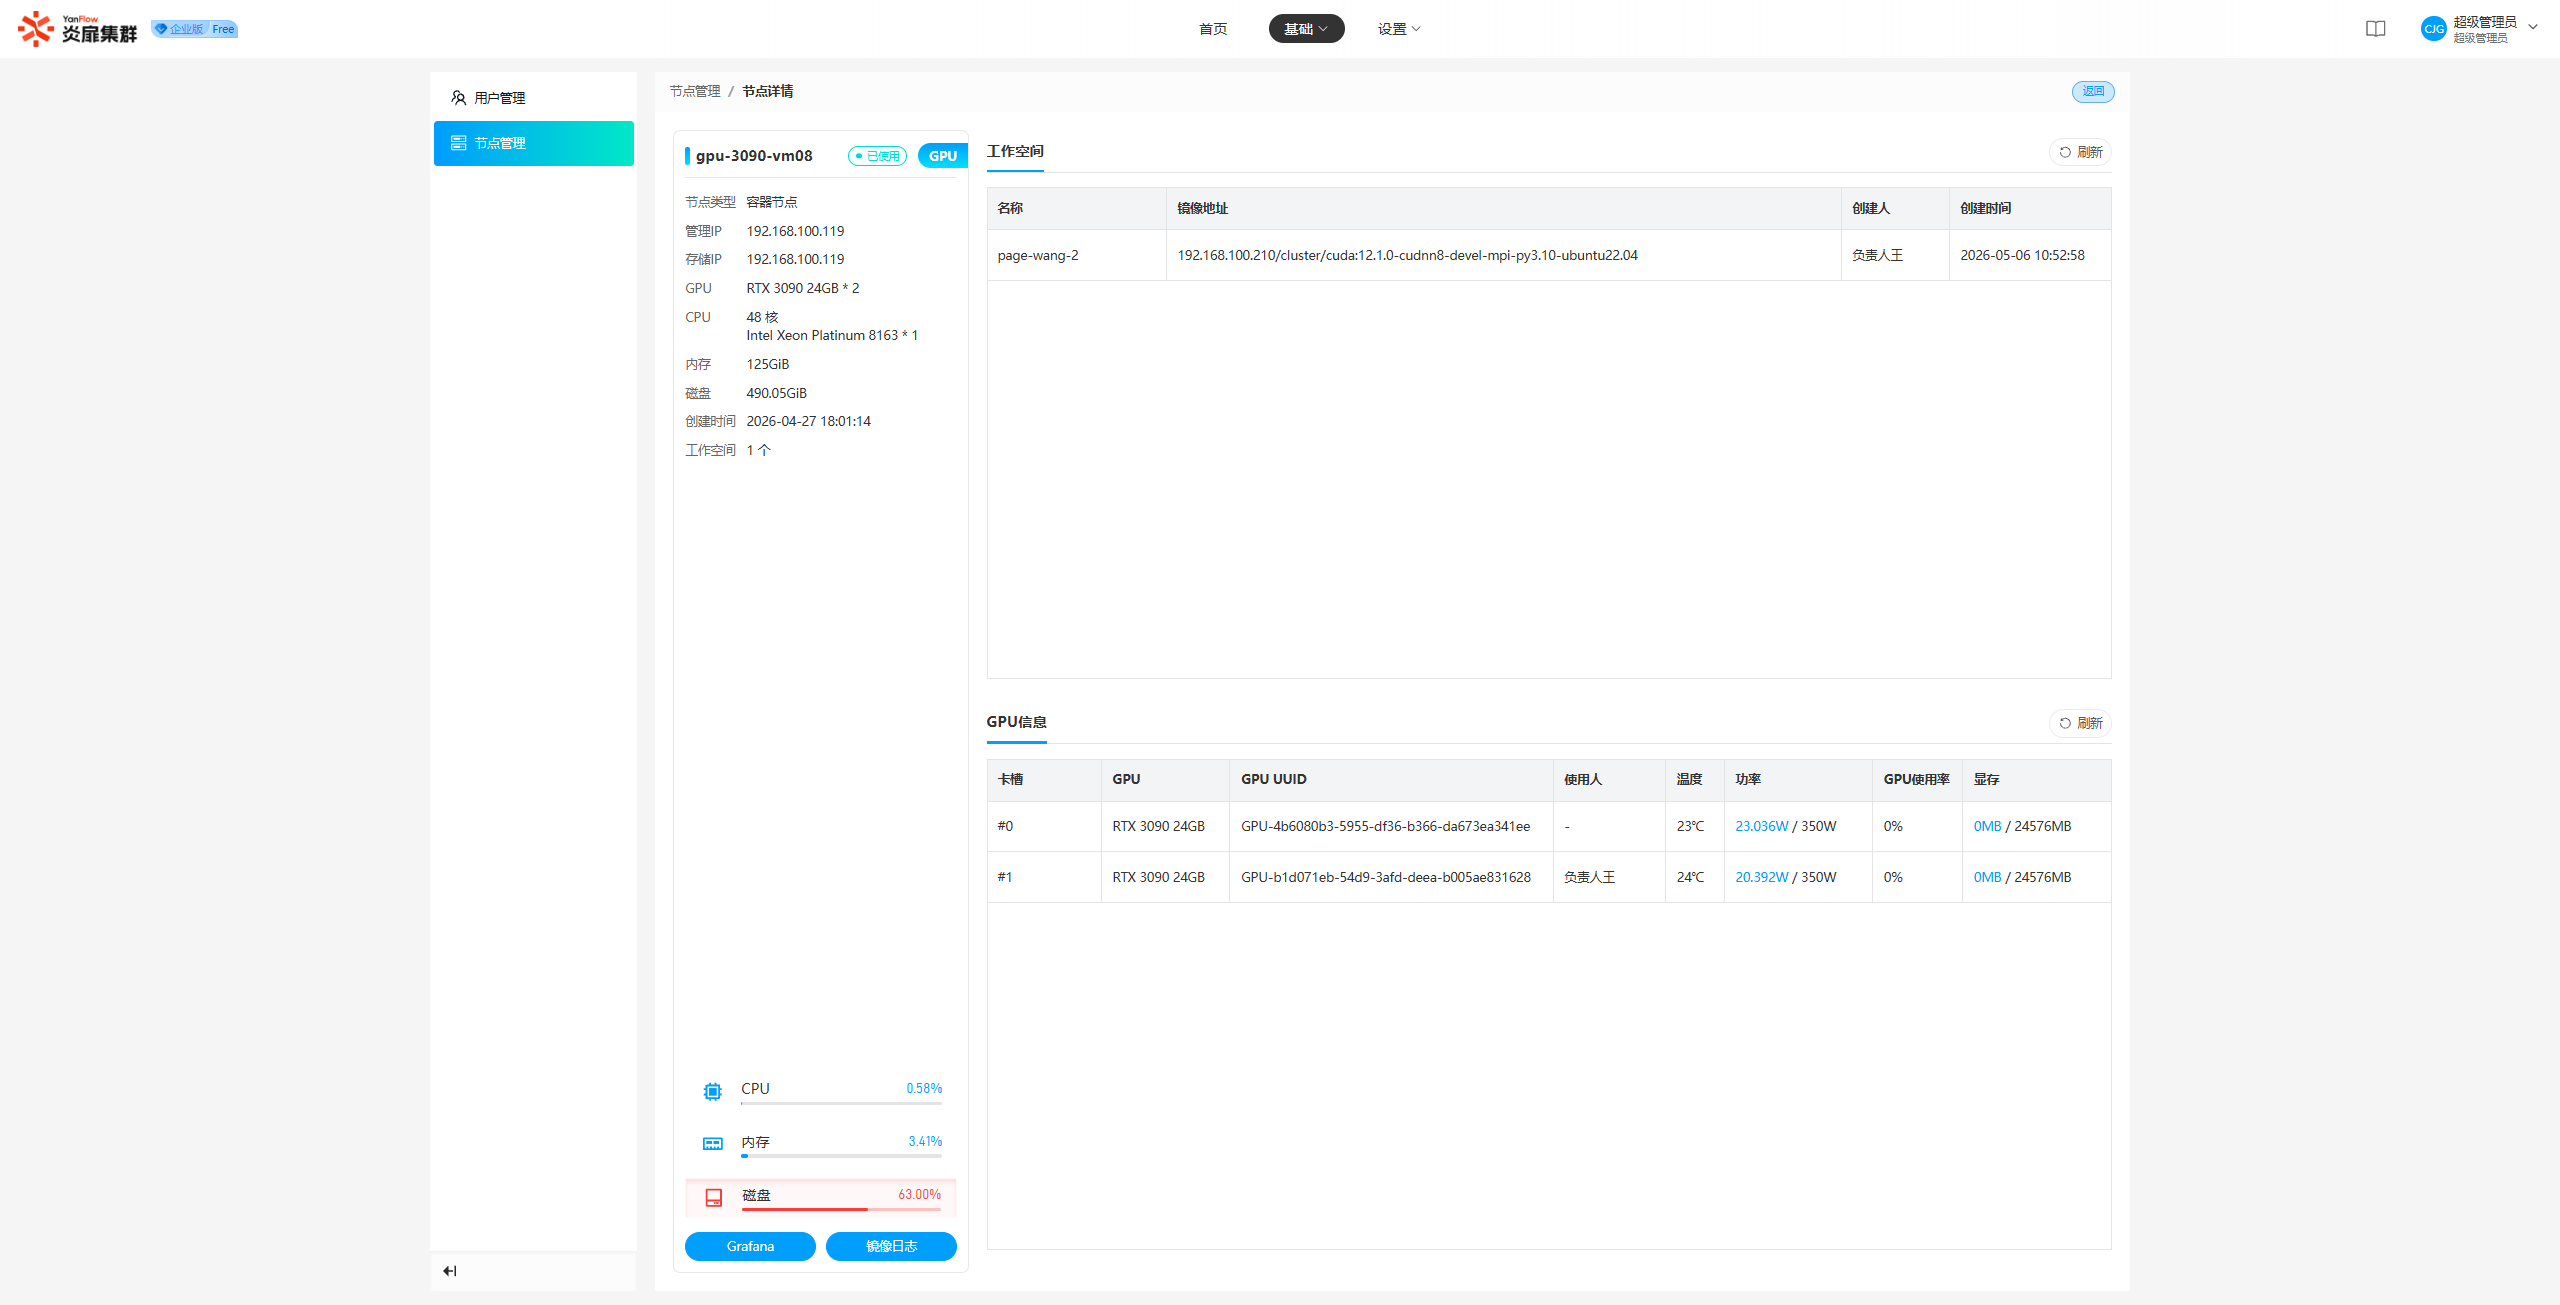
On the details page, click Grafana to display the Grafana monitoring dashboard. Click Image Logs to open the image log page for that node.
Node Images
Select a node and click Image to view all image information on that node. It supports keyword searches by Image Address or Image ID.
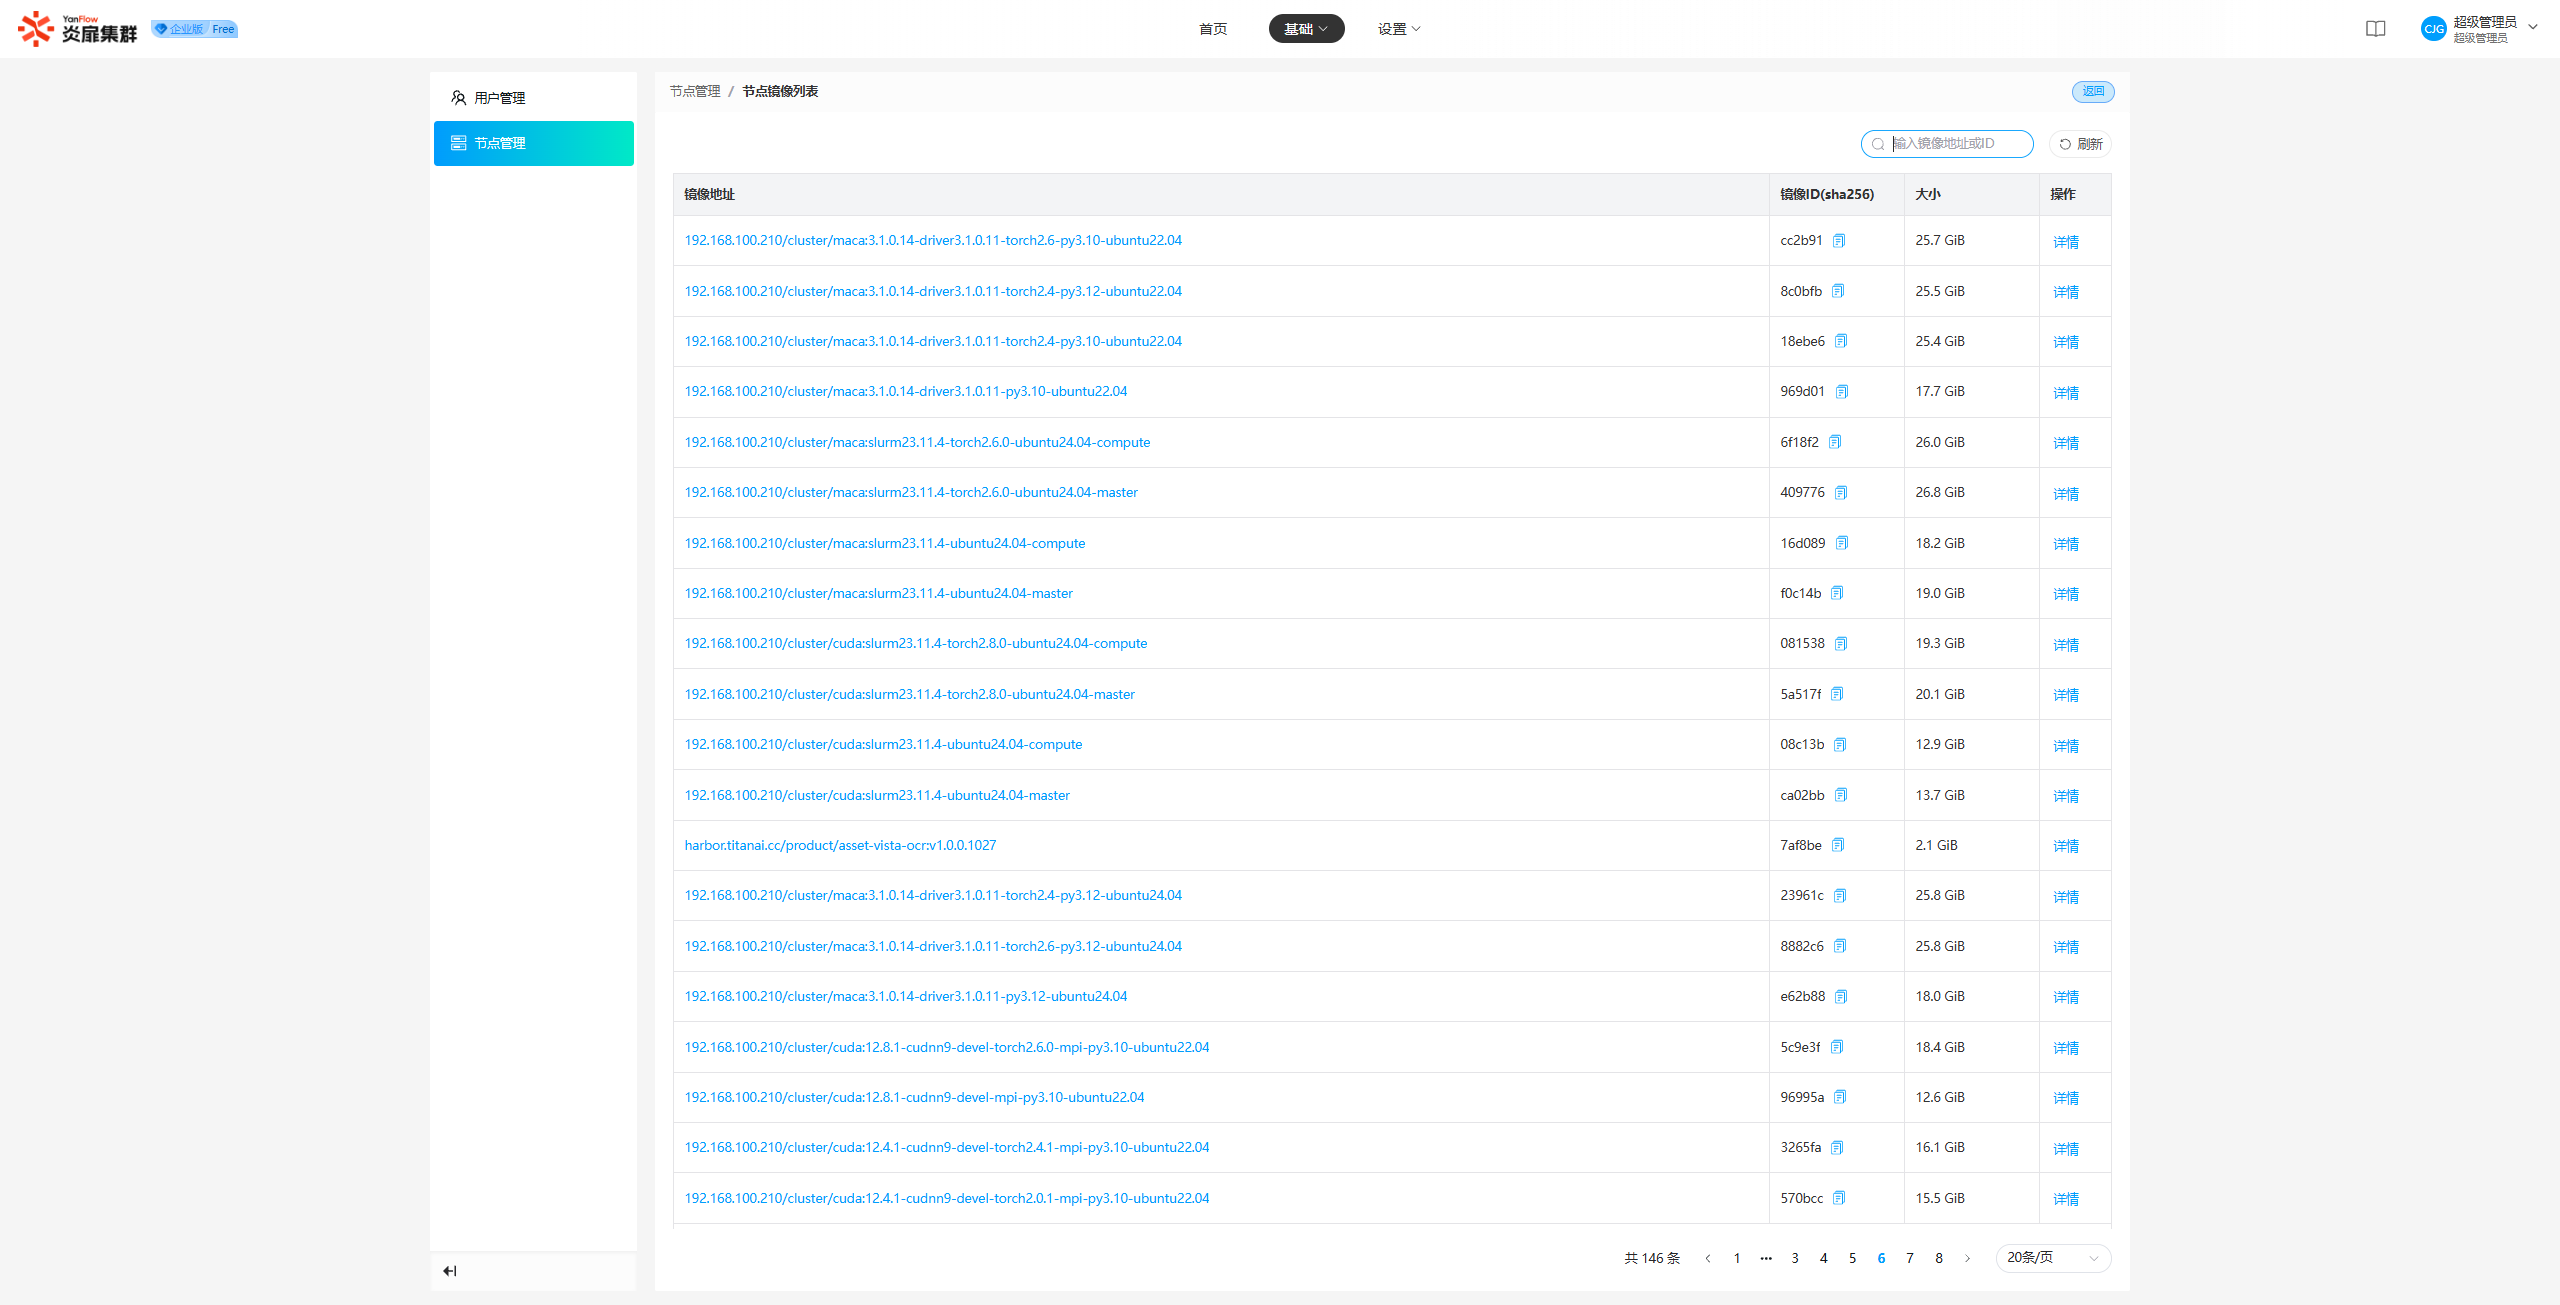
Copy Image ID: Click the Copy button next to the Image ID to copy the full ID.
View Image Address: When more than one image address is associated, a numerical badge will be displayed. Hover over it to view all associated image addresses.
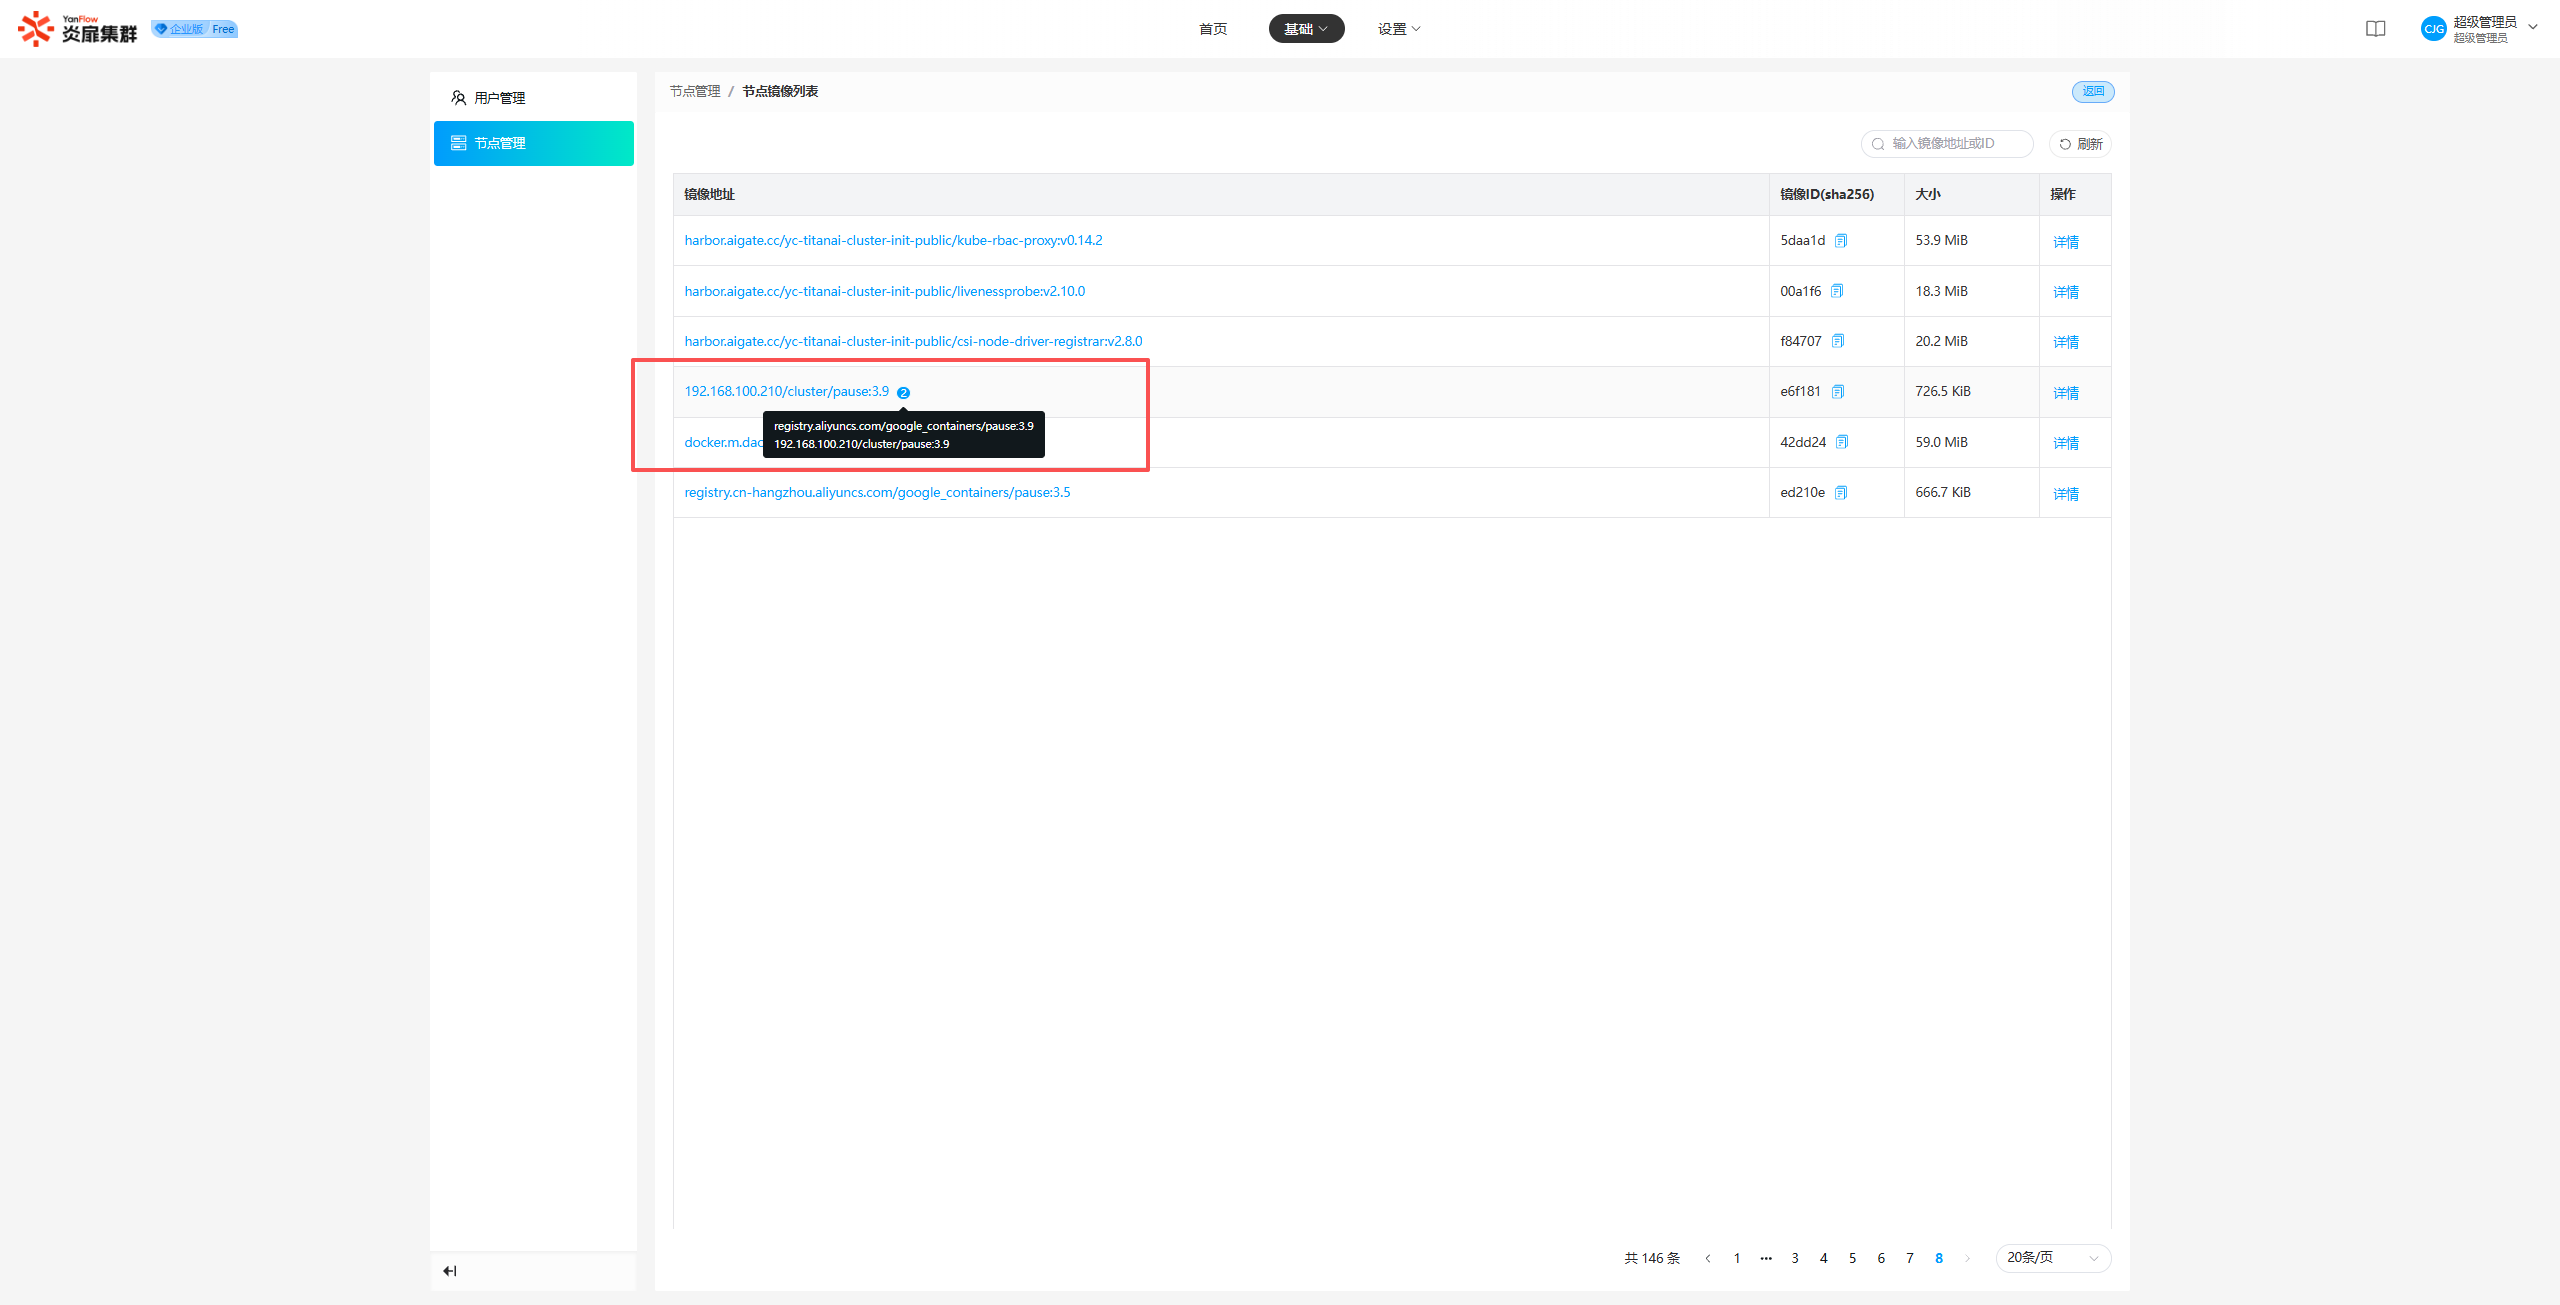
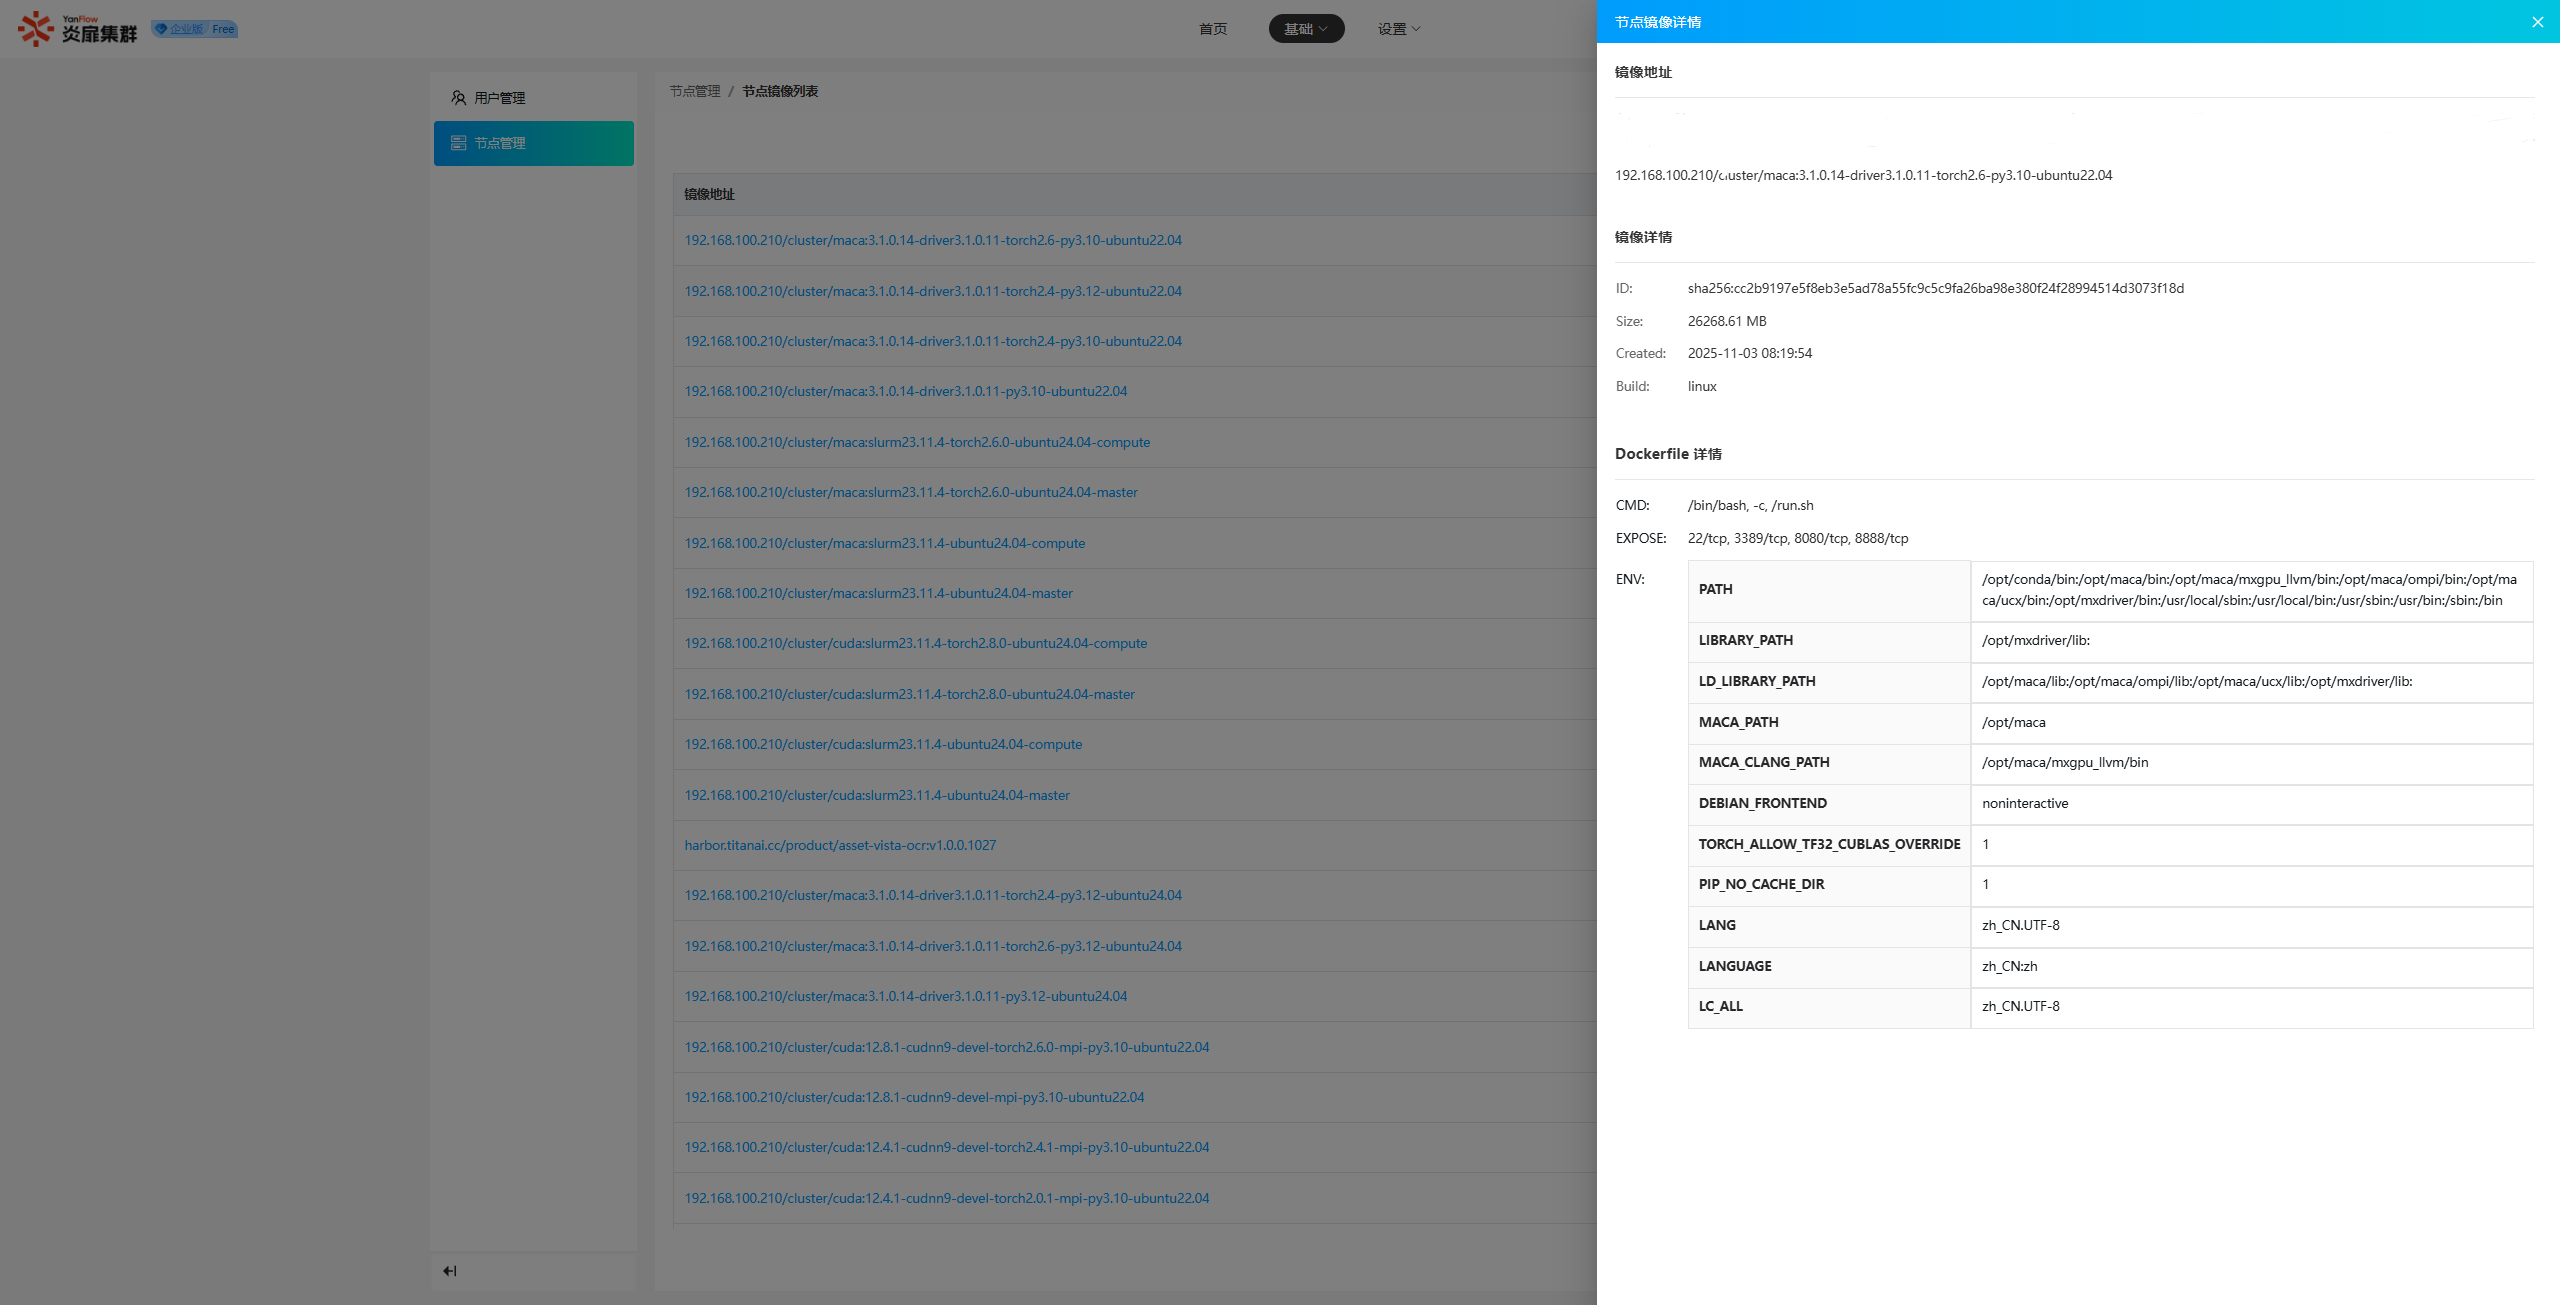
View Image Details: Click on an Image Address to view its details, including the image address, image details, and Dockerfile details.
Delete Node
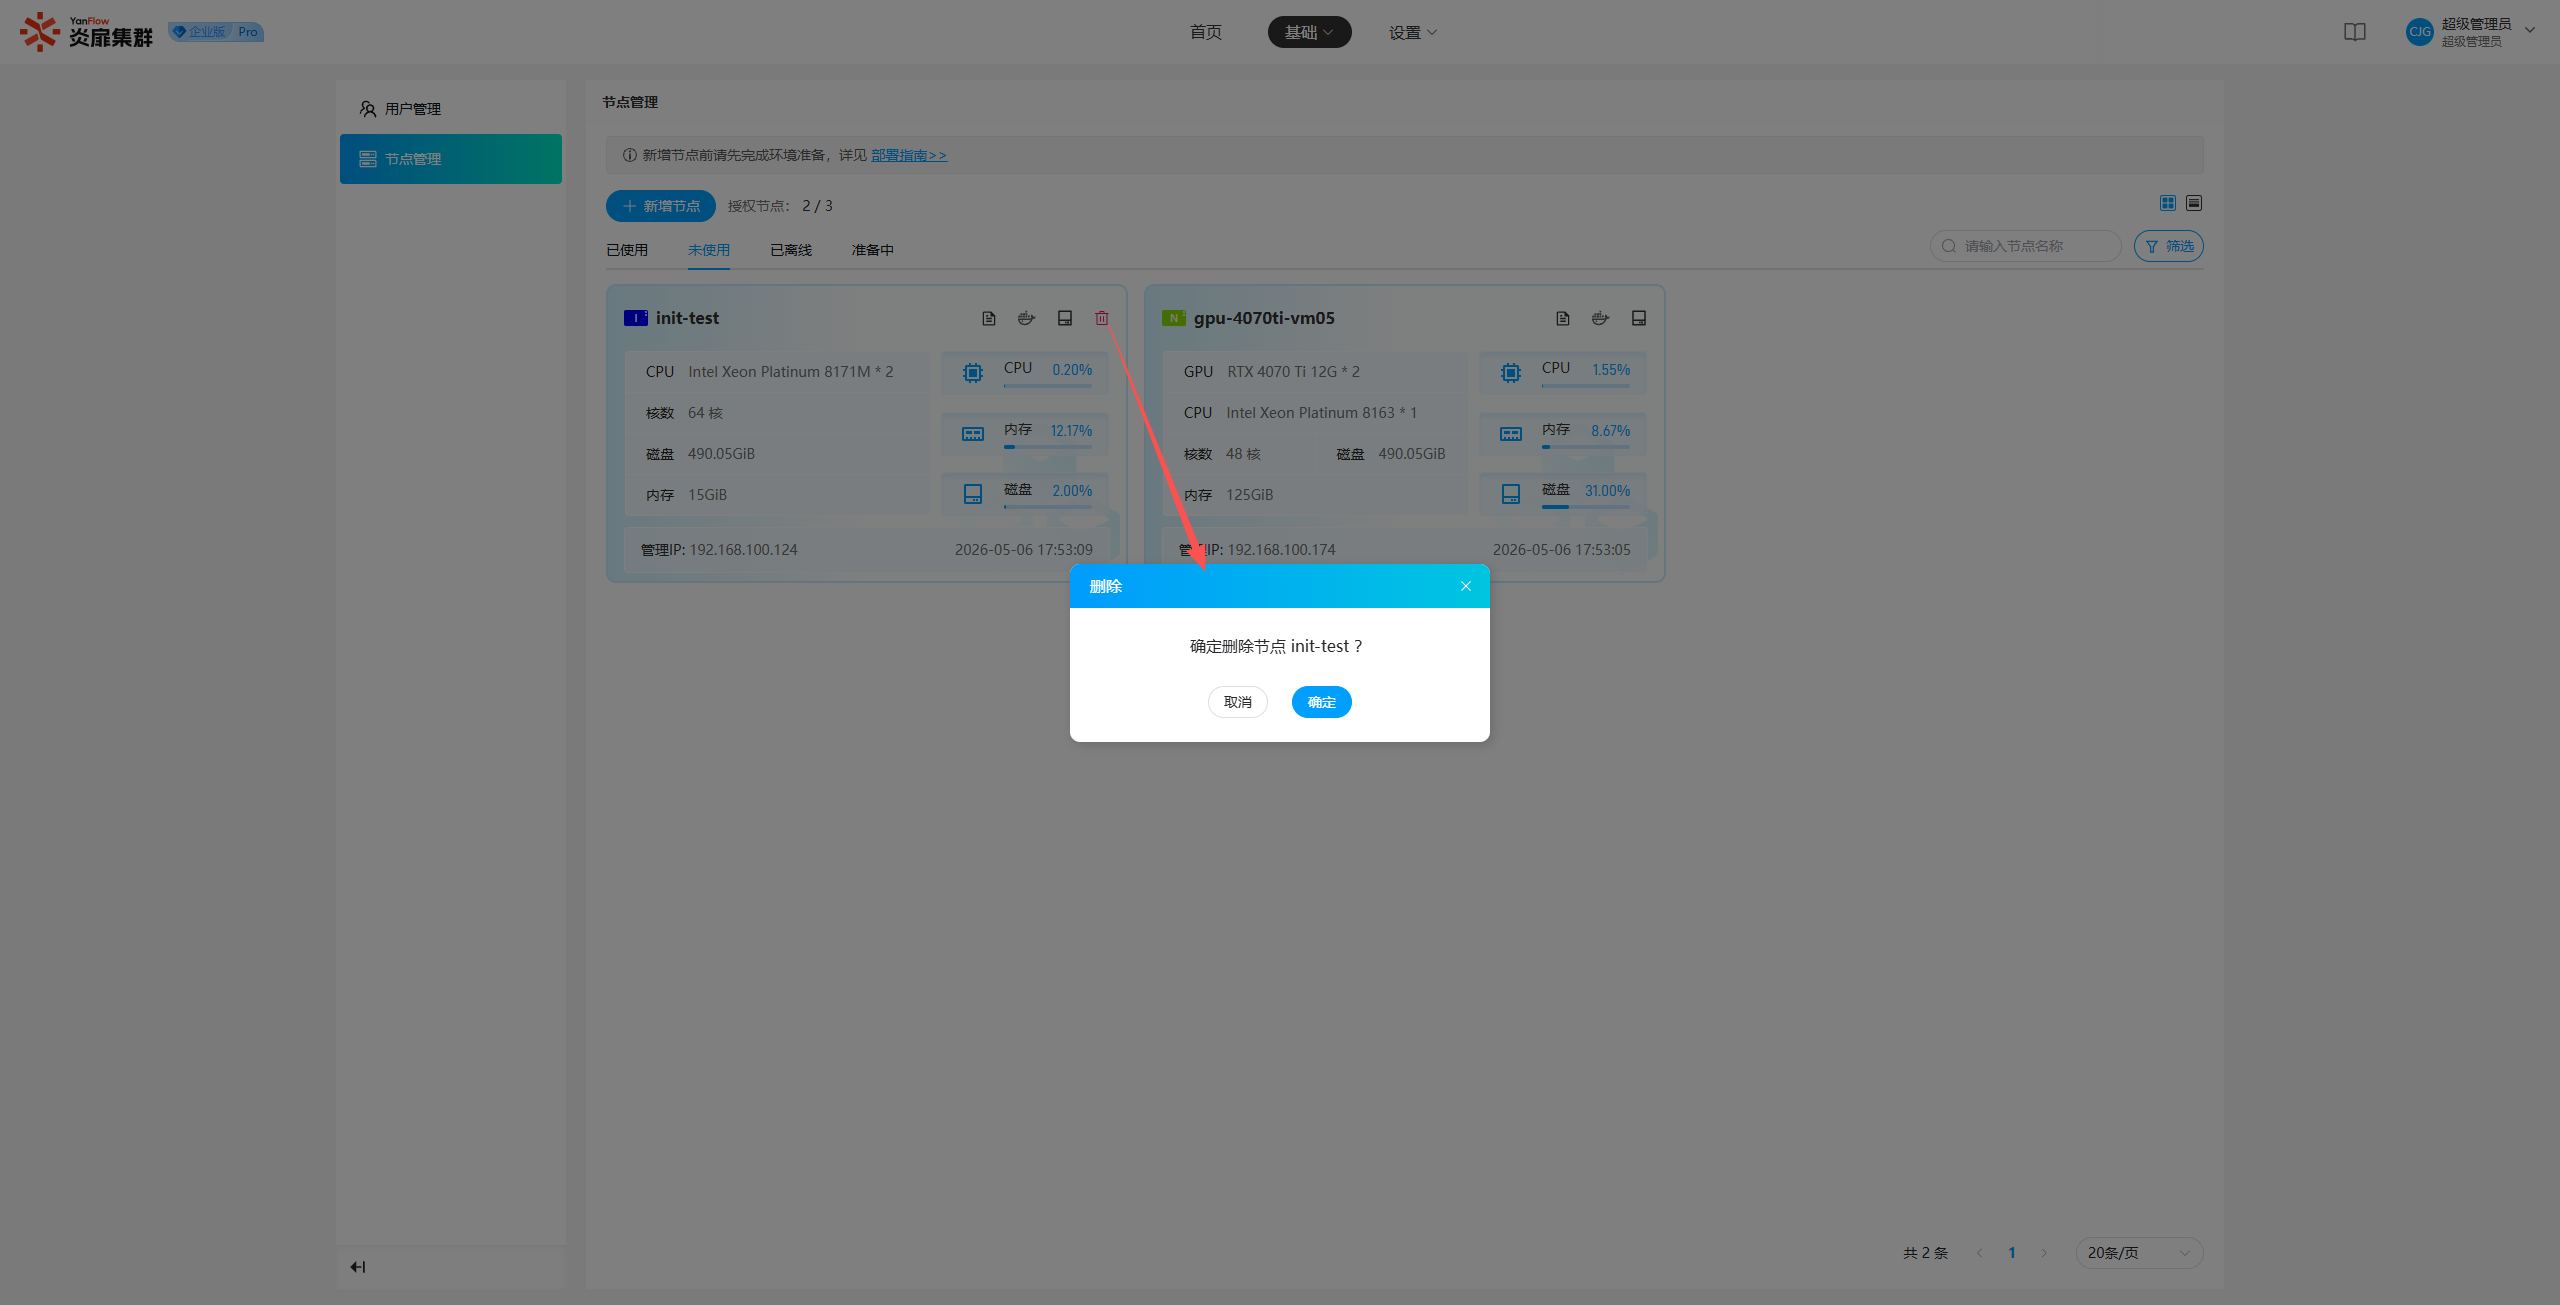
In the list of unused nodes, select a node, click Delete, and click Confirm in the prompt popup to delete it.
Settings
Personal Center
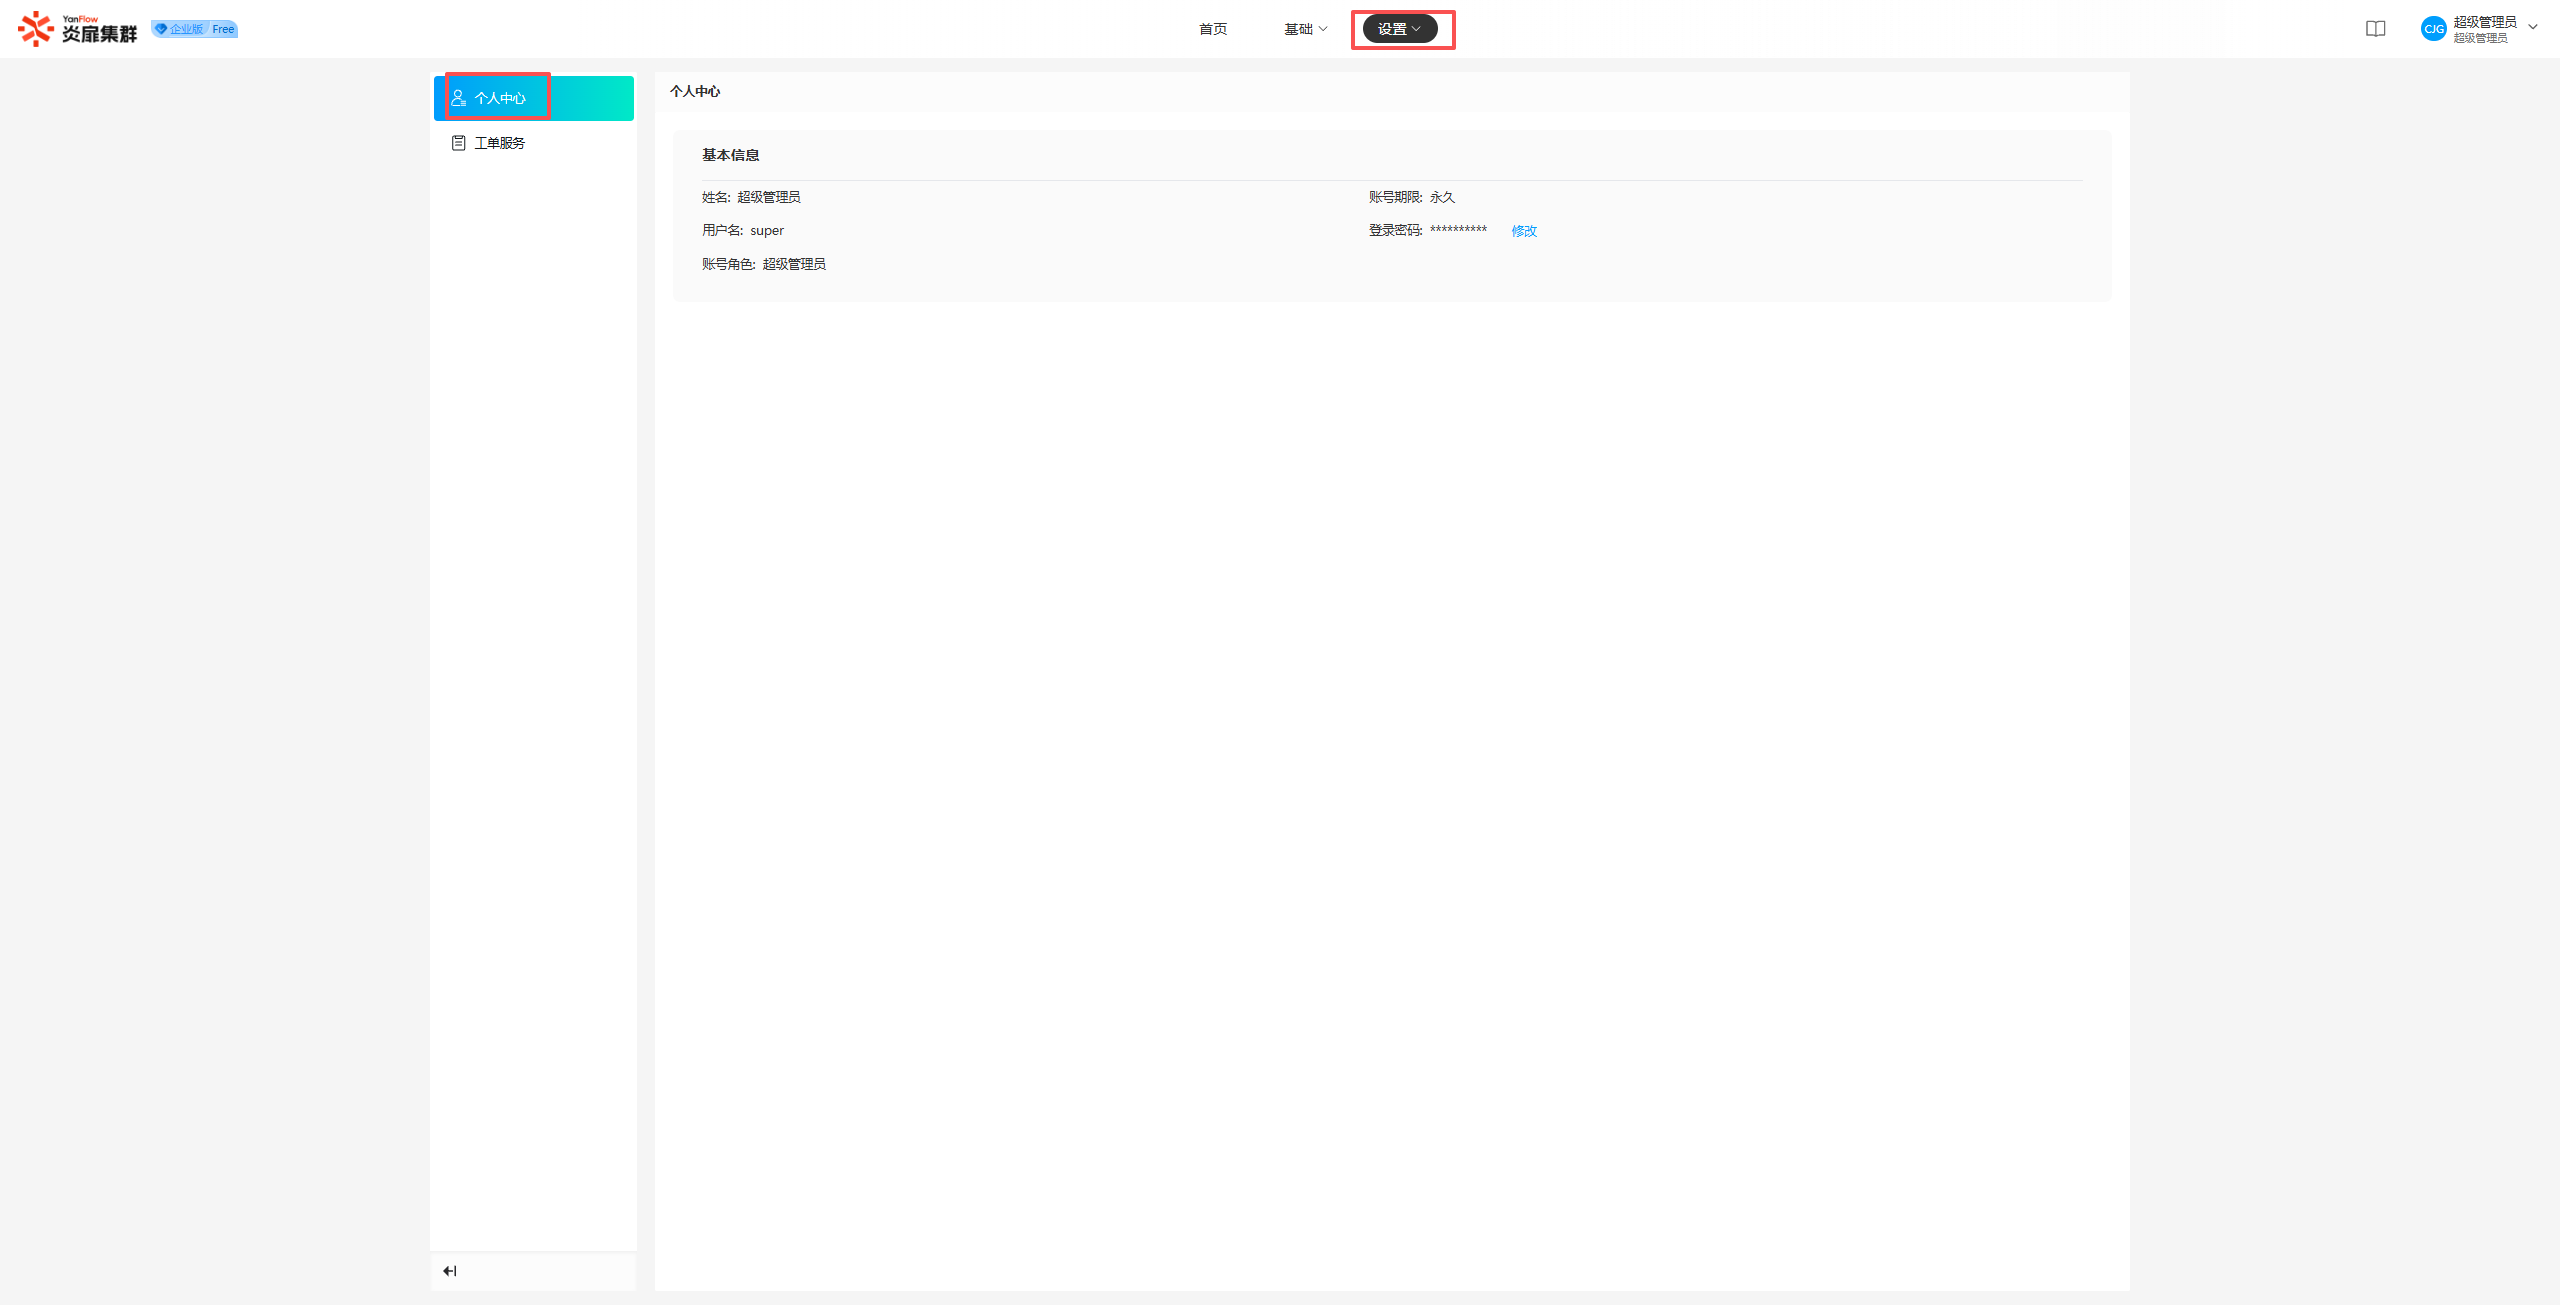
Click Settings - Personal Center or click the Username in the top right corner and select Personal Center to enter the page where you can view and maintain your basic information.
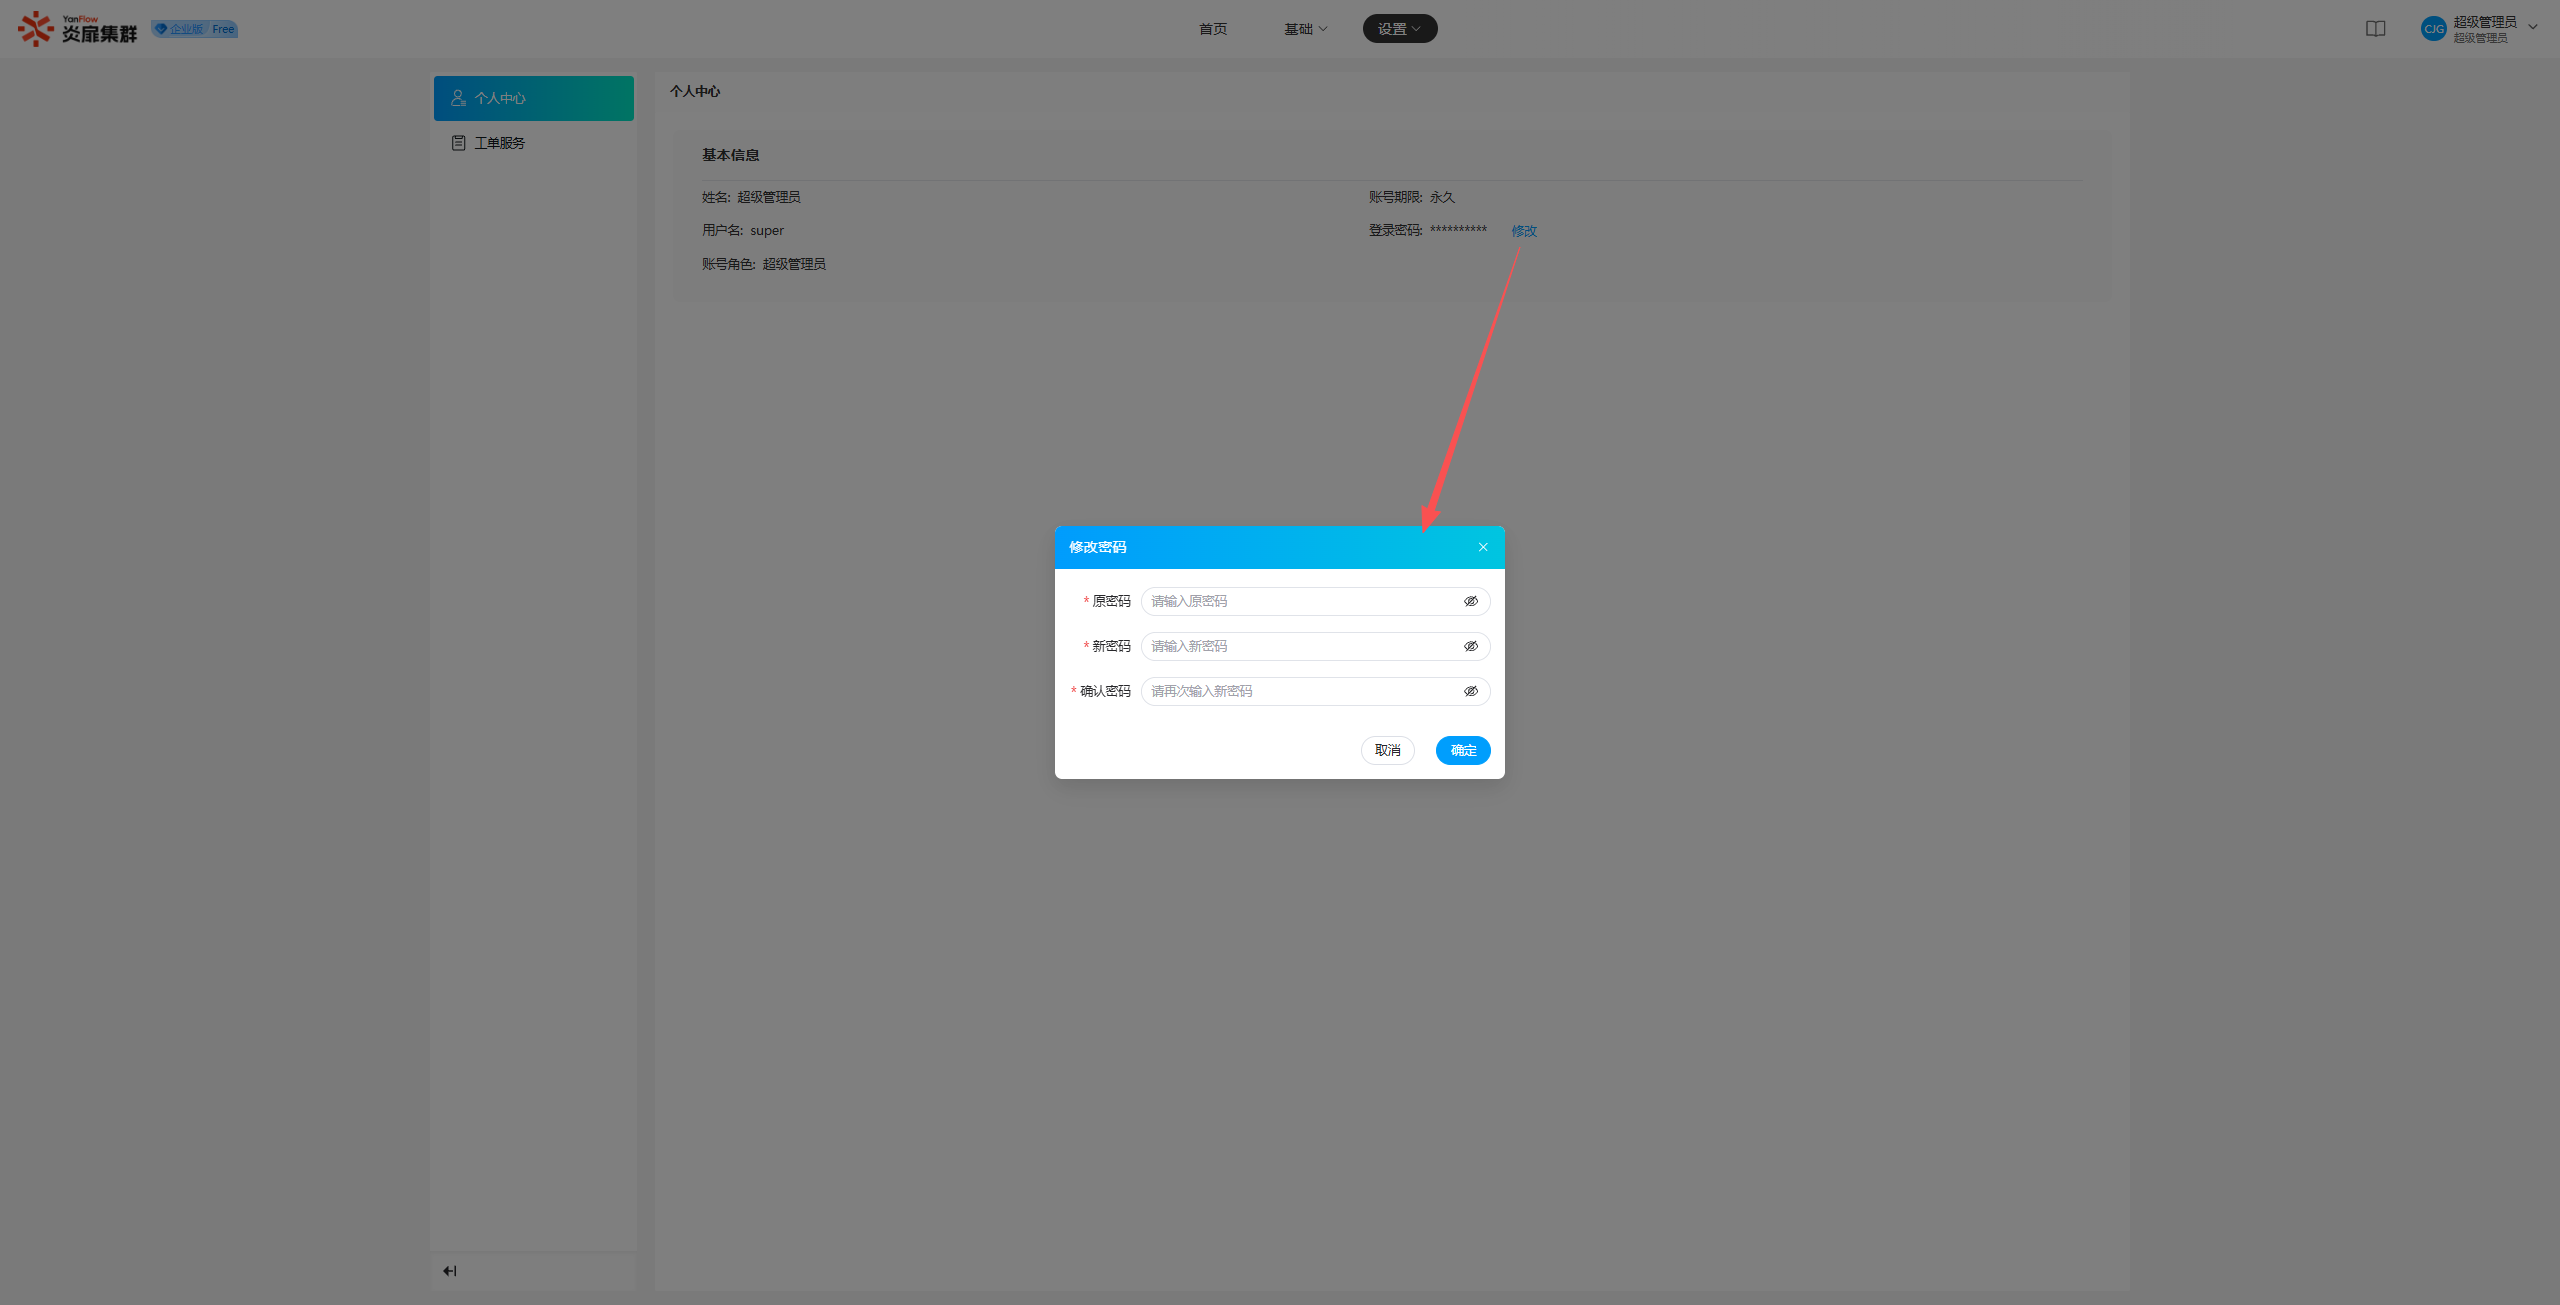
Change Login Password: Click Modify next to the password, enter your Old Password, New Password, and Confirm New Password, then click Confirm. Once validated, the password will be updated, and you will be logged out and required to log in again.
Ticket Service
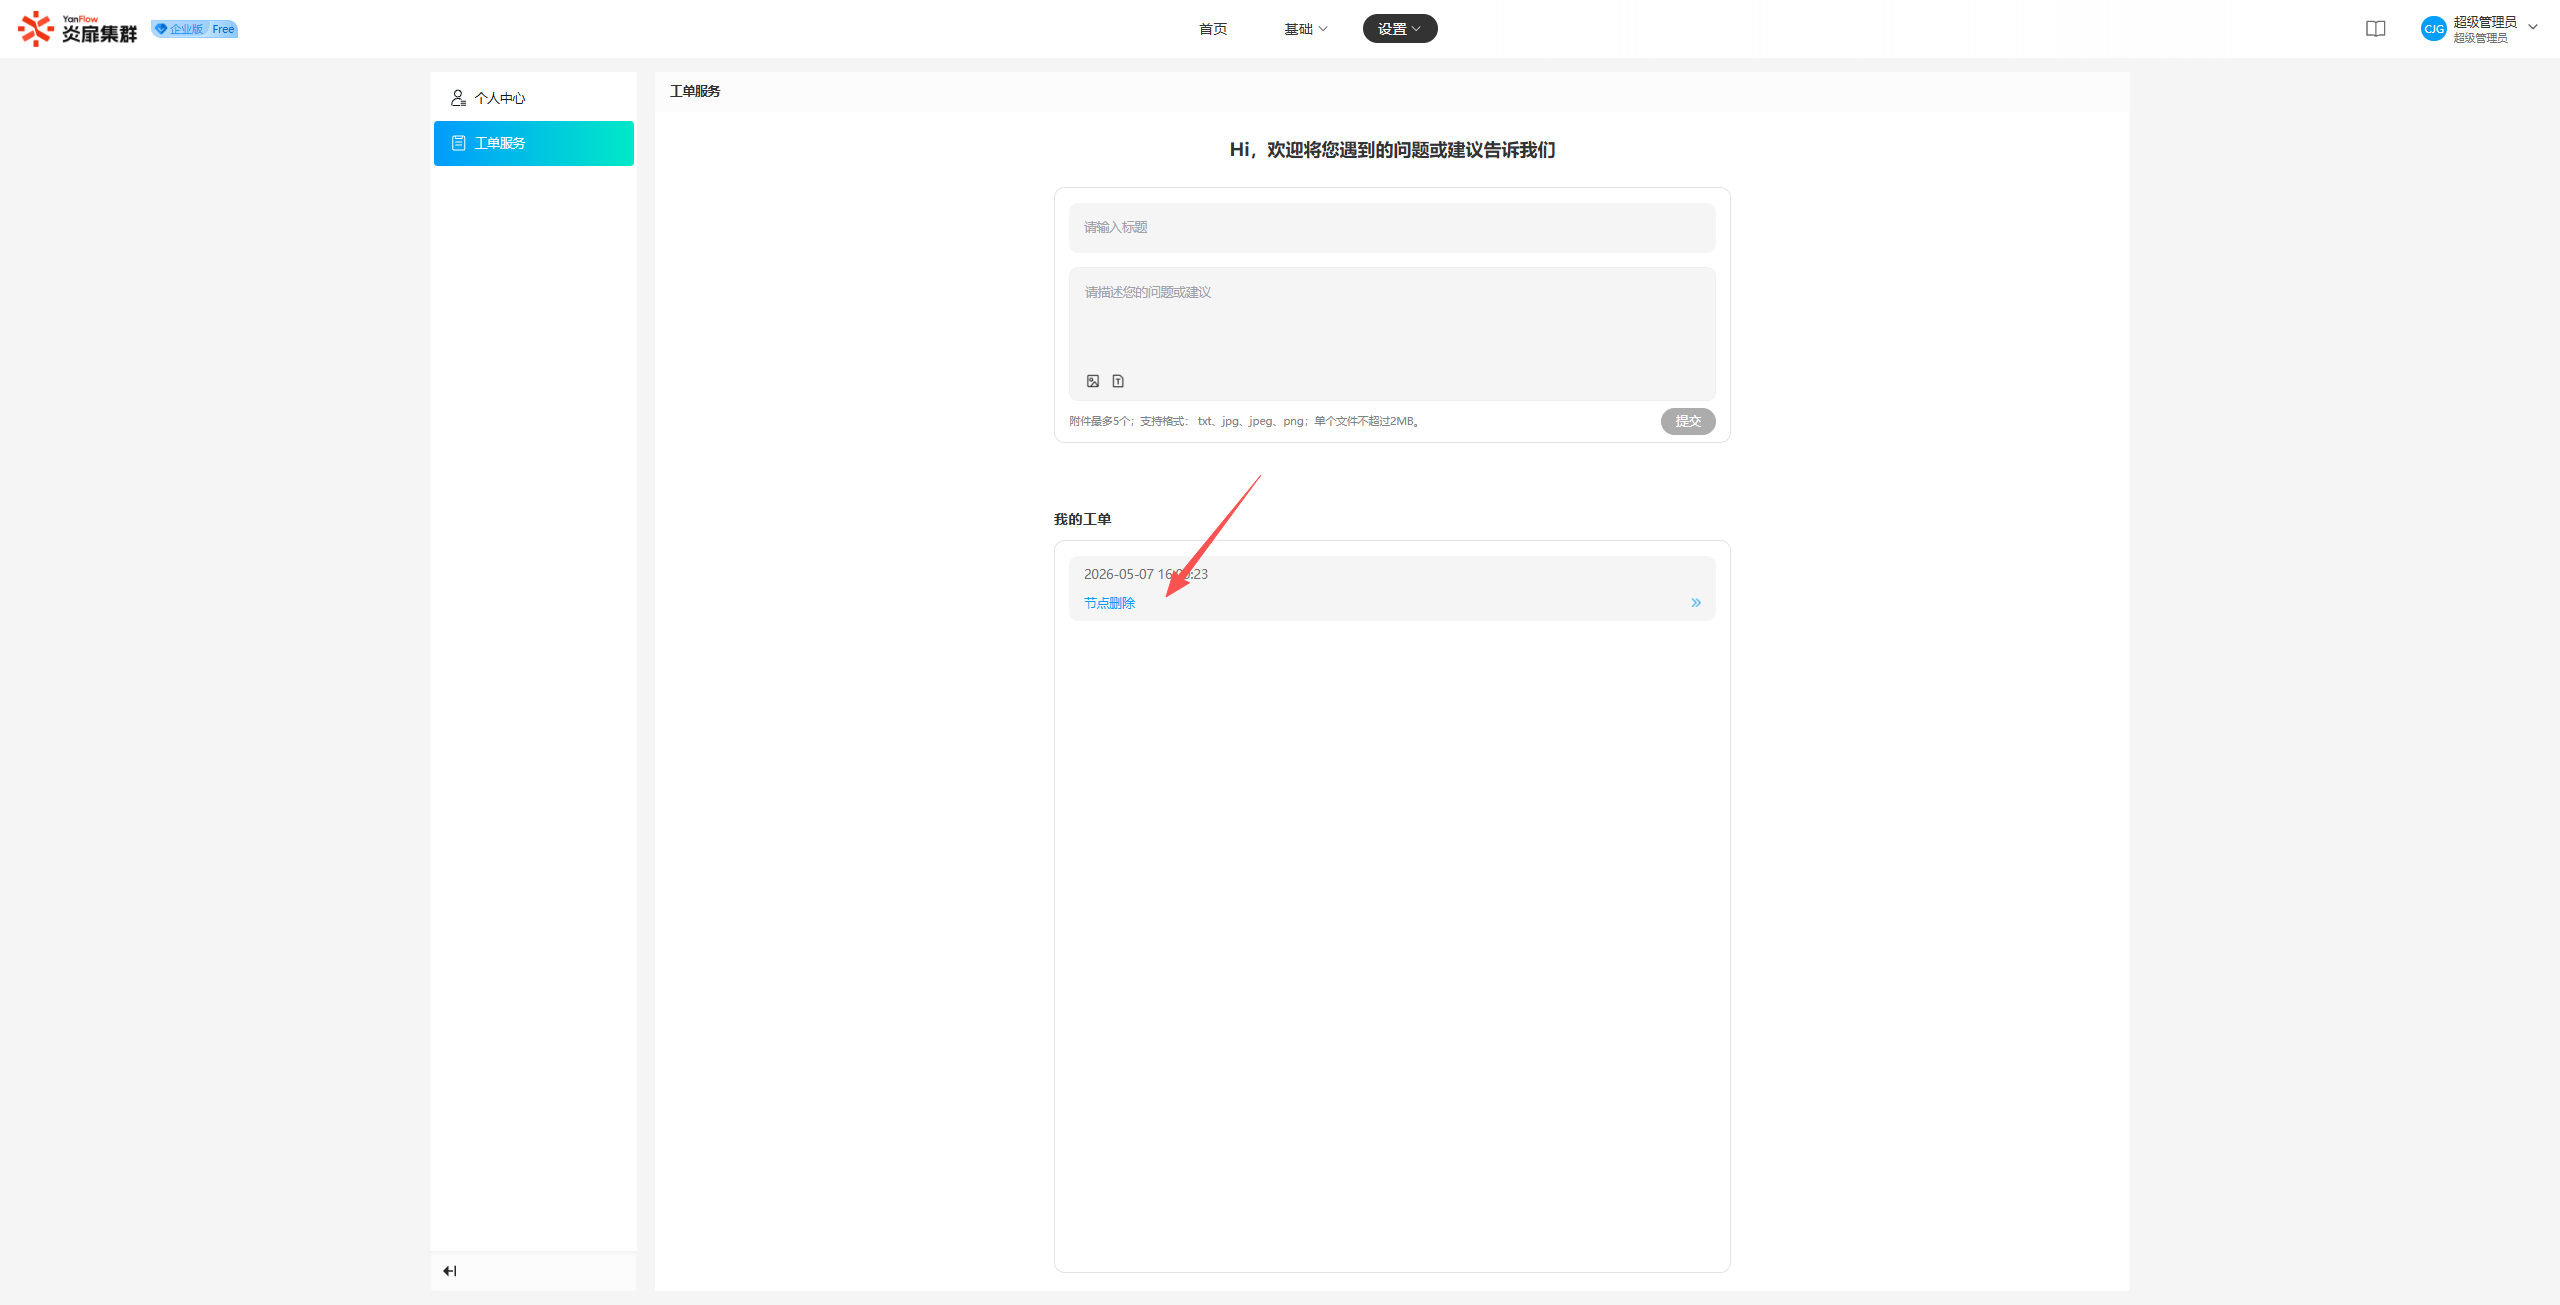
Submit a Ticket: Click Settings - Ticket Service or click the Username in the top right corner and select Ticket Service. Enter a title and description, then click "Submit" to complete the process.
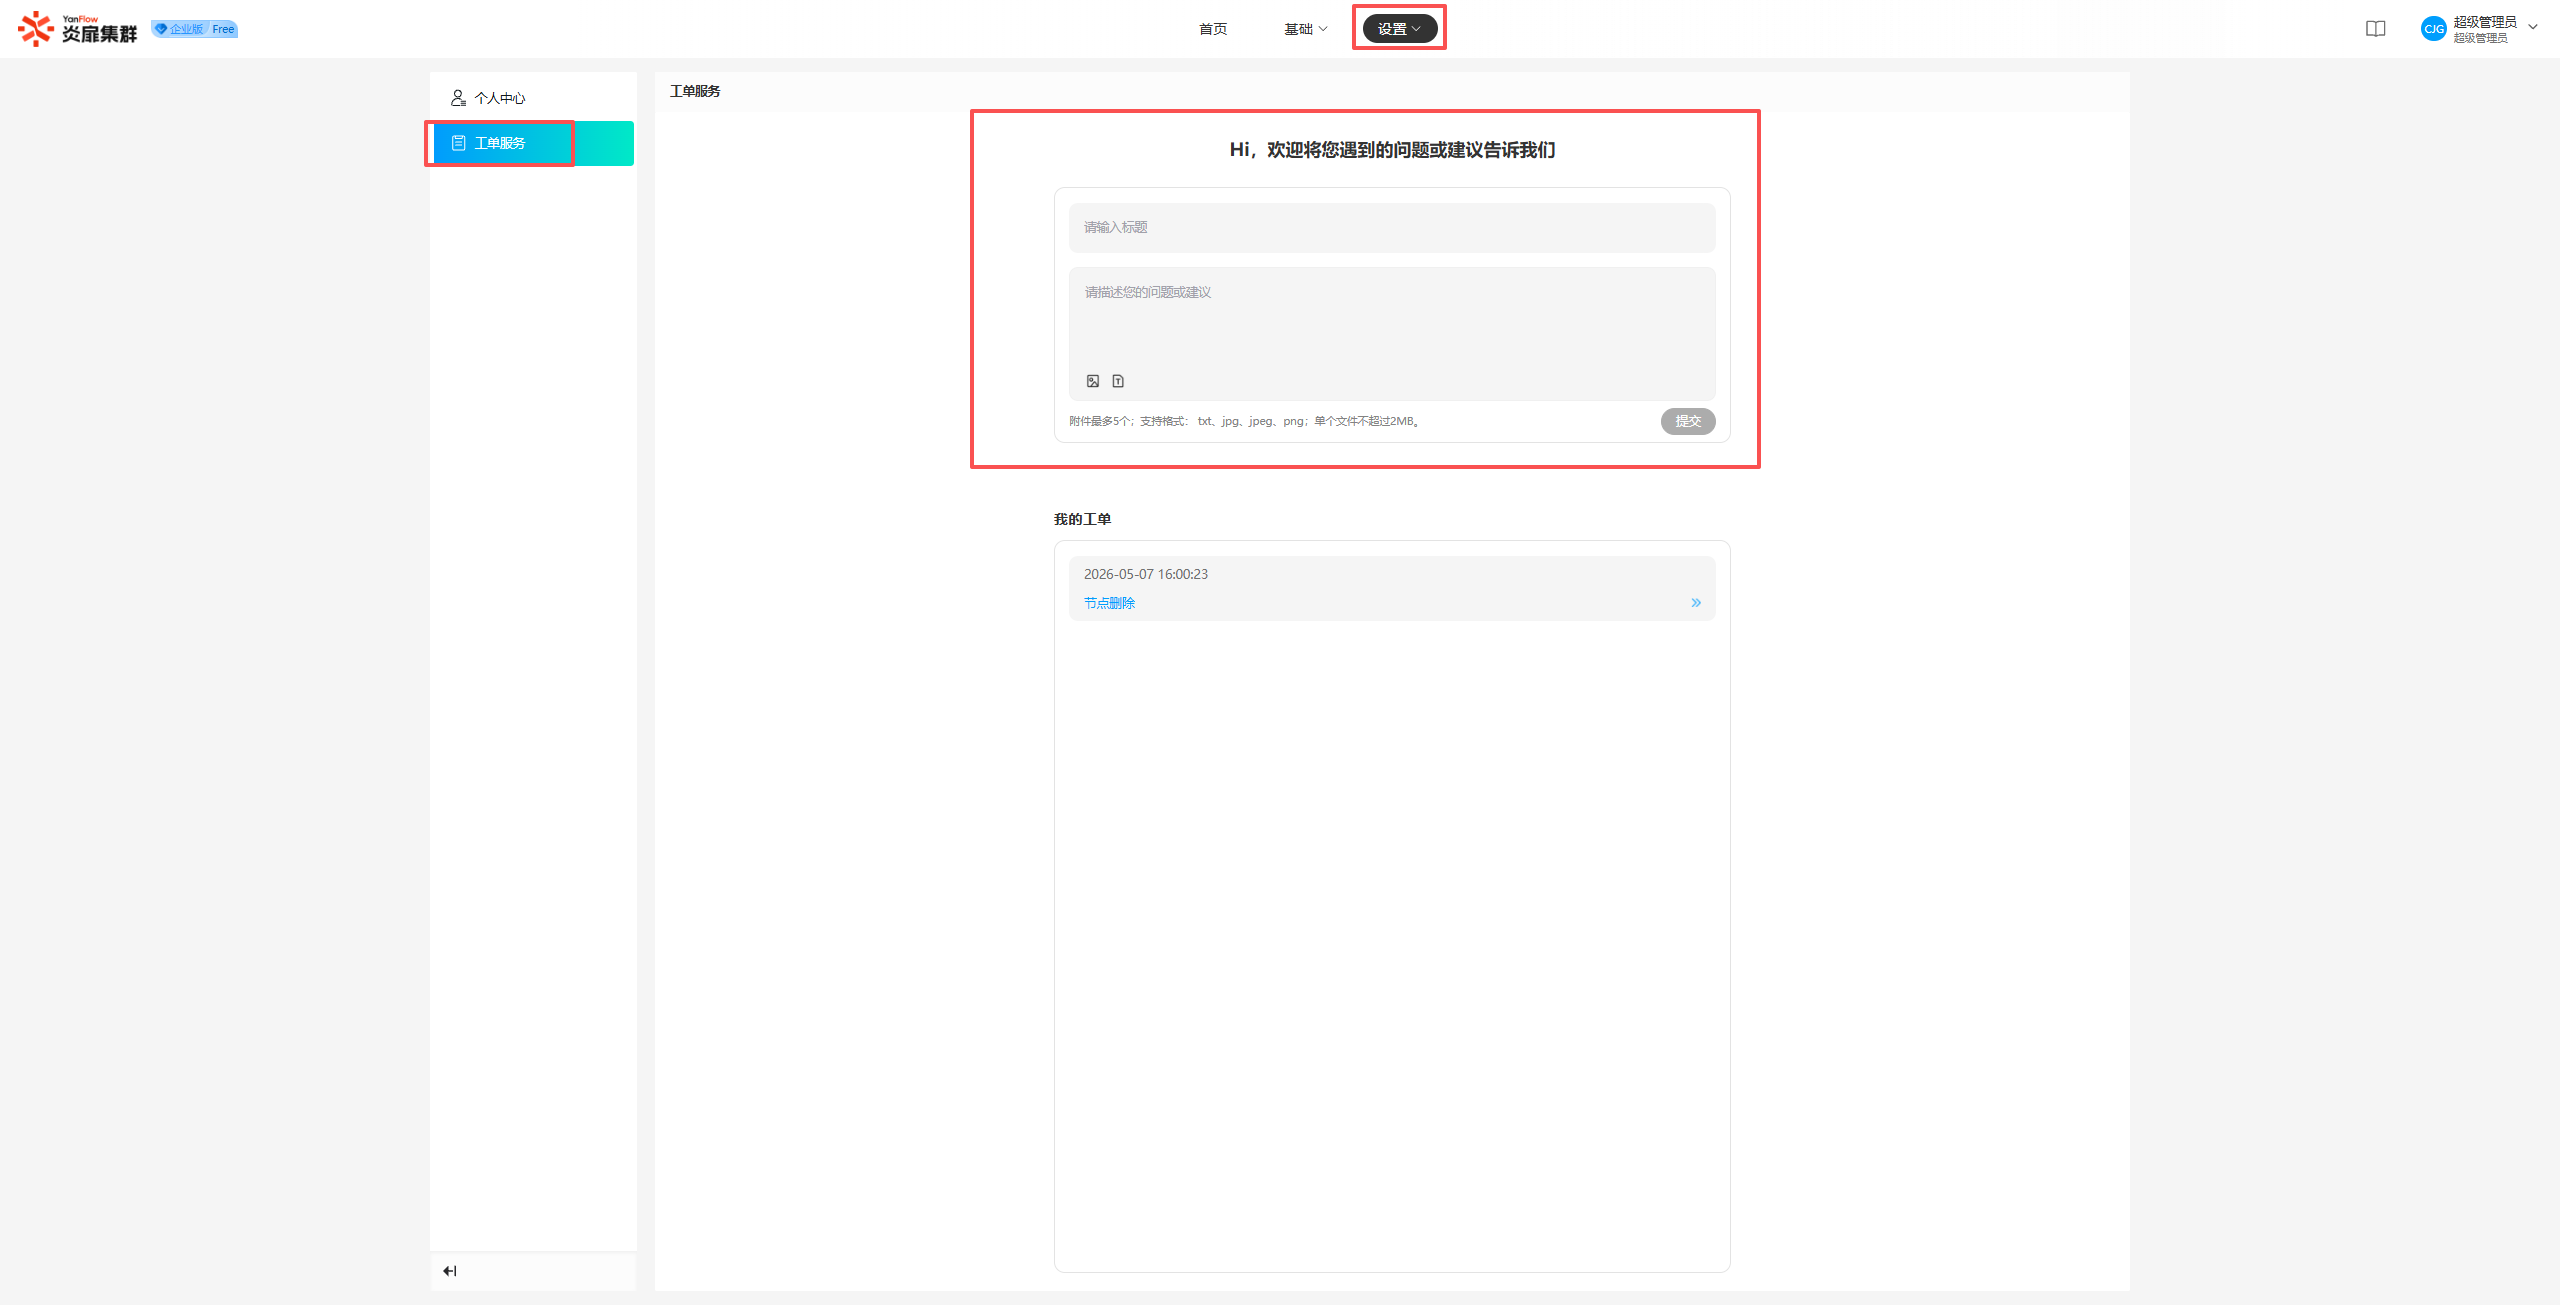
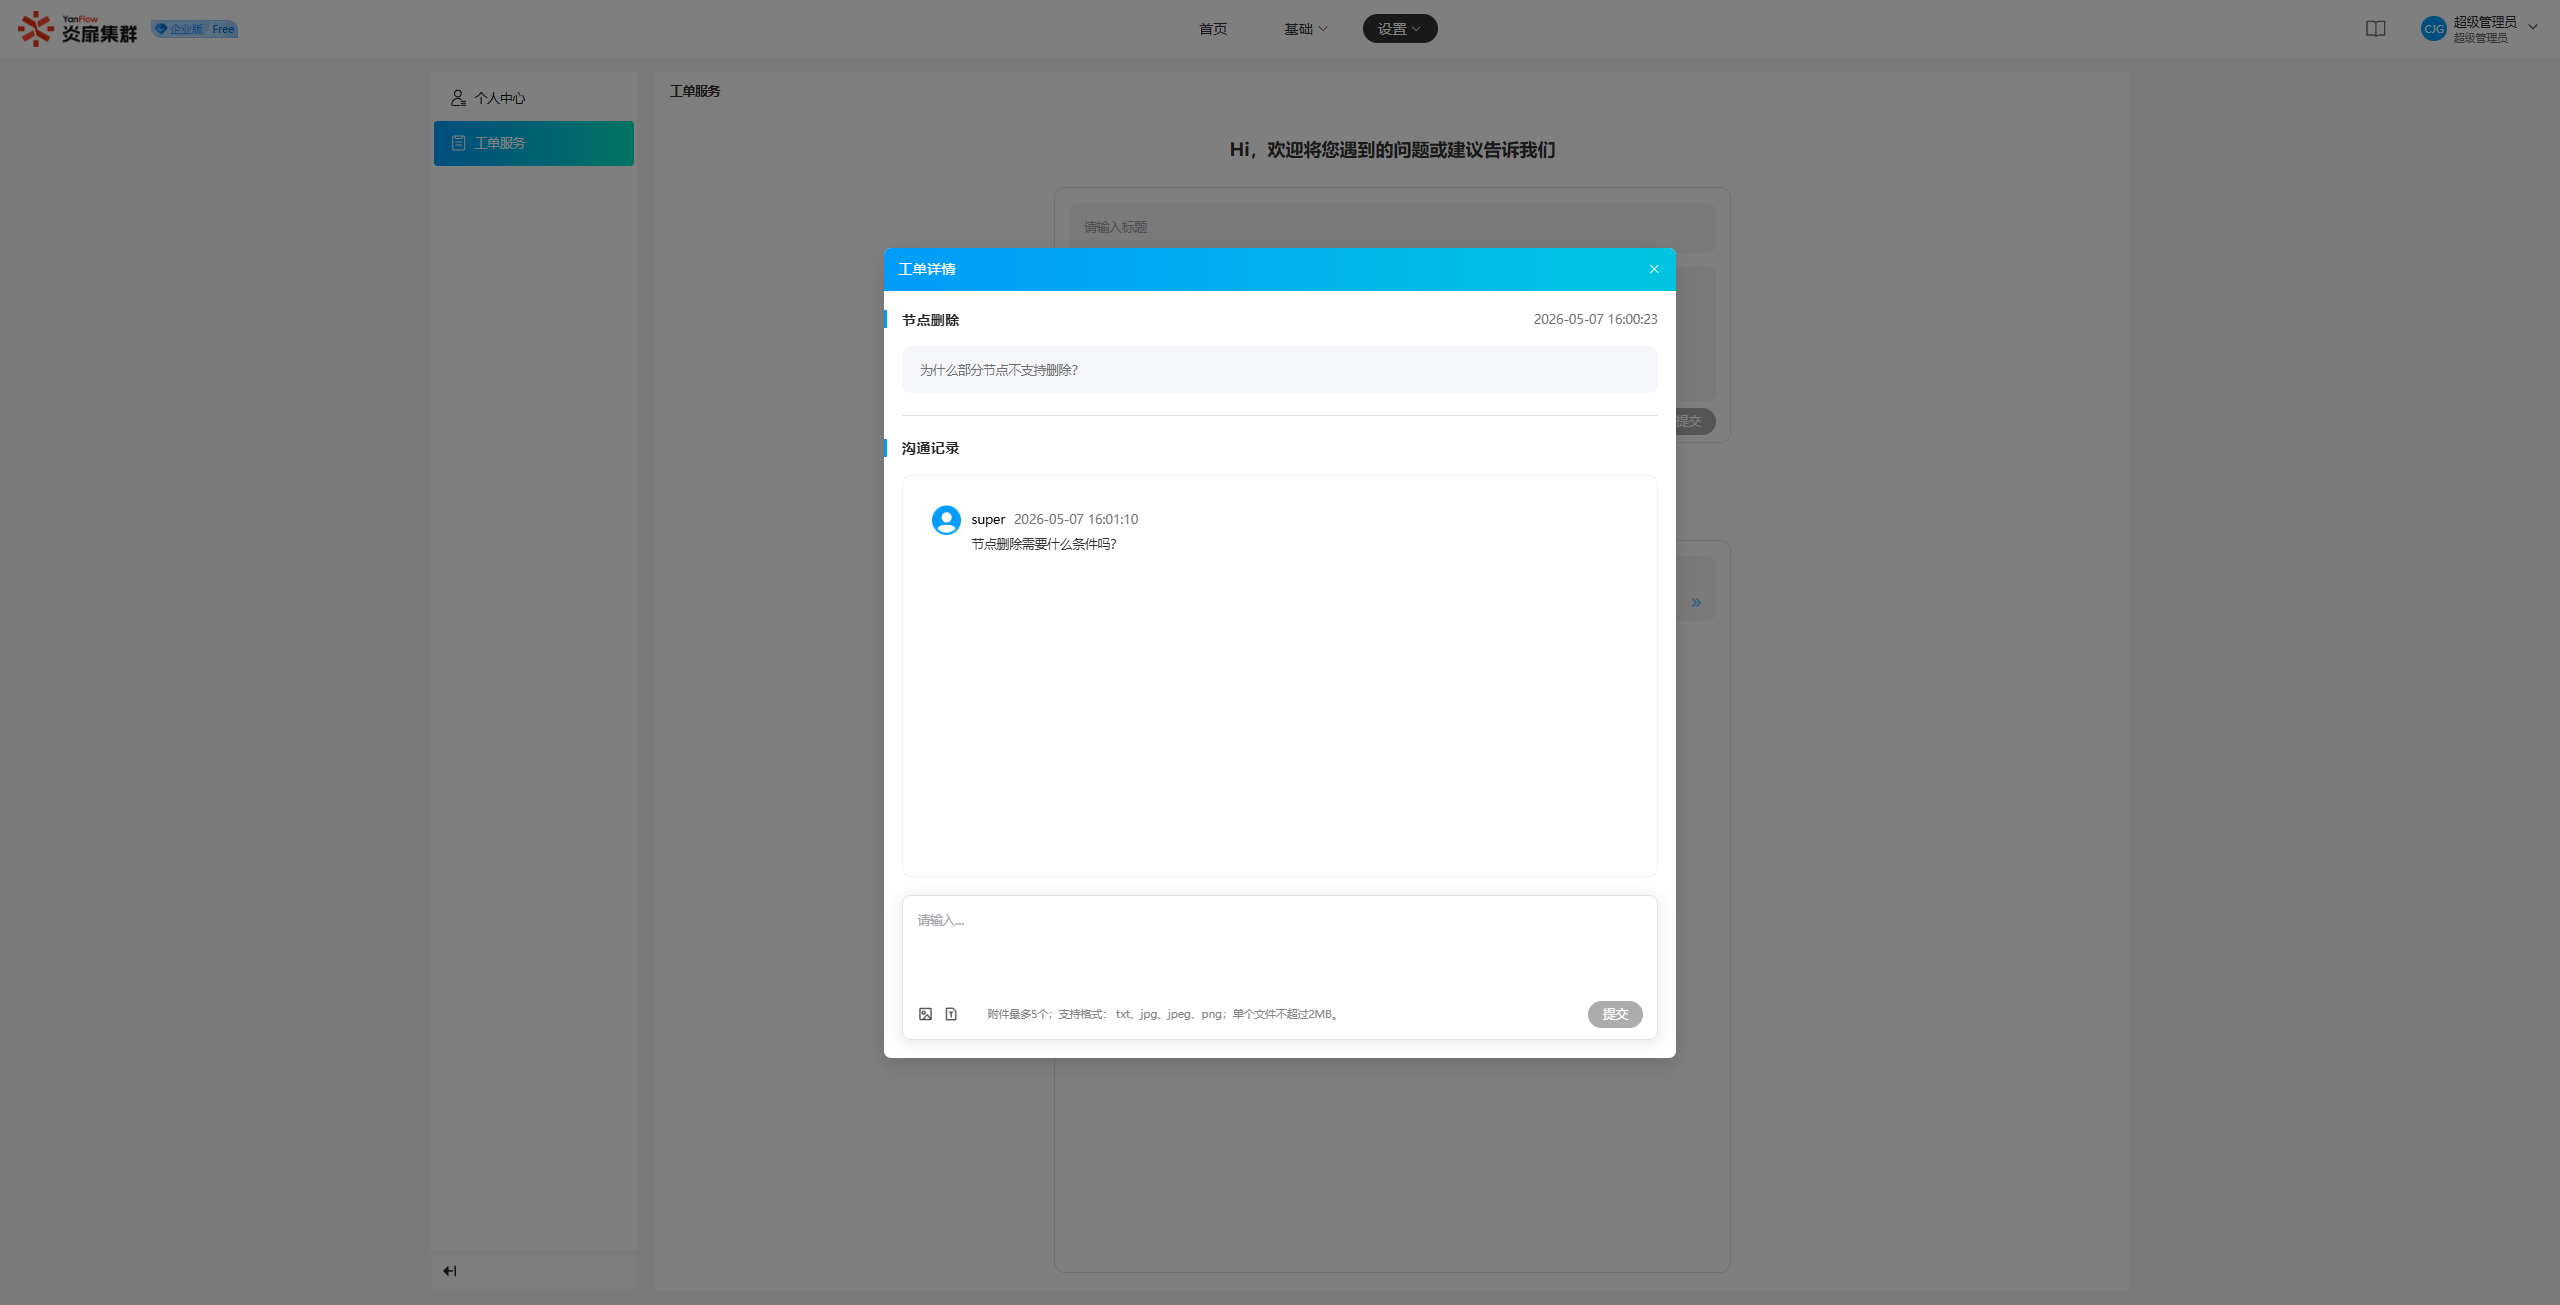
View Tickets: "My Tickets" displays a list of all historical tickets you have submitted. Click a ticket title to view its details, including the title, description, and communication records. Users and customer service can continue to leave messages for interaction on historical tickets.