
Regular User
This document is intended for users with the Regular User role in the Yanfei Computing Power Scheduling Platform, primarily including Project Leaders and regular members. In the Yanfei Cluster System, regular users mainly manage the projects they are responsible for or their own personal workspaces, virtual machines, jobs, Slurm, images, files, annotation tasks, and related data (different identities correspond to different management permissions).
Login
User Login
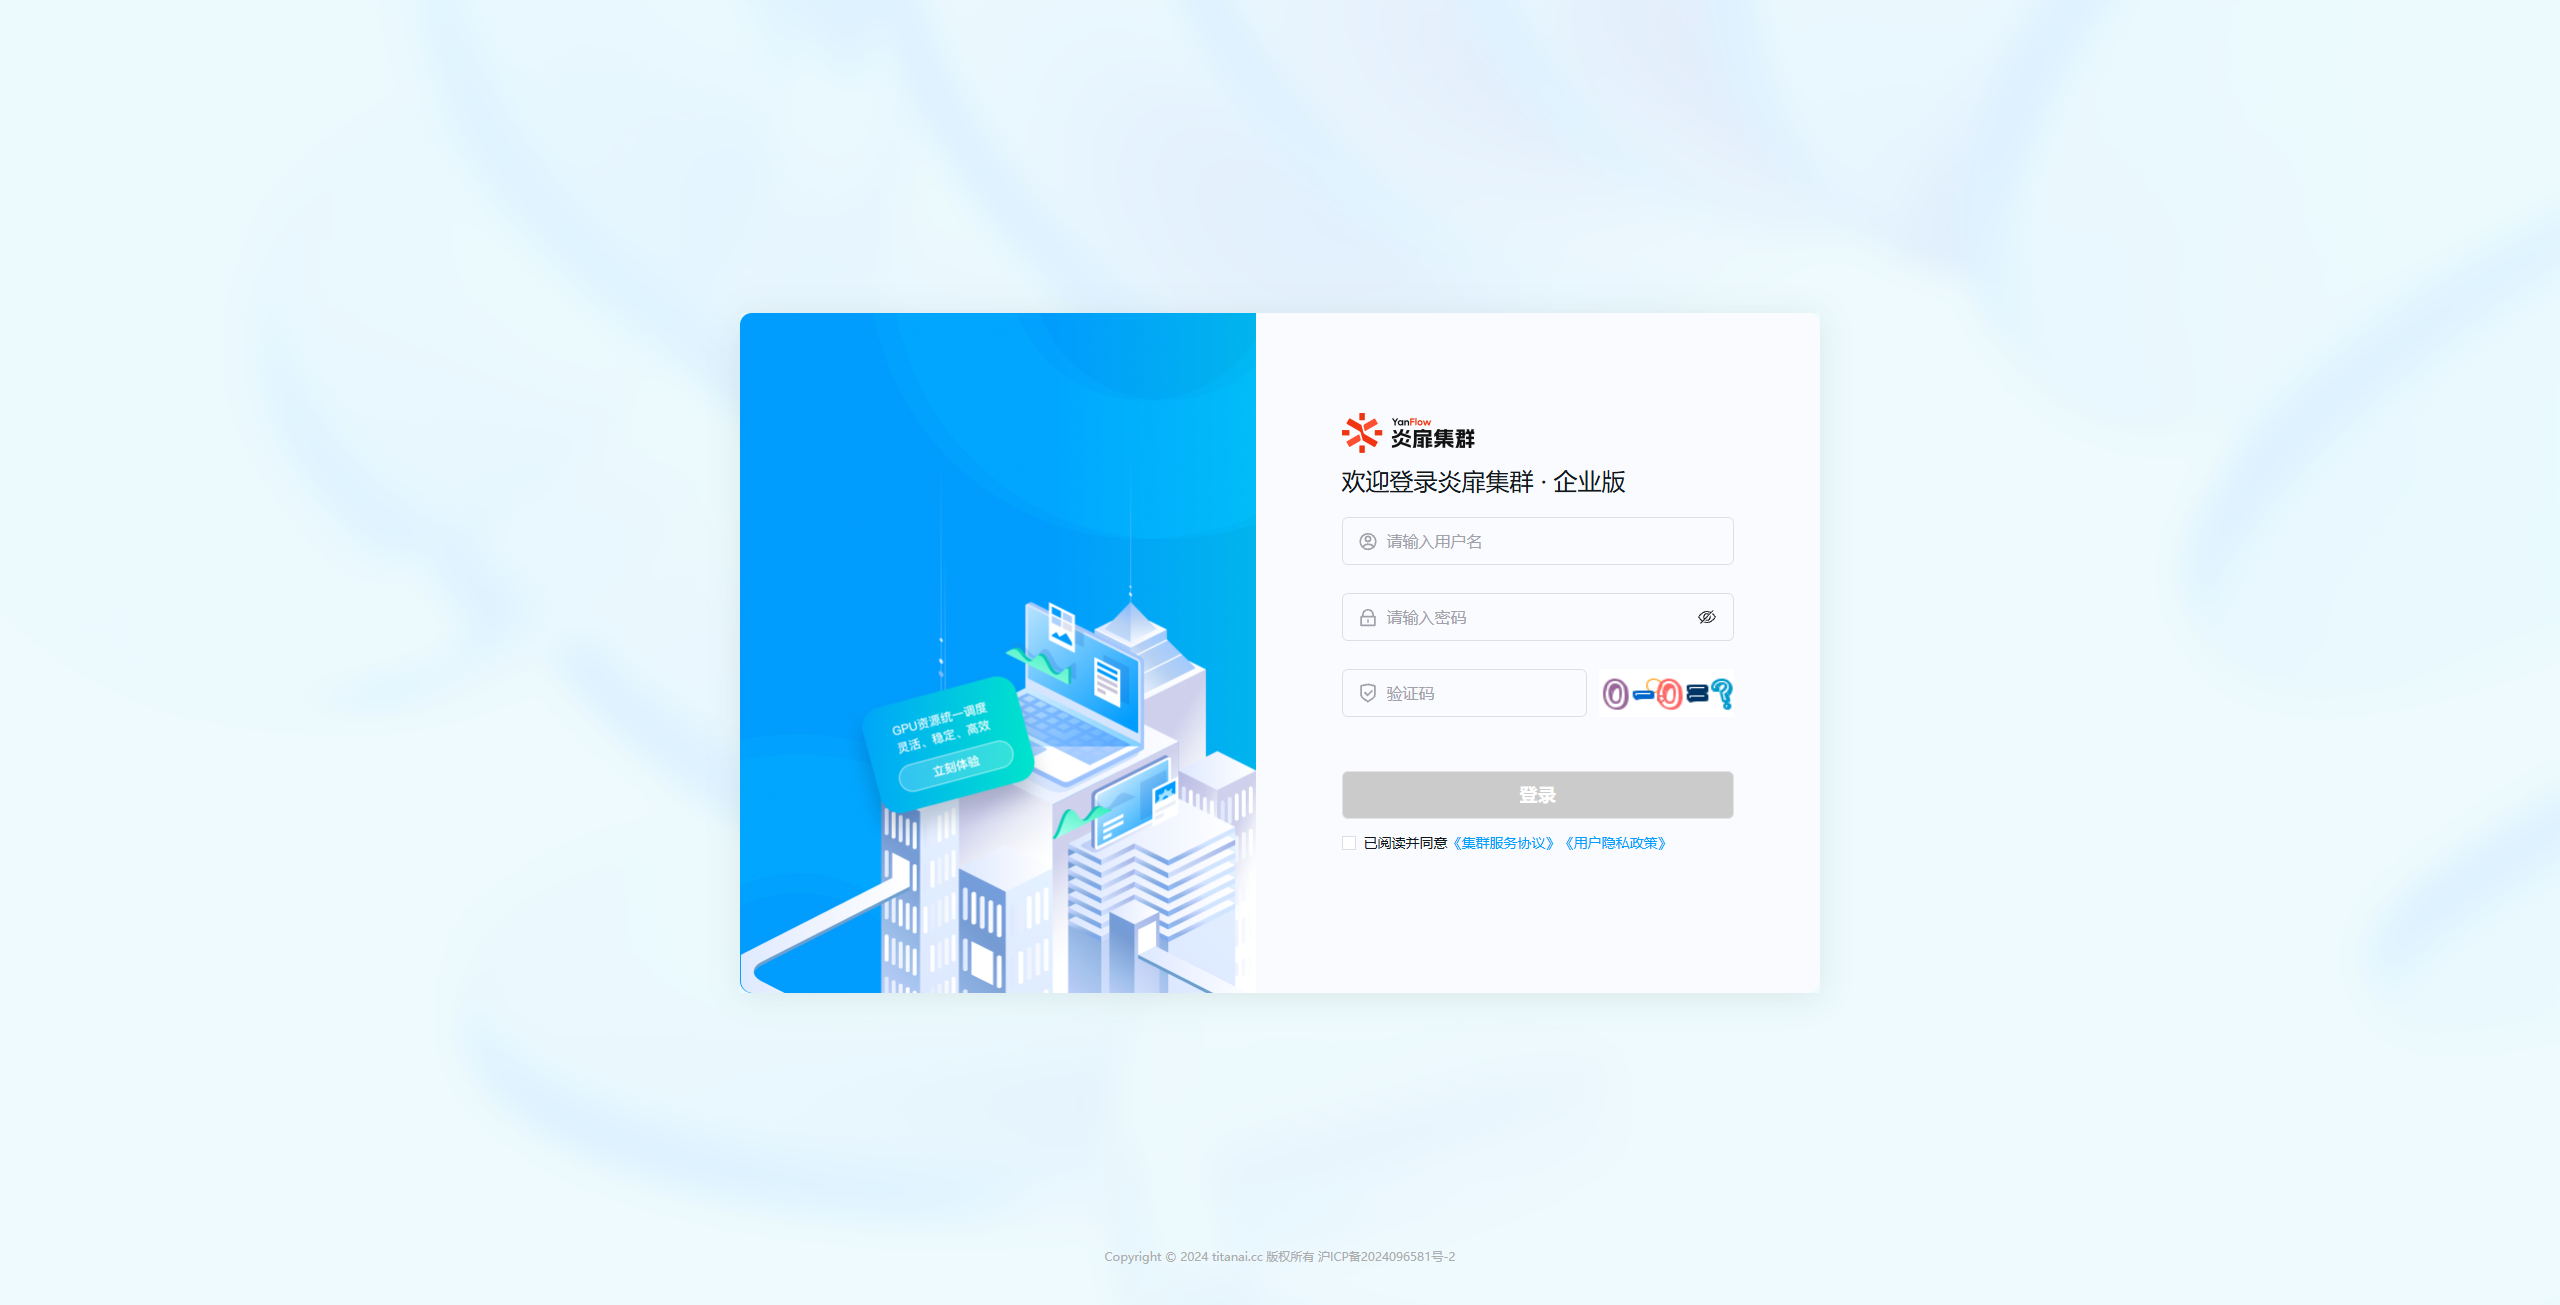
Enter your username, password, and verification code, check the agreement box, and click Login. Once verified, you can enter the system.
Logout
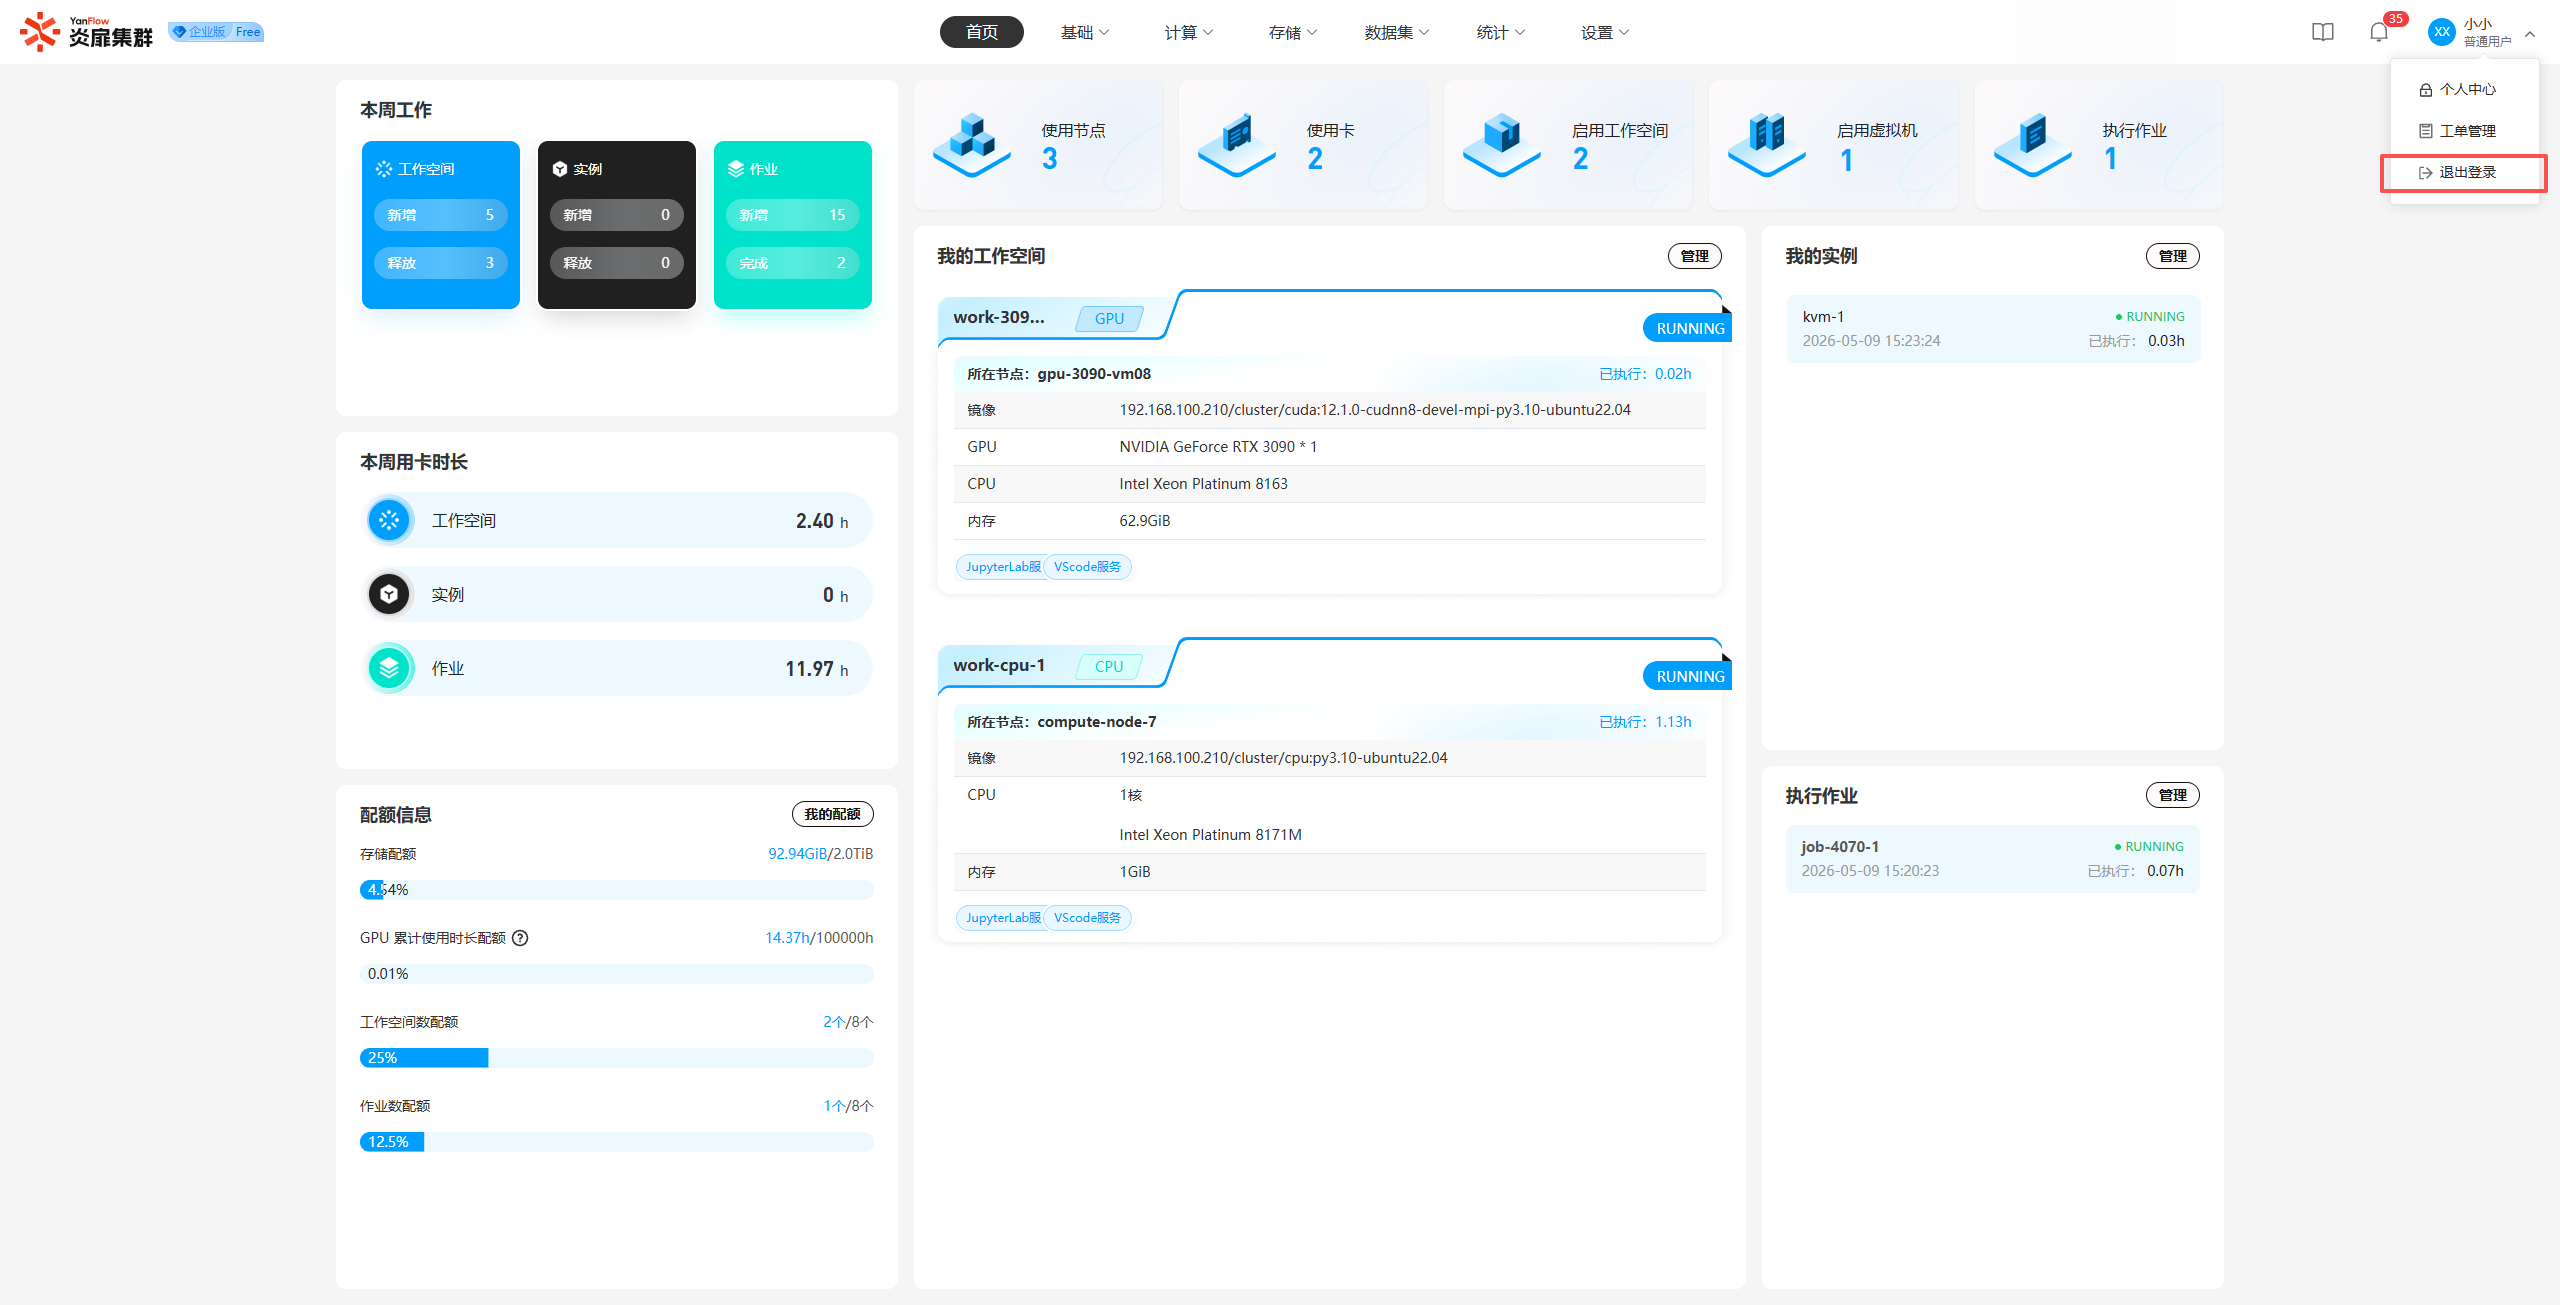
Click the User Avatar in the top right corner and select Logout. Click Confirm to log out and return to the login page.
Home
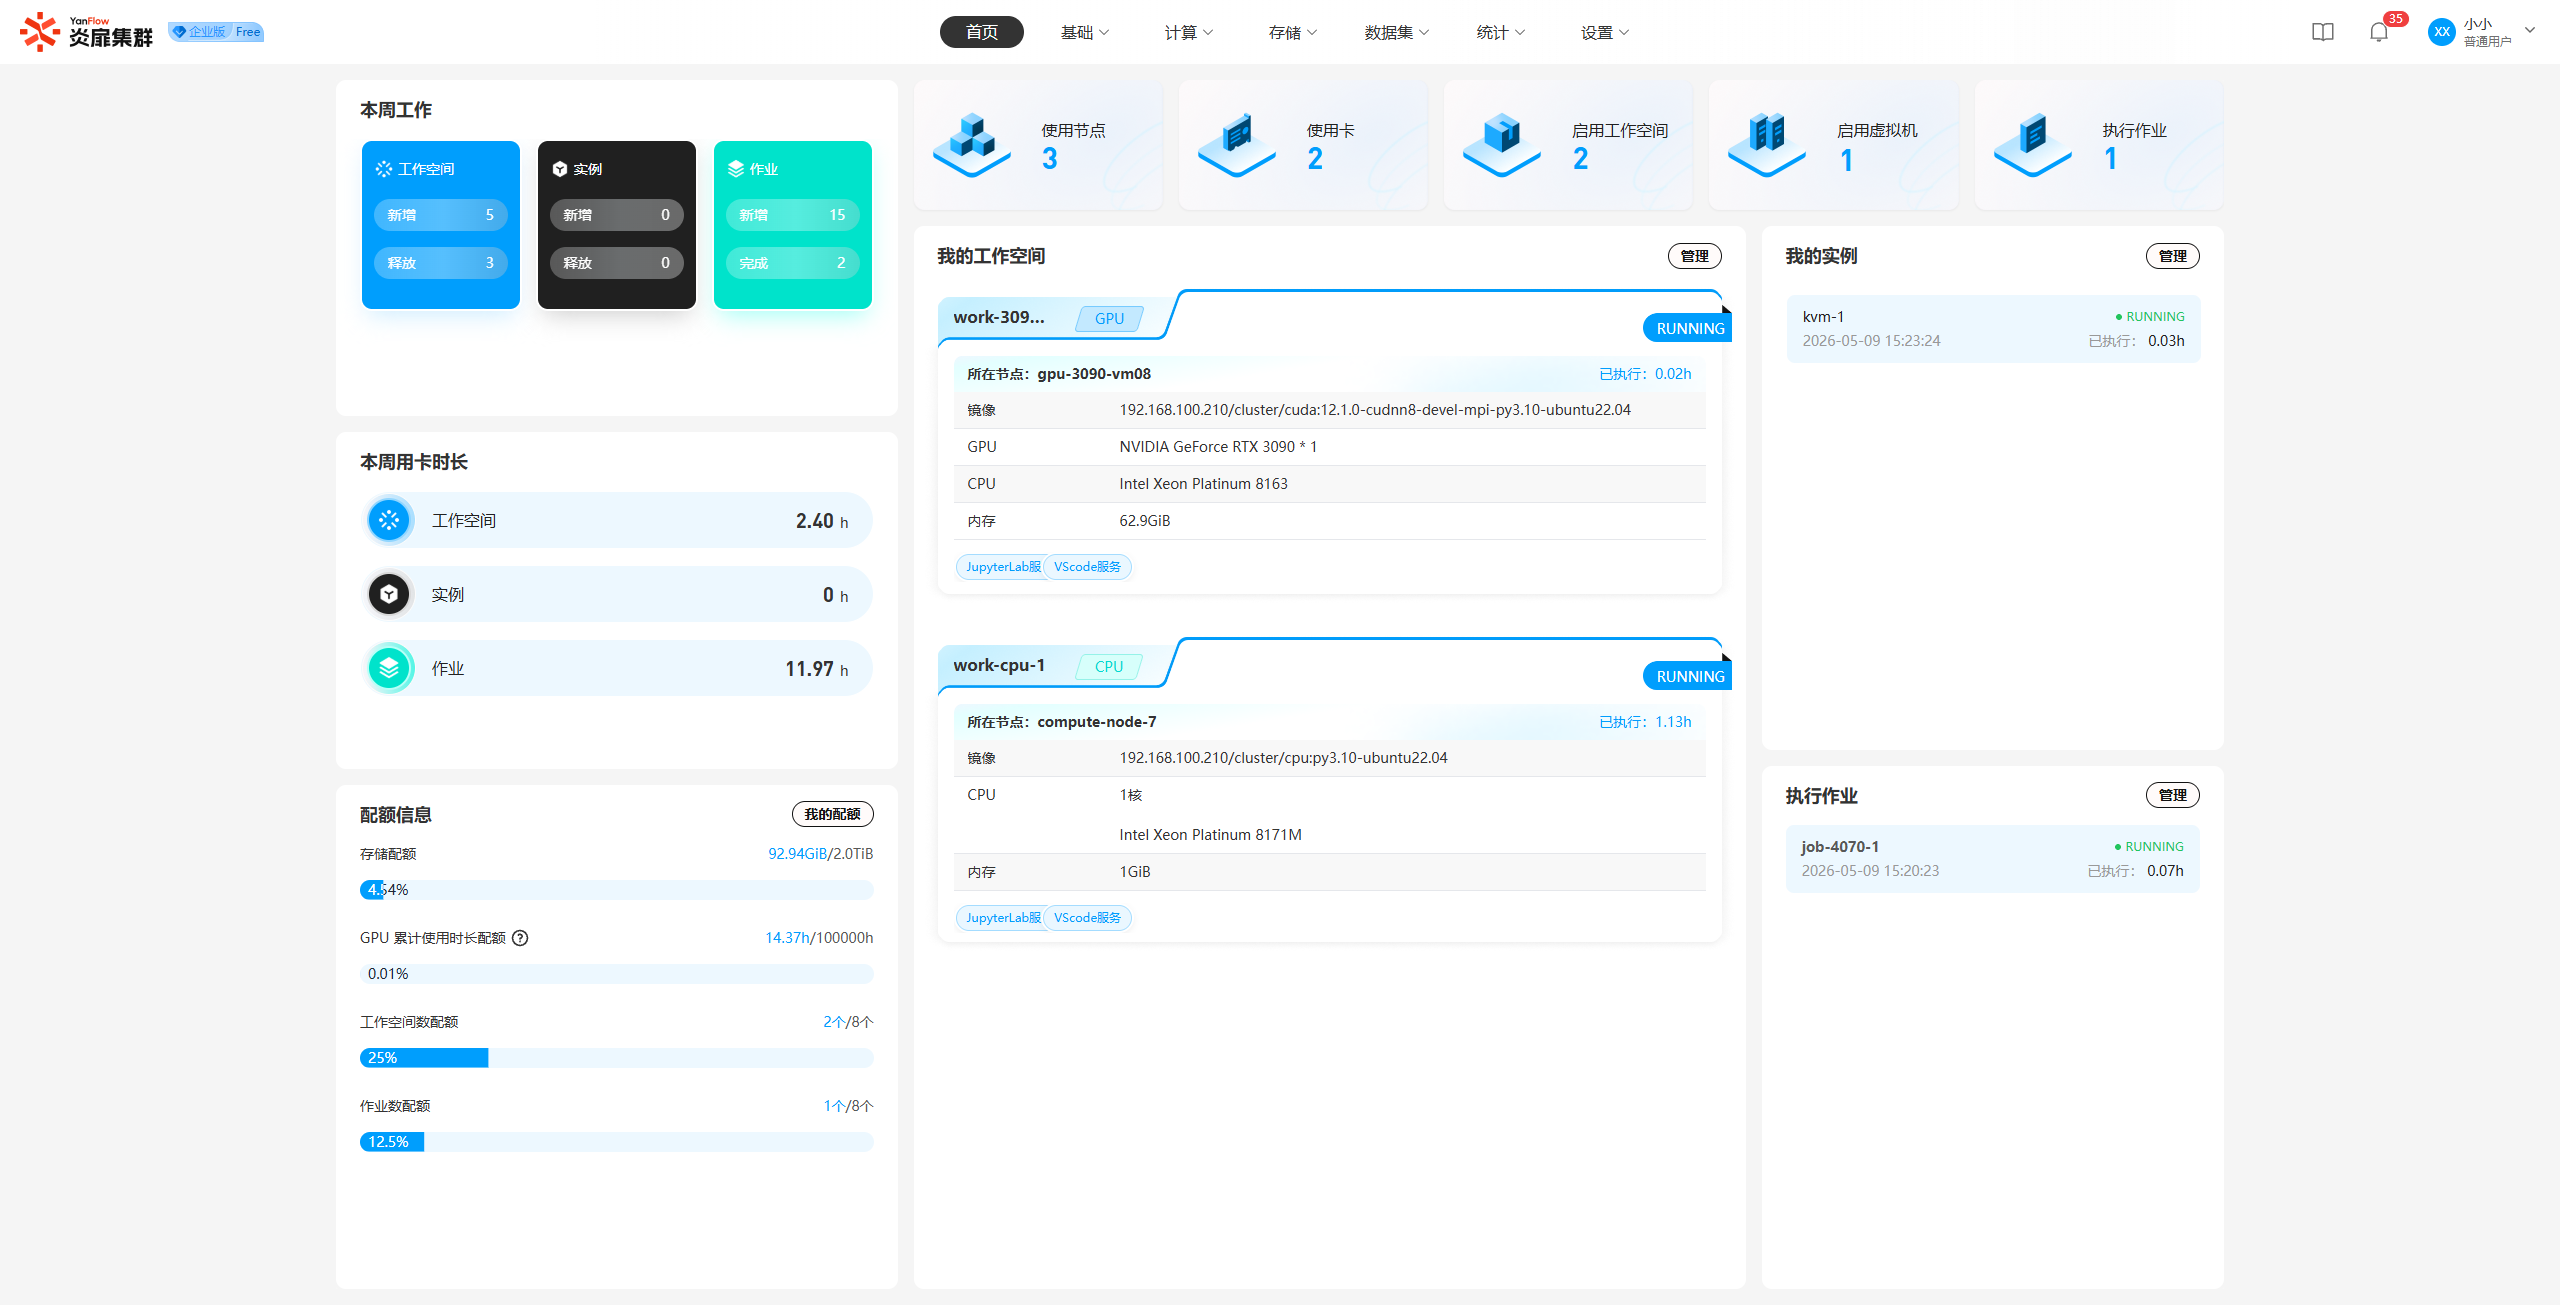
Through the visual dashboard, you can quickly understand your relevant work and data.
Basics
Project Management
Project List
Project Leaders can view the projects they are currently responsible for and manage project personnel. Support for keyword search via project name is provided.
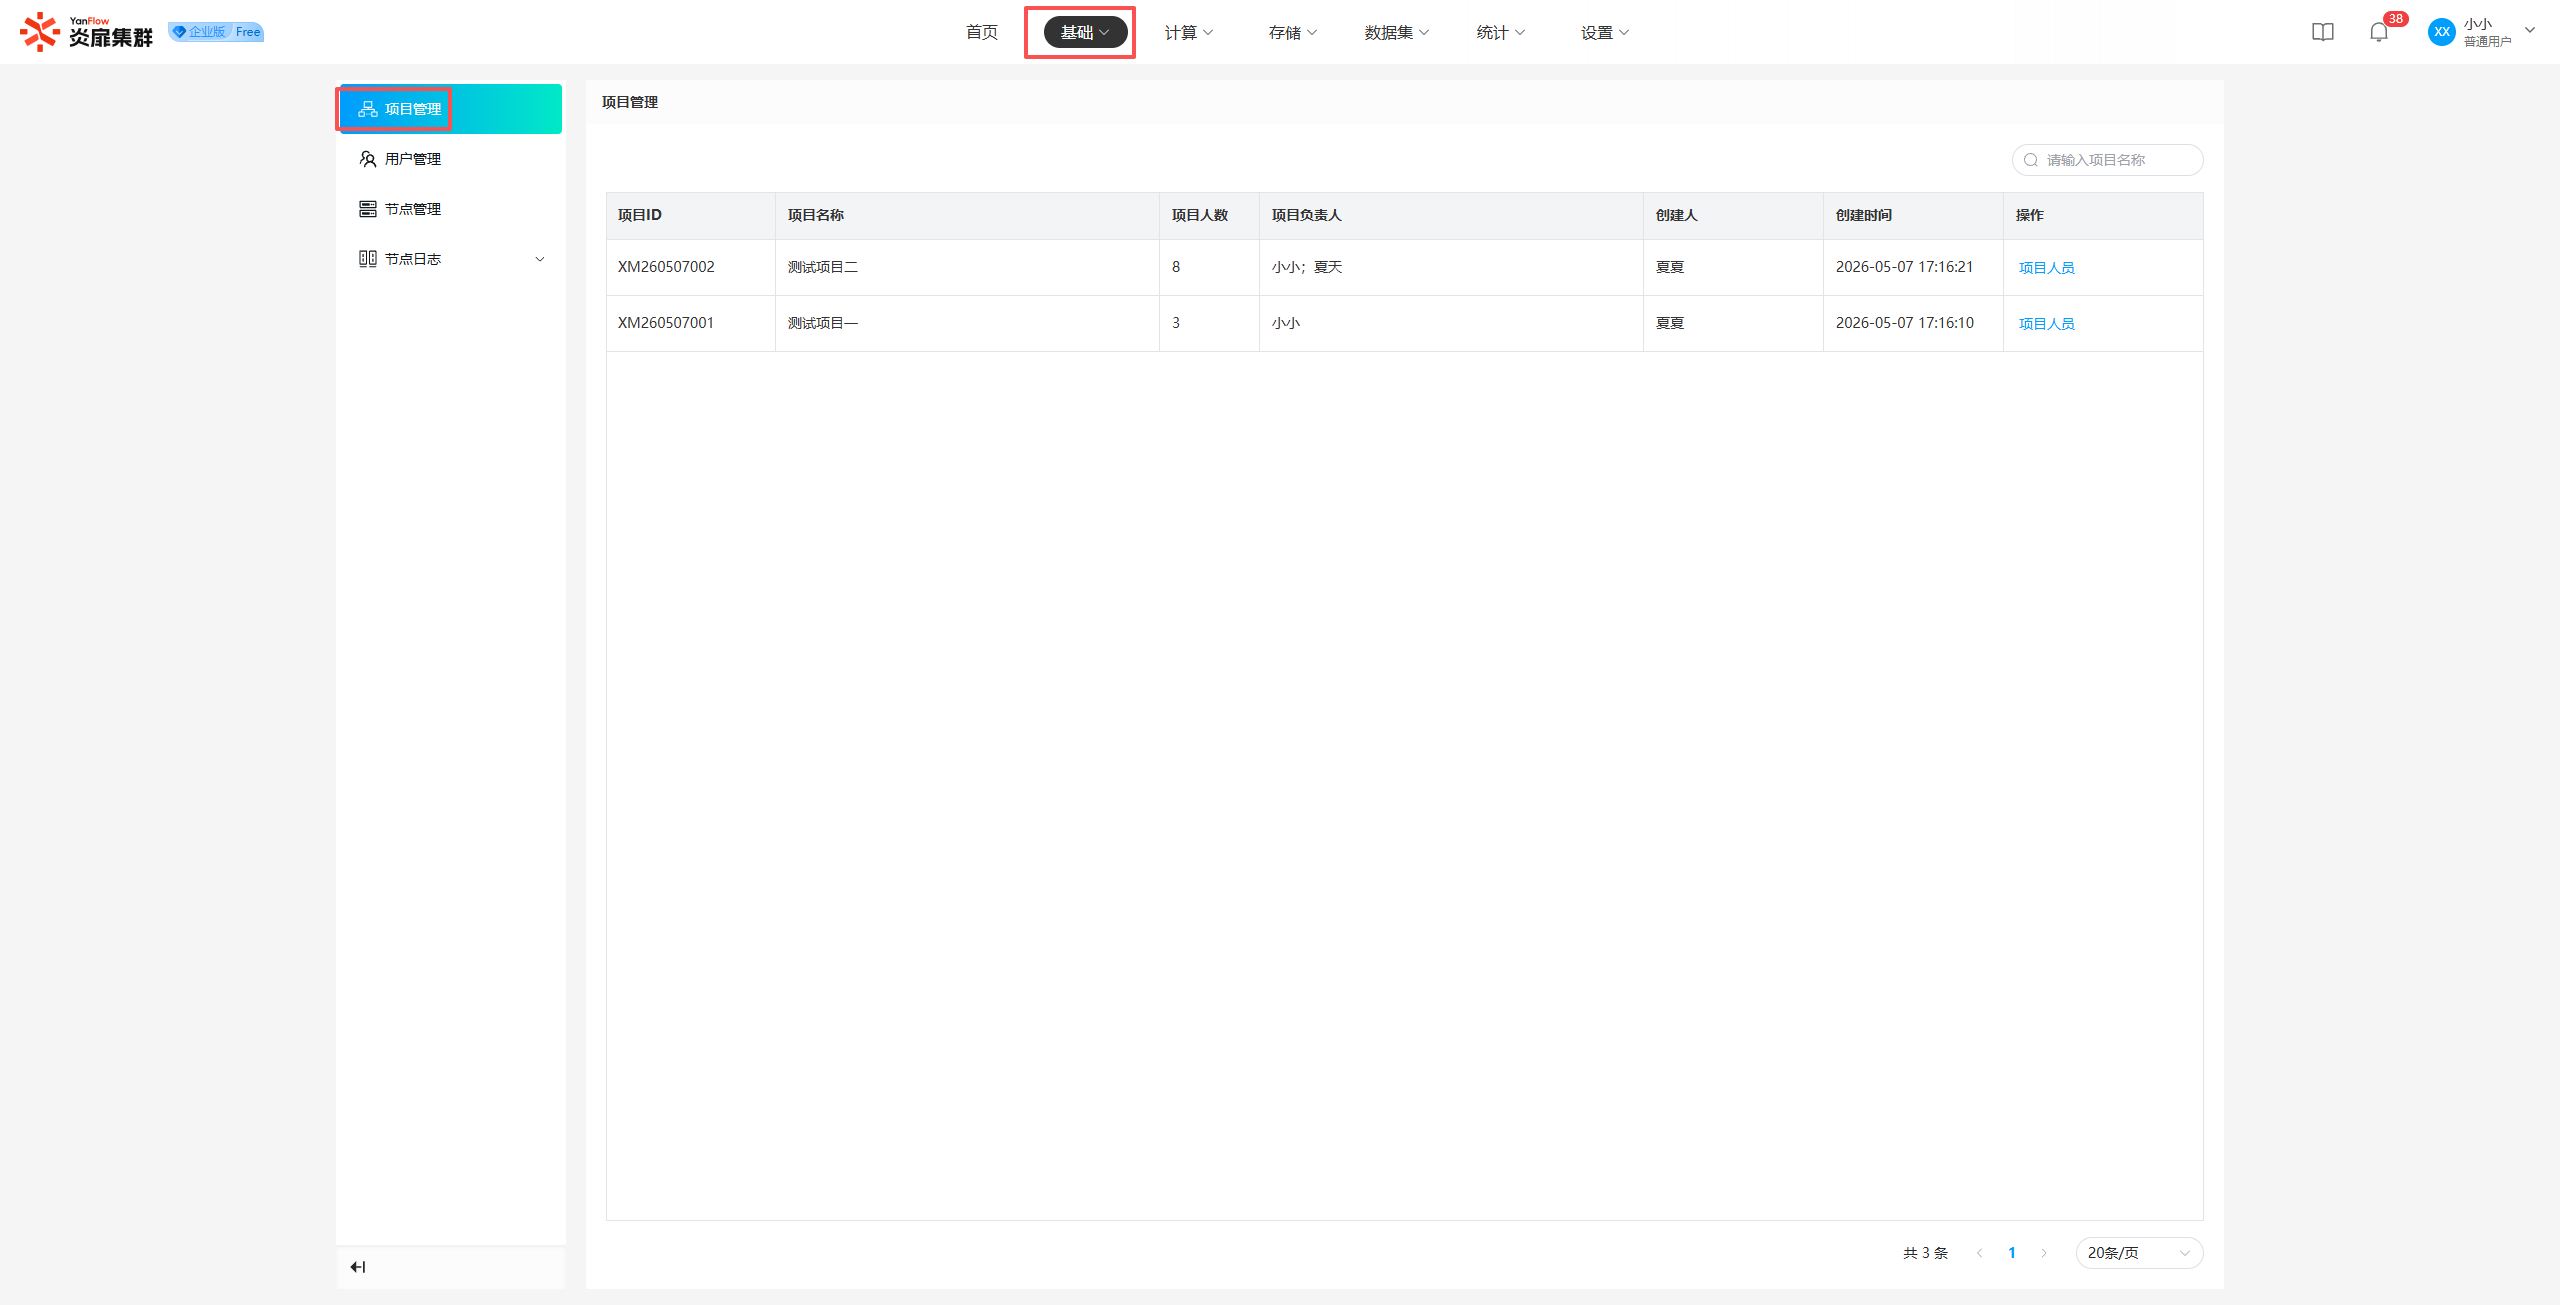
Note: If the regular user is not a Project Leader, the
Project Managementmenu will not be visible.
Project Personnel
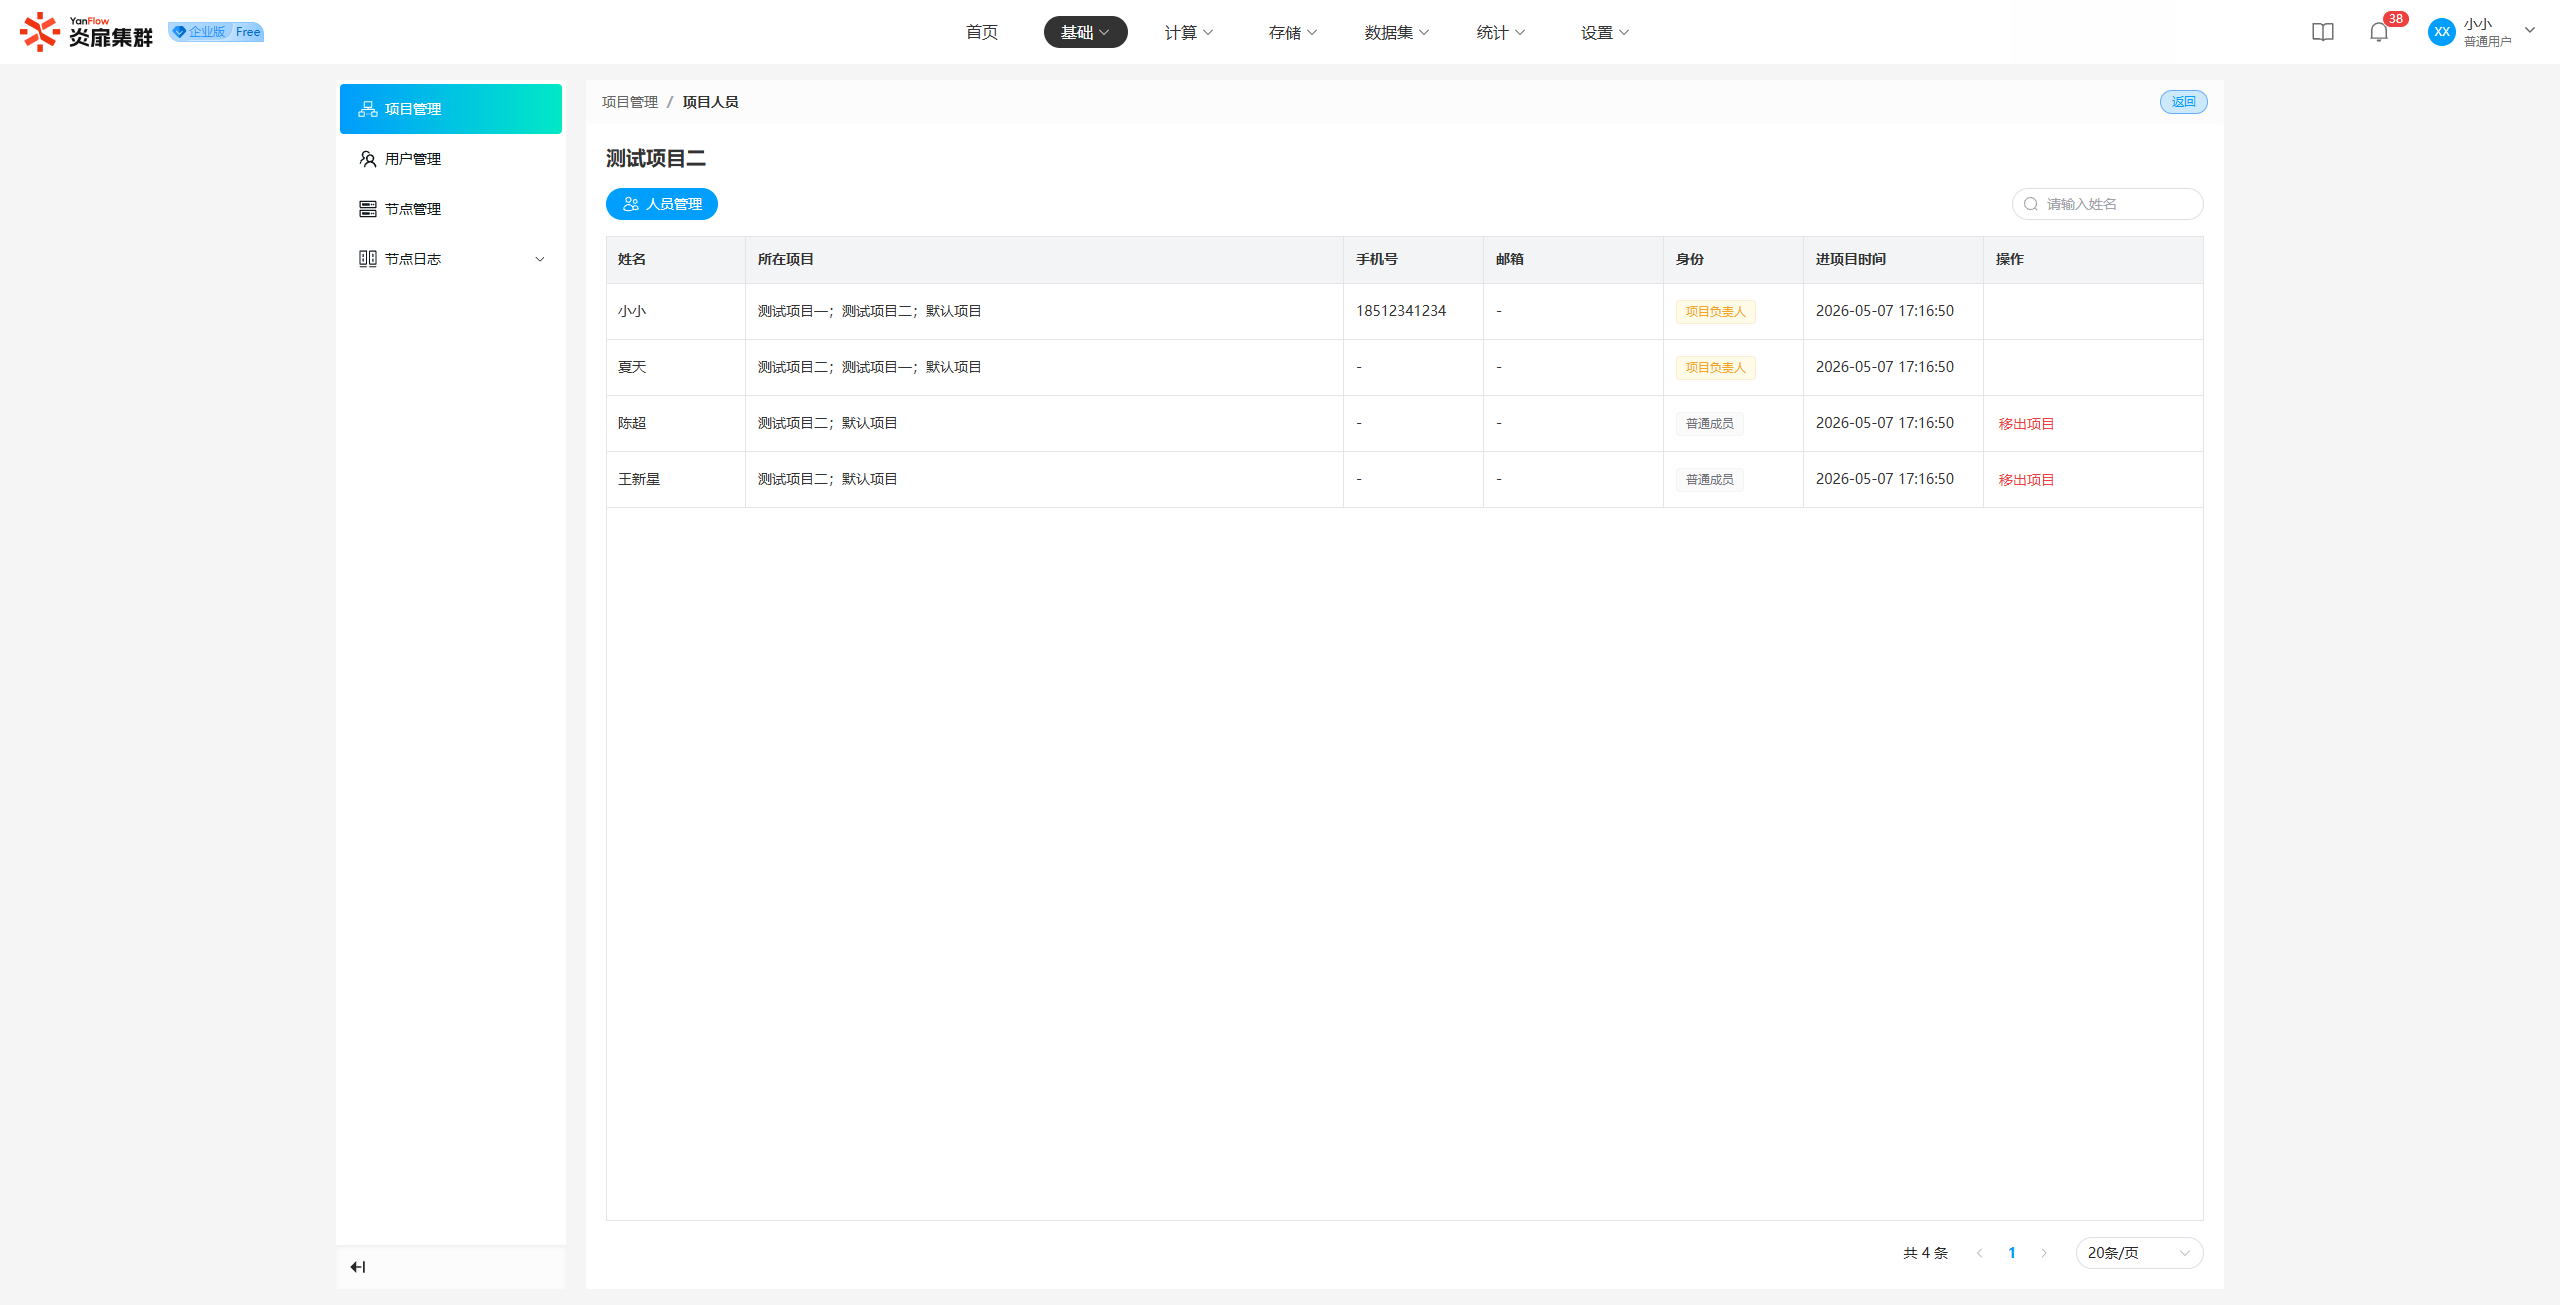
Click Project Personnel to enter the project personnel management page, where you can view and manage members within the project.
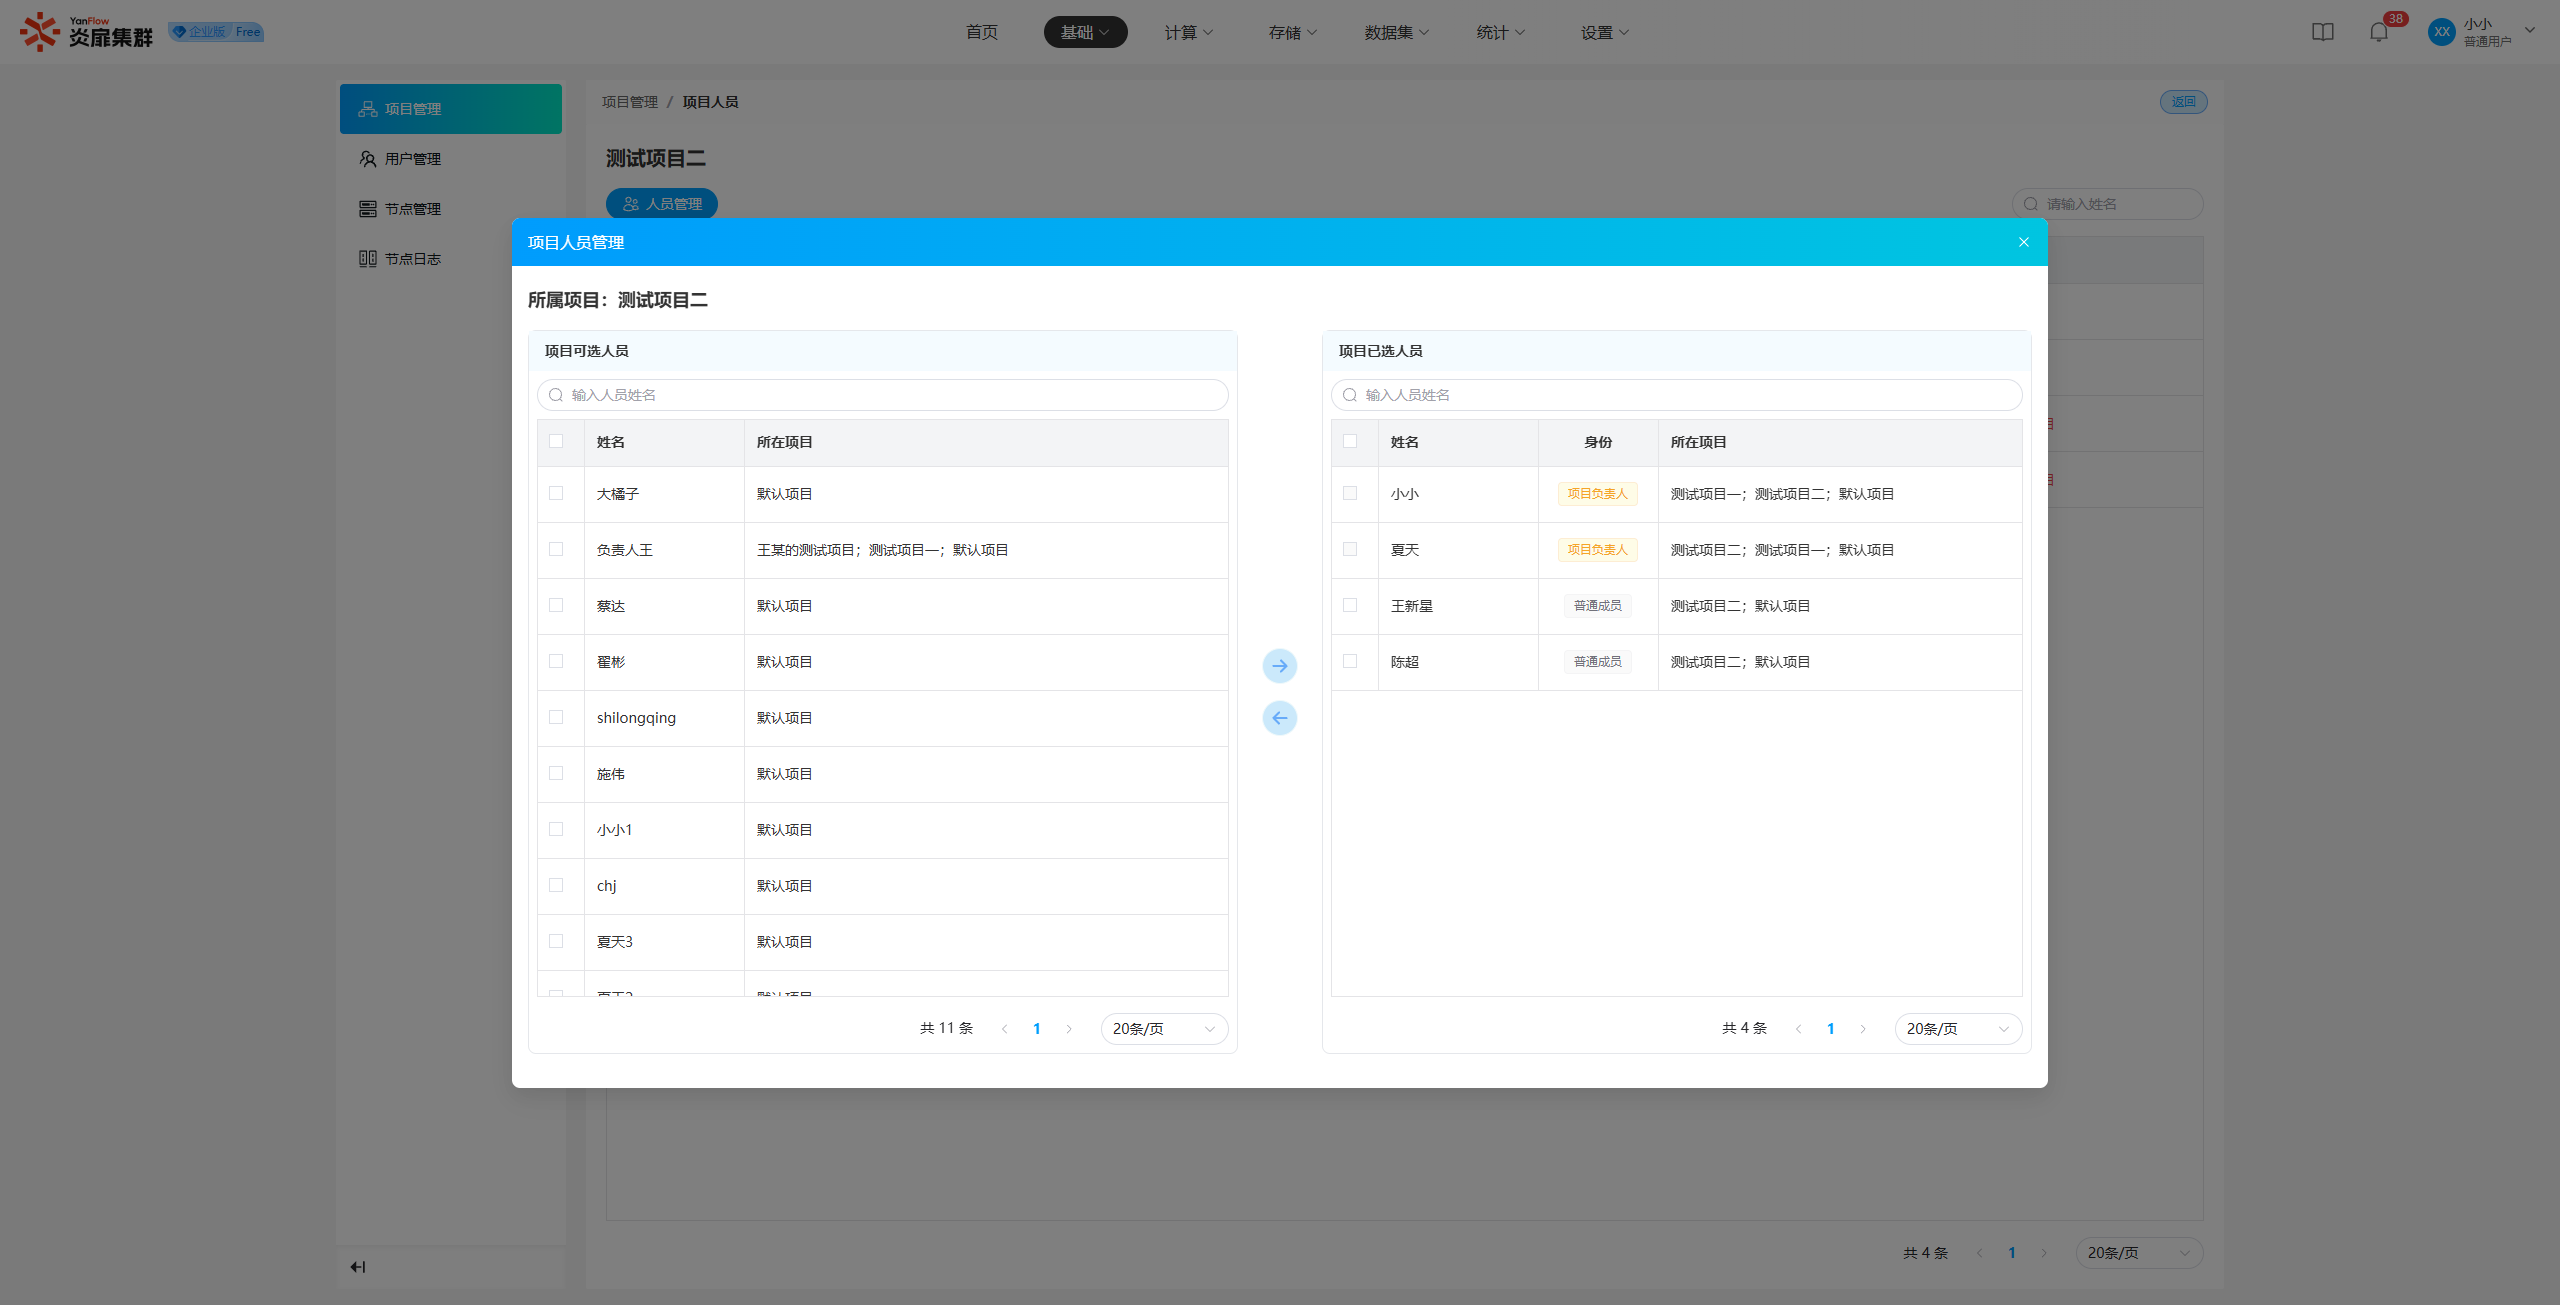
Personnel Management: Click Personnel Management to display a management popup, which supports adding or removing project members.
Remove from Project: Click Remove from Project to display a prompt popup. Click Confirm to remove the member from the project.
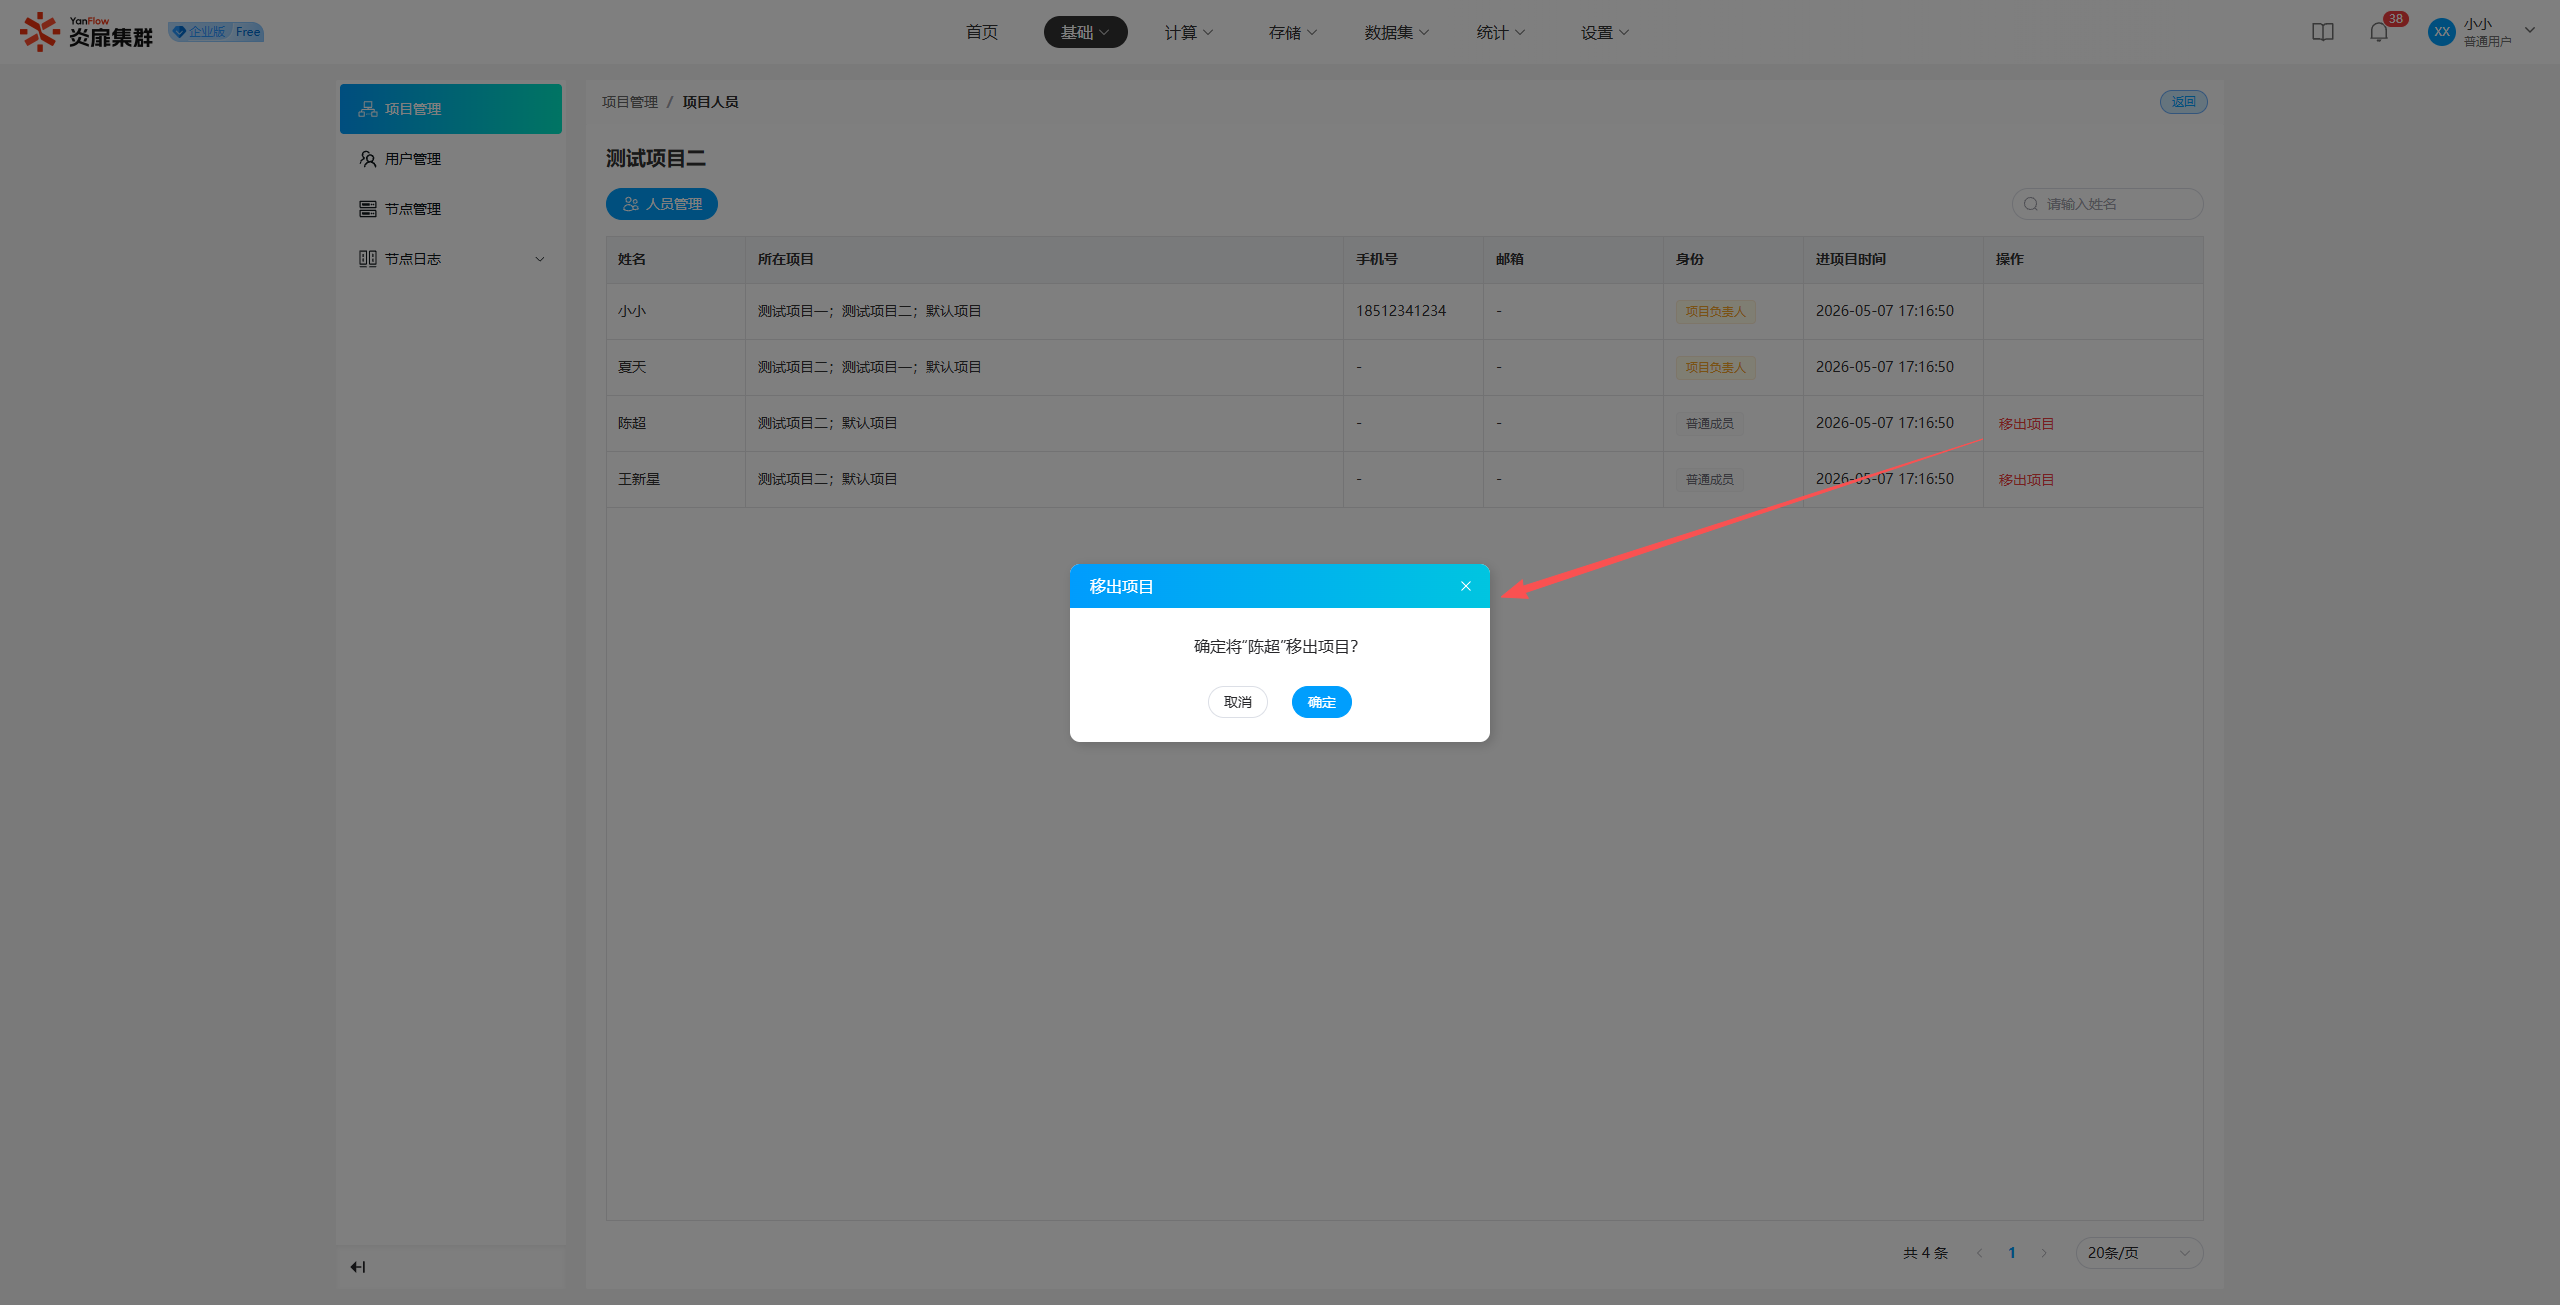
Note:
- It is not supported to remove the Project Leader from the project.
- Once a member is removed from a project, all their active resources within that project will be terminated.
User Management
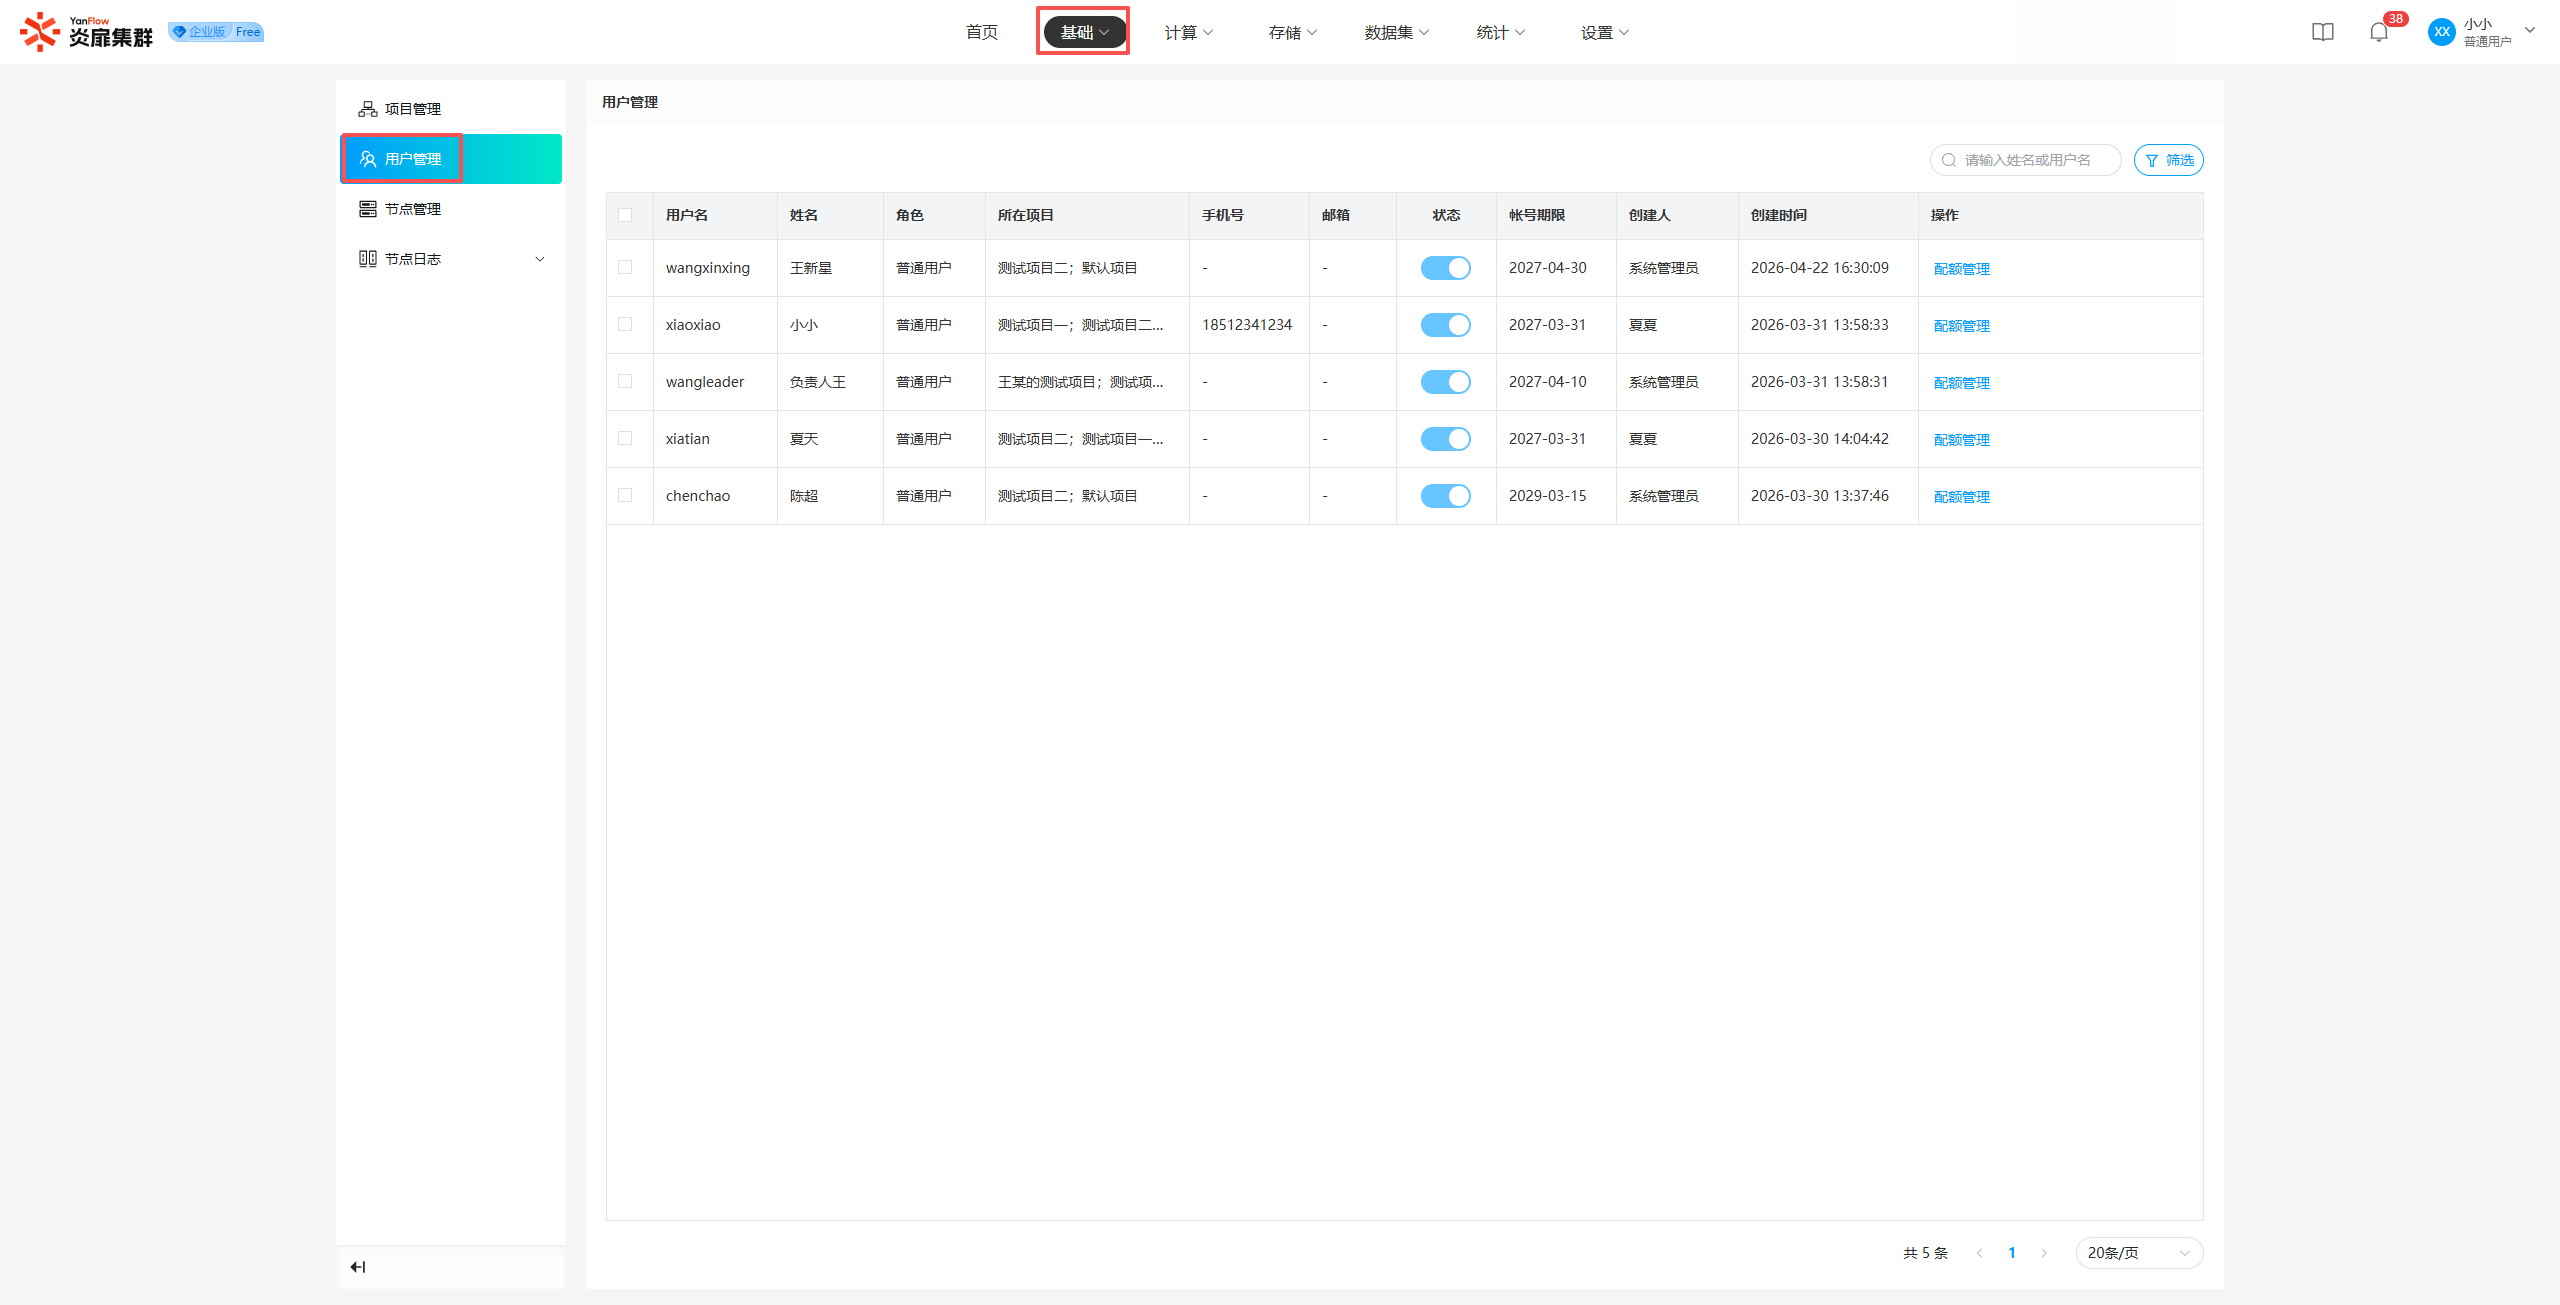
Project Leaders can view all user information within the projects they are responsible for. Support for keyword search via name or username is provided, as well as filtered search by project, user status, and creation date.
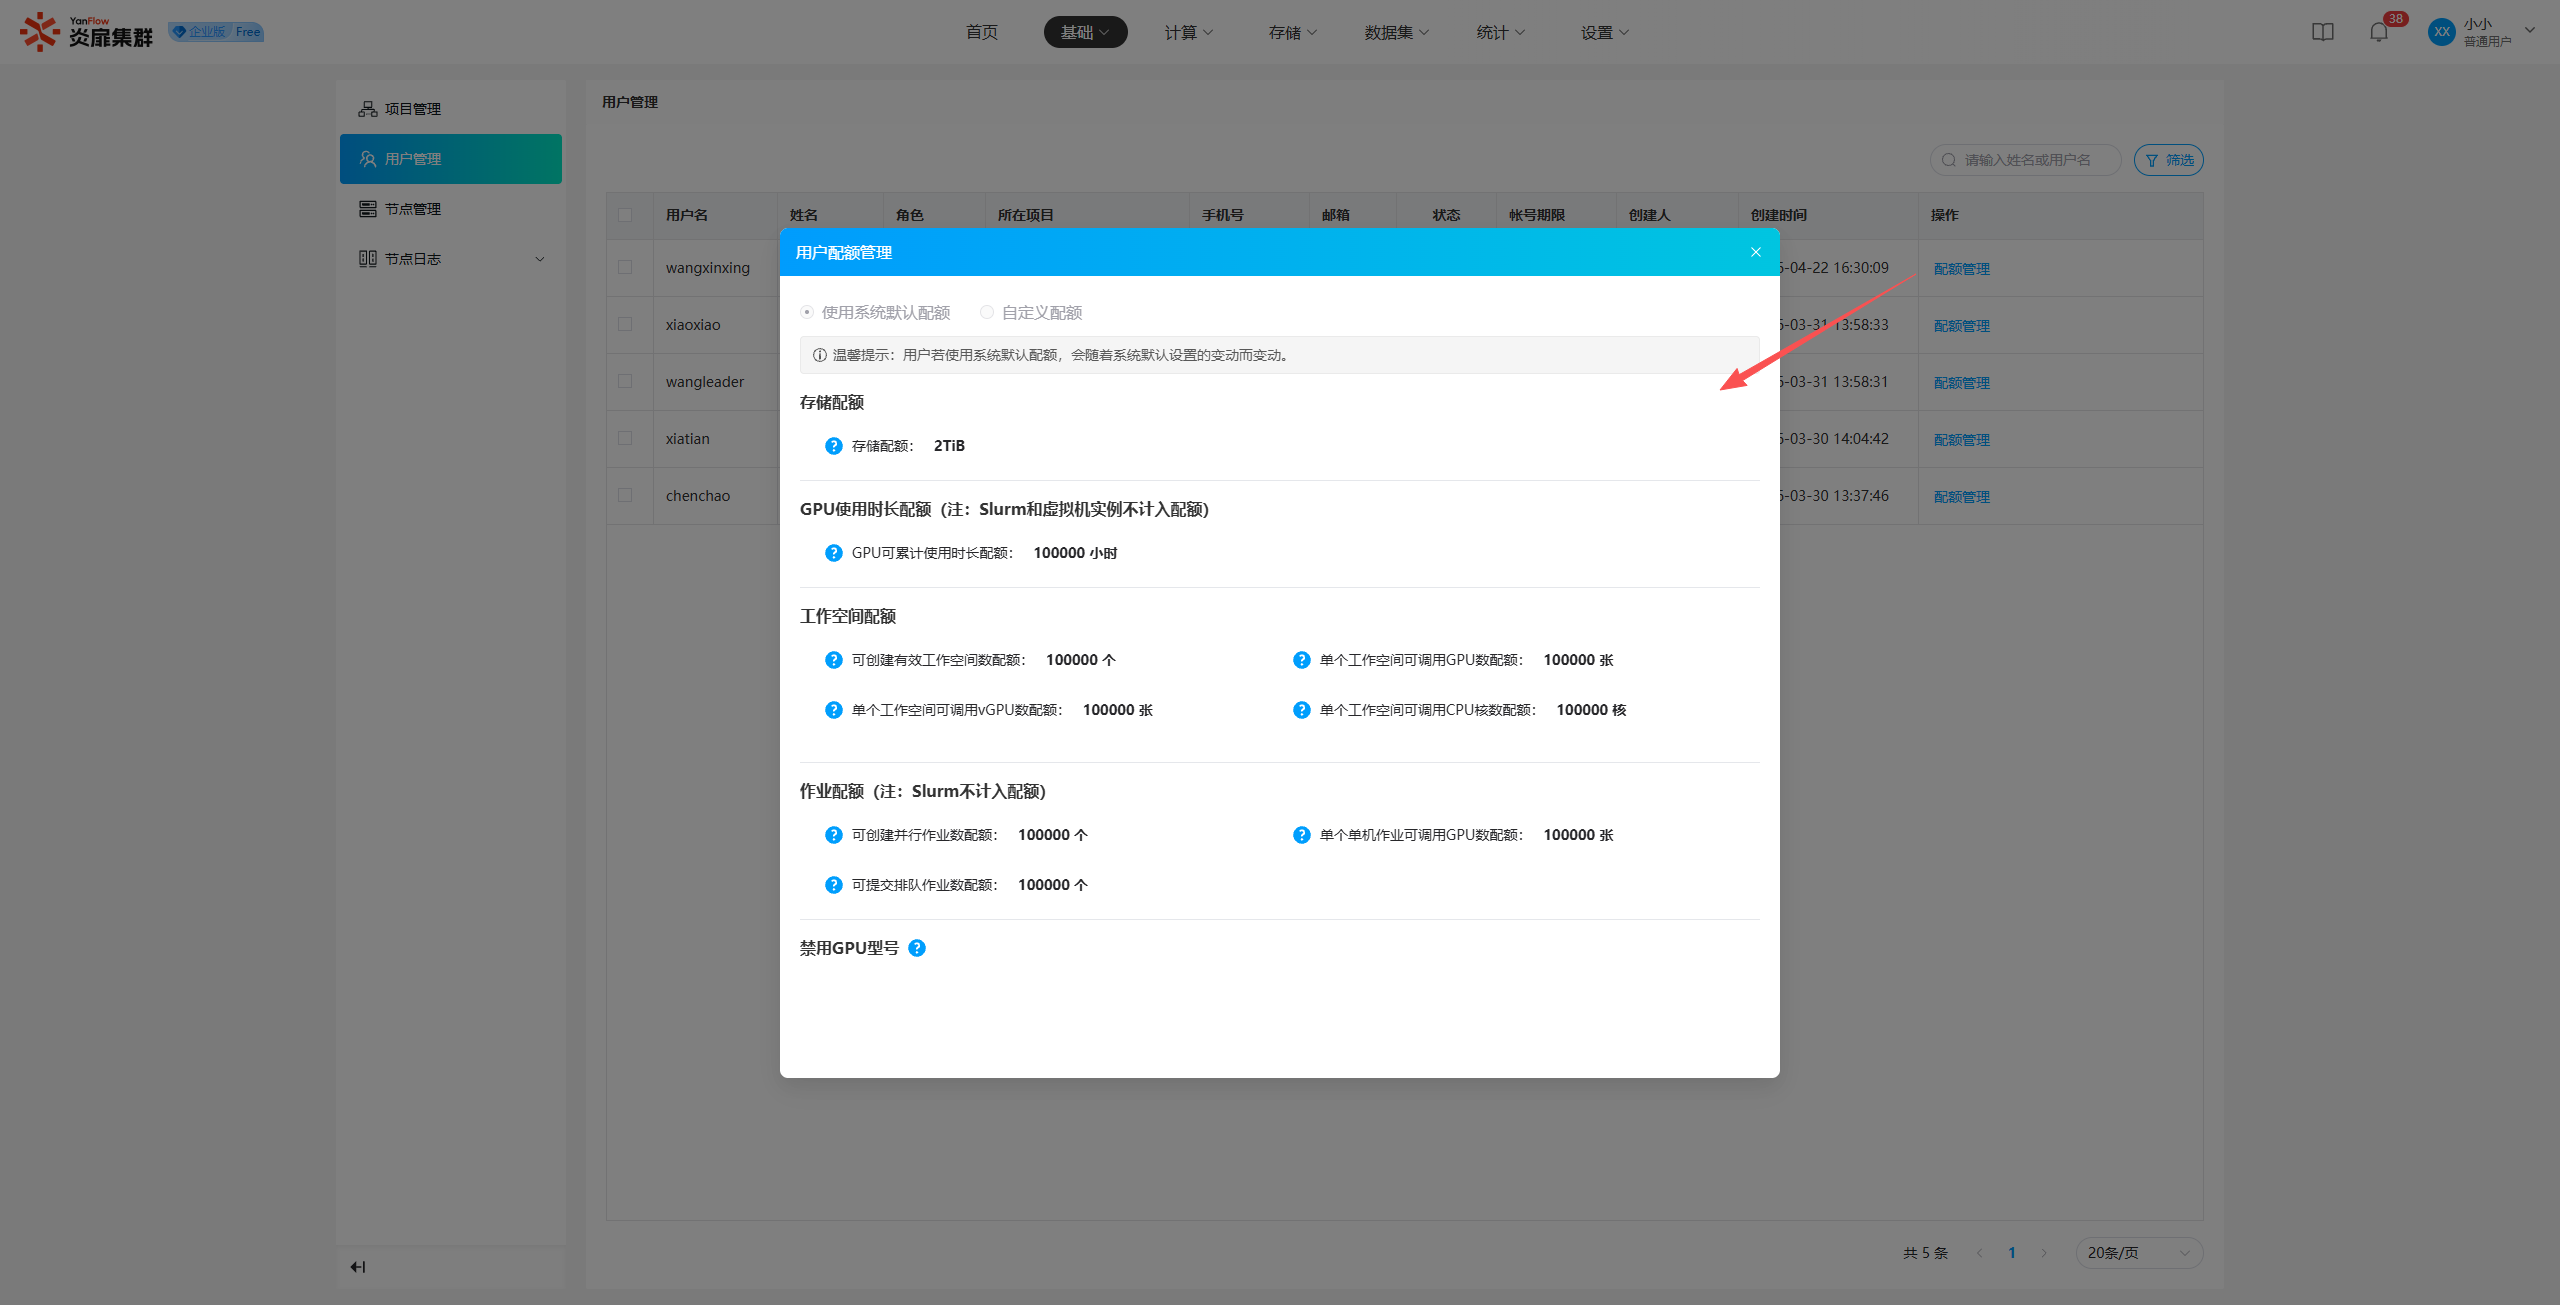
View Quota: Click Quota Management to view detailed quota information for that user.
Note:
- If the regular user is not a Project Leader, the
User Managementmenu will not be visible.- You can only view users within your responsible projects; other users are not visible.
Node Management
Node List
Two forms are provided: Card and Table. All system nodes, including container nodes and virtual machine nodes, are displayed according to their different statuses. Support for keyword search via node name is provided, as well as filtered search by node mode, GPU model, and CPU model.
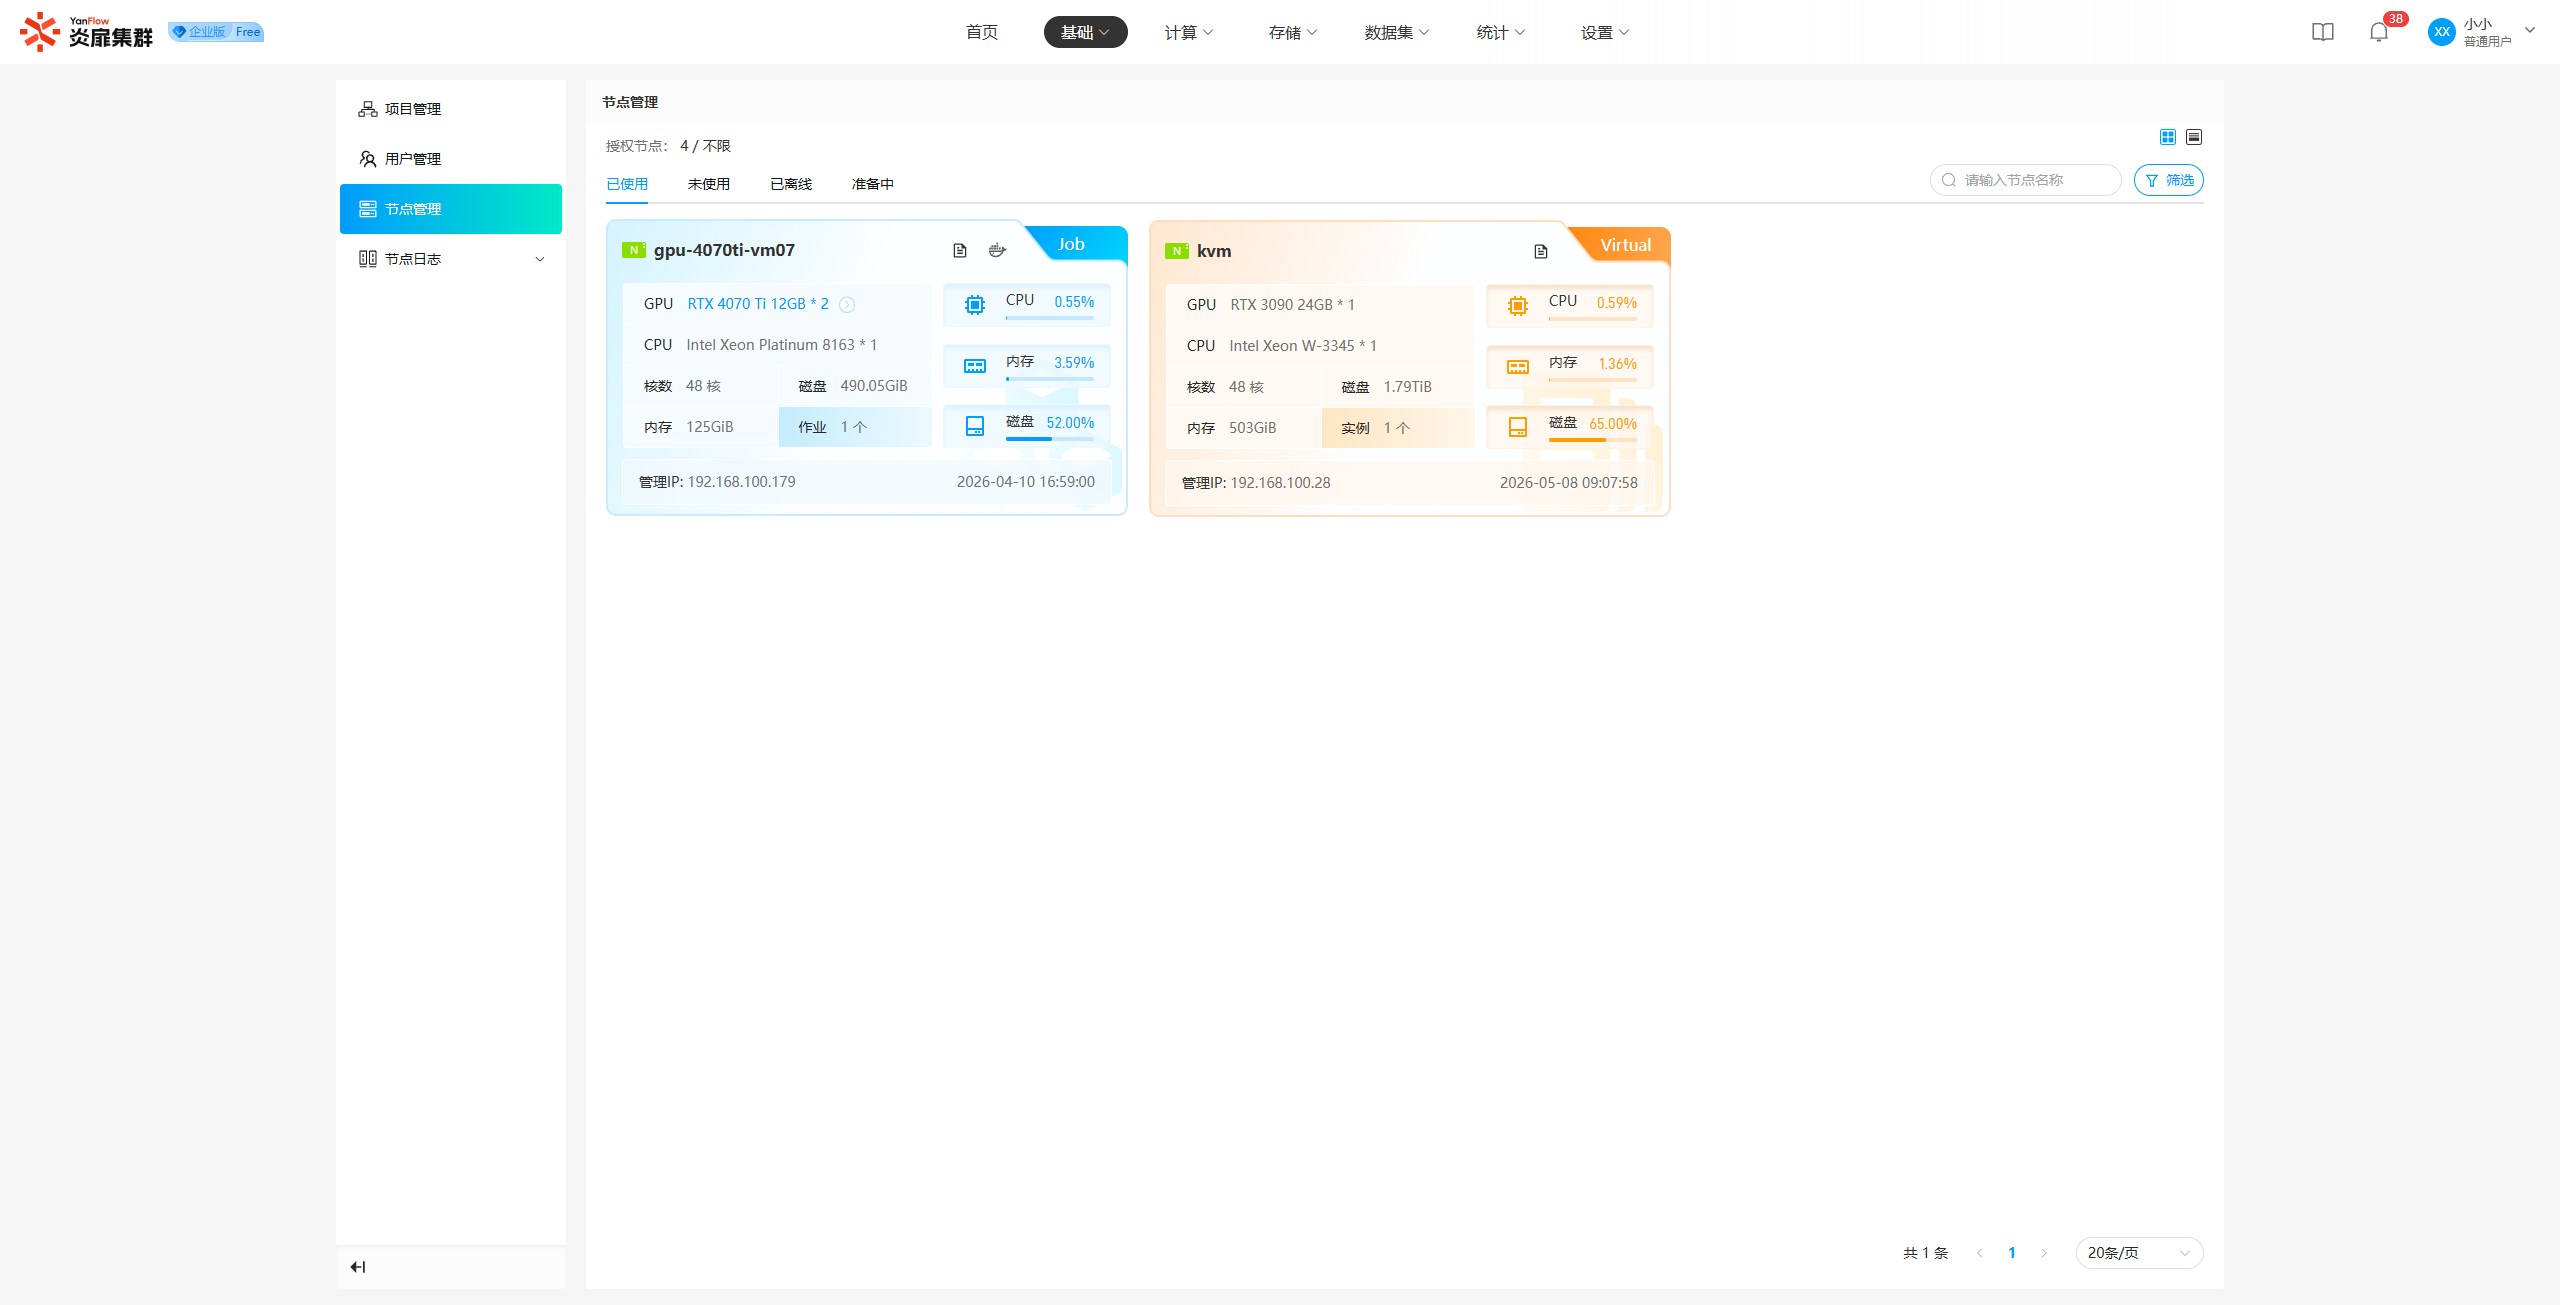
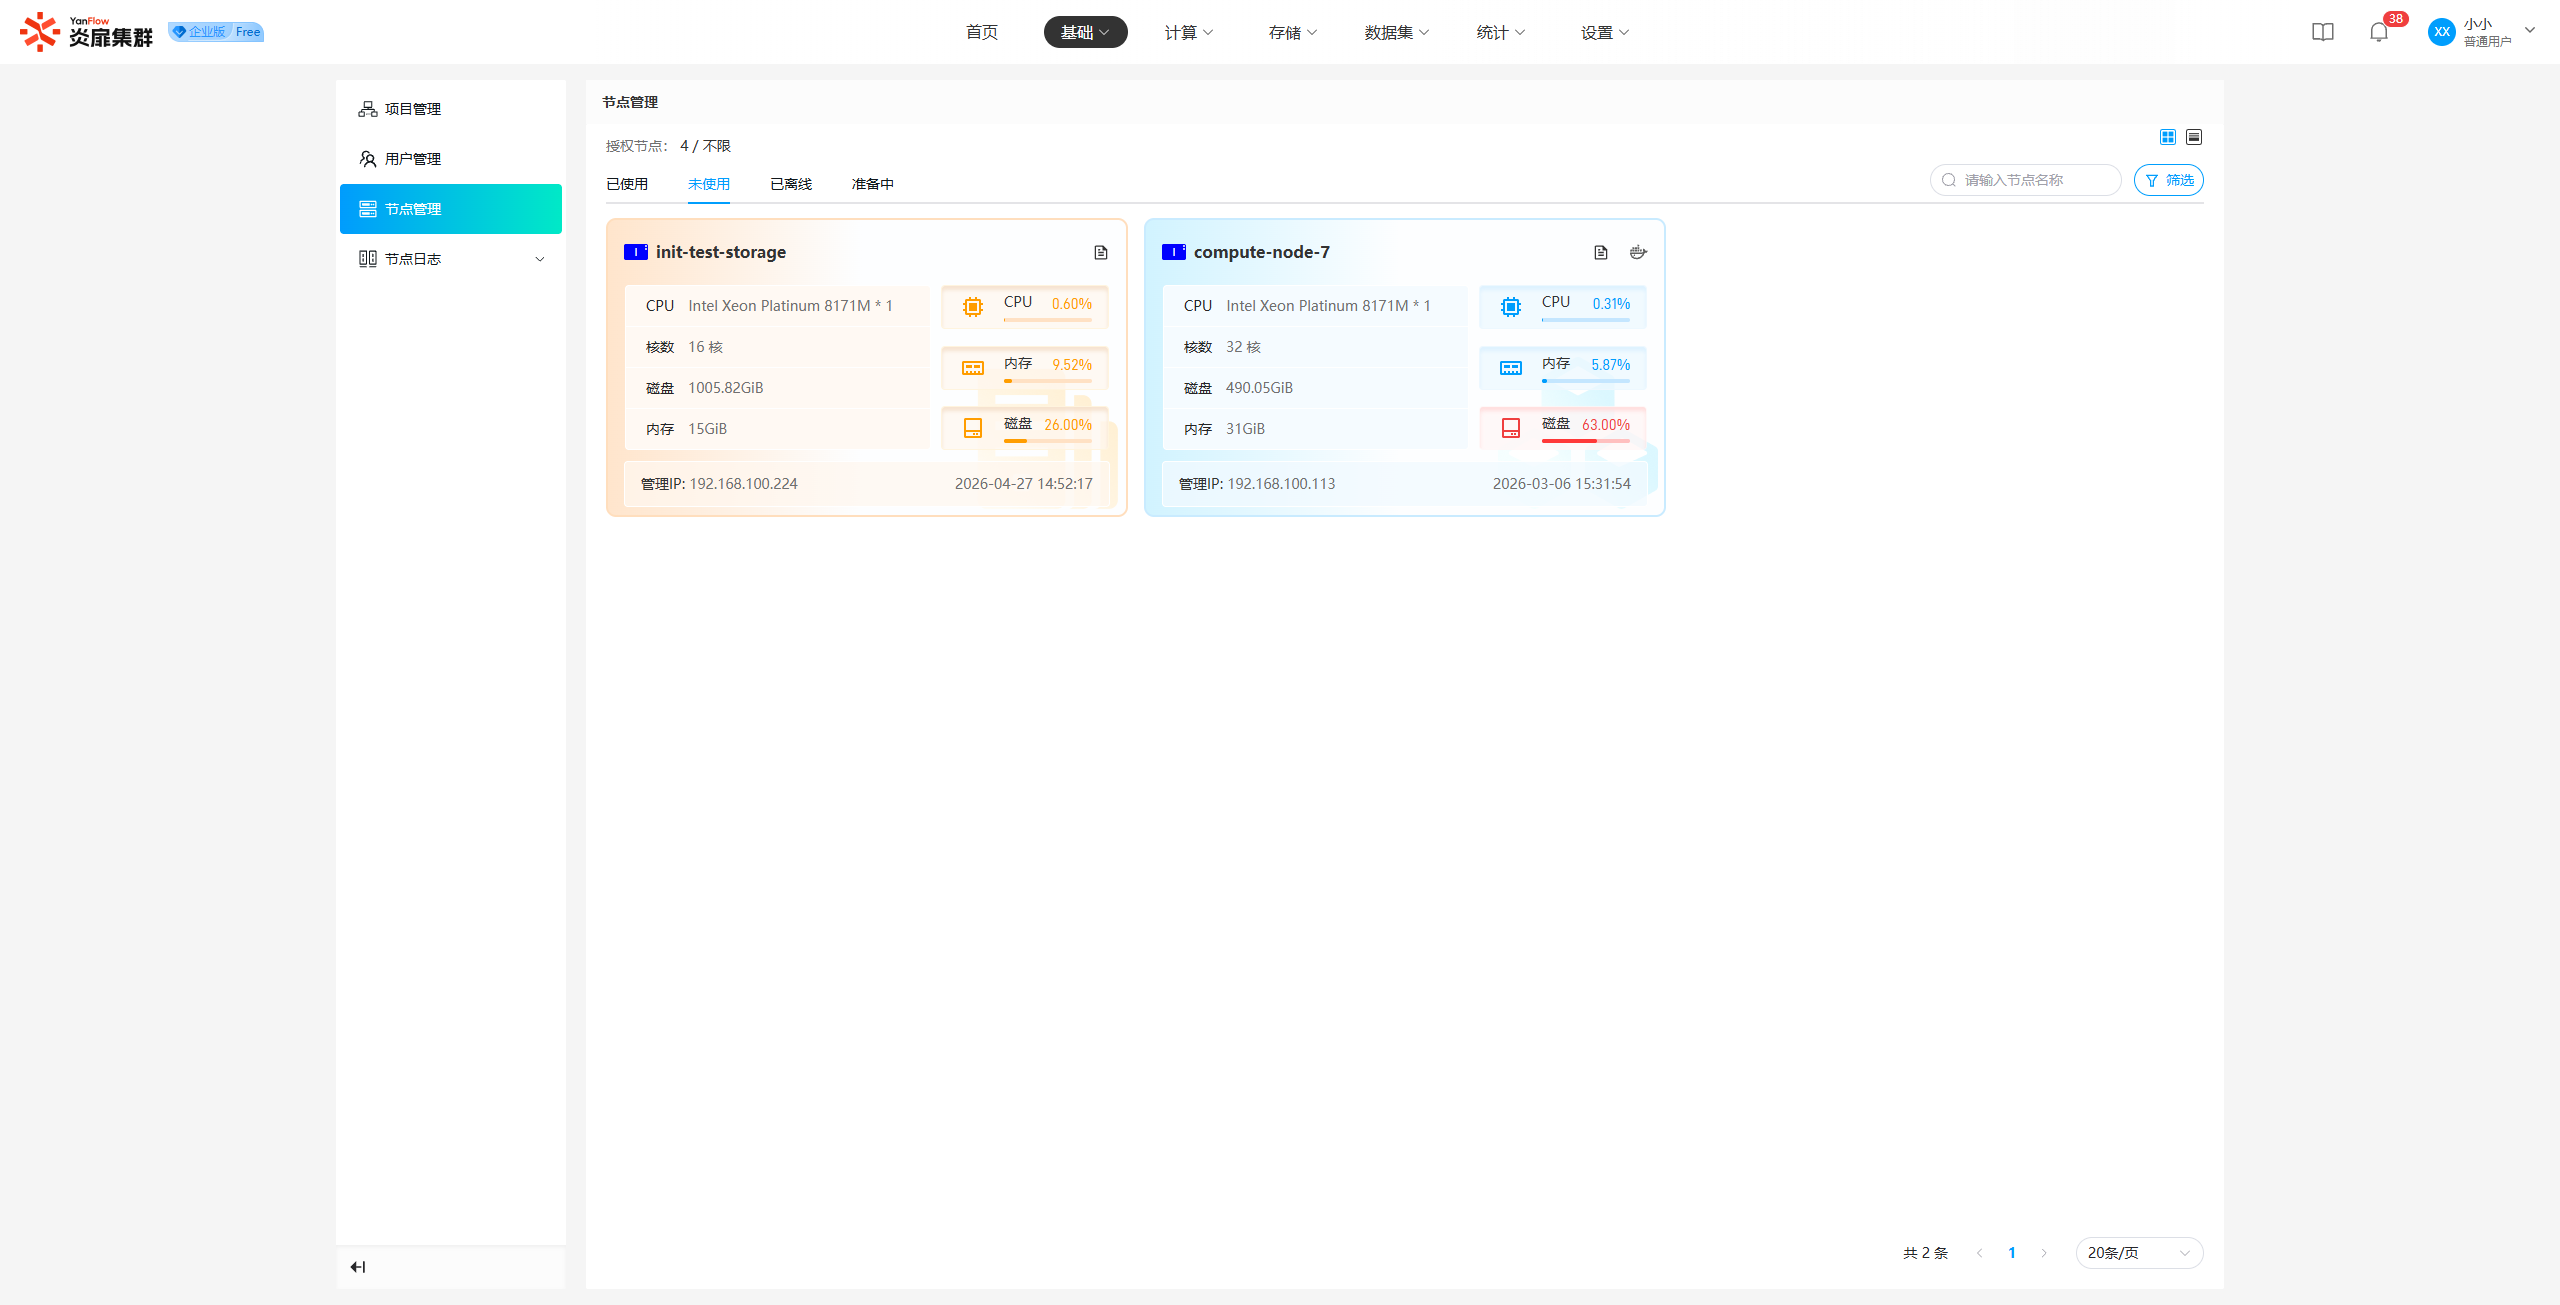
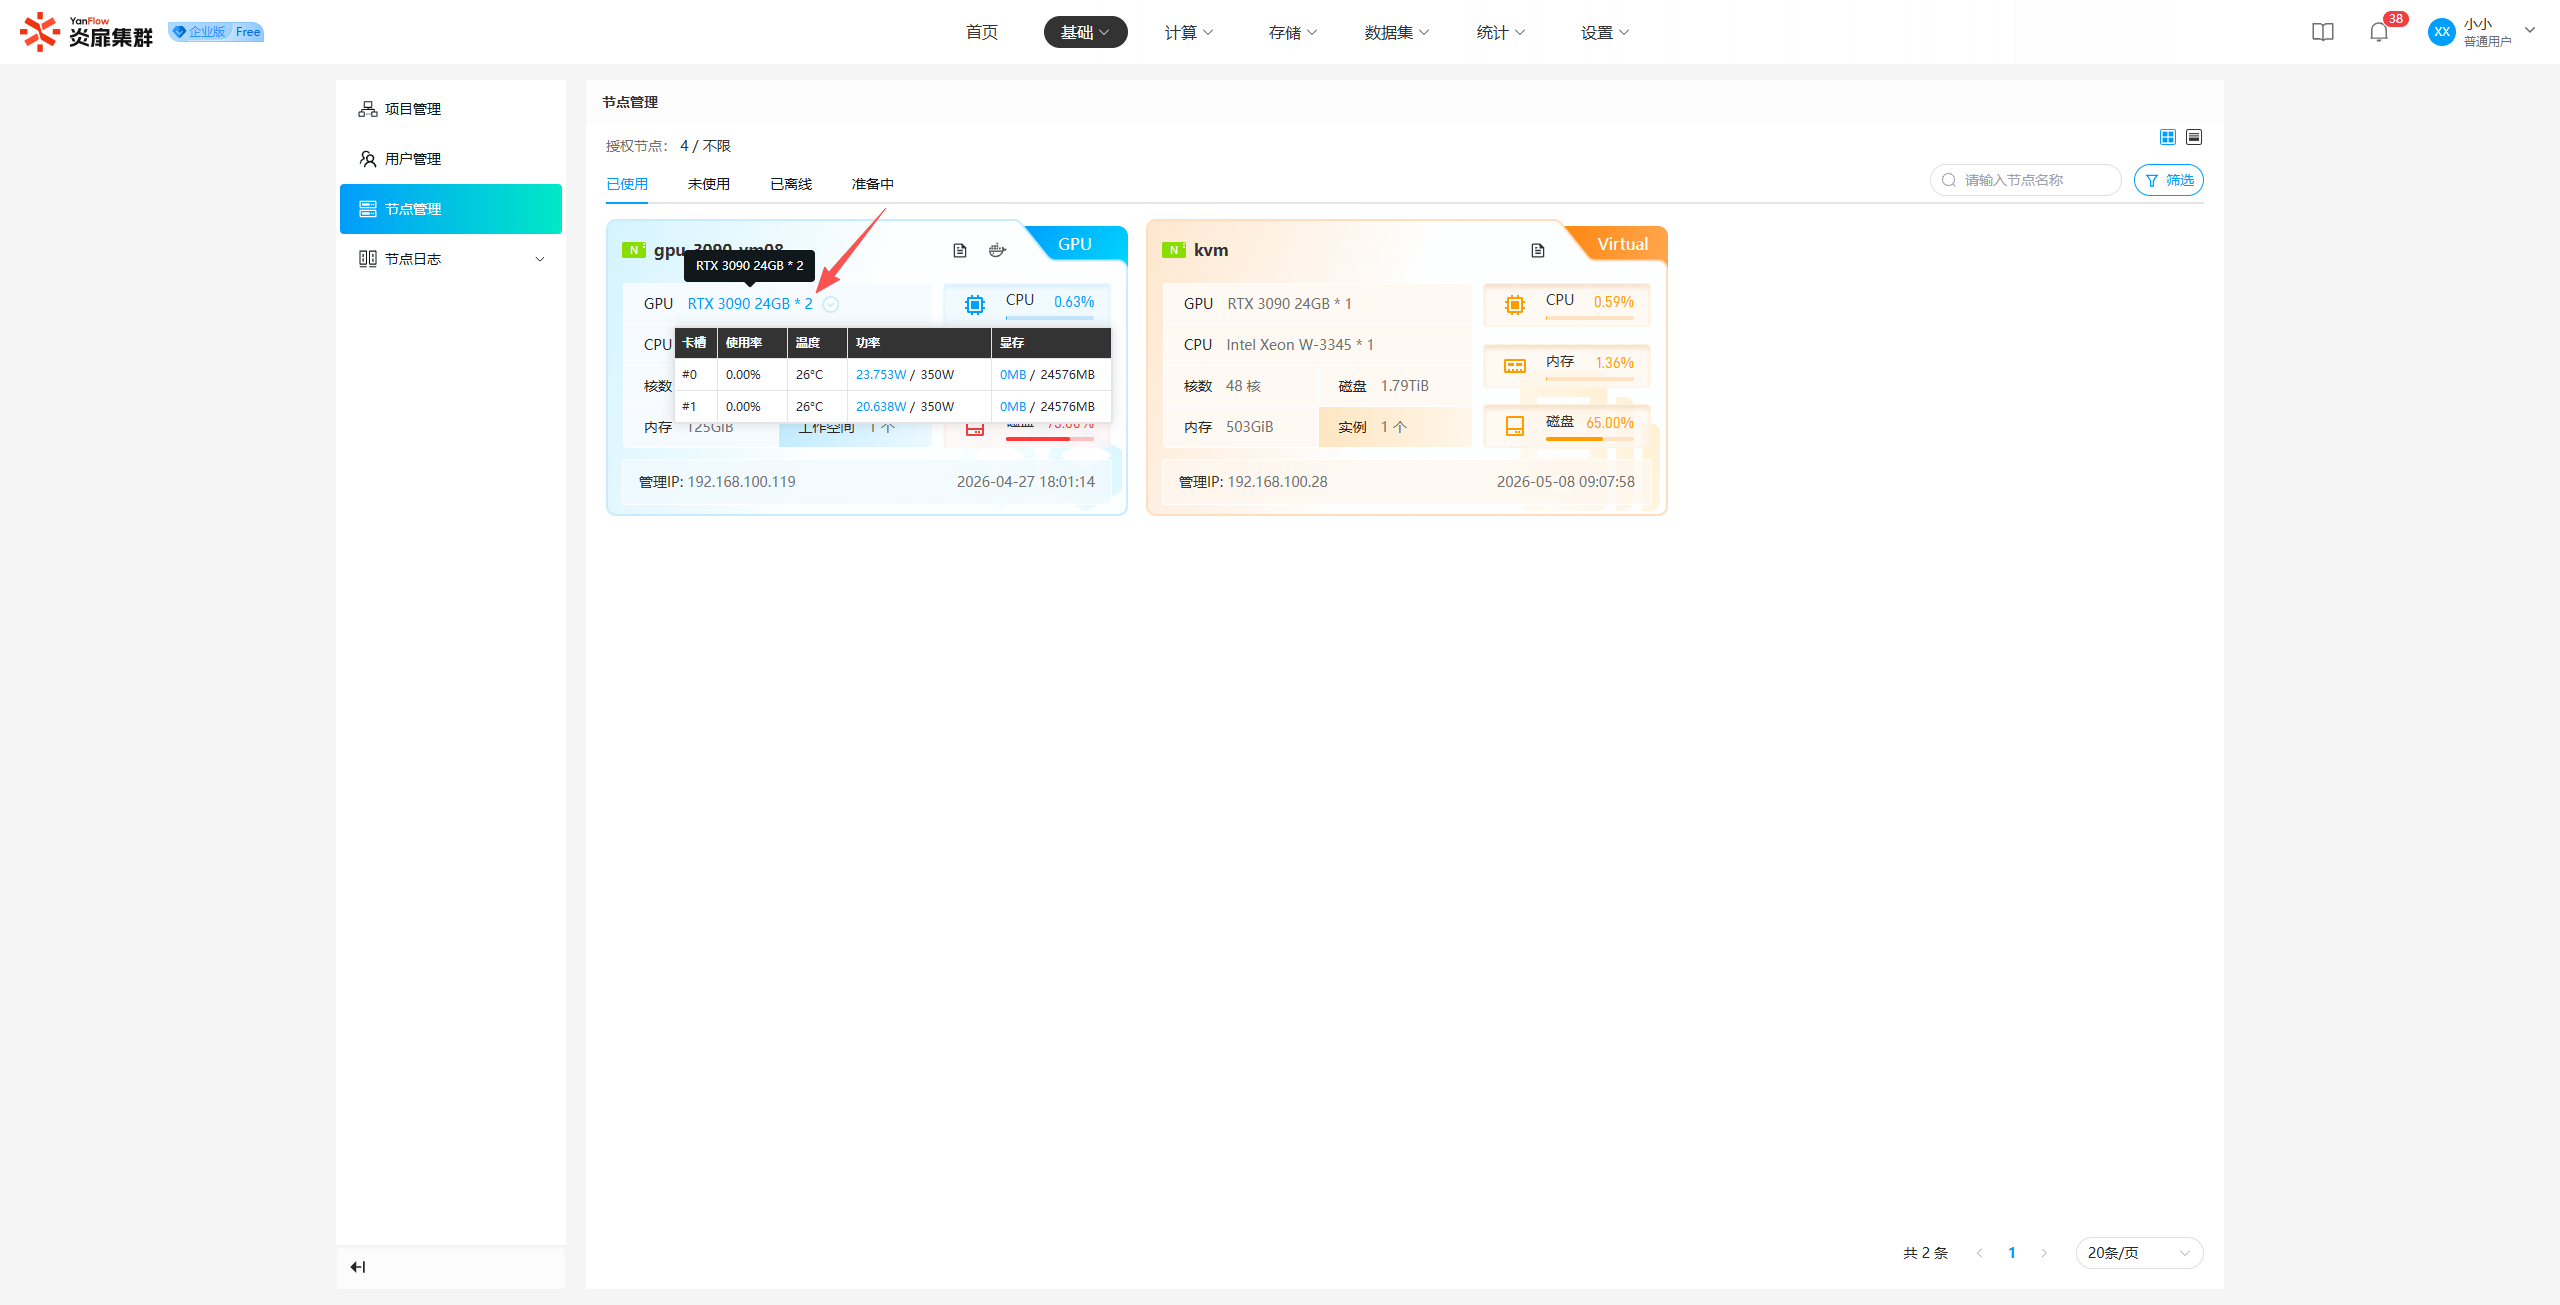
GPU Details: In Card view, for container nodes in Used status, click on the GPU Model to view GPU usage data. (Only Container Nodes support this feature)
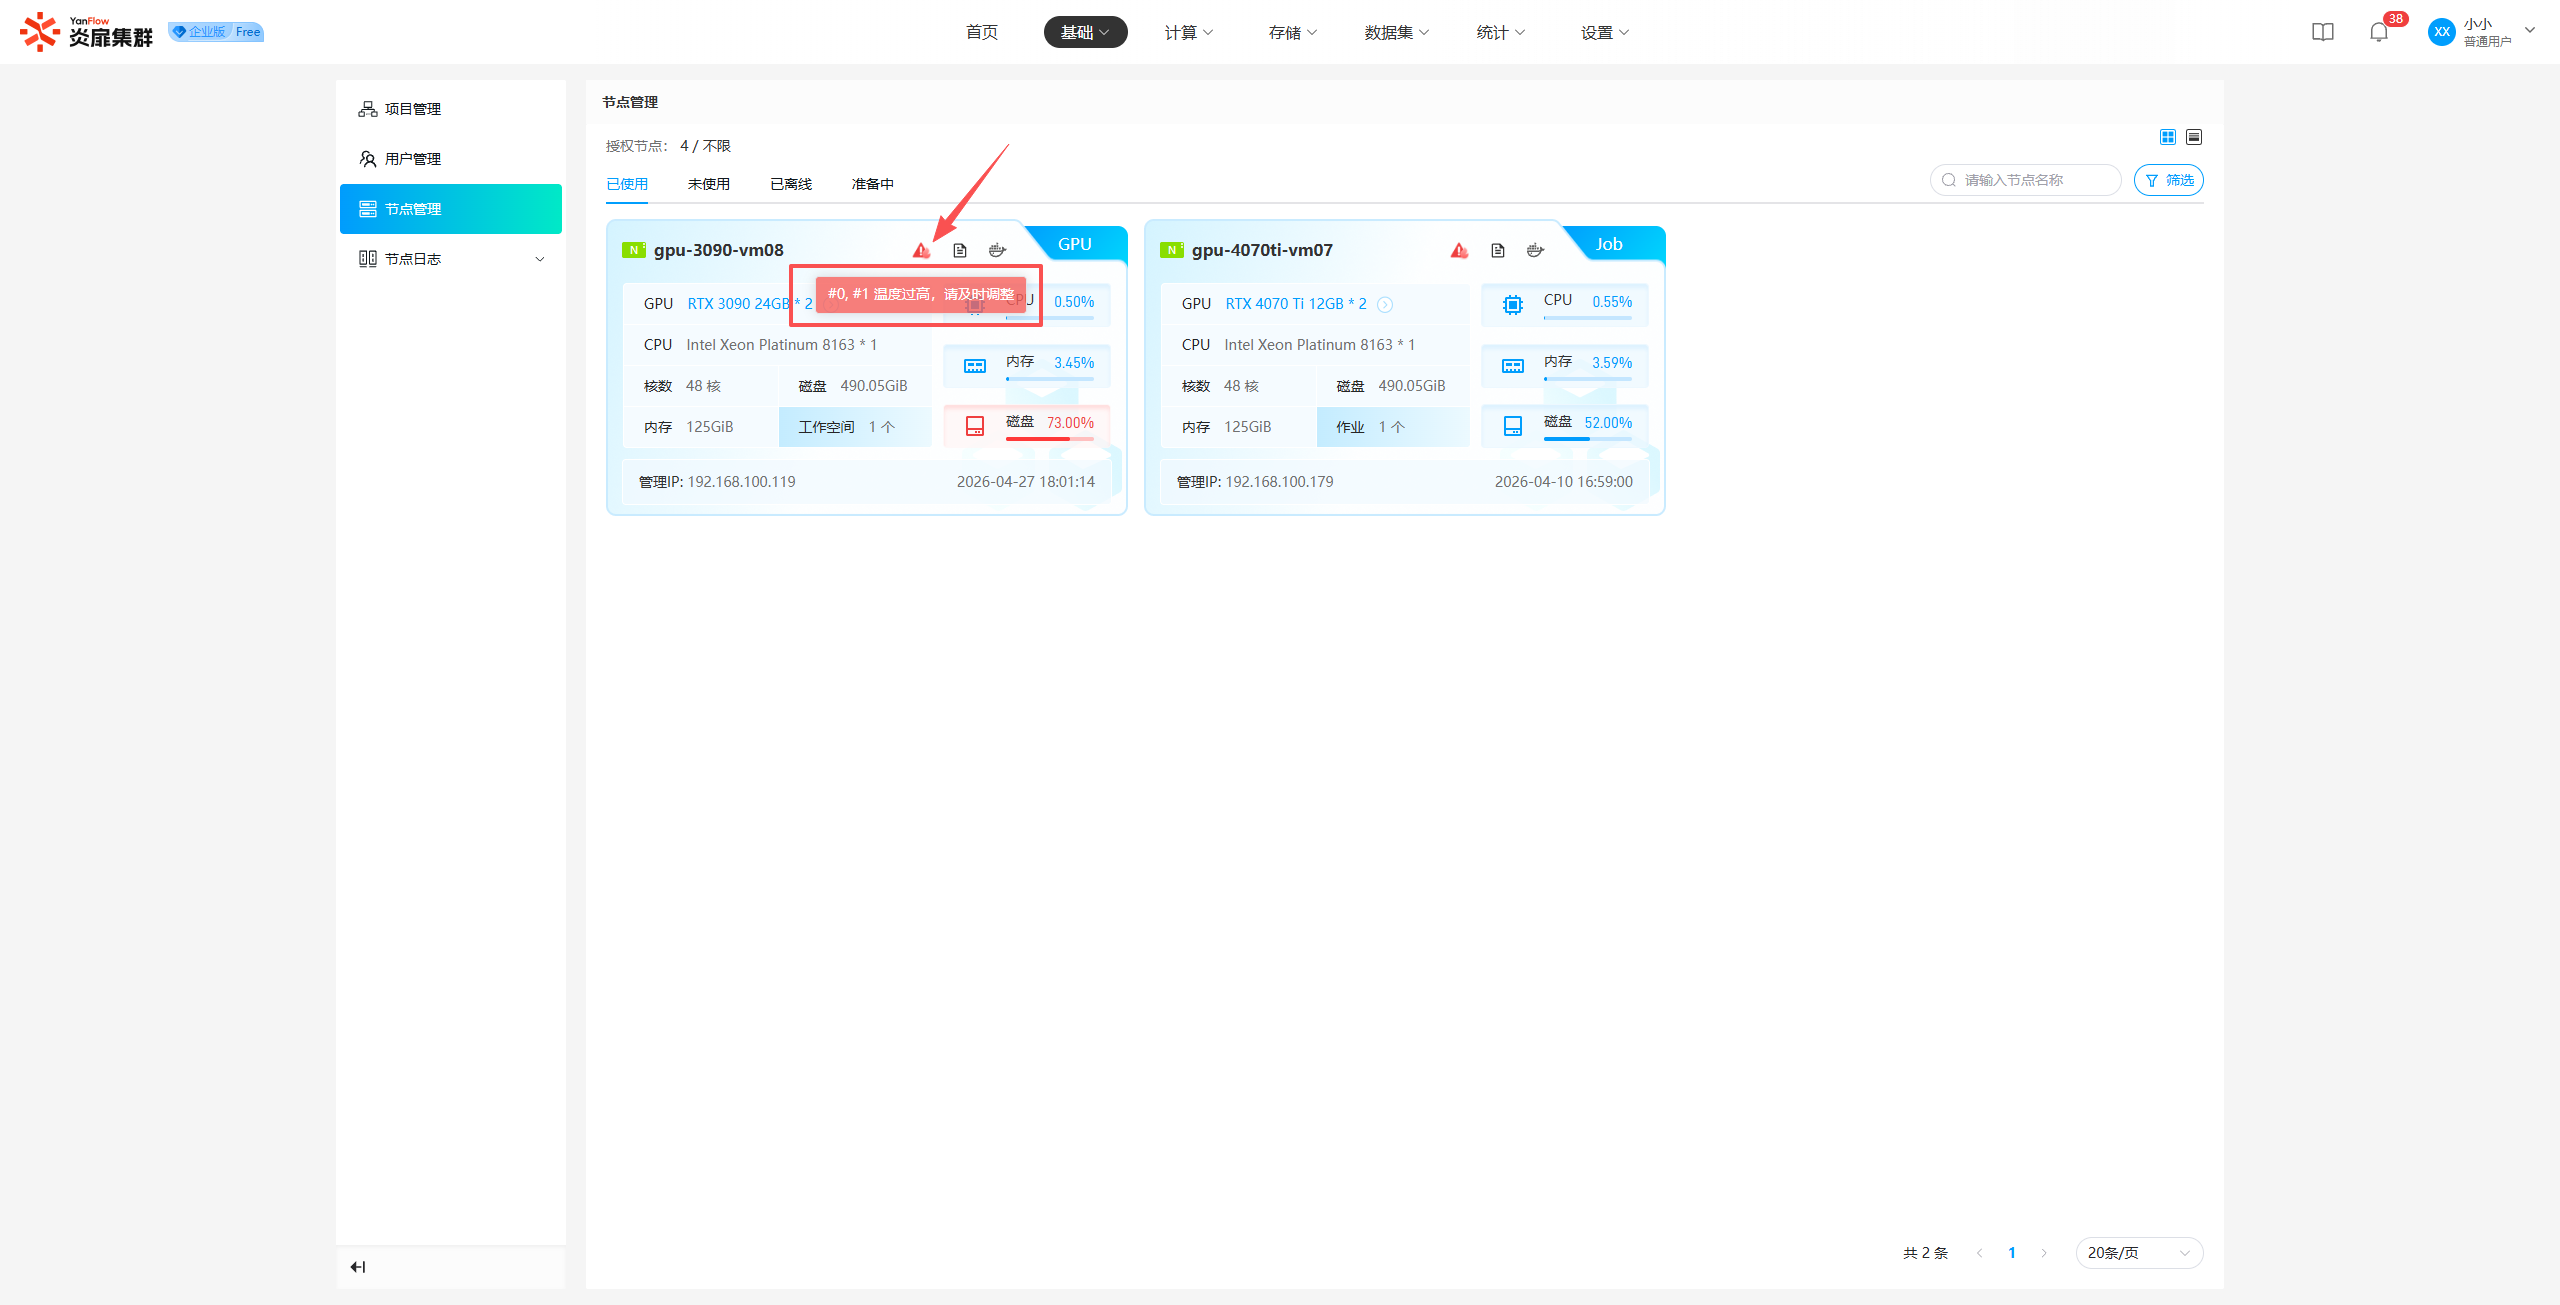
GPU Temperature Warning: If the GPU temperature exceeds the threshold, the node will display a warning icon in Card view. Hovering over the icon allows you to view the information of the overheated GPU slot.
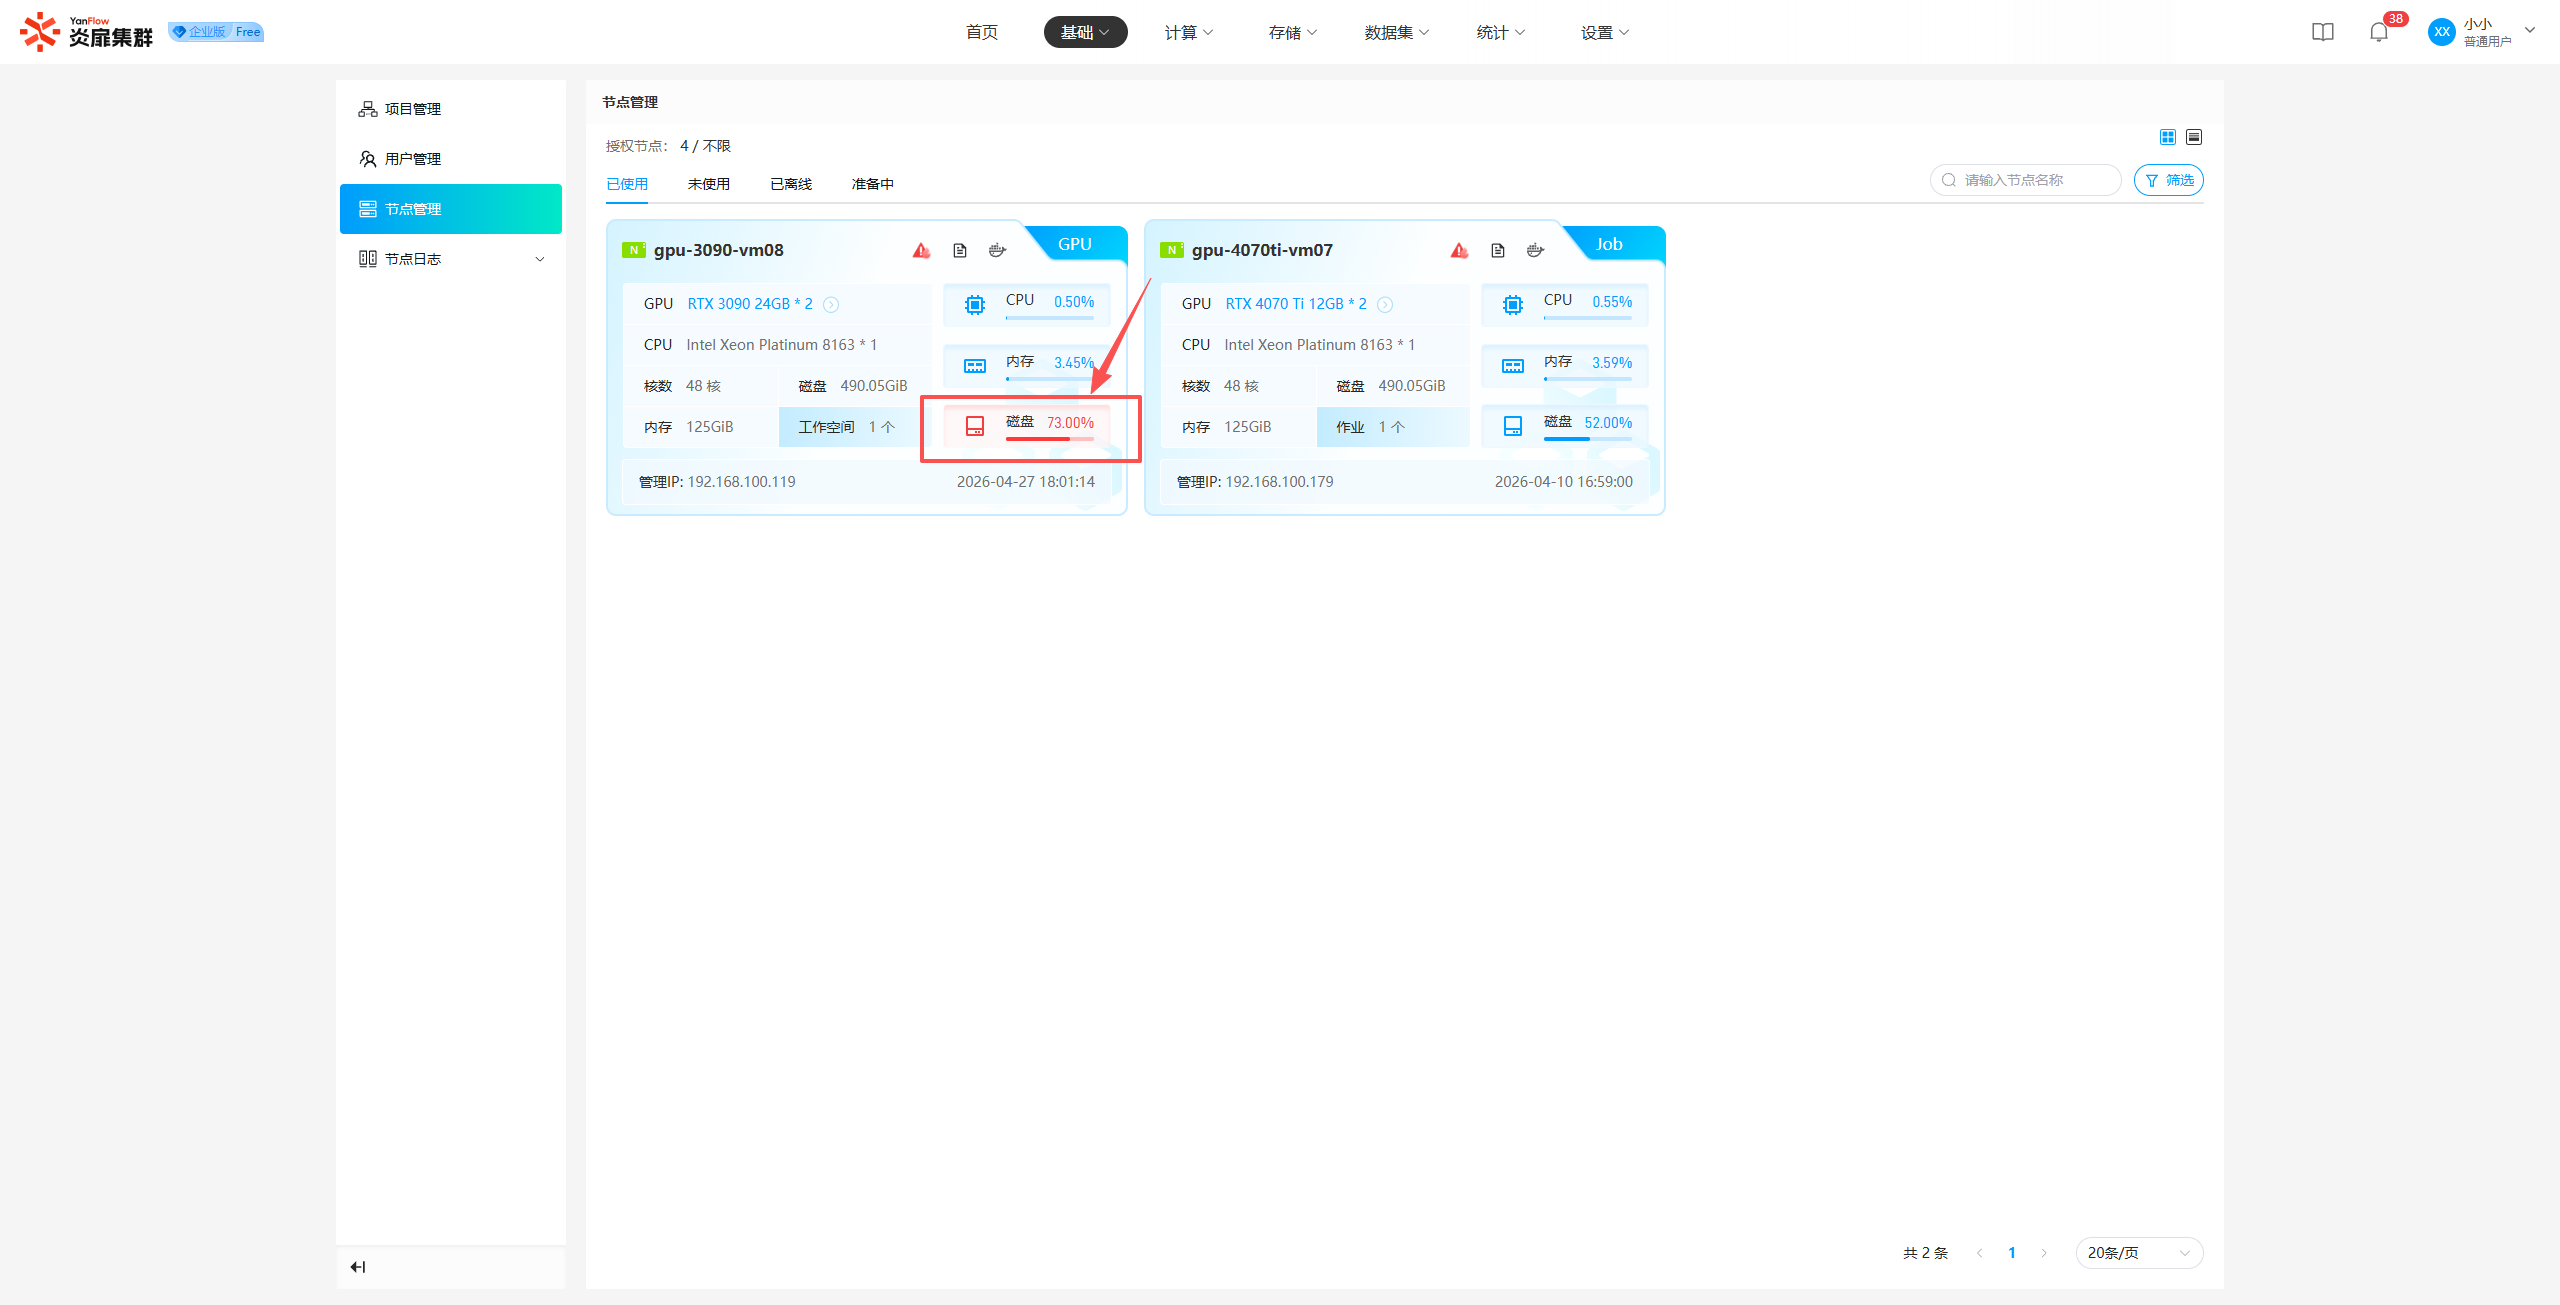
Disk Space Warning: If the node's disk space usage exceeds the threshold, the disk usage value will be highlighted in red in Card view.
Note:
- When a node is in use, the system automatically configures its mode, such as
GPU,vGPU,CPU,Job,LLM, orVirtual.- The warning thresholds for GPU temperature and disk space are set by the System Administrator in
Settings-System Configuration-Threshold Settings.
Node Details
Click Details to view detailed information about the node, including basic information, CPU/Memory/Disk usage, workspace information, GPU information, etc.
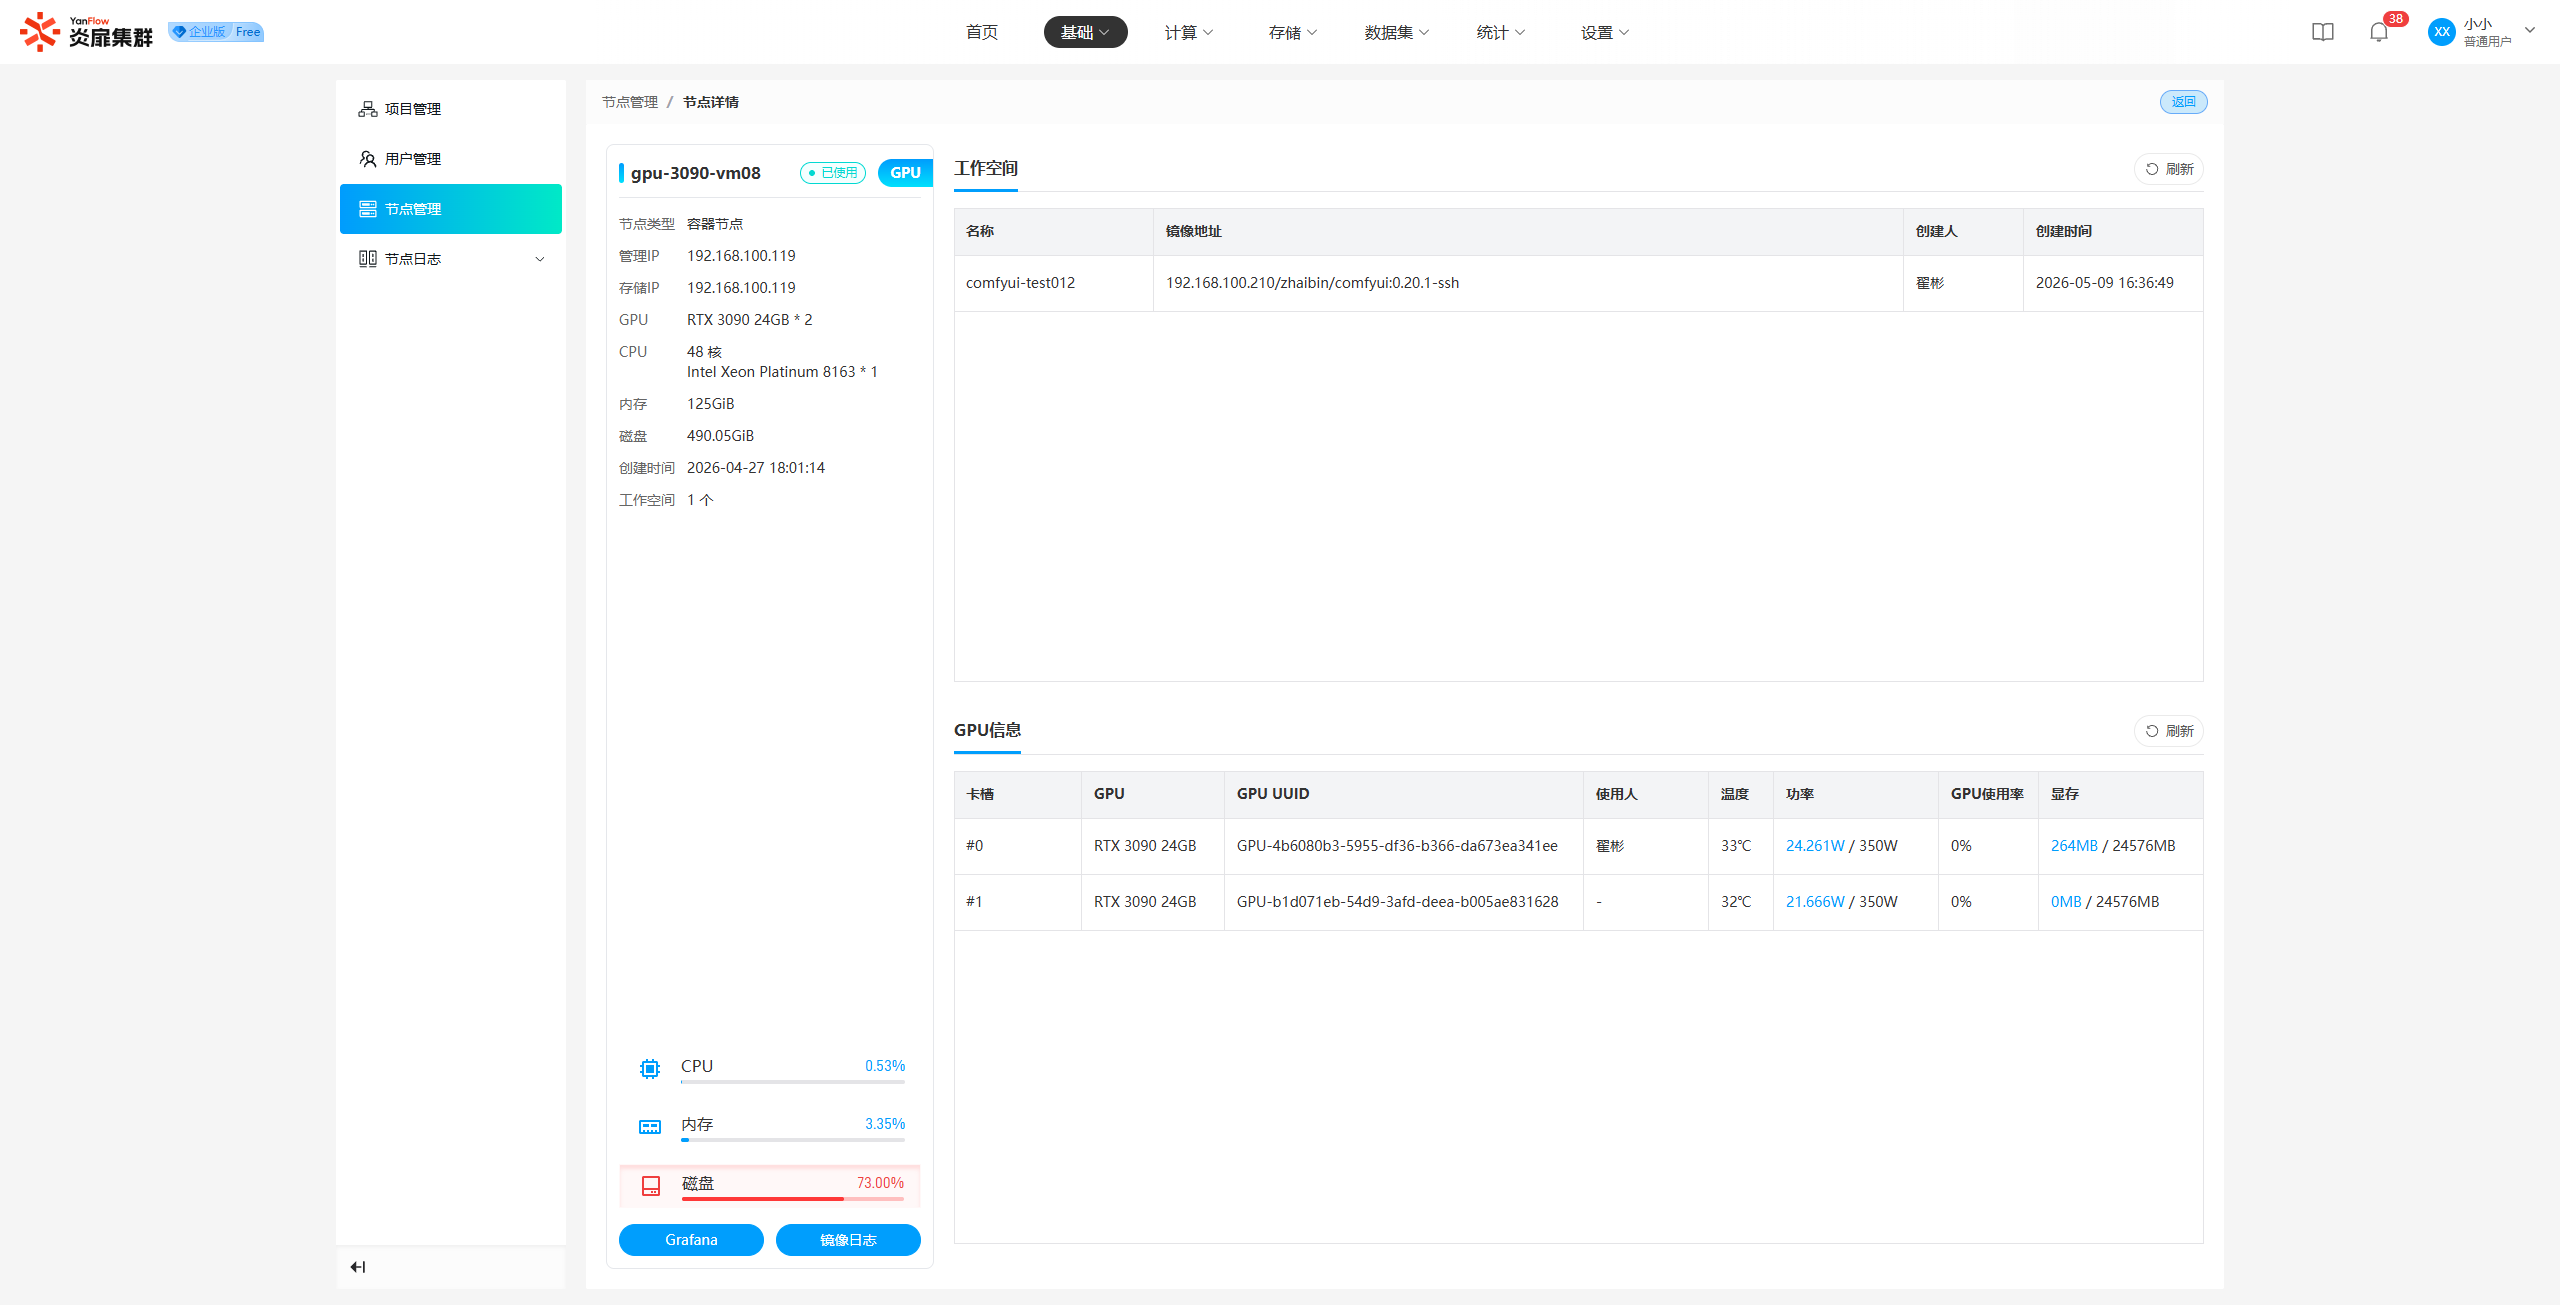
On the details page, click Grafana to display the Grafana monitoring dashboard. Click Image Logs to open the image log page for that node.
Node Images
Click Image to view all image information on that node. Support for keyword search via image address or Image ID is provided.
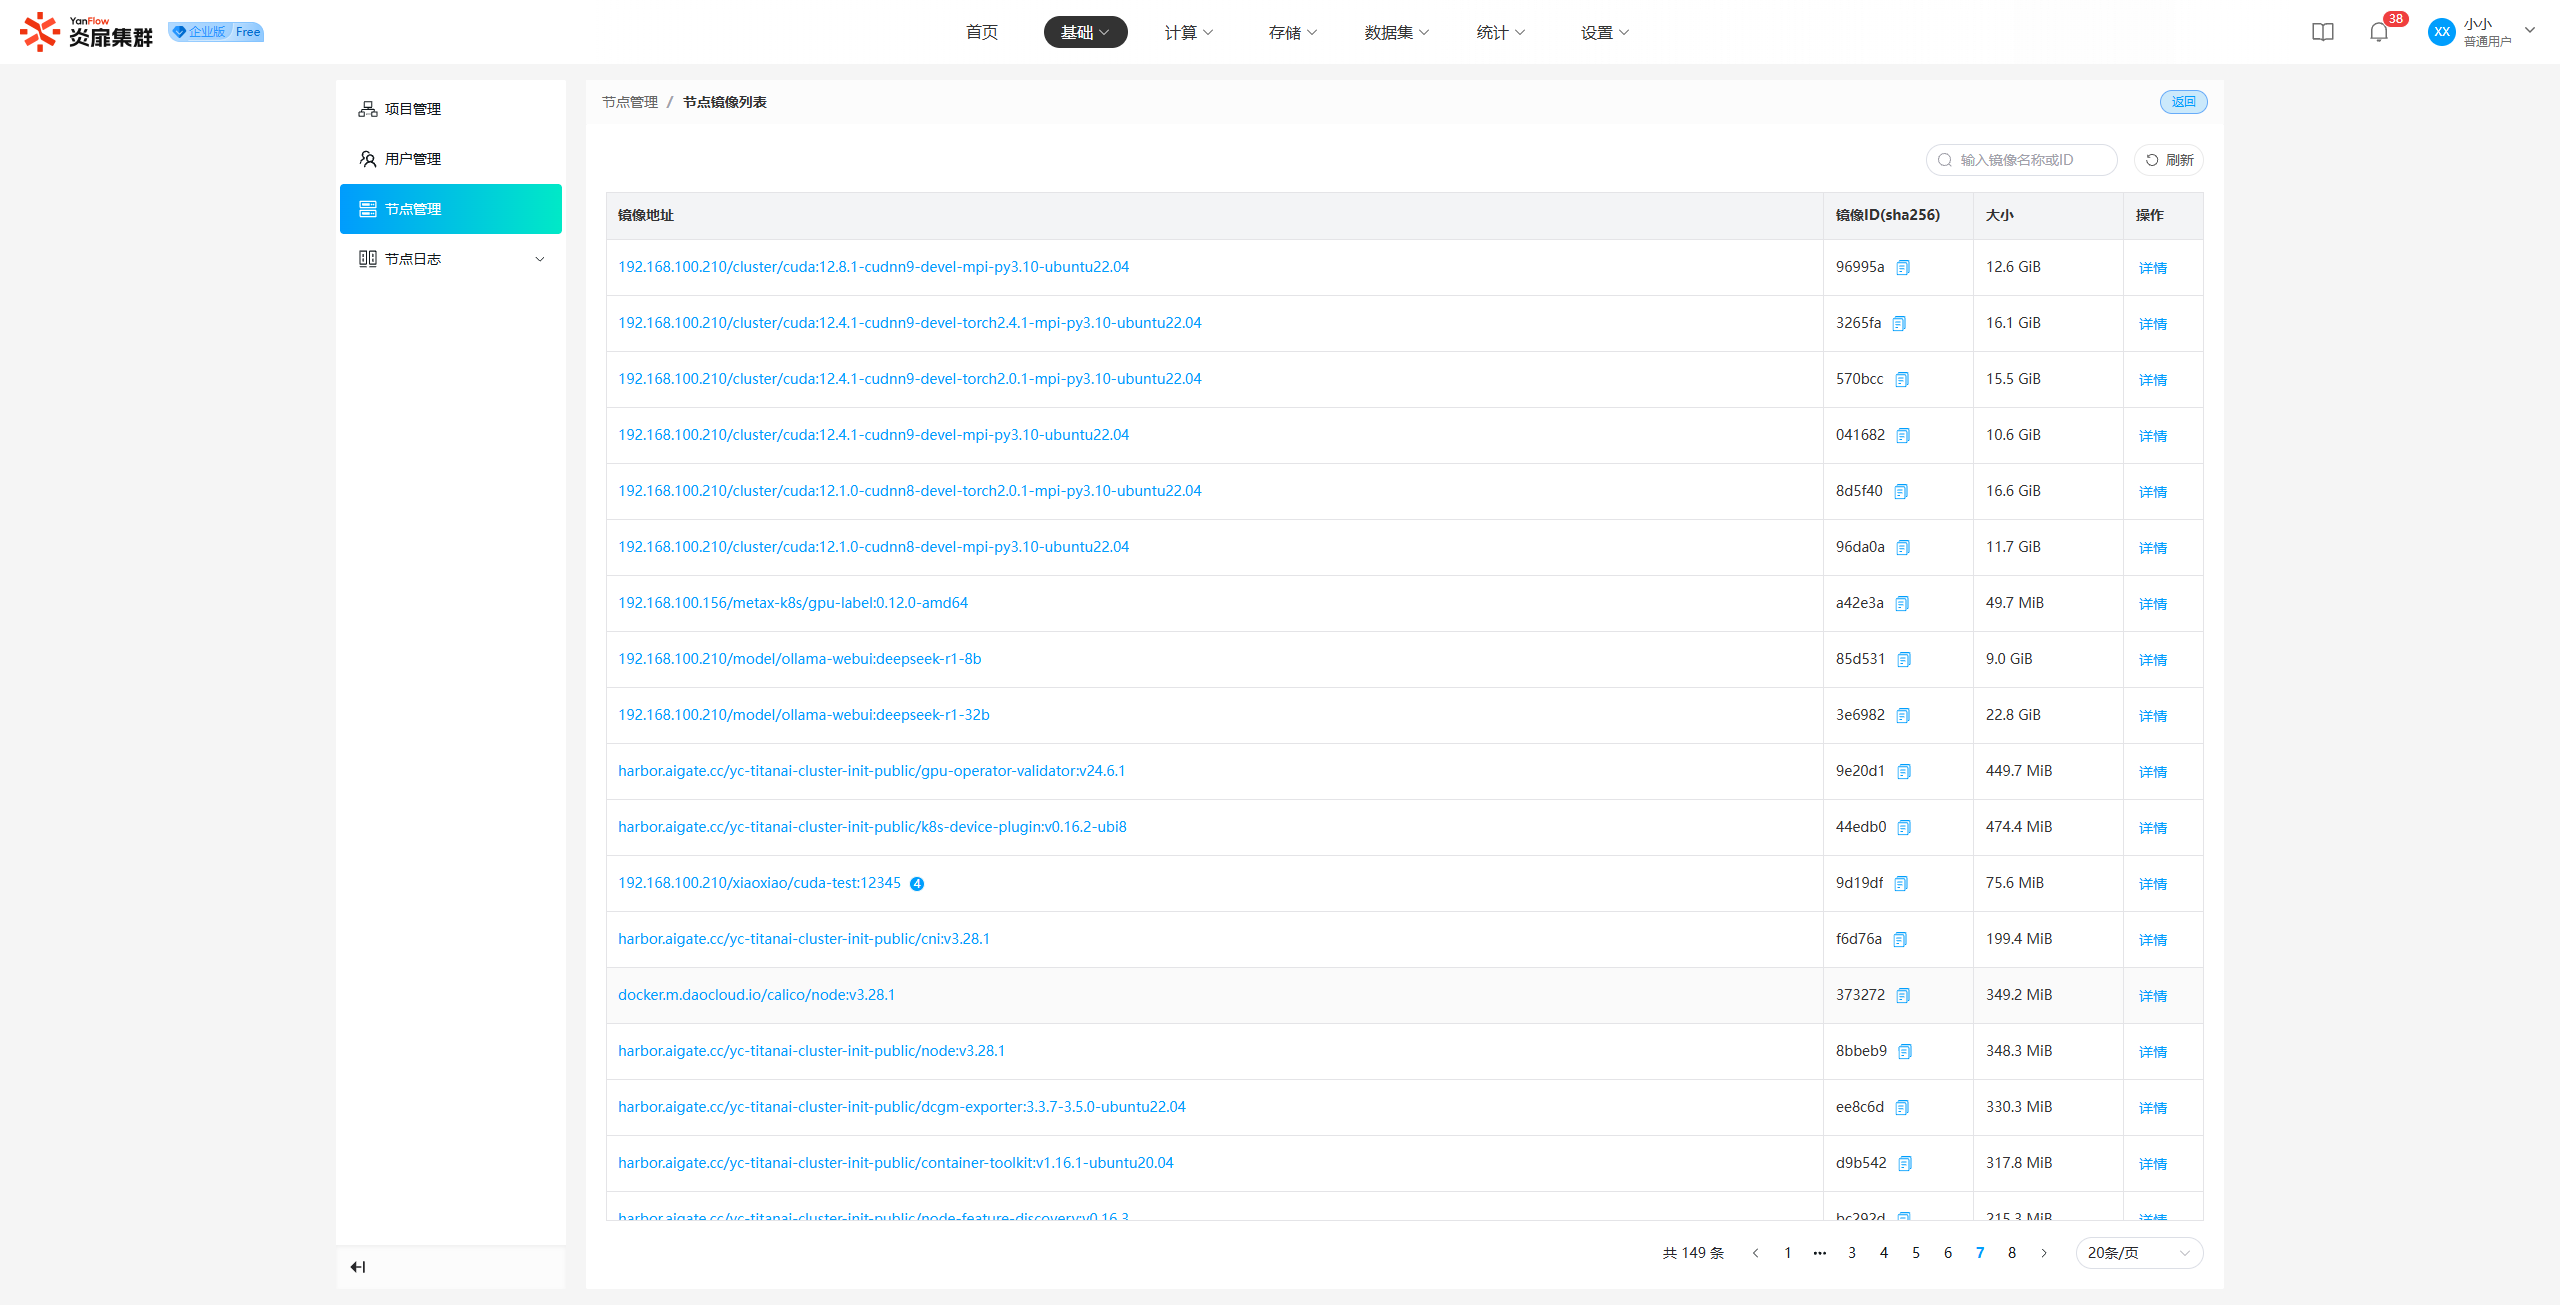
Copy Image ID: Click the Copy button next to the Image ID to copy the full Image ID.
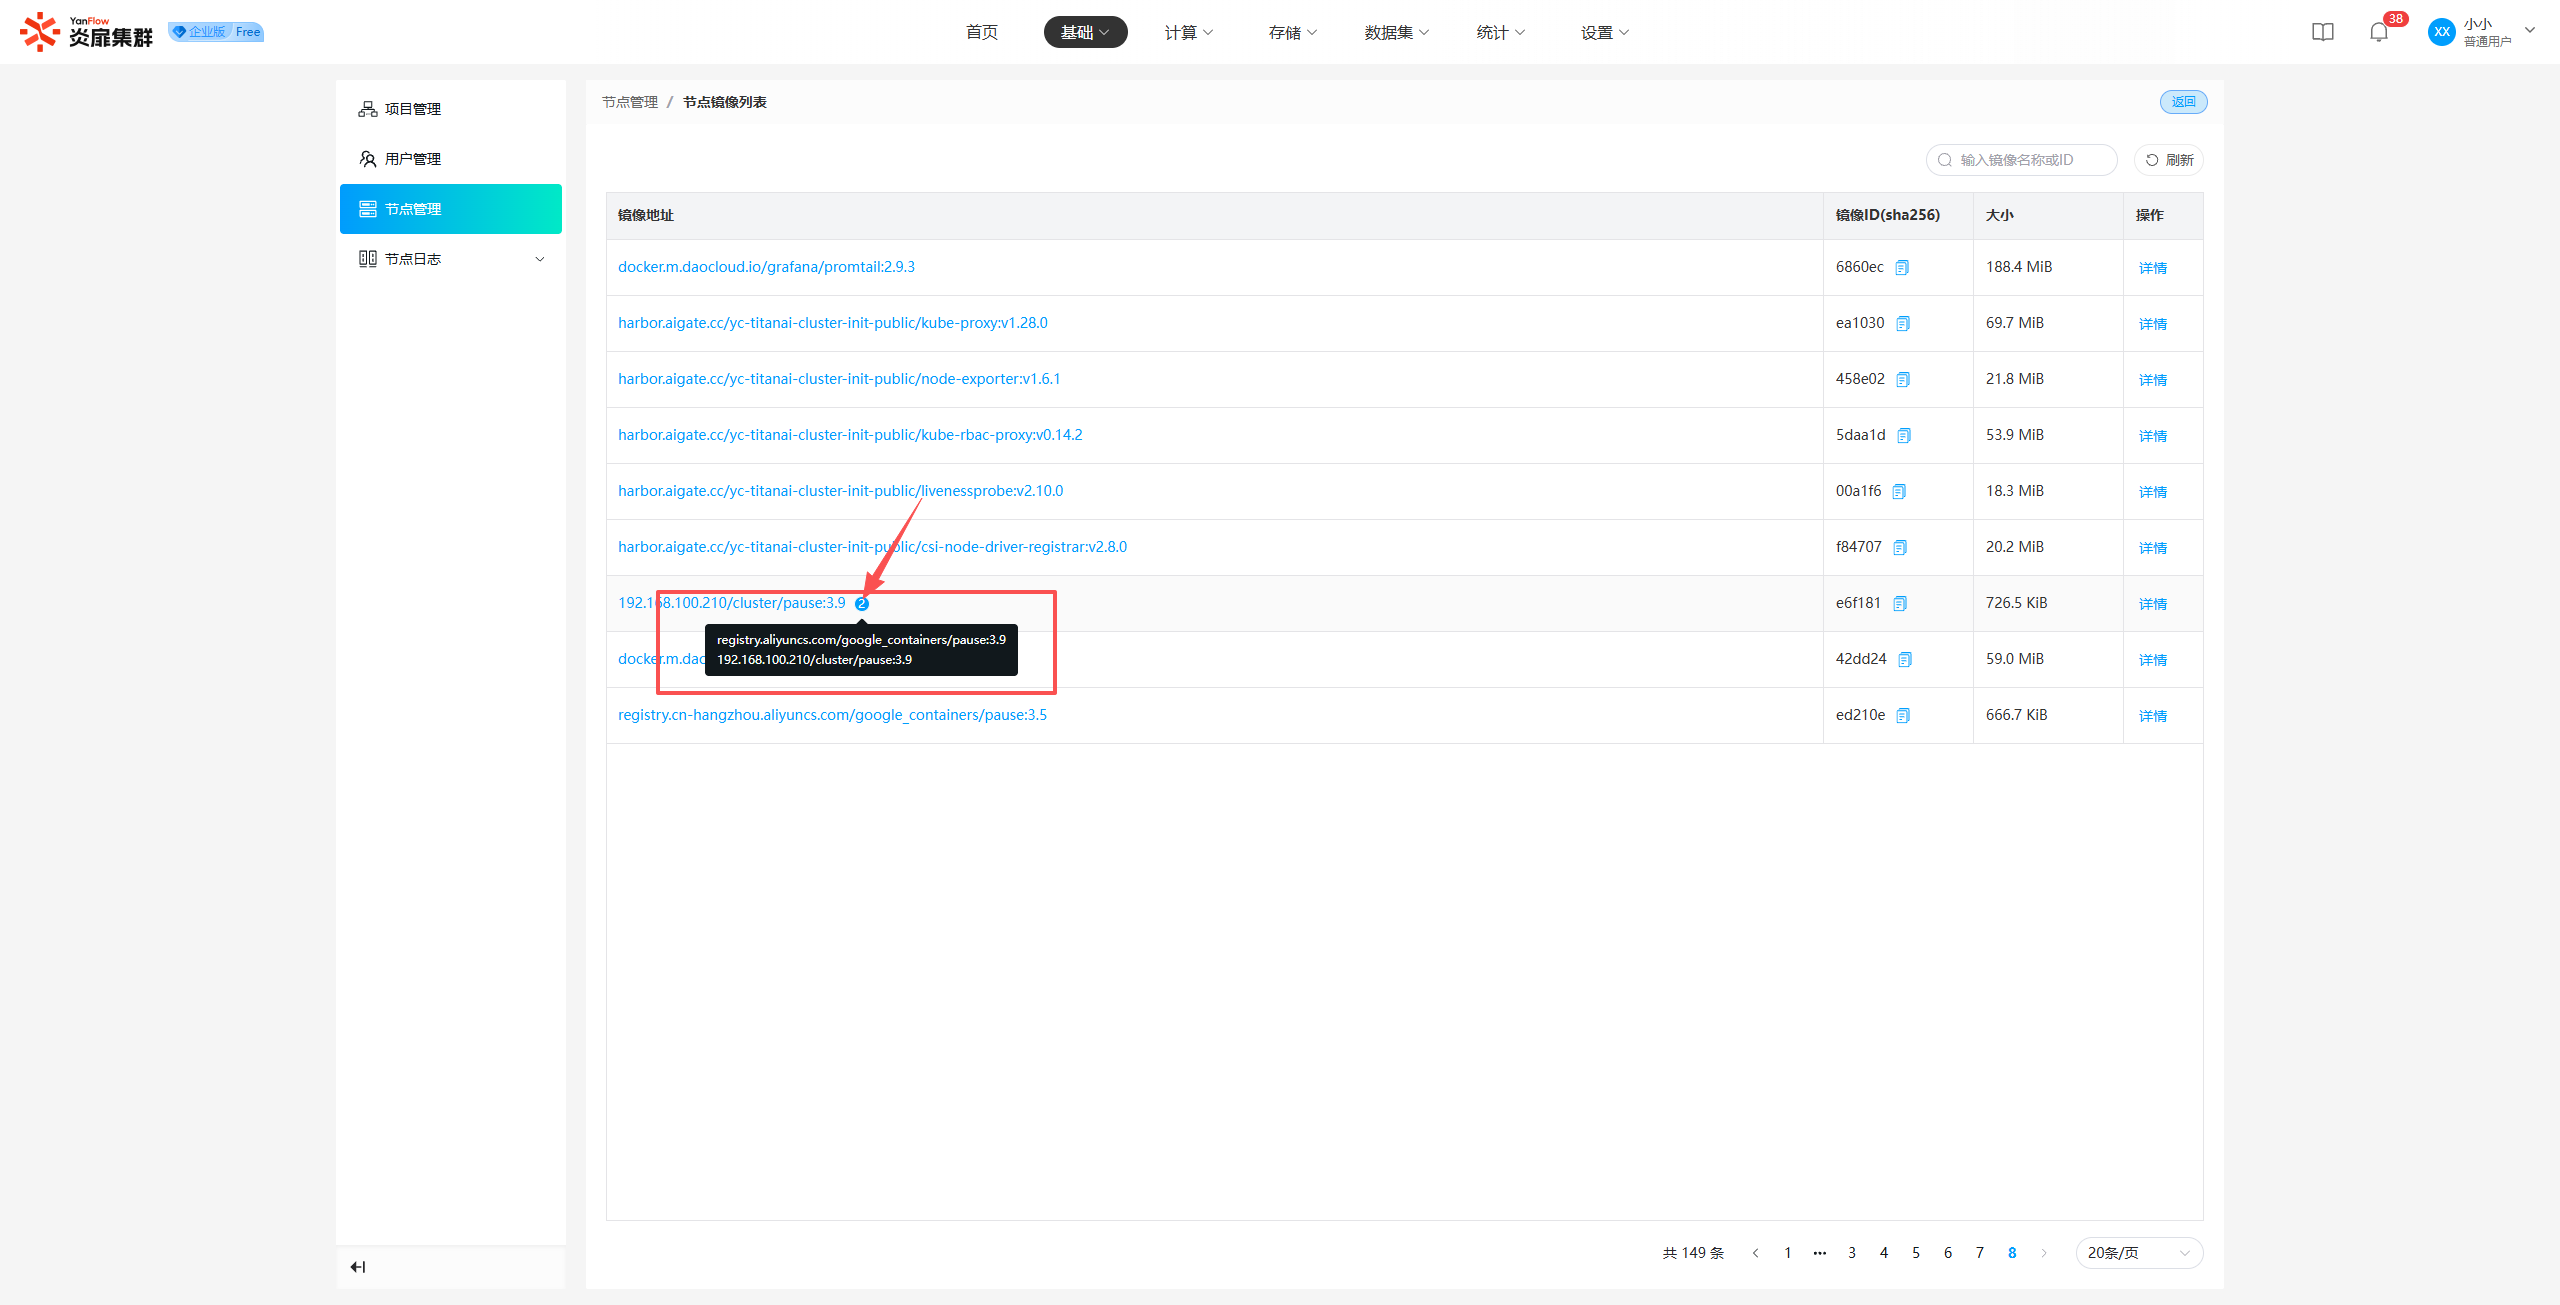
View Image Address: When more than one image address is associated, a numerical badge will be displayed. Hover over it to view all associated image addresses.
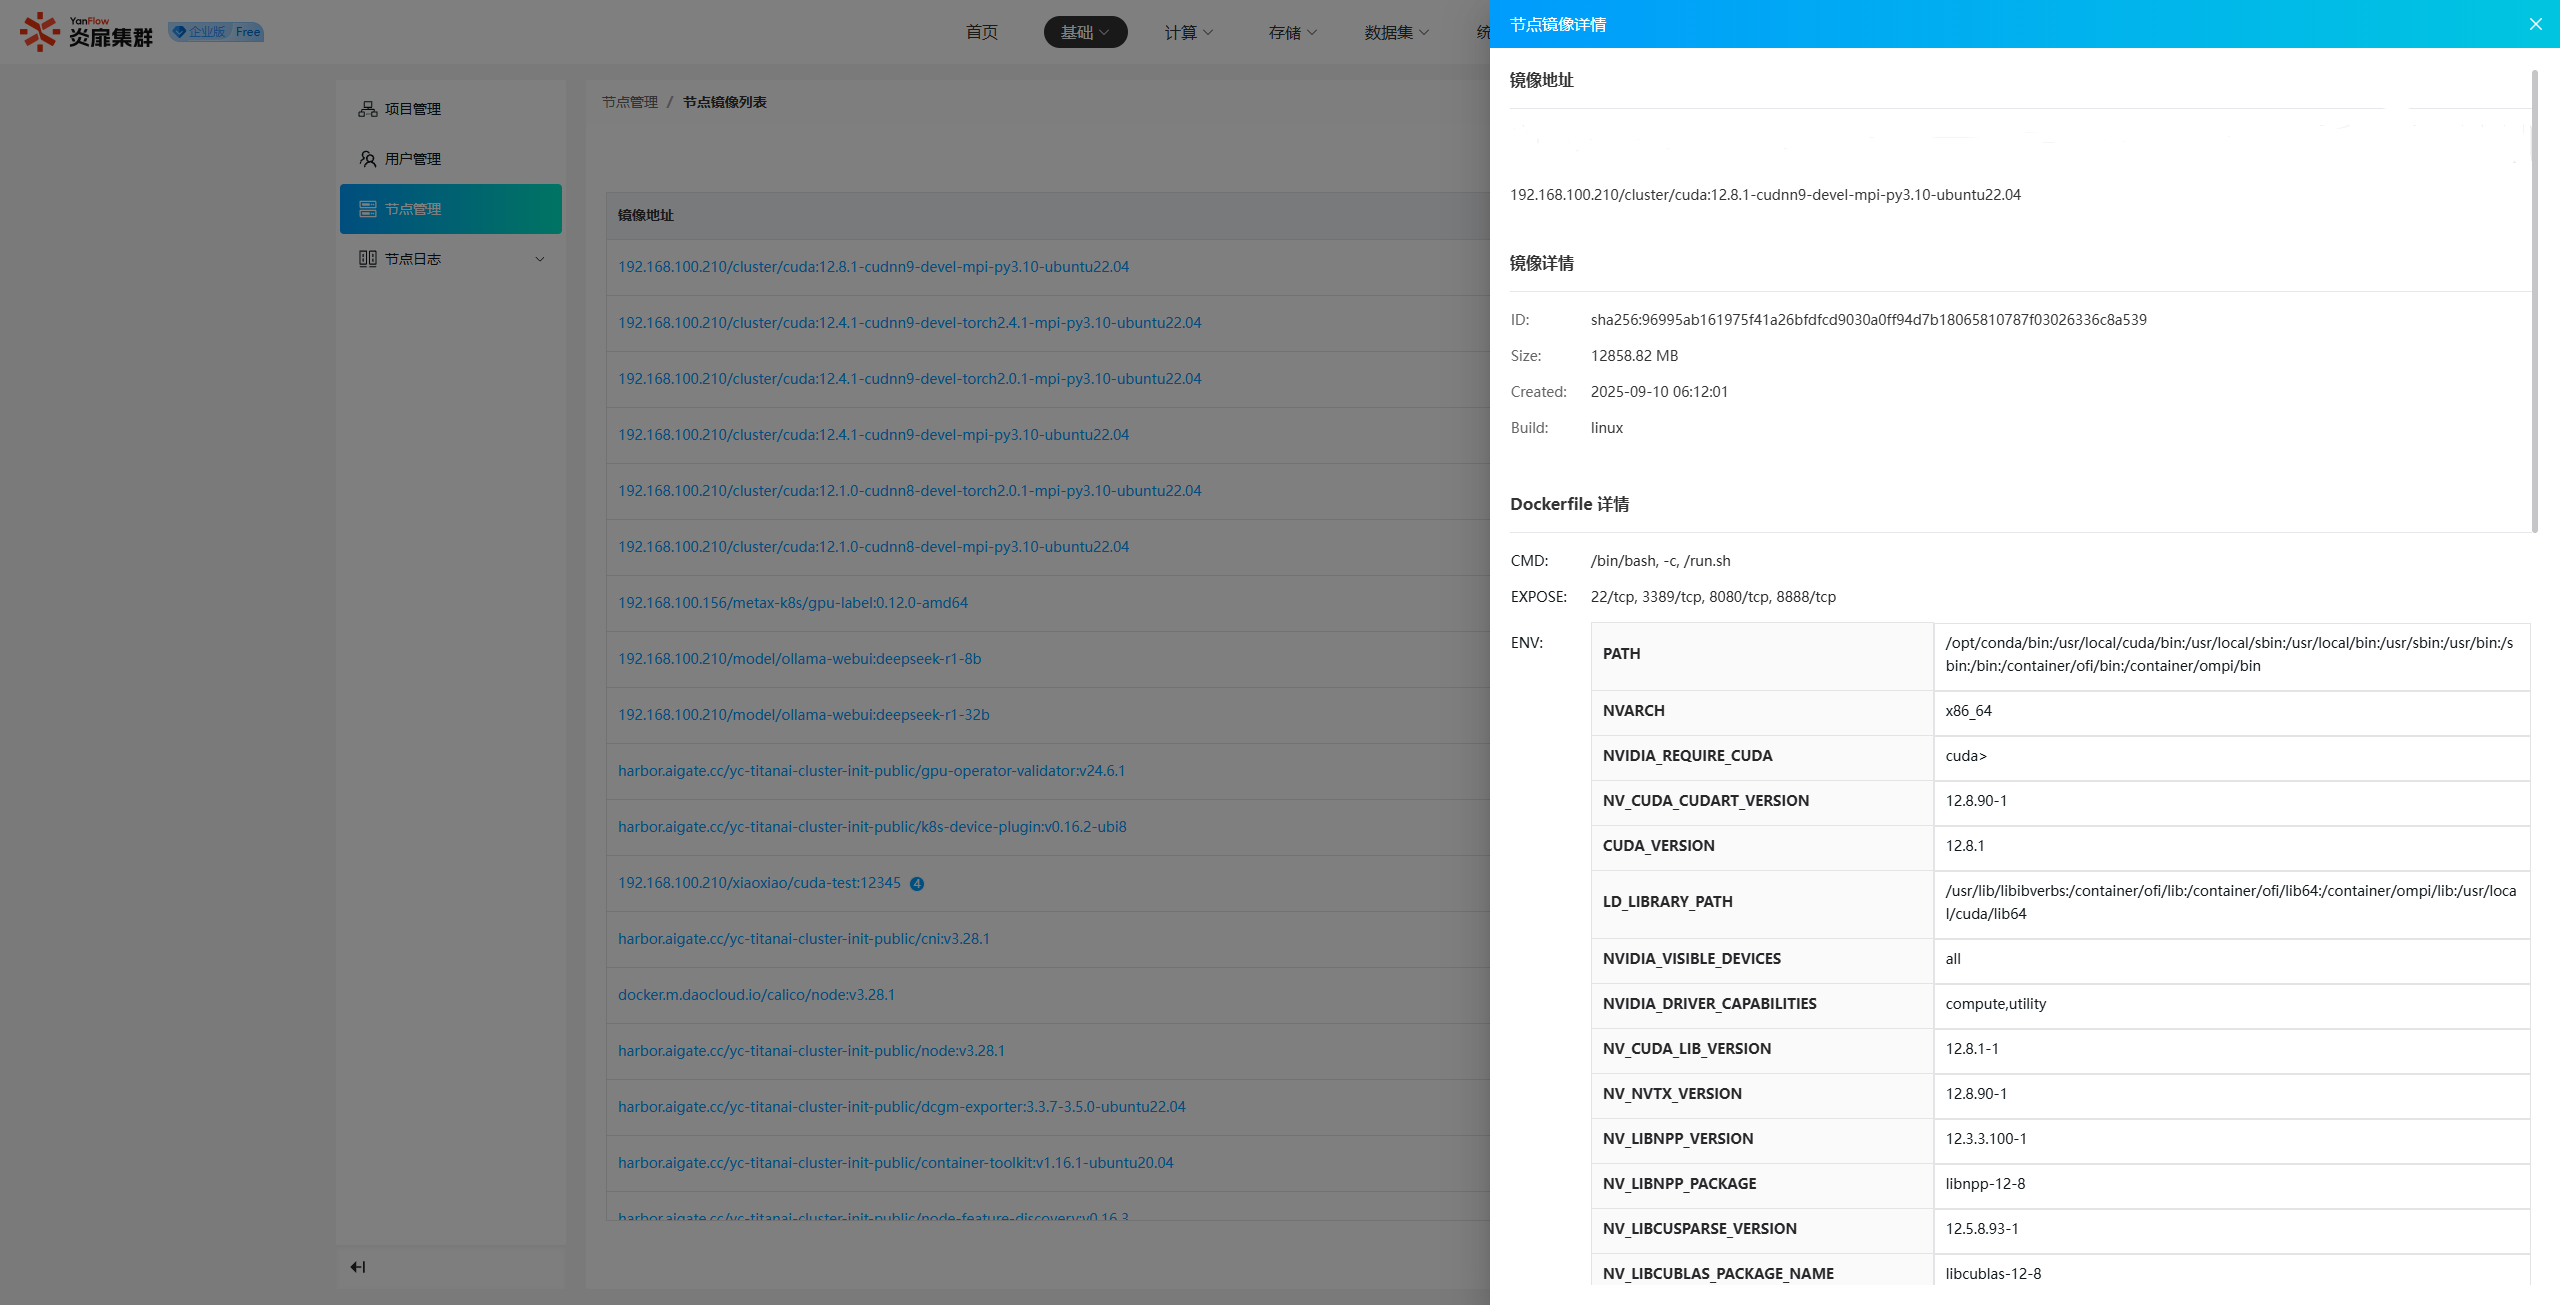
View Image Details: Click an Image Address to view image details, including the image address, image details, and Dockerfile details.
Node Logs
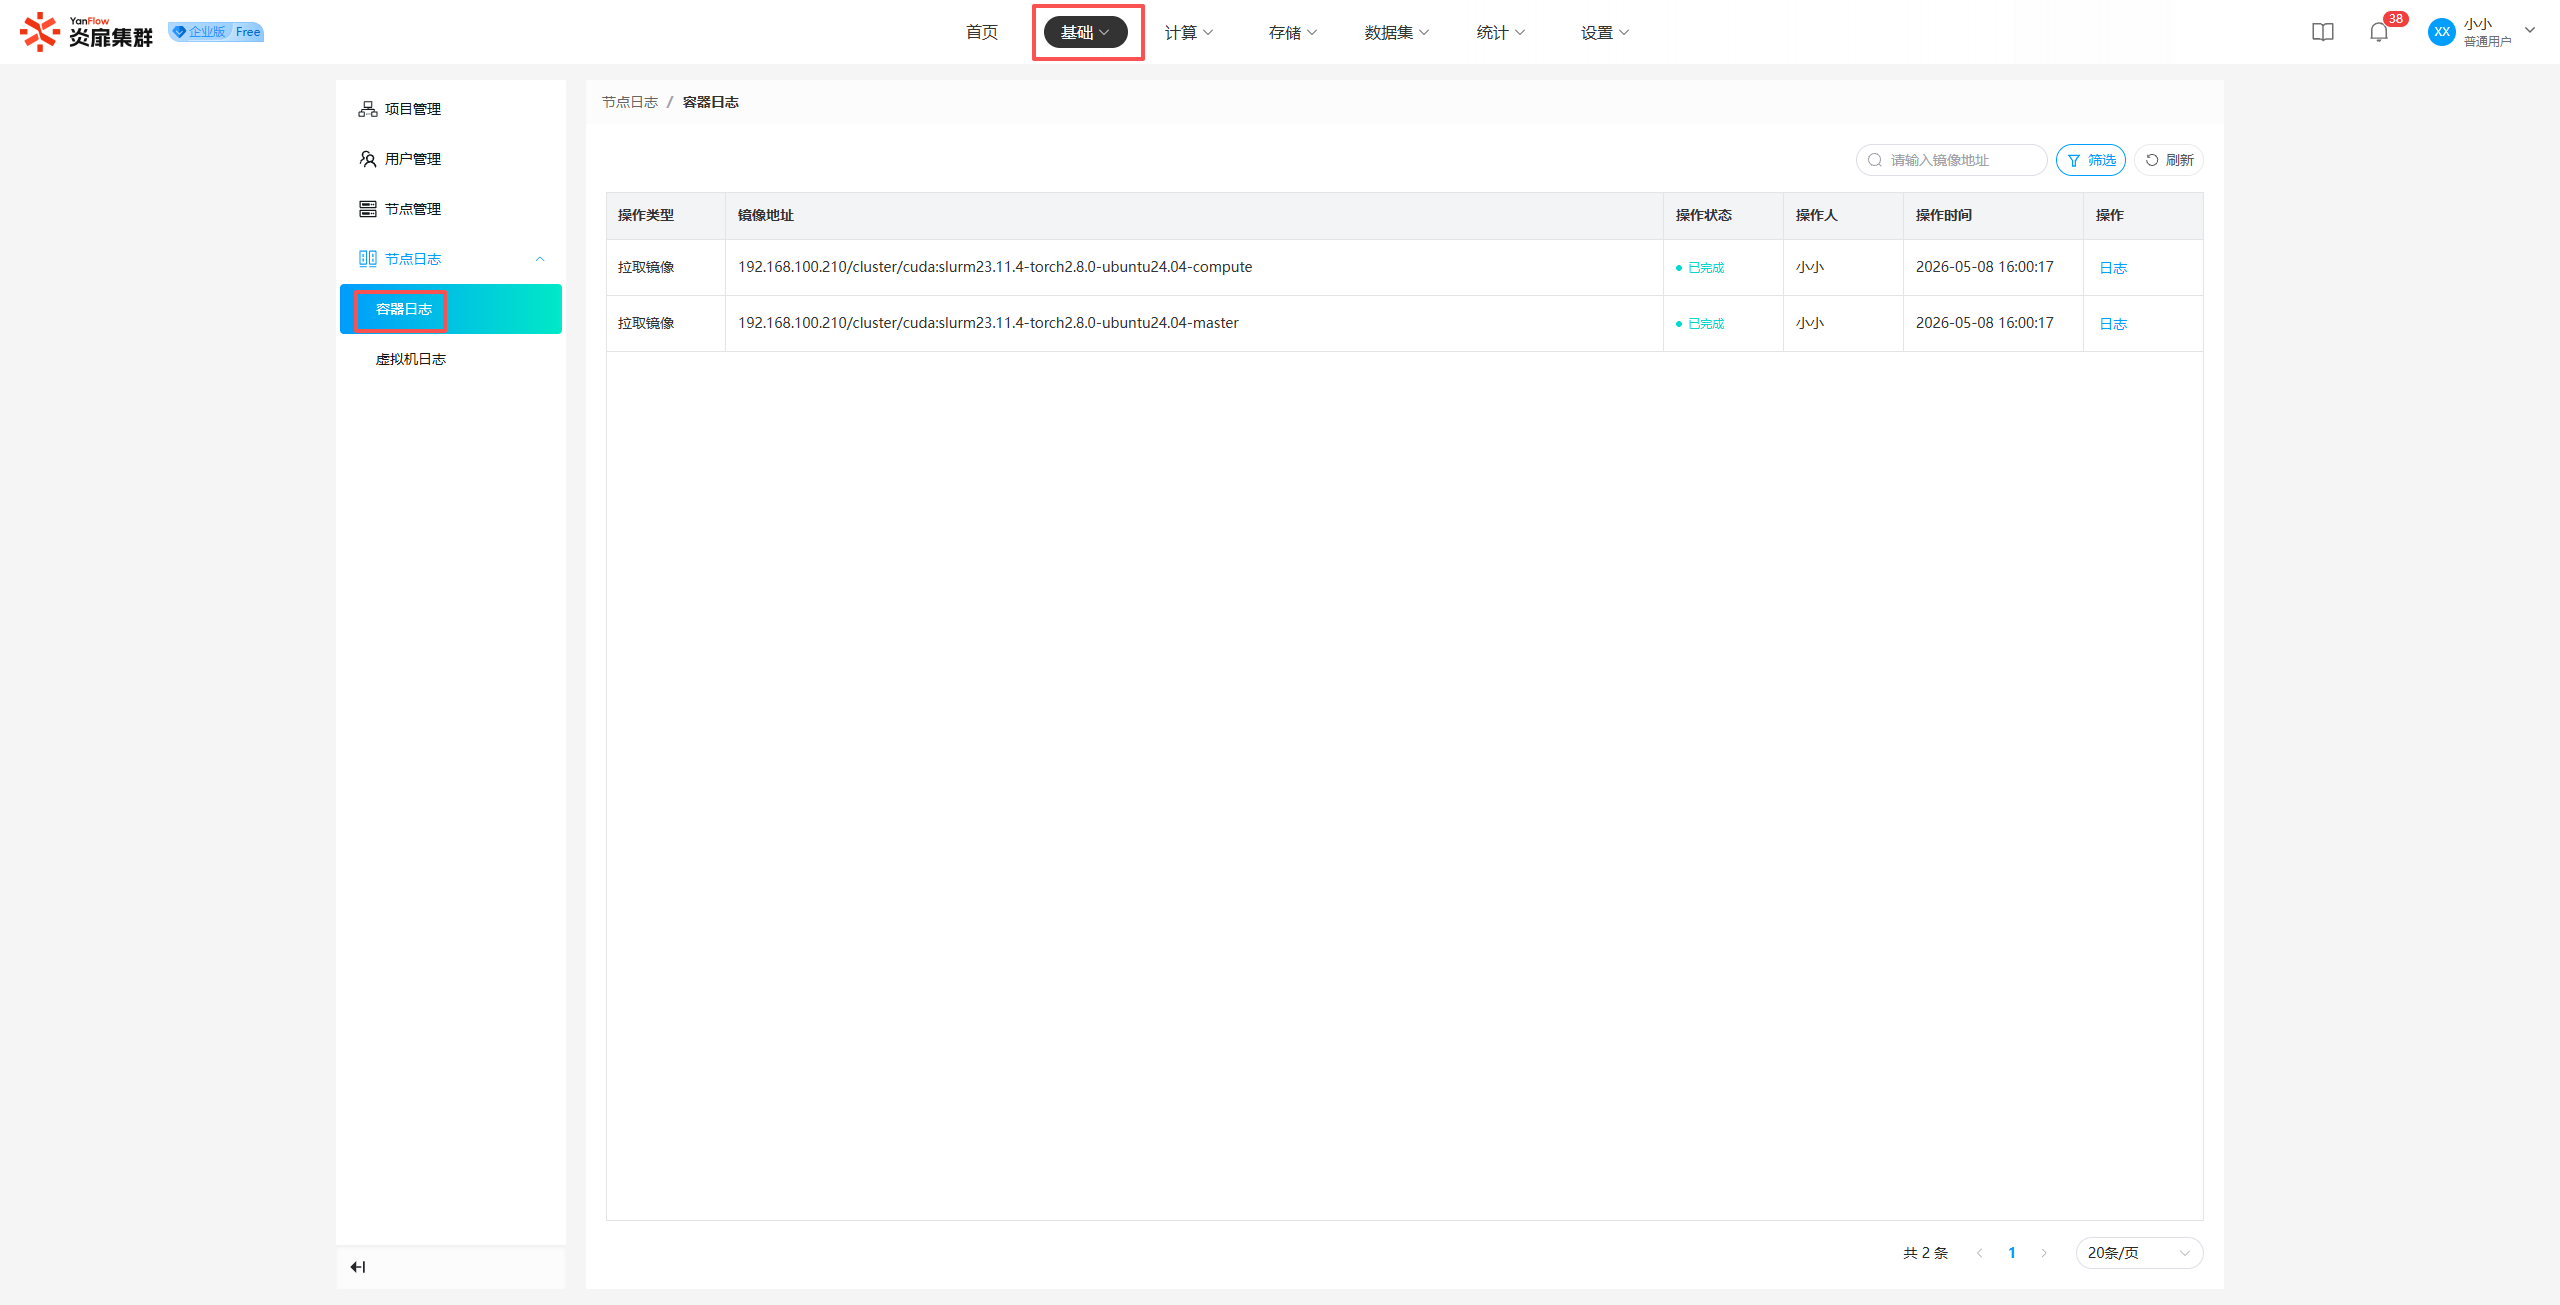
Container Logs
Displays the image operation logs for all container nodes. Support for keyword search via image address is provided, as well as filtered search by operation type, operation status, operation time, etc. Click Logs to view detailed log content.
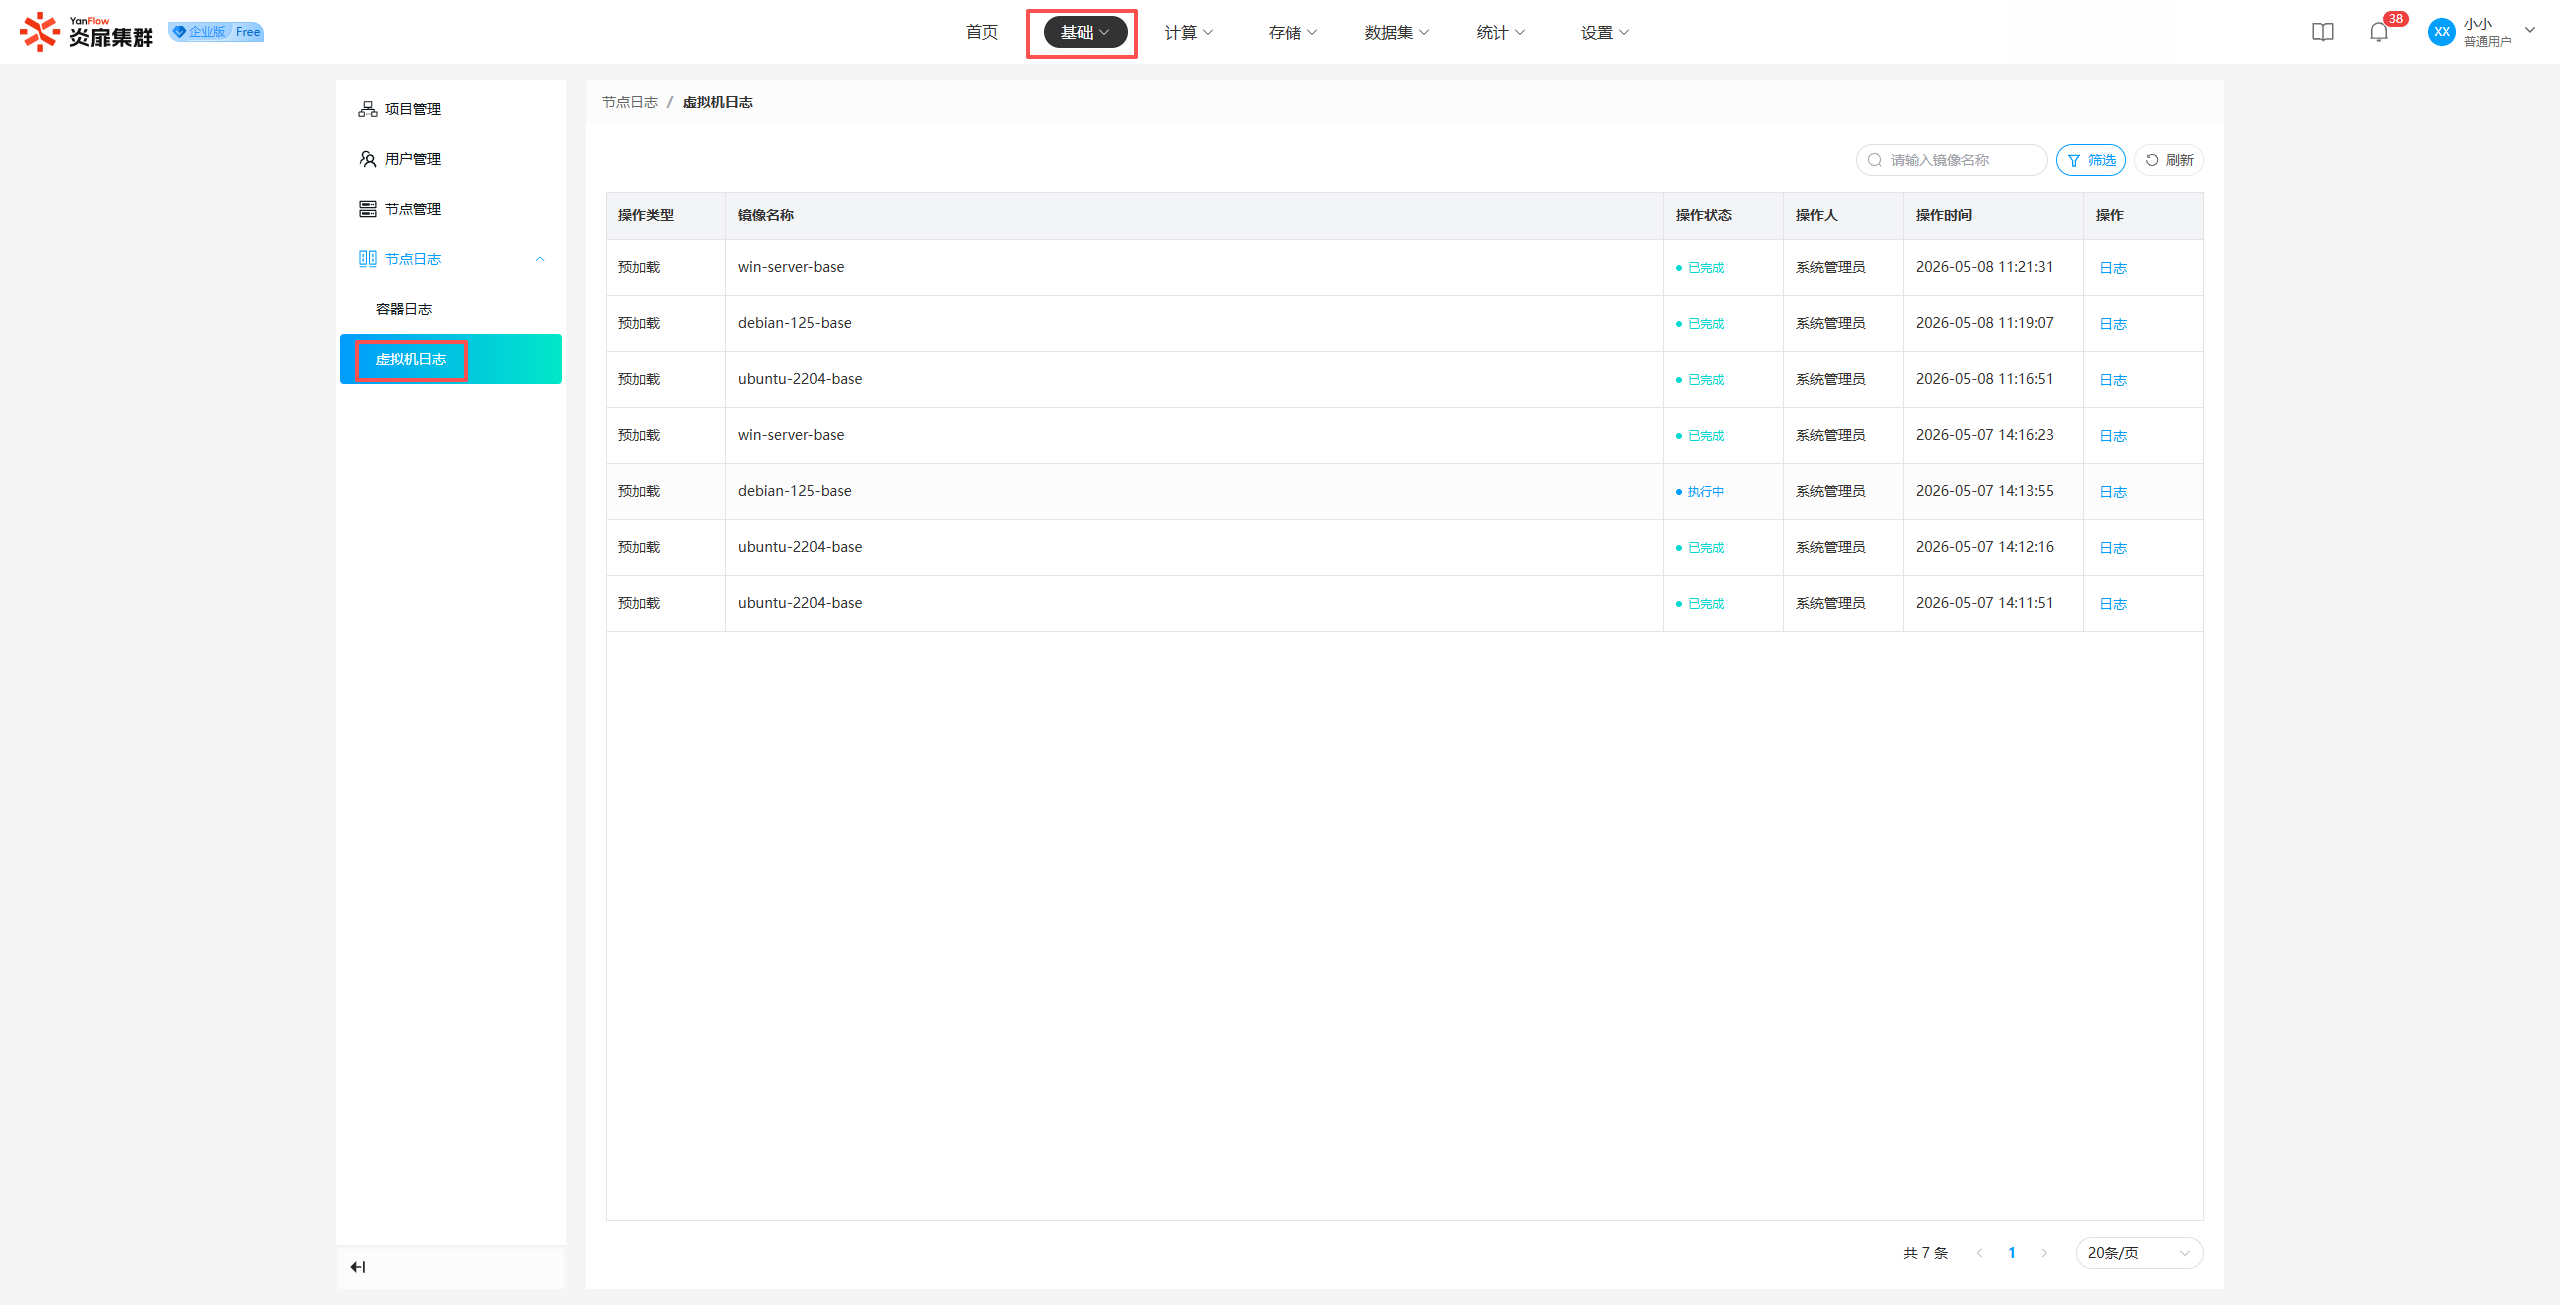
Virtual Machine Logs
Displays the image operation logs for all virtual machine nodes. Support for keyword search via image name is provided, as well as filtered search by operation status, operation time, etc. Click Logs to view detailed log content.
Computing
Workspace
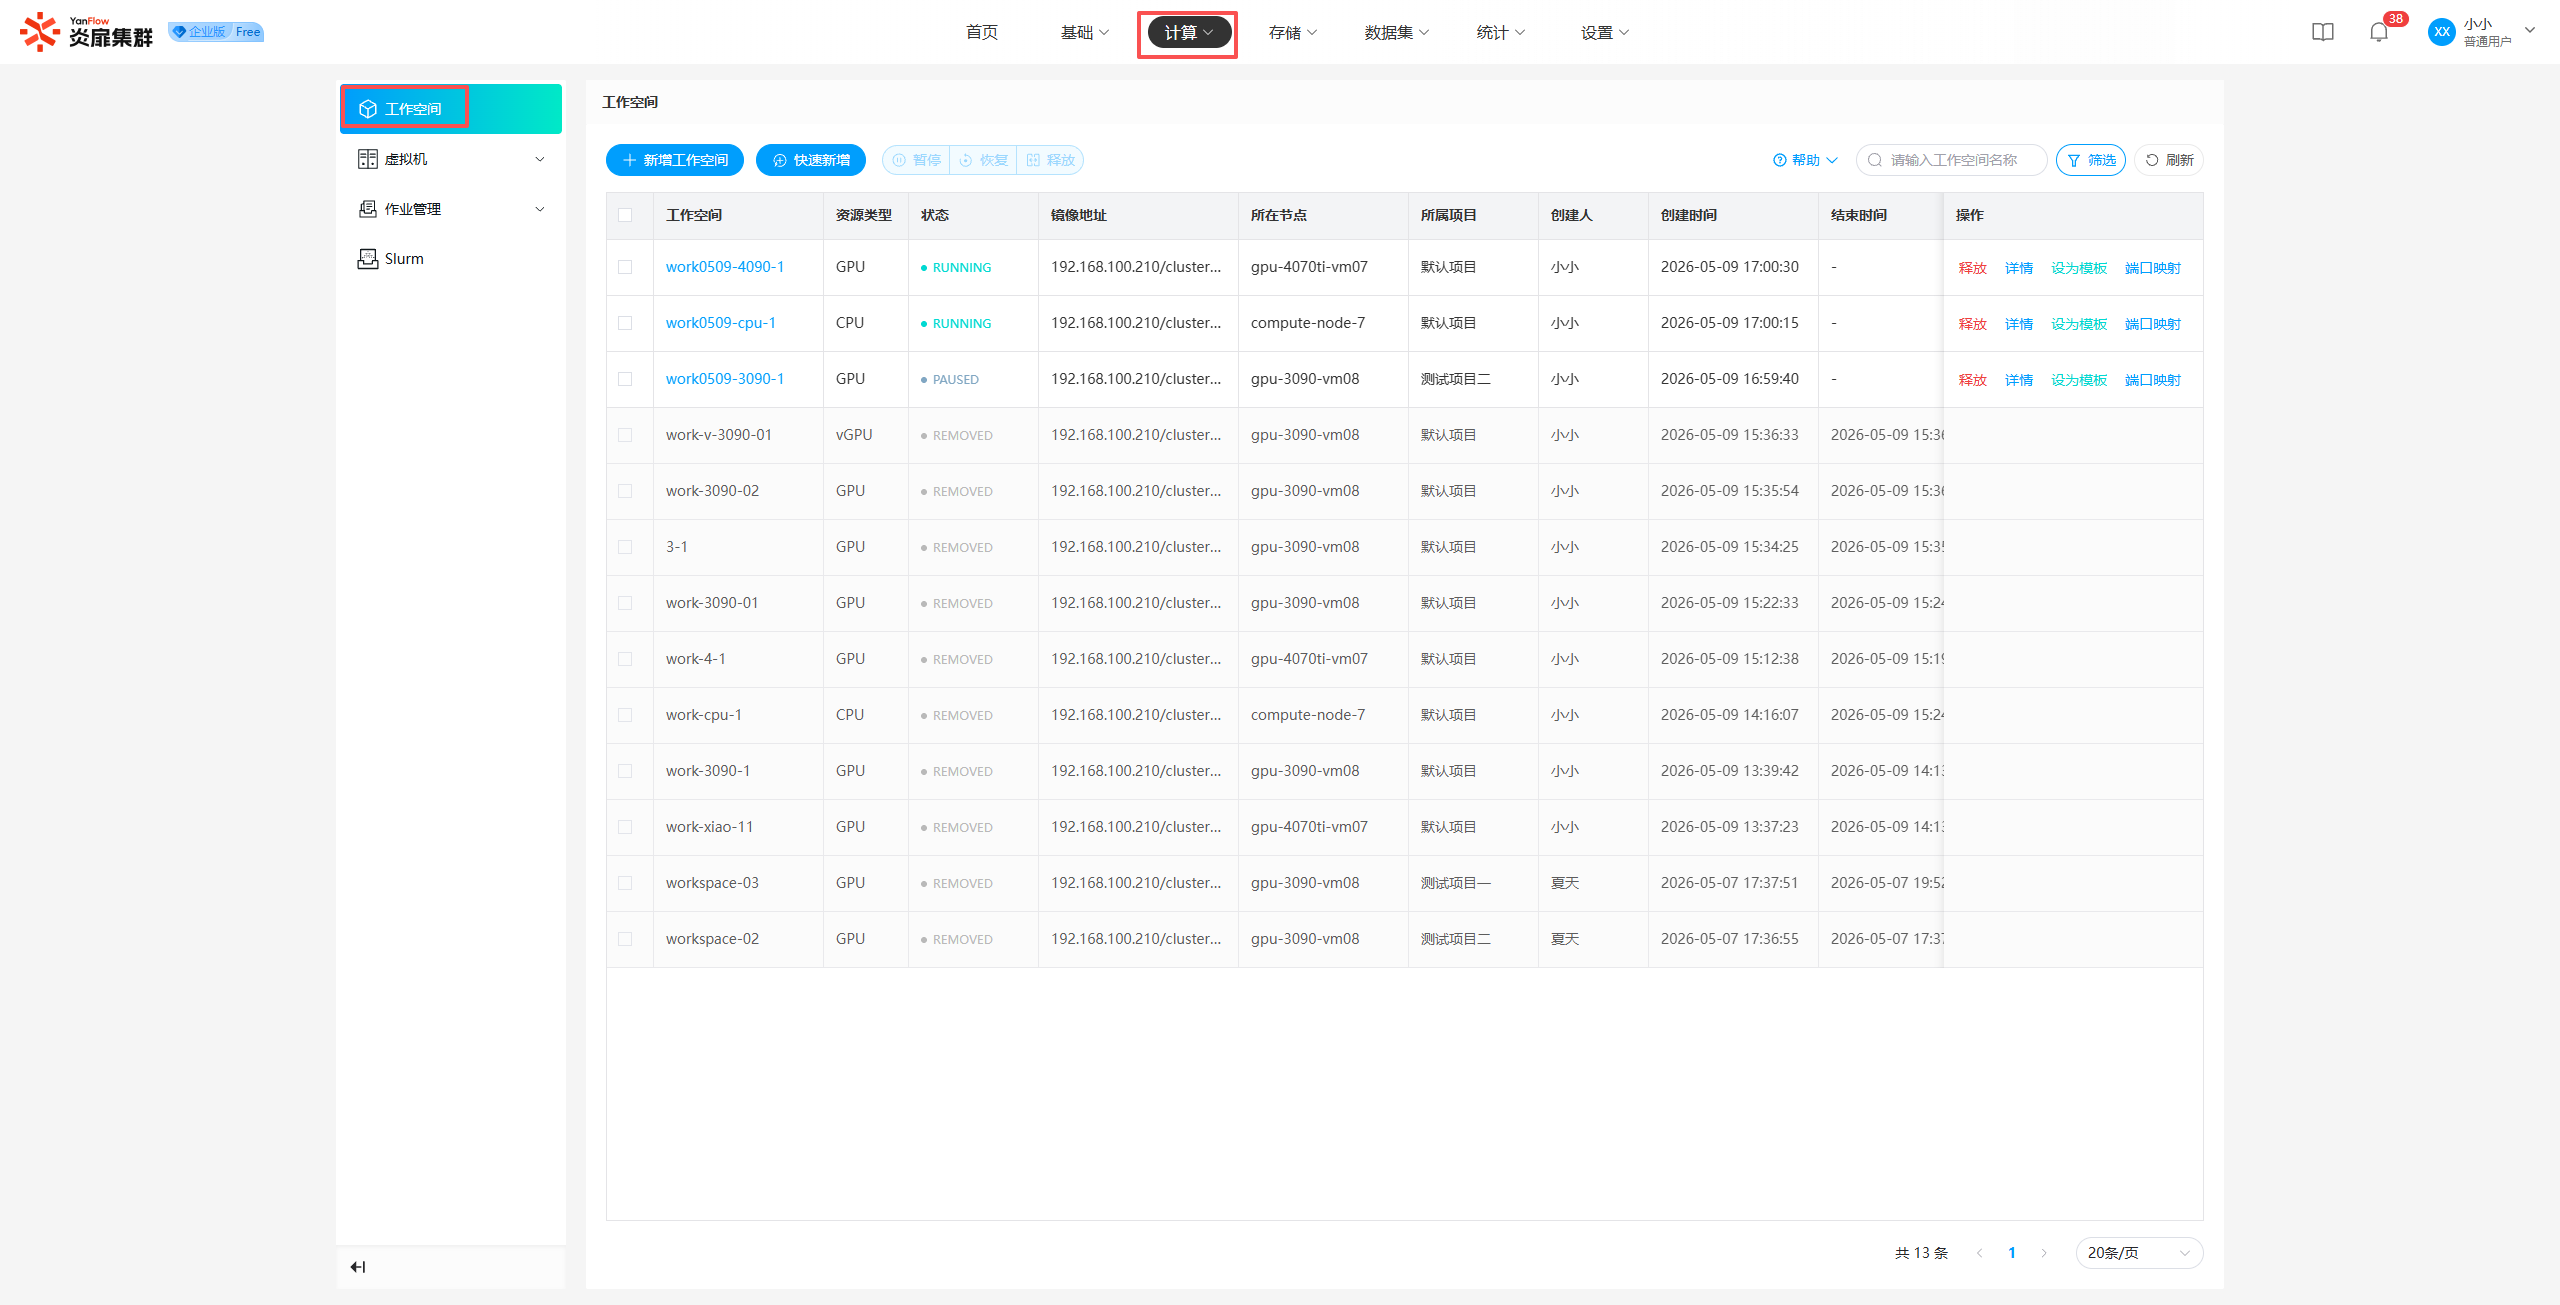
Workspace List
Regular users can view all workspaces they have created and all workspaces under the projects they are currently responsible for. Support for keyword search via workspace name is provided, as well as filtered search by resource type, status, belonging project, node, creation date, and creator.
Add New Workspace
Click Add New Workspace to open the creation popup. Based on actual business needs, configure information such as belonging project, workspace name, resource type, model, quantity, image, port mapping, data volume, command, environment, etc. Click Confirm; if validation passes, a new workspace will be created.
Parameter Description
| Parameter | Description | Example |
|---|---|---|
| Resource Type | Defines the environment type of the computing resource | GPU, vGPU, CPU |
| Model | Selects the required hardware model, limited by system quota and current remaining quantity | |
| Quantity | The number of GPUs or cores to be mounted into the container this time | |
| Image | The base image for the workspace | |
| Port Mapping | Exposes internal container service ports for remote connection or web access | |
| Volume | Mounts the platform's distributed storage (File Management) into the container for data persistence | |
| CMD | The default entry program or script executed when the container starts | python, /bin/bash |
| ARGS | Running parameters passed when executed with CMD | |
| WORKDIR | The default entry path after the image starts; the system will execute commands under this path | /mnt/volume/username |
| ENV | Used to inject custom configurations in key-value form into the container runtime environment | TEMP_LIMIT=80, MODE=test |
| Dependency Install Command | Used to supplement missing third-party dependency packages in the image during early container startup | pip install numpy |
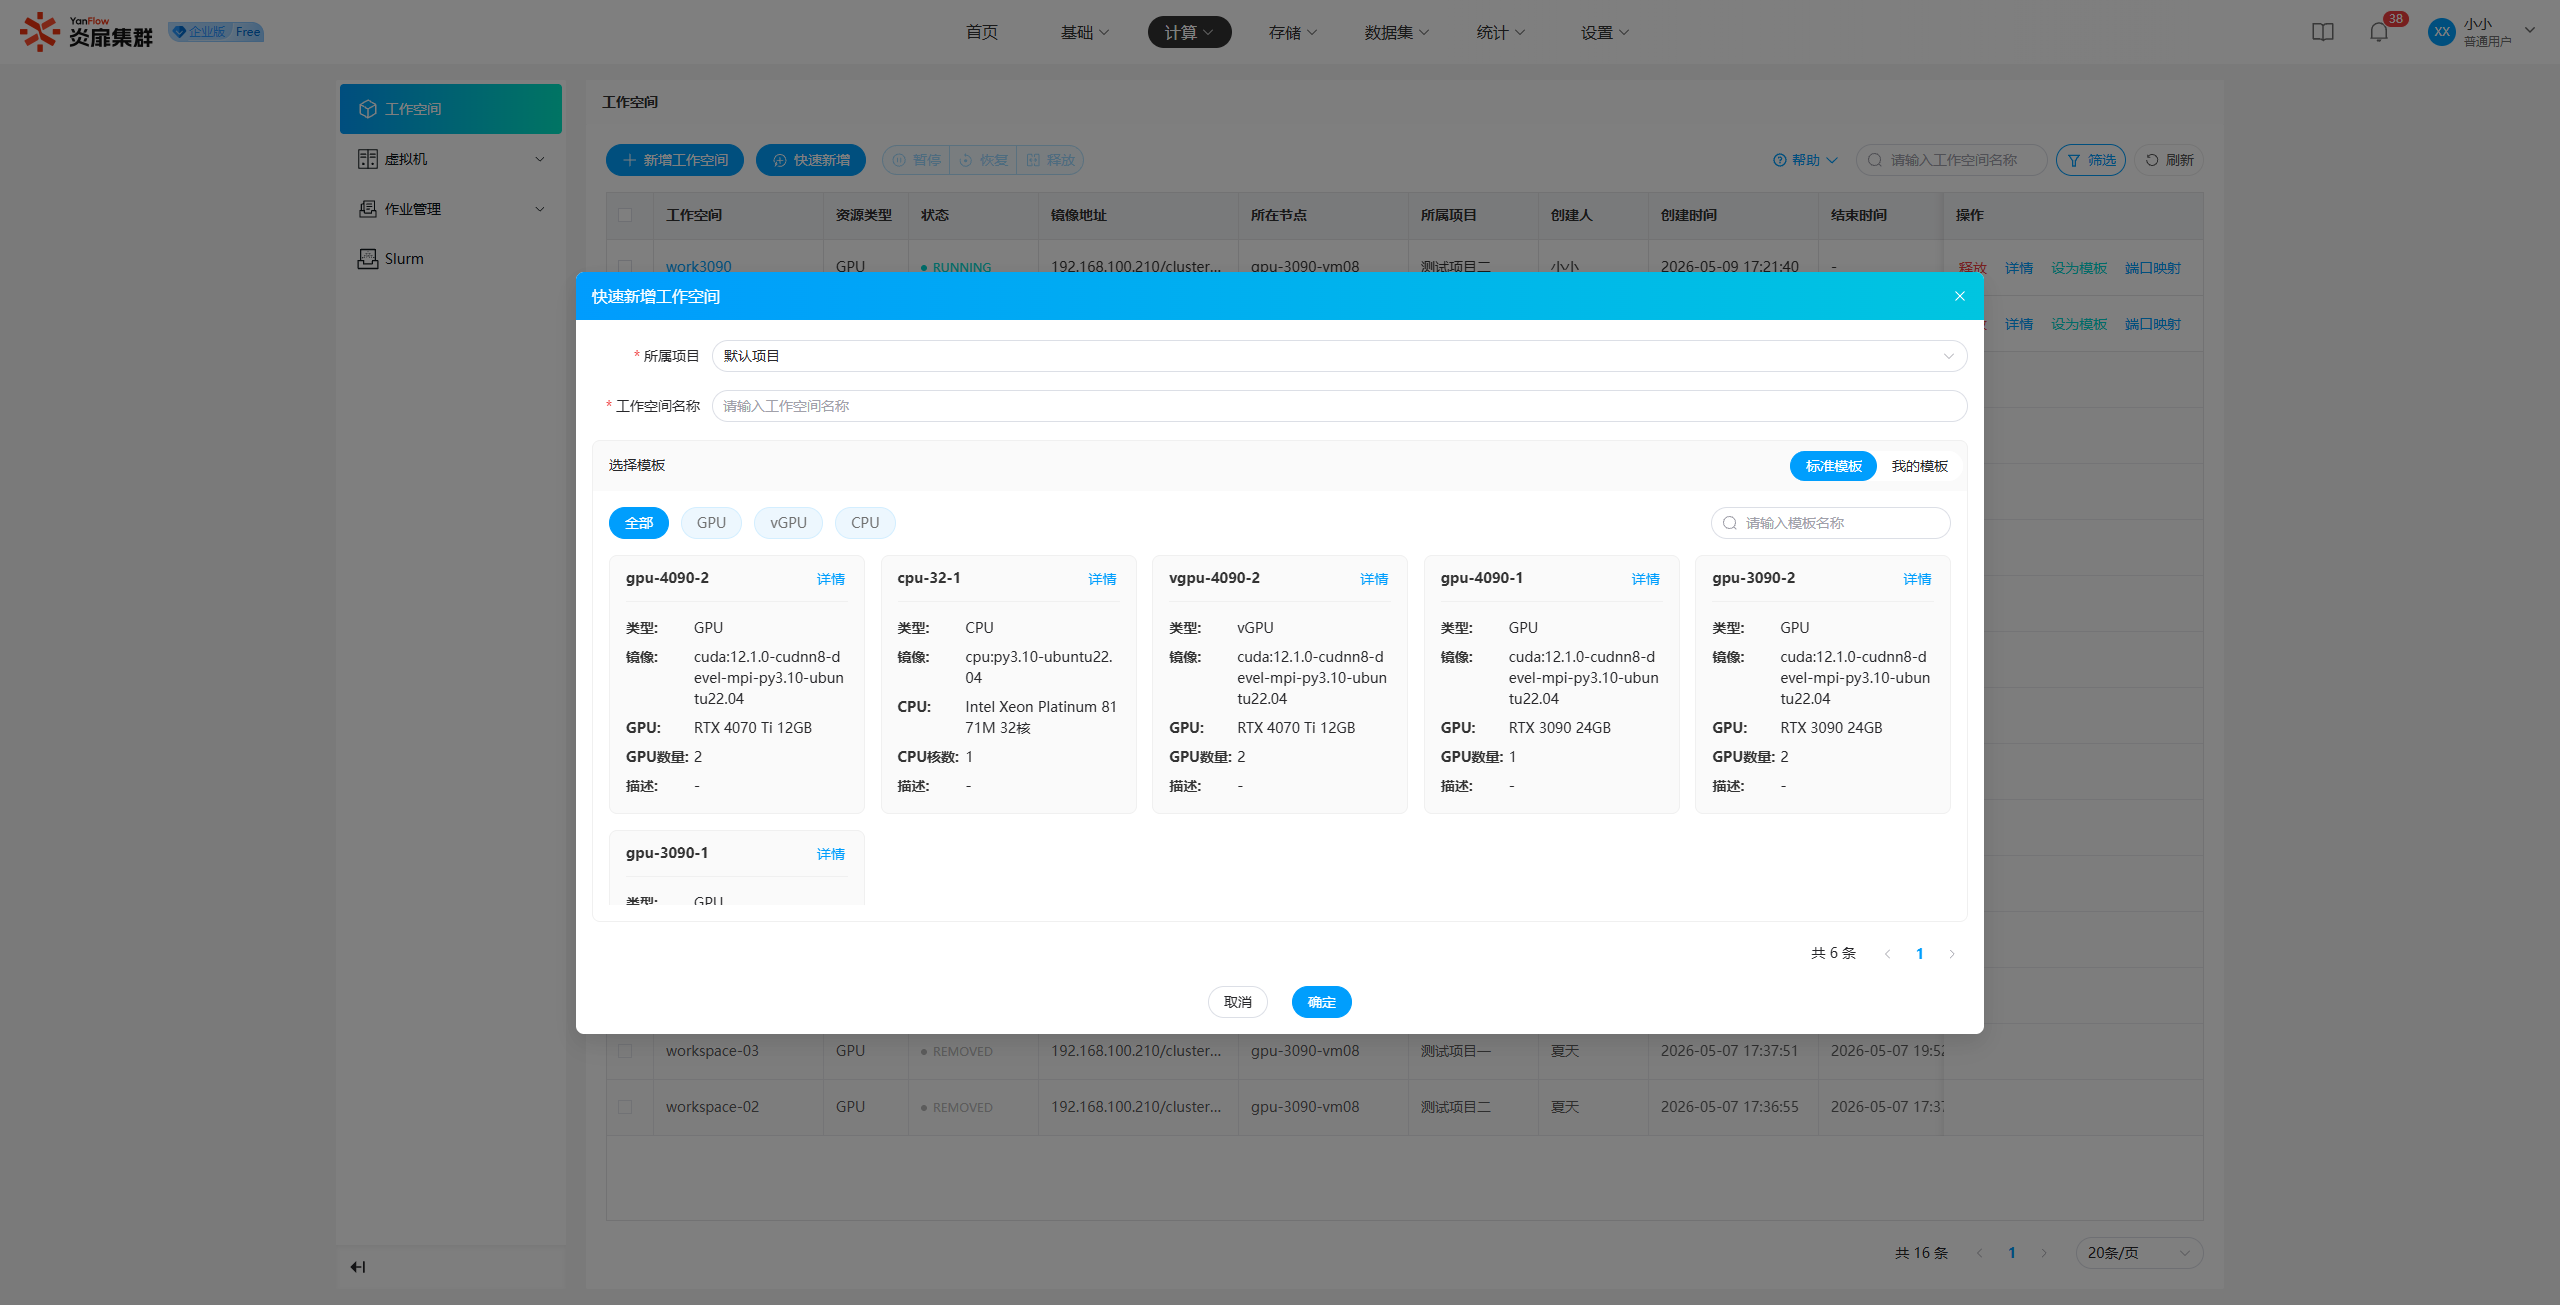
Quick Add
Click Quick Add to open the quick addition popup. Configure the belonging project and workspace name, select a template, and click Confirm. If validation passes, a new workspace consistent with the template will be quickly created.
Workspace Details
Click the Workspace Name to display the details page, where you can view basic information, port mapping, resource information, mount information, and environment variables. It also supports viewing Logs, Inspect, and Console connections.
Save Image: Enter an image address and click Save Image. If validation passes, the save operation will be executed.
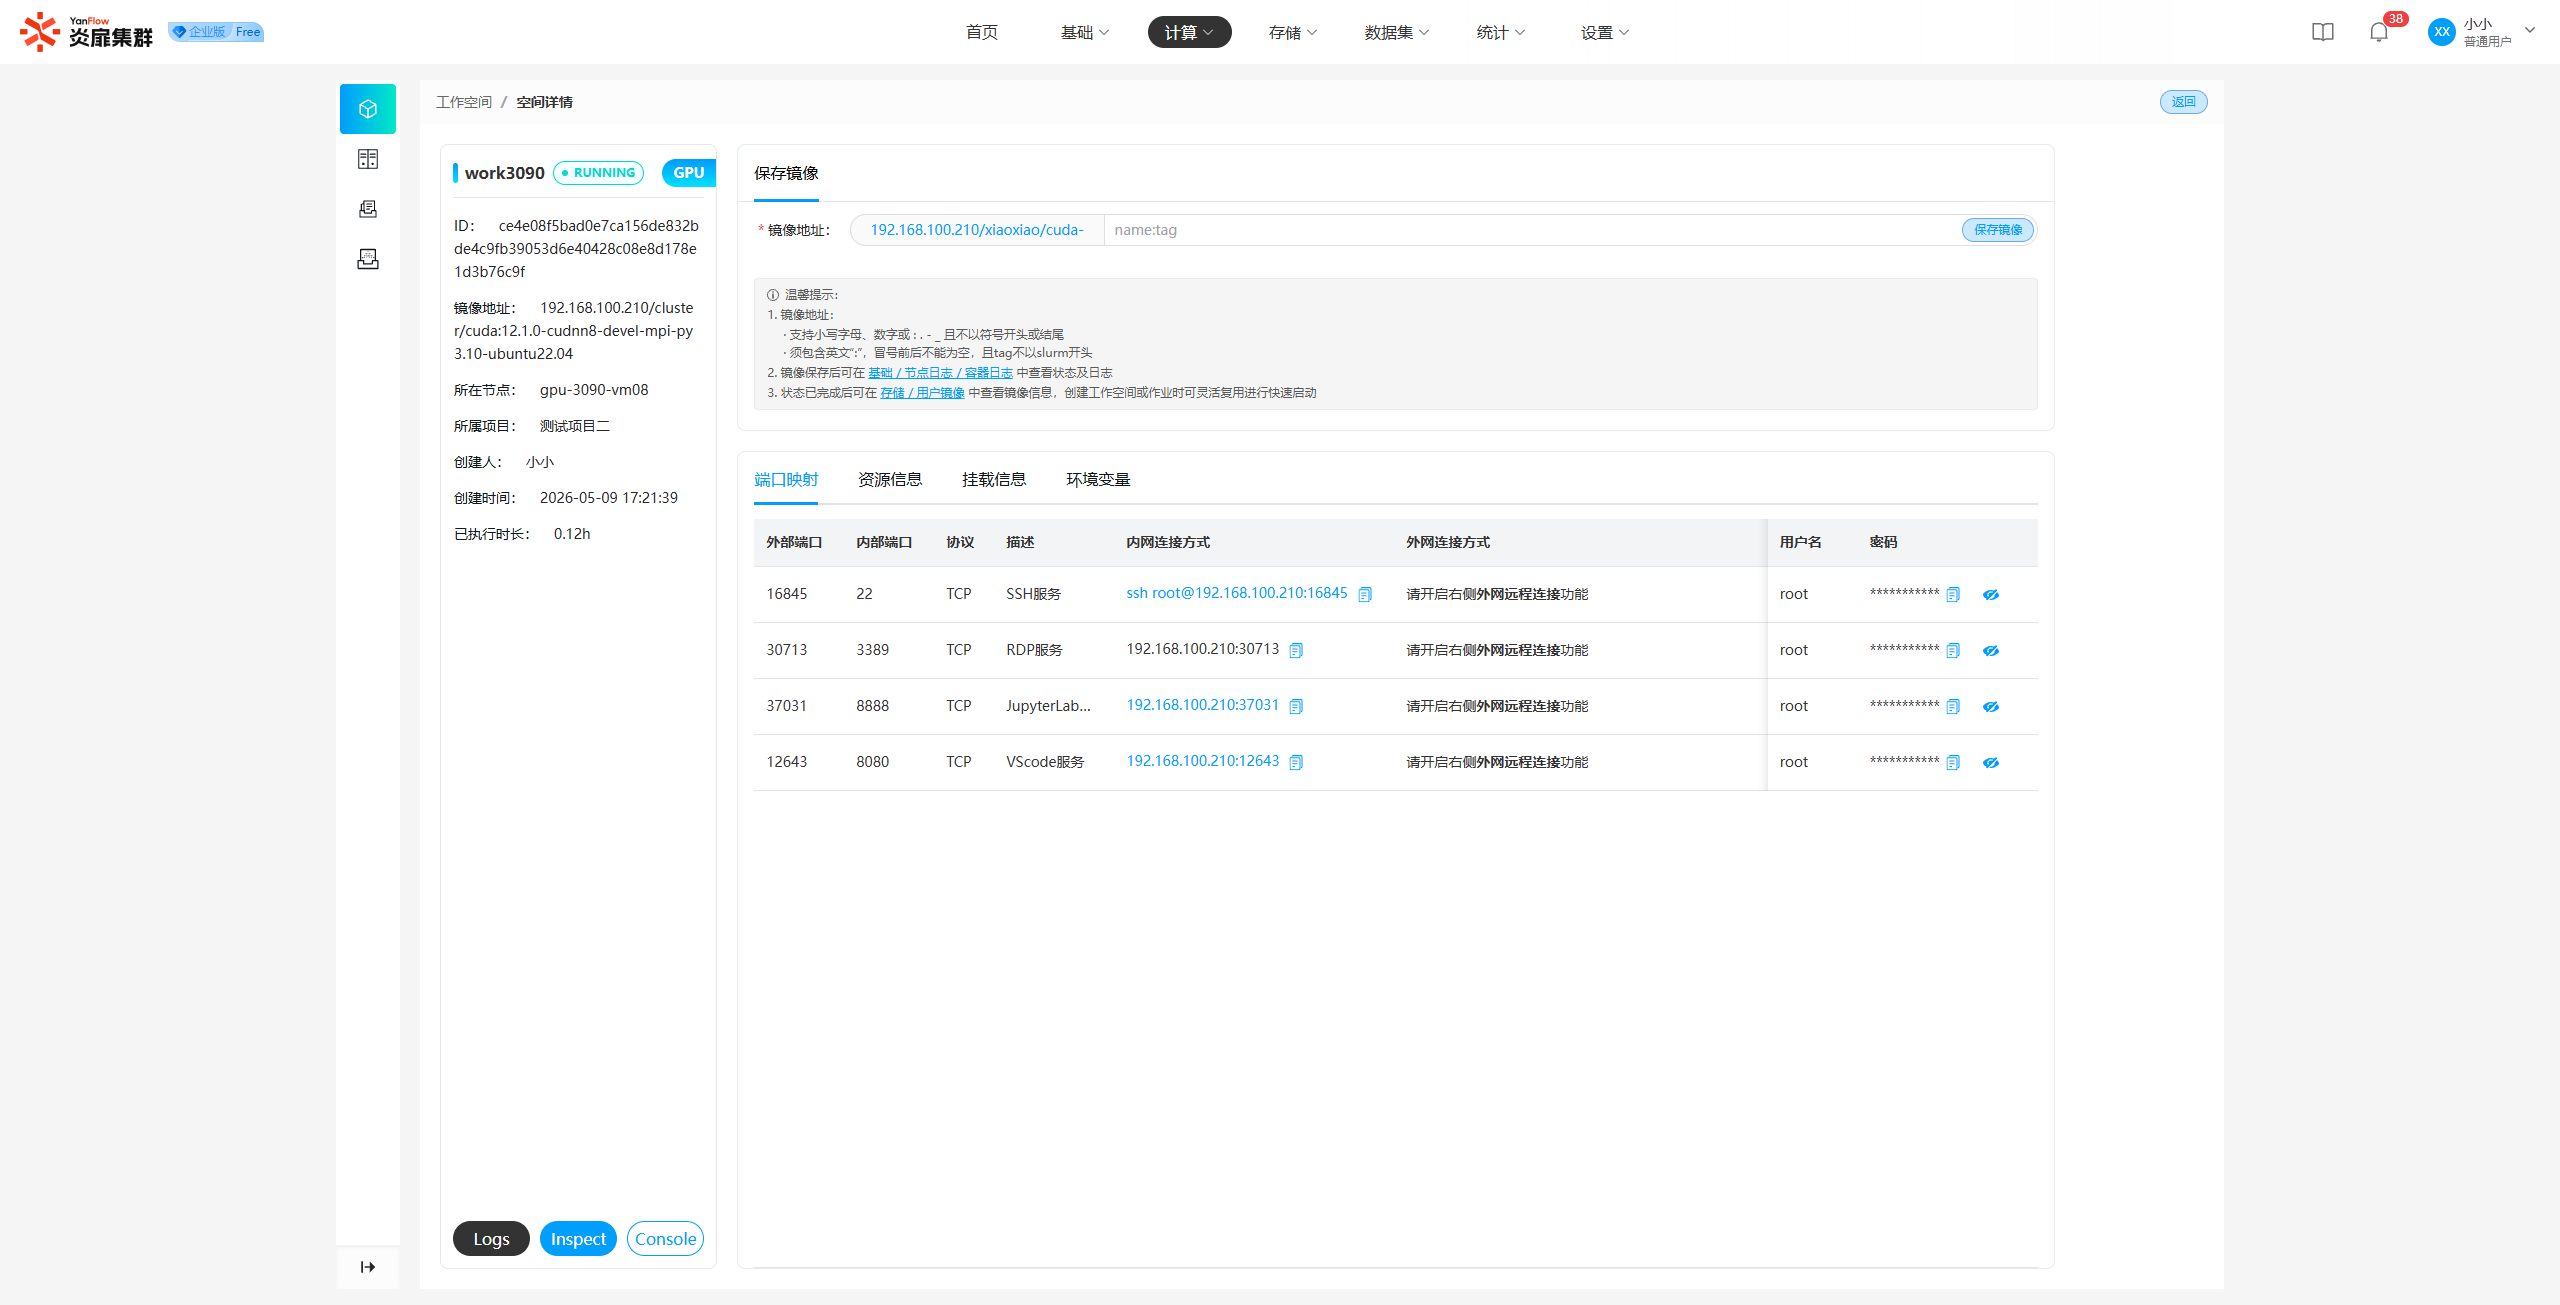
Note: Only workspaces in RUNNING and PAUSED status can view
Details. Only workspaces created by yourself provide theSave Imageoption.
Pause/Resume/Release
Supports System Administrators in performing Pause / Resume / Release operations on workspaces. Select one or more workspaces, click the corresponding operation, and click Confirm in the prompt popup to complete the operation.
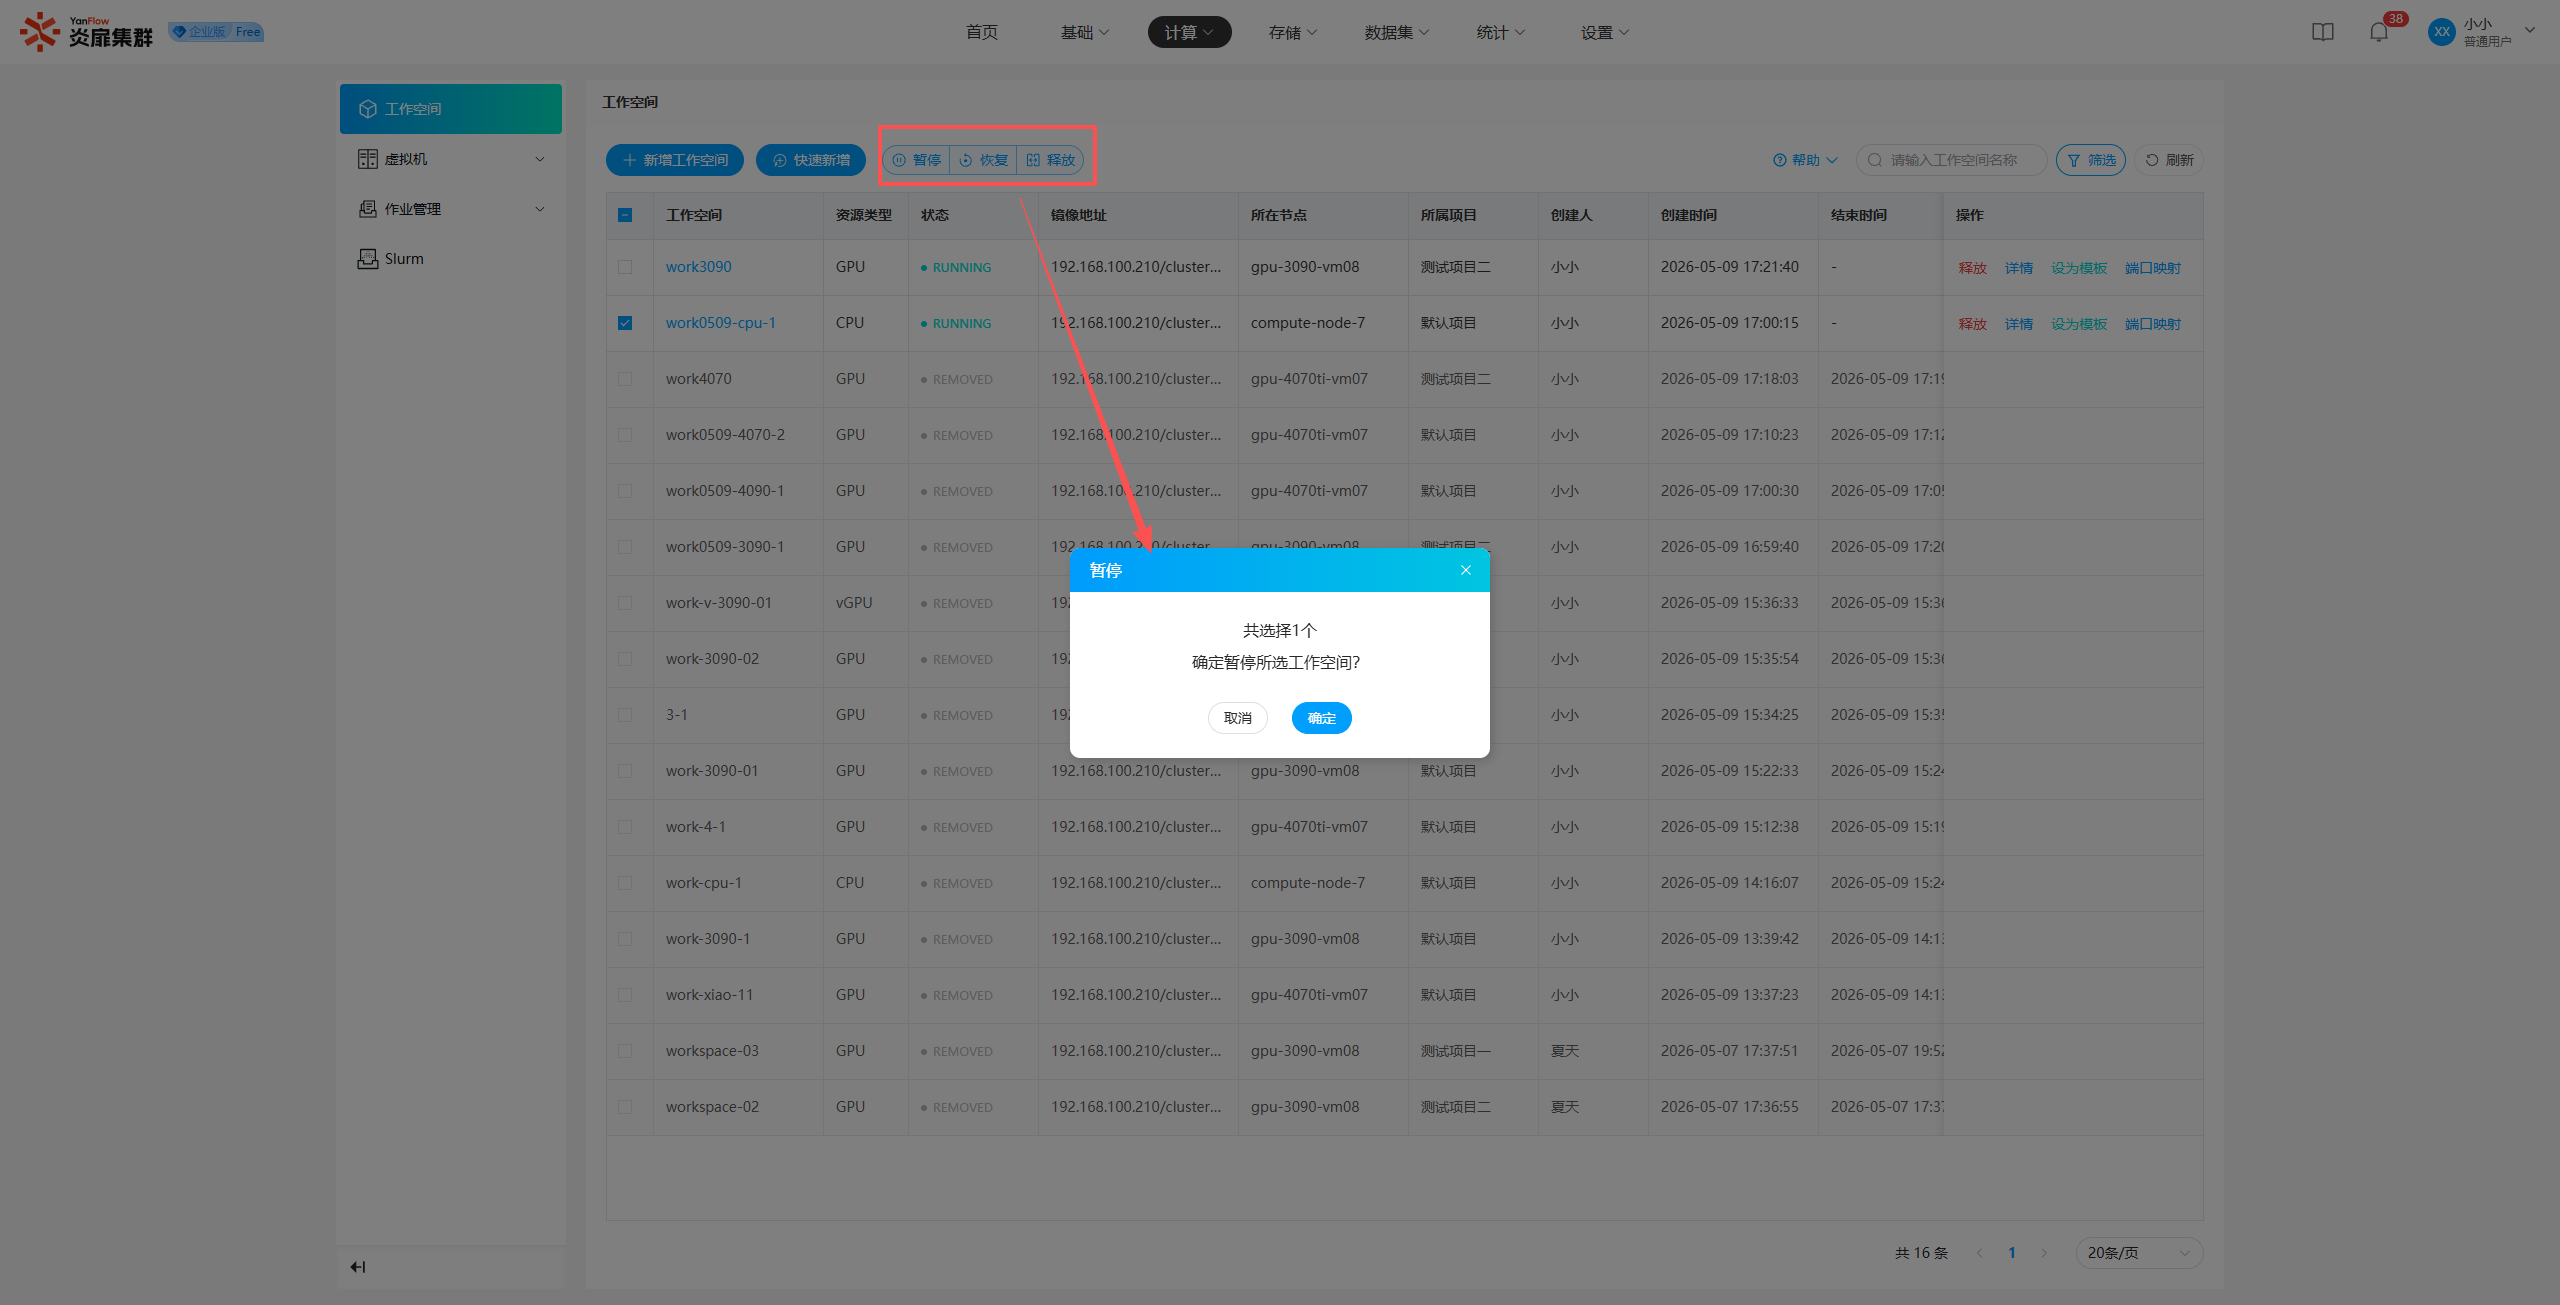
Note:
- Only
Pausecan be executed in RUNNING status.- Only
Resumecan be executed in PAUSED status.
Port Mapping
Click Port Mapping to display the port mapping information of the workspace in a popup. It supports multiple connection methods to access the interior of the container and also supports enabling external network remote connections for ports (requires the remote connection service to be enabled by the system in advance).
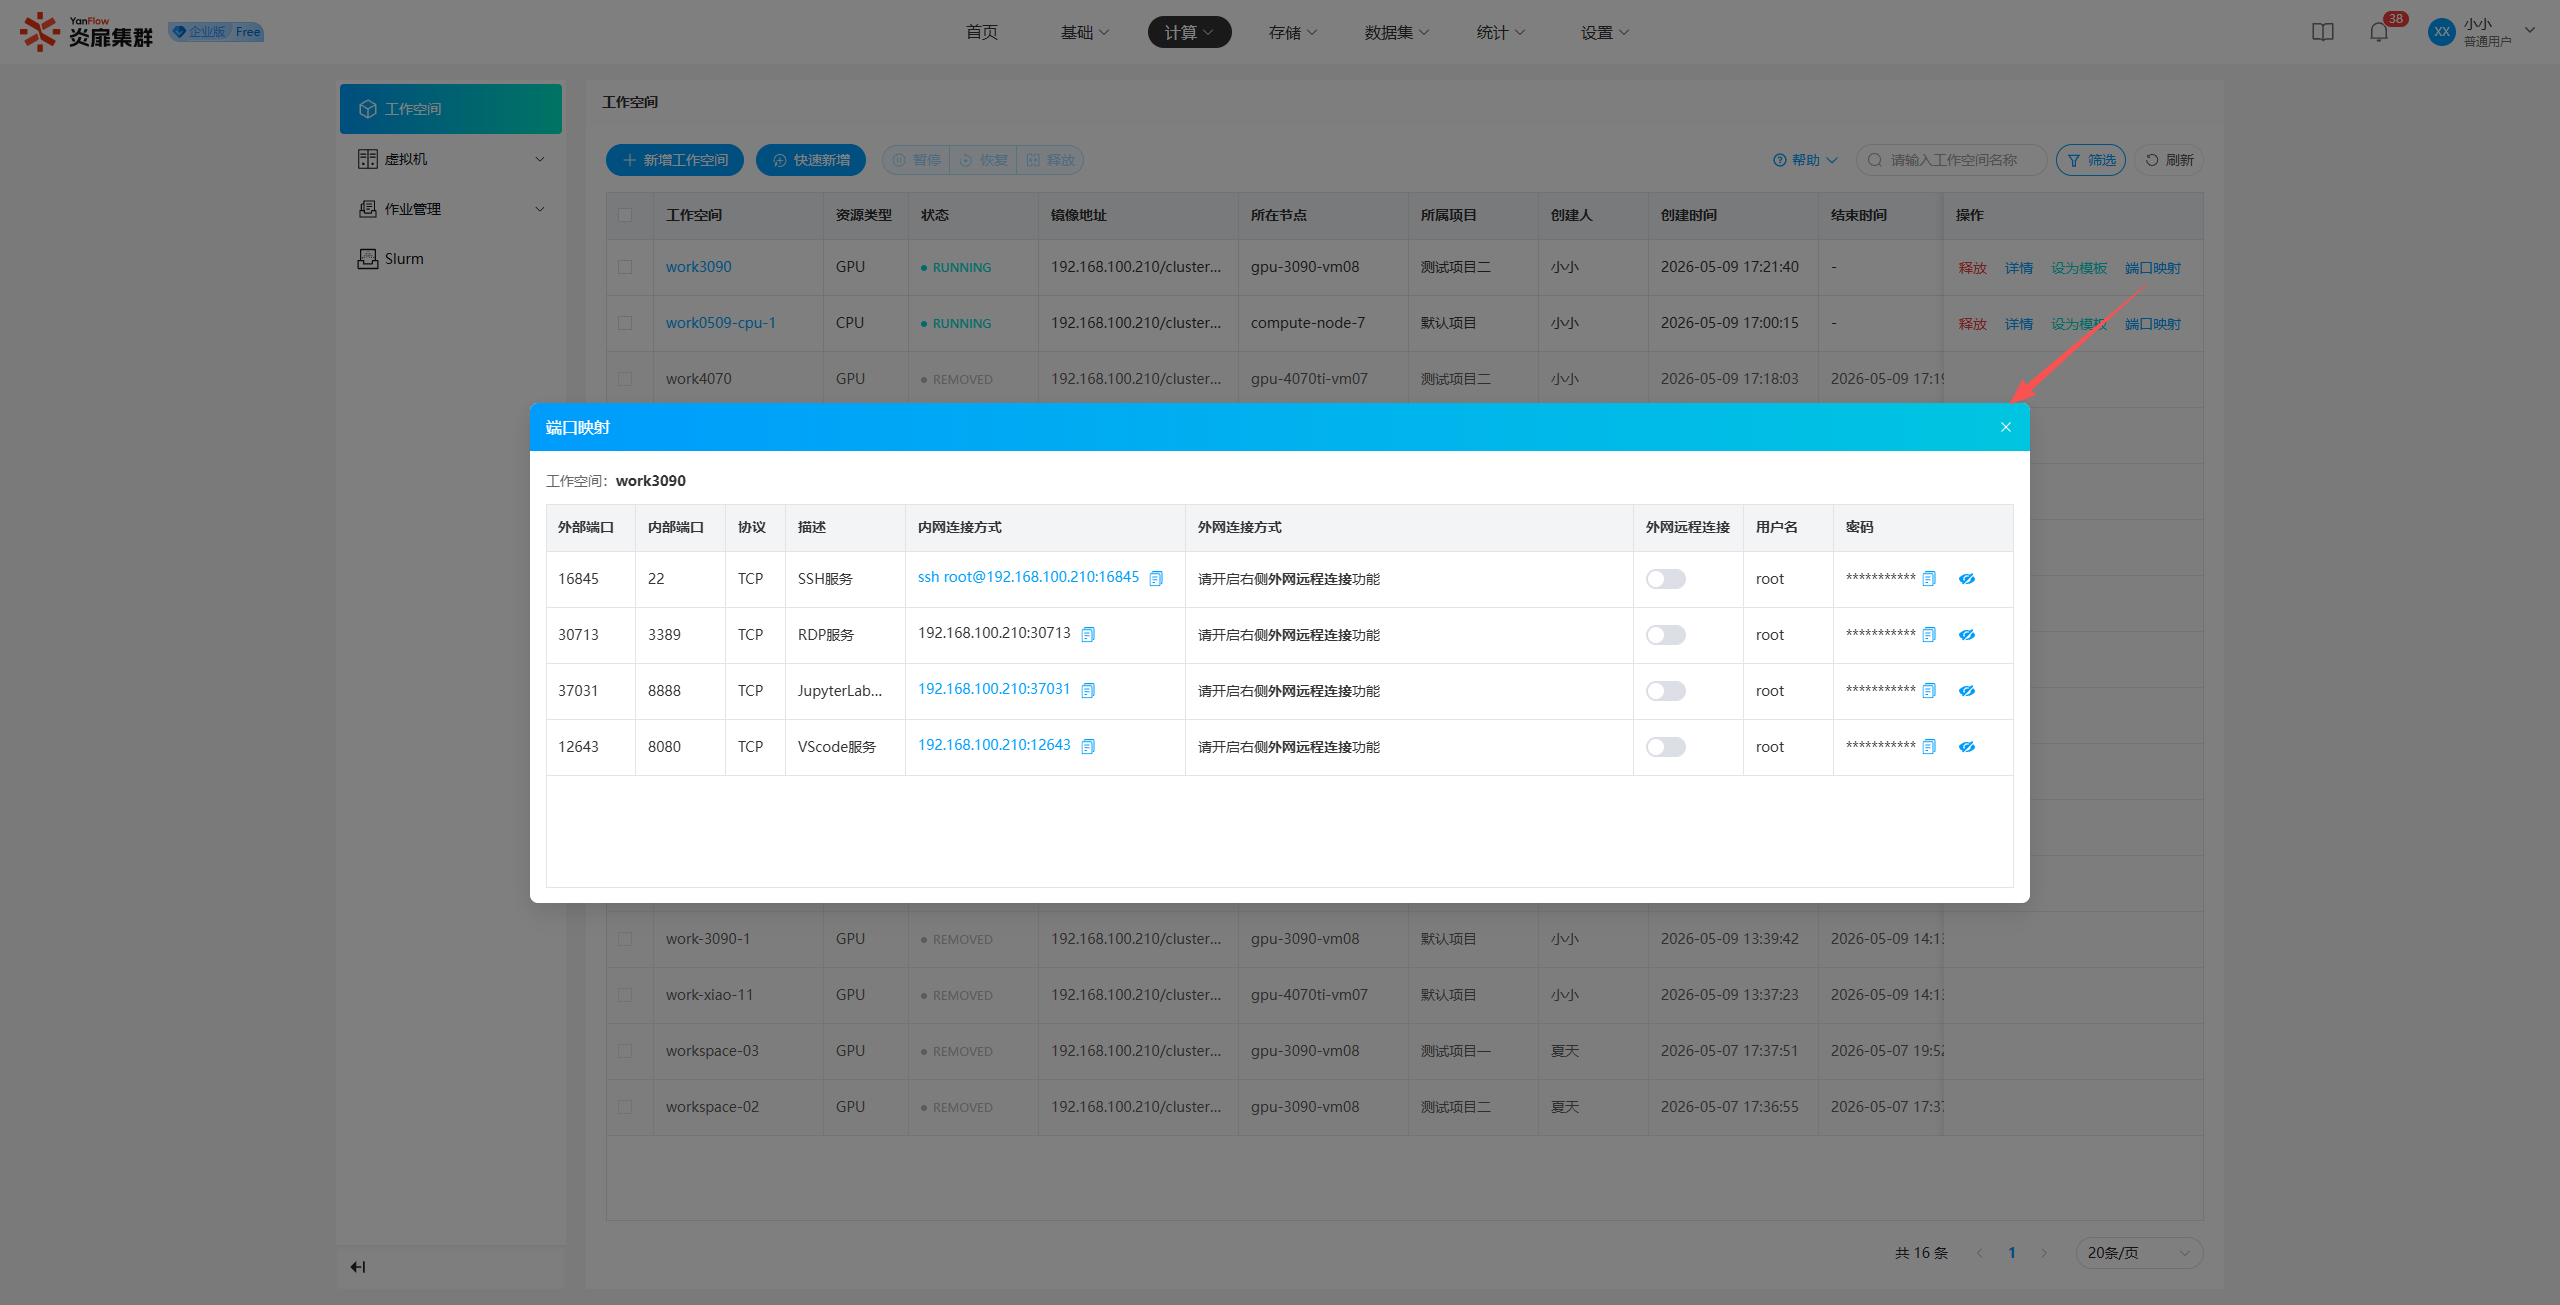
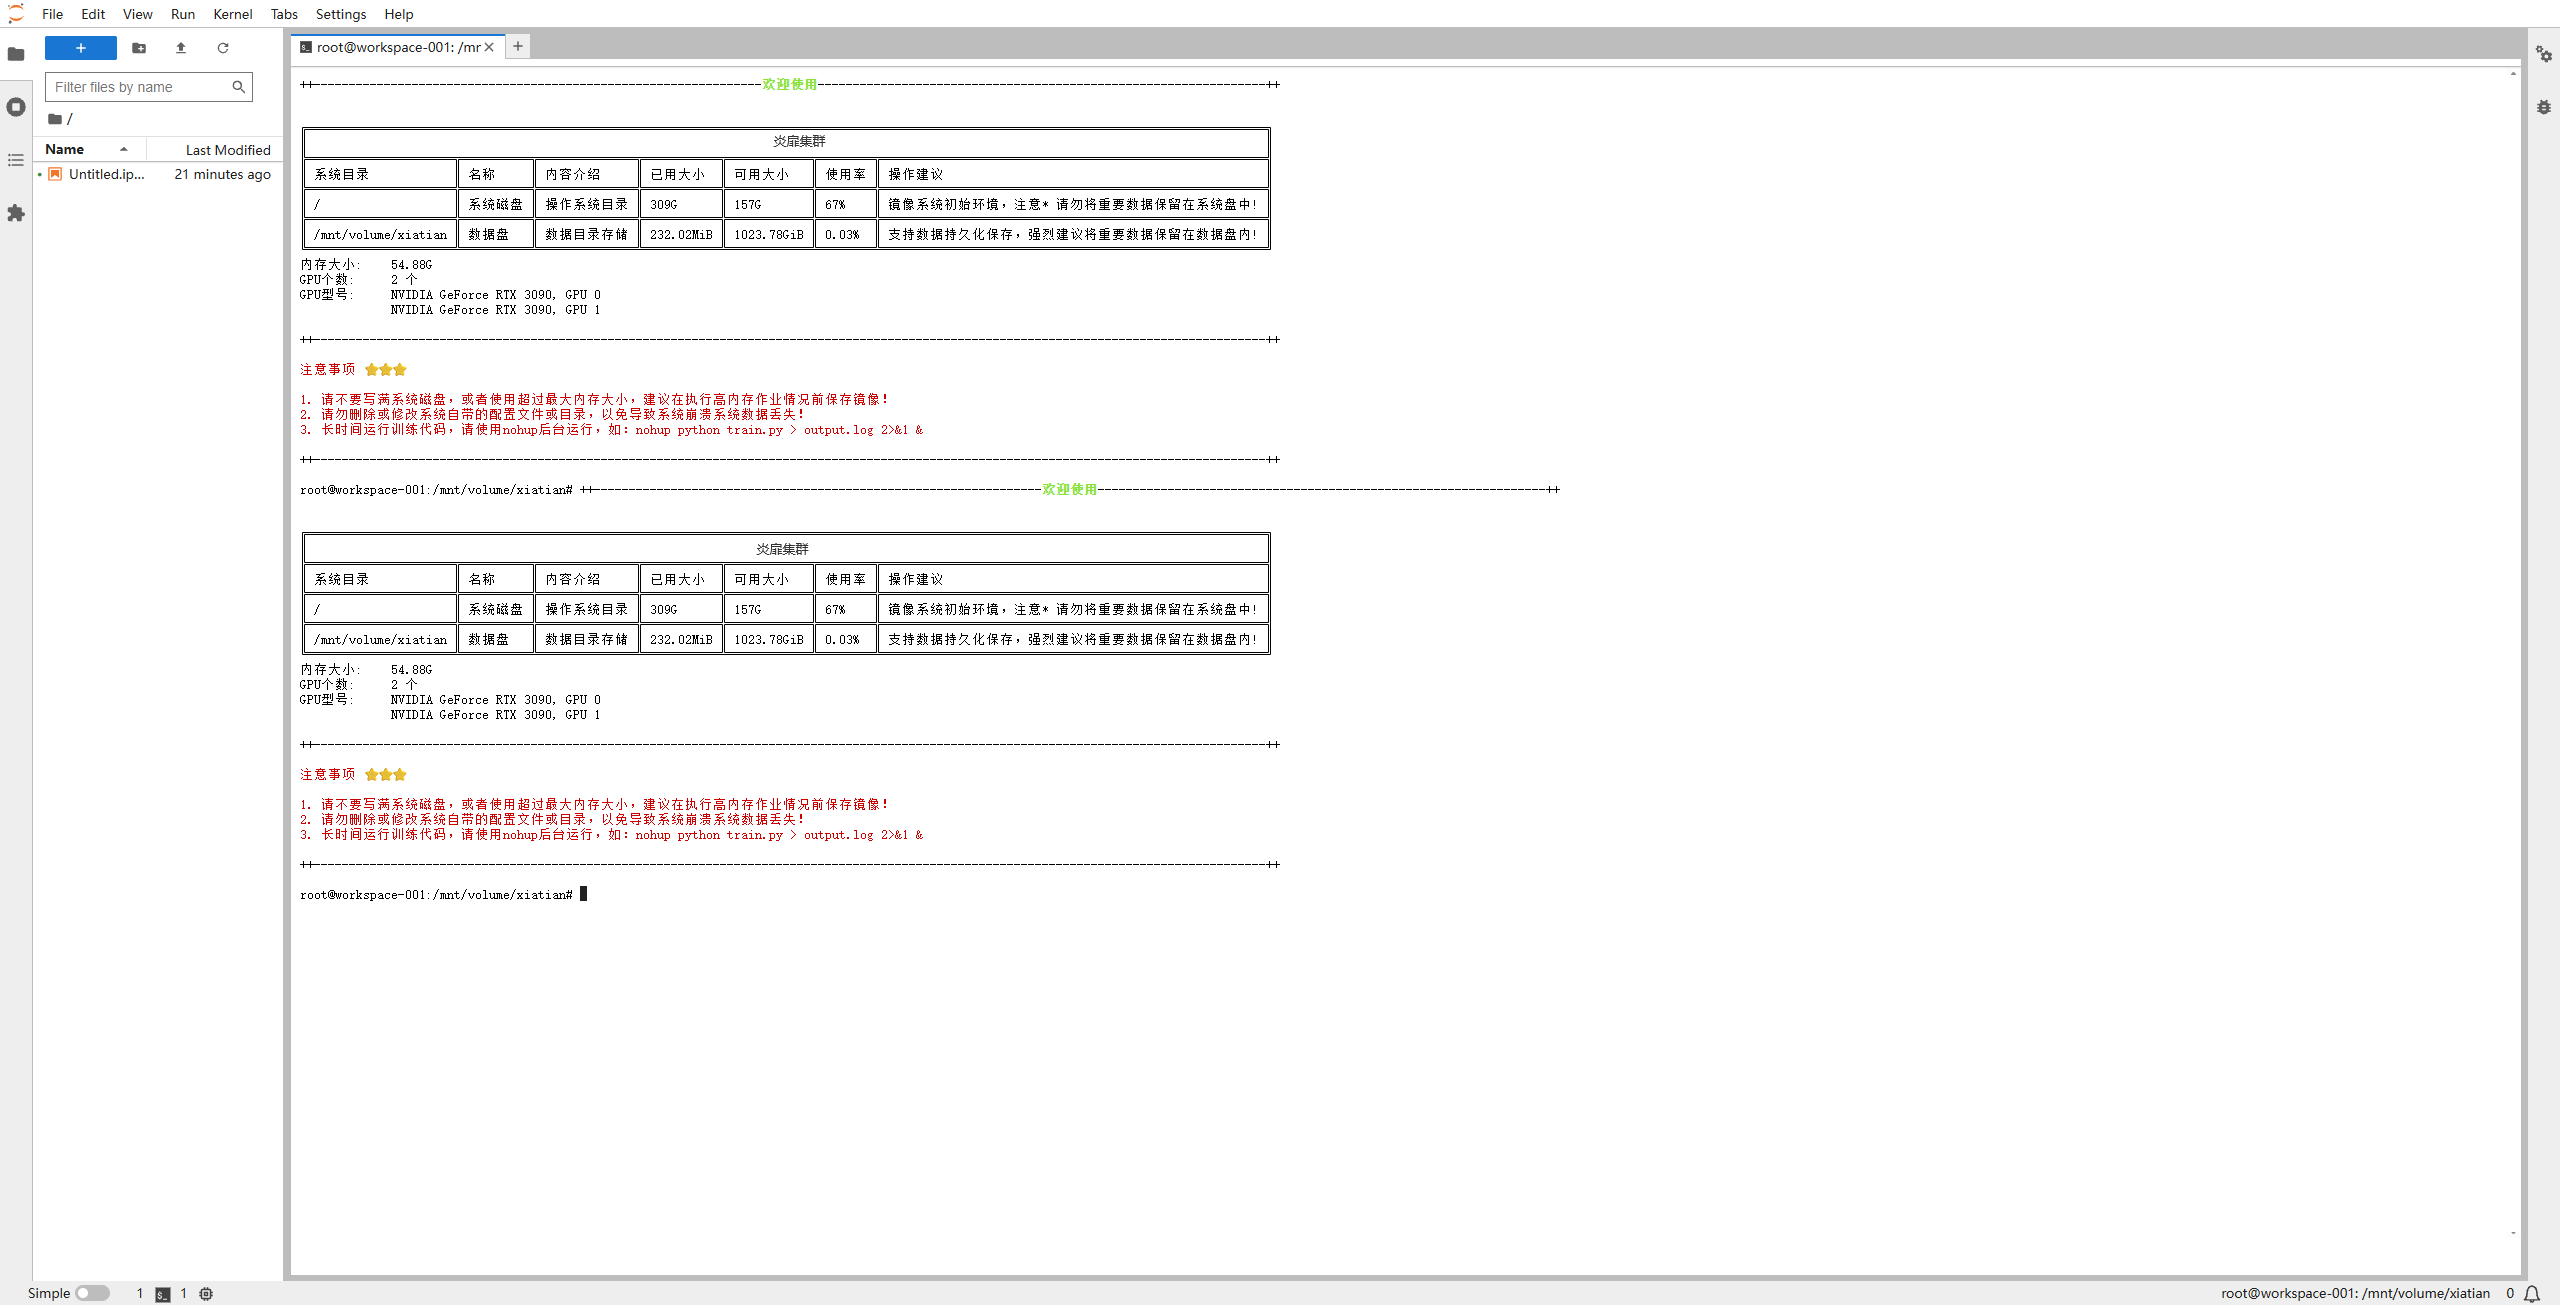
Note: Only RUNNING and PAUSED status can view
Port Mapping. Only for workspaces created by yourself can you operate theExternal Network Remote Connectiontoggle for ports.
Set as Template
Click Set as Template to display a prompt popup. Enter a template name and click Confirm to set the corresponding workspace as a template.
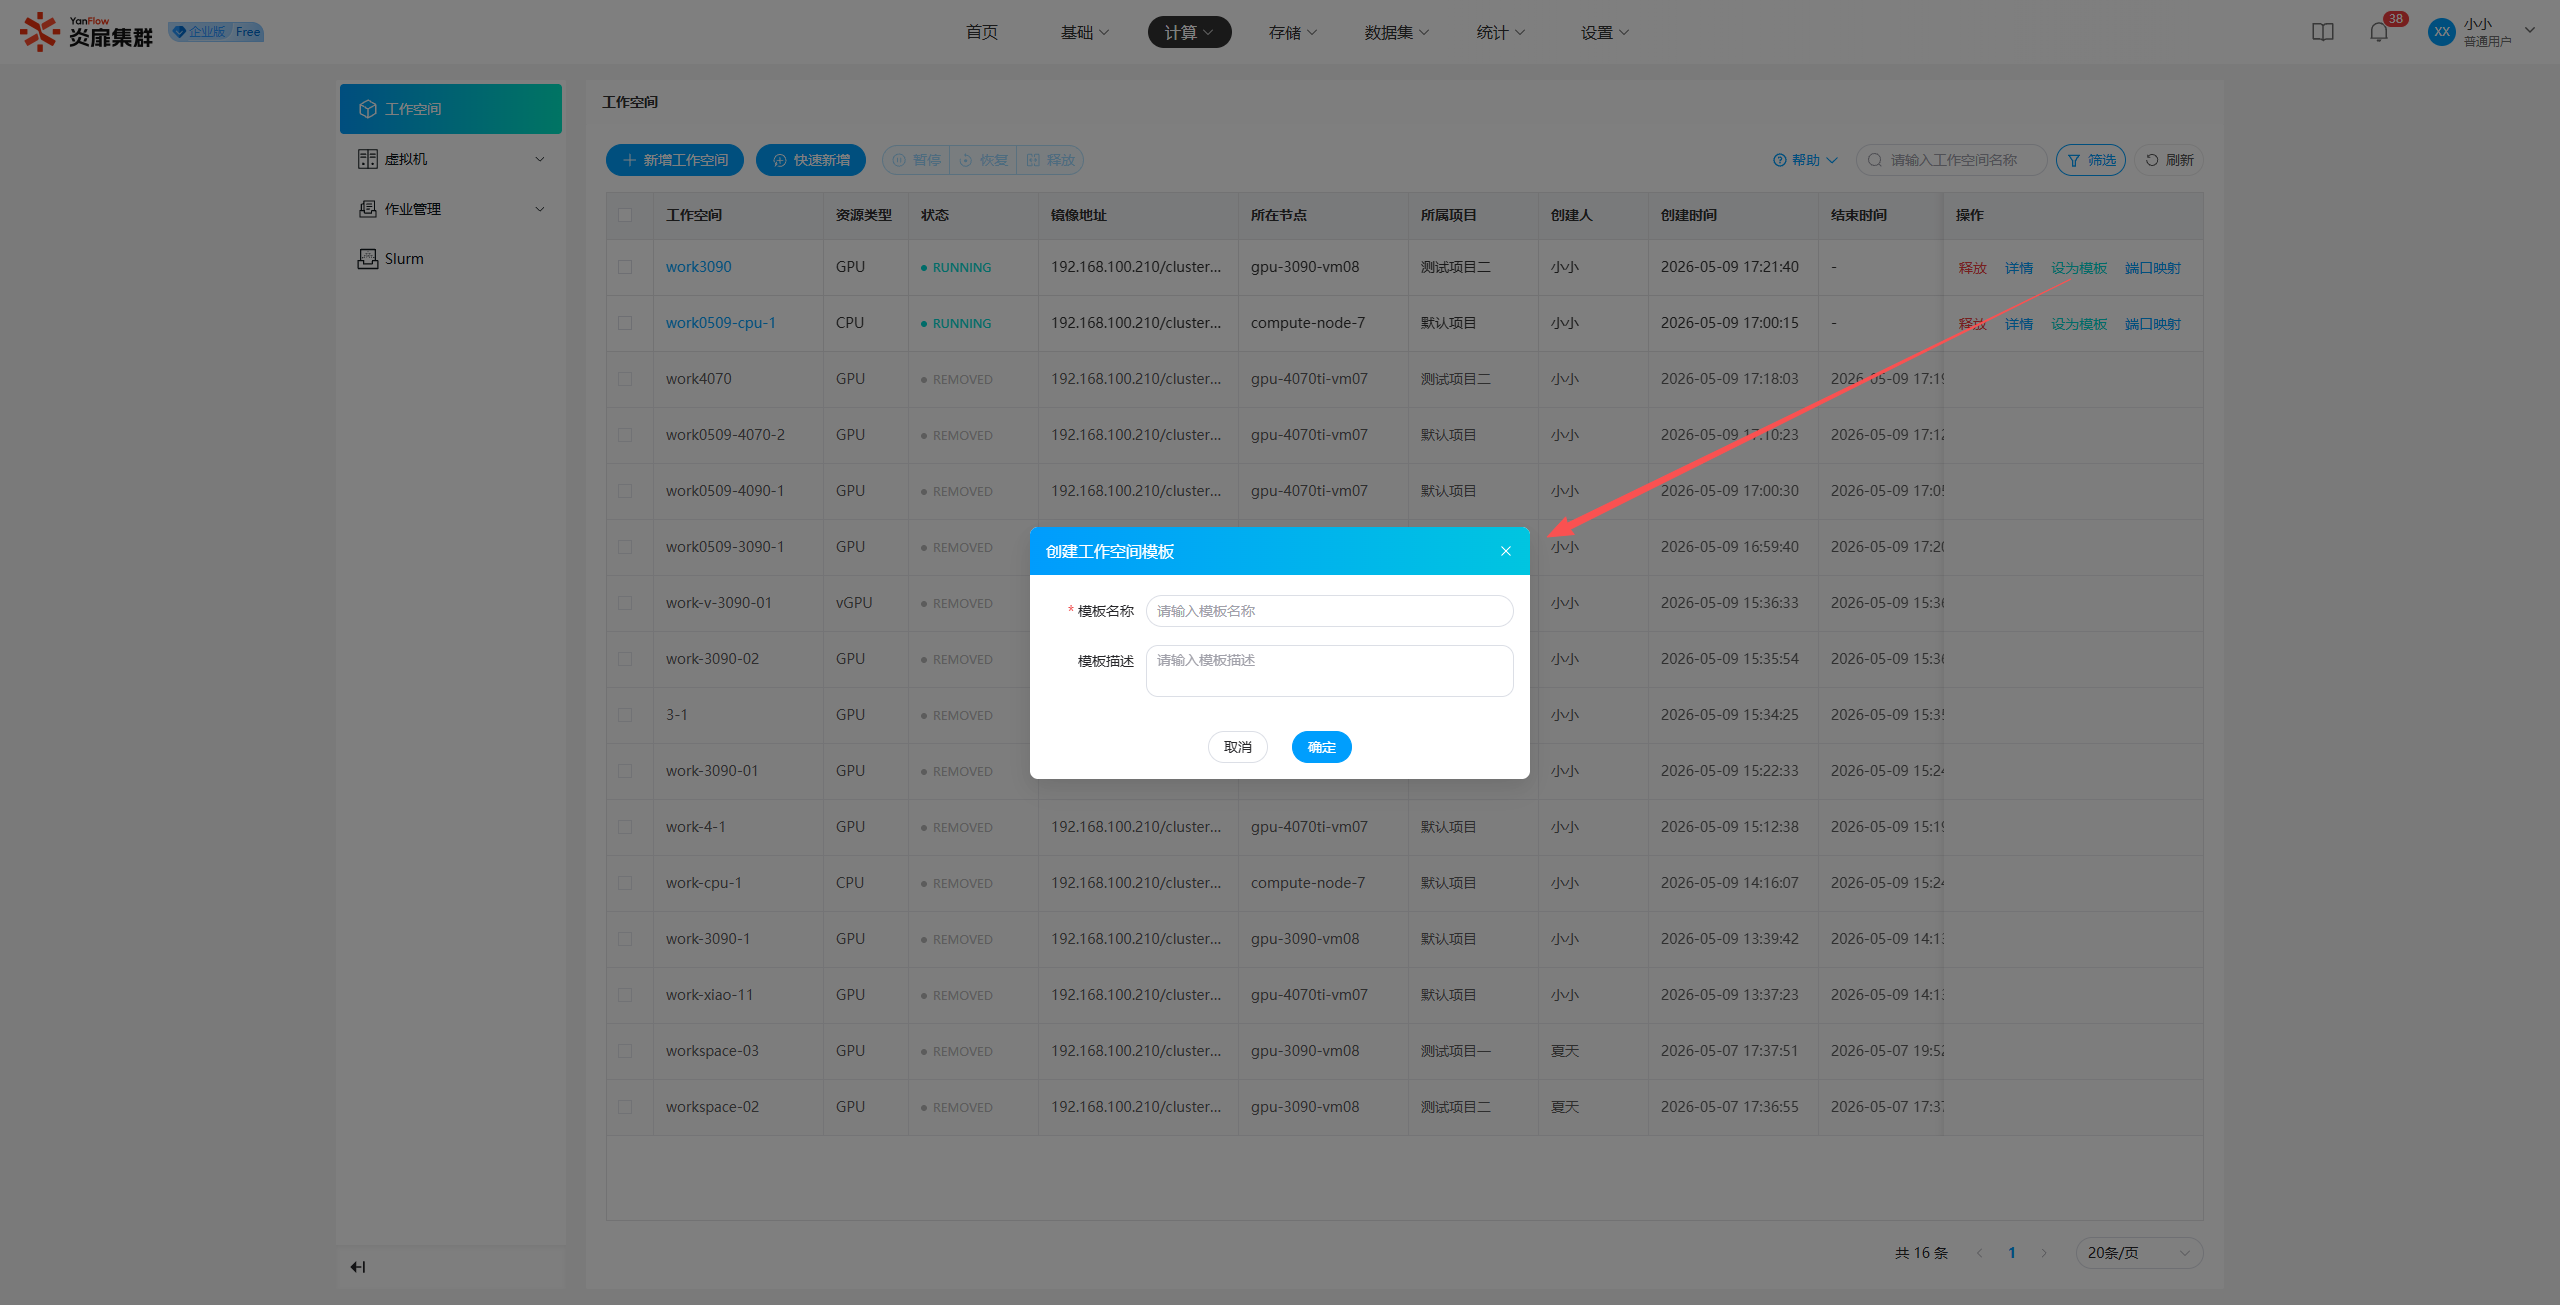
Note: Only workspaces created by yourself can be set as templates.
Virtual Machine
Instance
Instance List
Regular users can view all instances they have created and all instances under the projects they are currently responsible for. Support for keyword search via instance name is provided, as well as filtered search by system, status, belonging project, node, creation date, and creator.
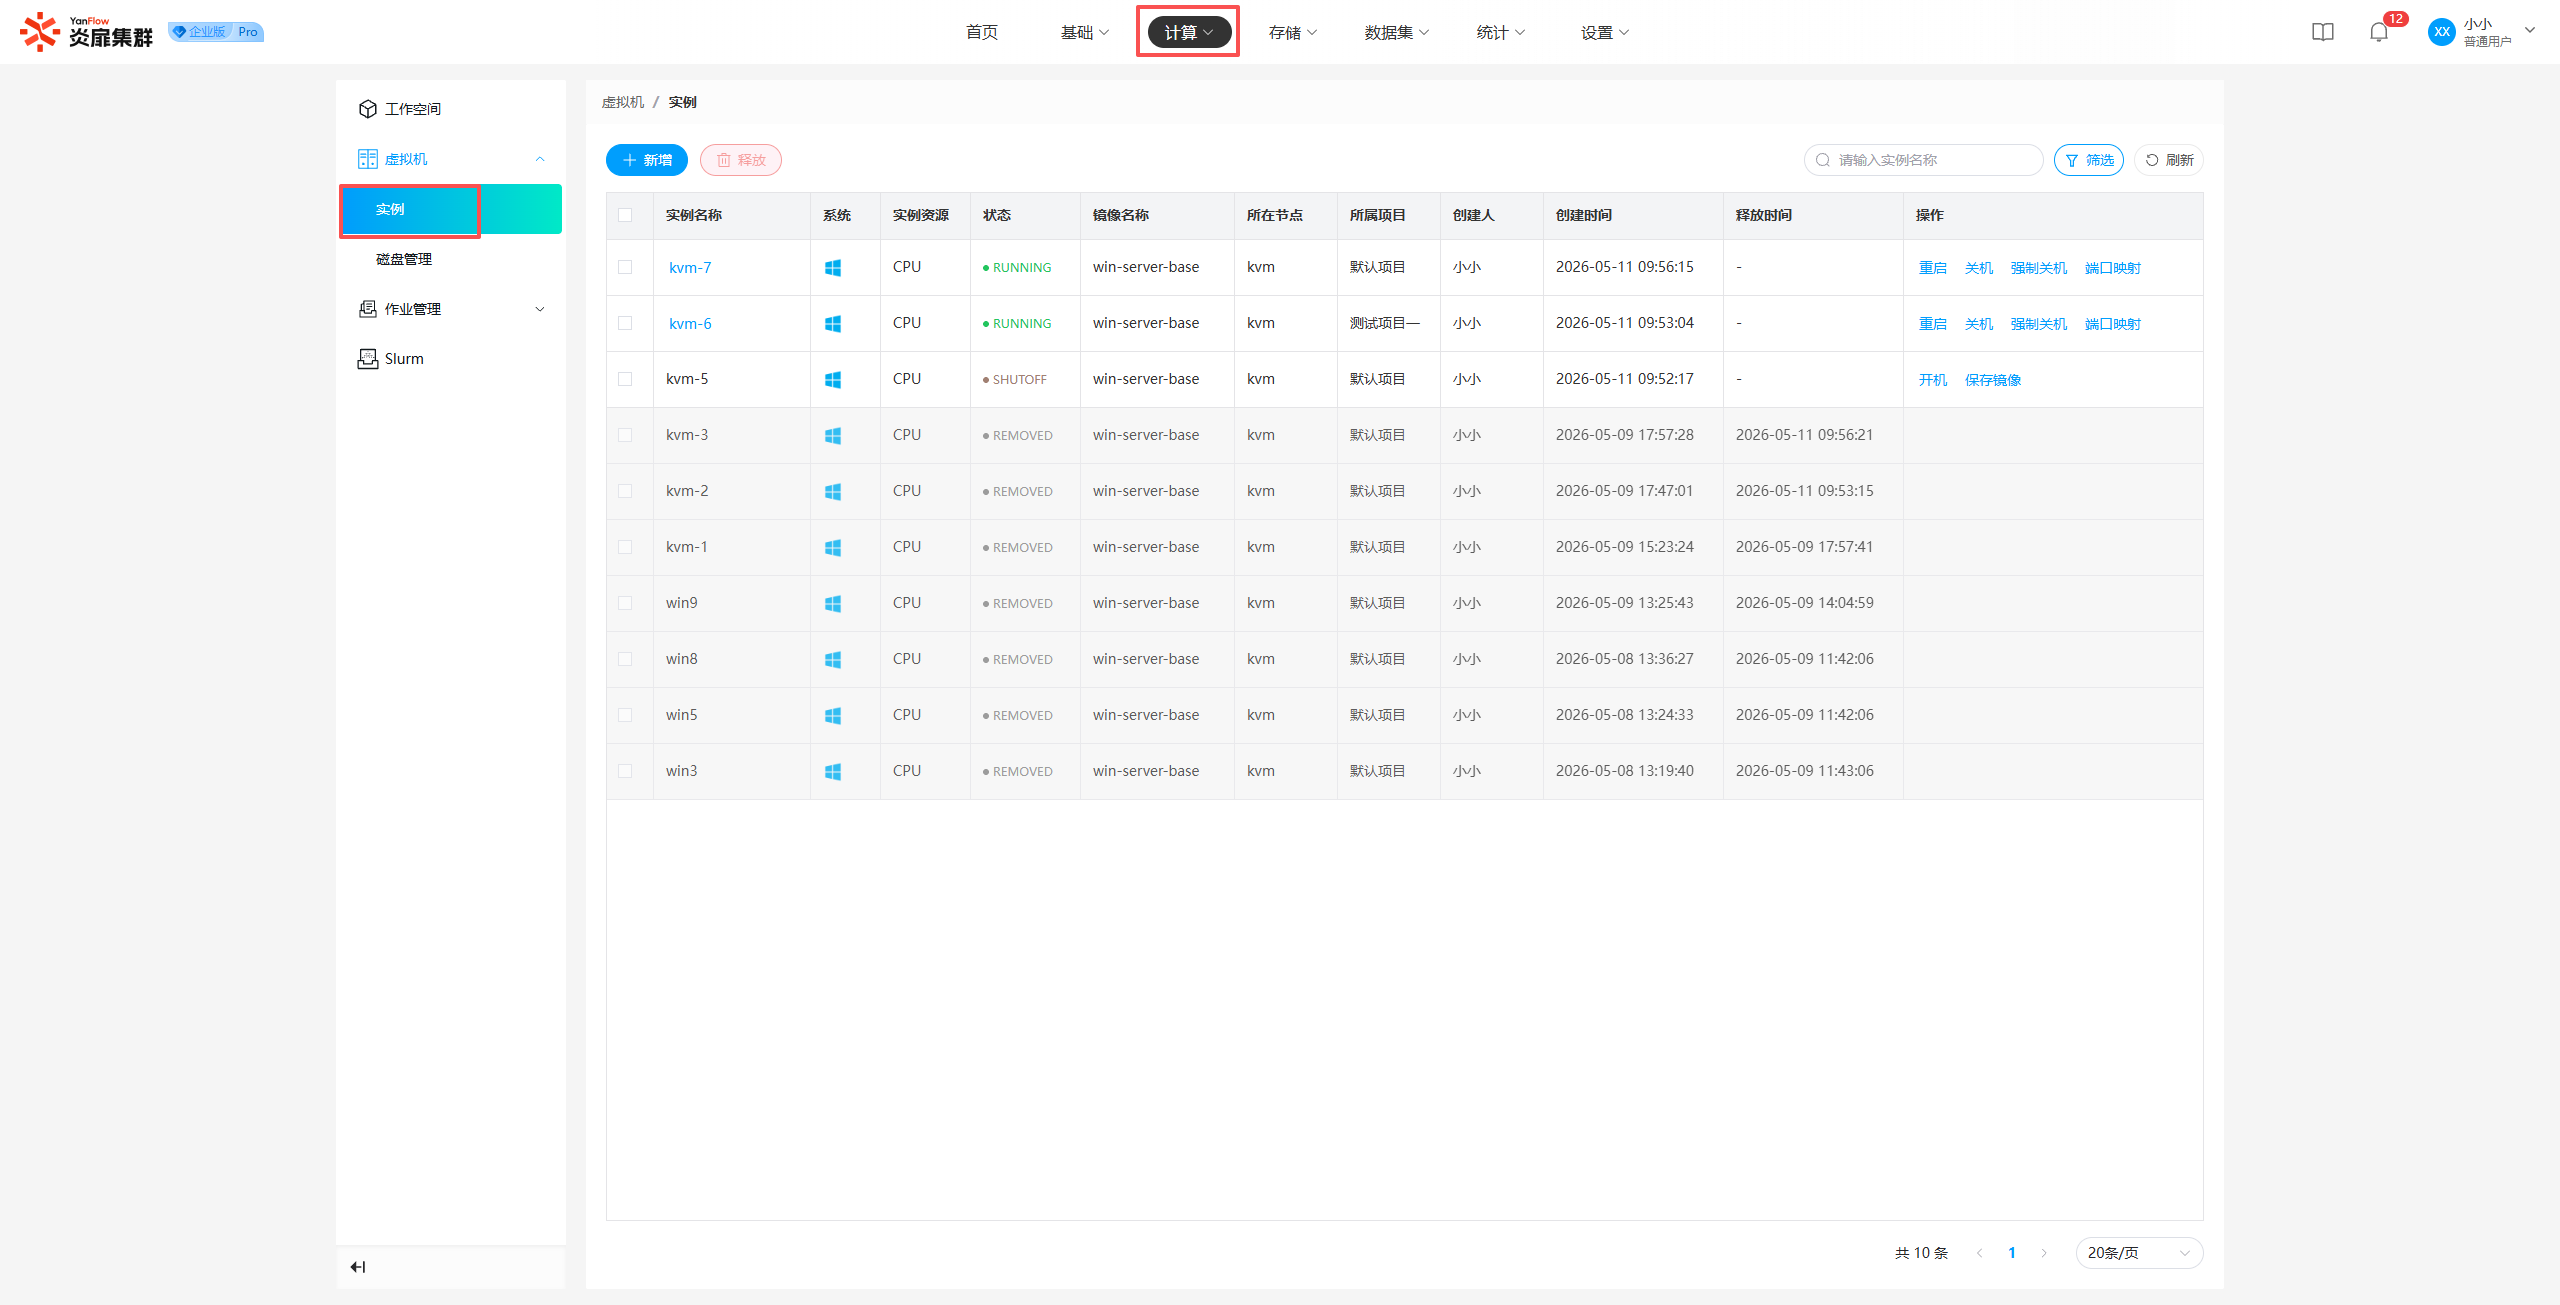
Add New Instance
Click Add to open the creation popup. Based on actual business needs, configure information such as belonging project, instance name, host, resource usage quantity, image, data disk, ports, etc. Click Confirm; if validation passes, a new instance will be created.
Note: After creation, the instance first enters the READY state to perform relevant processing. Once processing is complete, it enters the RUNNING state.
Instance Details
Click the Instance Name to display the details page, where you can view basic information, port mapping, resource information, and data disks.
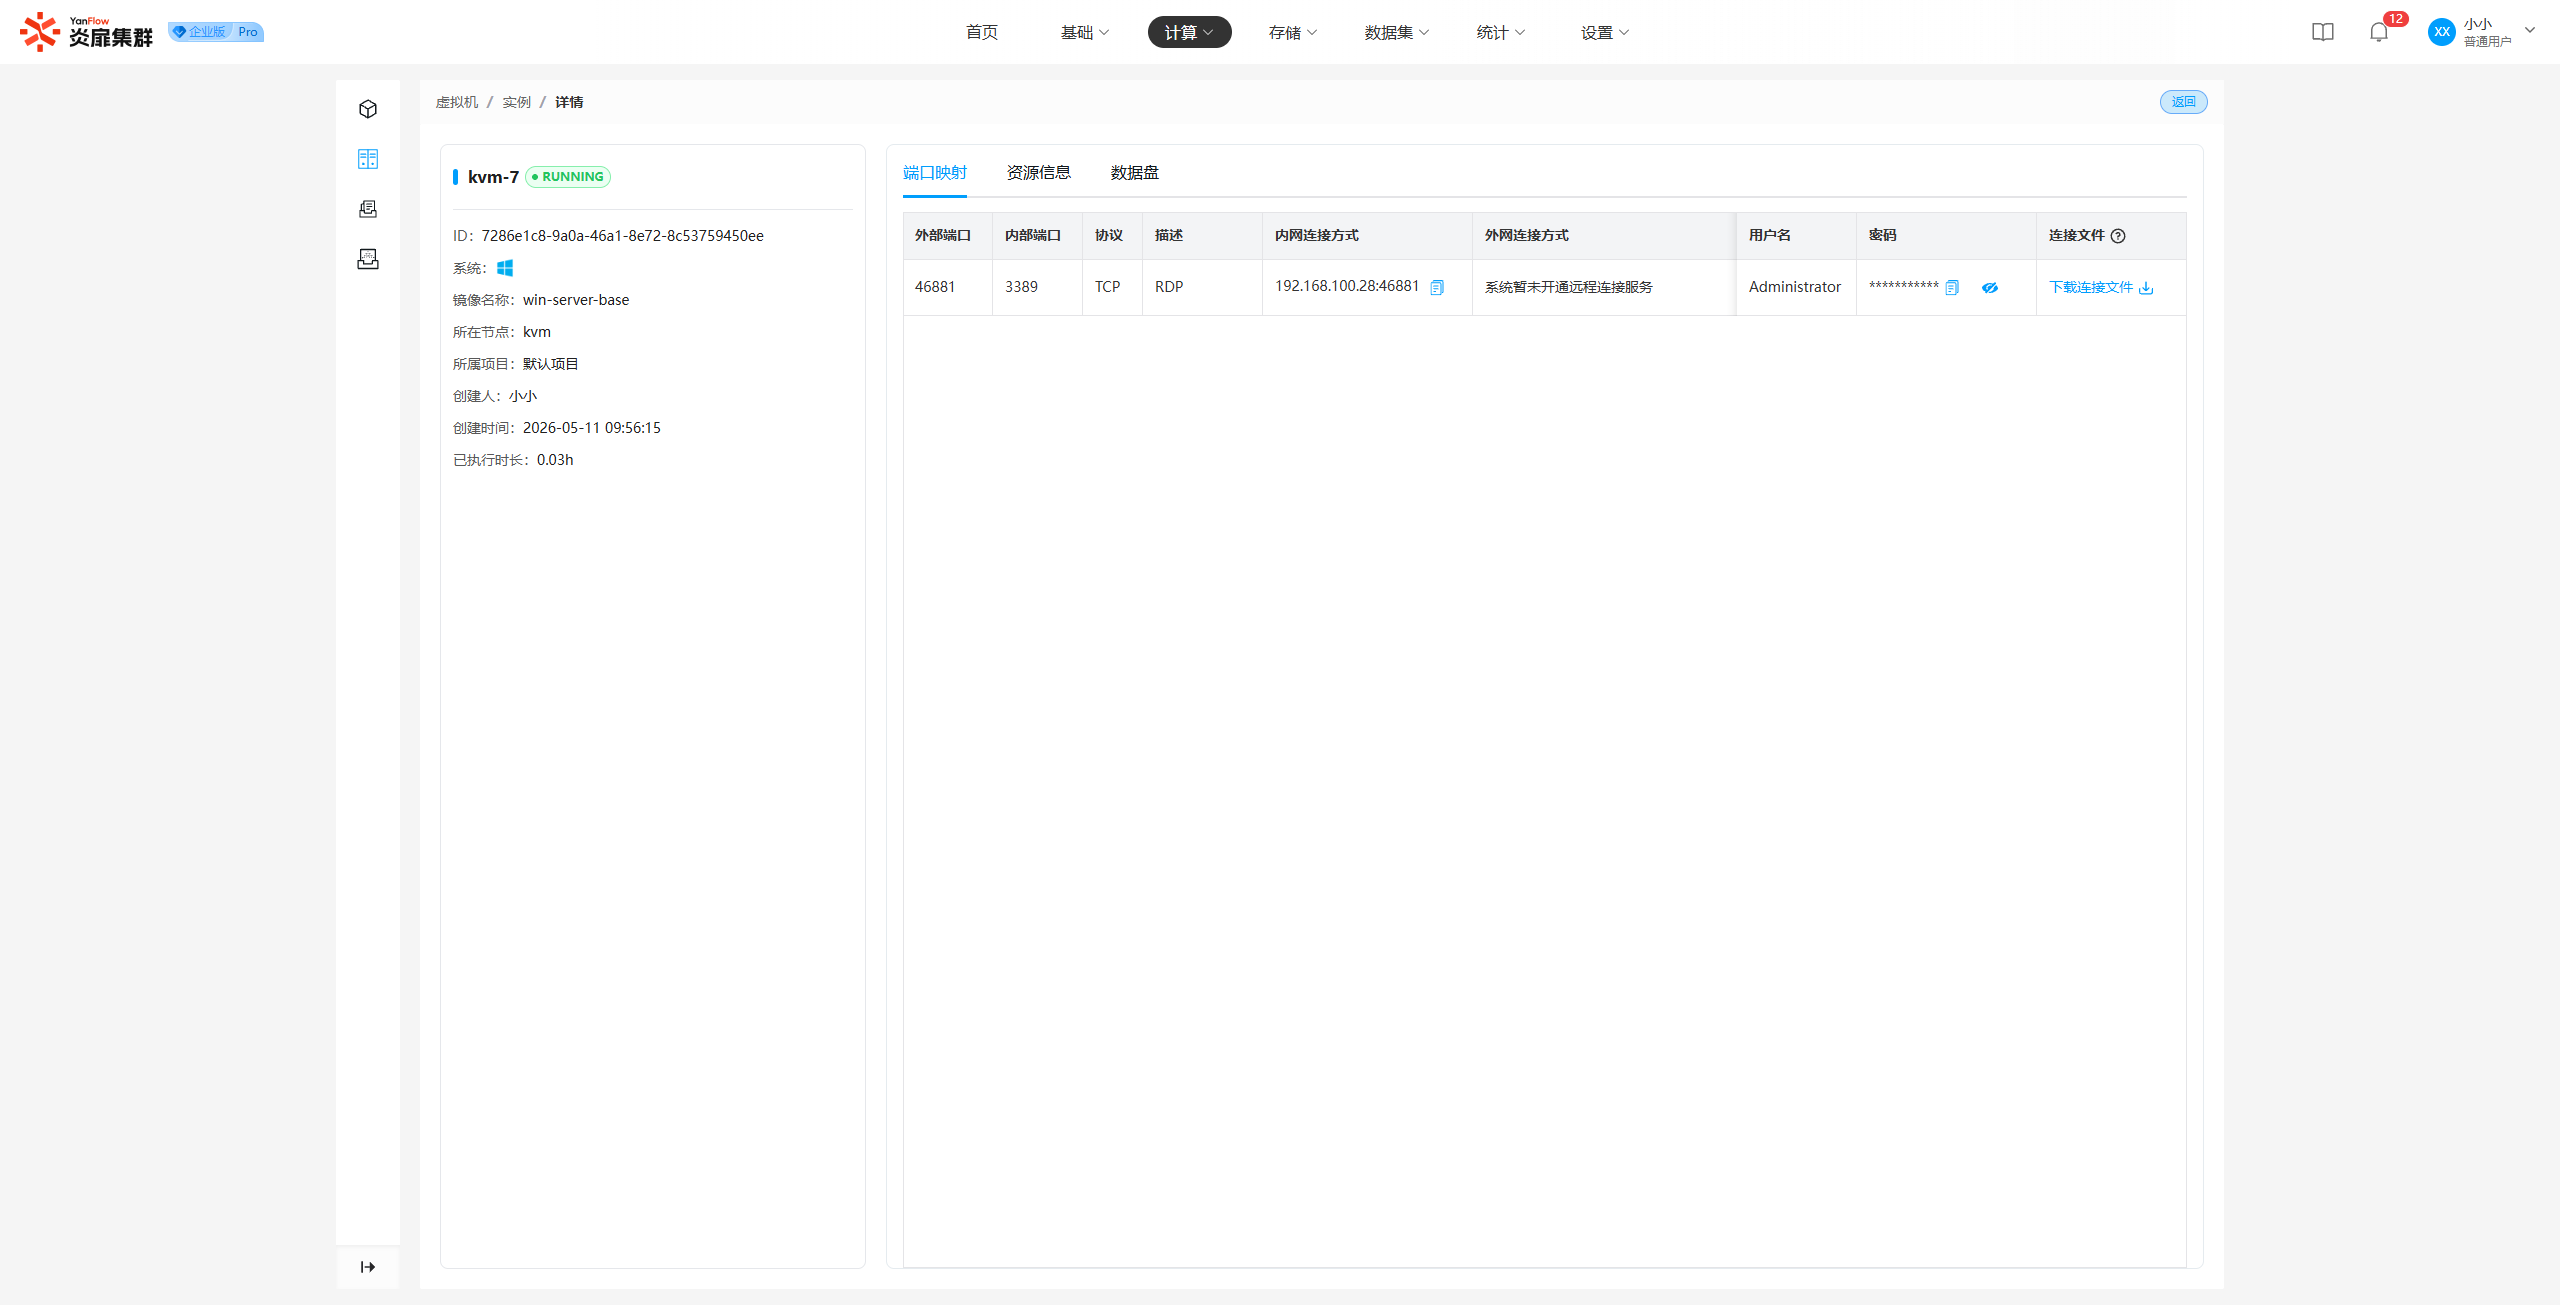
Note: Only RUNNING status can view
Details.
Restart/Power On/Off/Release
Supports regular users in performing Restart, Shutdown, Force Shutdown, Power On, and Release operations on instances. Click the corresponding operation, and click Confirm in the prompt popup to complete the operation.
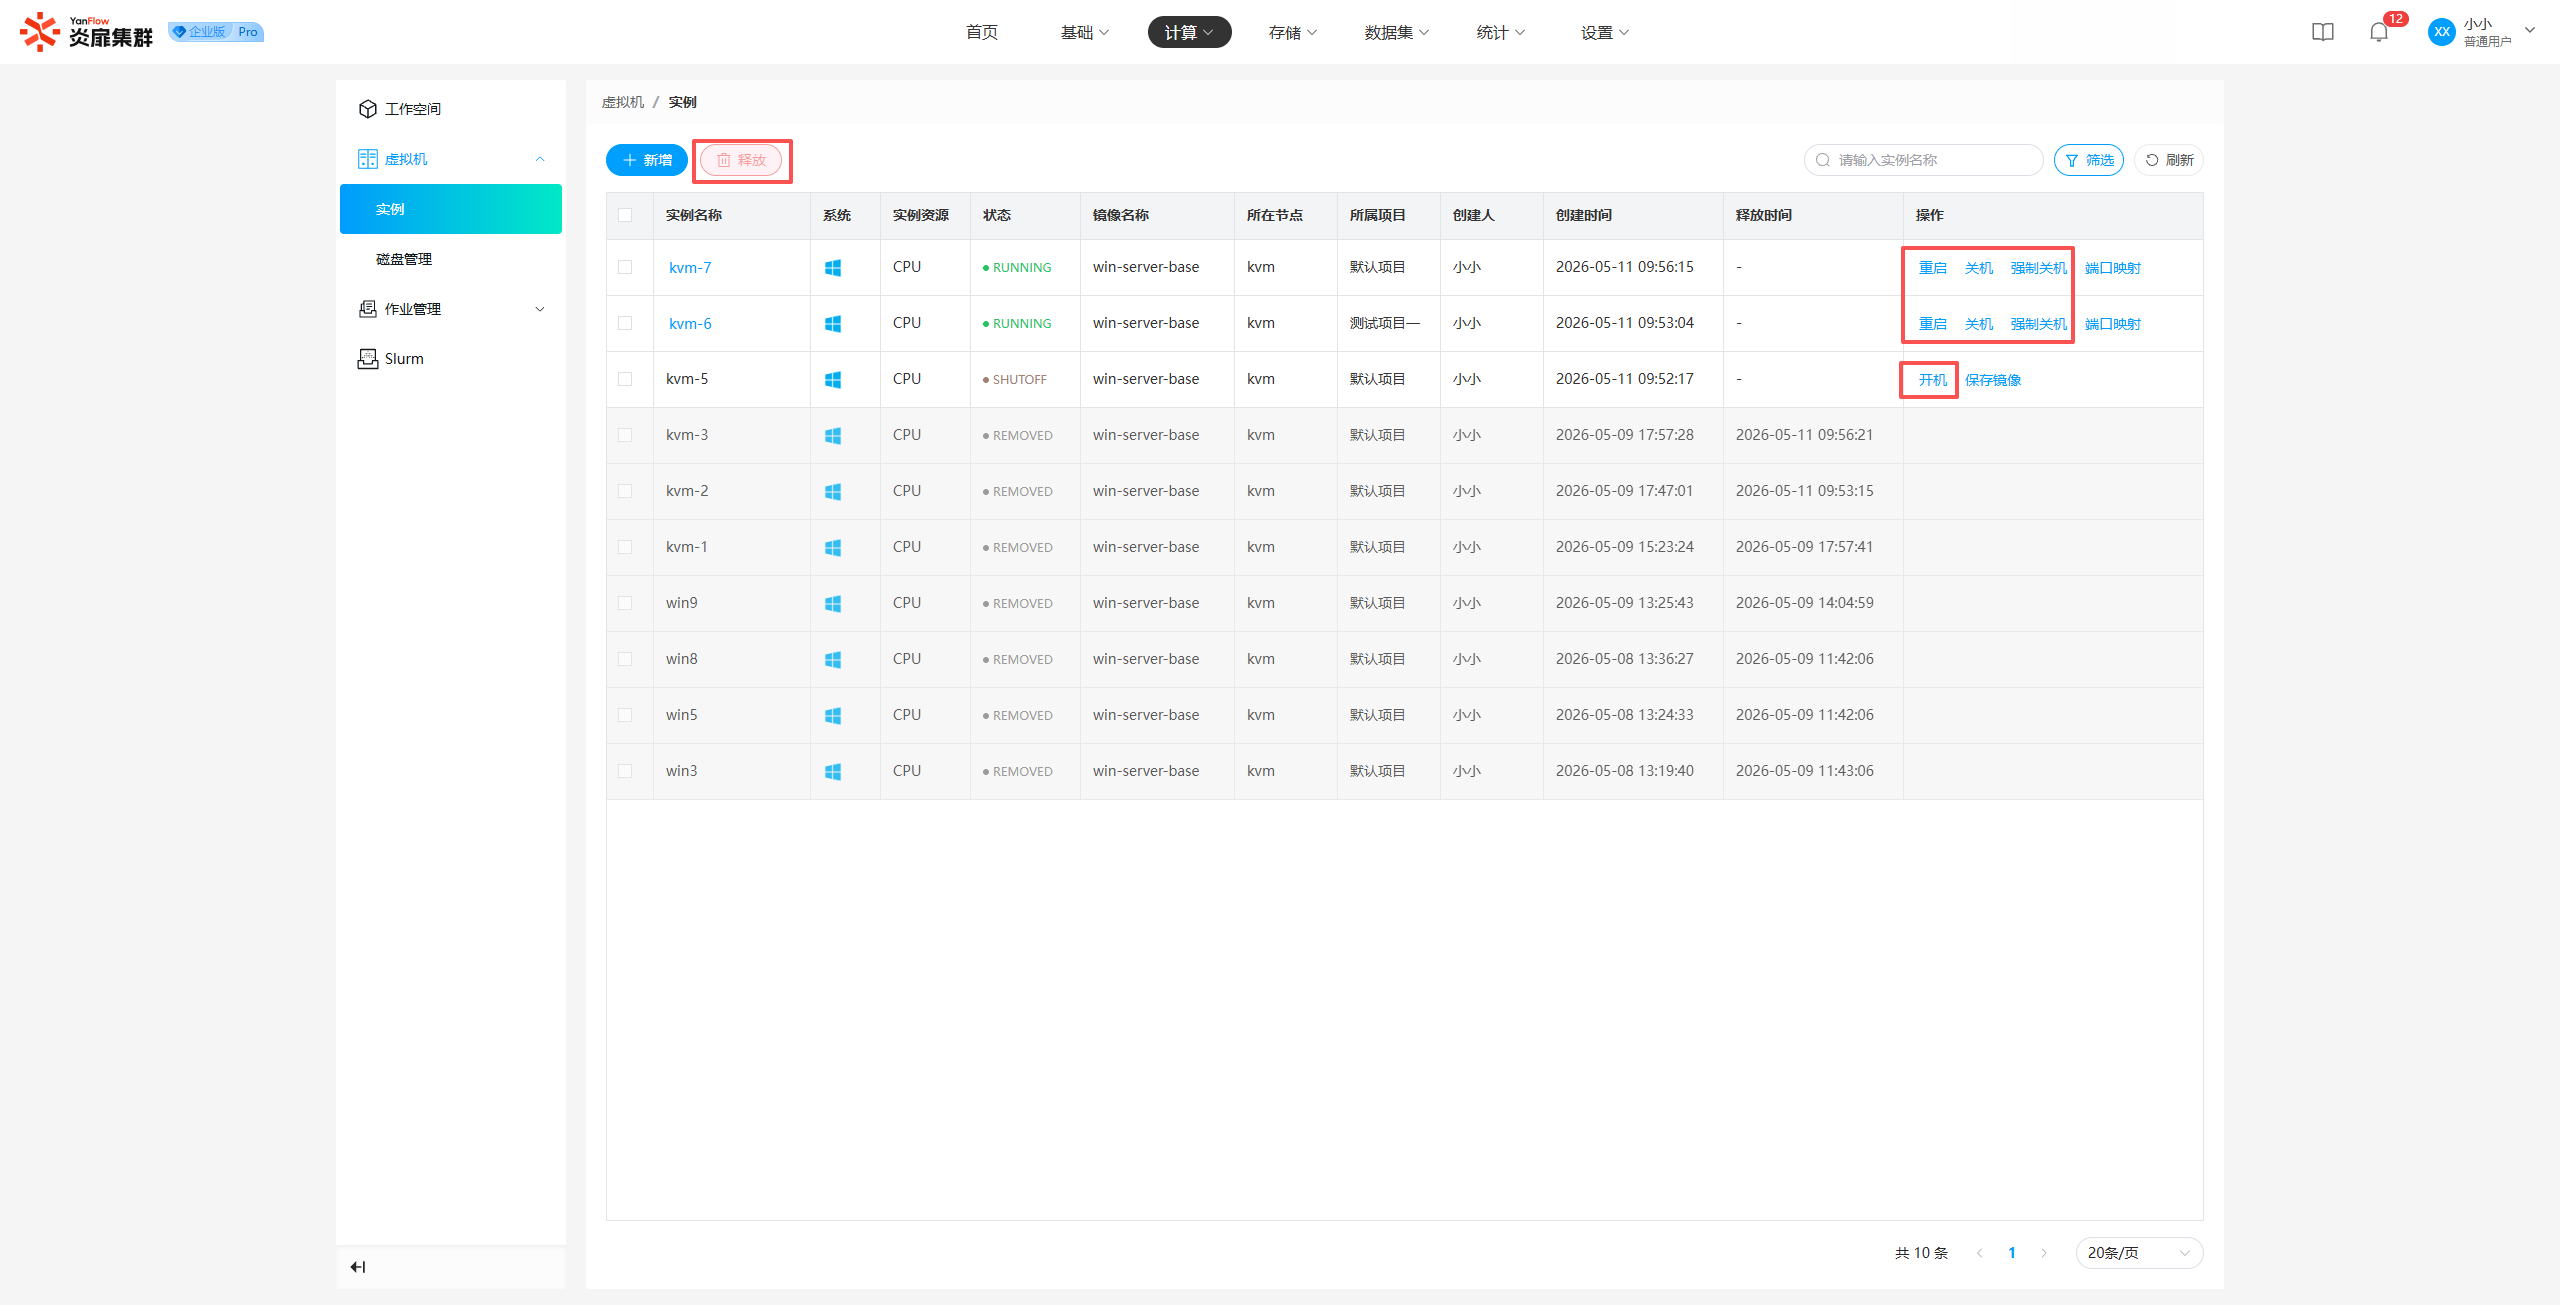
Note:
- Only
Restart,Shutdown, andForce Shutdowncan be executed in RUNNING status.- Only
Power Oncan be executed in SHUTOFF status.
Port Mapping
Click Port Mapping to display the instance's port mapping information in a popup. It also supports enabling external network remote connections for ports (requires the remote connection service to be enabled by the system in advance).
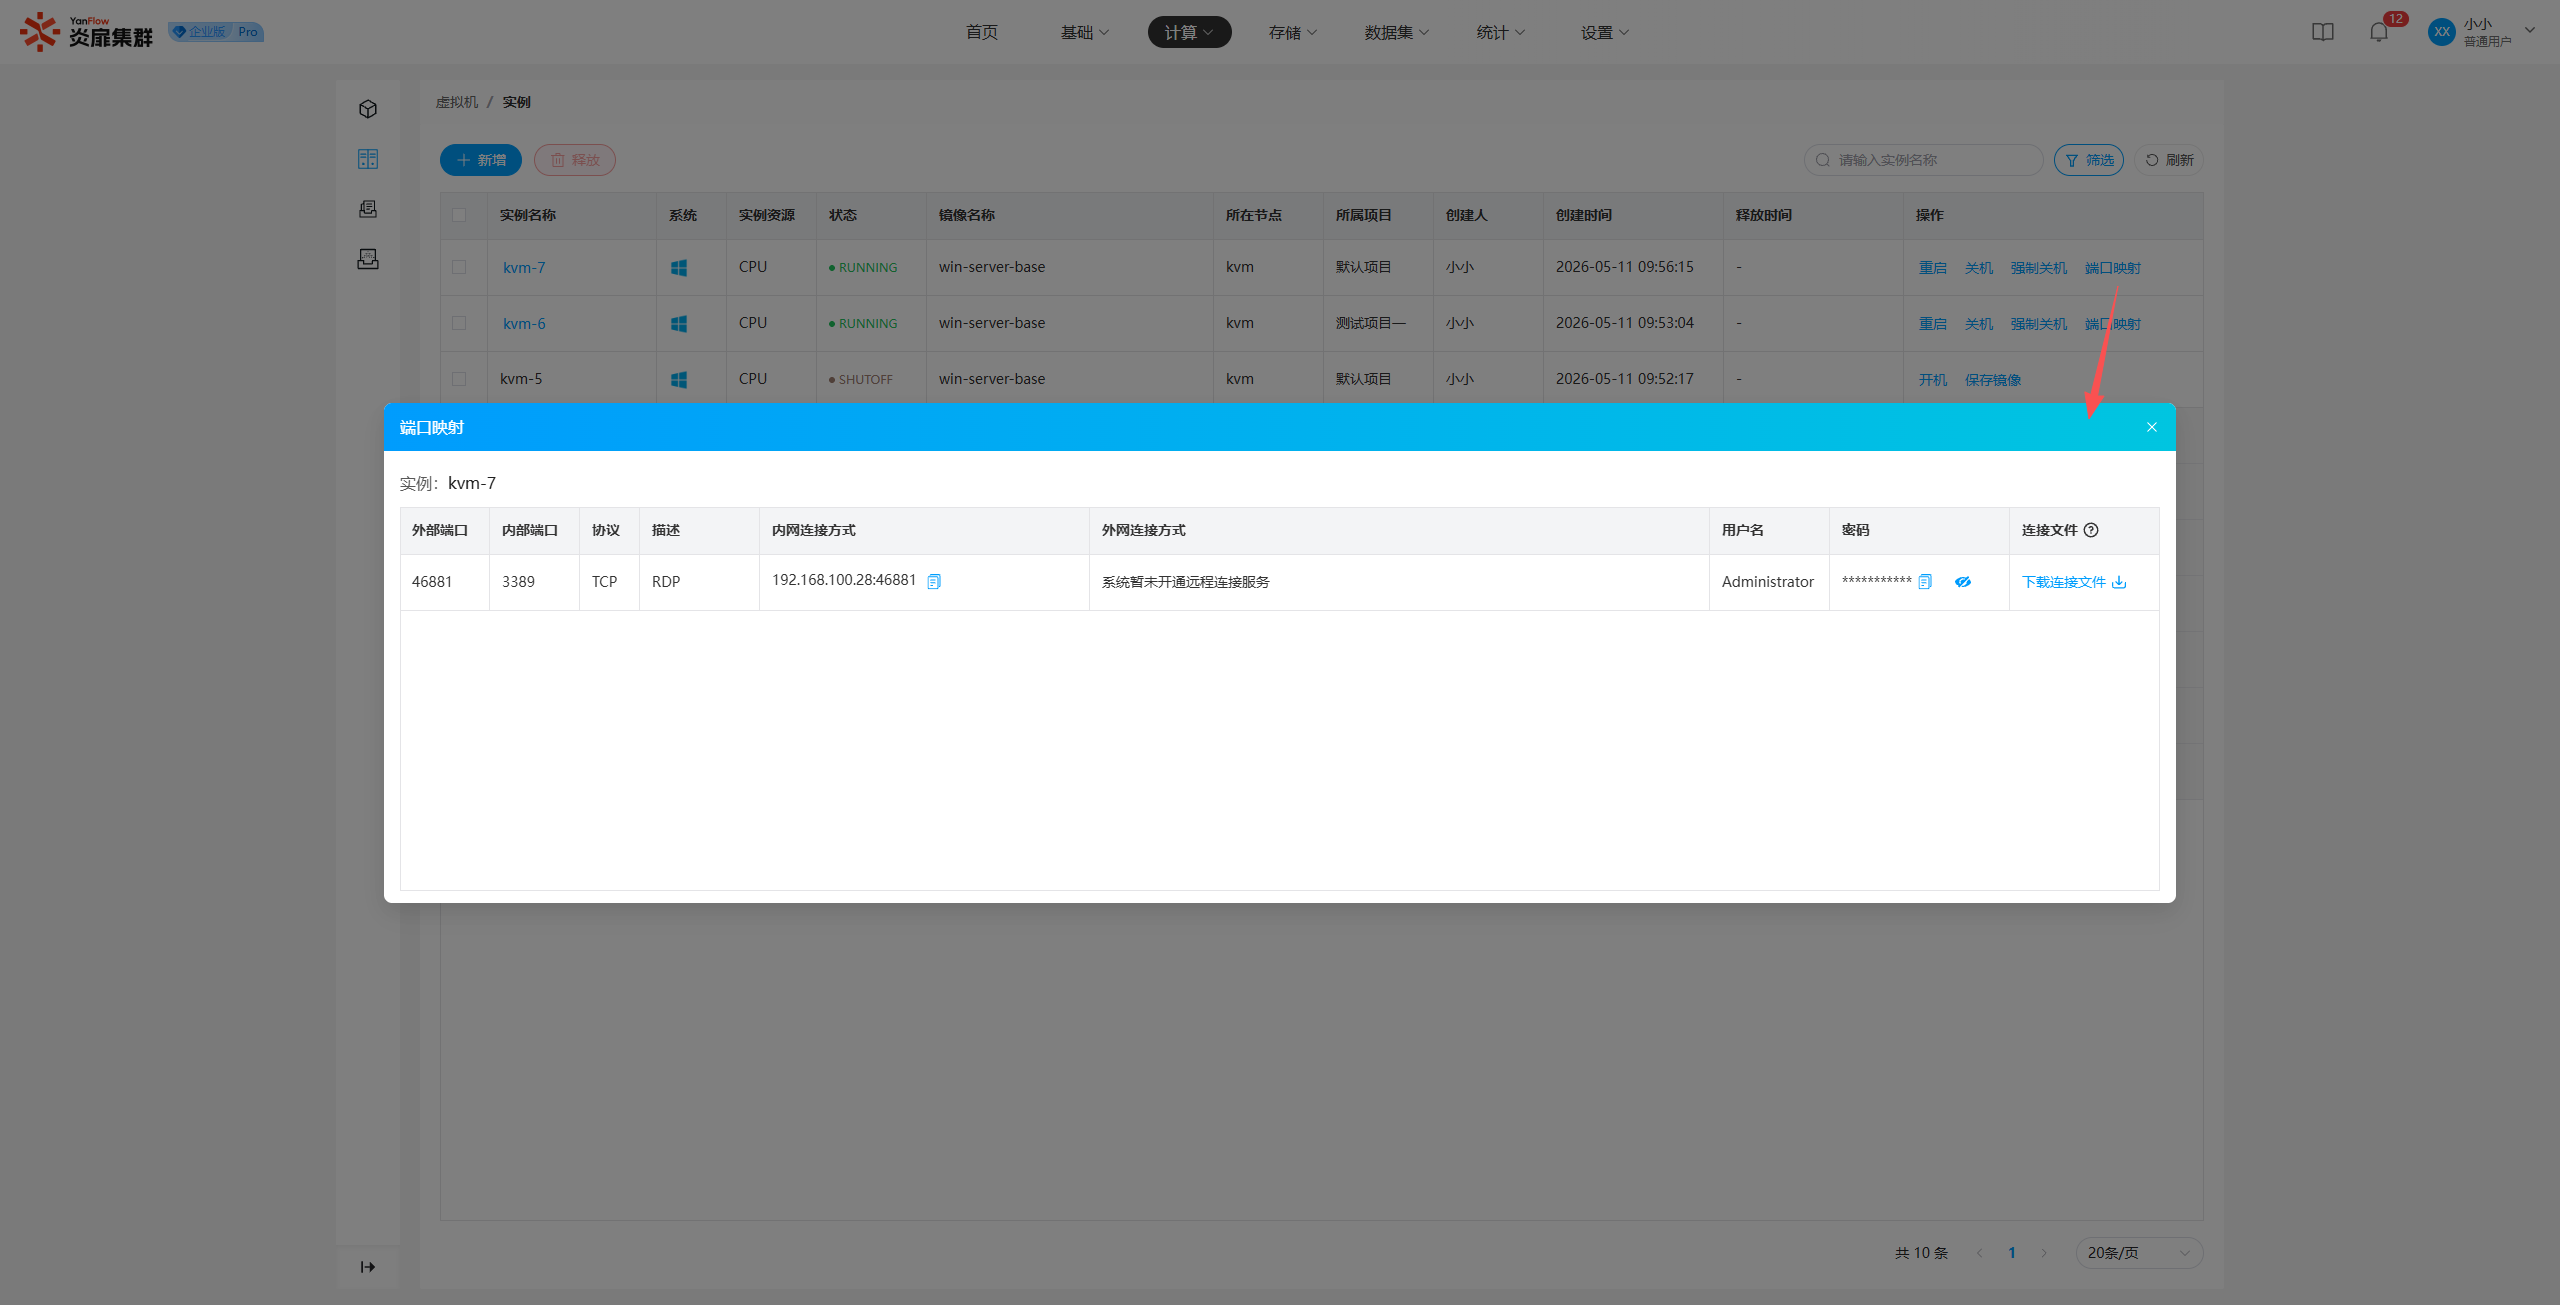
Note:
- Only RUNNING and PAUSED status can view
Port Mapping.- Only for instances created by yourself can you operate the
External Network Remote Connectiontoggle for ports.- Only for instances created by yourself and for RDP type ports is
Download Connection Filesupported.
Save Image
Click Save Image to display a settings popup. Enter an image name and click Save Image. If validation passes, the save operation will be executed.
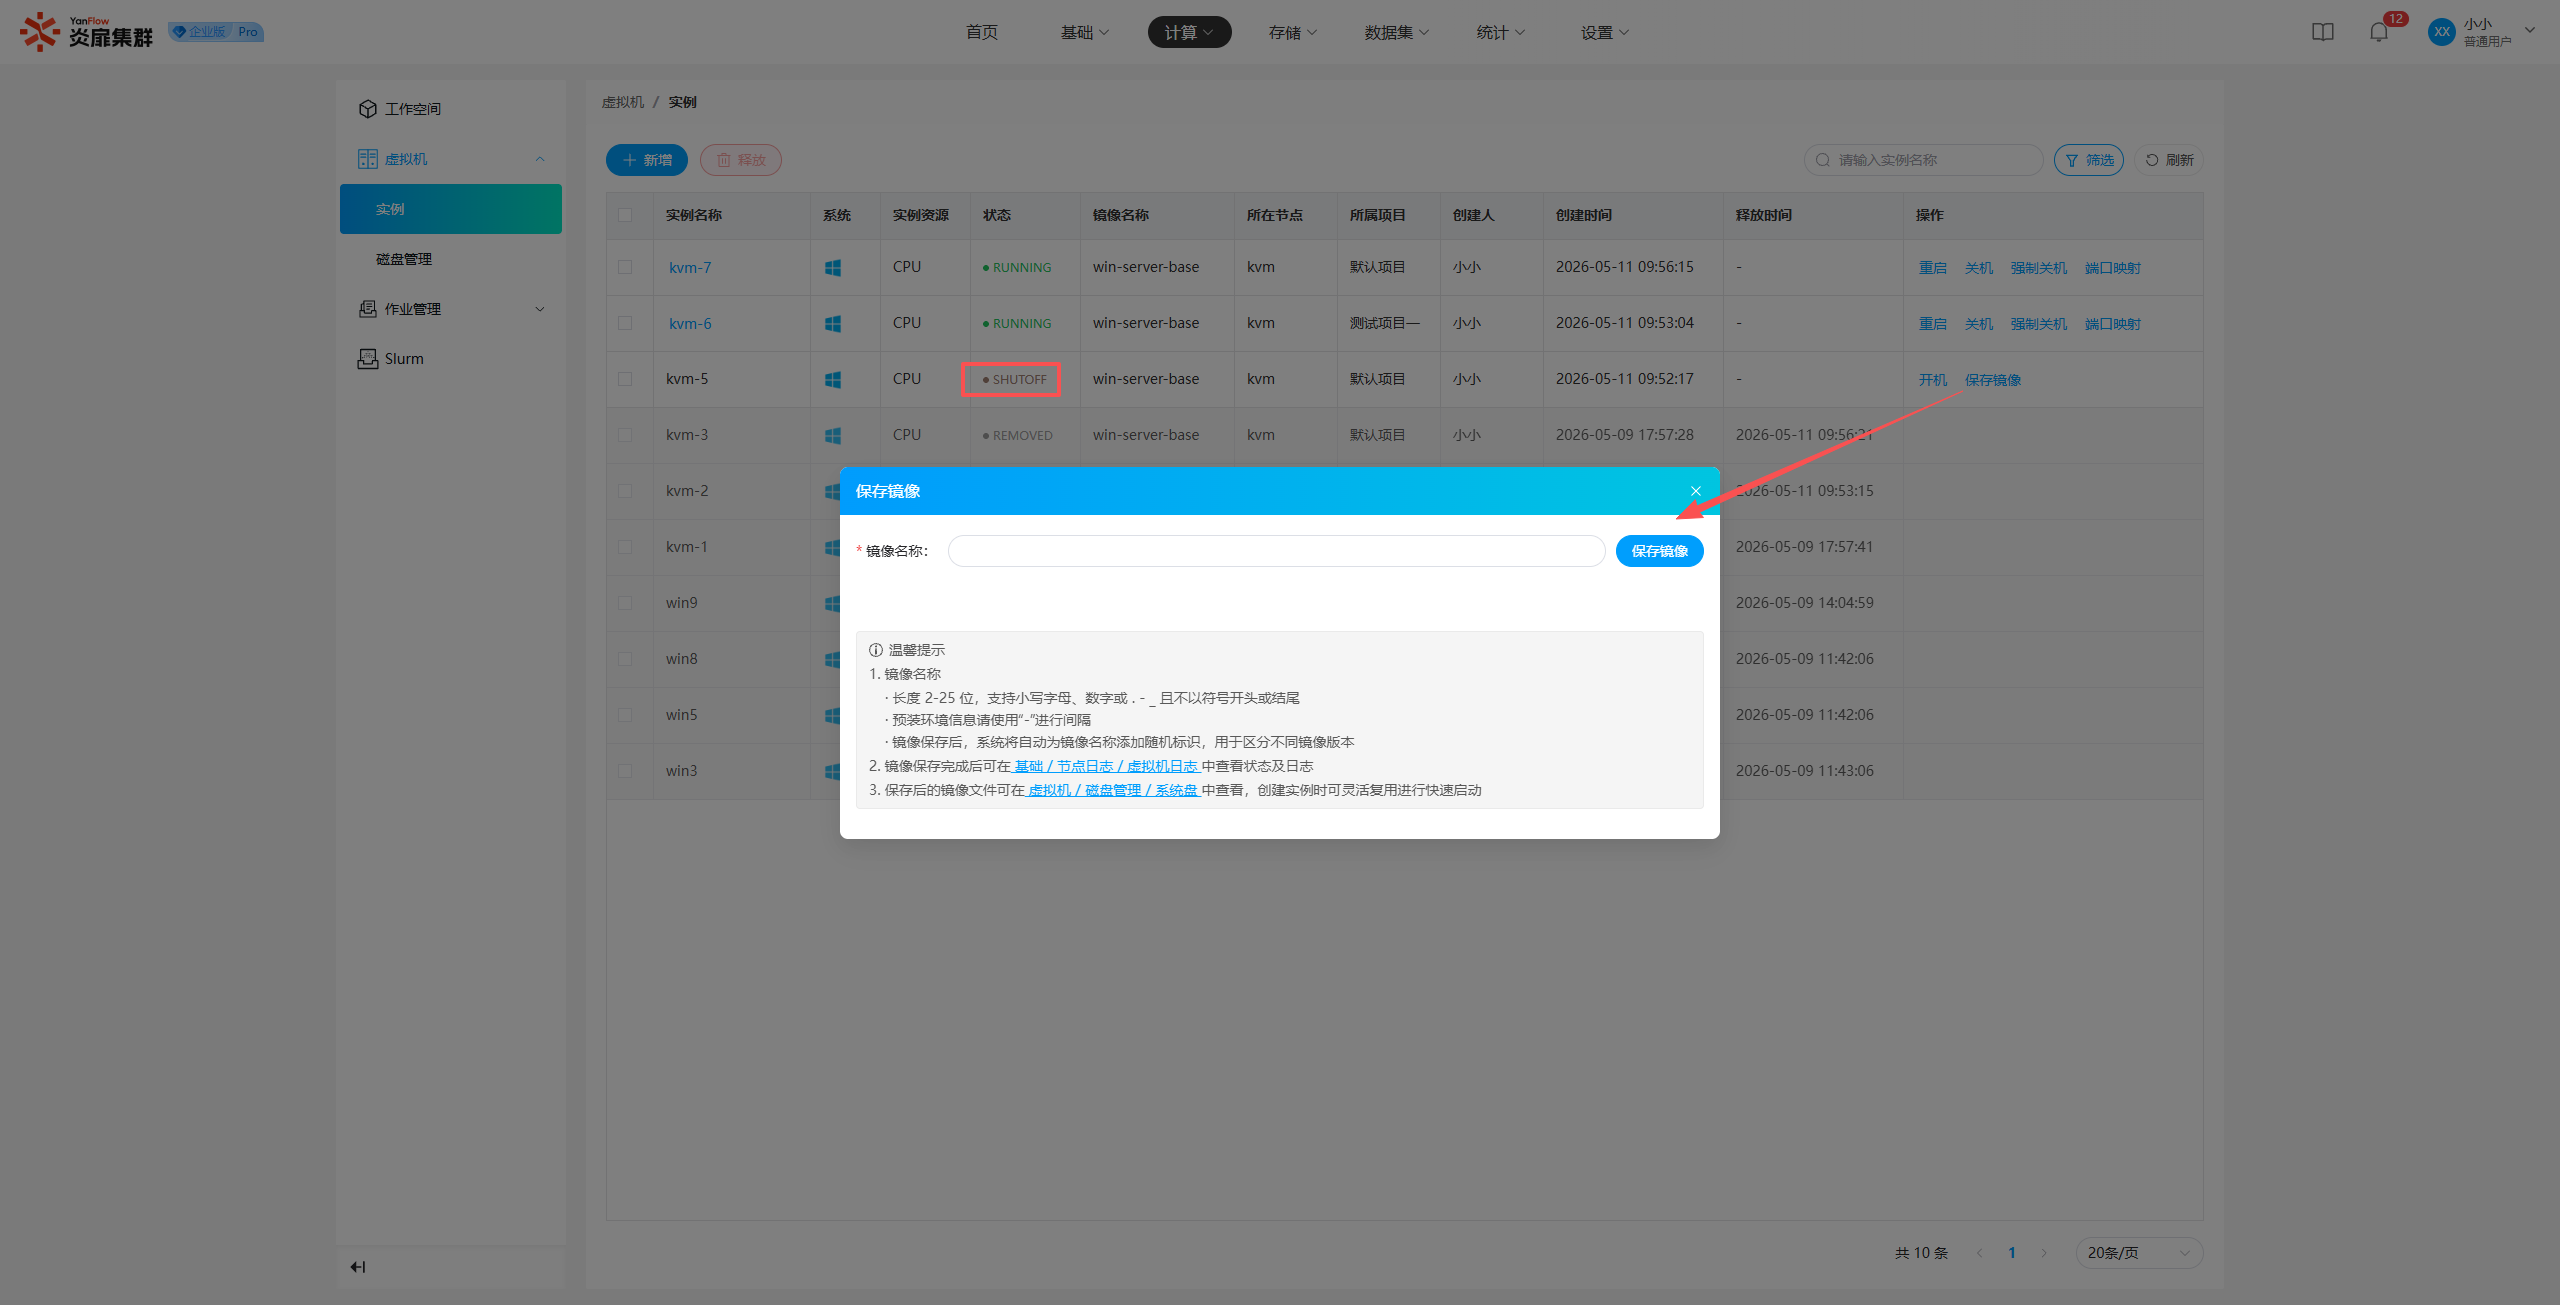
Note:
- Only SHUTOFF status supports
Save Image.
Job Management
Kubernetes
Job List
Regular users can view all Kubernetes jobs they have created and all jobs under the projects they are currently responsible for. Support for keyword search via job name is provided, as well as filtered search by status, belonging project, creation date, and creator.
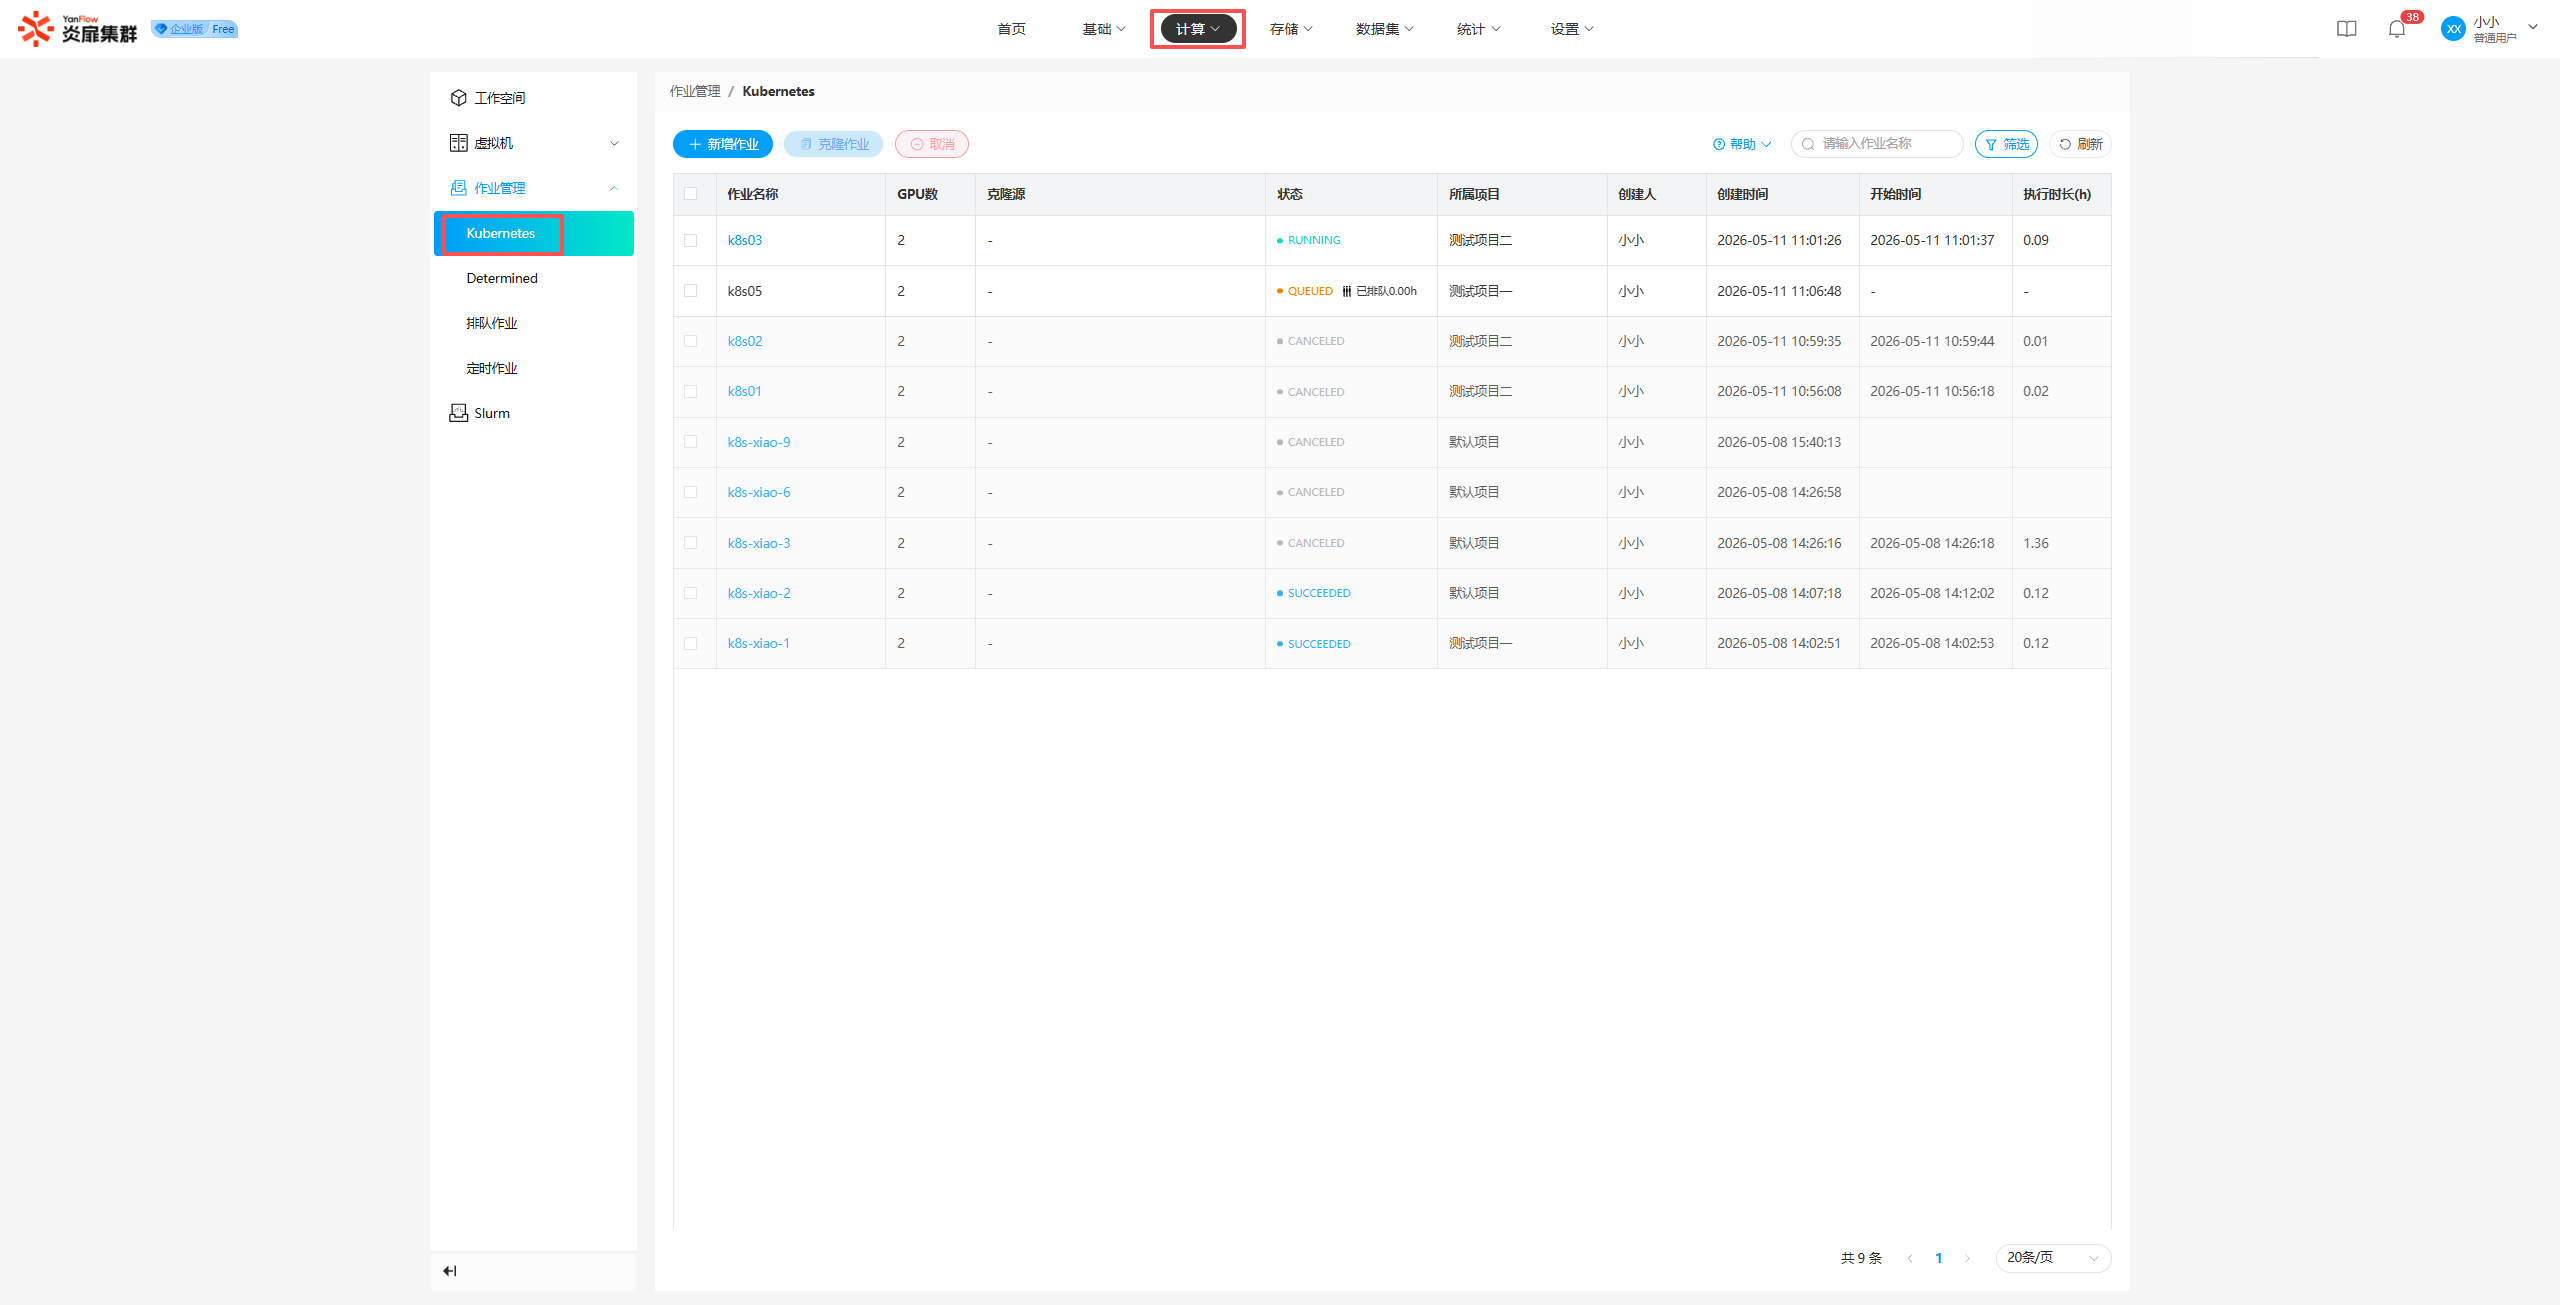
Add New Job
Click Add Job to open the creation popup. Based on actual business needs, configure information such as belonging project, resources, image, and mounts. Select the executable training code path (Please select the directory of the code project), supplement environment dependencies via installation commands, and click Submit or Scheduled Submit. If validation passes, a new Kubernetes job will be created.
Parameter Description
| Parameter | Description |
|---|---|
| GPU Model | Selects the required hardware model, limited by system quota and current remaining quantity |
| Quantity | The number of nodes to be scheduled |
| Image | Select an appropriate image, ensuring PyTorch and relevant environments and communication libraries are installed |
| Mount | Mounts the platform's distributed storage (File Management) into the container for data persistence |
| Code Path | Select the executable training code path; the path should point to the folder where the executable file is located |
| Dependency Install Command | If dependencies are missing in the image, supplement them via the "Dependency Environment Installation Command" |
Note: Code projects are generally stored in the user's personal file directory. The platform defaults to mounting this directory (training code path) to
/root/workdir/inside the container.
Job Details
Click the Job Name to display the details page, which supports viewing logs and the Console connection.
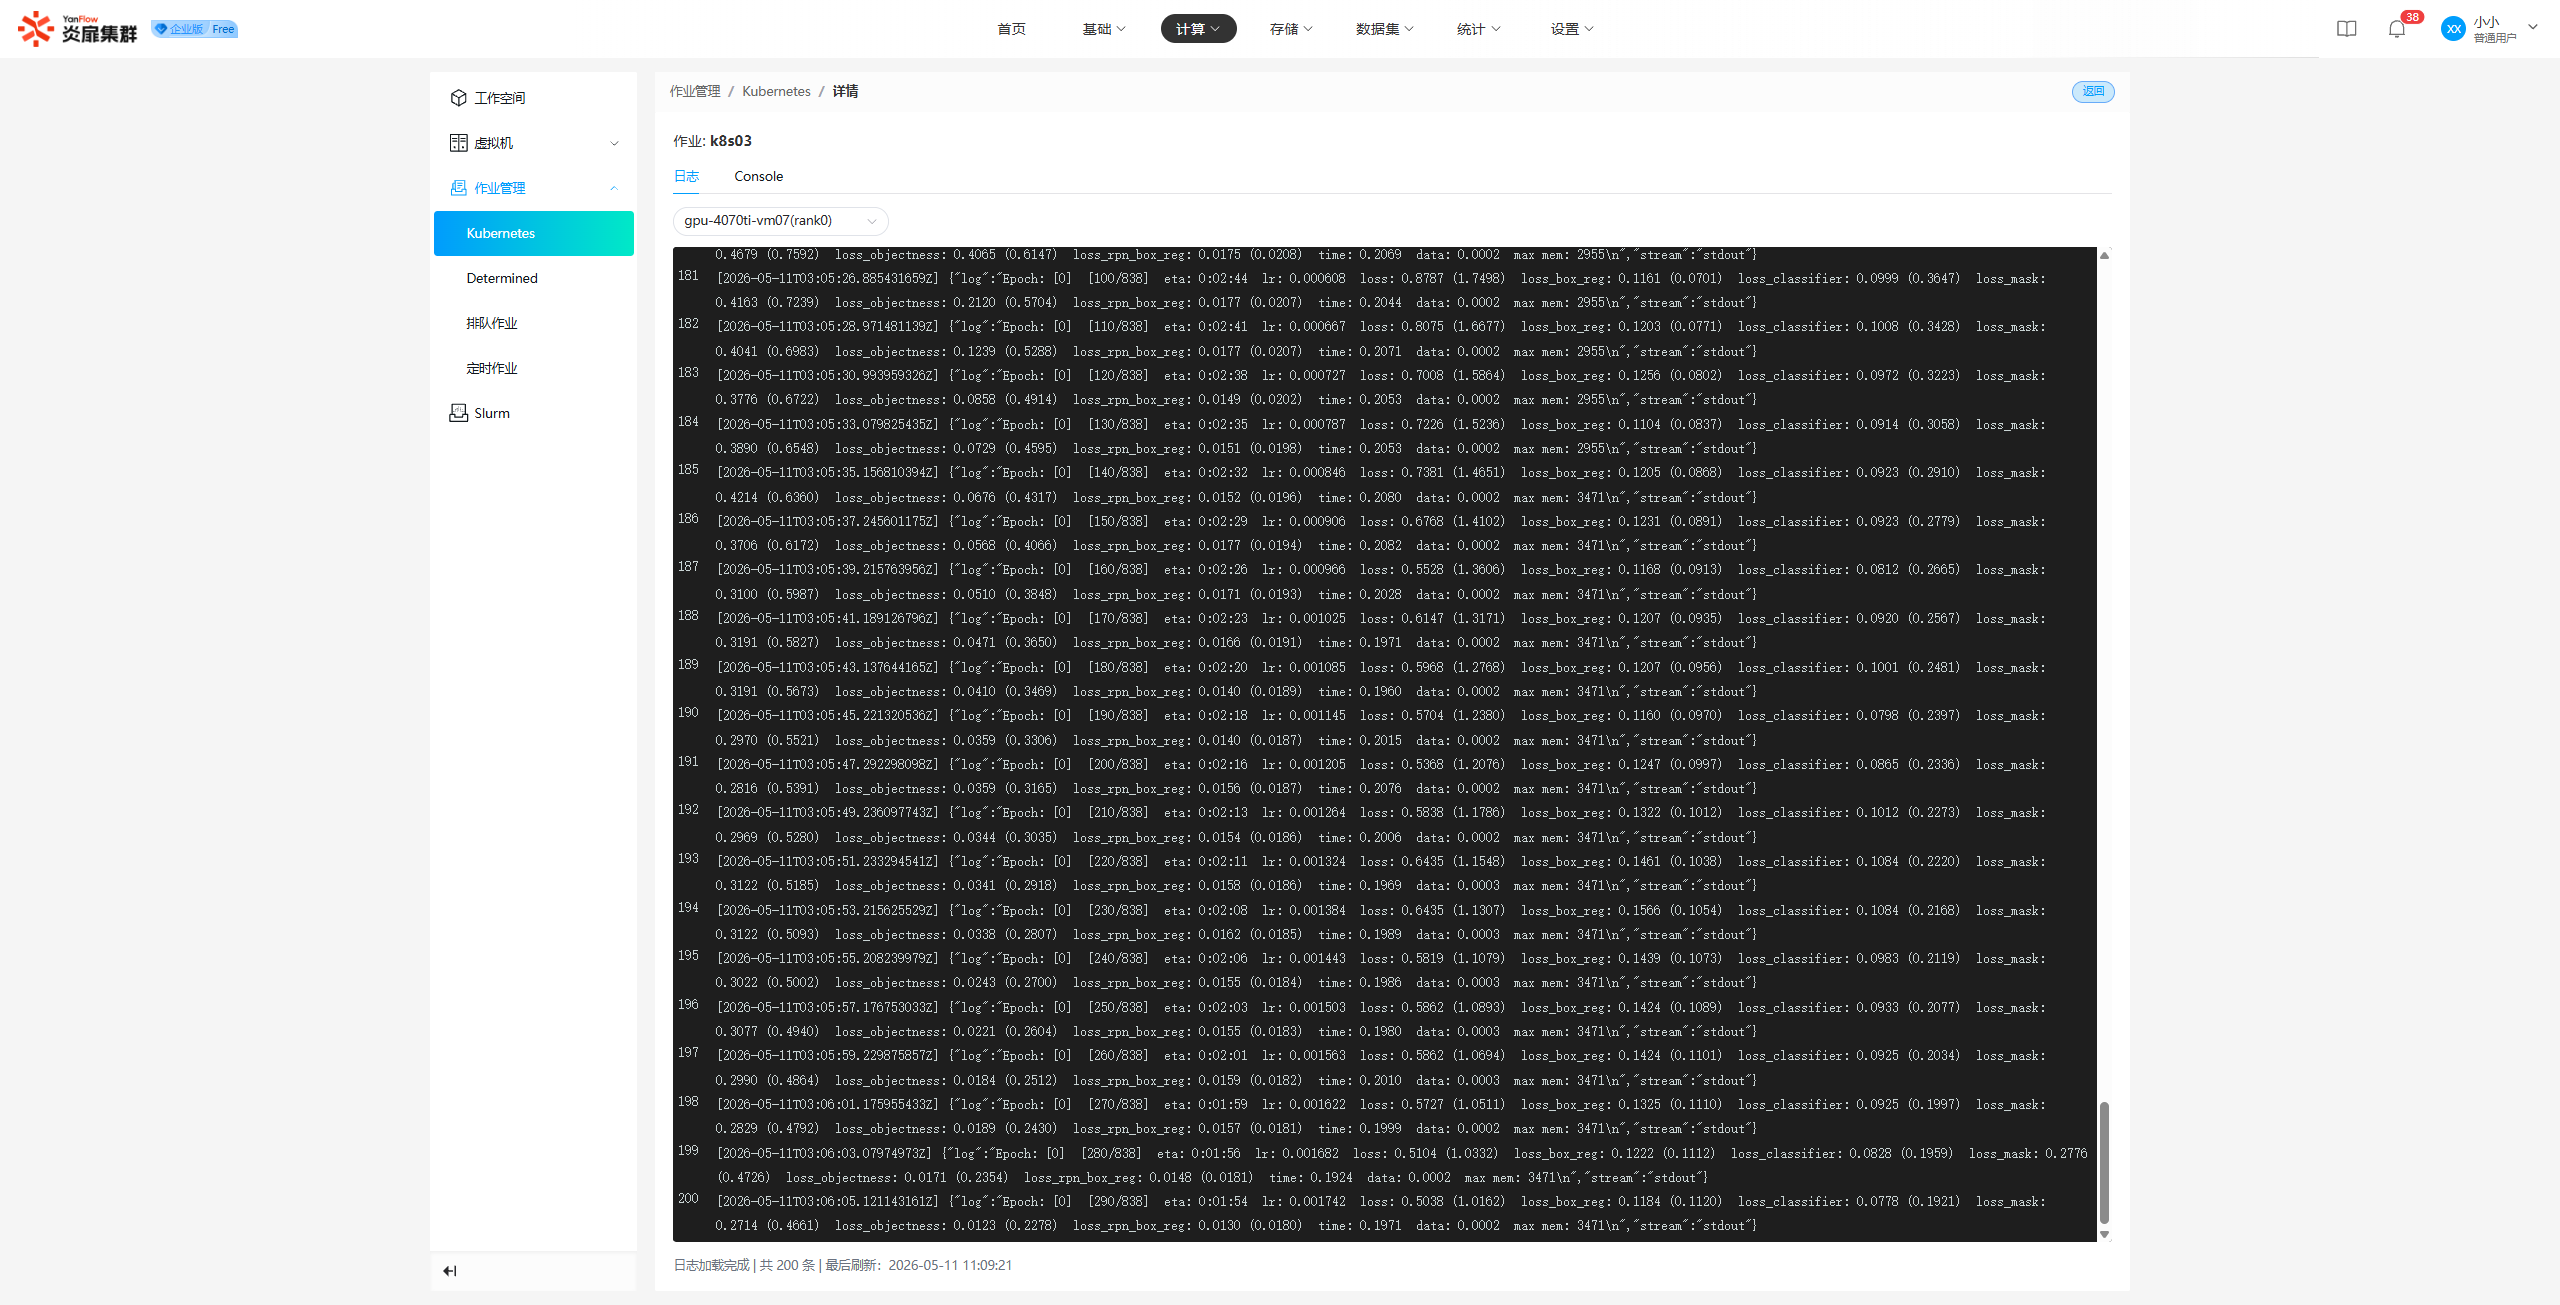
Cancel Job
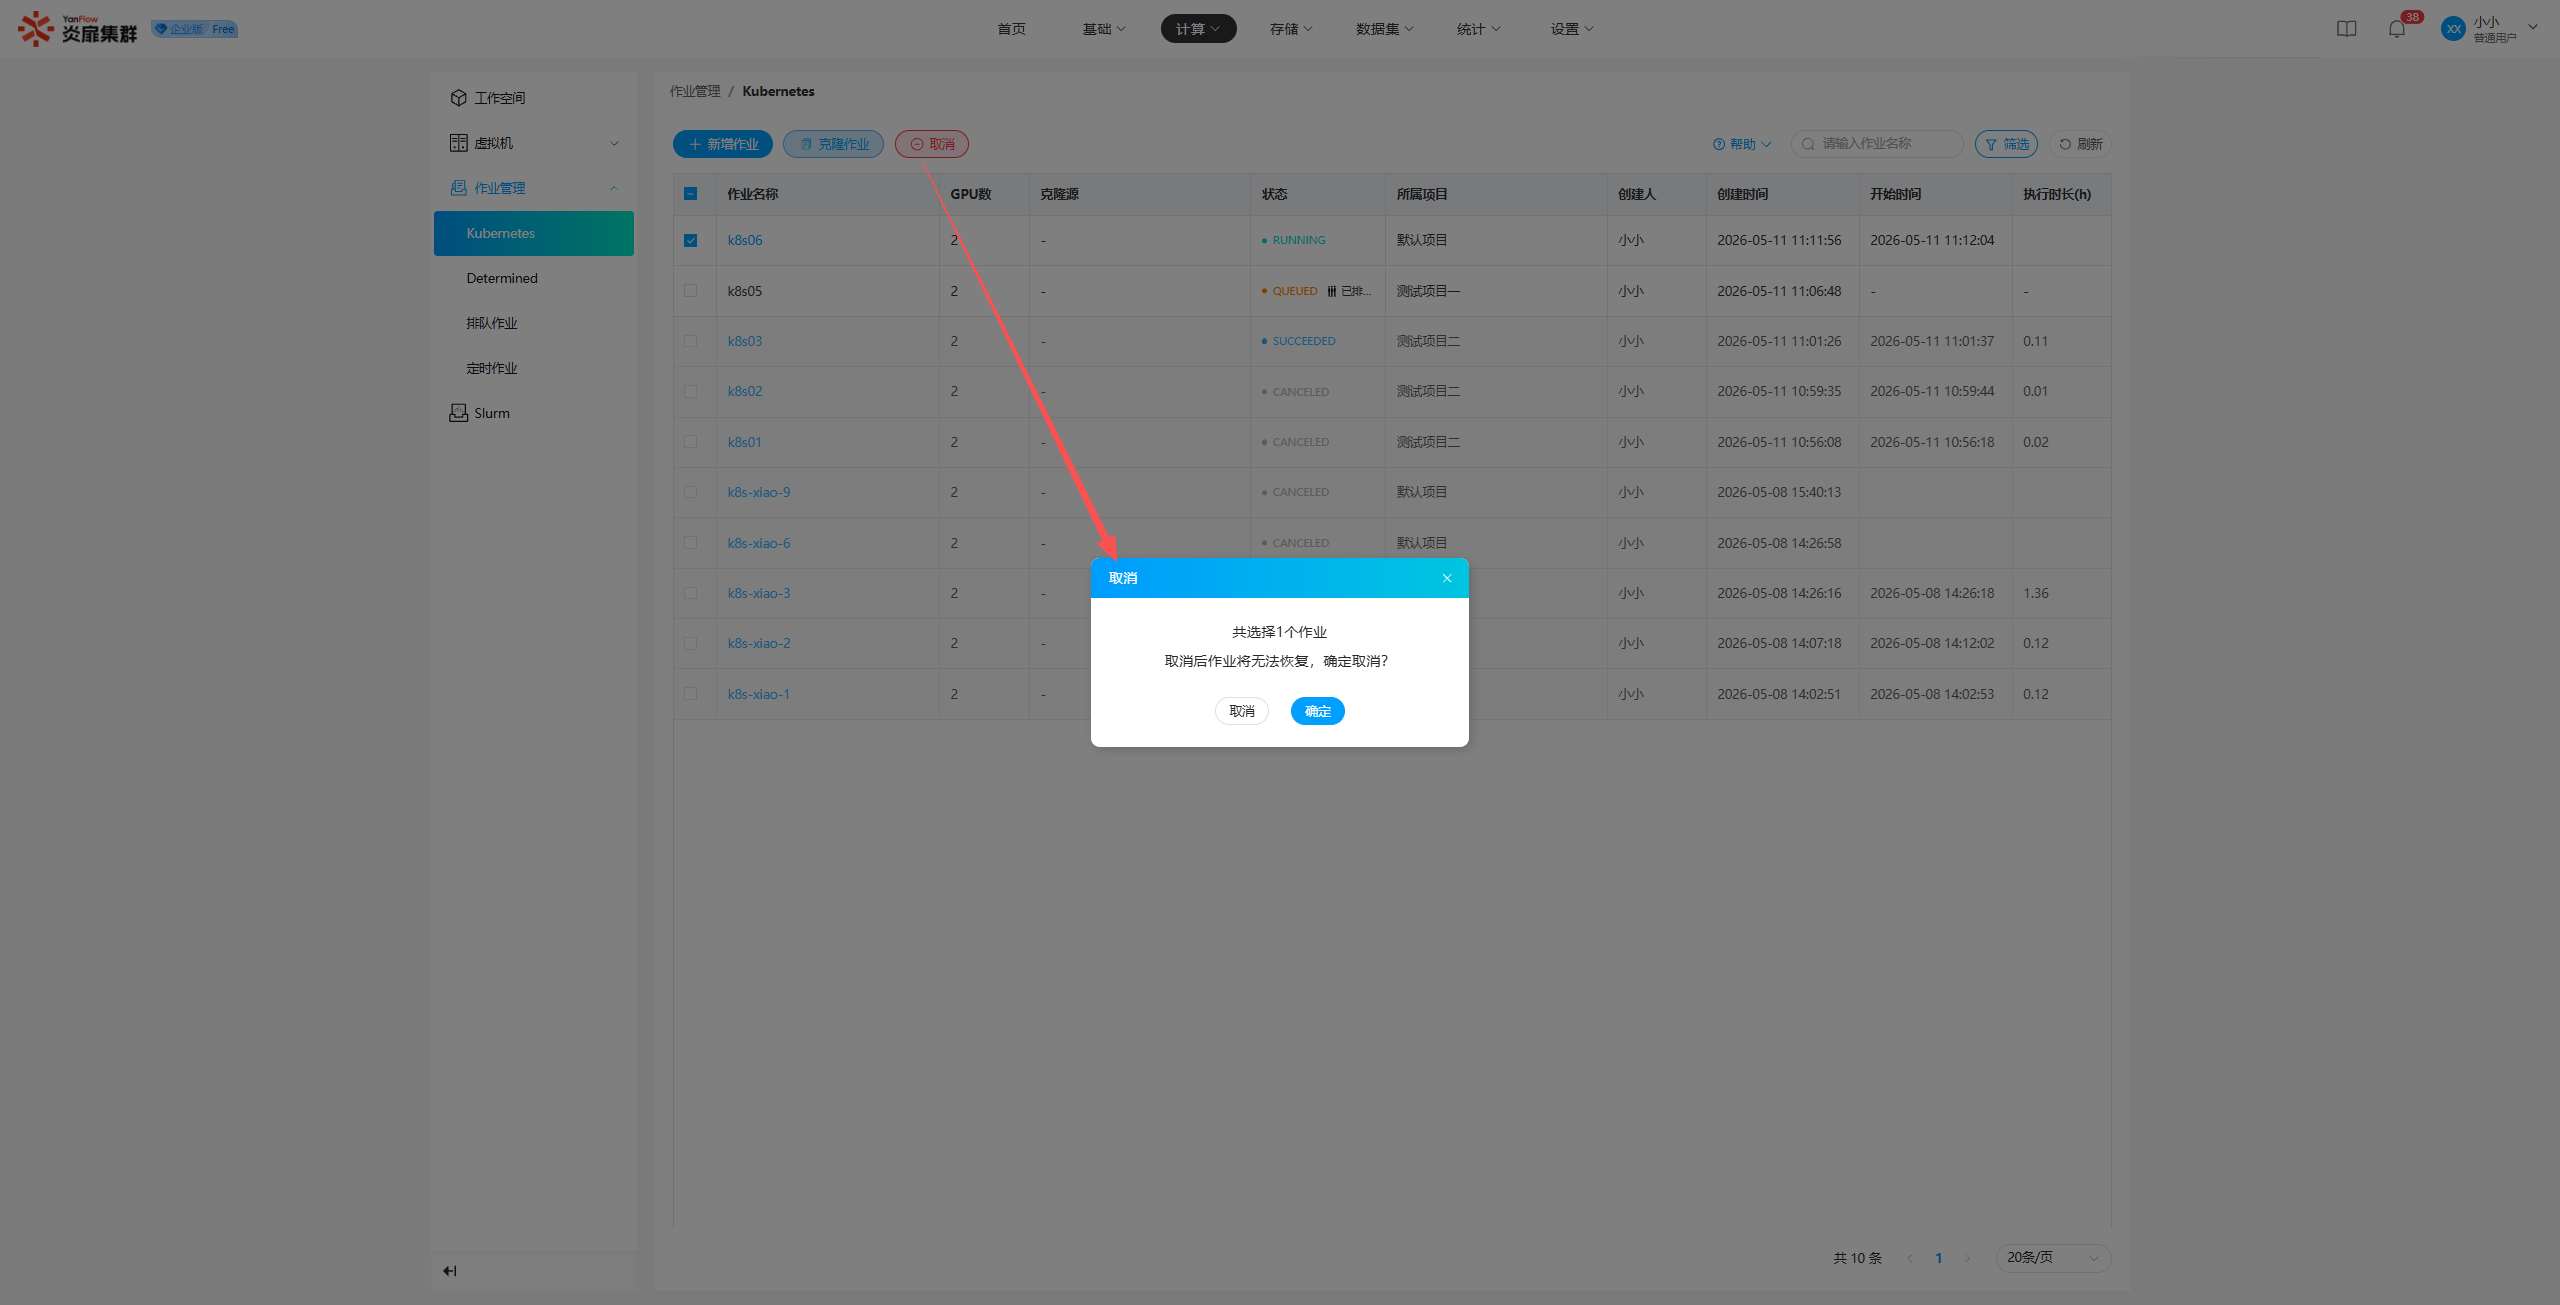
Supports regular users in performing the cancel operation on Kubernetes jobs. Select one or more jobs, click Cancel, and click Confirm in the prompt popup to complete the cancellation.
Clone Job
Check a job and click "Clone Job" to display the clone popup. It echoes the relevant information of the source job. You can modify information such as job name, resources, image, executable file, and code path as needed. Click Submit or Scheduled Submit. If validation passes, a new Kubernetes job will be created.
Determined
Job List
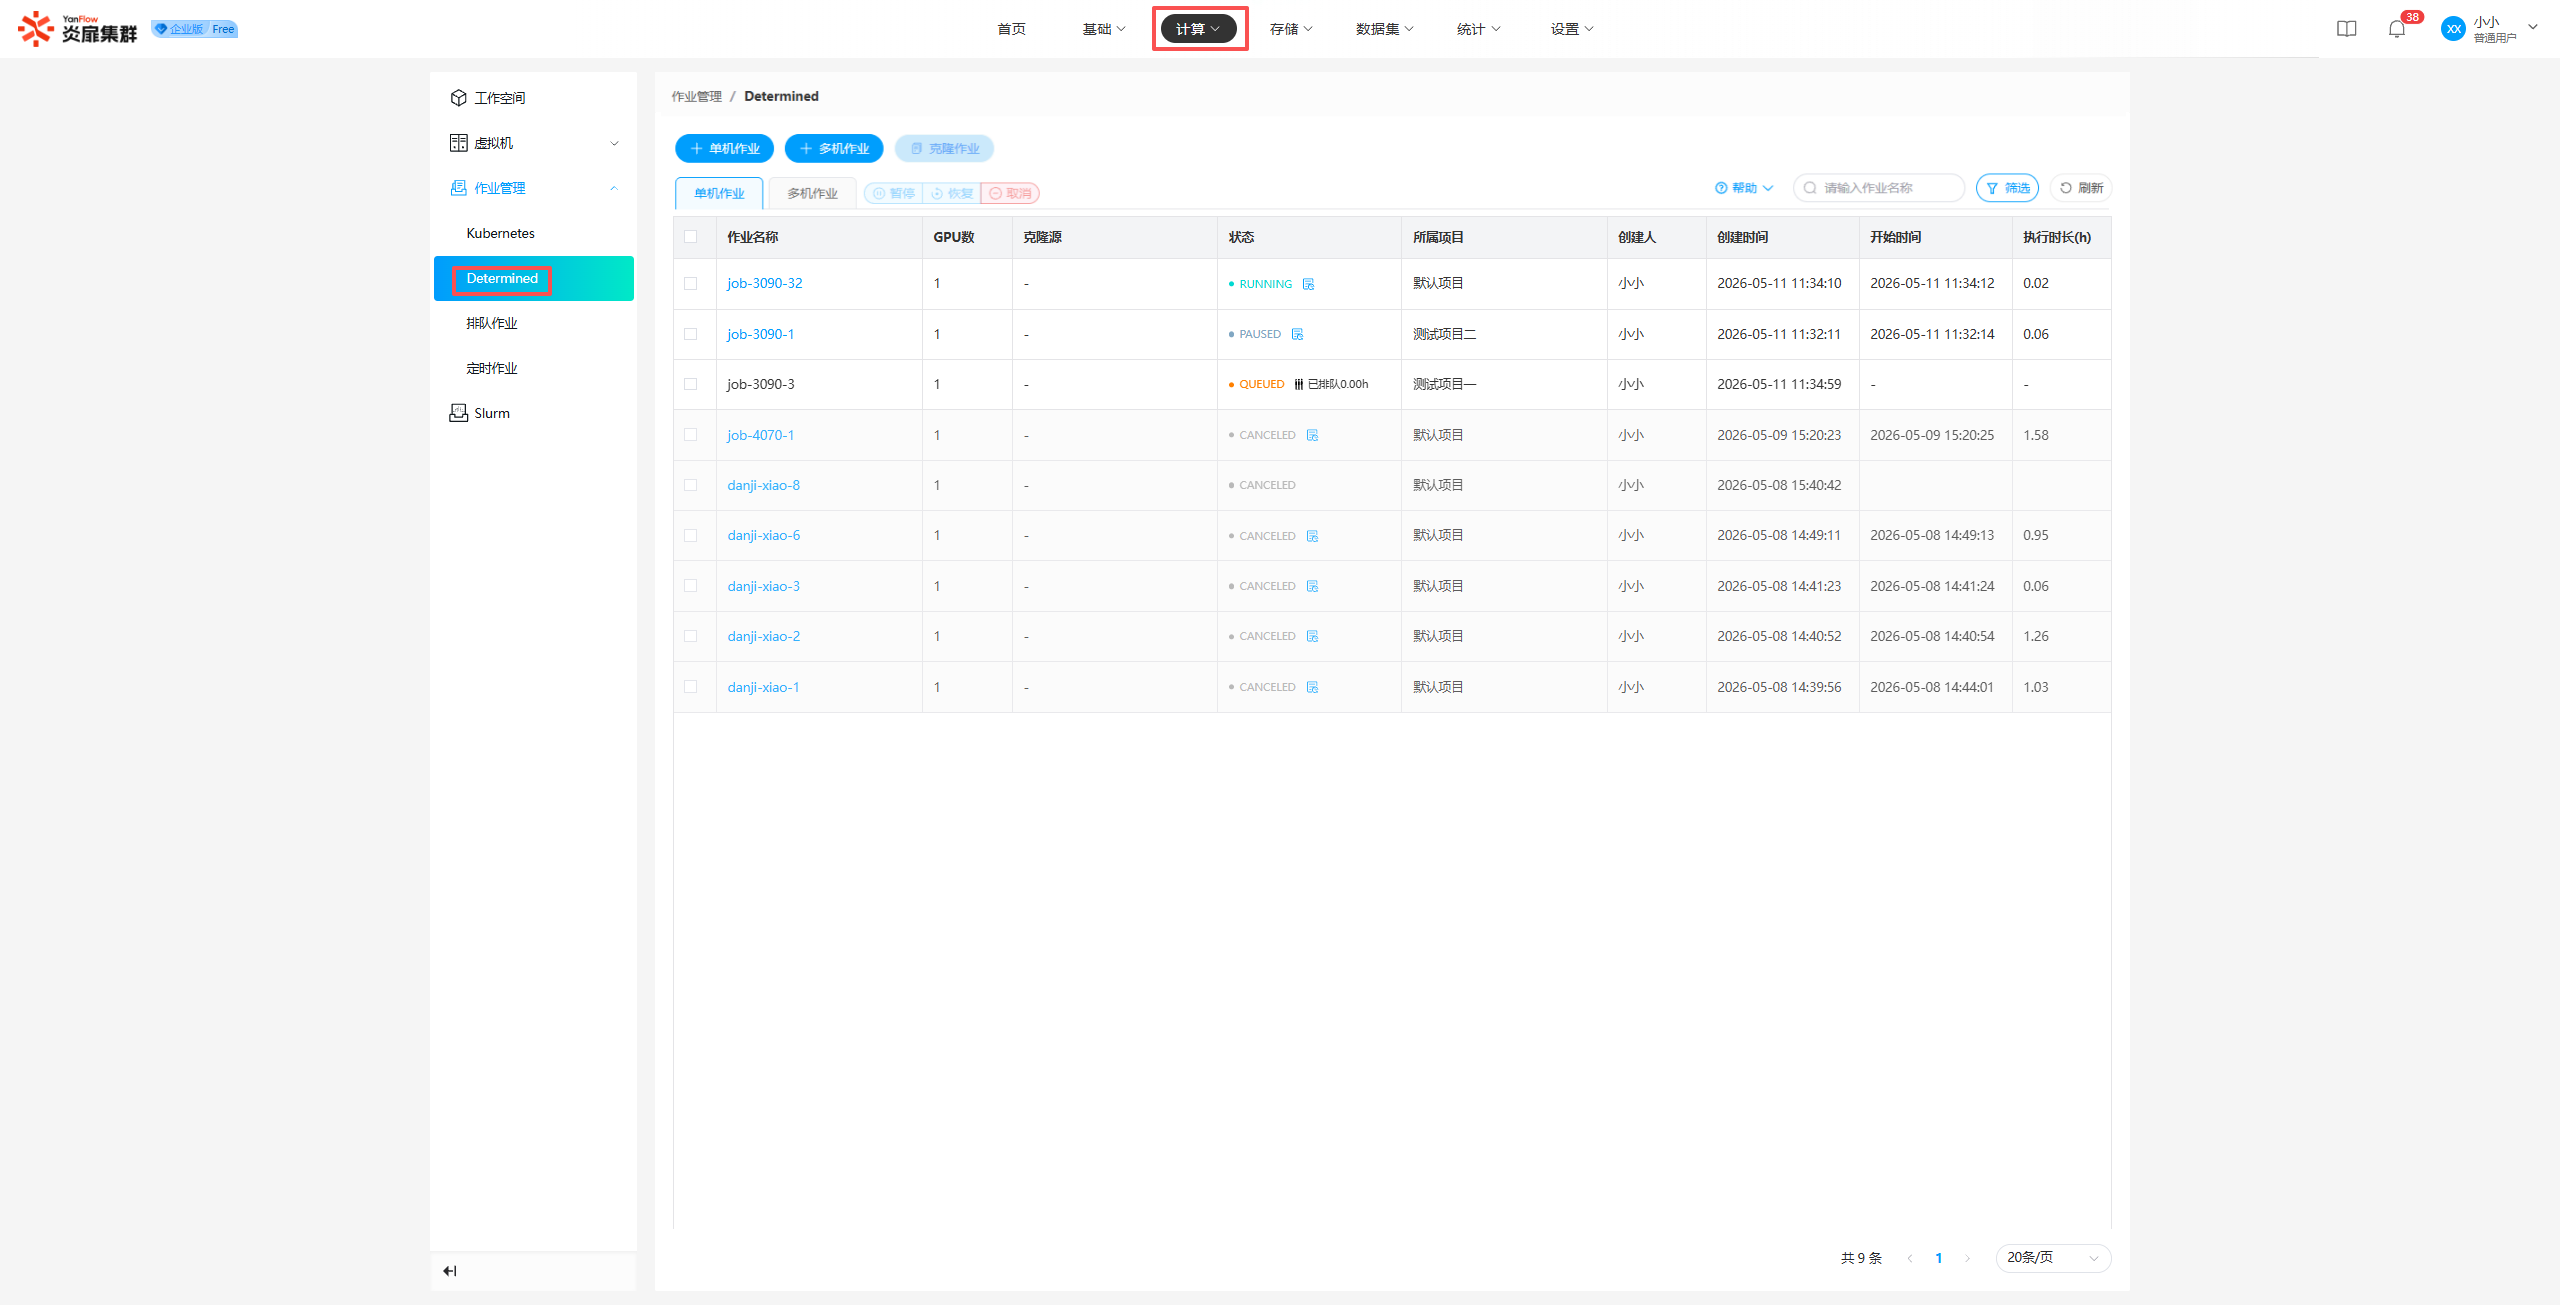
Regular users can view all Determined jobs they have created and all jobs under the projects they are currently responsible for, including Single-machine jobs and Multi-machine jobs. Support for keyword search via job name is provided, as well as filtered search by status, belonging project, creation date, and creator.
Add New Single-machine Job
Click +Single-machine Job to open the creation popup. Based on actual business needs, configure information such as belonging project, resources, image, and mounts. Select the executable training code path (Please select the directory of the code project), supplement environment dependencies via installation commands, and click Submit or Scheduled Submit. If validation passes, a new Determined single-machine job will be created.
Parameter Description
| Parameter | Description | Example |
|---|---|---|
| GPU Model | Selects the required hardware model, limited by system quota and current stock | |
| GPU Quantity | The number of GPUs to be mounted into the container this time | |
| Image | The base image selected by the user for the single-machine job | |
| Mount | Mounts the platform's distributed storage (File Management) into the container for data persistence | |
| Entrypoint | The Shell command the user needs to execute | python xxx.py, mkdir xxx |
| Training Code Path | The absolute path of the uploaded code project; the system will execute the Entrypoint command under this path | |
| Dependency Install Command | Used to supplement dependencies missing in the image | pip install xxx, apt-get install xxx |
Add New Multi-machine Job
Click +Multi-machine Job to open the creation popup. Based on actual business needs, configure information such as belonging project, resources, image, and mounts. Select the executable training code path (Please select the directory of the code project), supplement environment dependencies via installation commands, and click Submit or Scheduled Submit. If validation passes, a new Determined multi-machine job will be created.
Note:
- New multi-machine jobs default to "Normal Mode." You can switch to "Advanced Mode" to set relevant information and parameters via code editing. The data in the code editing area is linked with the parameter settings on the left; "Normal Mode" is view-only, while "Advanced Mode" is editable.
Job Details
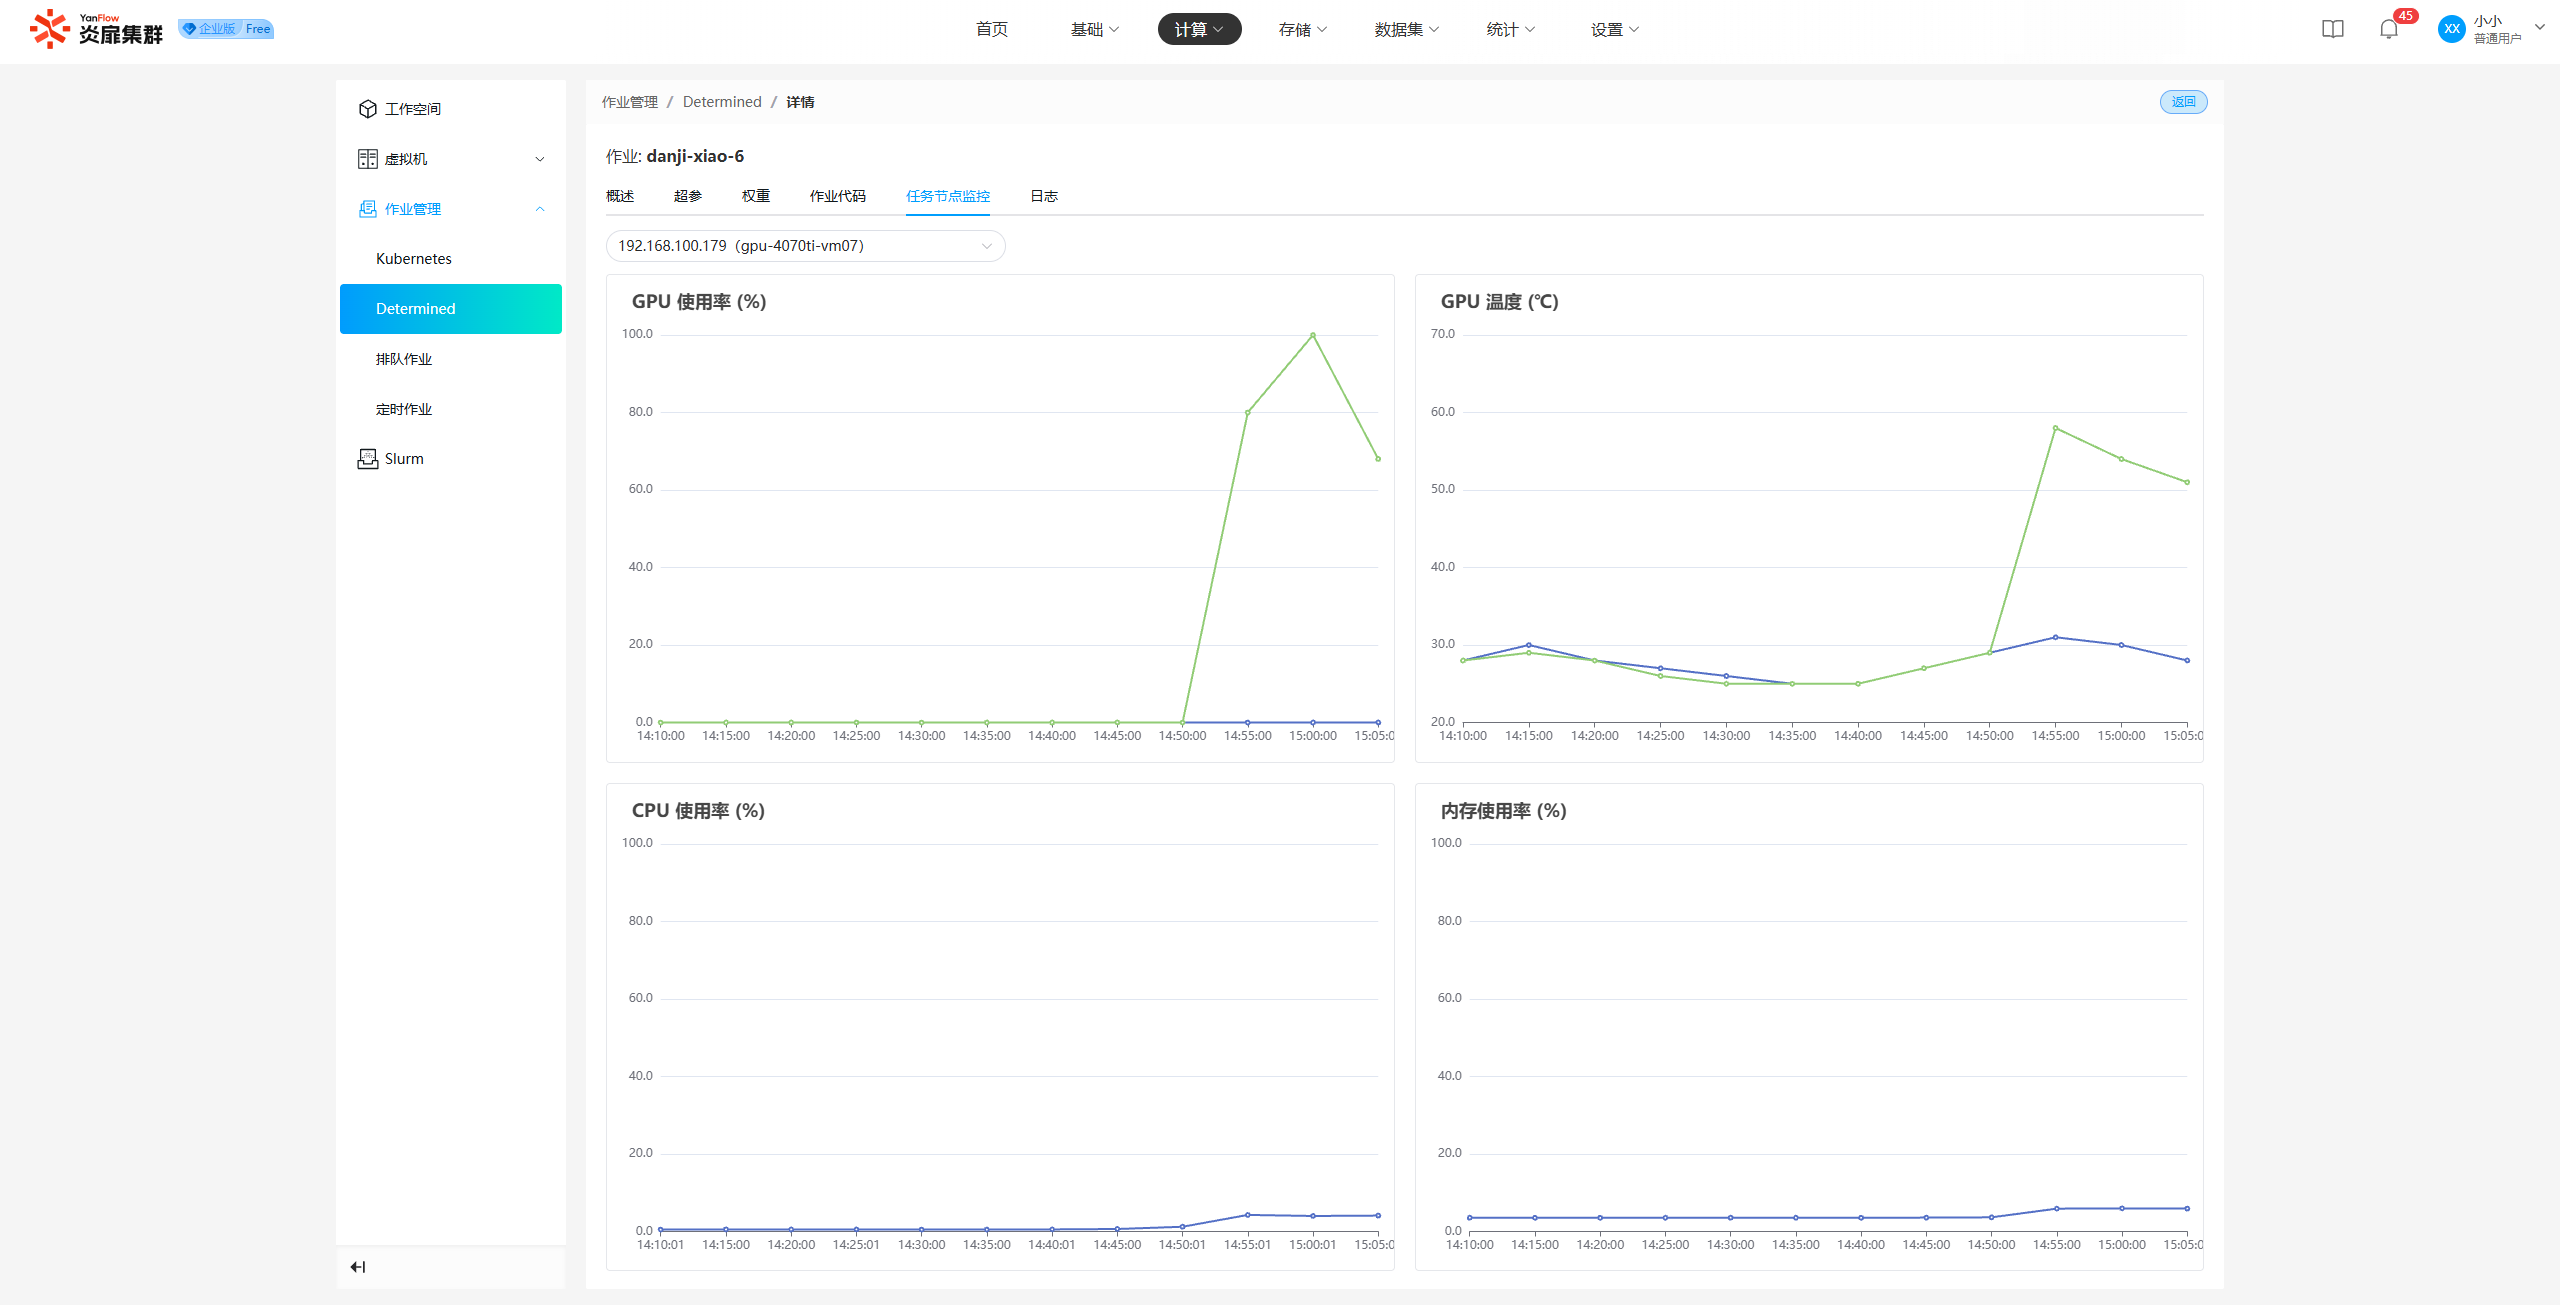
Click the Job Name to display the details page, which supports viewing hyperparameters, weights, job code, node monitoring, logs, etc.
Pause/Resume/Cancel
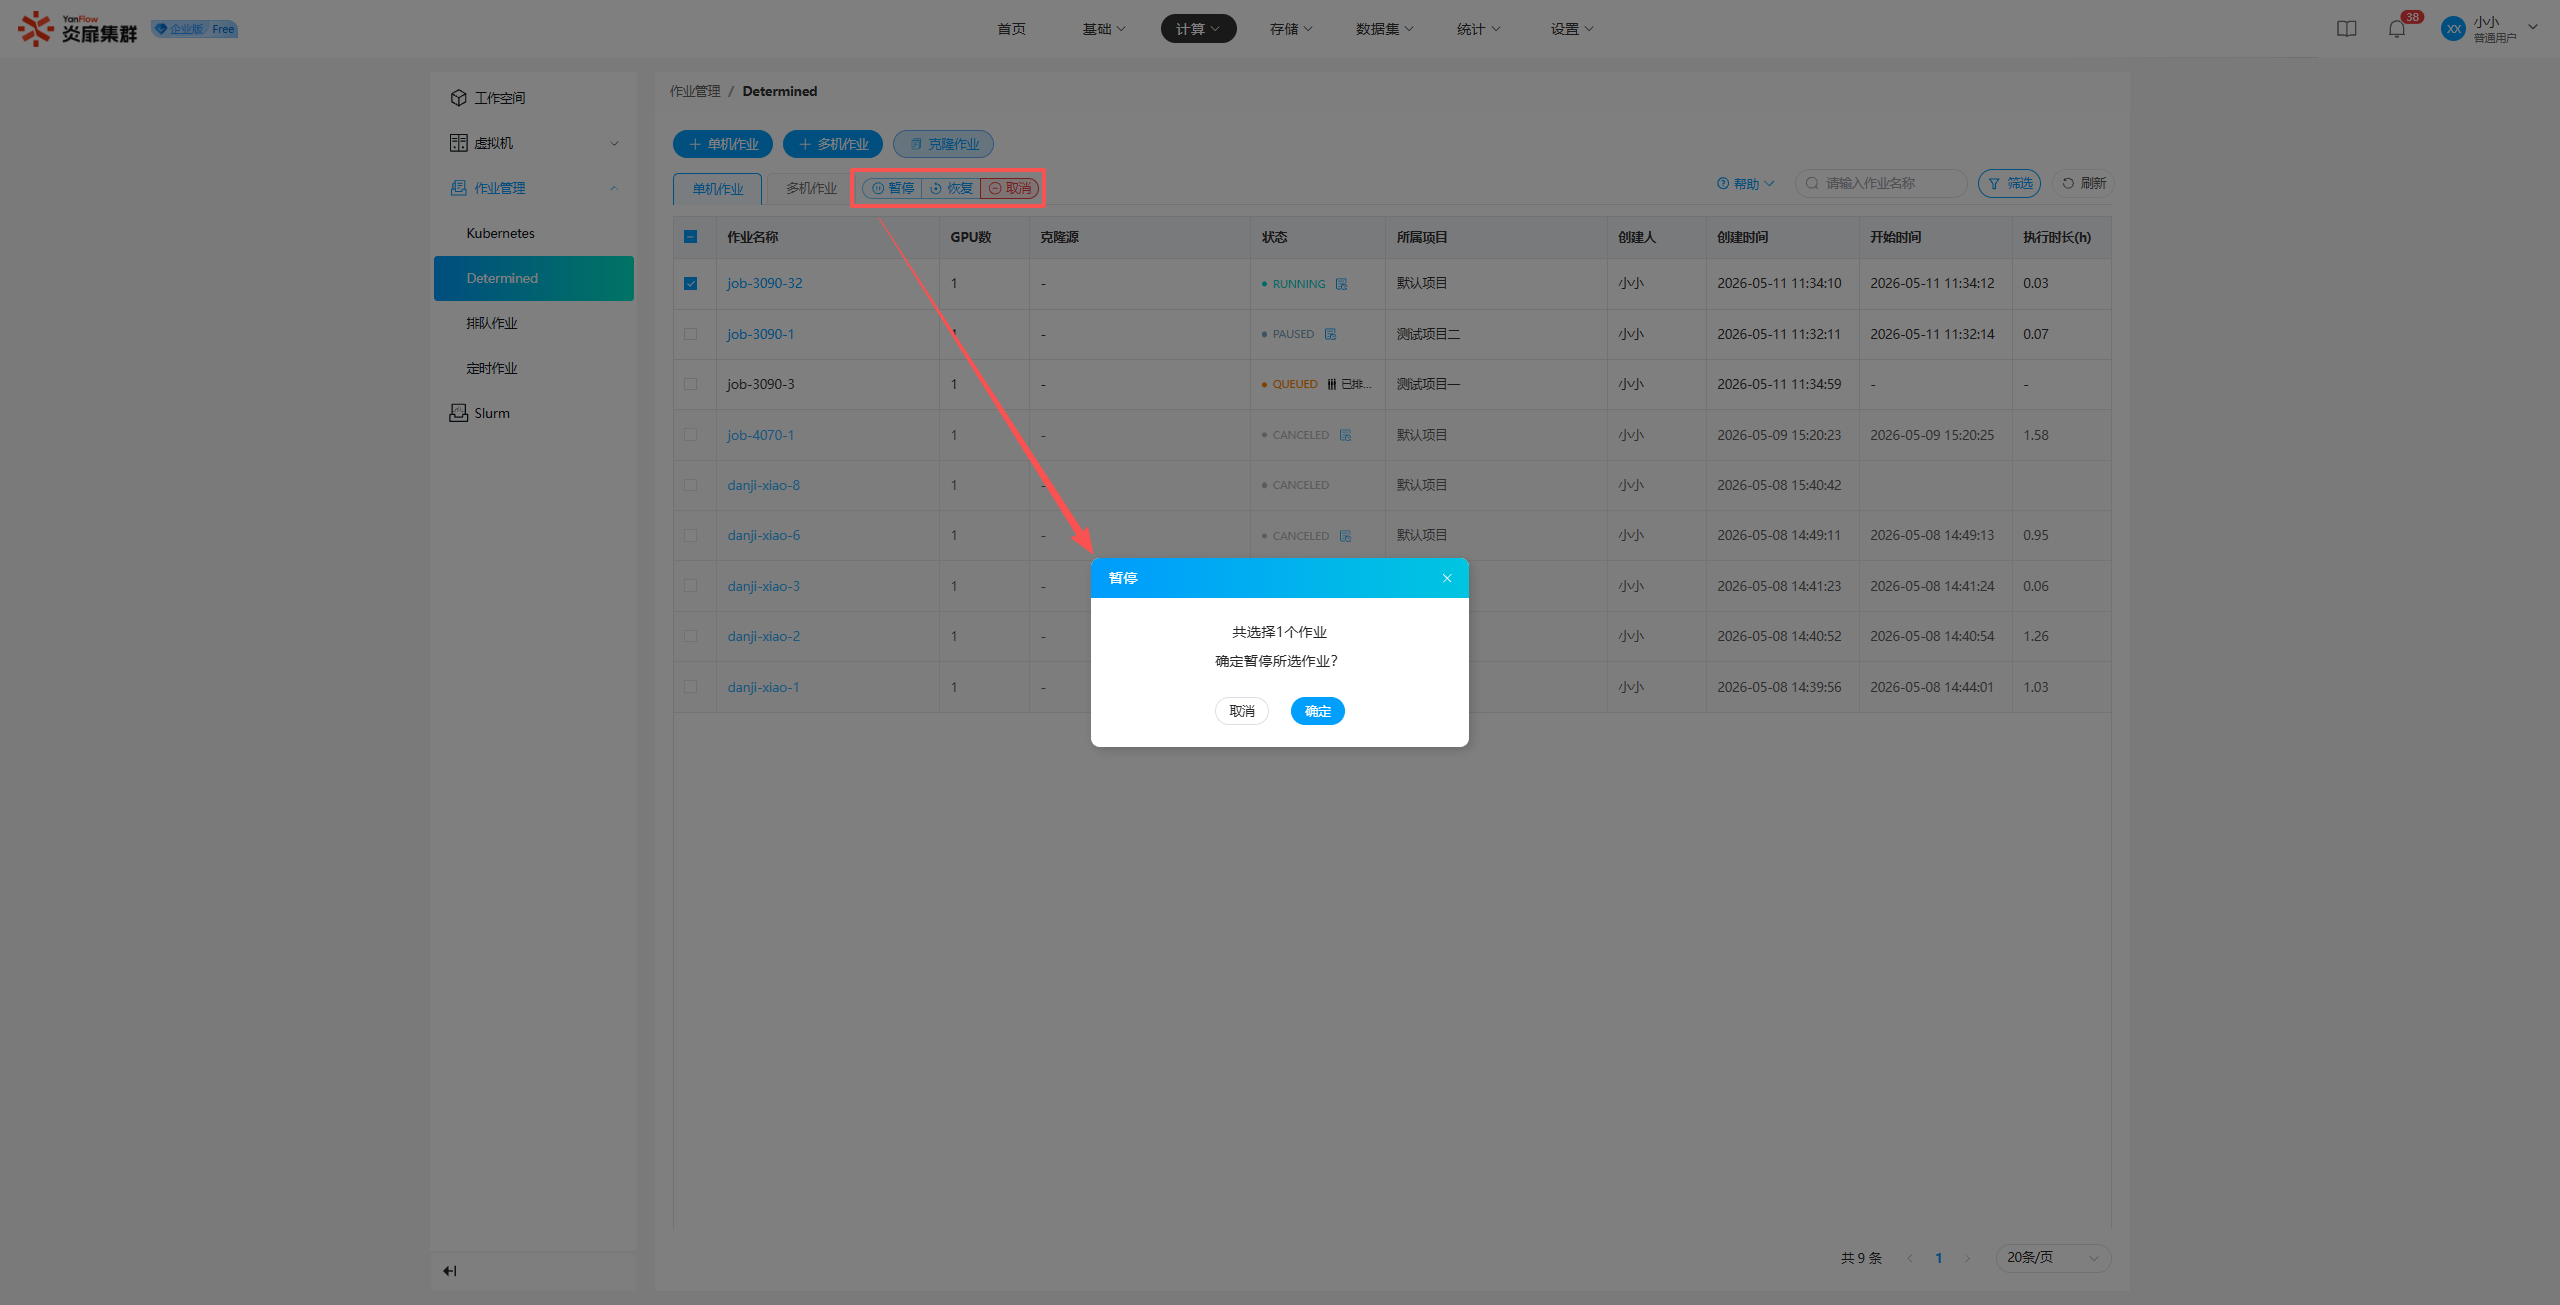
Supports regular users in performing Pause, Resume, and Cancel operations on Determined jobs. Select one or more jobs, click the corresponding operation, and click Confirm in the prompt popup to complete the operation.
Clone Job
Check a job and click "Clone Job" to display the clone popup. It echoes the relevant information of the source job. You can modify information such as job name, resources, image, and code path as needed. Click Submit or Scheduled Submit. If validation passes, a new single-machine or multi-machine job will be created.
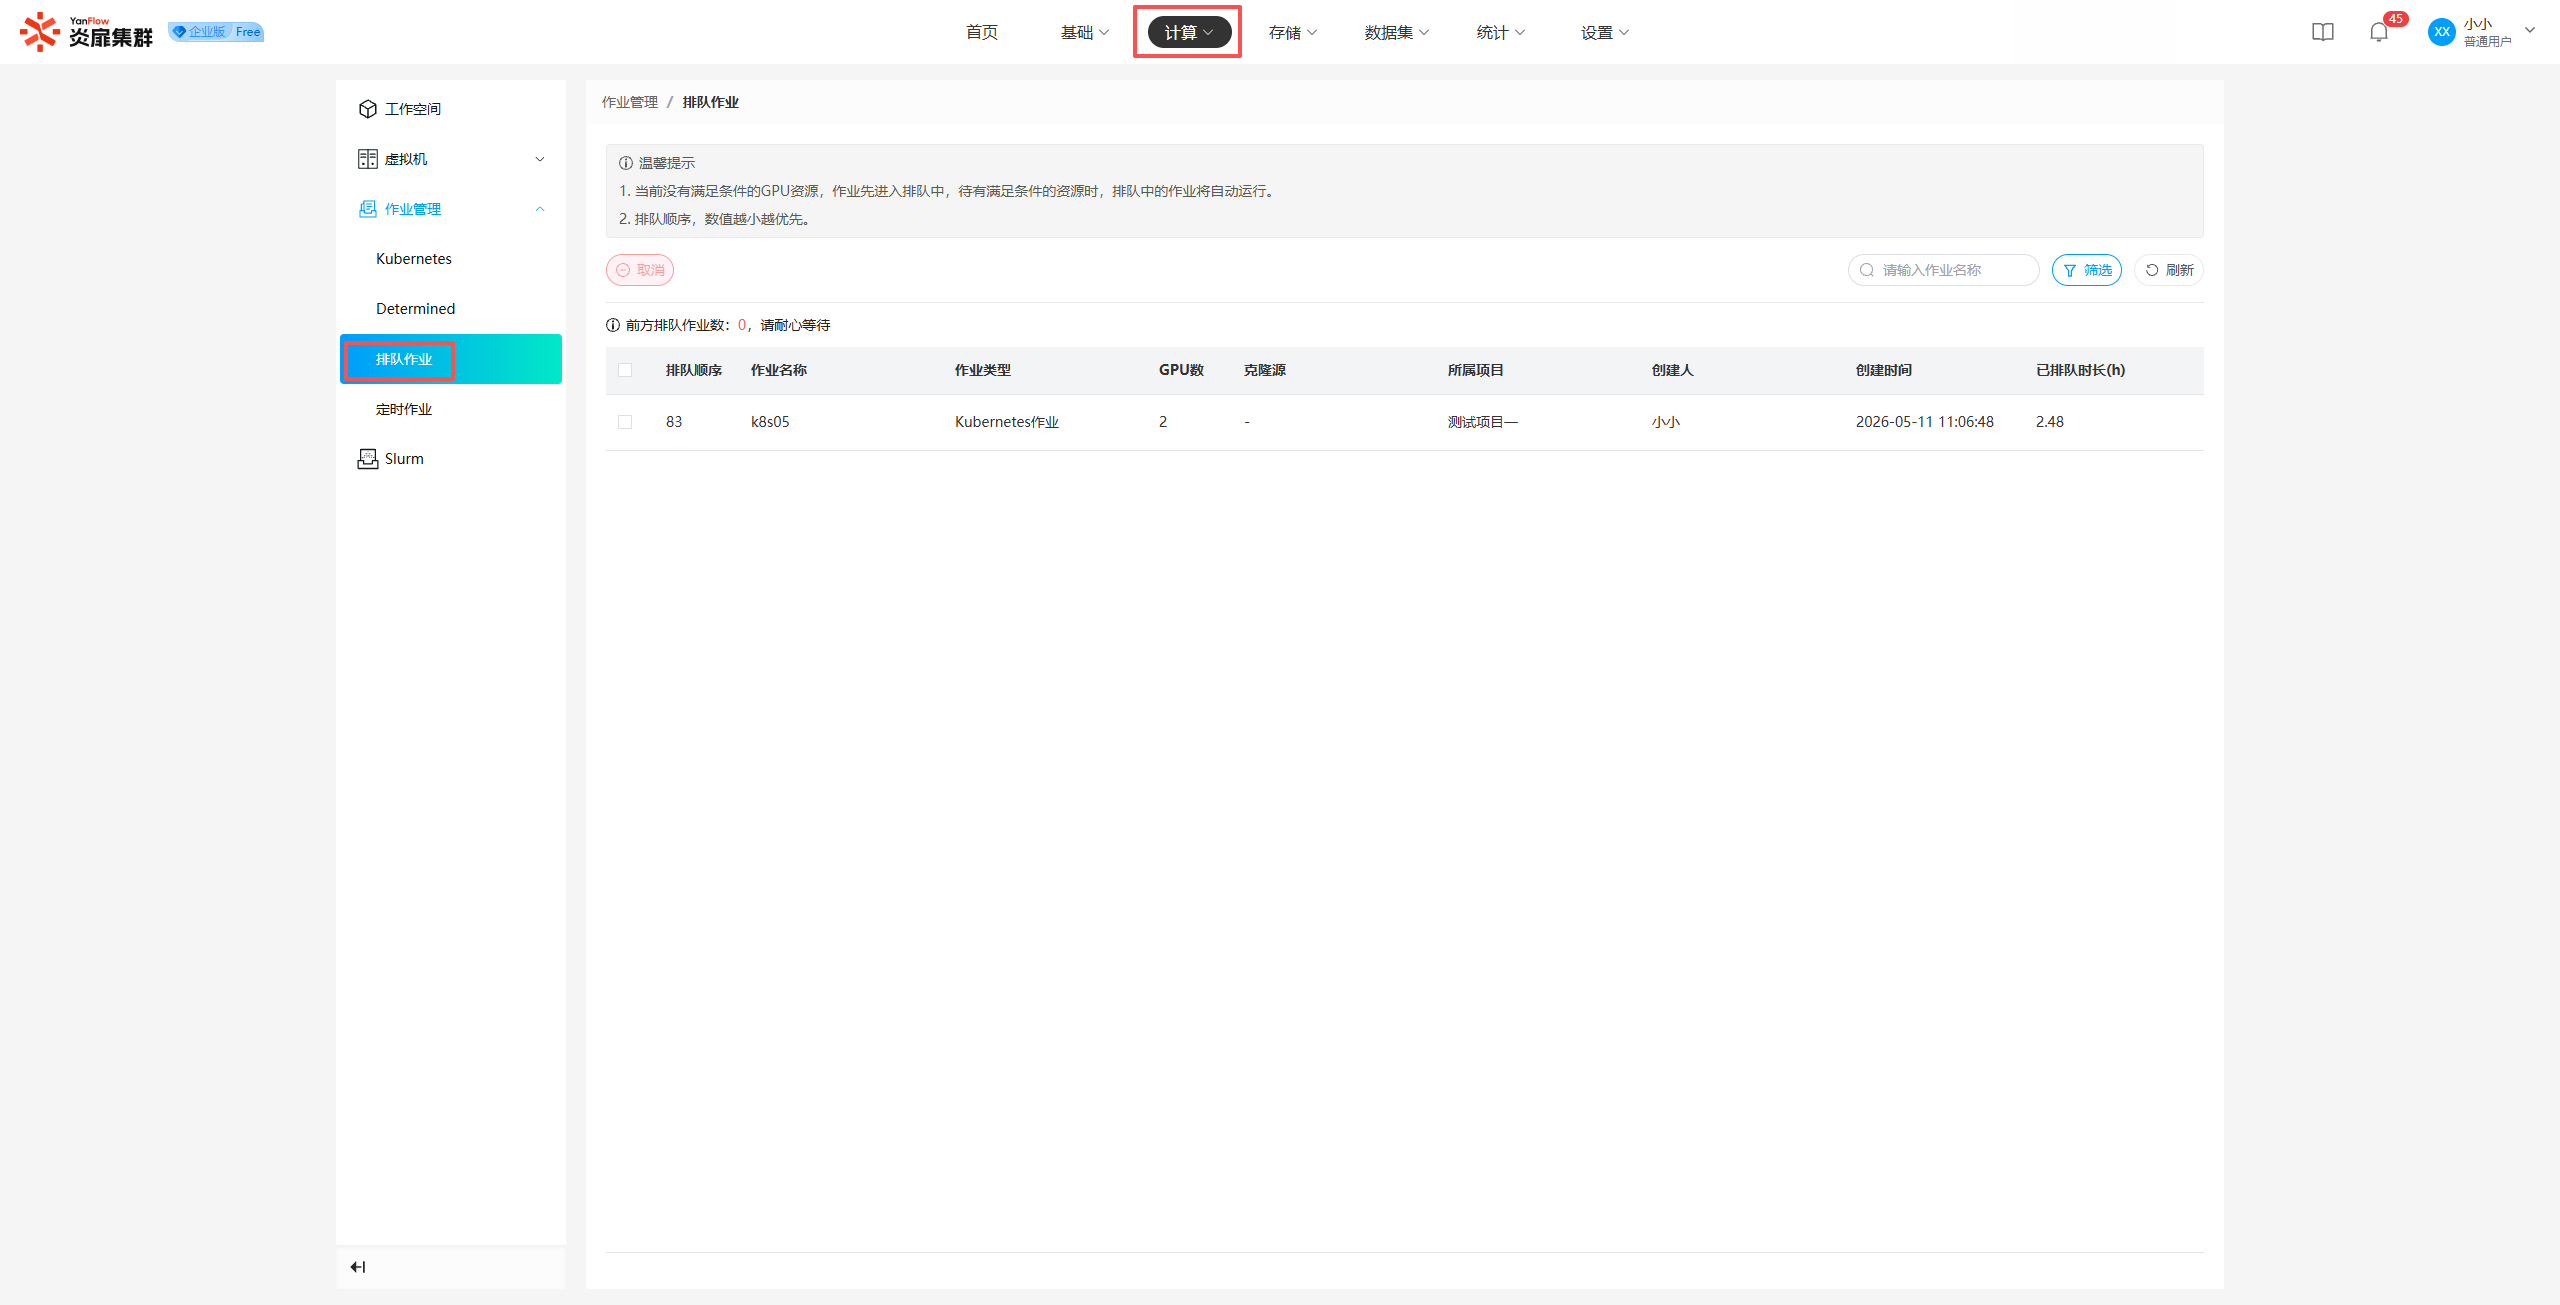
Queued Jobs
Regular users can view all queued jobs they have created and all queued jobs under the projects they are currently responsible for. Support for keyword search via job name is provided, as well as filtered search by belonging project, creation date, and creator.
Cancel Job: Supports regular users in canceling queued jobs. Select one or more jobs, click Cancel, and click Confirm in the prompt popup to complete the cancellation.
Scheduled Jobs
Regular users can view all scheduled jobs they have created and all scheduled jobs under the projects they are currently responsible for. Support for keyword search via job name is provided, as well as filtered search by belonging project, creation date, and creator.
Modify Time: Before the scheduled time, you can click  to reset the scheduled submission time.
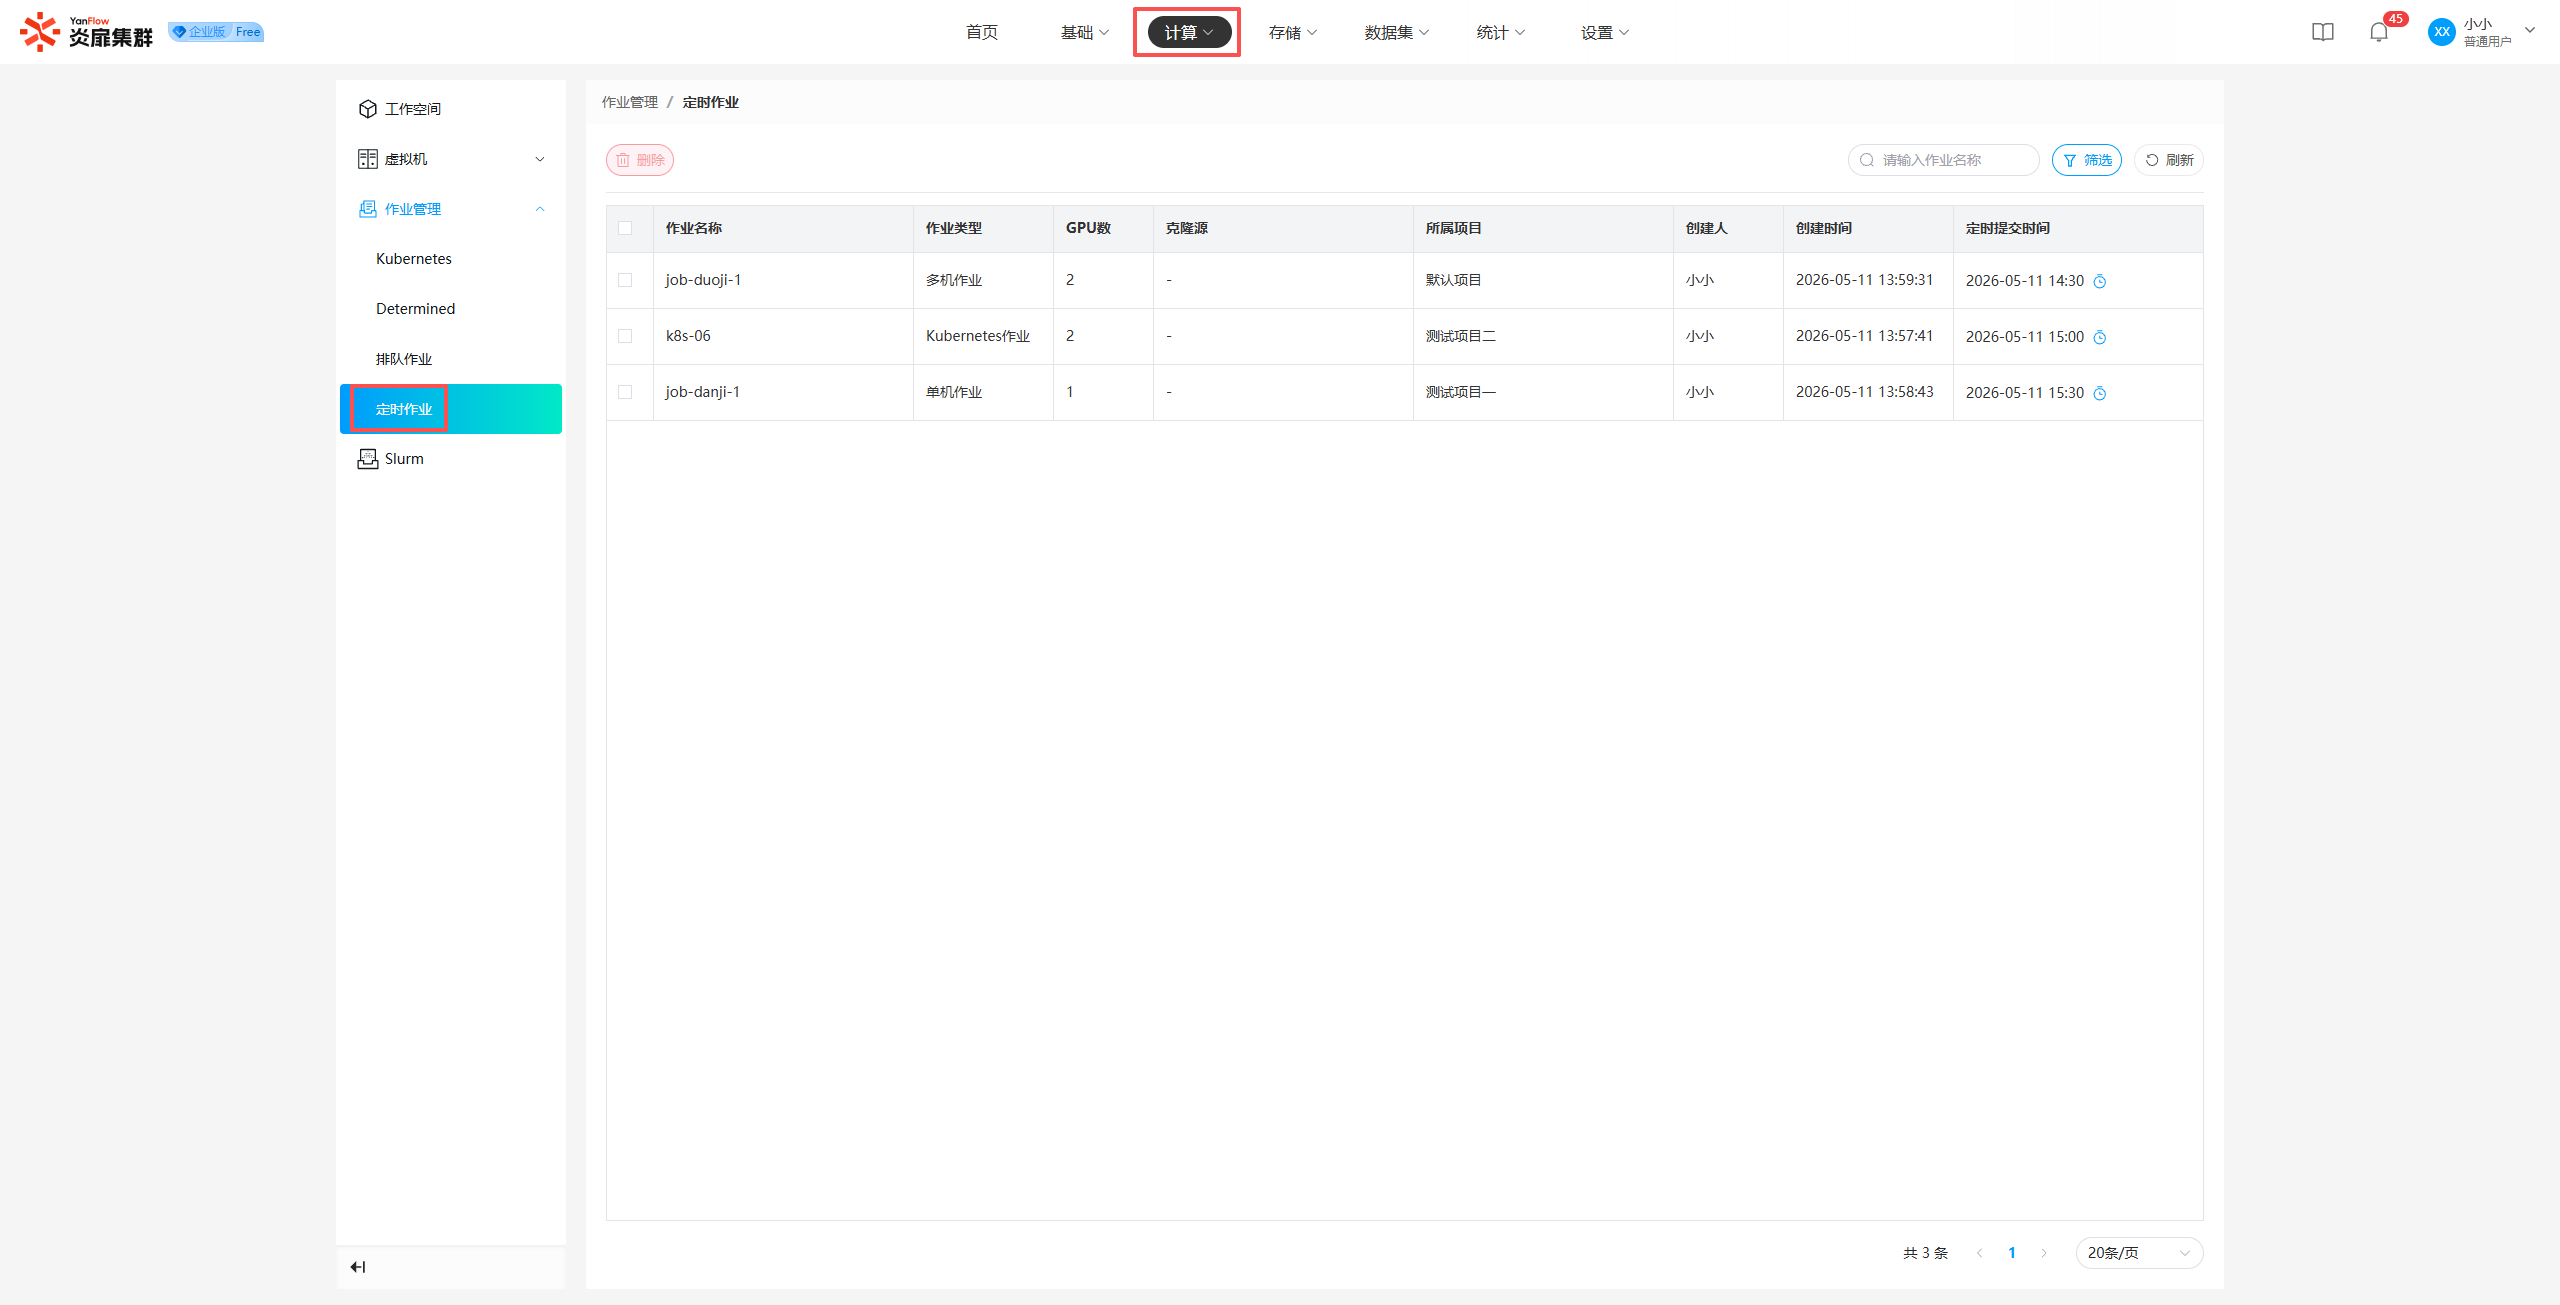
Note: When the set time arrives, the system automatically executes the job submission. If submission fails, a
Submission Failedprompt will be displayed; hover over it to see the reason for failure.
Slurm
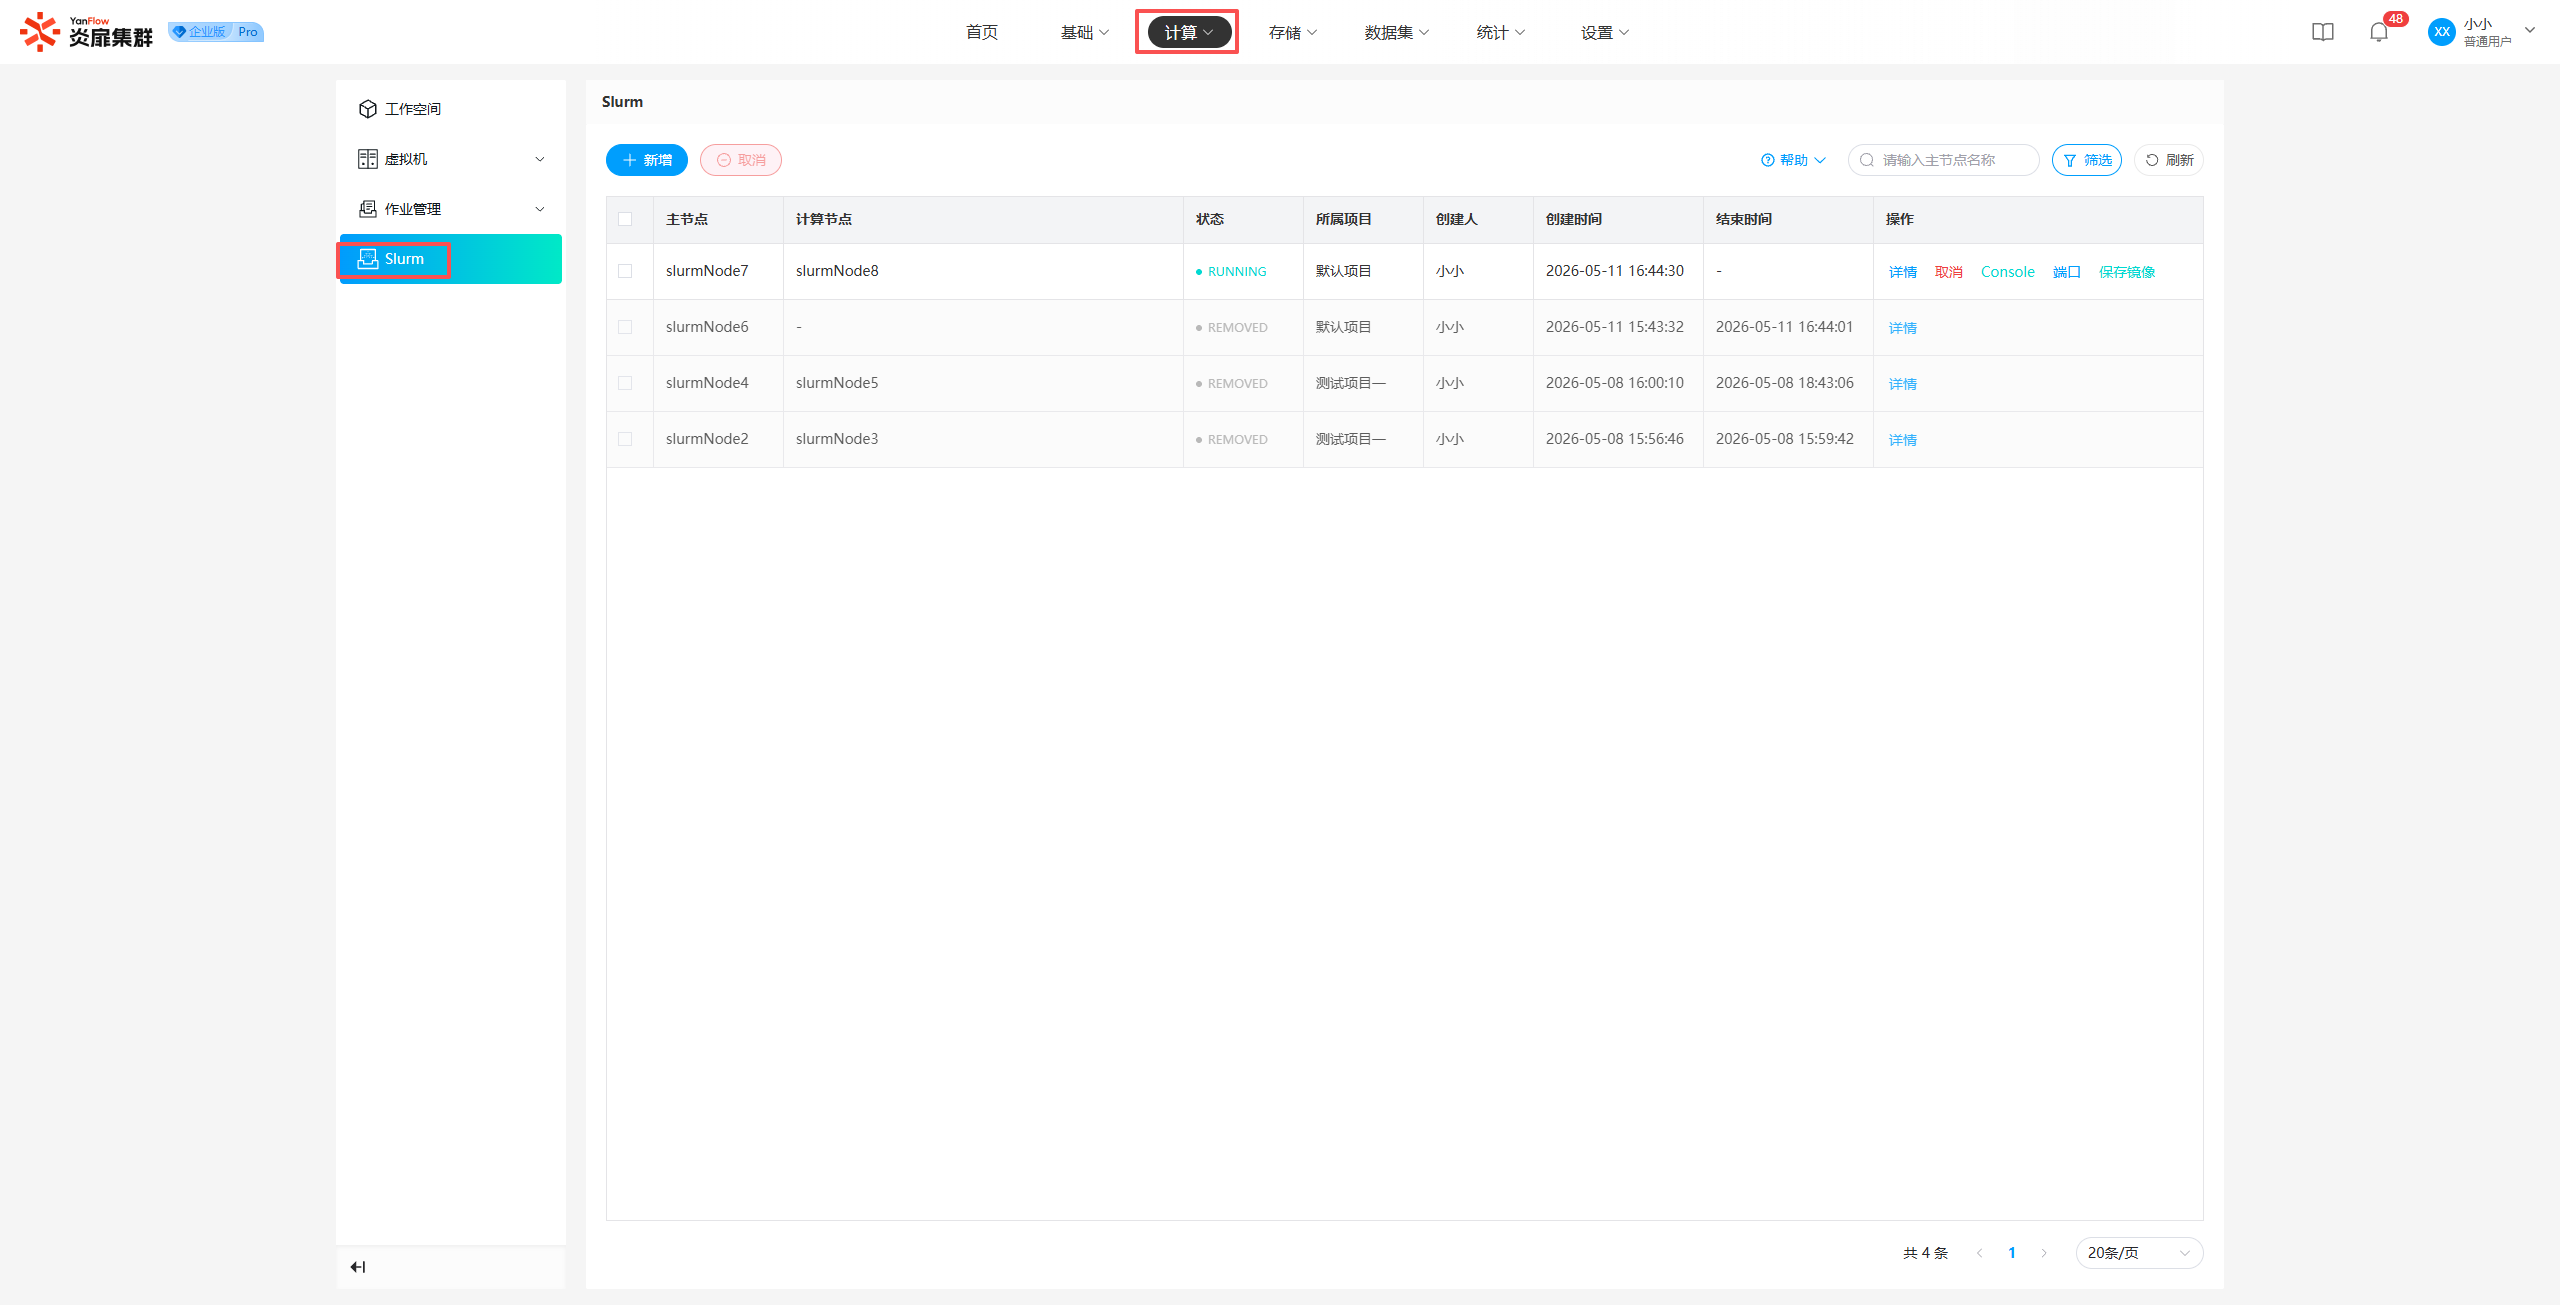
Instance List
Regular users can view all Slurm instances they have created and all Slurm instances under the projects they are currently responsible for. Support for keyword search via master node name is provided, as well as filtered search by status, belonging project, creation date, and creator.
Add New Instance
Click Add to open the creation popup. Based on actual business needs, configure information such as belonging project, master node (required), compute nodes (optional), image, mount, and ports. Click Confirm; if validation passes, a new Slurm instance will be created.
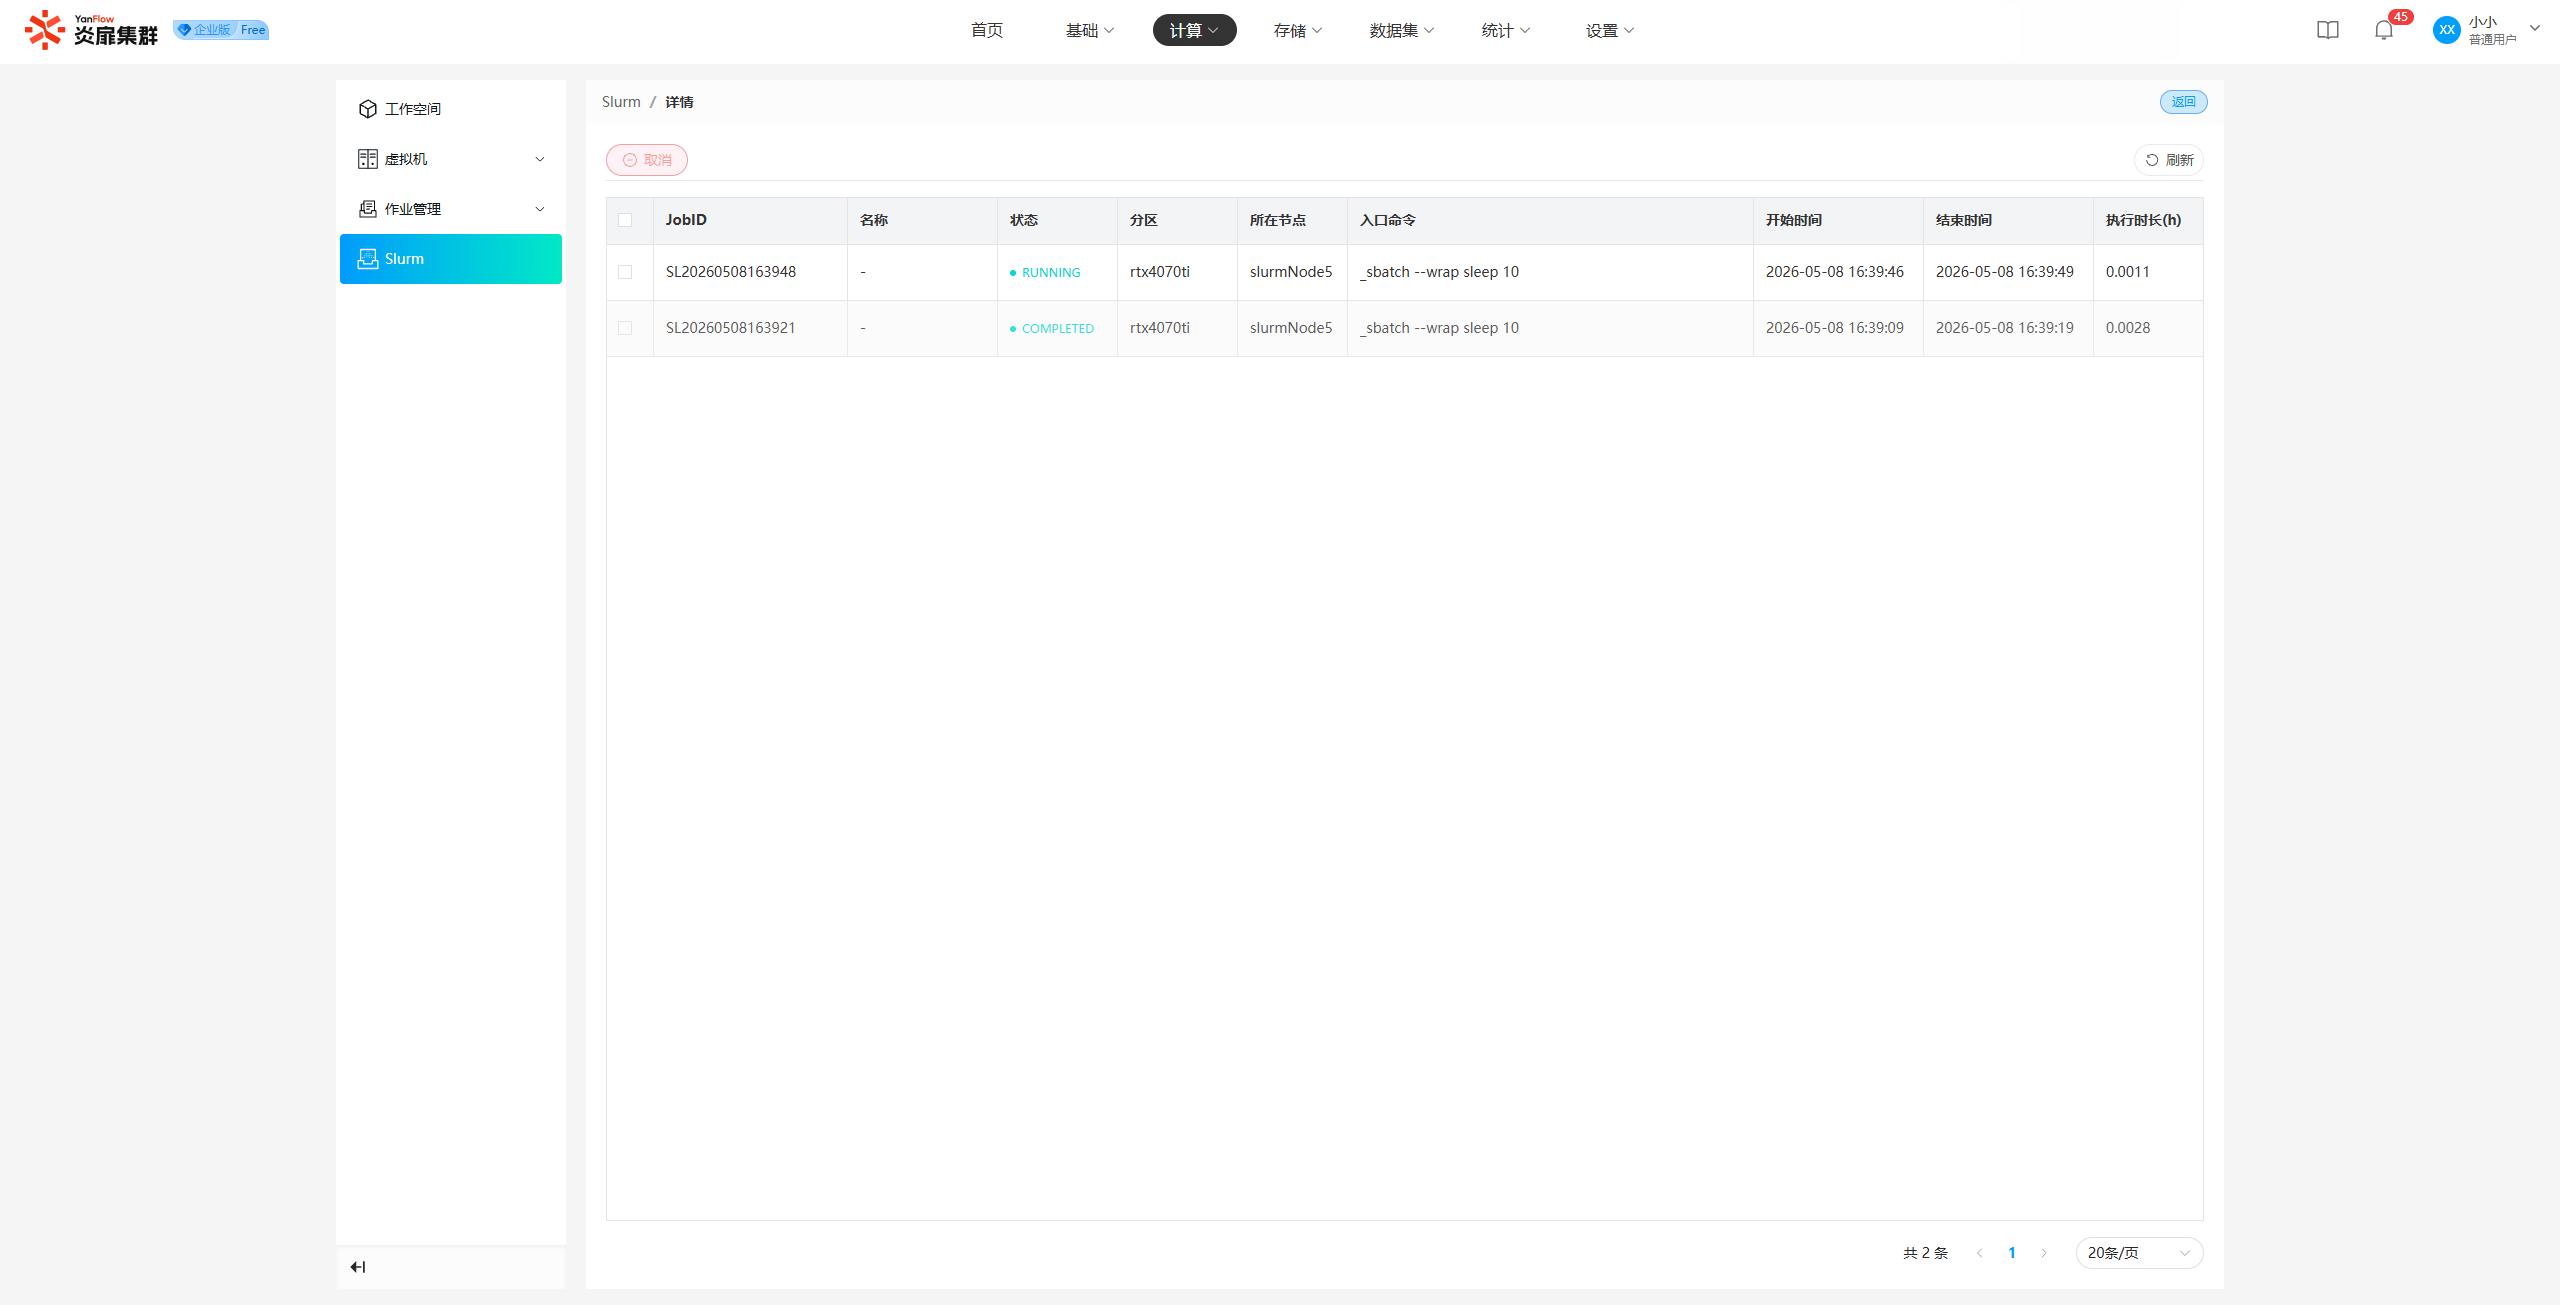
Details
Click Details to display the details page, where you can view the job list and also support Canceling jobs.
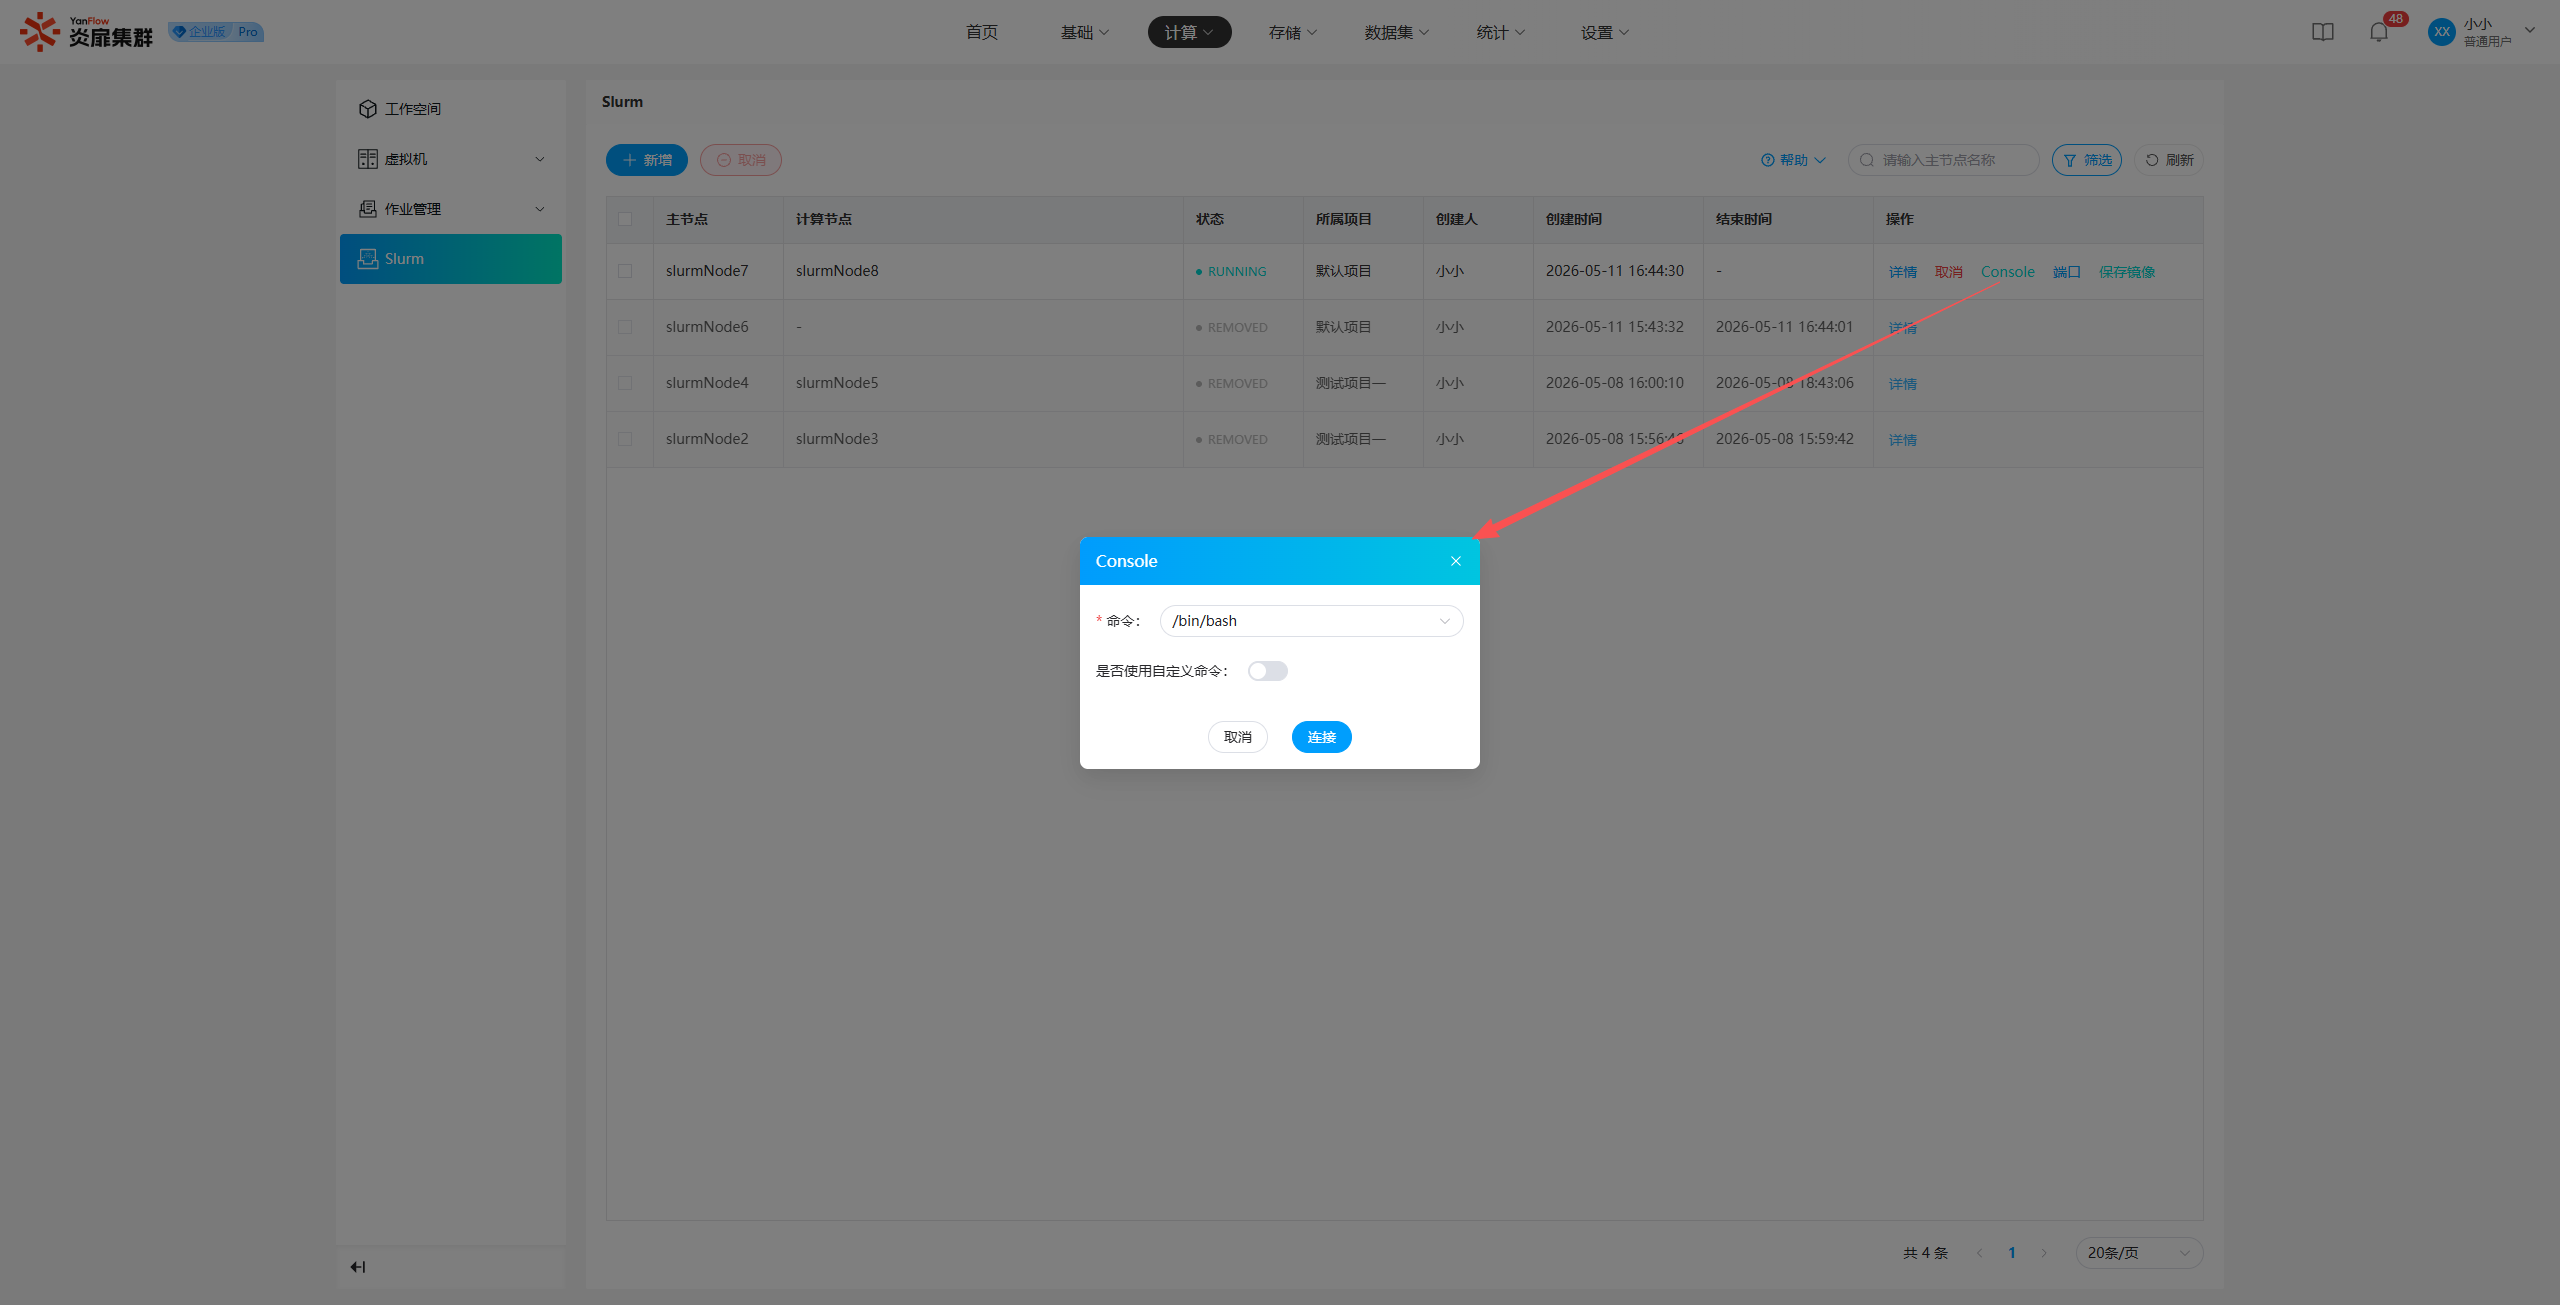
Console
After the instance starts, click Console to connect to the Console and view relevant information.
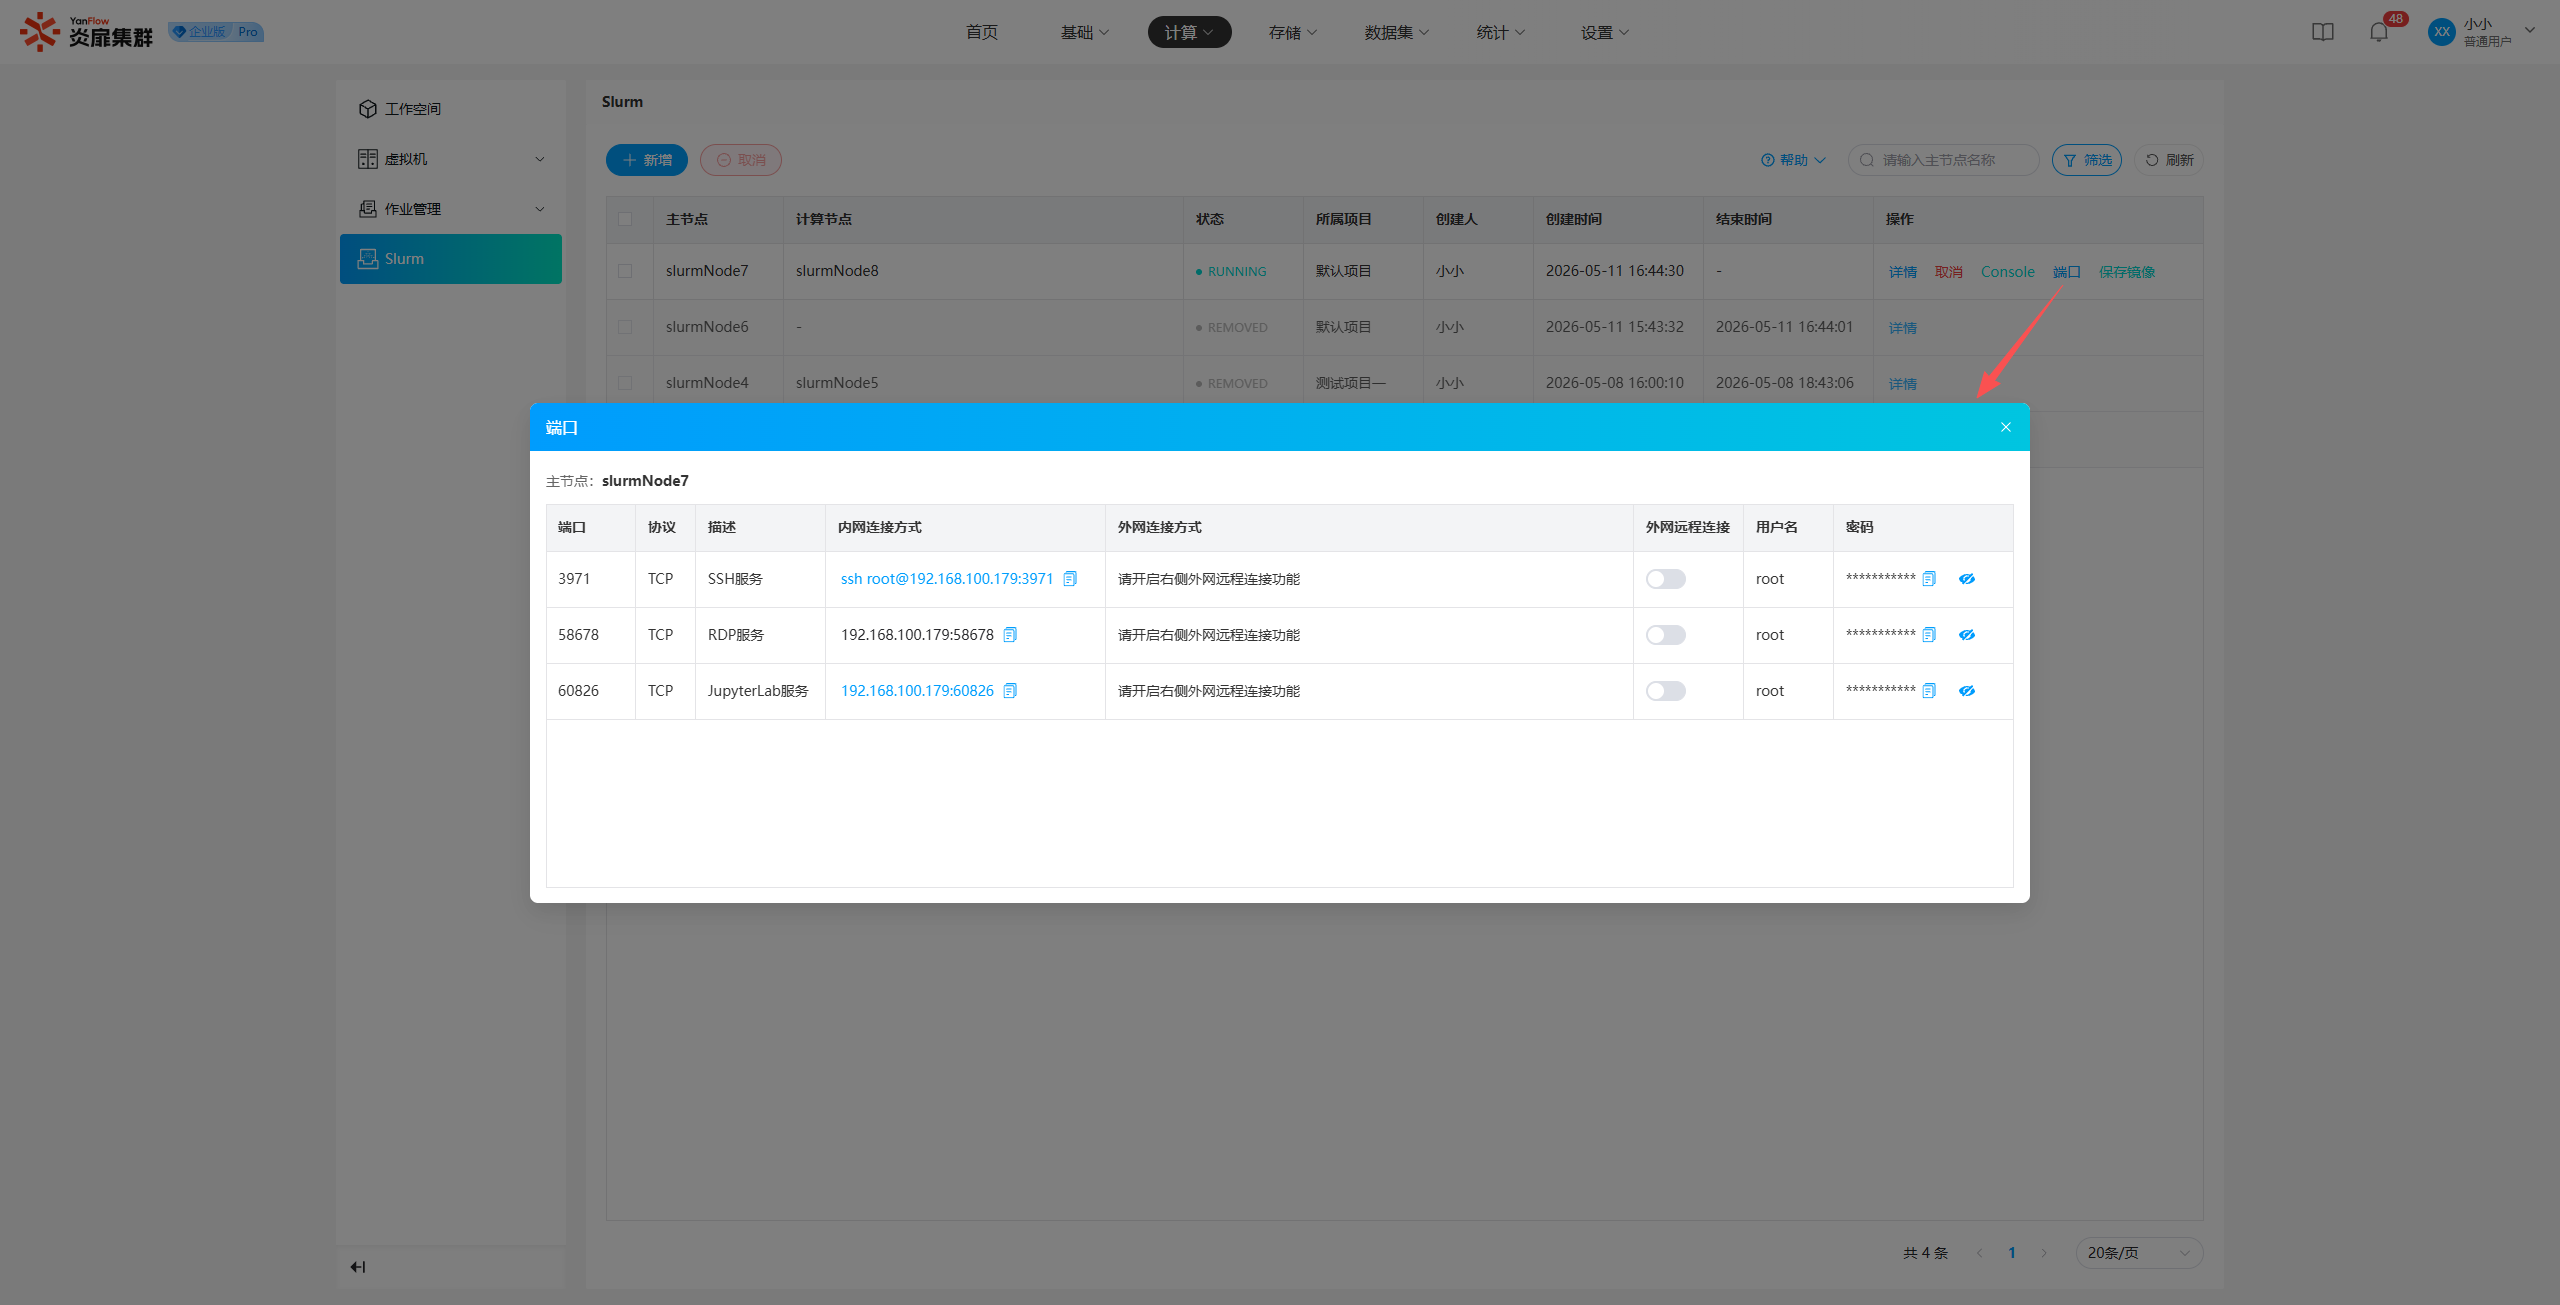
Port Mapping
Click Port to display the instance's port mapping information in a popup. It also supports enabling external network remote connections for ports (requires the remote connection service to be enabled by the system in advance).
Note:
- Only RUNNING status can view
Port Mapping.- Only for Slurm instances created by yourself can you operate the
External Network Remote Connectiontoggle for ports.
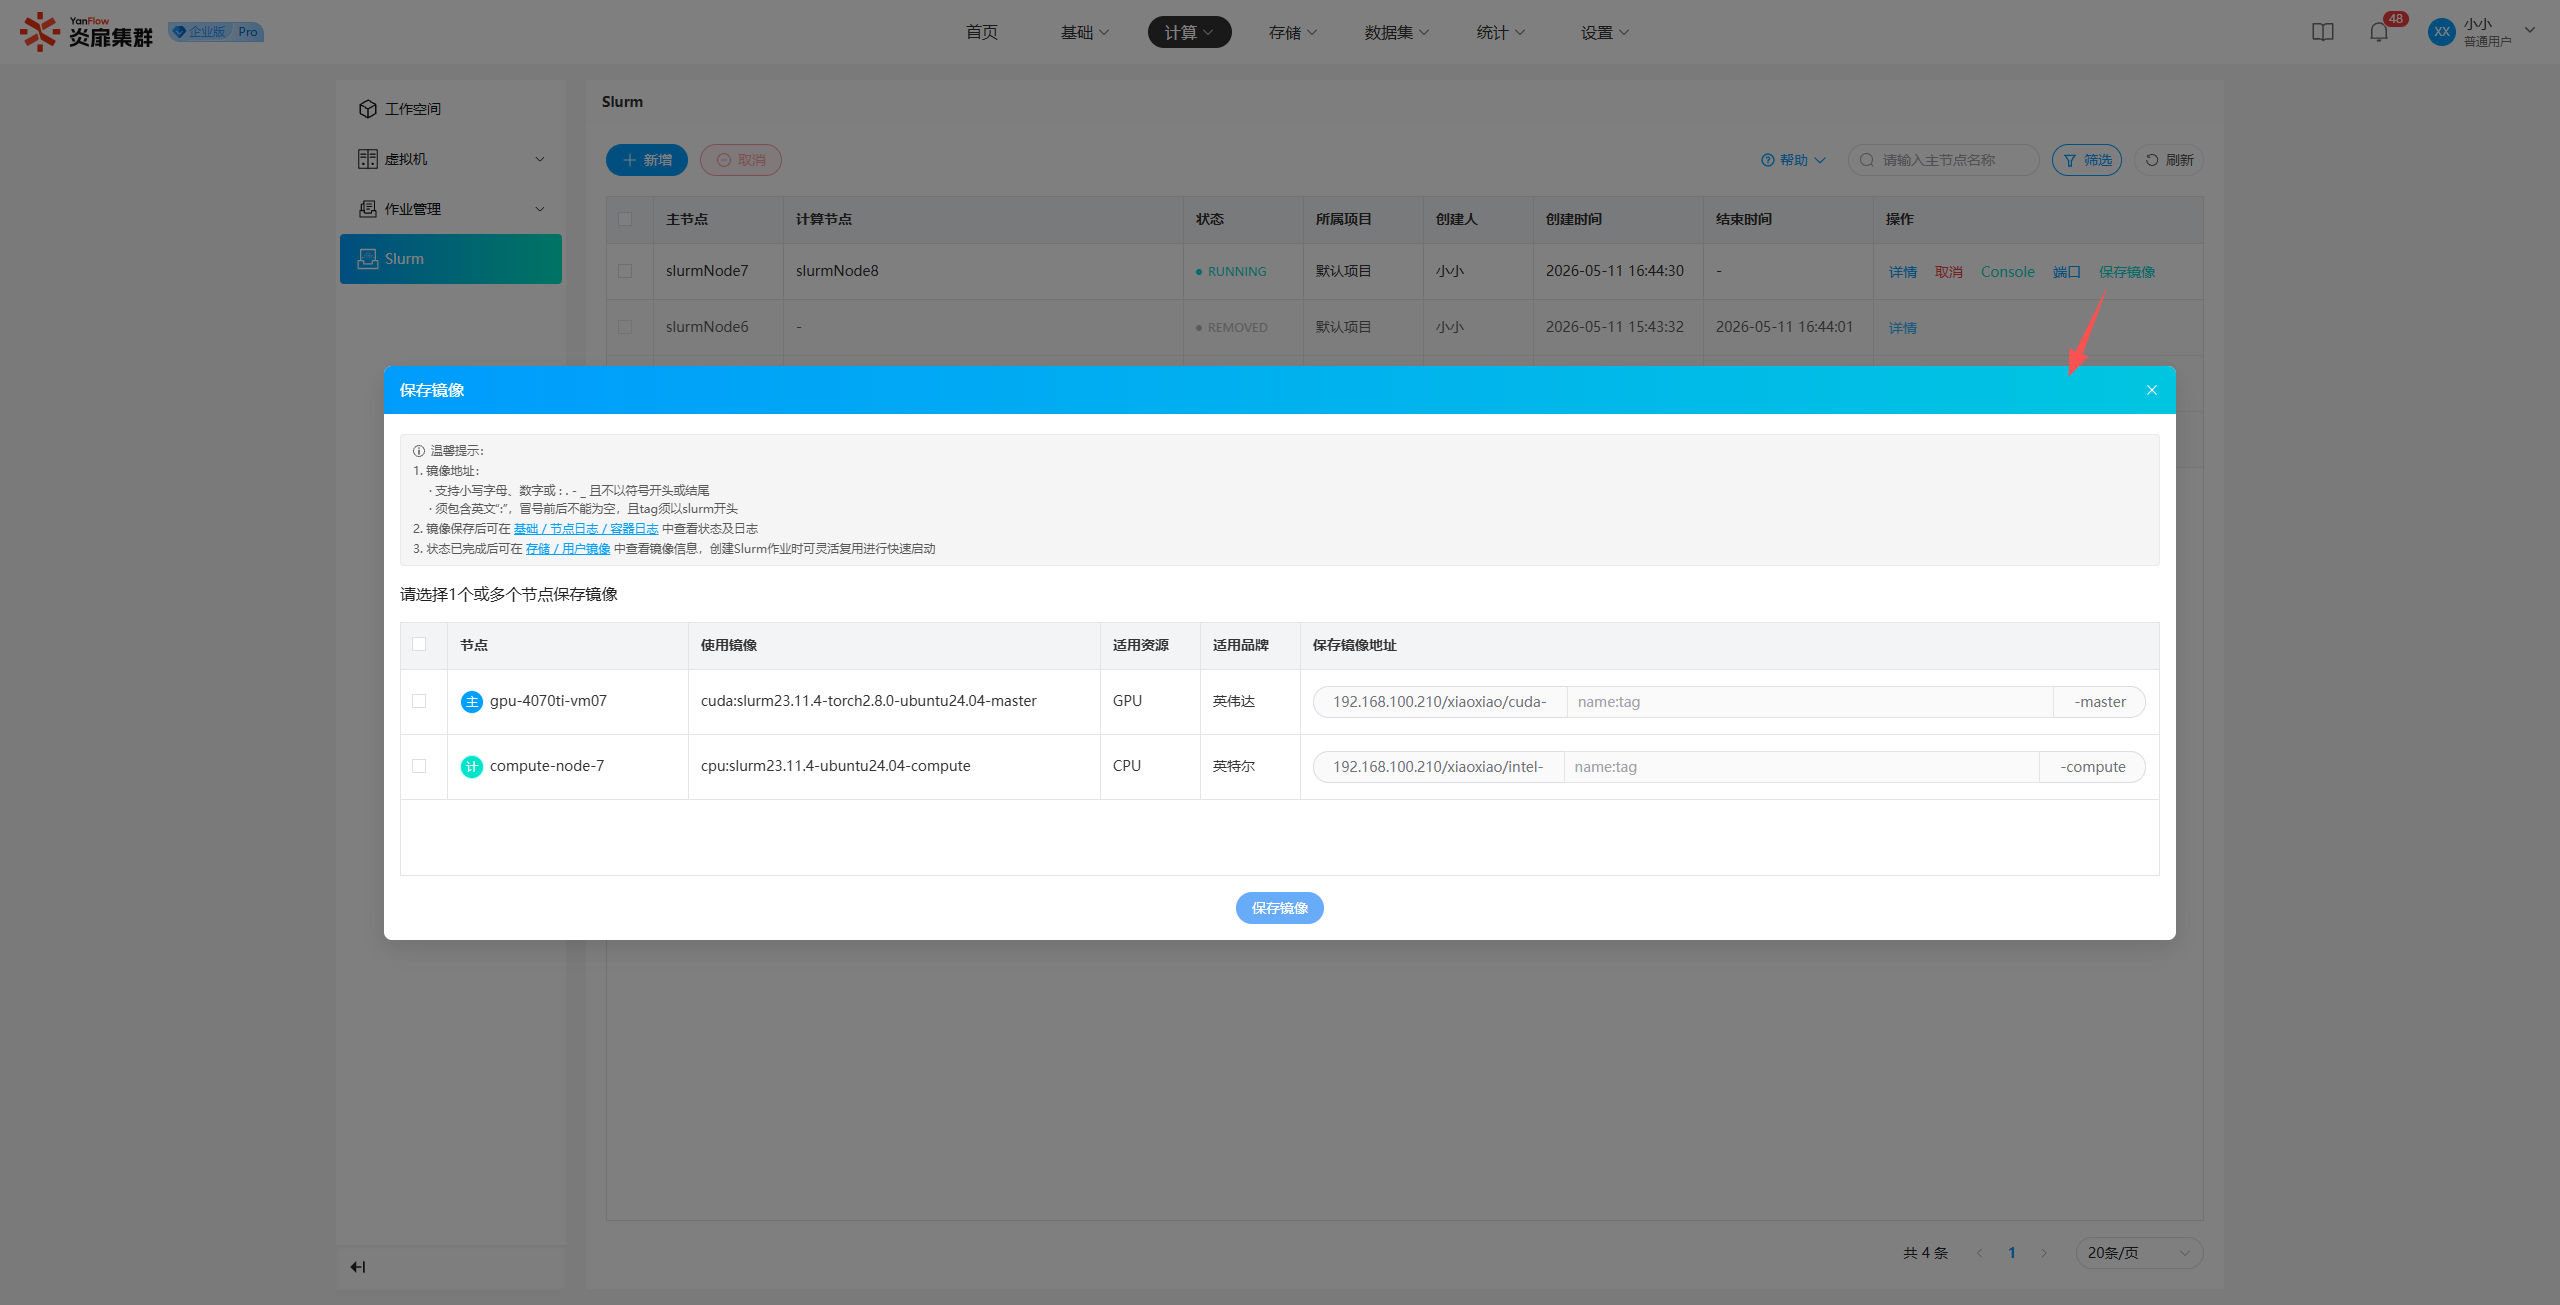
Save Image
Click Save Image to display a settings popup. Select the corresponding node, enter an image address, and click Save Image. If validation passes, the image save operation will be executed.
Cancel Instance
Select one or more instances, click Cancel, and click Confirm in the prompt popup to complete the cancellation.
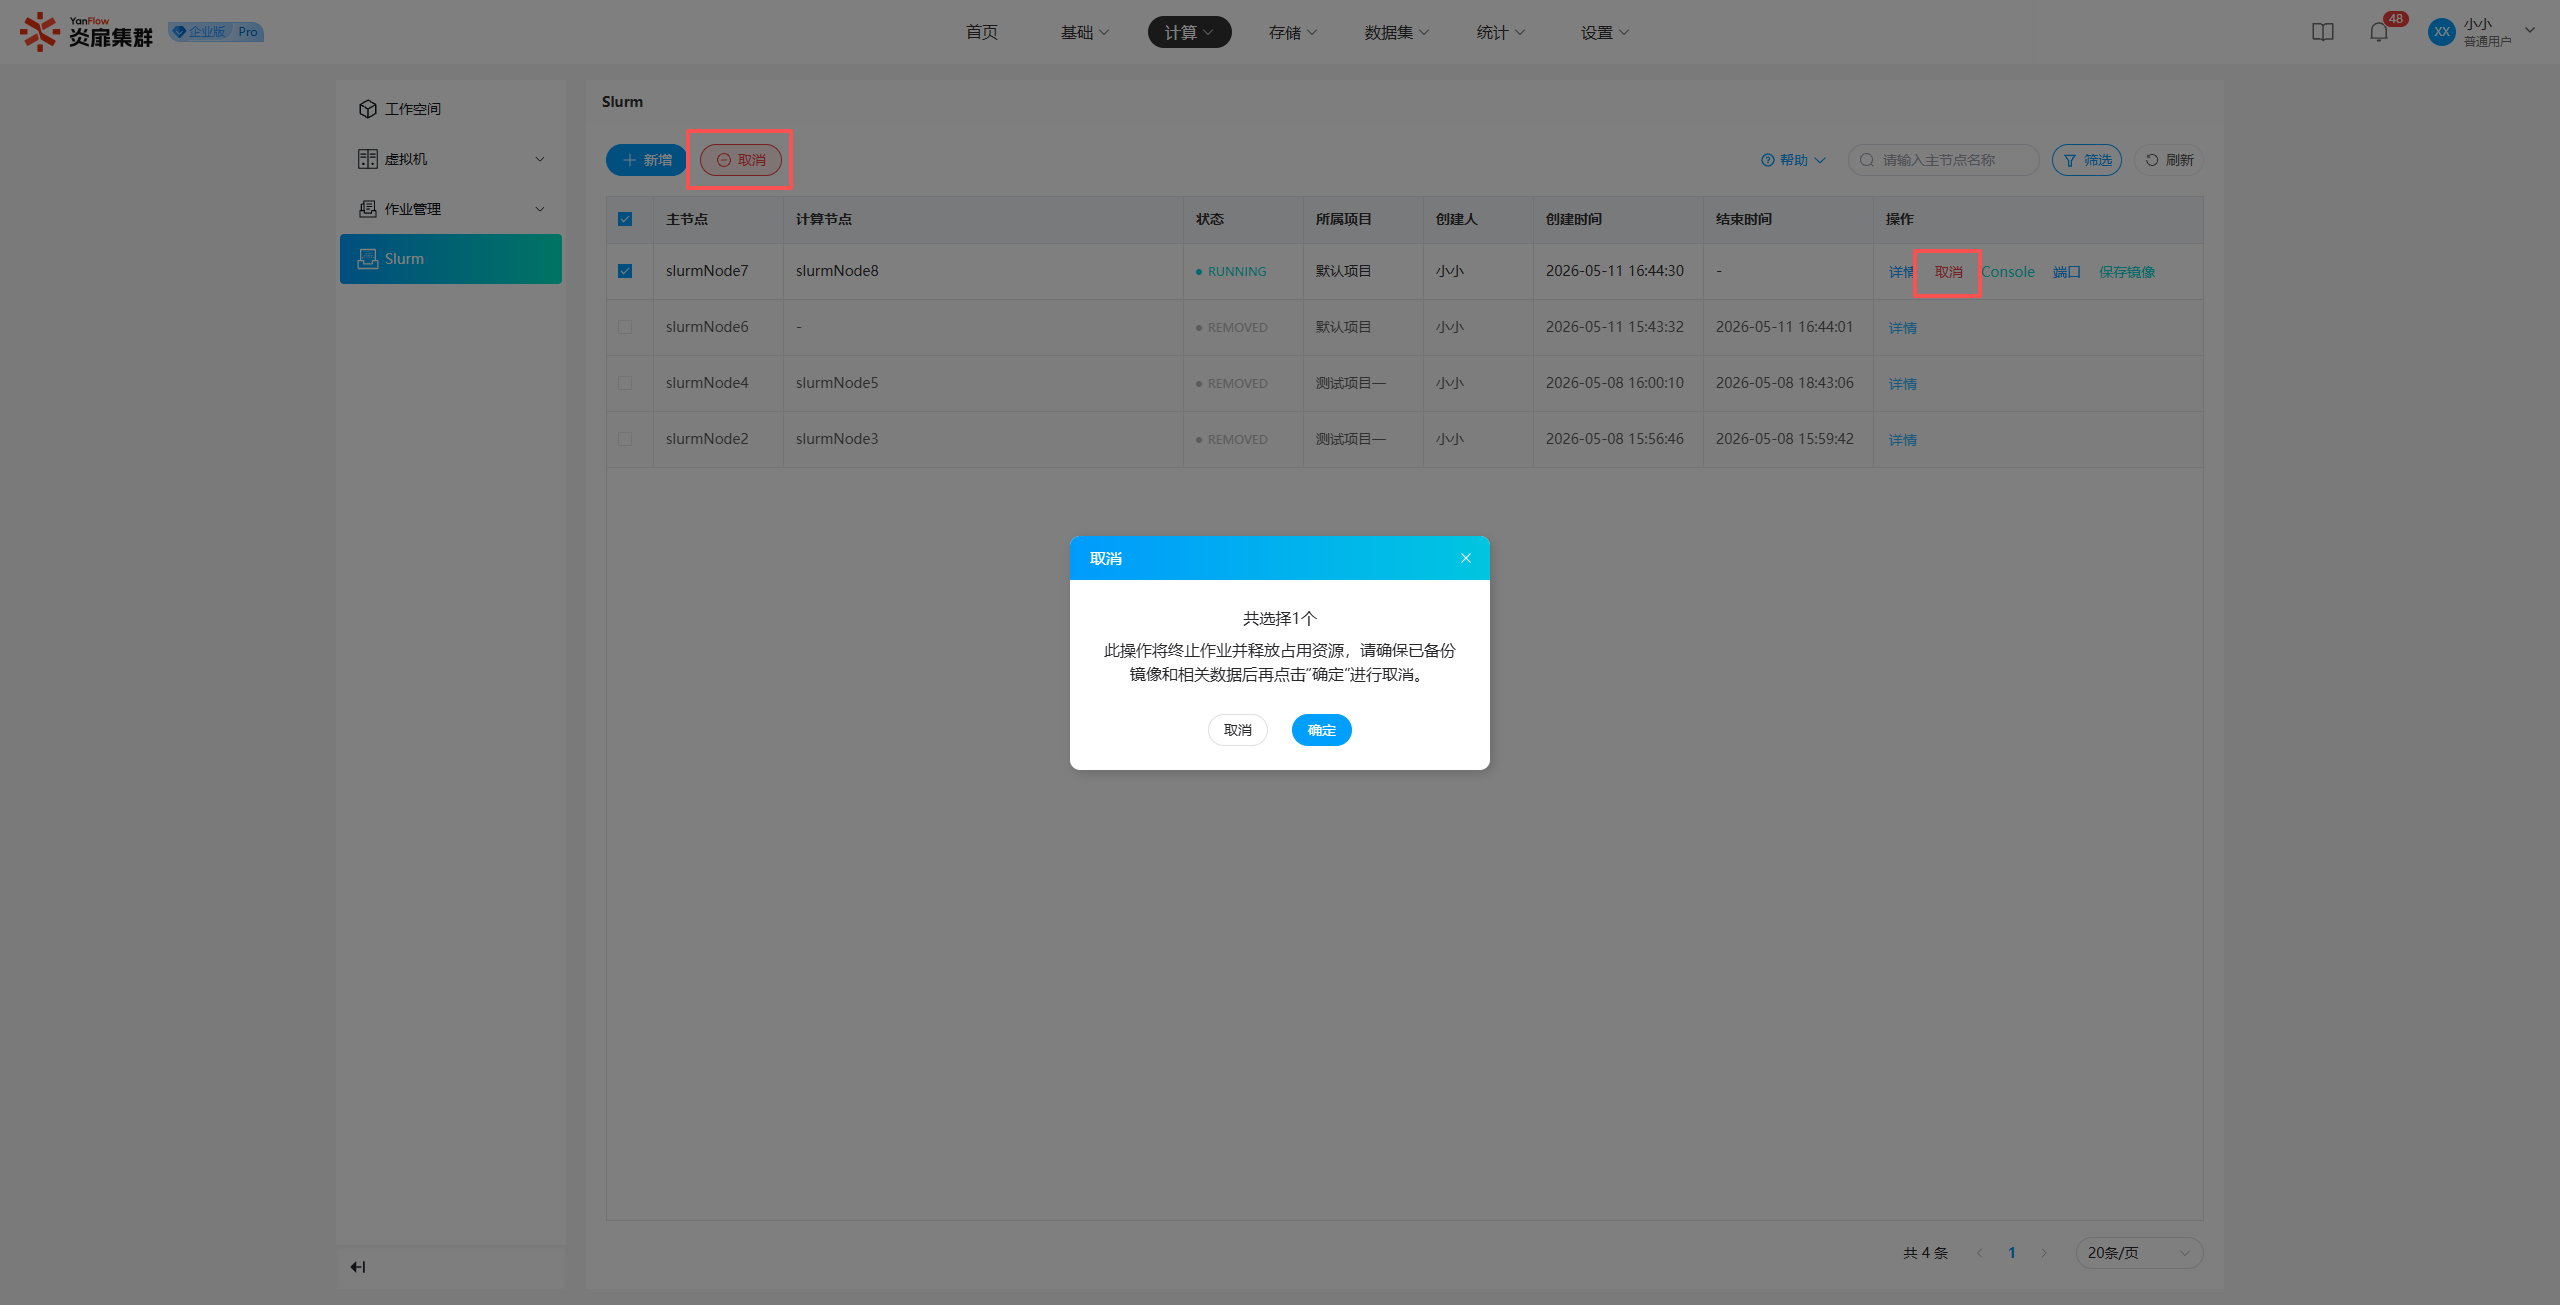
Note: After a Slurm instance is canceled, all jobs within the corresponding container will also be terminated.
Storage
Template Images
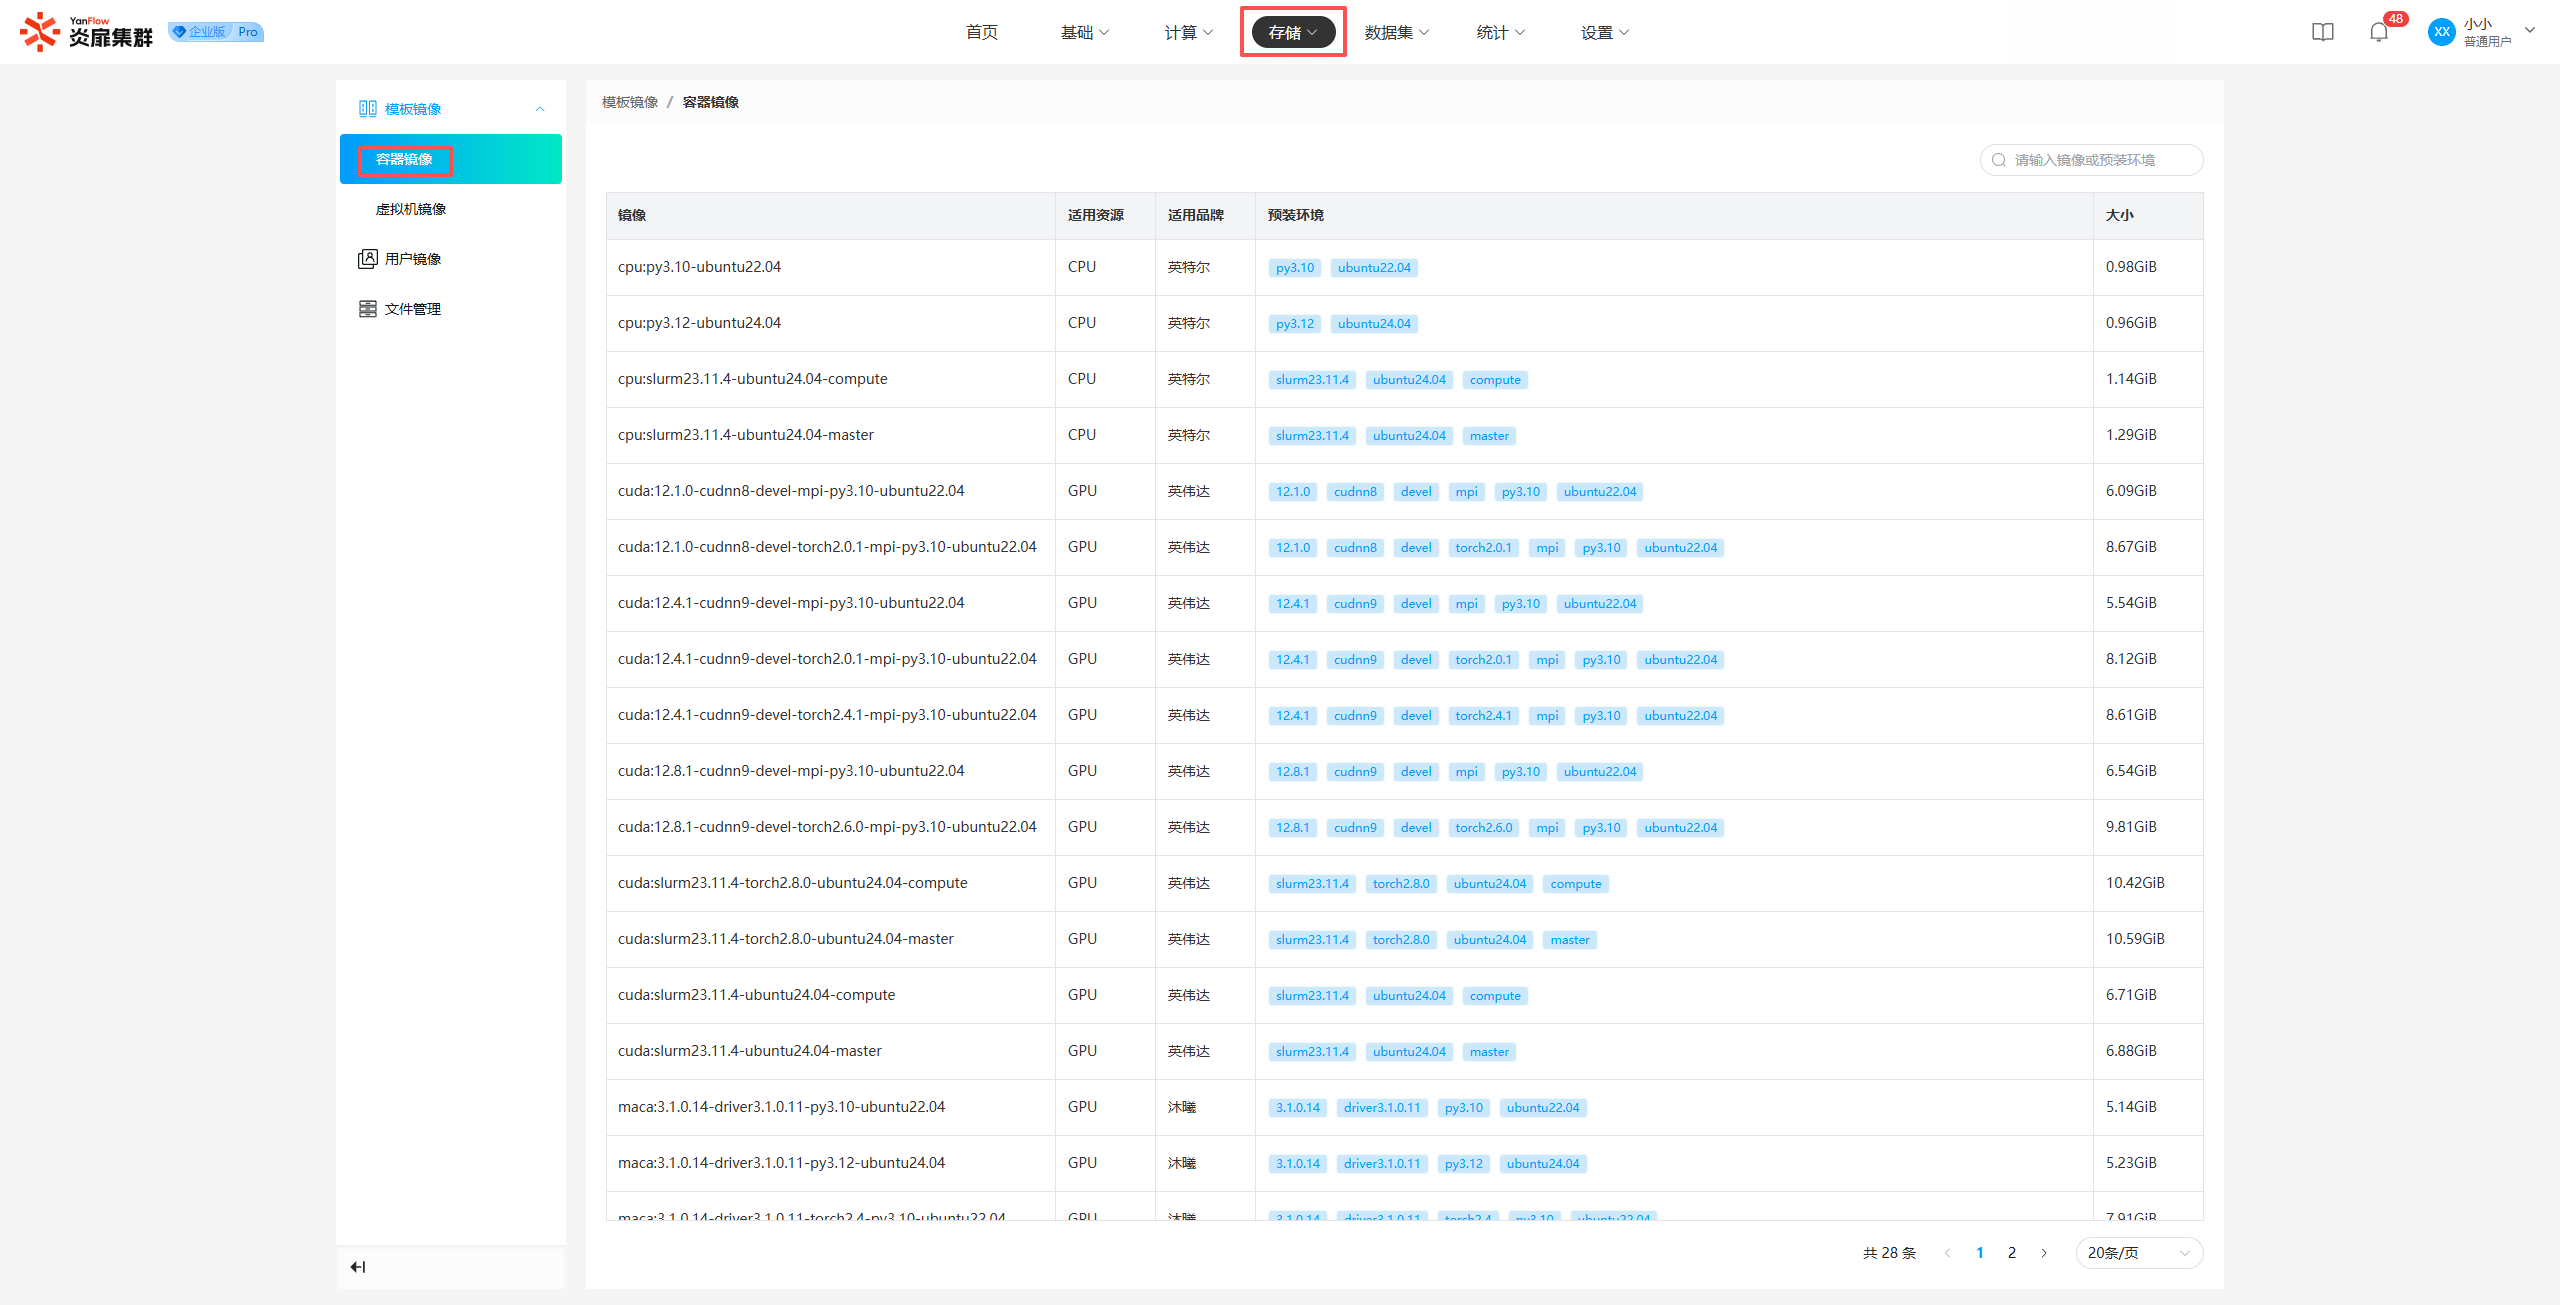
Container Images
Regular users can view all container node template images in the system. Support for keyword search via image or pre-installed environment is provided.
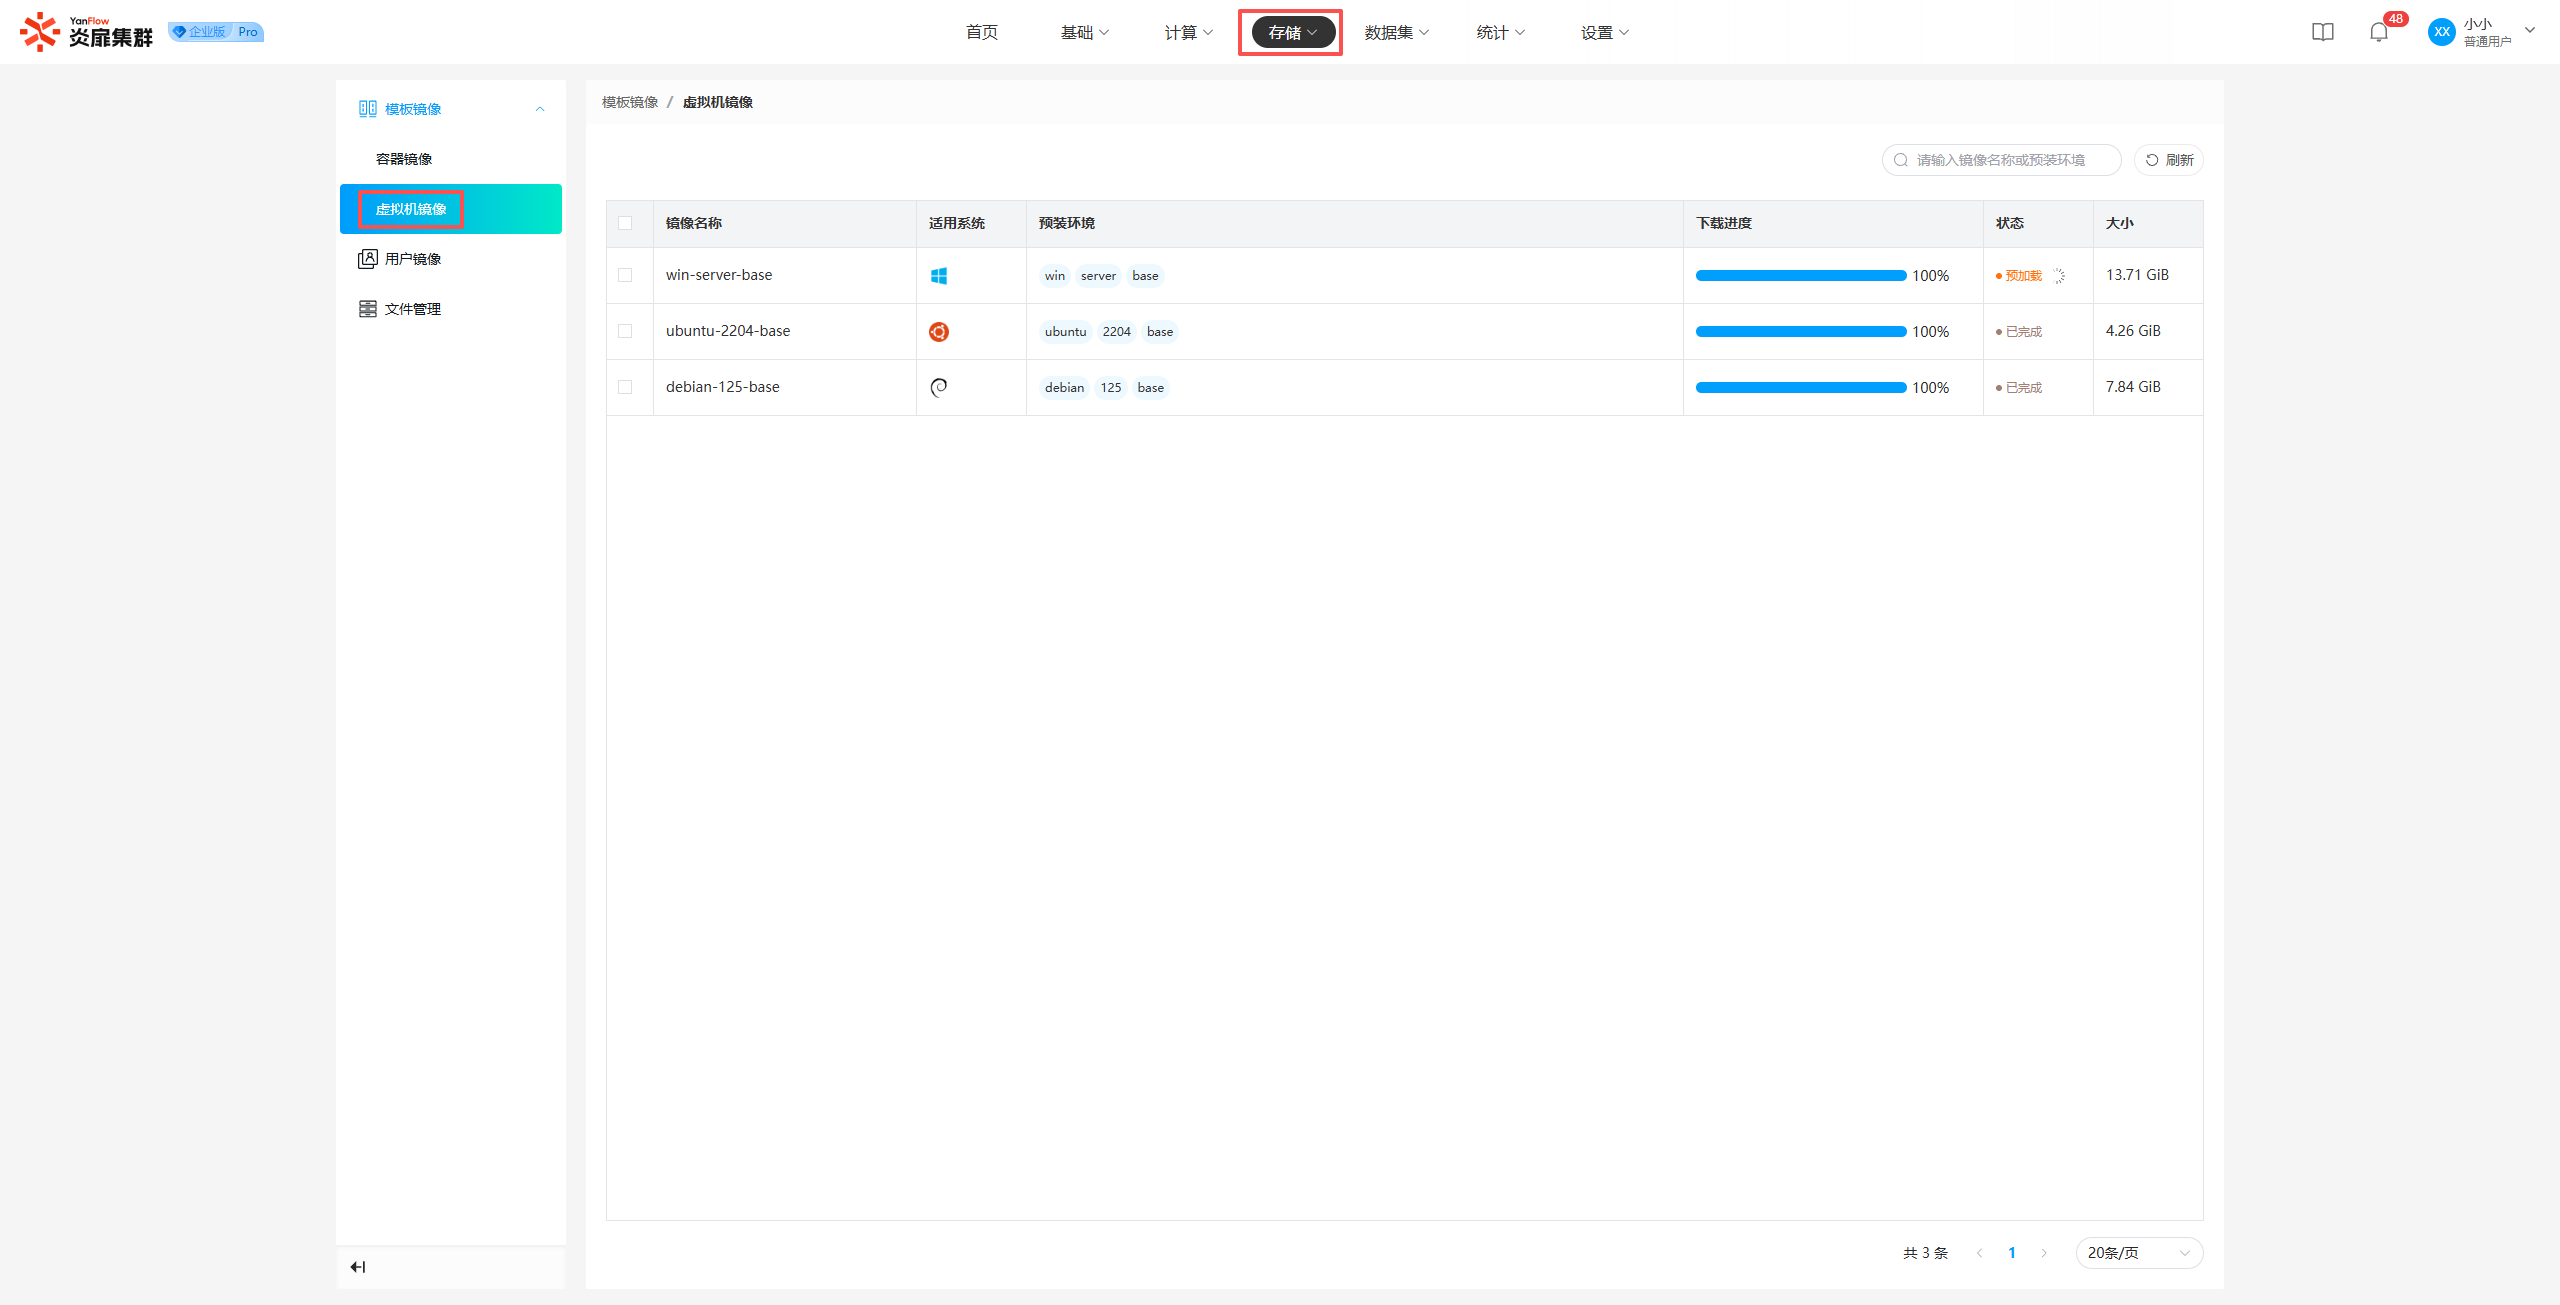
Virtual Machine Images
Regular users can view all virtual machine node template images in the system. Support for keyword search via image name or pre-installed environment is provided.
User Images
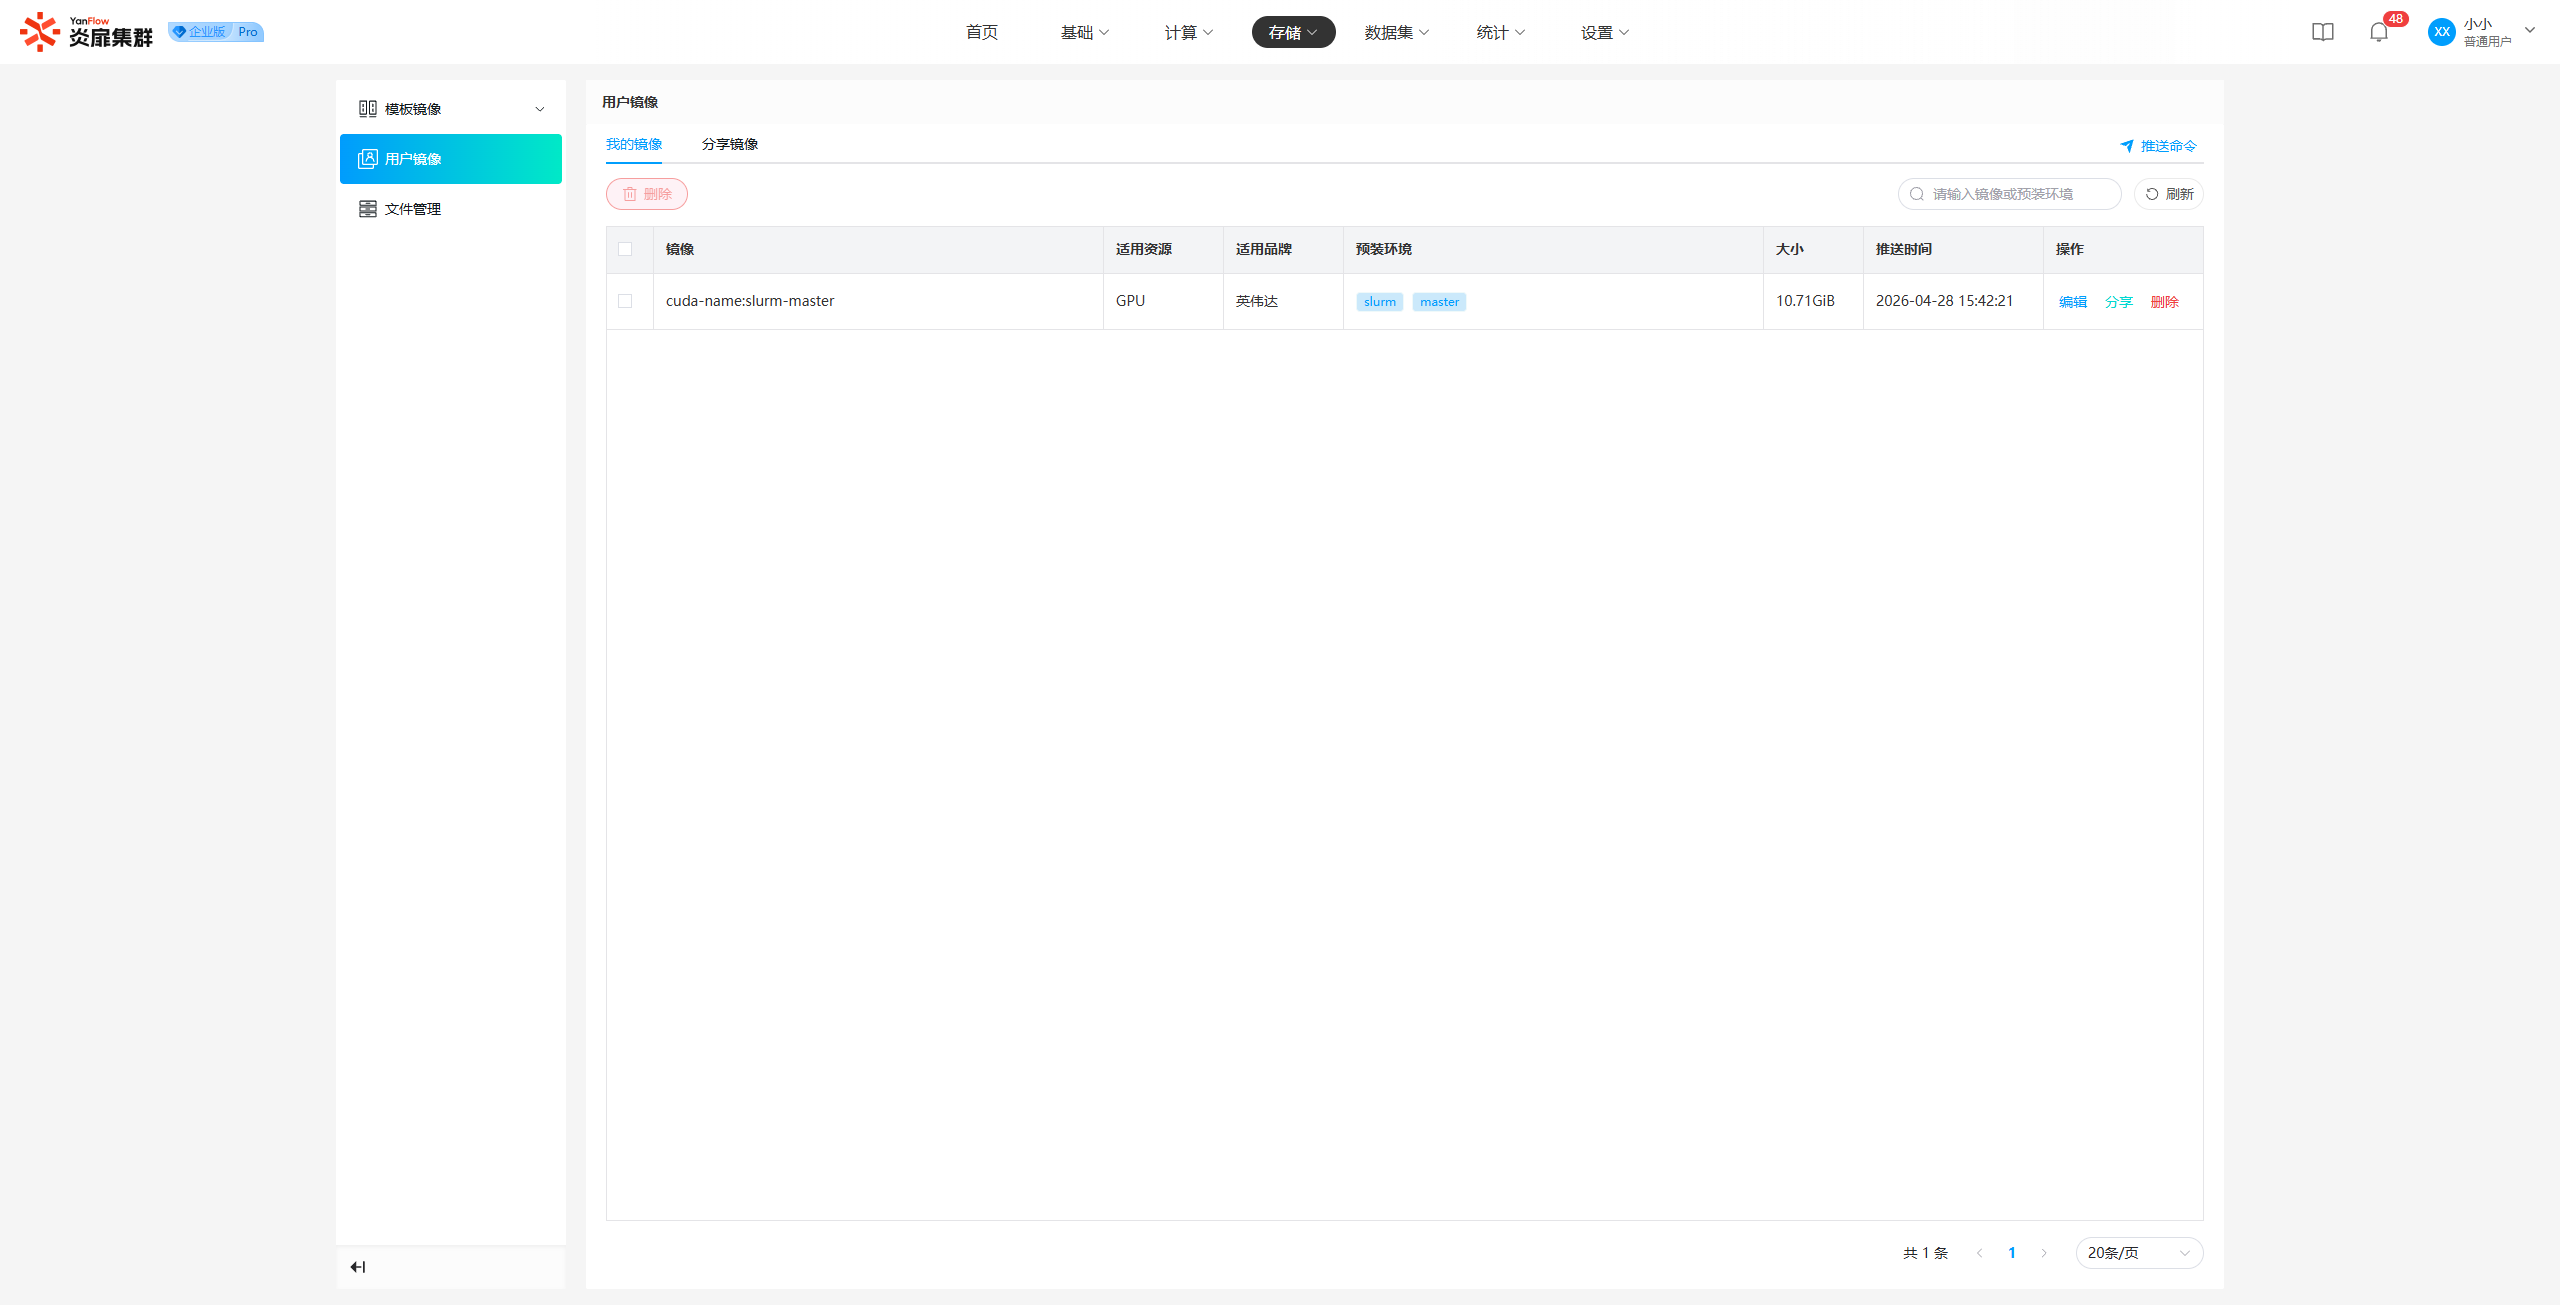
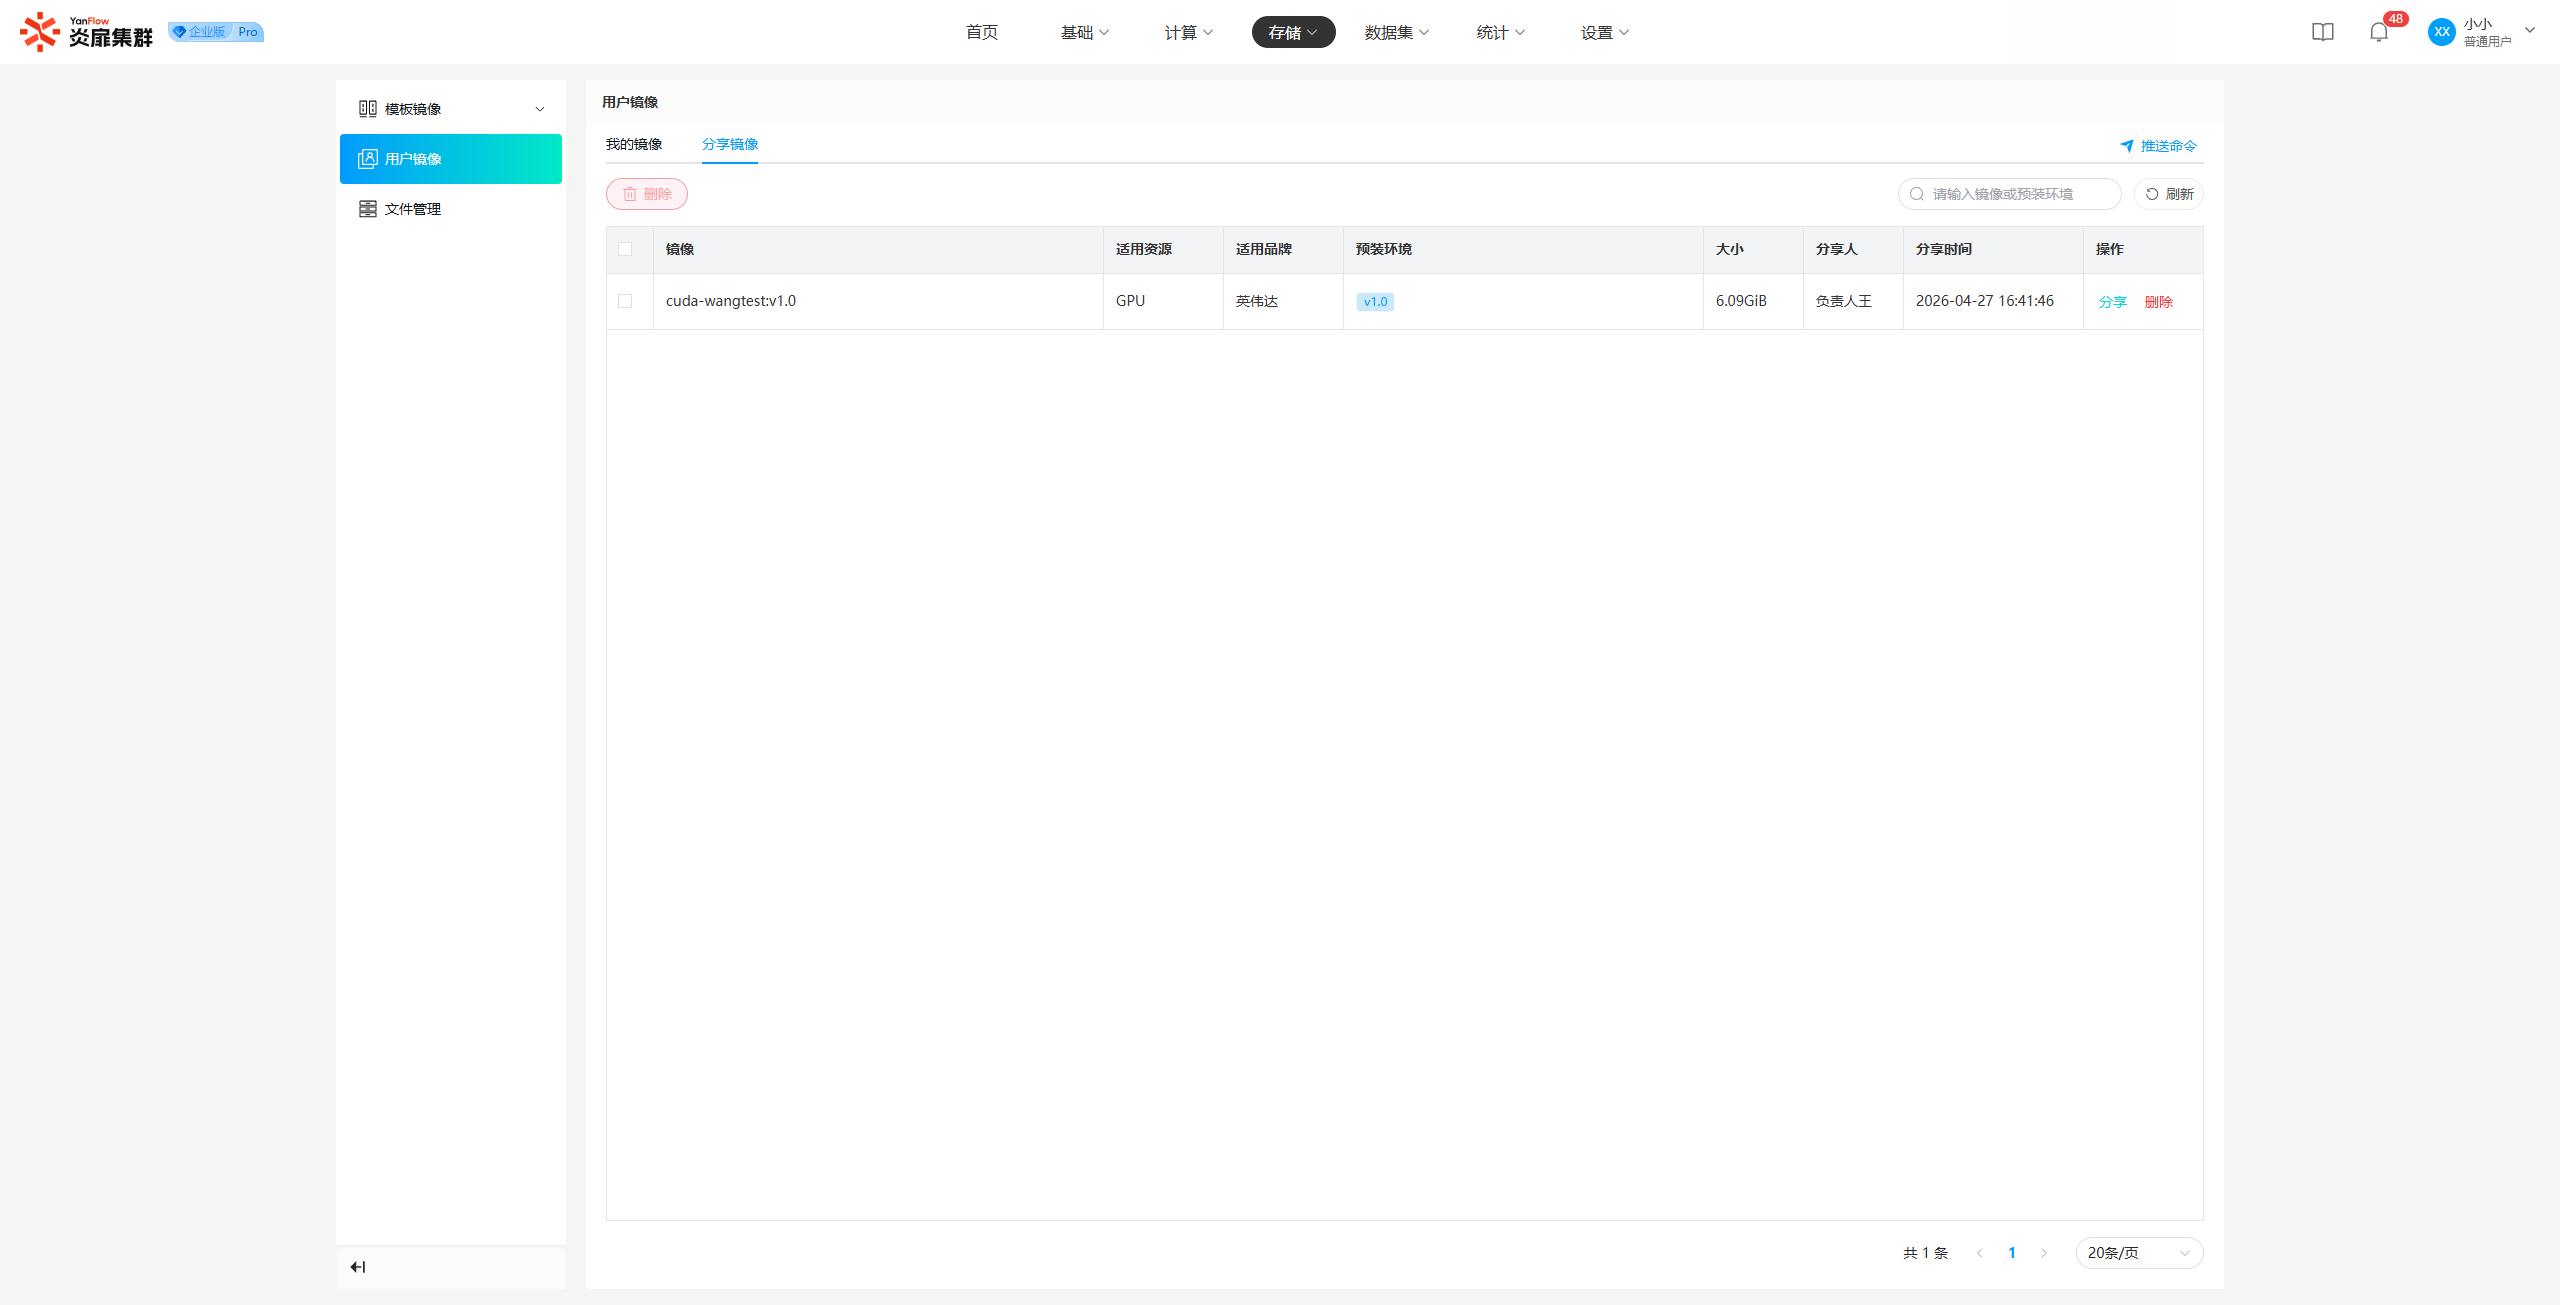
In the User Image Management module, regular users can view or manage their own images and images shared with them by others.
Image List
My Images: Displays your own image data.
Shared Images: Displays image data shared with you by others.
Edit Image
Click Edit to display an editing popup. Modify the information that needs to be changed and click Confirm to update the image information.
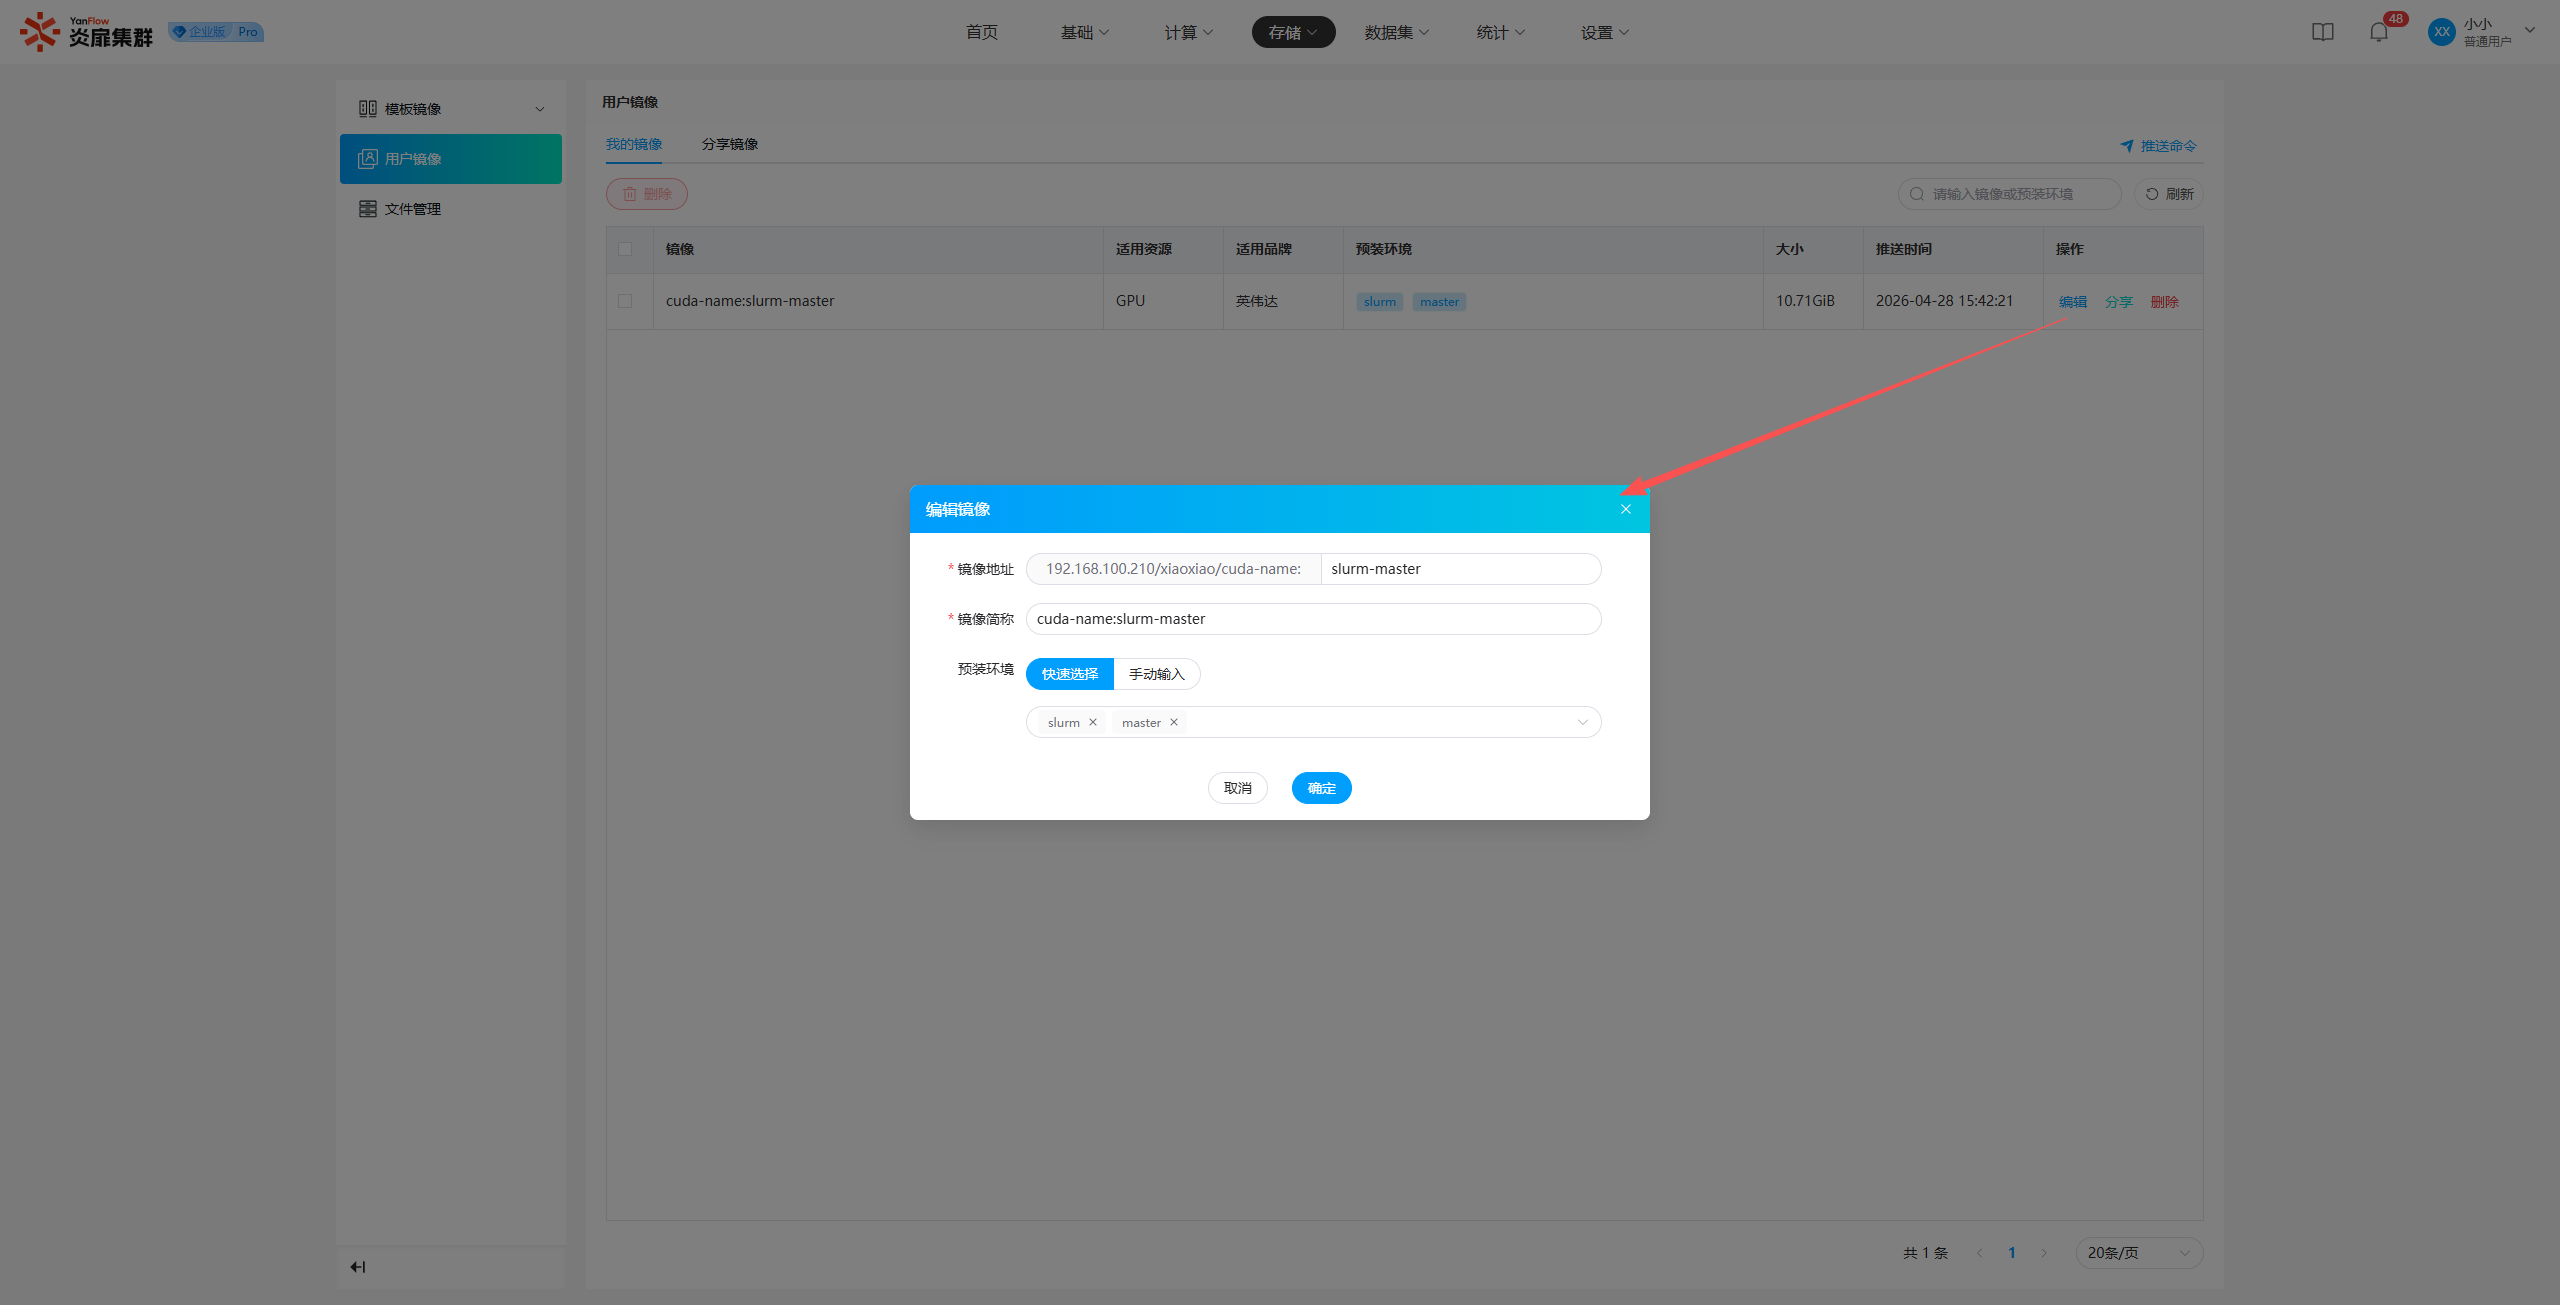
Note: Only My Images support
Edit.
Share Image
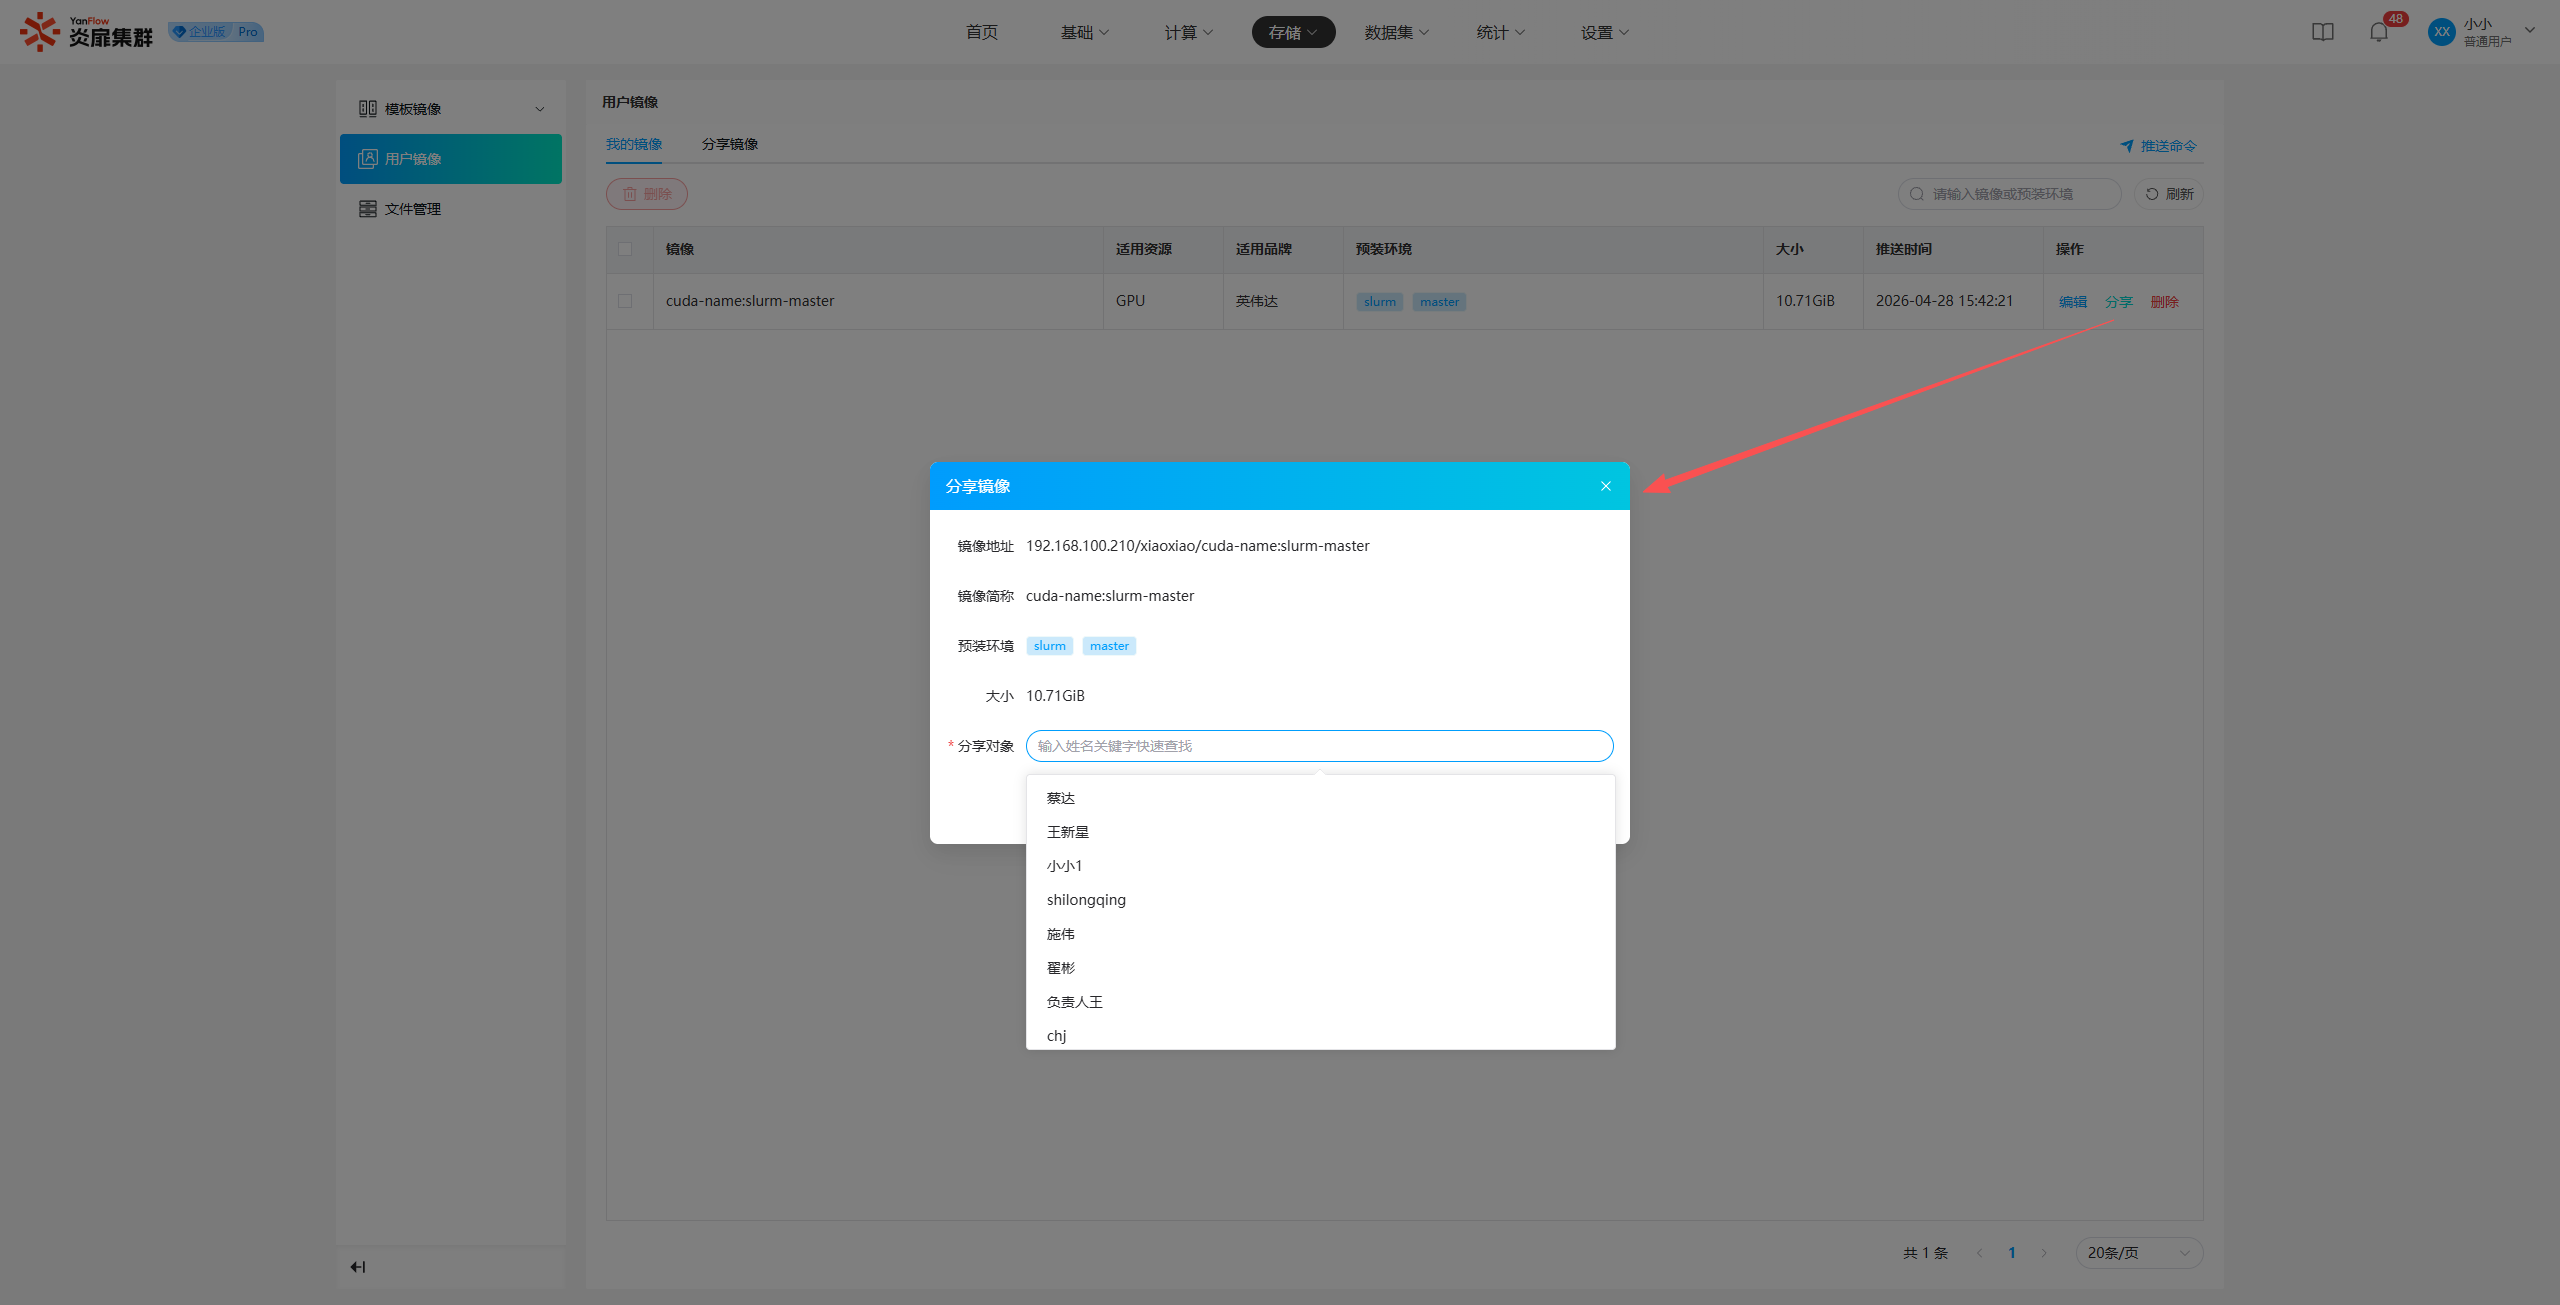
Click Share to display a sharing popup. Select the regular users you wish to share with and click Confirm to share the image.
Delete Image
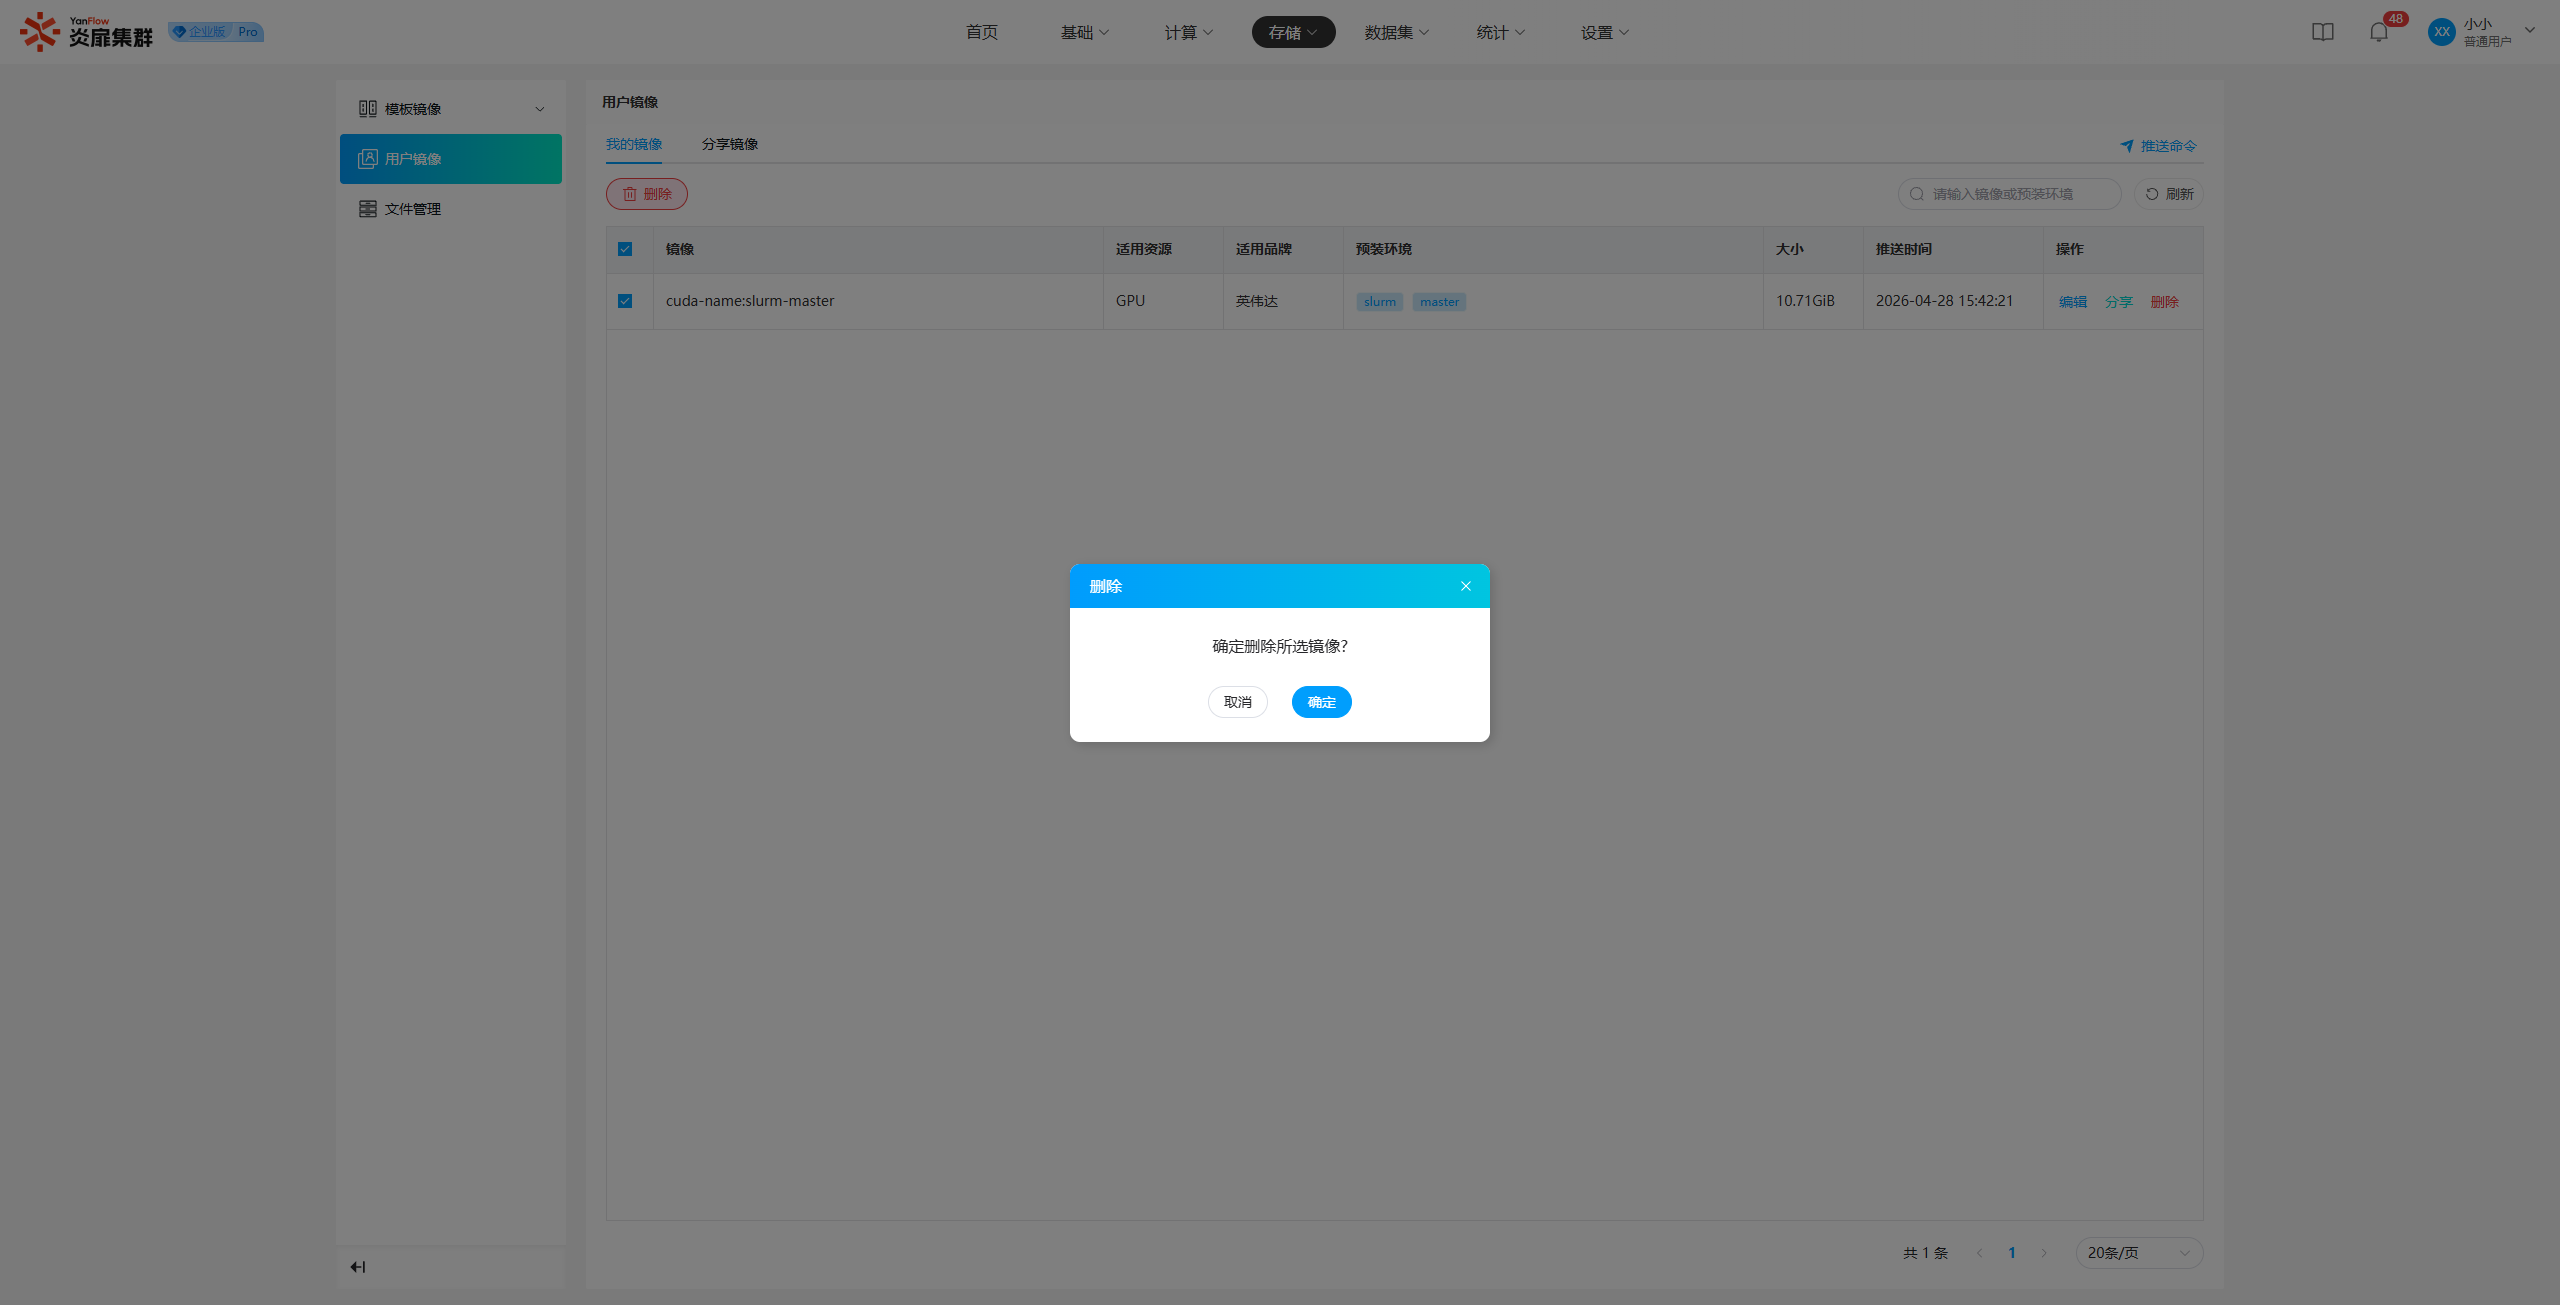
Click Delete or check the images and click the Delete button at the top to display a prompt popup. Click Confirm to delete the image.
Push Command
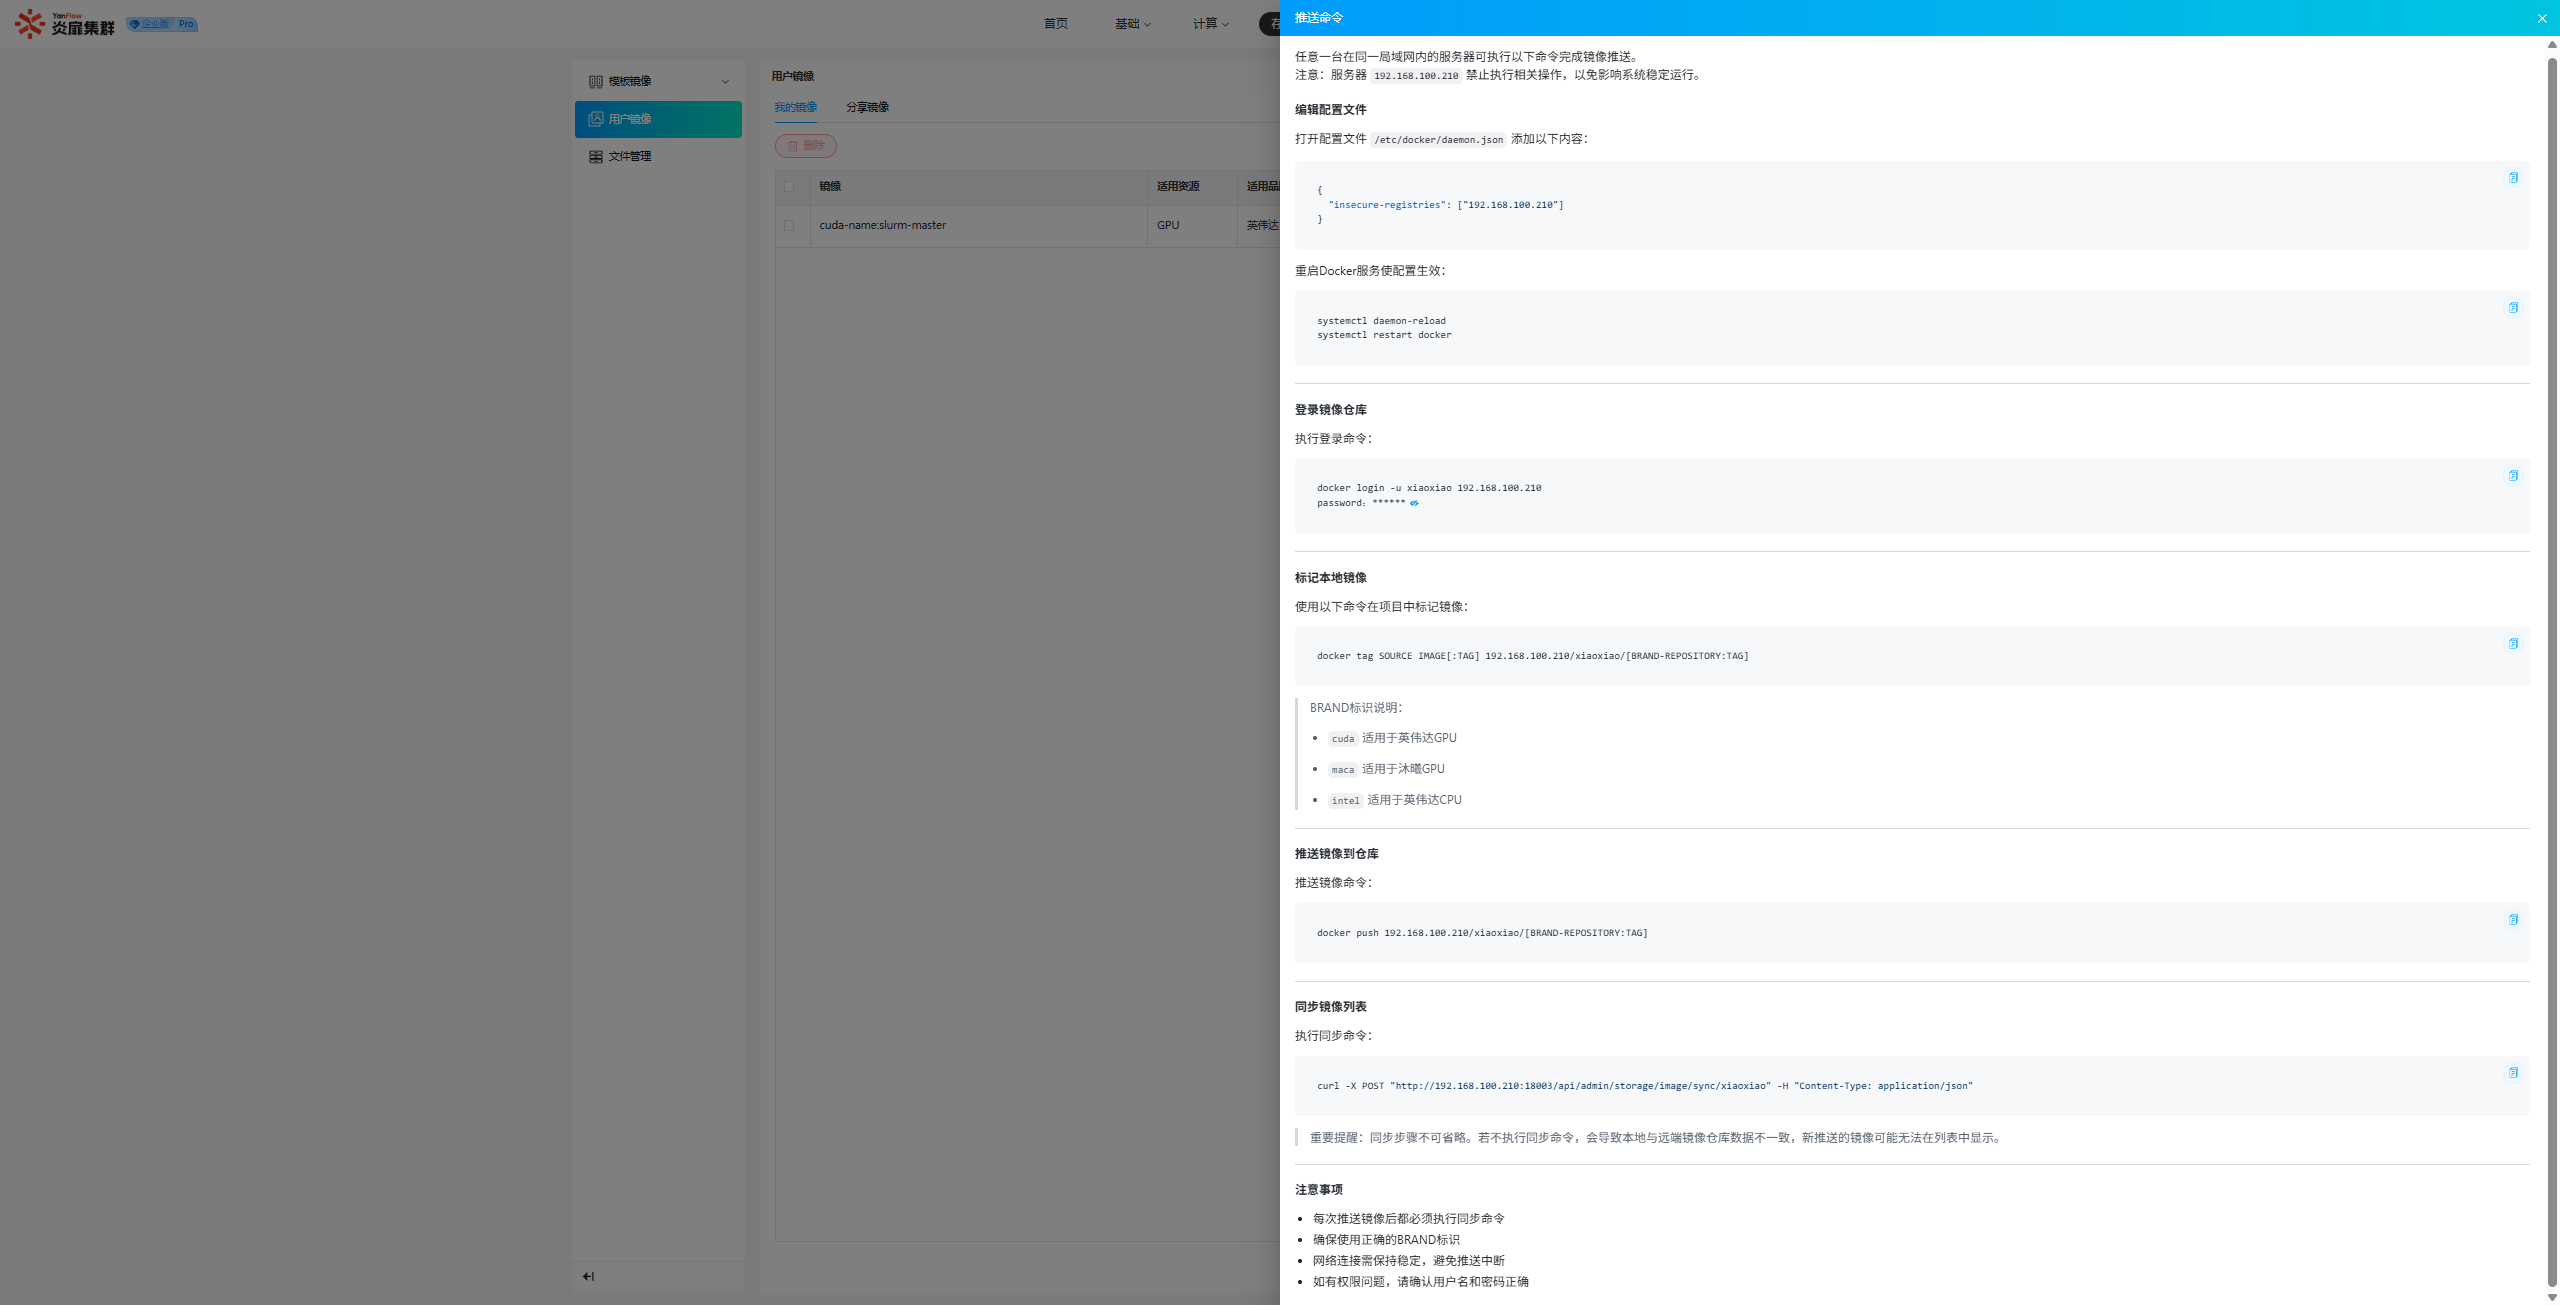
Supports users in pushing images via push commands. Click Push Command to display the image push command instructions in a popup. Follow the instructions to push the image to My Images.
File Management
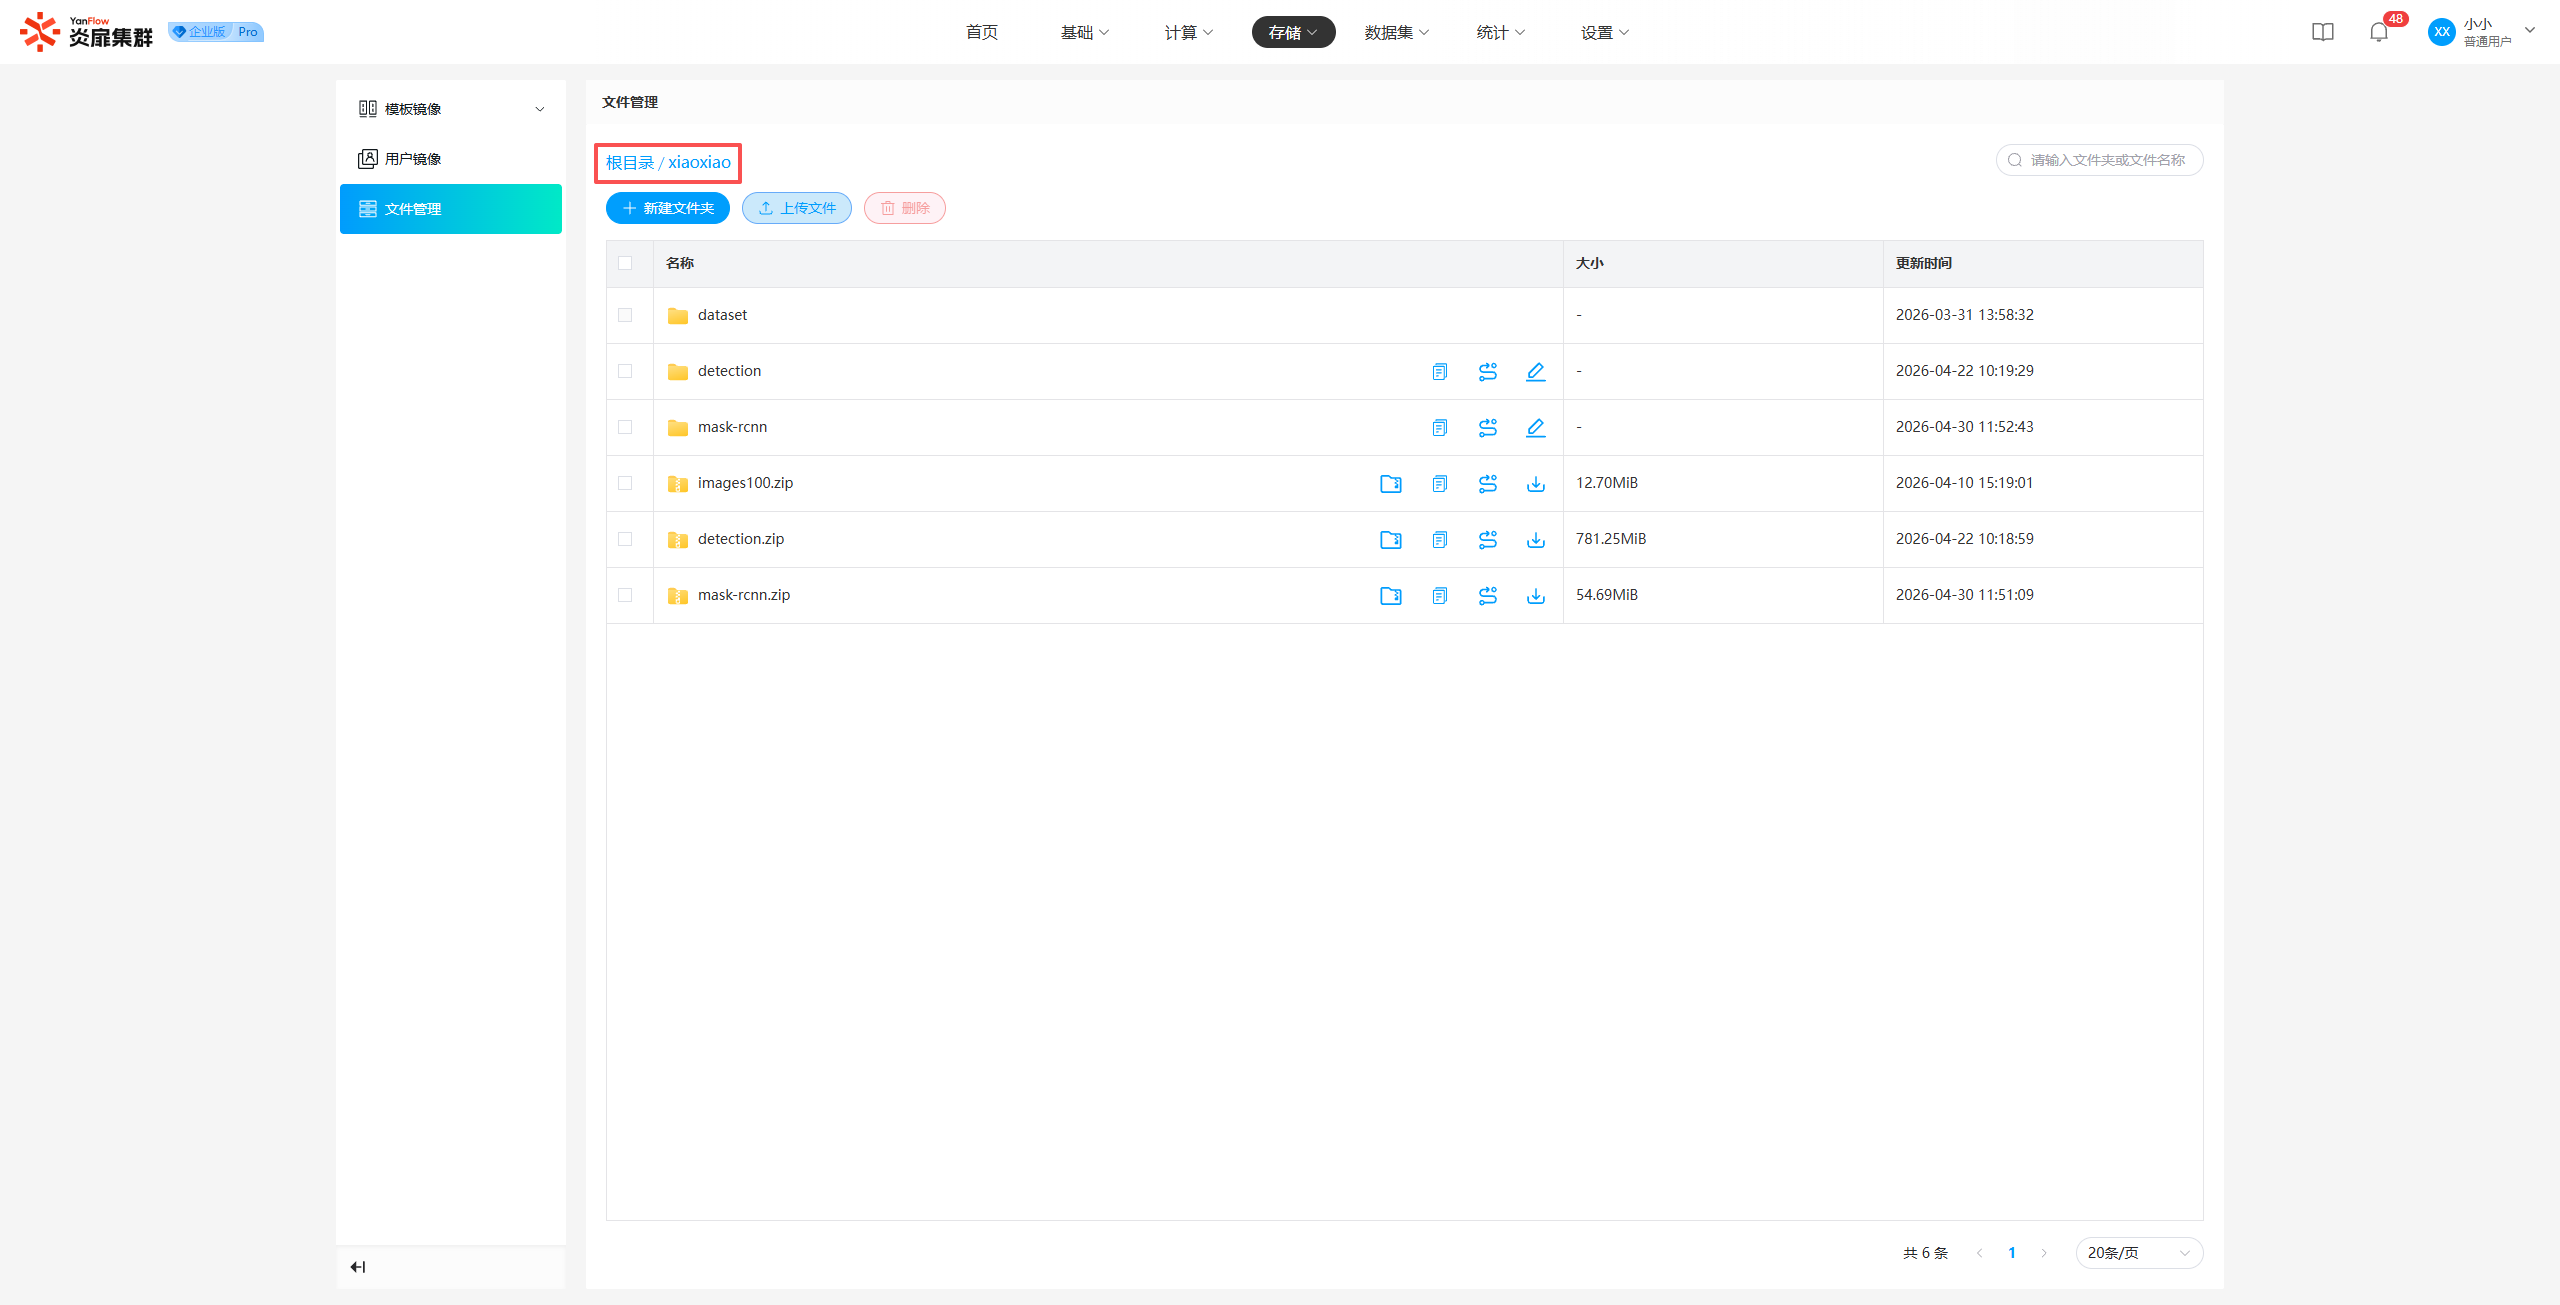
Root Directory
Regular users can view the Public Folder, Project Folder, and User Folder in the root directory. Support for keyword search via folder or file name is provided.
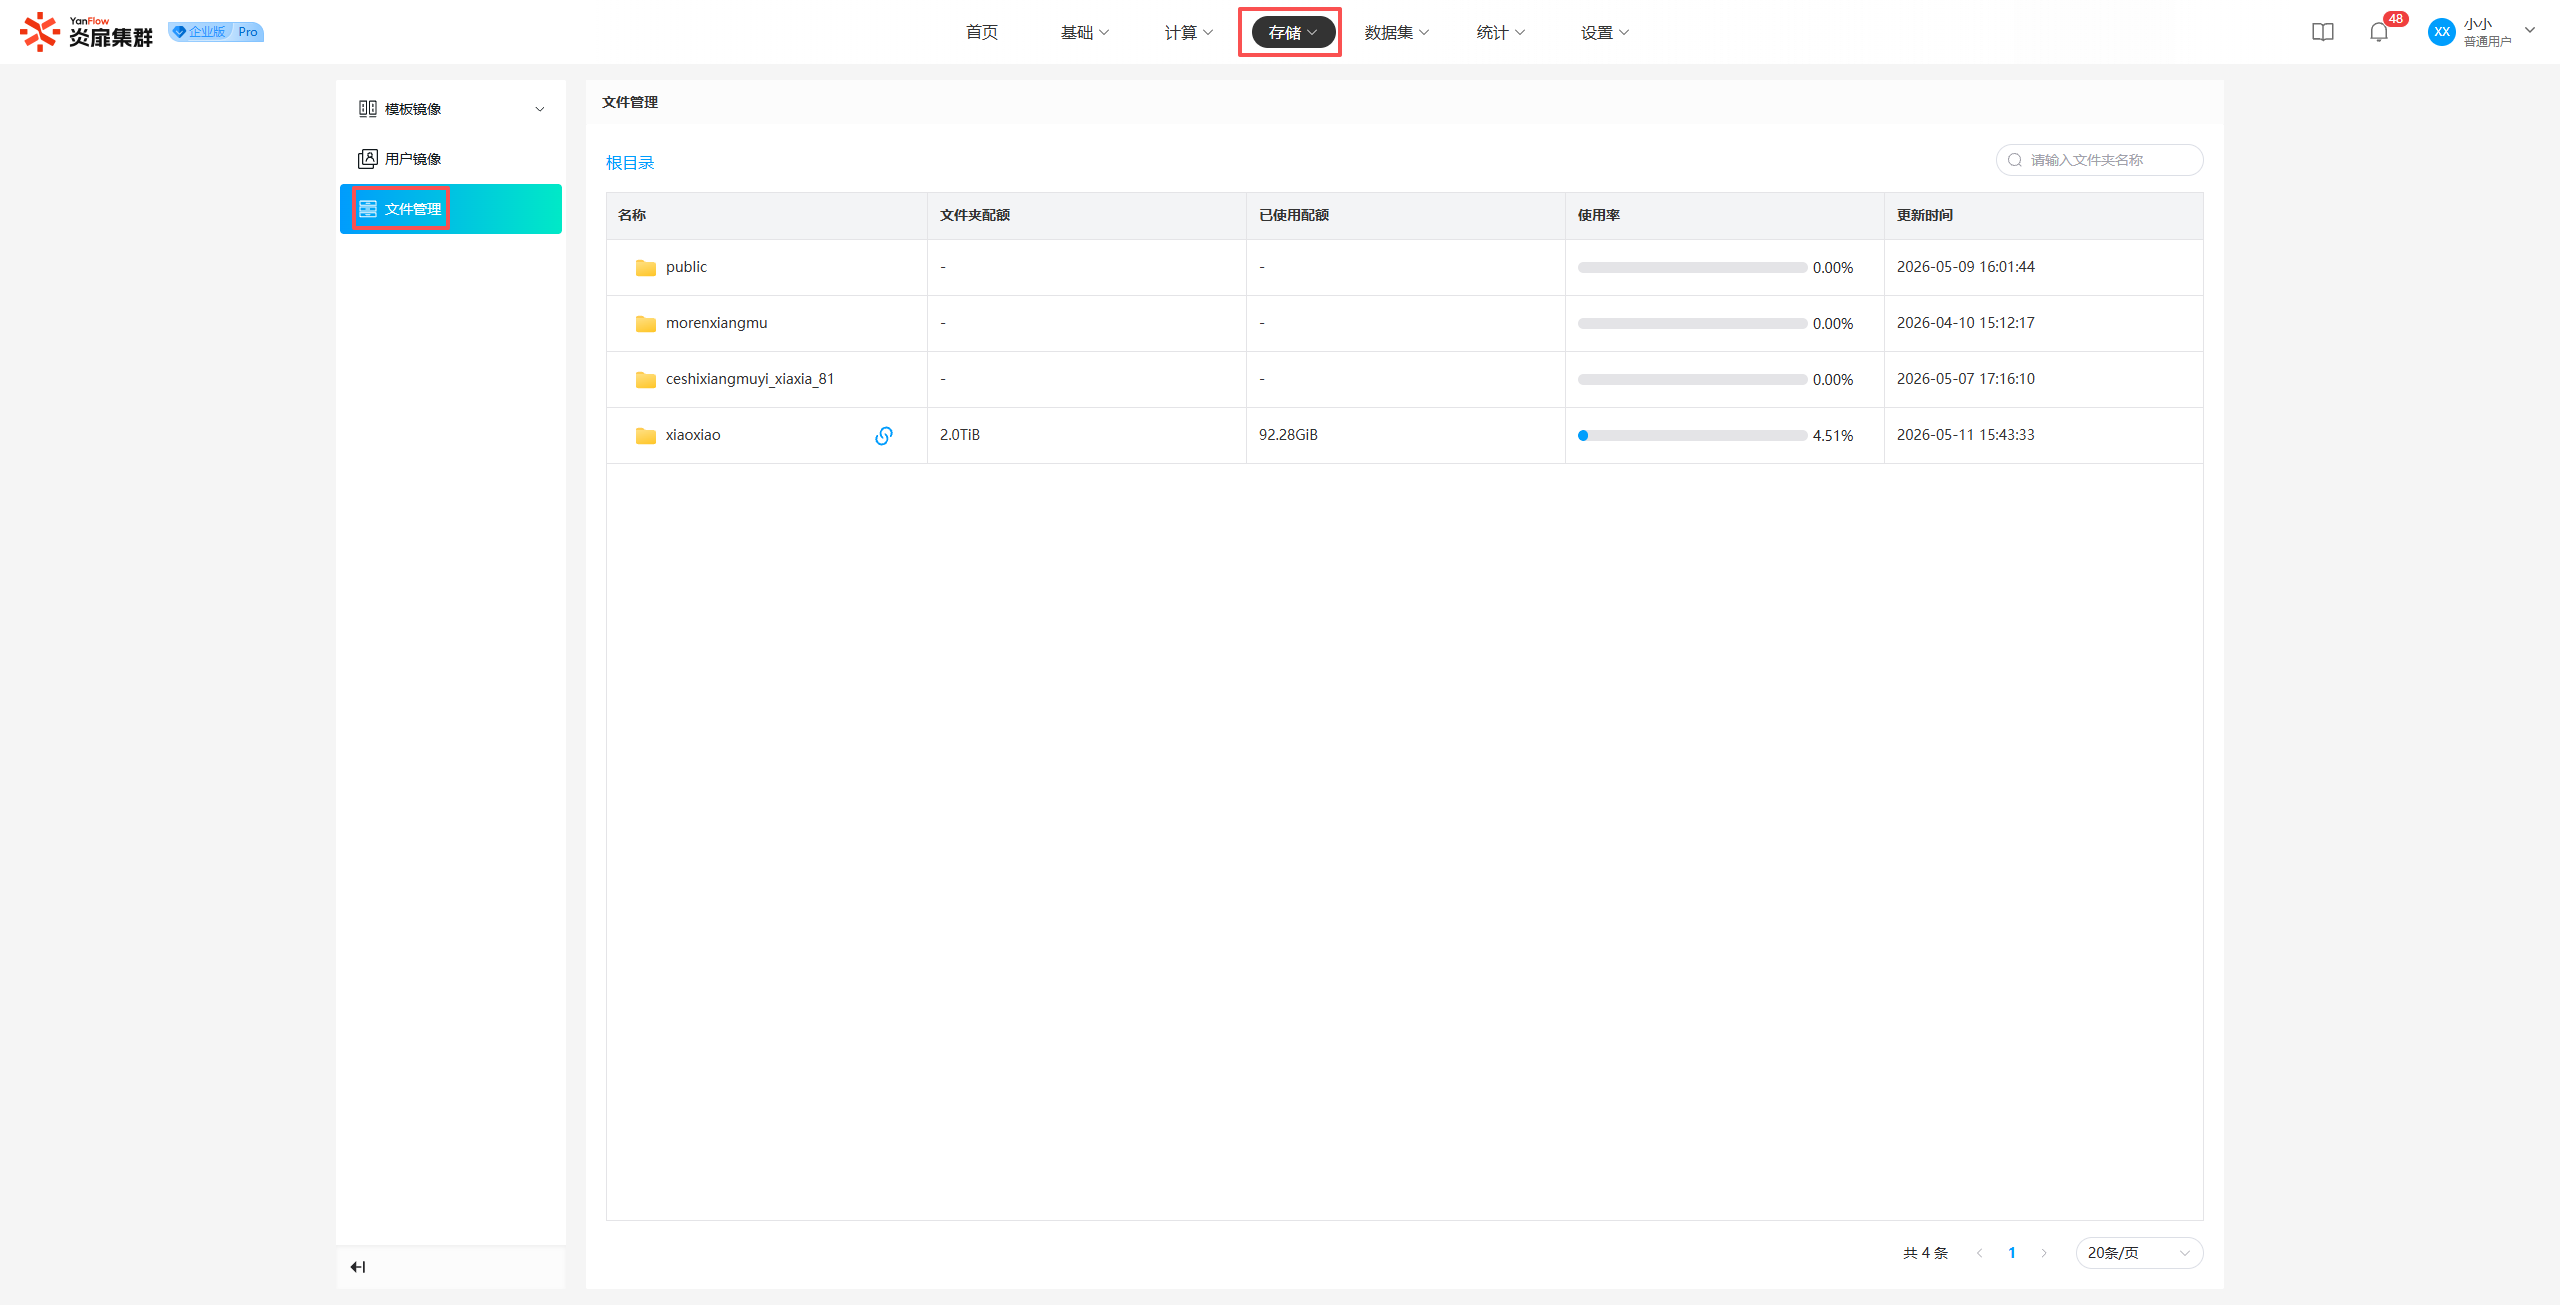
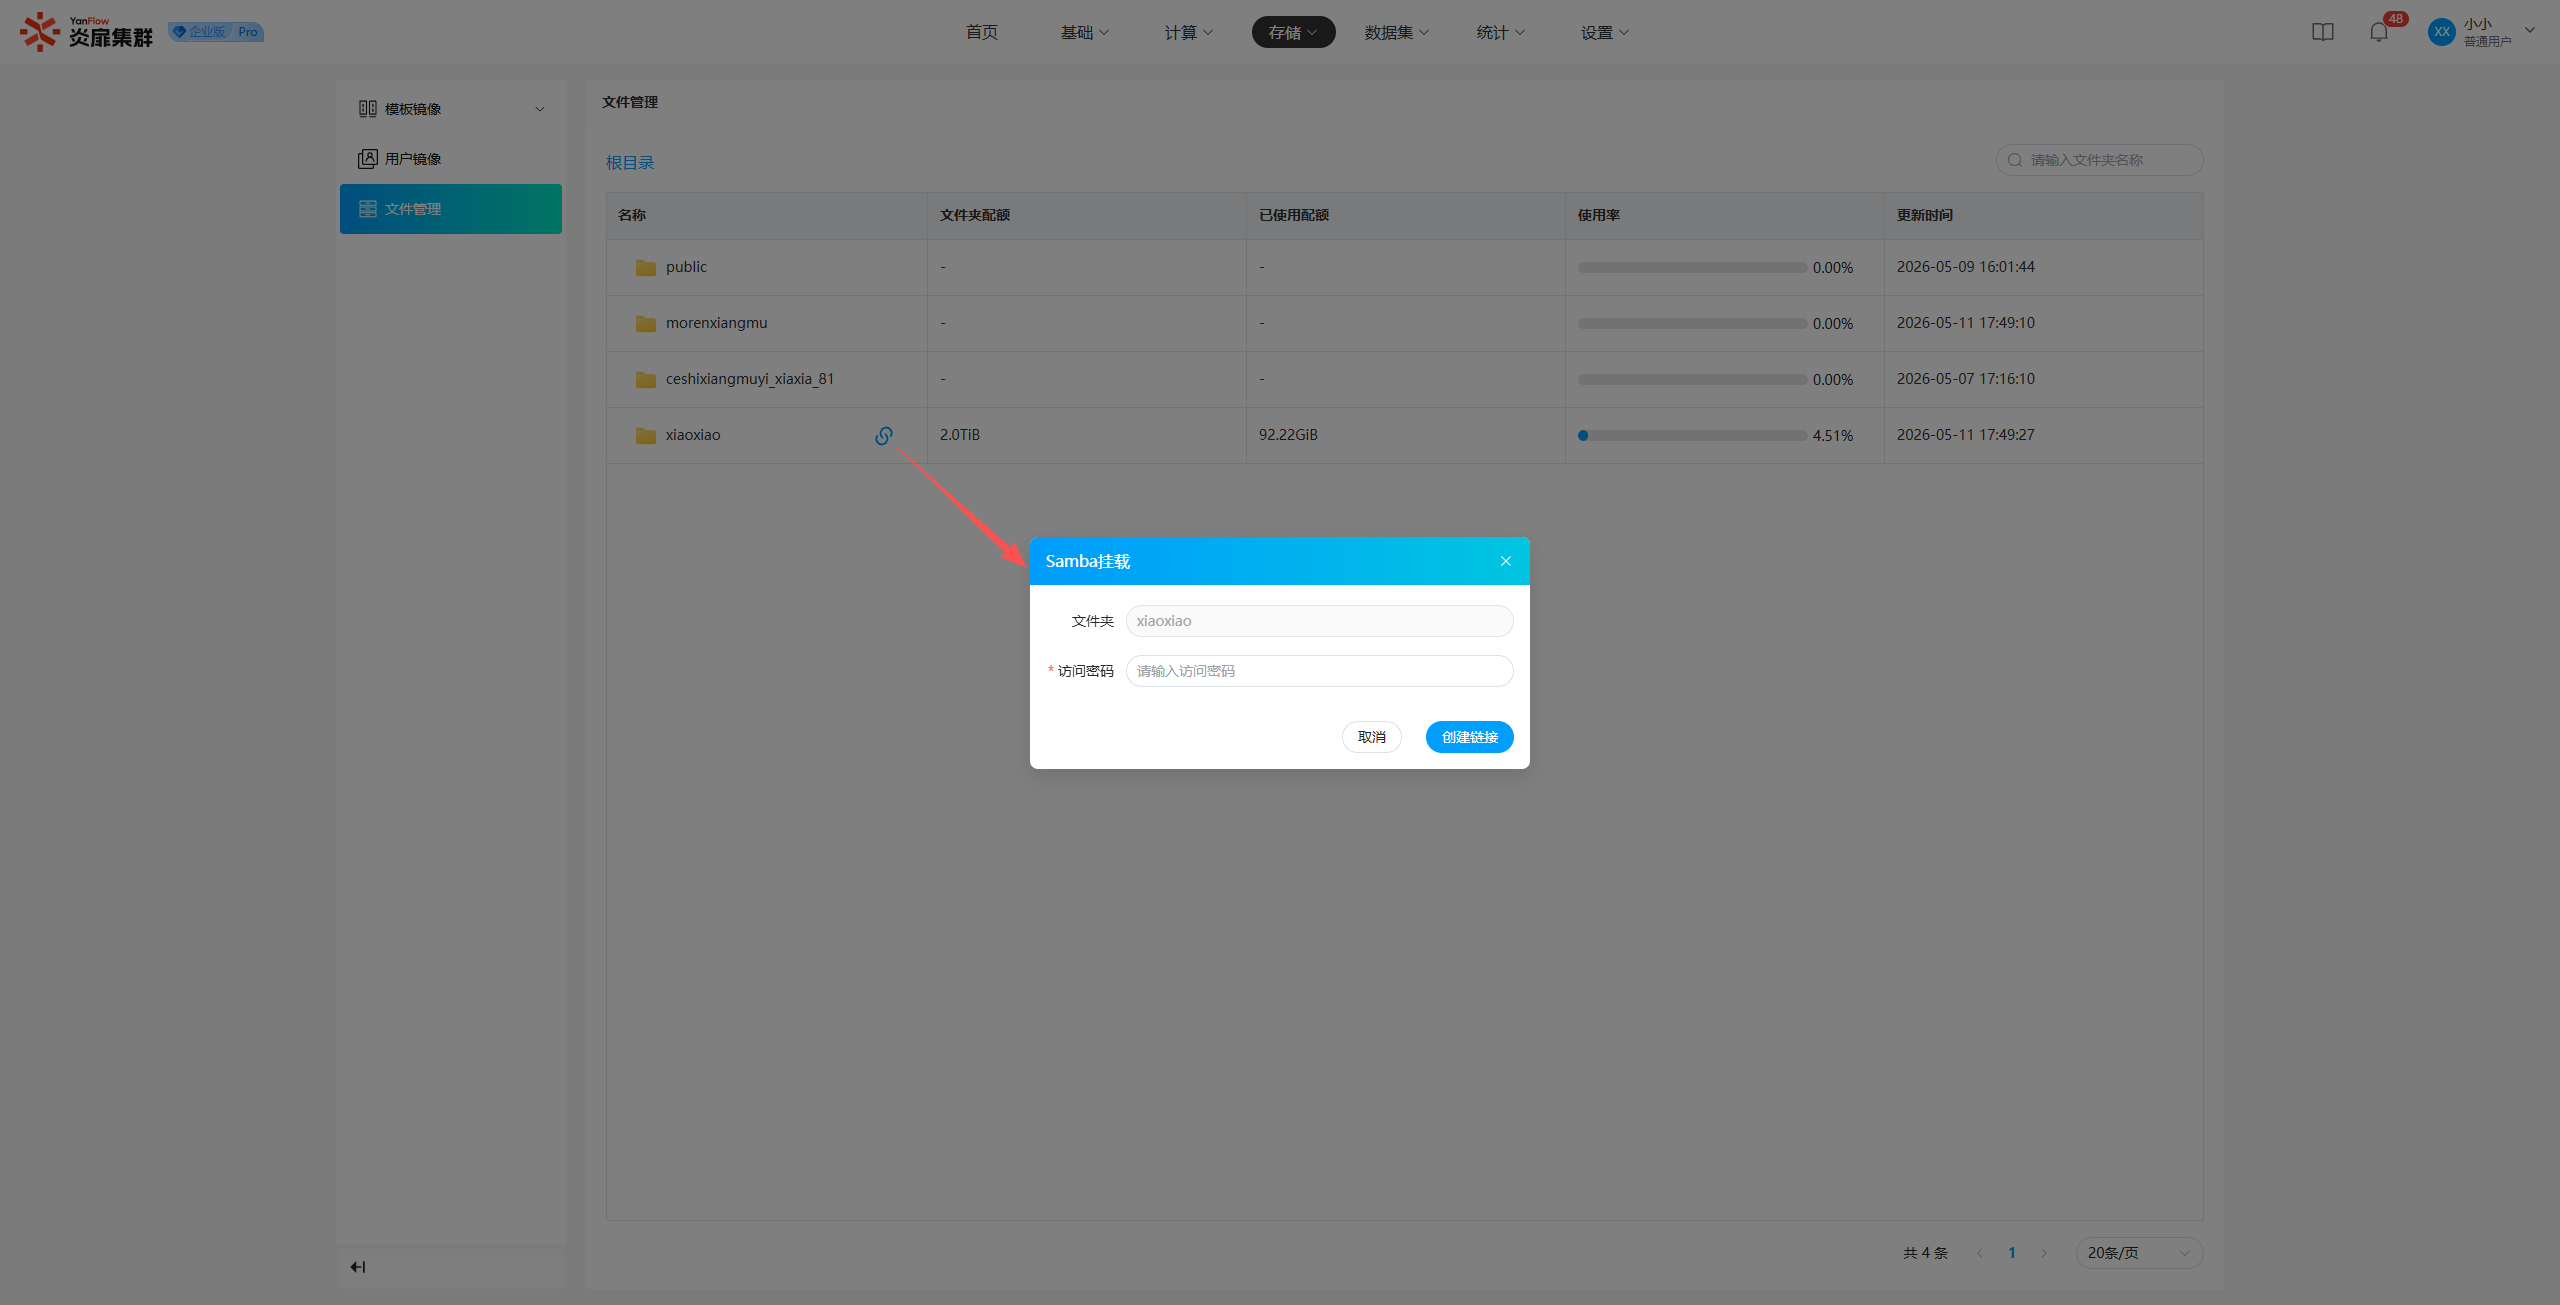
Samba Mount: Regular users can perform Samba mount settings for their personal folders.
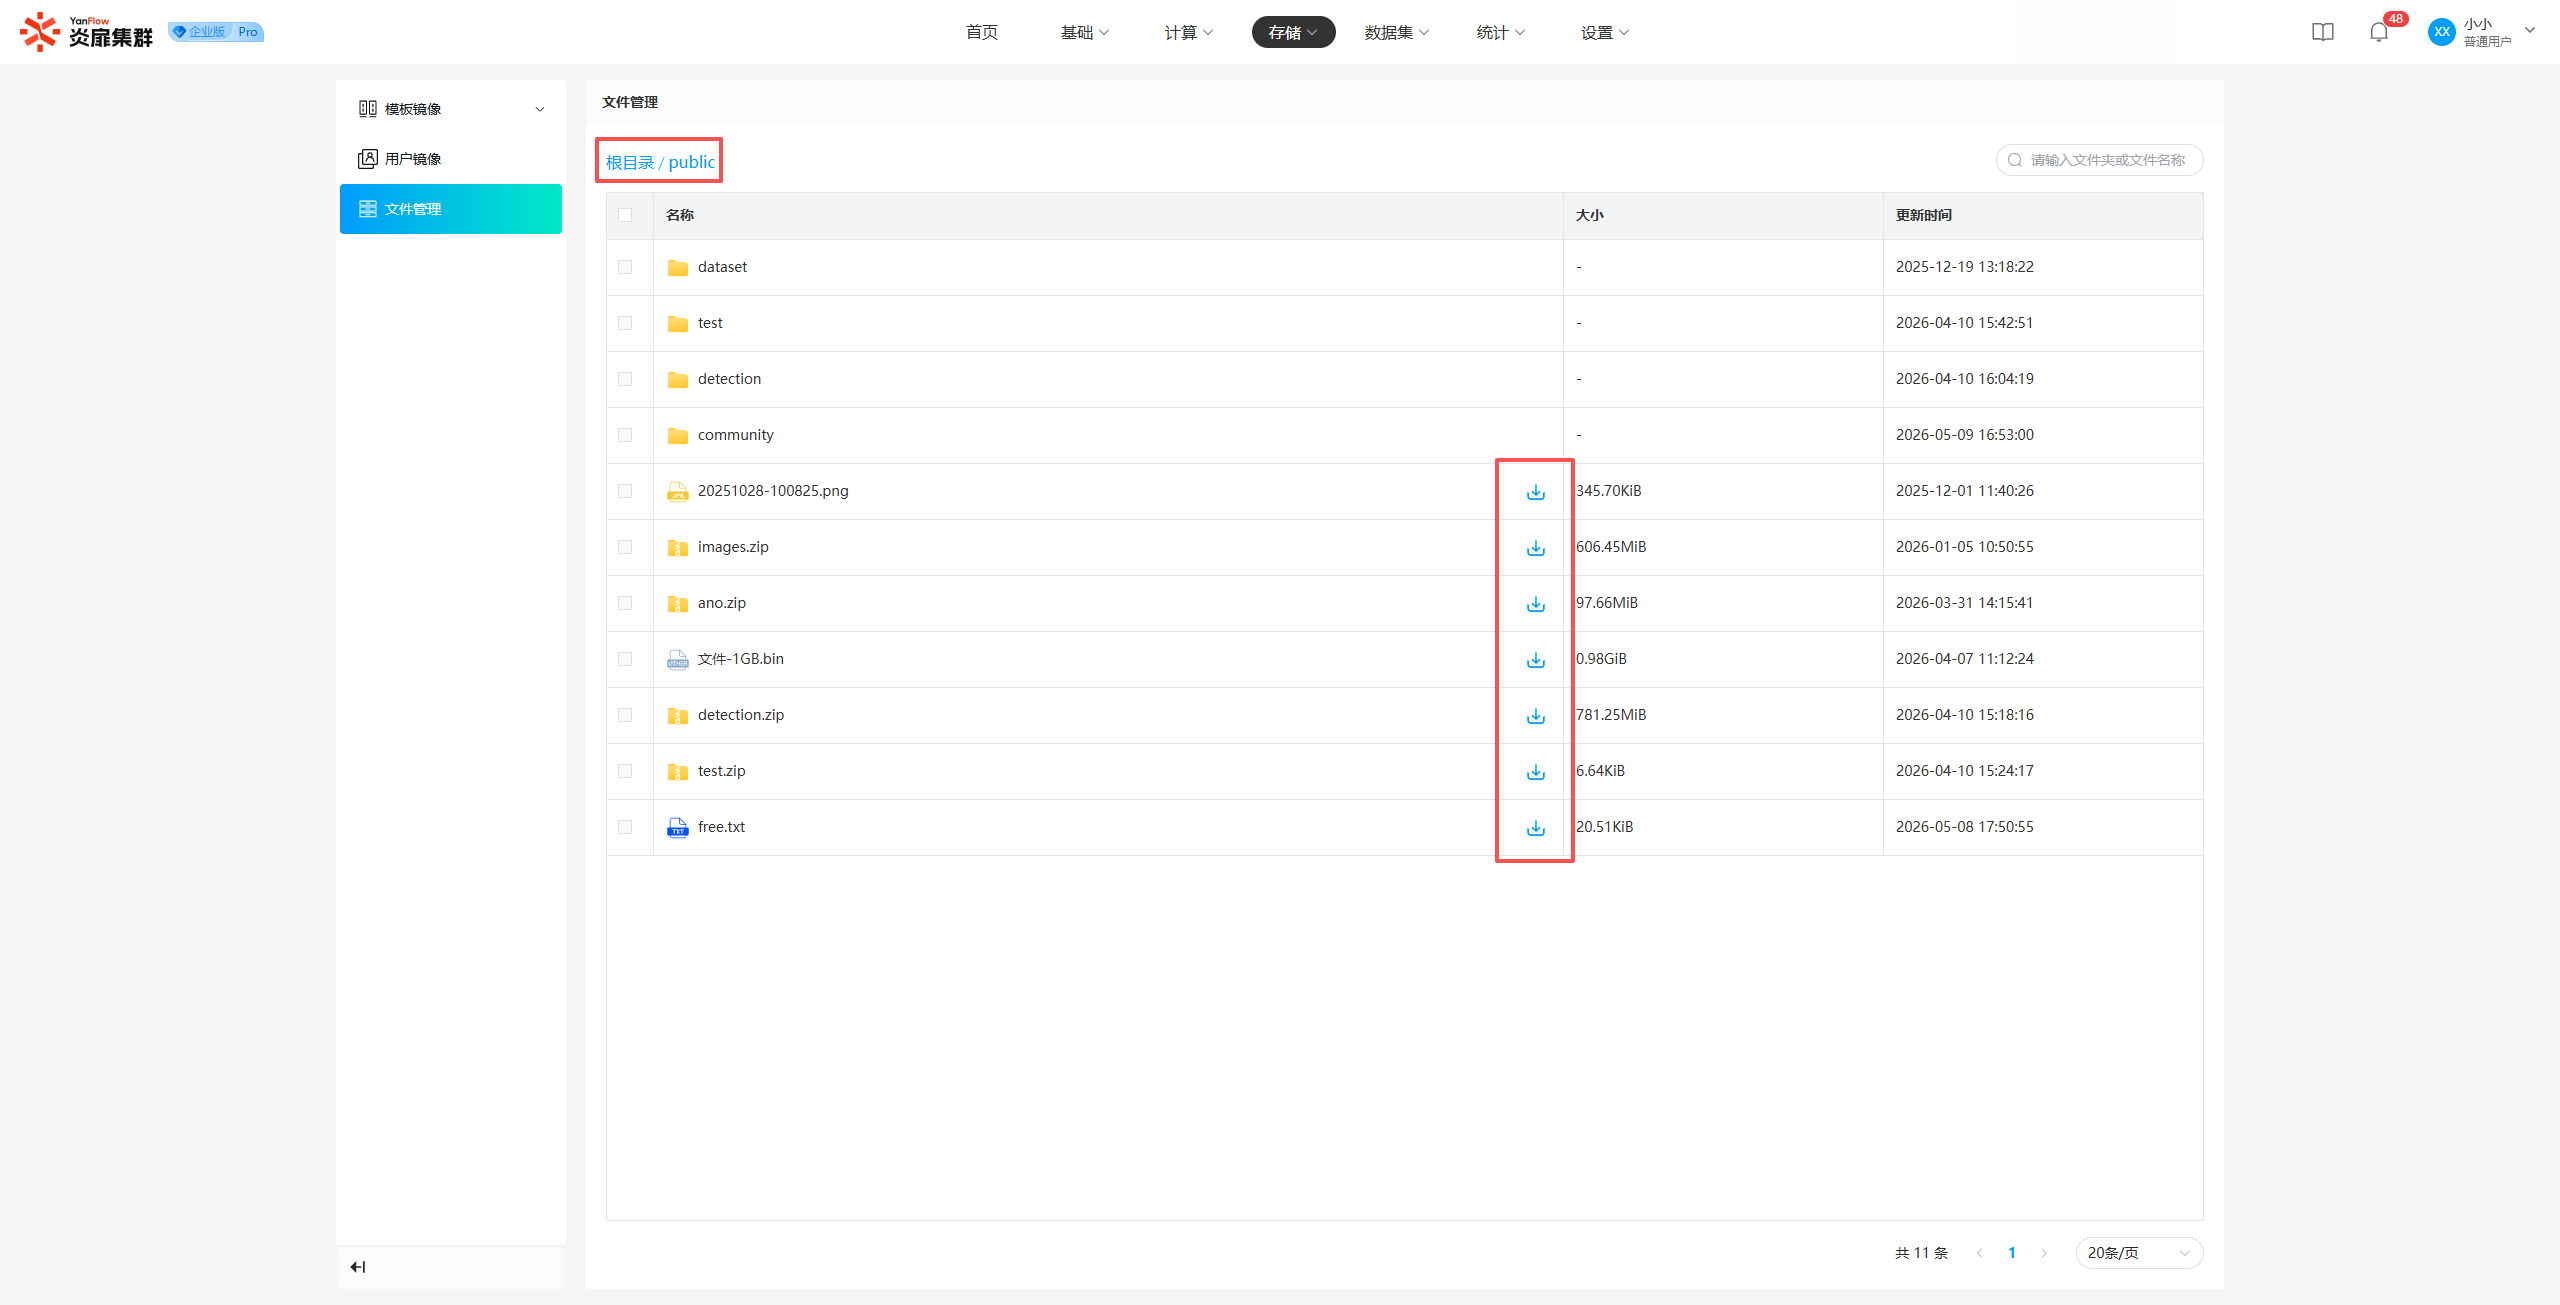
Subdirectories
public folder: Regular users can only View or Download subfolders or files within the public folder.
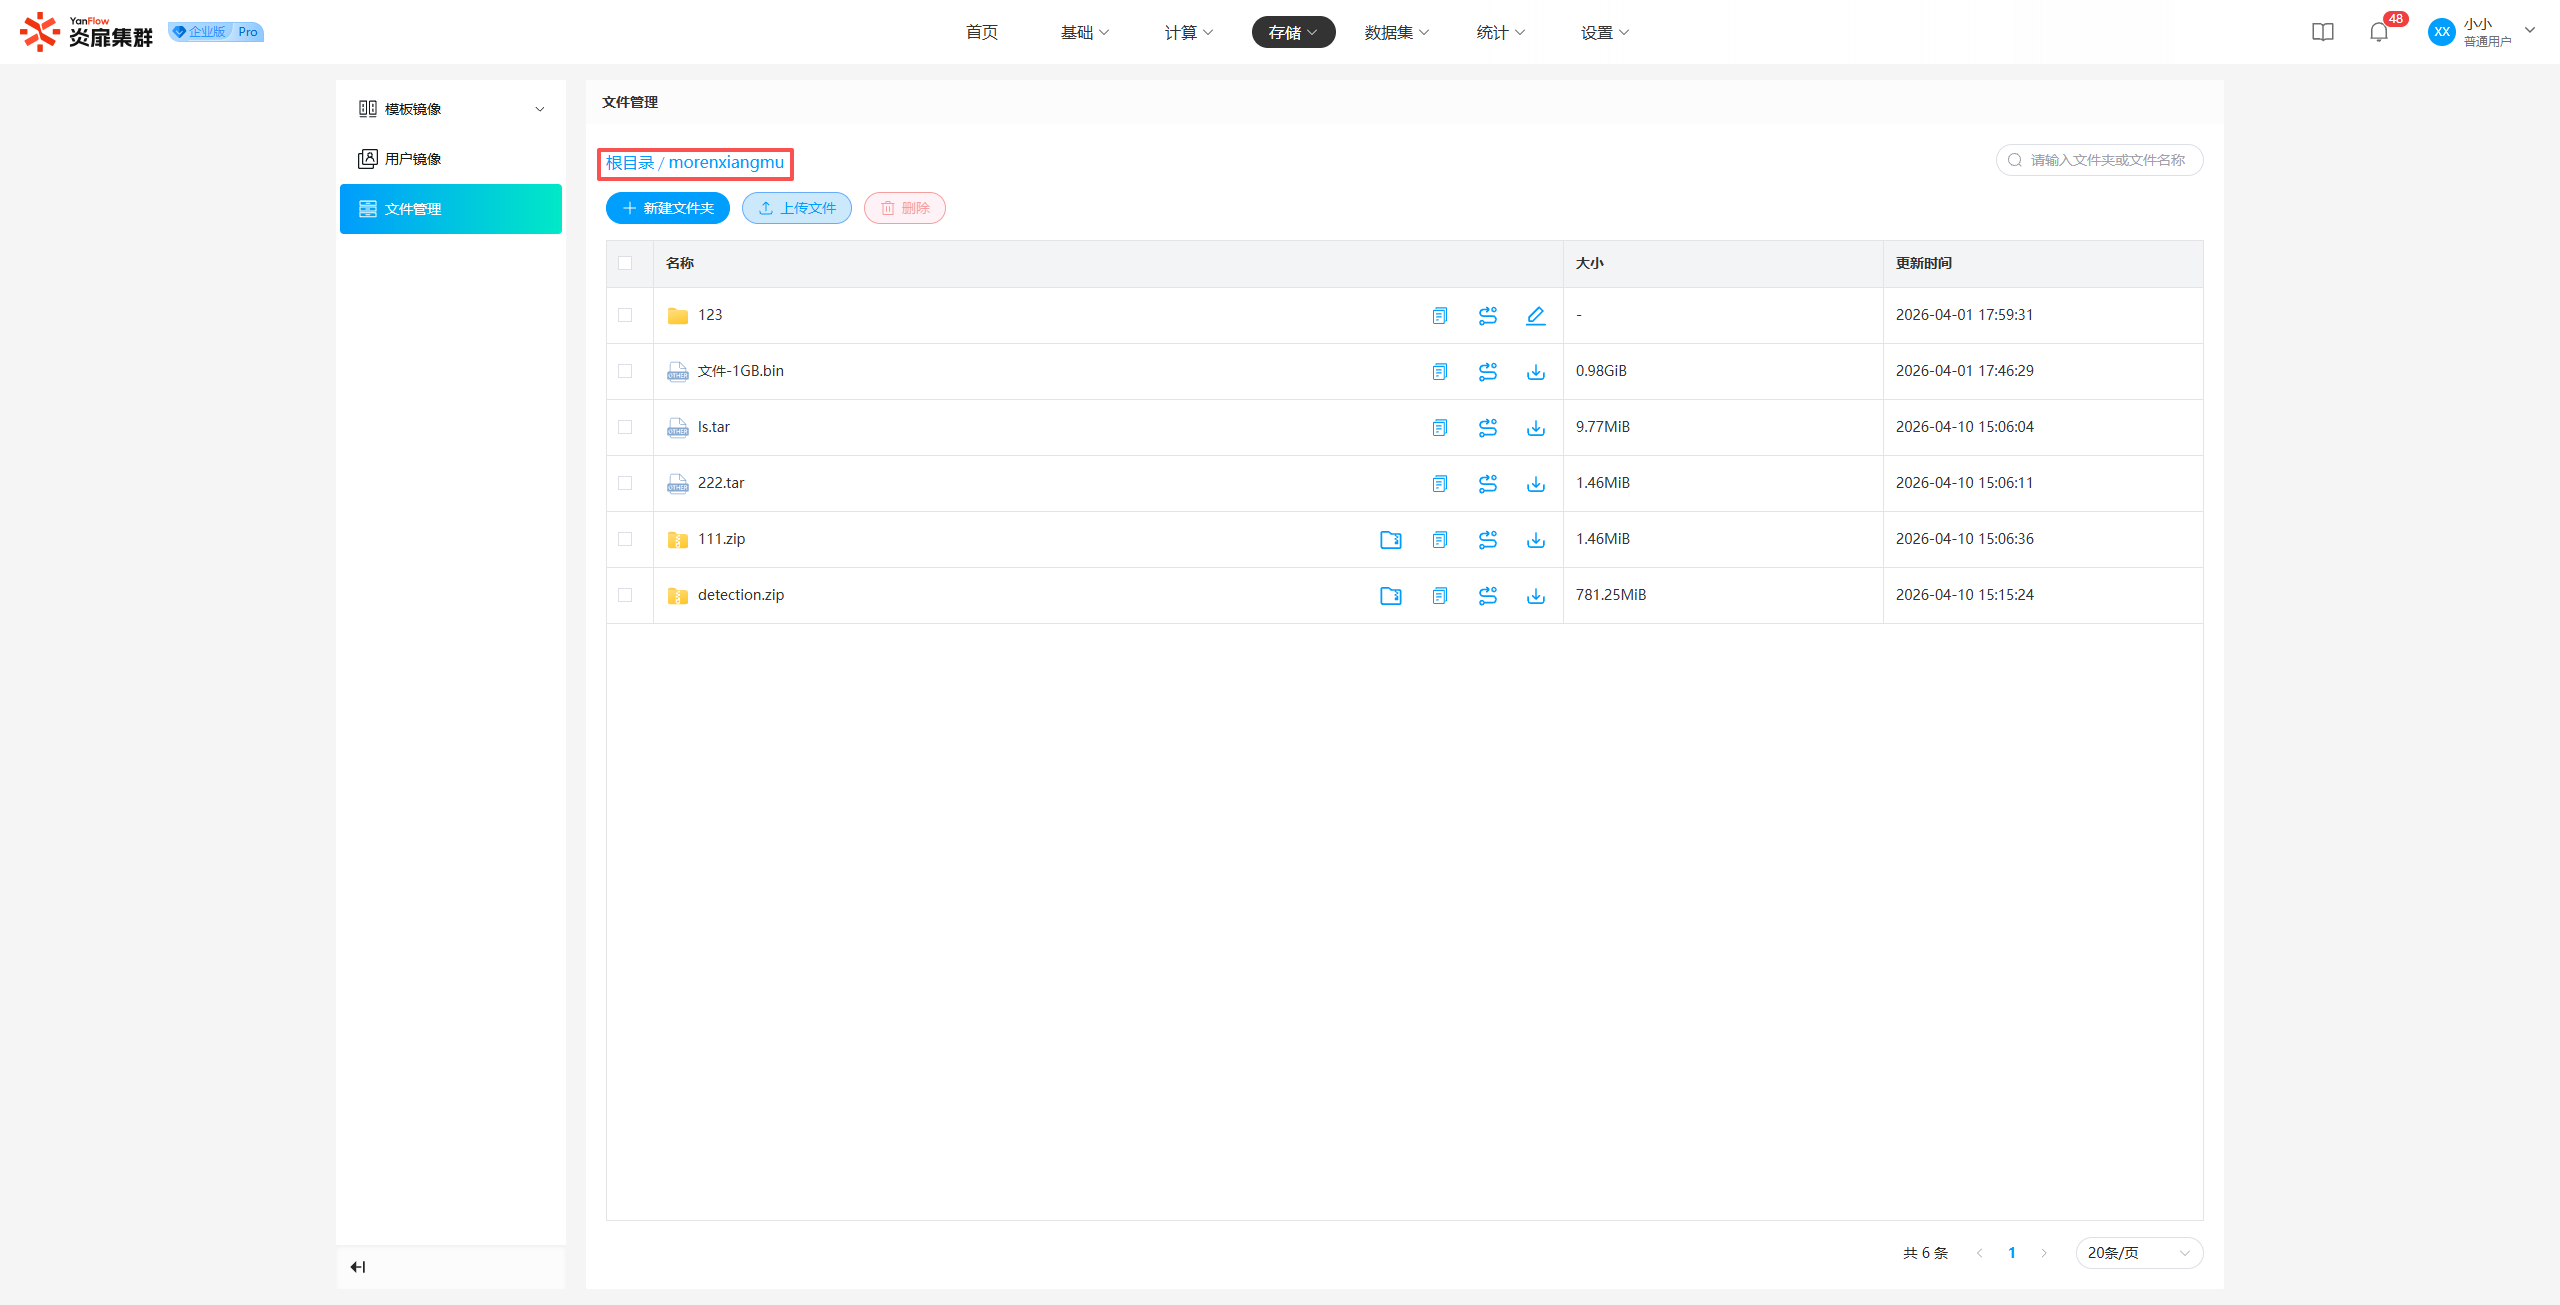
Project Folder, User Folder: Regular users can View, Create New, Copy, Upload, Download, Rename, Move, Unzip, and Delete within the current project folder and personal folder.
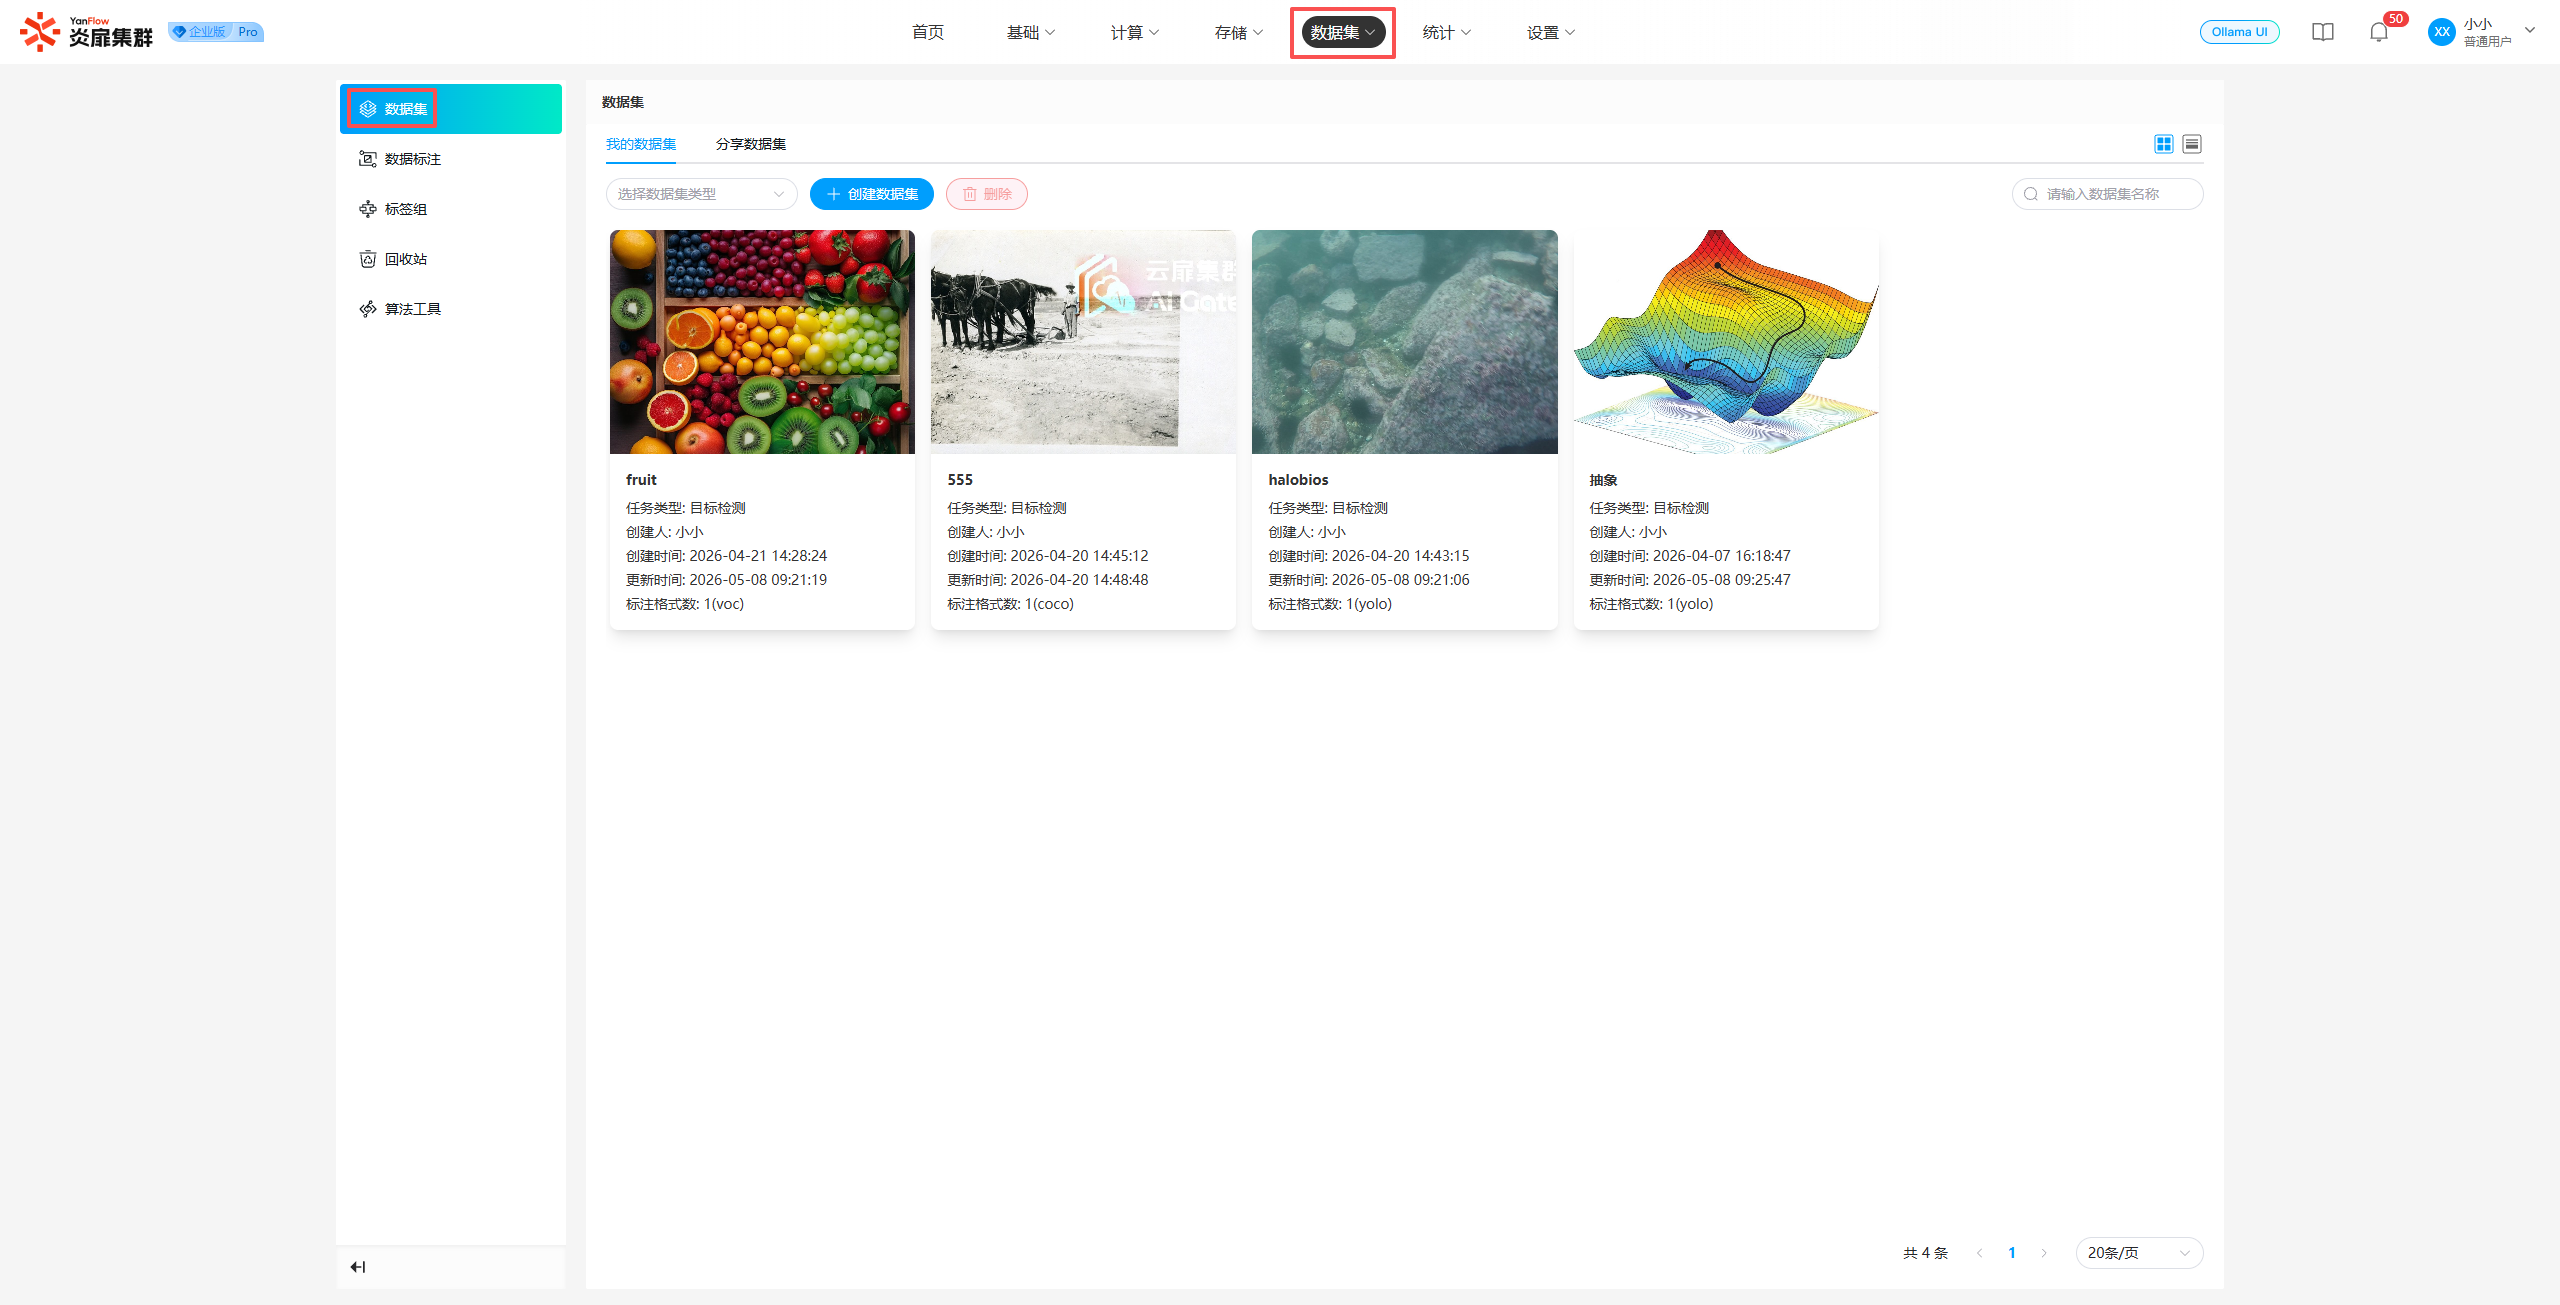
Datasets
Datasets
Through Dataset Management, regular users manage datasets they have created and datasets shared with them by others.
Dataset List
Two forms are provided: Card and Table, to display datasets created by yourself and those shared with you. Support for keyword search via dataset name or filtered search by dataset type is provided.
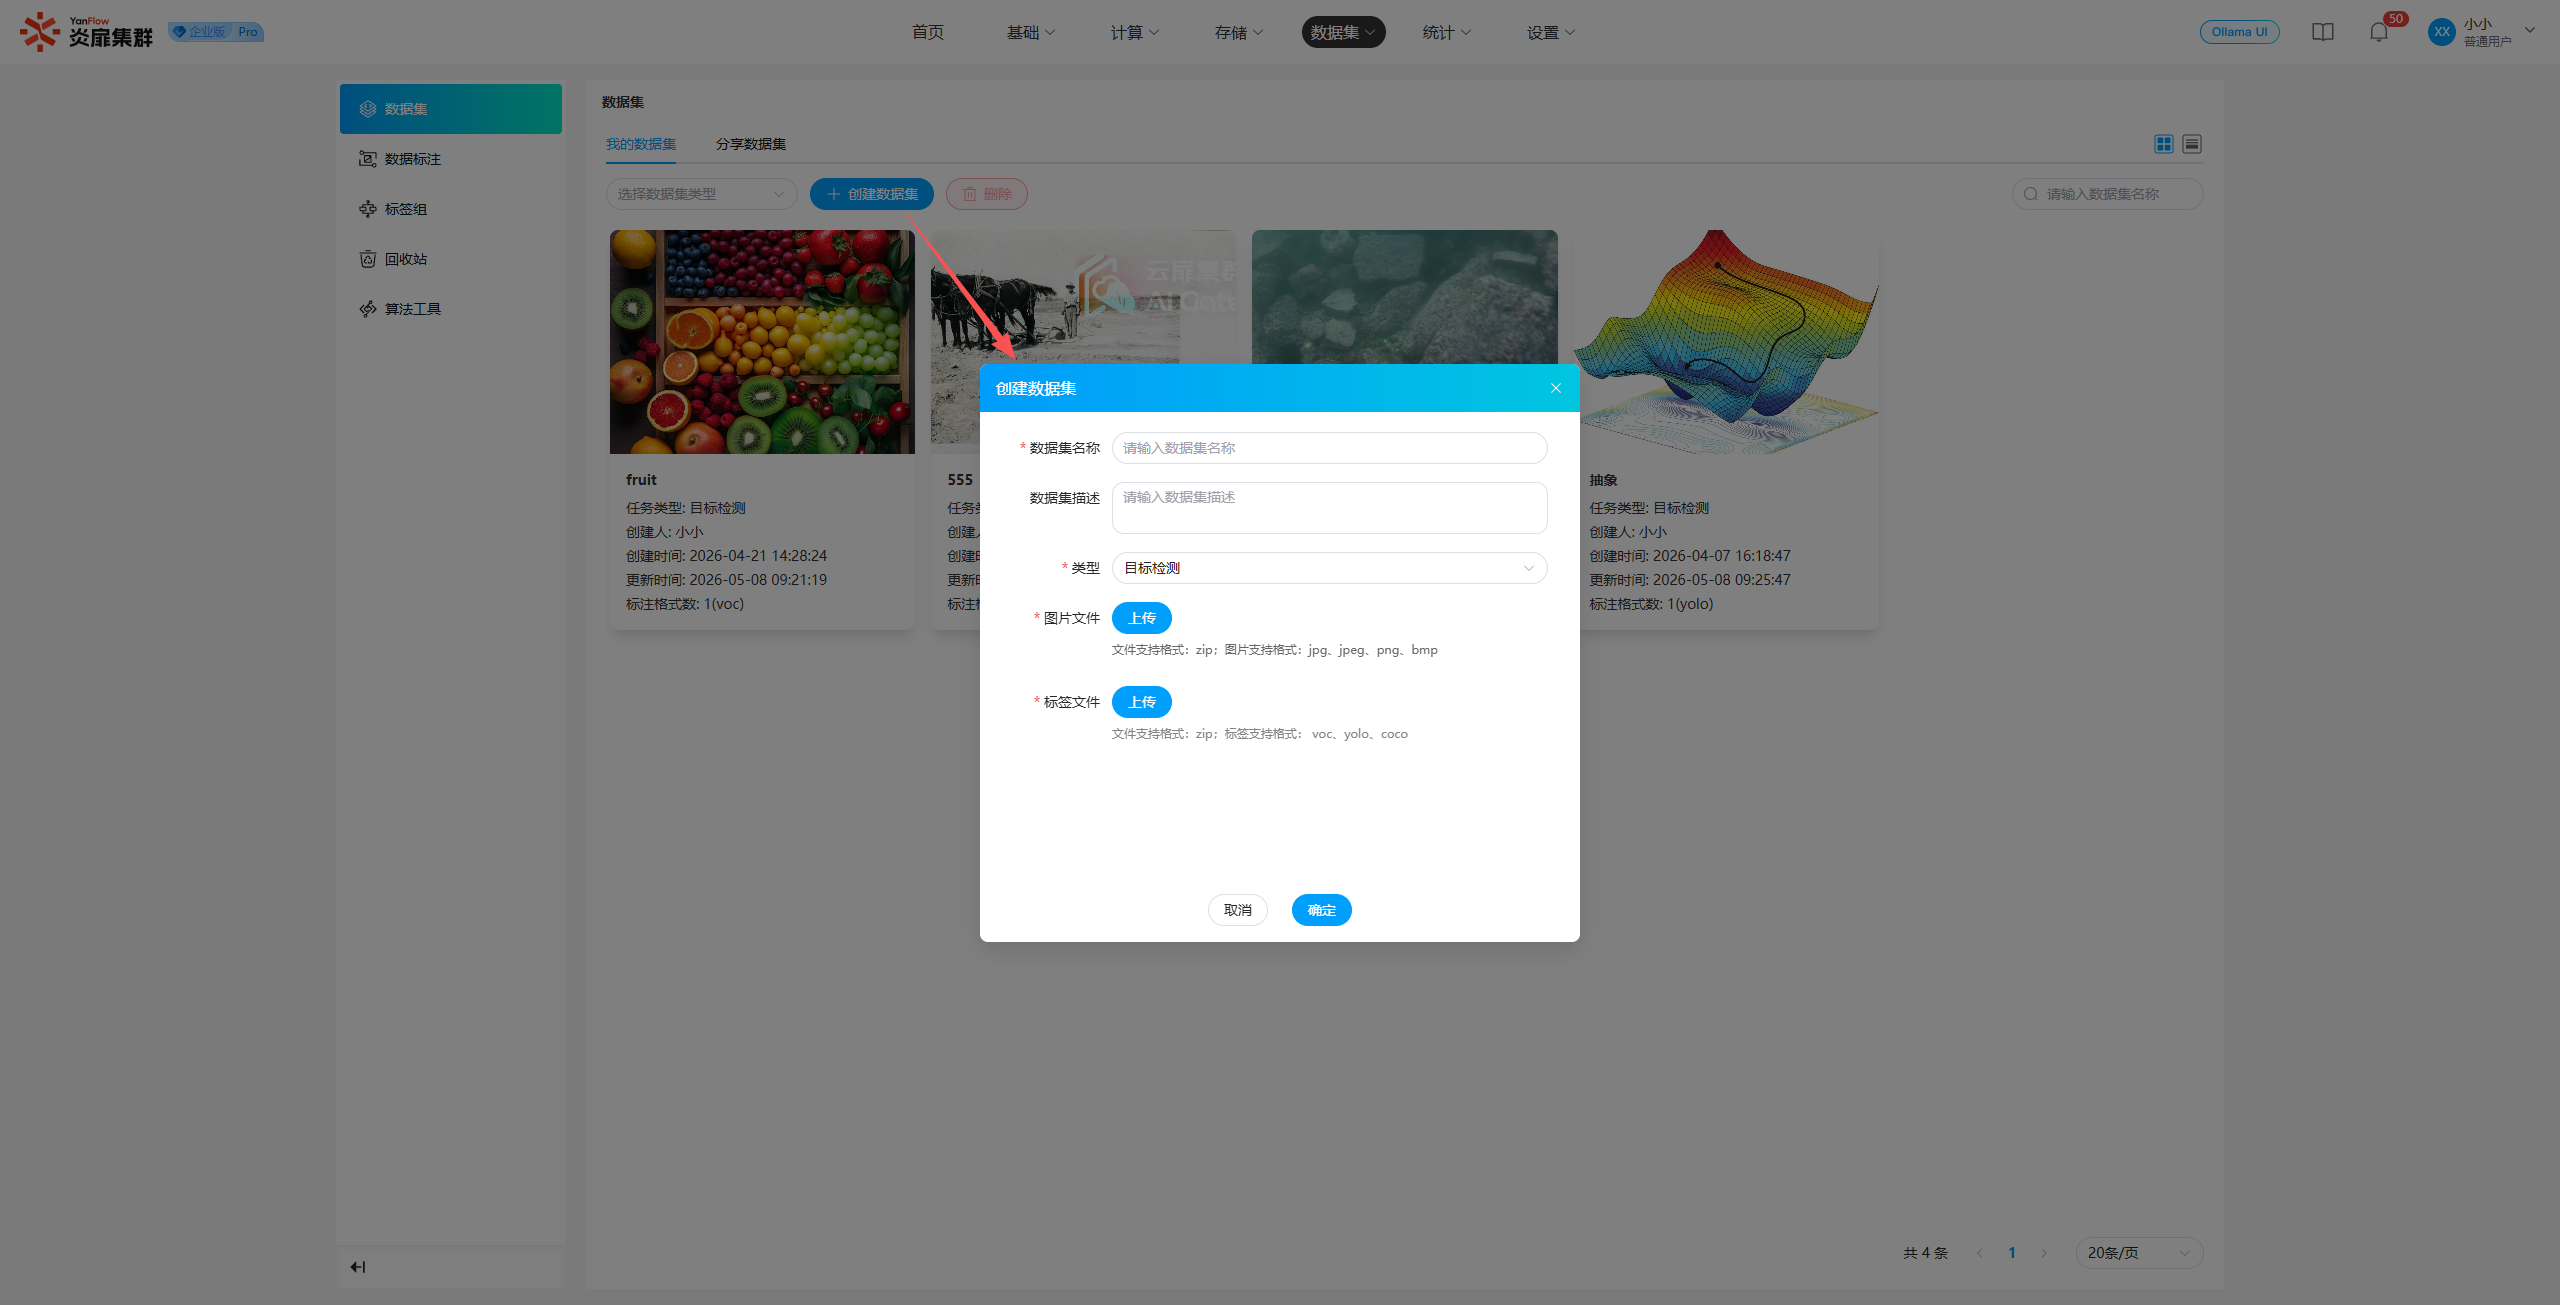
Create Dataset
Click Create Dataset to display the creation popup. Set the relevant content and click Confirm; if validation passes, a new dataset will be created.
Dataset Details
Click on the basic information area of a card or click the Dataset Name in the list to enter the details page, where you can view basic information, tag information, and image information.
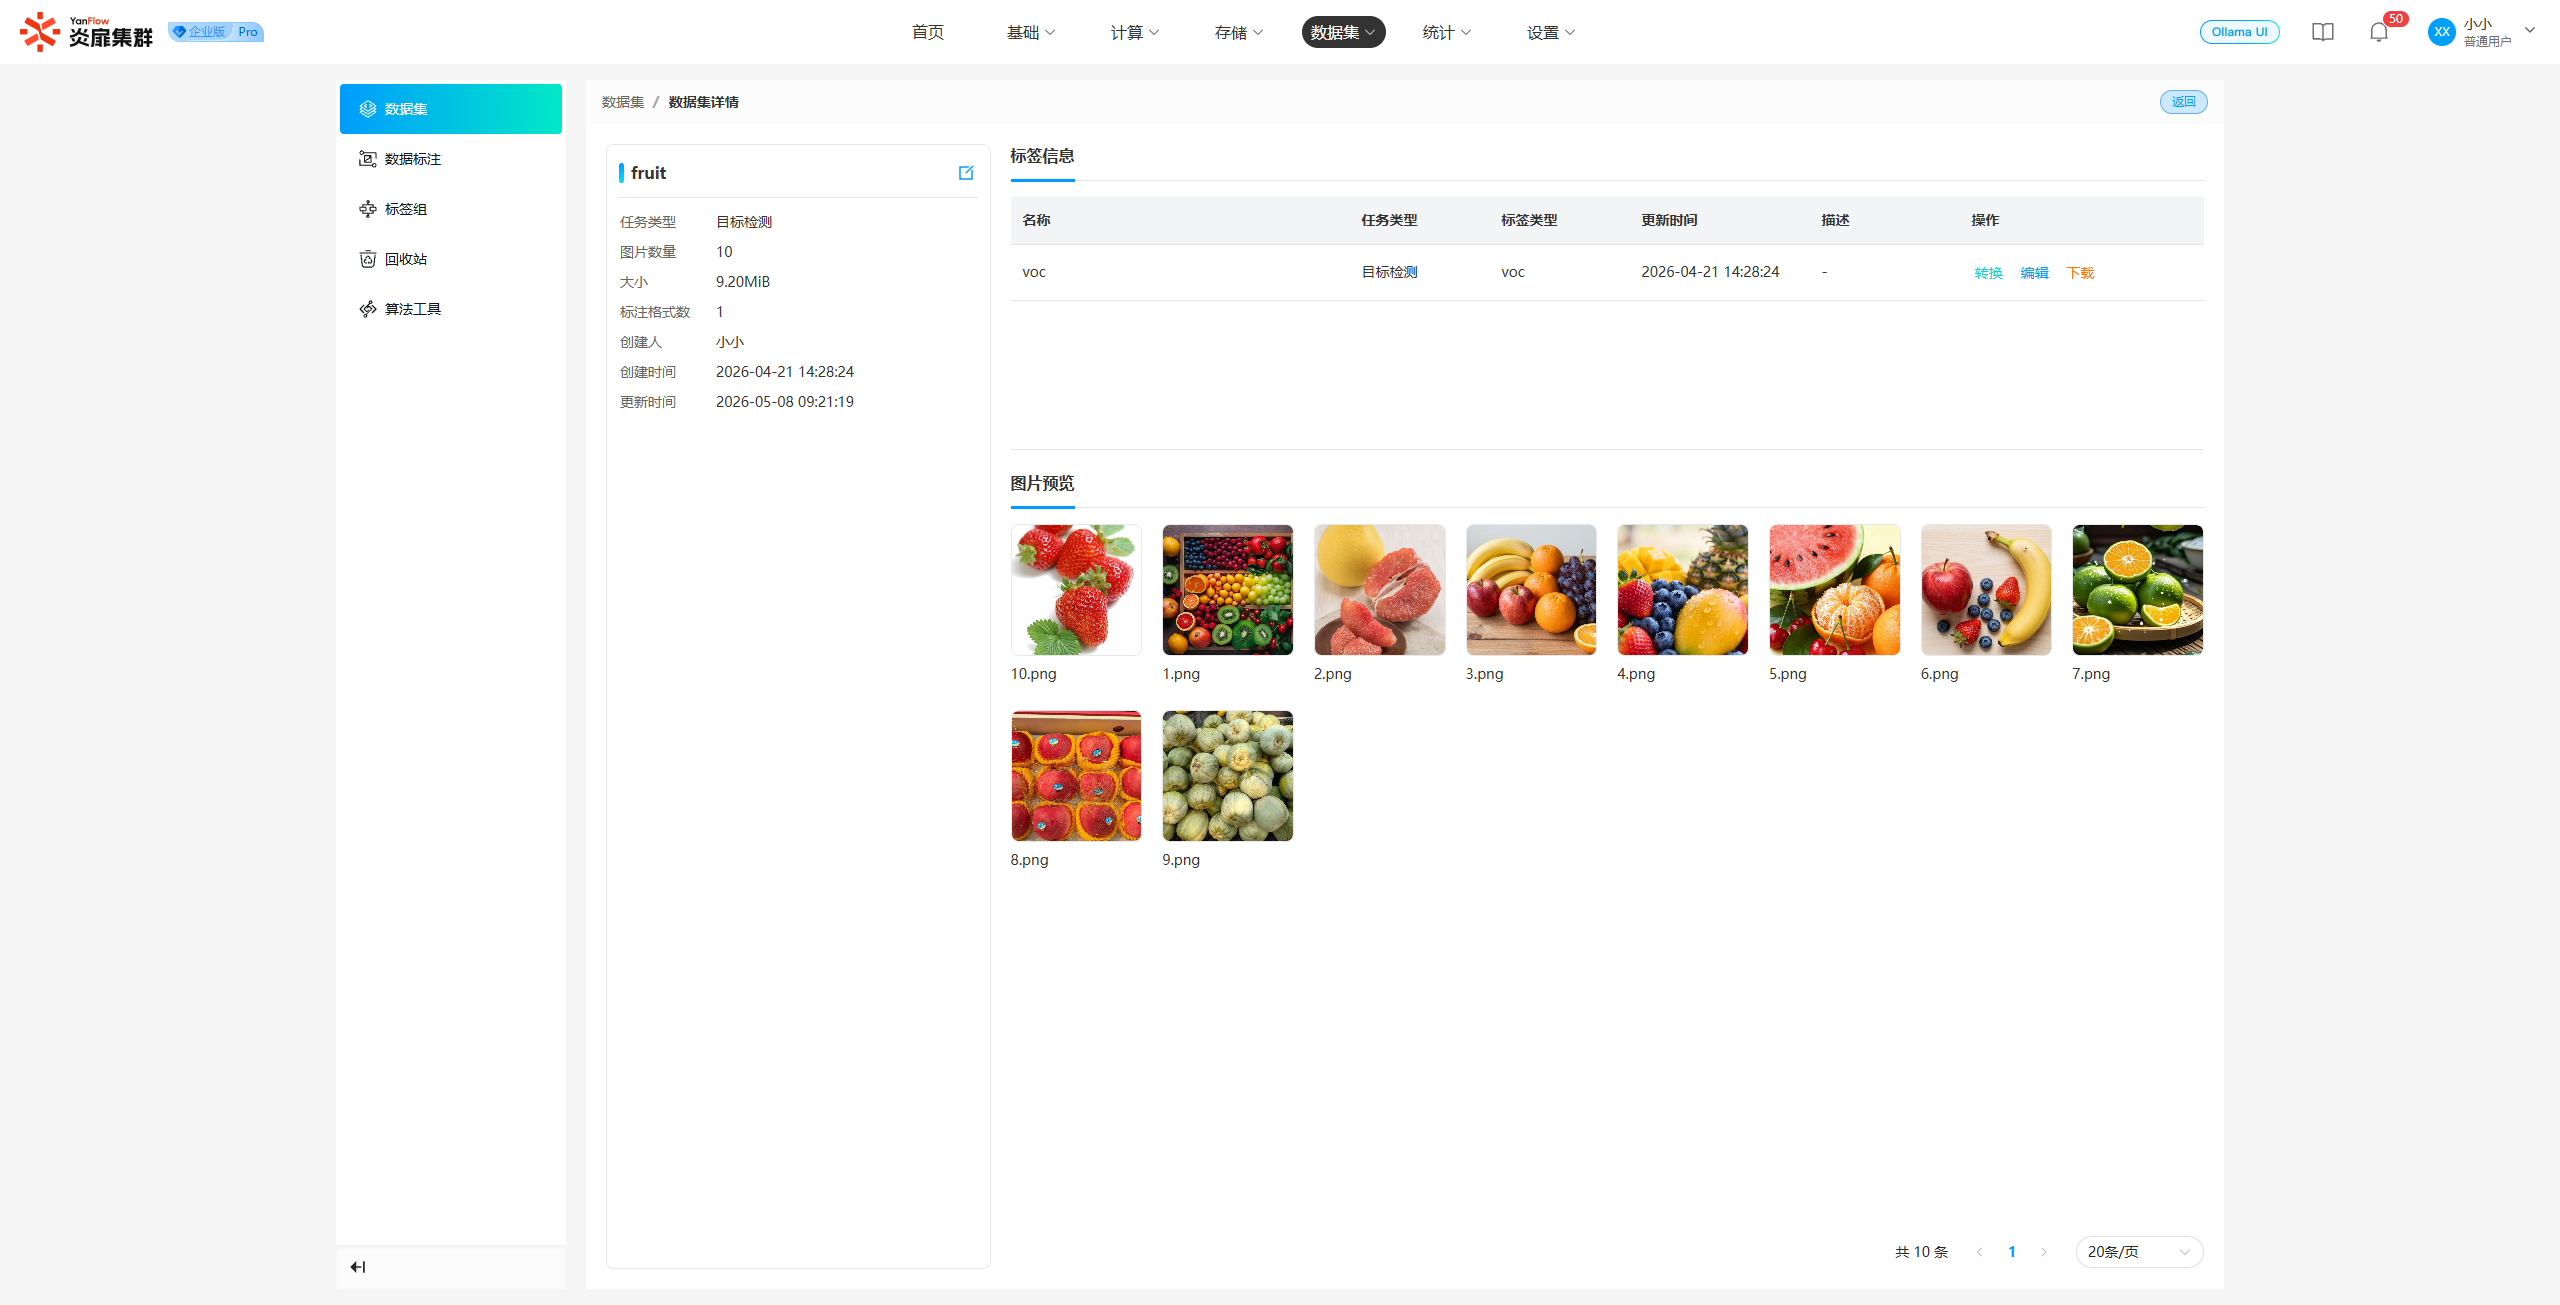
Edit: Click the "Edit" button to the right of the dataset name to re-edit the dataset name and description.
Tag Processing: Supports format conversion, editing, downloading, and deleting. Click the operation to display the corresponding popup and perform relevant settings.
Image Preview: Click an image to perform relevant settings.
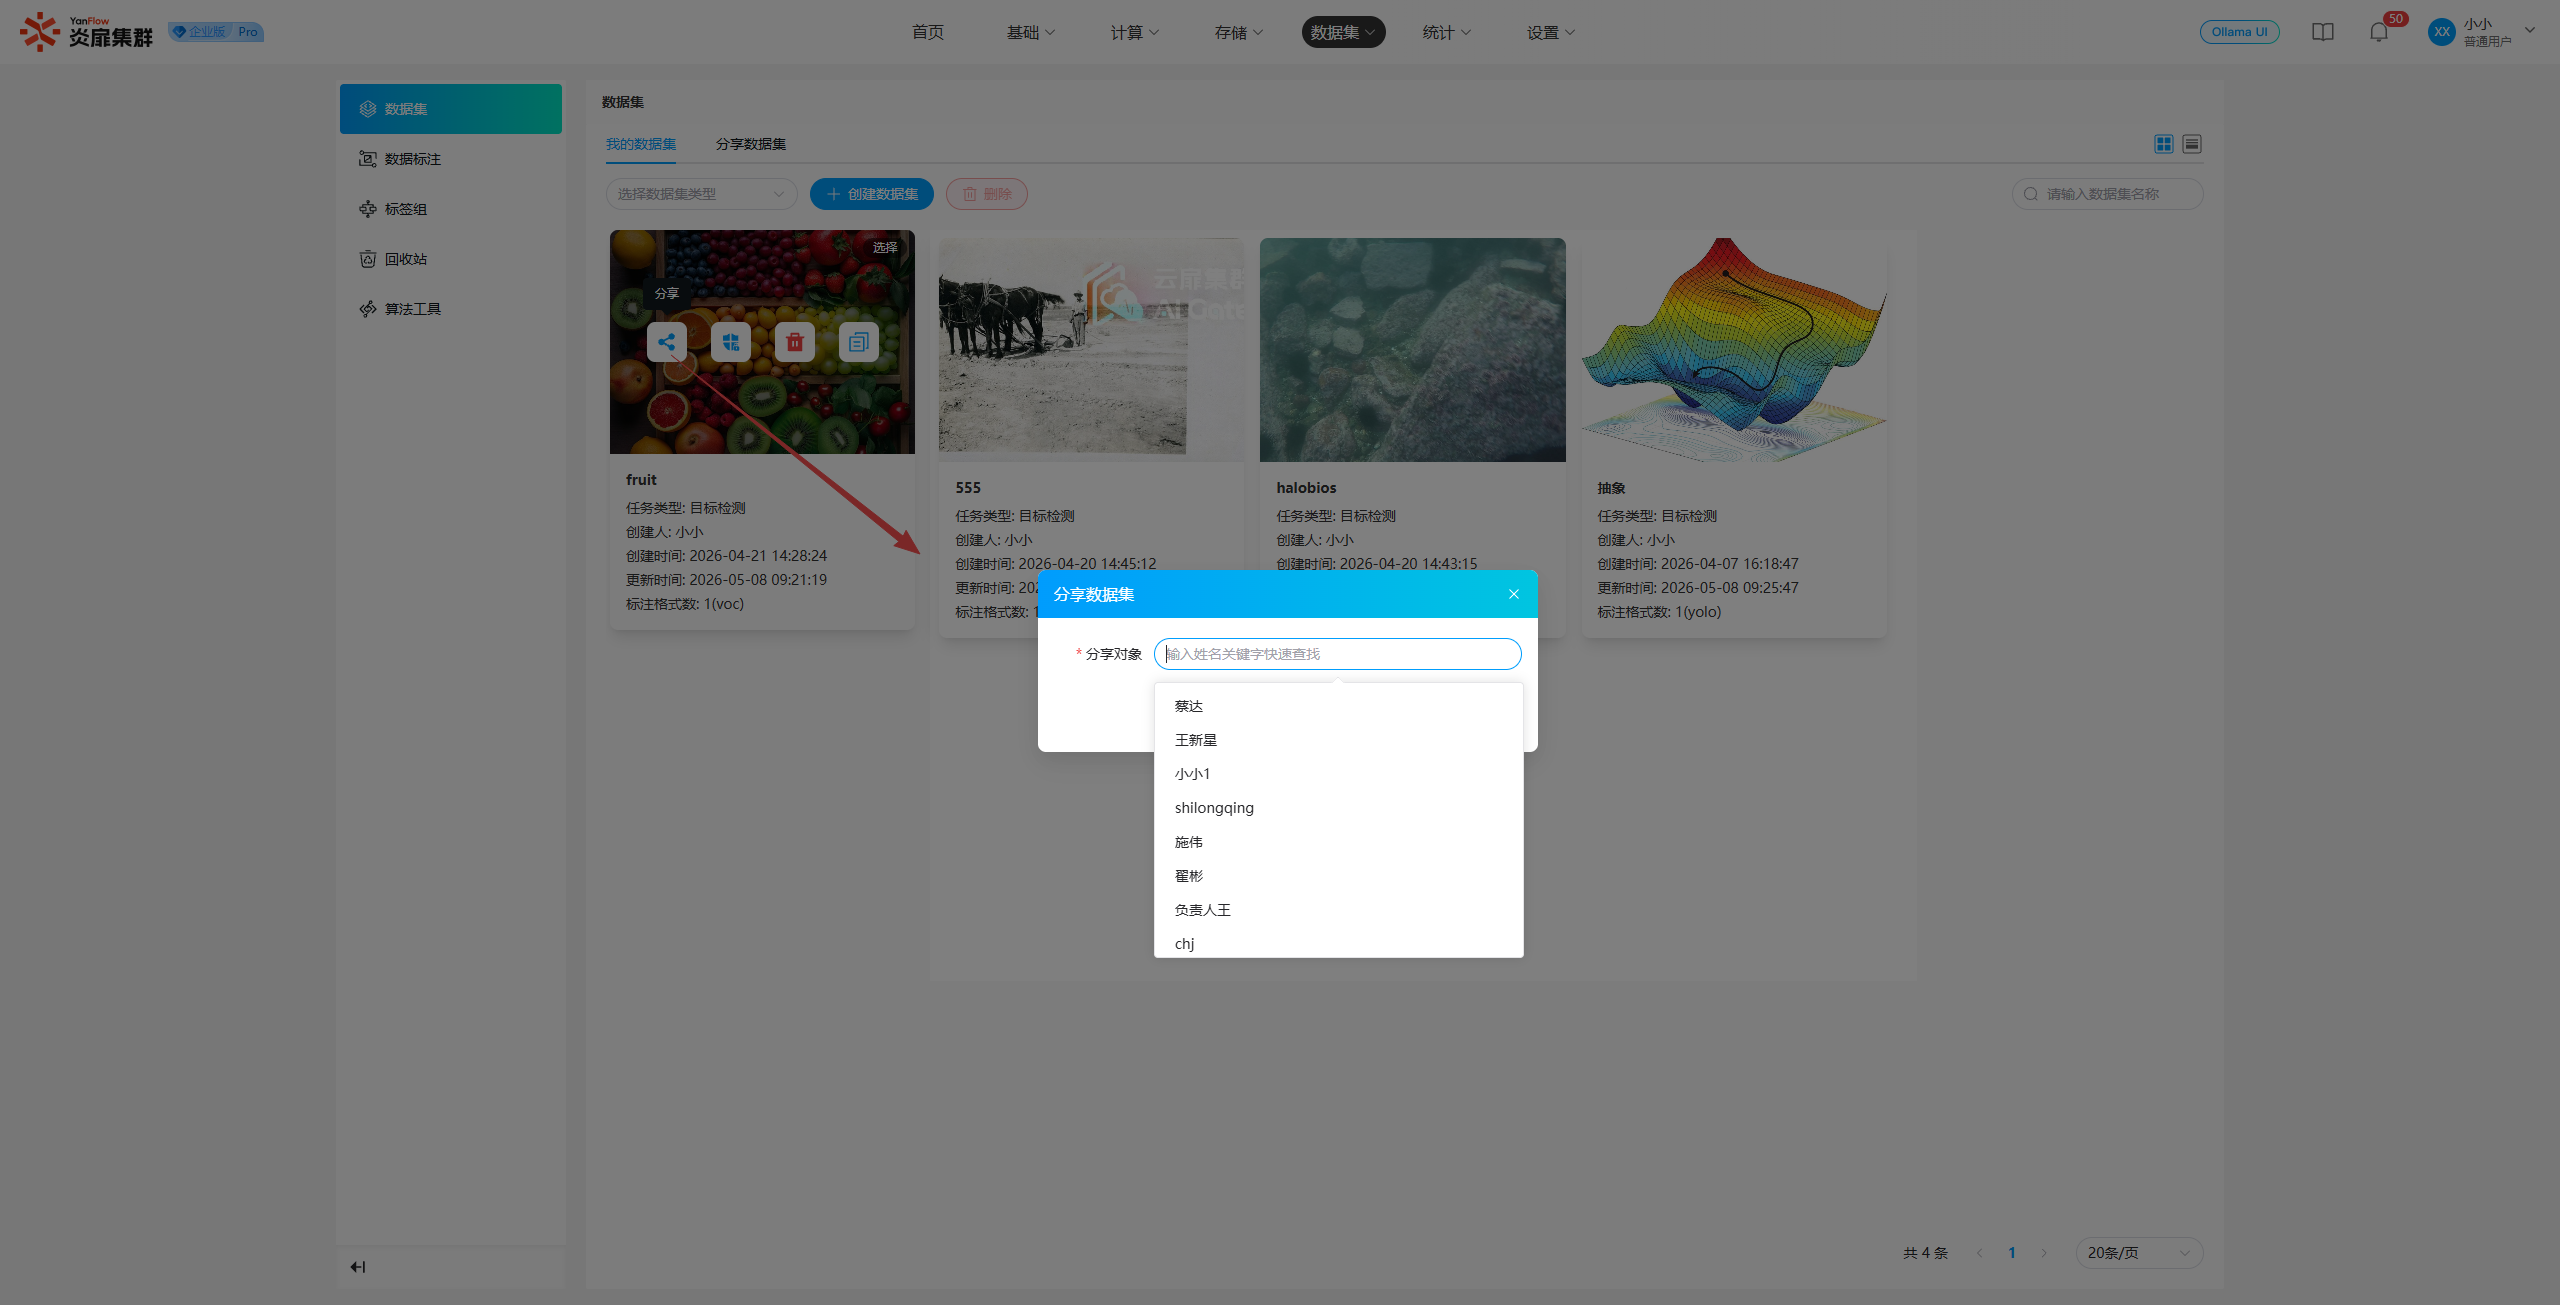
Share Dataset
Click Share on a dataset to display the sharing popup. Select one or more sharing targets (limited to regular users) and click "Confirm" to share the dataset with other users.
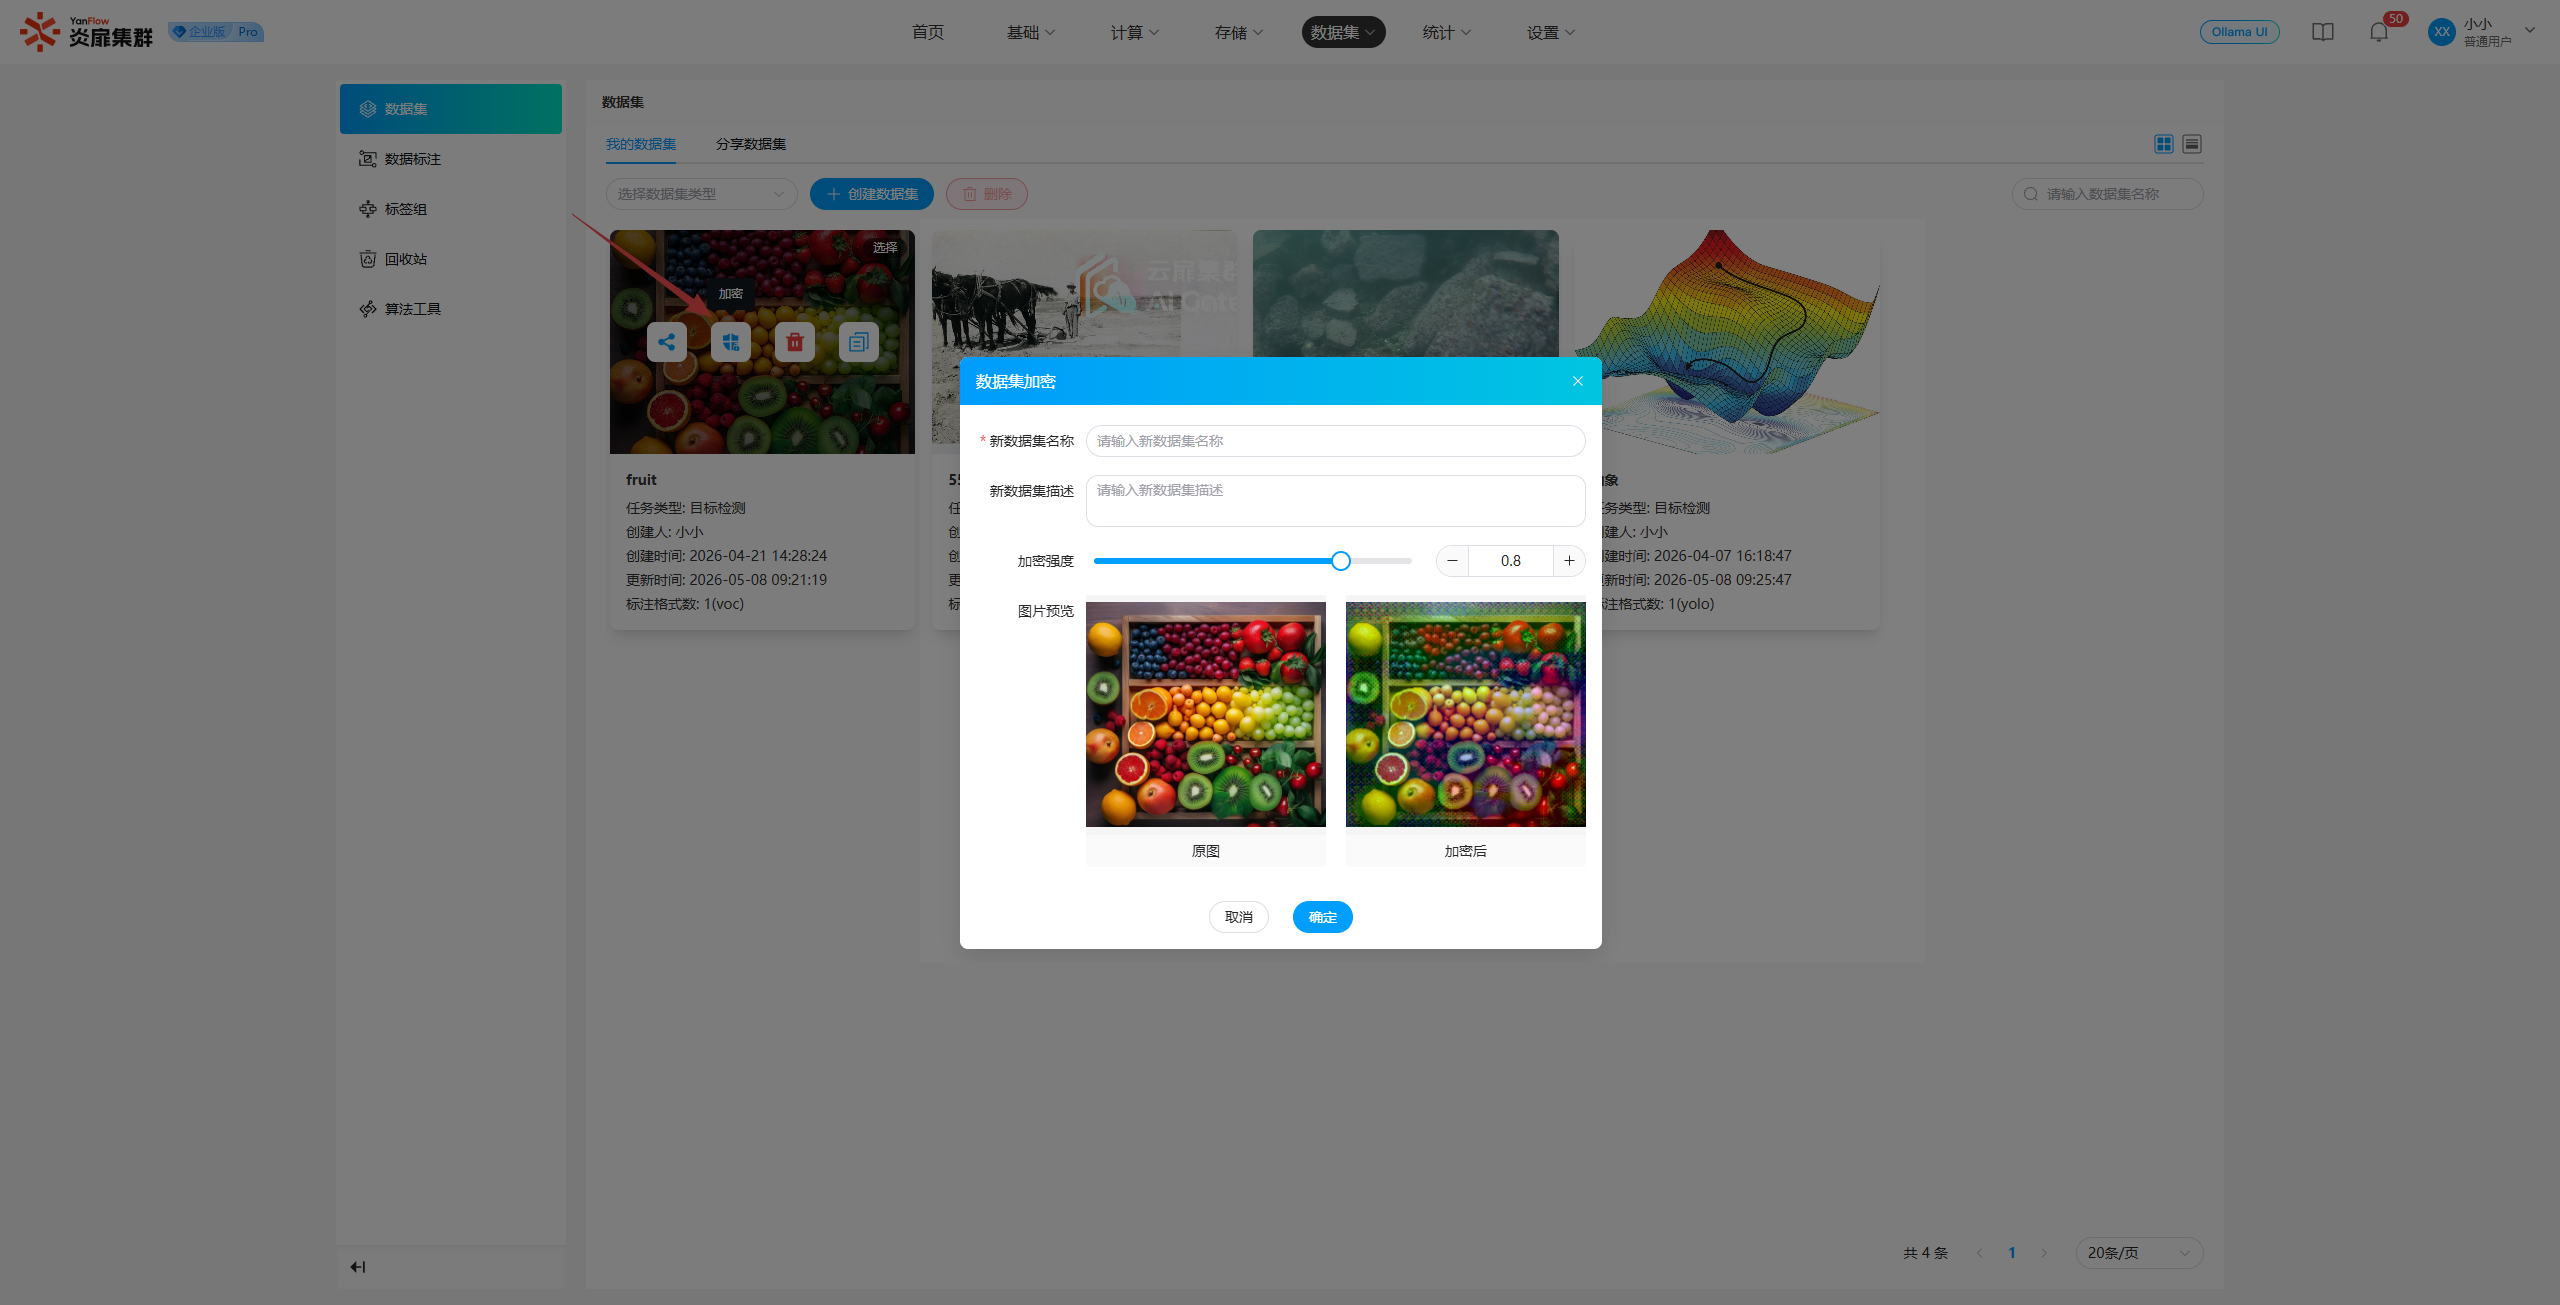
Encrypt Dataset
Click Encrypt on a dataset to display the settings popup. You can set a new dataset name, description, and encryption strength. Click "Confirm" to create the corresponding encrypted dataset.
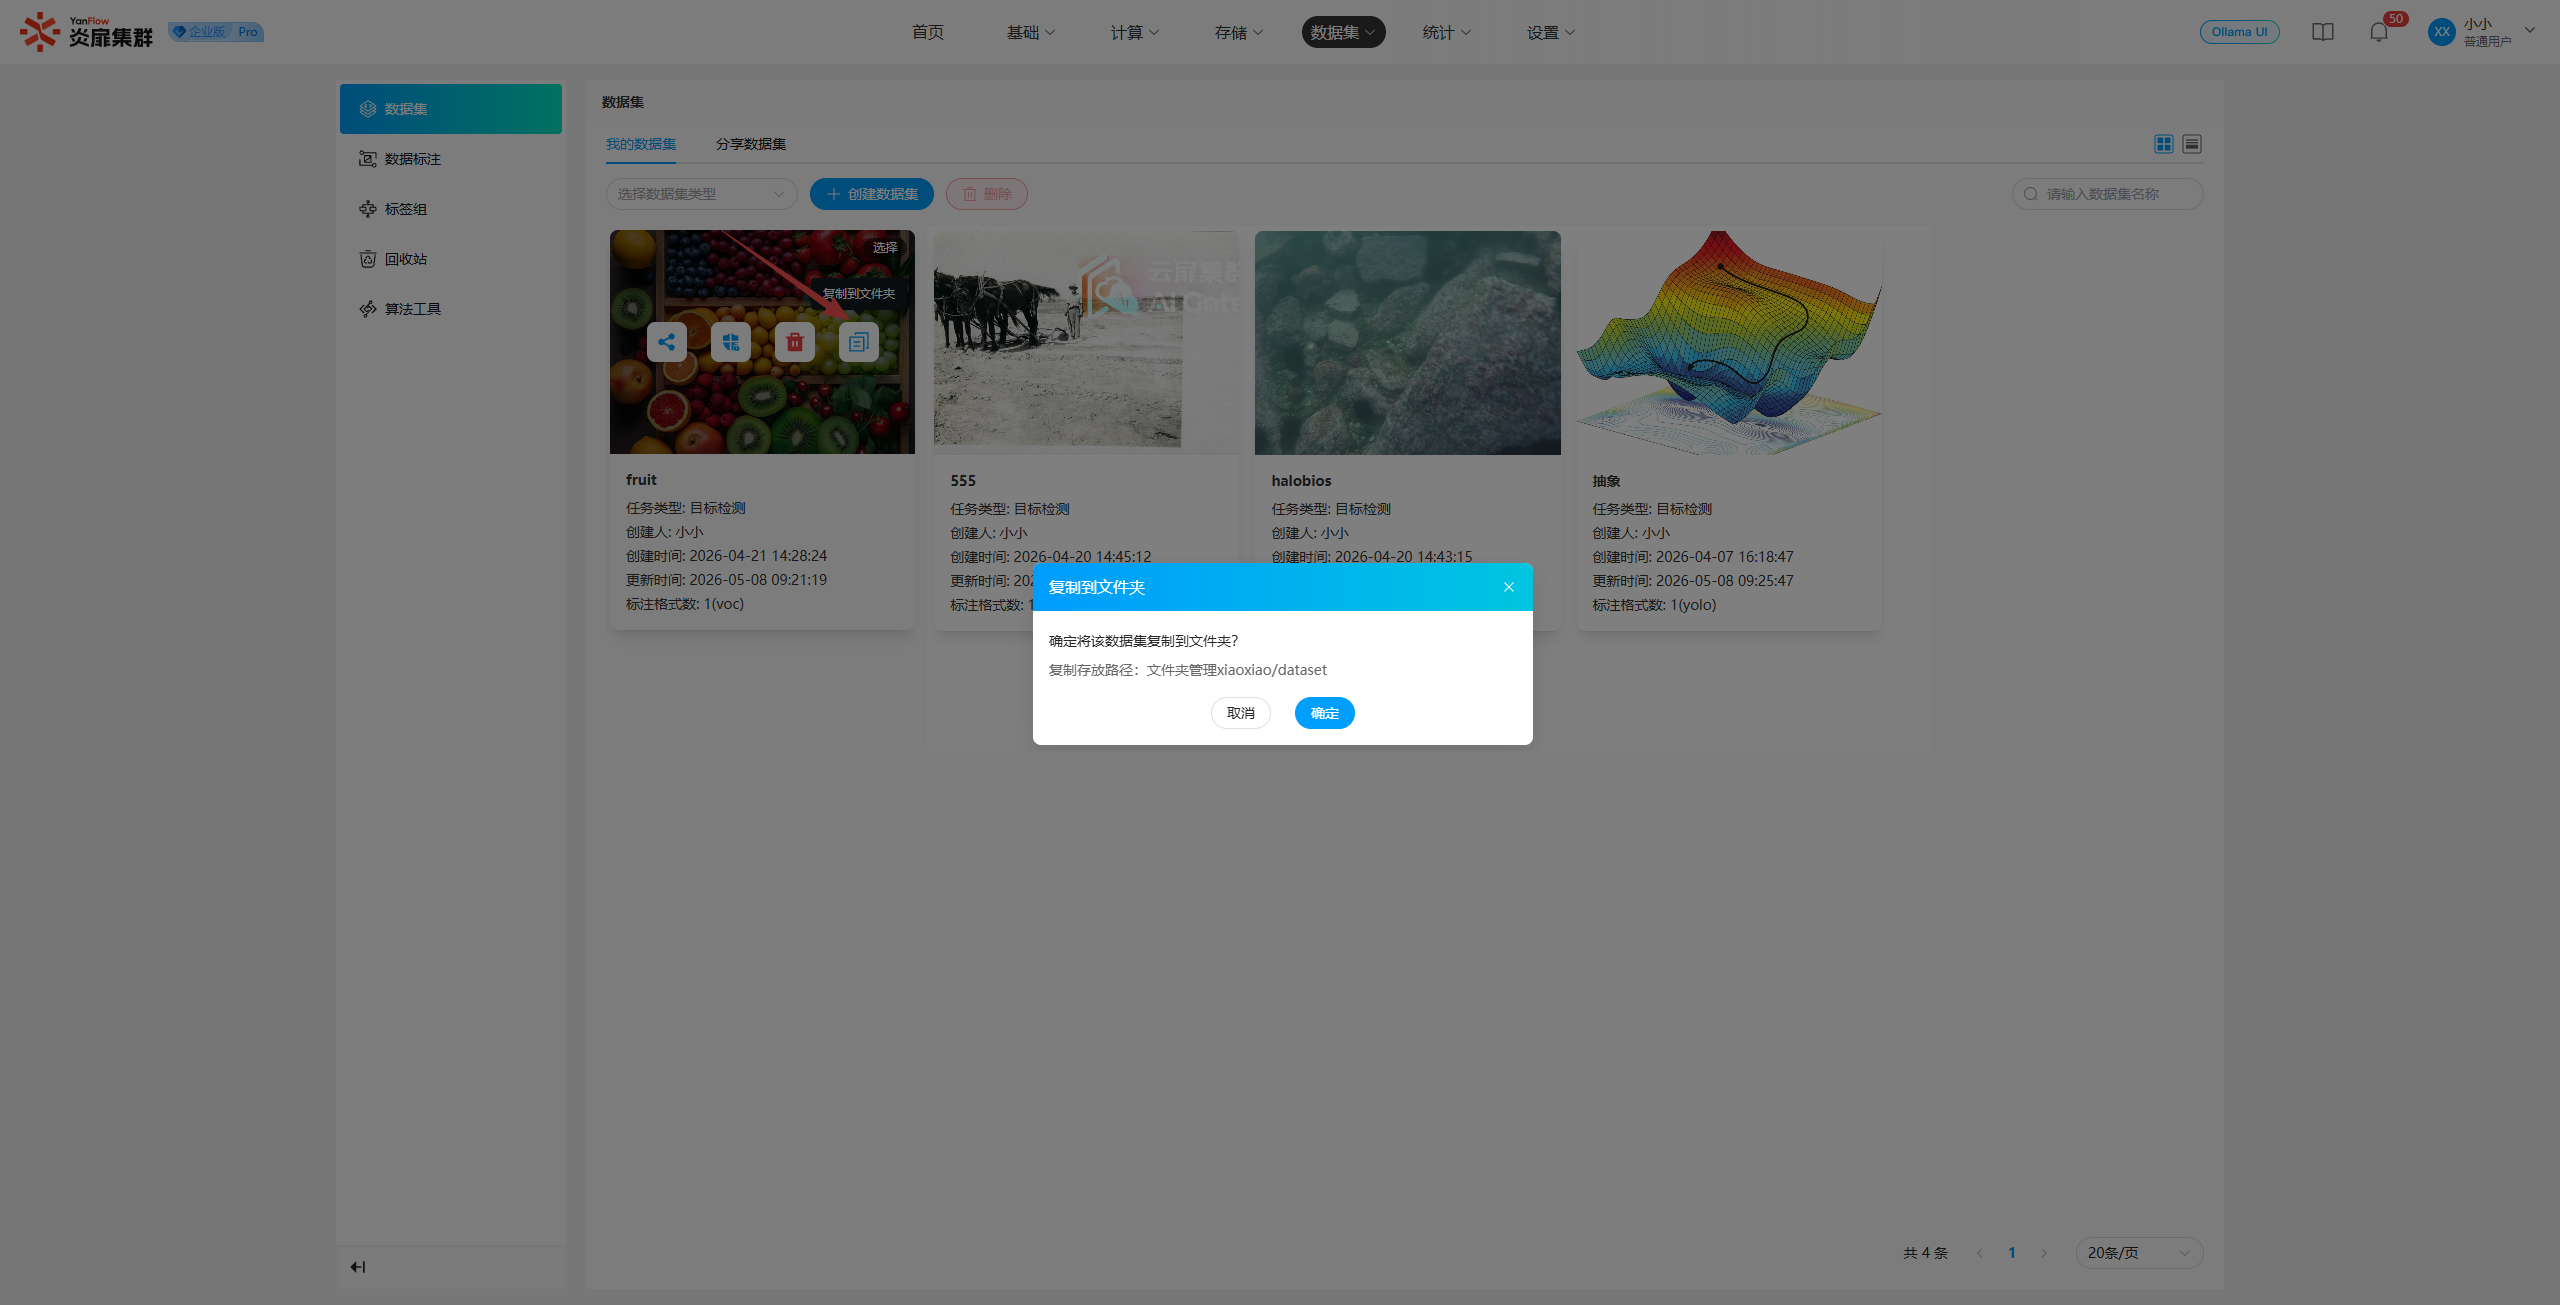
Copy to Folder
Click Copy to Folder on a dataset to display a prompt popup. Click "Confirm" to complete the operation.
Delete Dataset
Click Delete to display a prompt popup. Click Confirm to delete the dataset.

Data Annotation
Users can create and manage data annotation tasks.
Annotation Task List
Regular users can view annotation tasks they have created or those assigned to them by other users. Support for keyword search via task name or filtered search by task type is provided.
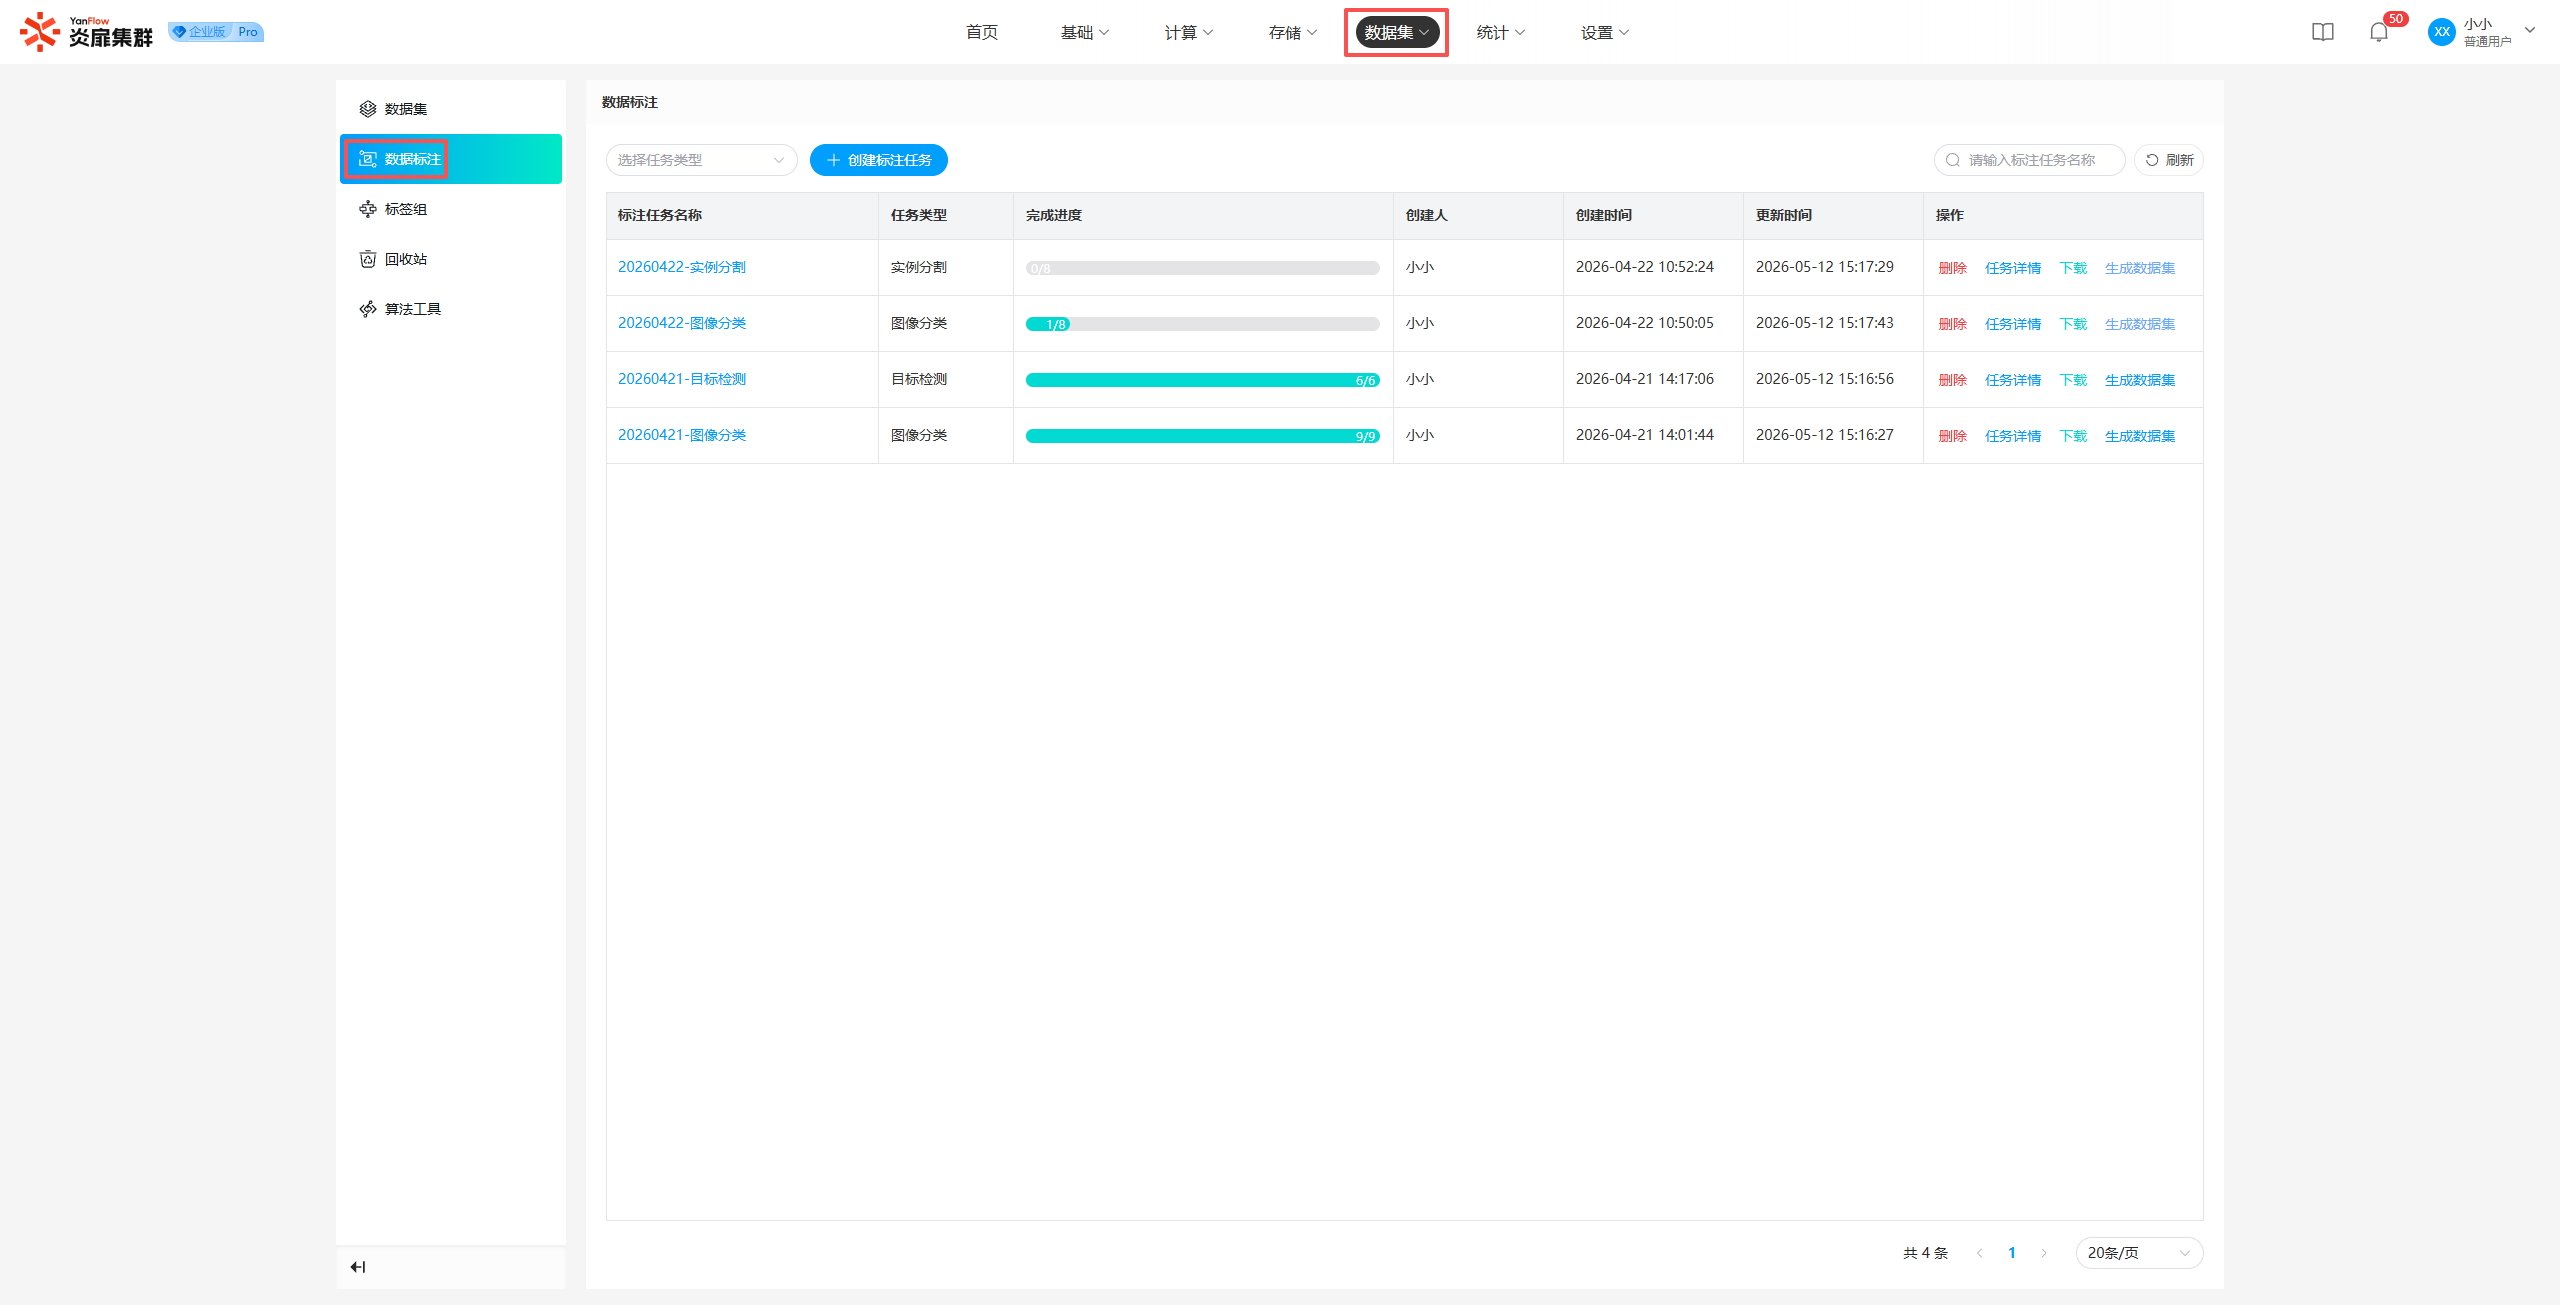
Add New Annotation Task
Click Create Annotation Task to display the creation popup. It supports two methods: Local Upload and Dataset Import. Set the relevant content and click Confirm; if validation passes, a new annotation task will be created.
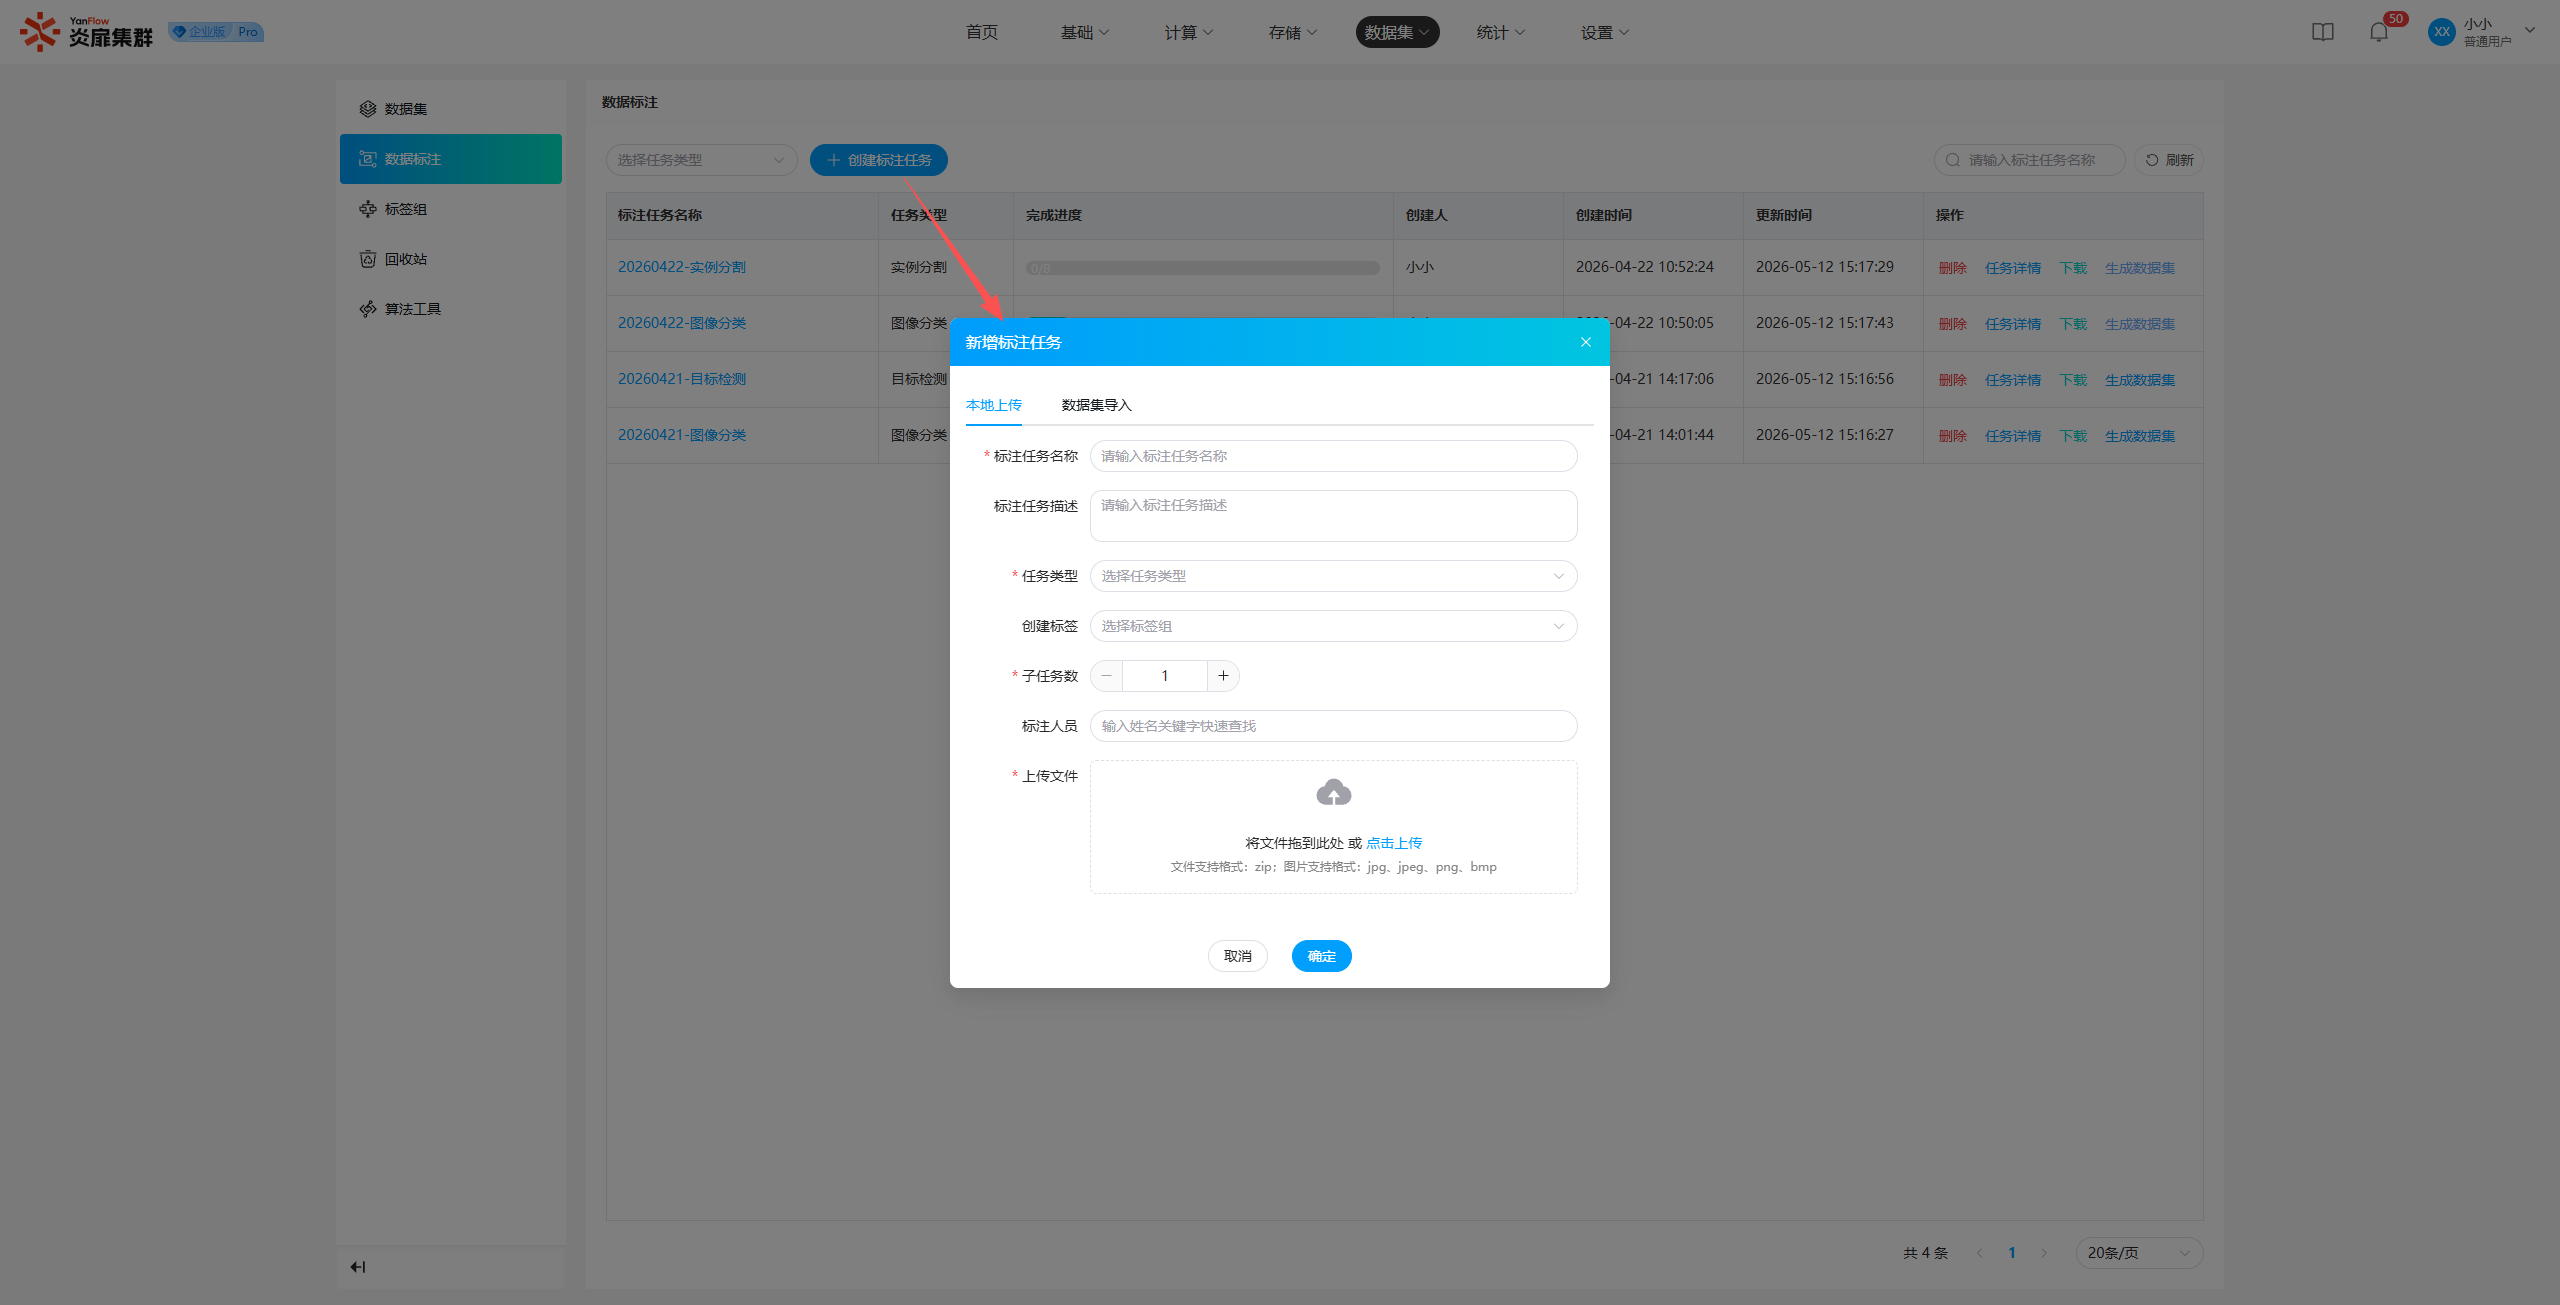
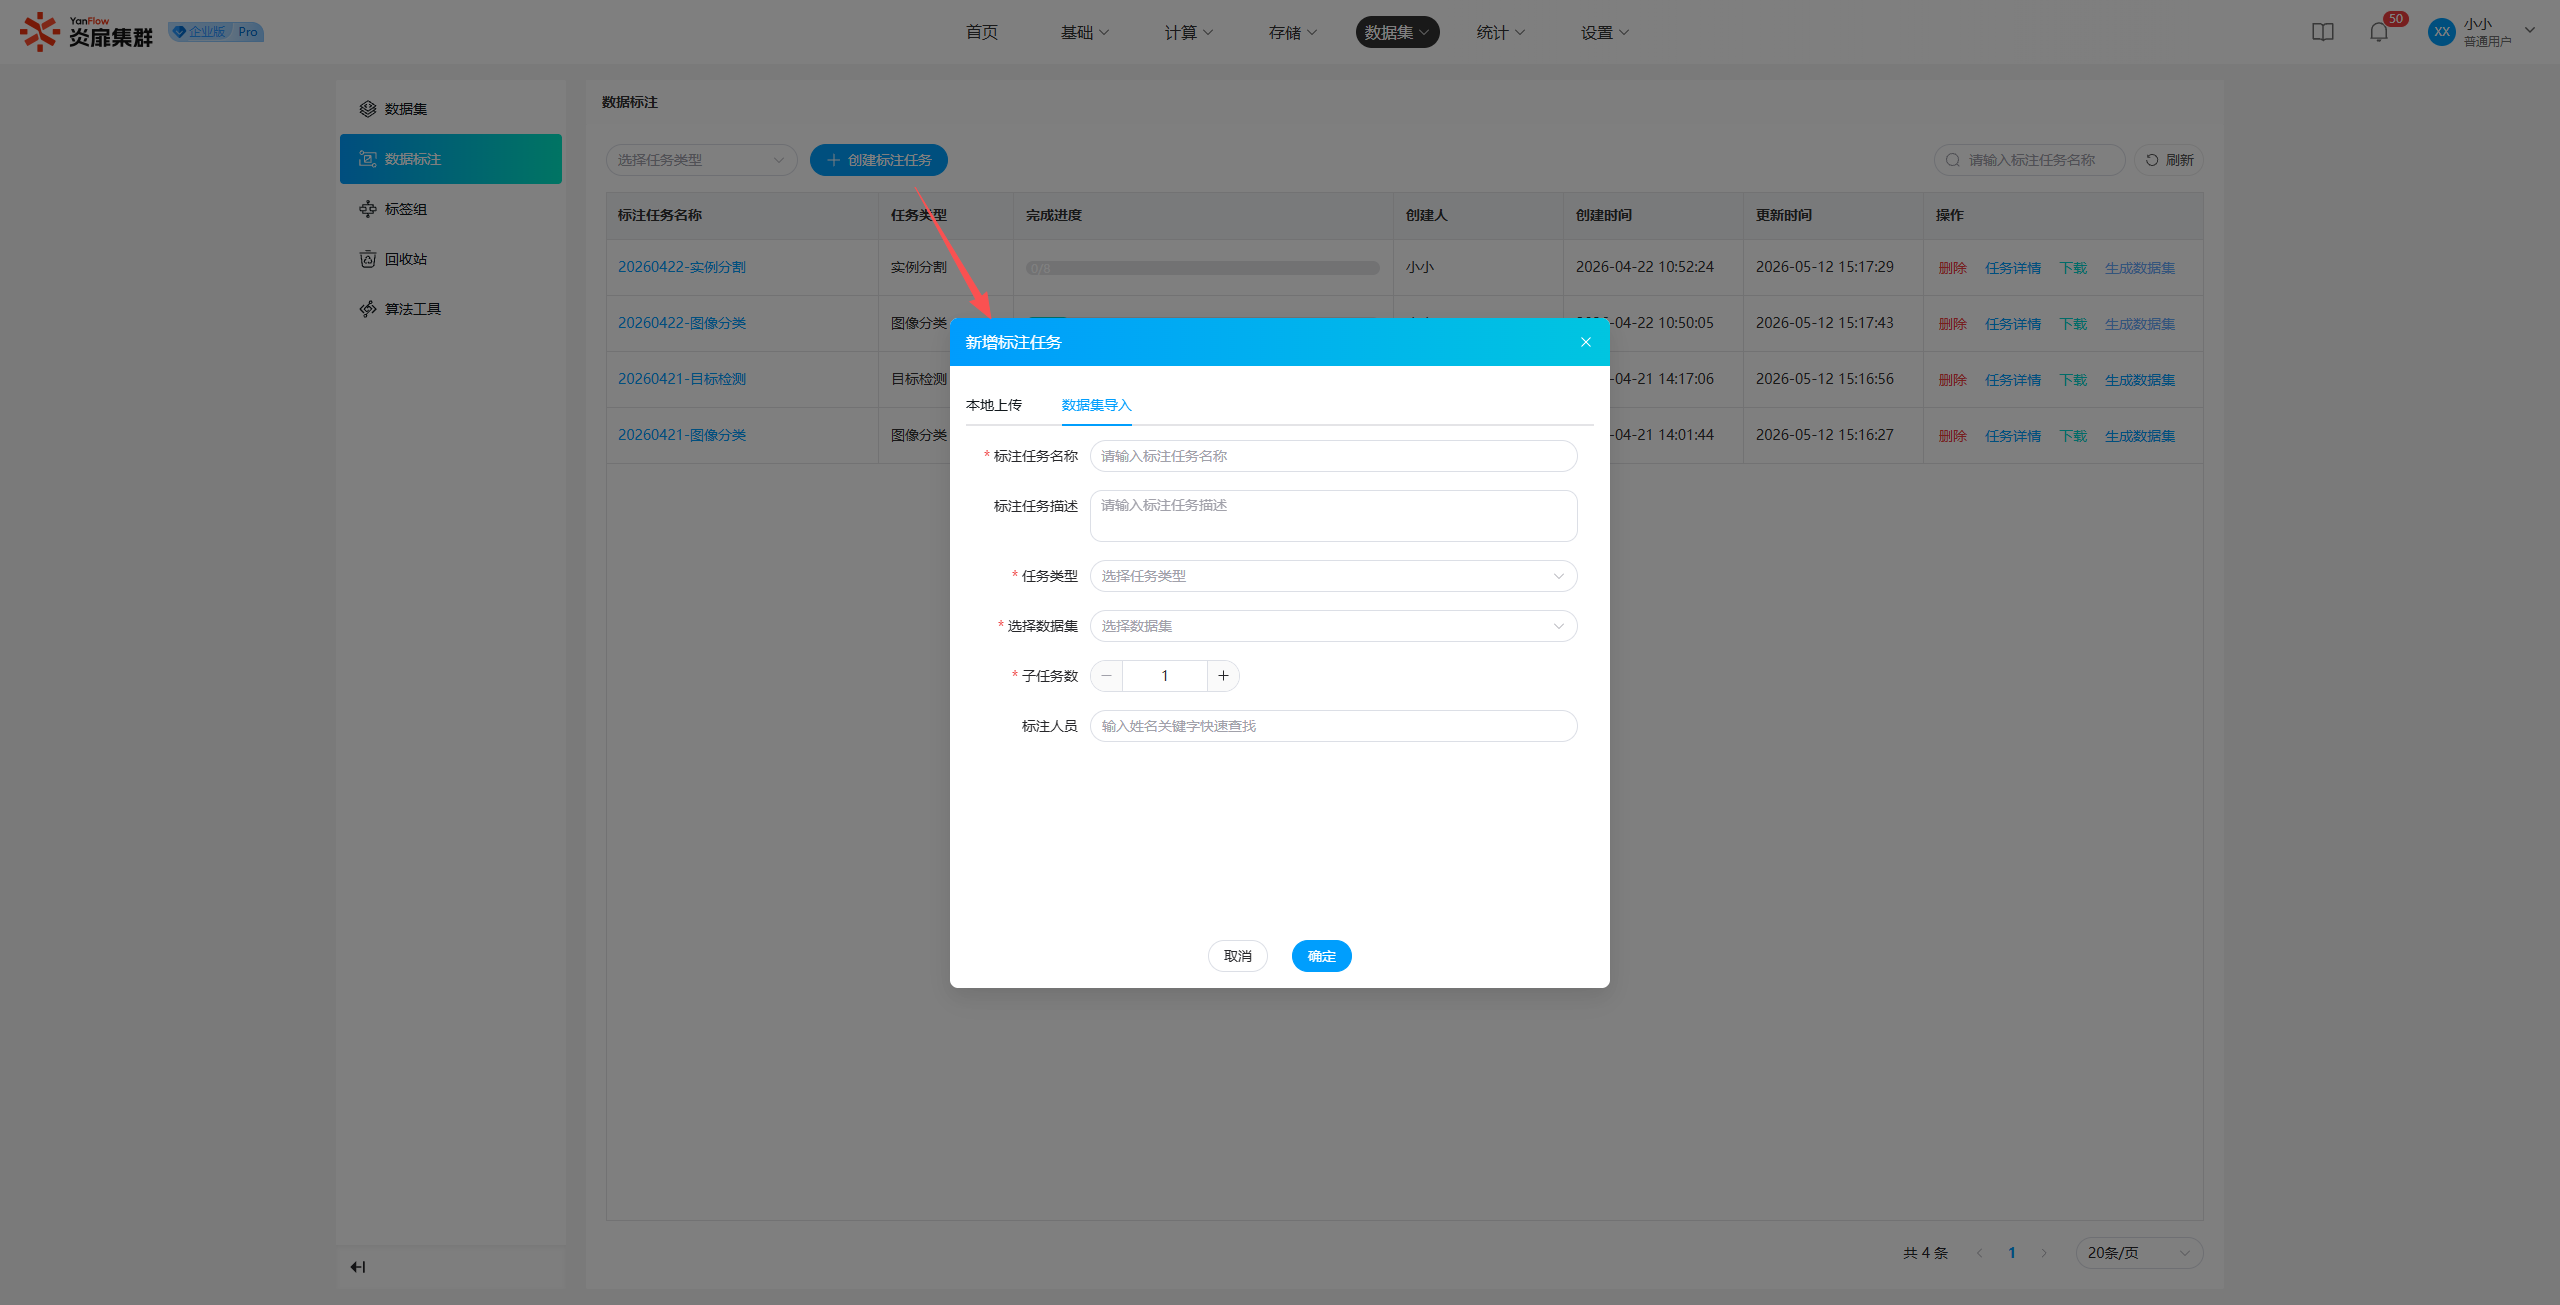
Note:
- If the number of images is less than the number of subtasks, tasks cannot be properly assigned, and an abnormal annotation task will be generated.
- Annotators can only select regular users or temporary users; system administrators cannot be selected.
- After an annotation task is created, the creator is added to the annotators by default and cannot be removed.
Task Details
View Details
Click the Annotation Task Name to enter the details page, where you can view basic information, annotator information, tag information, subtask information, etc.
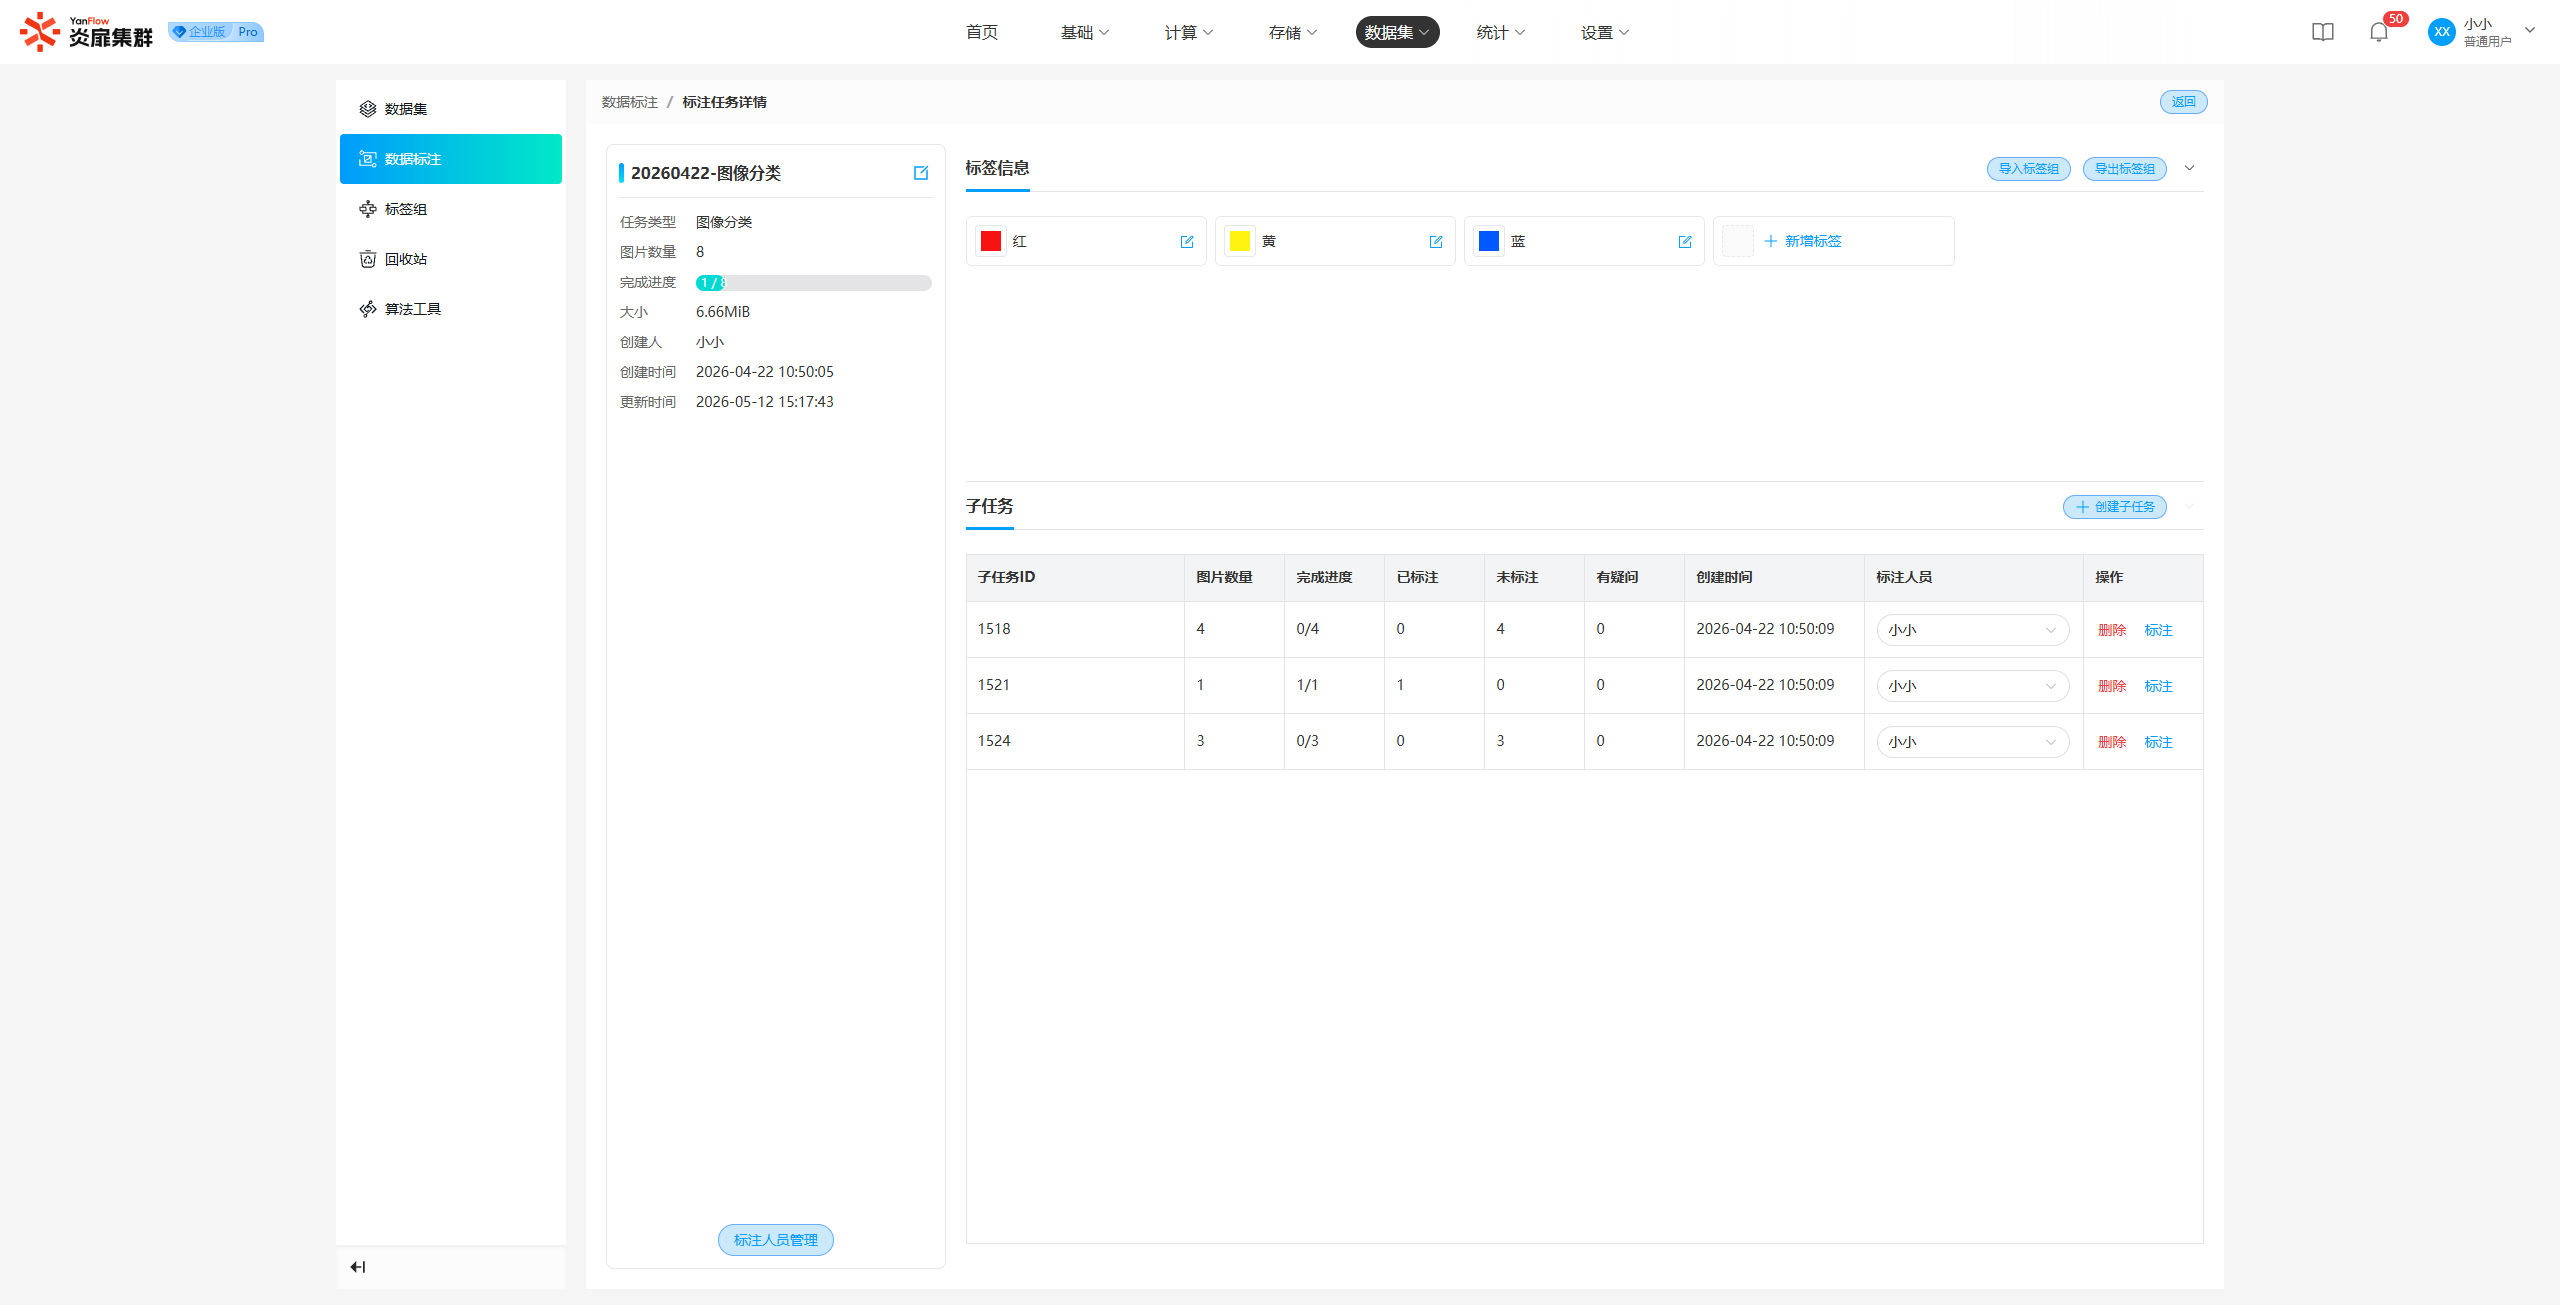
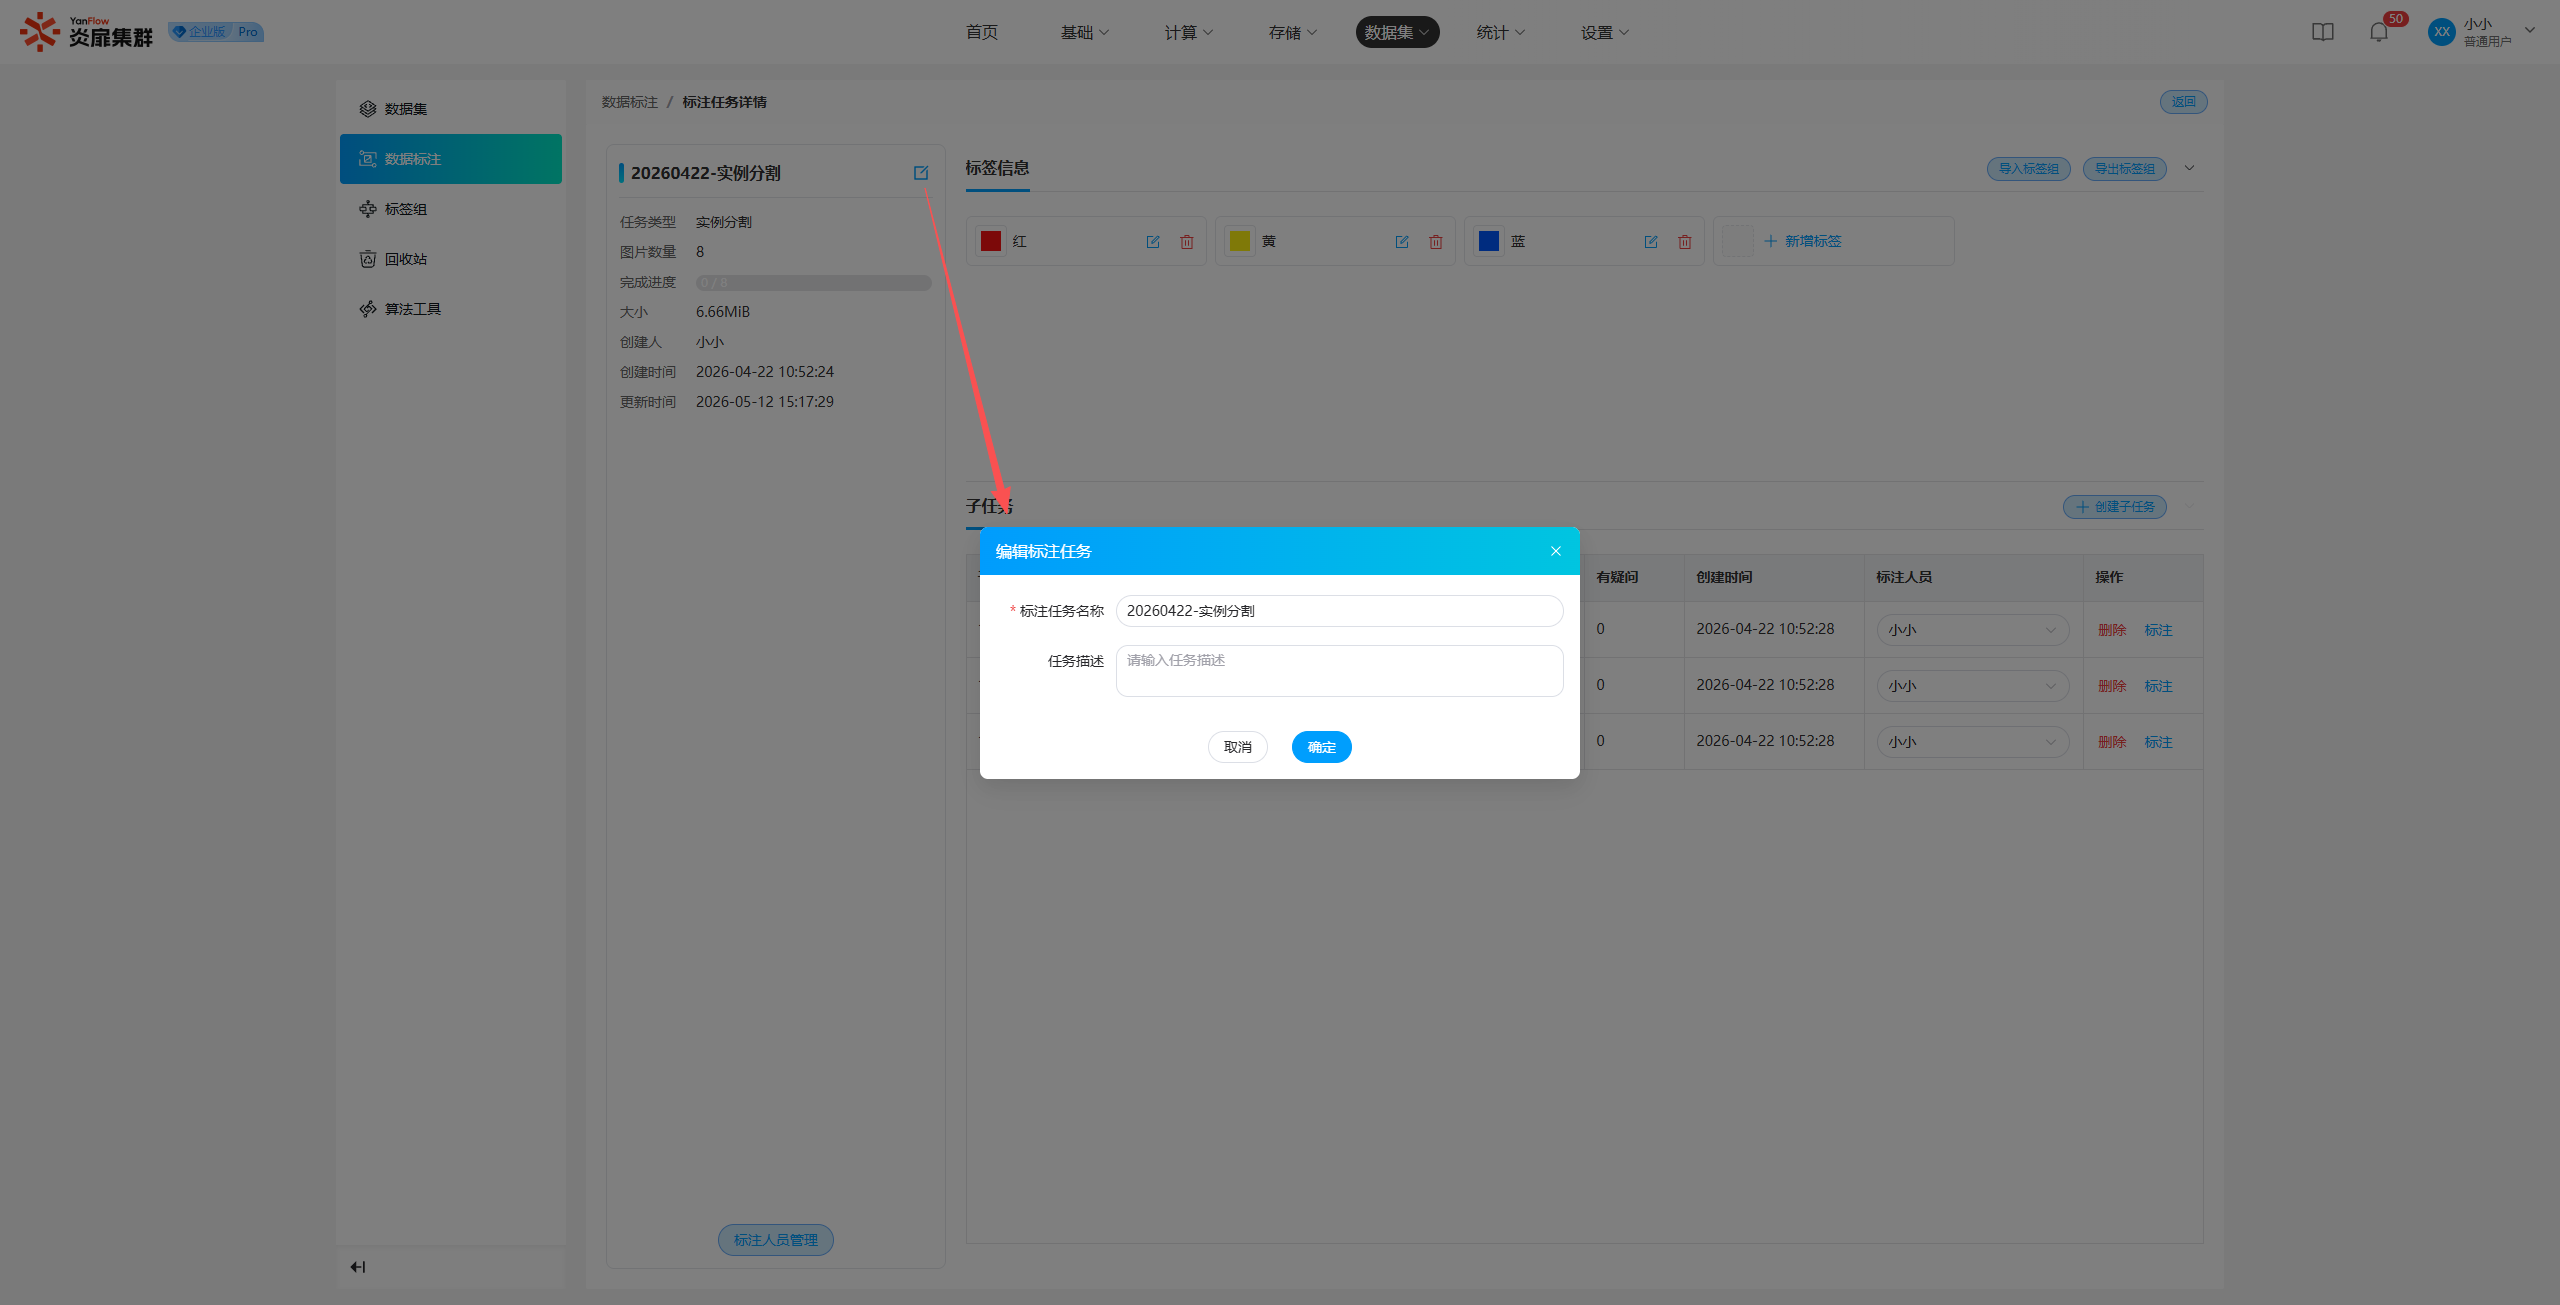
Edit Task
Click Edit to the right of the task name to re-edit the name and description.
Annotator Management
Click Annotator Management to display a management popup, showing the list of added and unadded annotators. You can continue to add or remove annotators.
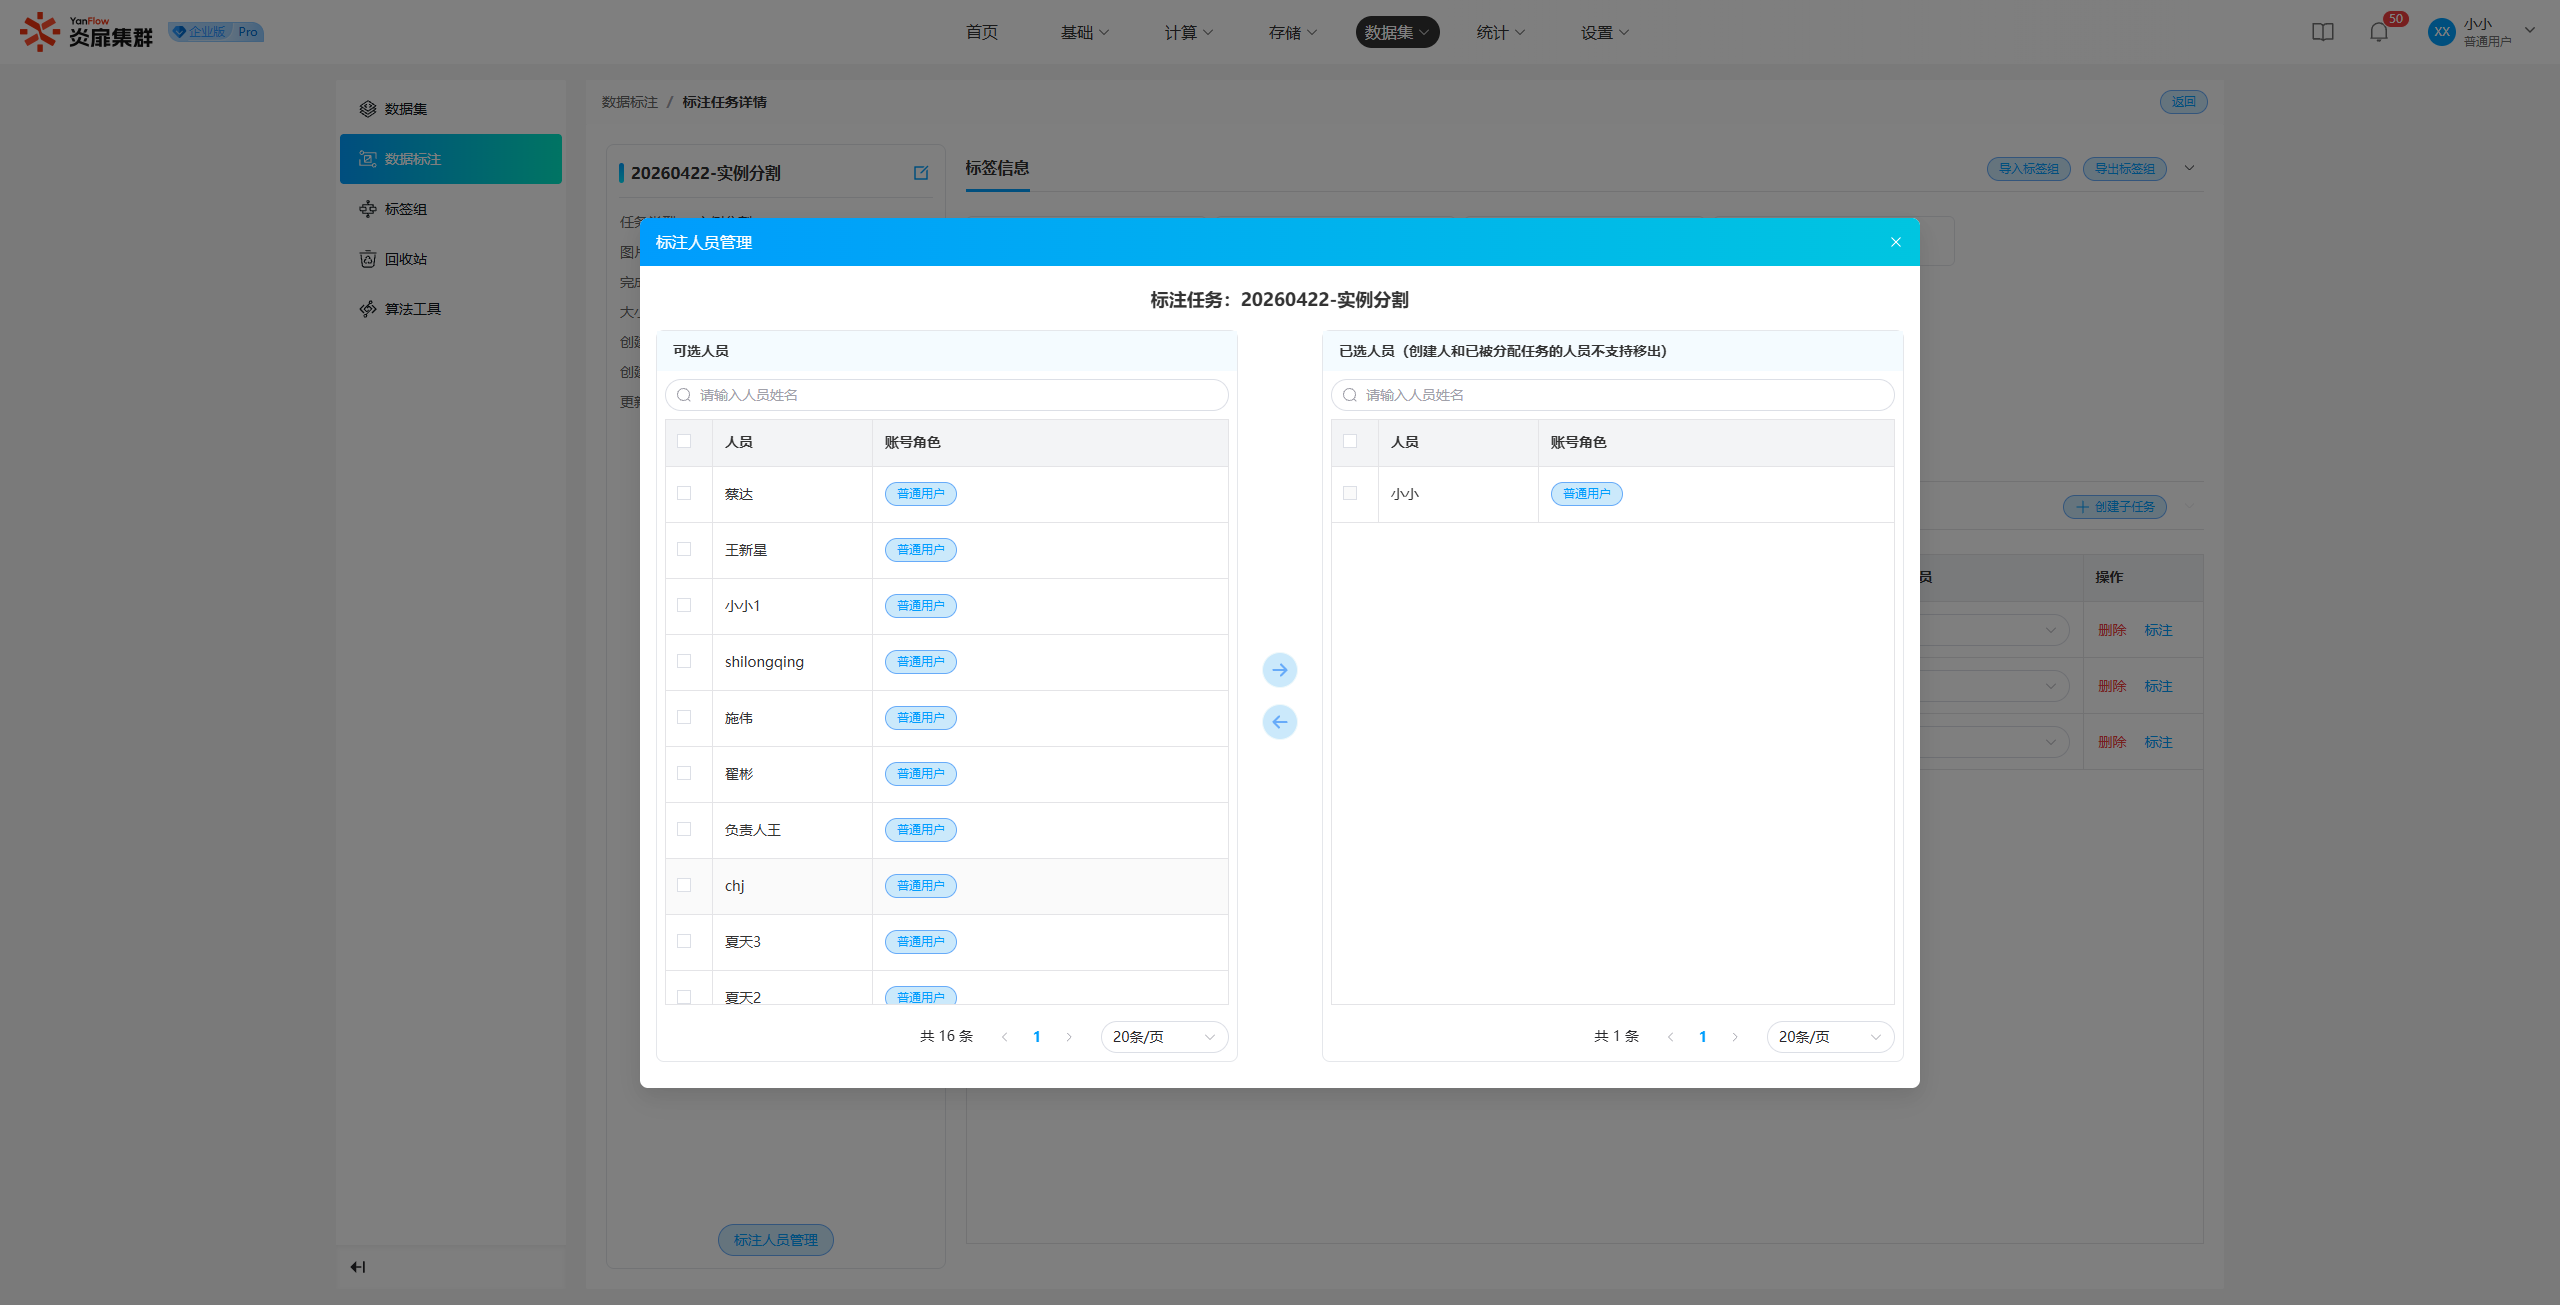
Tag Information
Regular users can manage tag information for annotation tasks they have created, including adding, editing, deleting, importing tag groups, and exporting tag groups.
- Add Tag: Click
Add Tag, select a color, and enter a tag name to add a new tag. - Edit Tag: Click
Editon a tag to modify its color or name. - Delete Tag: Click
Deleteon a tag to display a prompt popup. ClickConfirmto delete. - Import Tag Group: Click
Import Tag Groupto display an import popup. Select the desired tag group and clickConfirmto import the selected tags into the current task. - Export Tag Group: Click
Export Tag Groupto display an export popup. It shows all tag information. Set the name and description of the tag group and clickConfirmto export it.
Subtask Management
Supports regular users in managing subtasks for tasks they have created.
- Create Subtask: Click
Create Subtaskto display a creation popup. Set the number of subtasks and upload image files, then clickConfirmto complete the creation. - Assign Subtask: For a specific subtask, select a specific annotator from the annotator dropdown menu to assign the subtask to them.
- Delete Subtask: Click
Deleteon a subtask to display a prompt popup. ClickConfirmto delete the subtask.
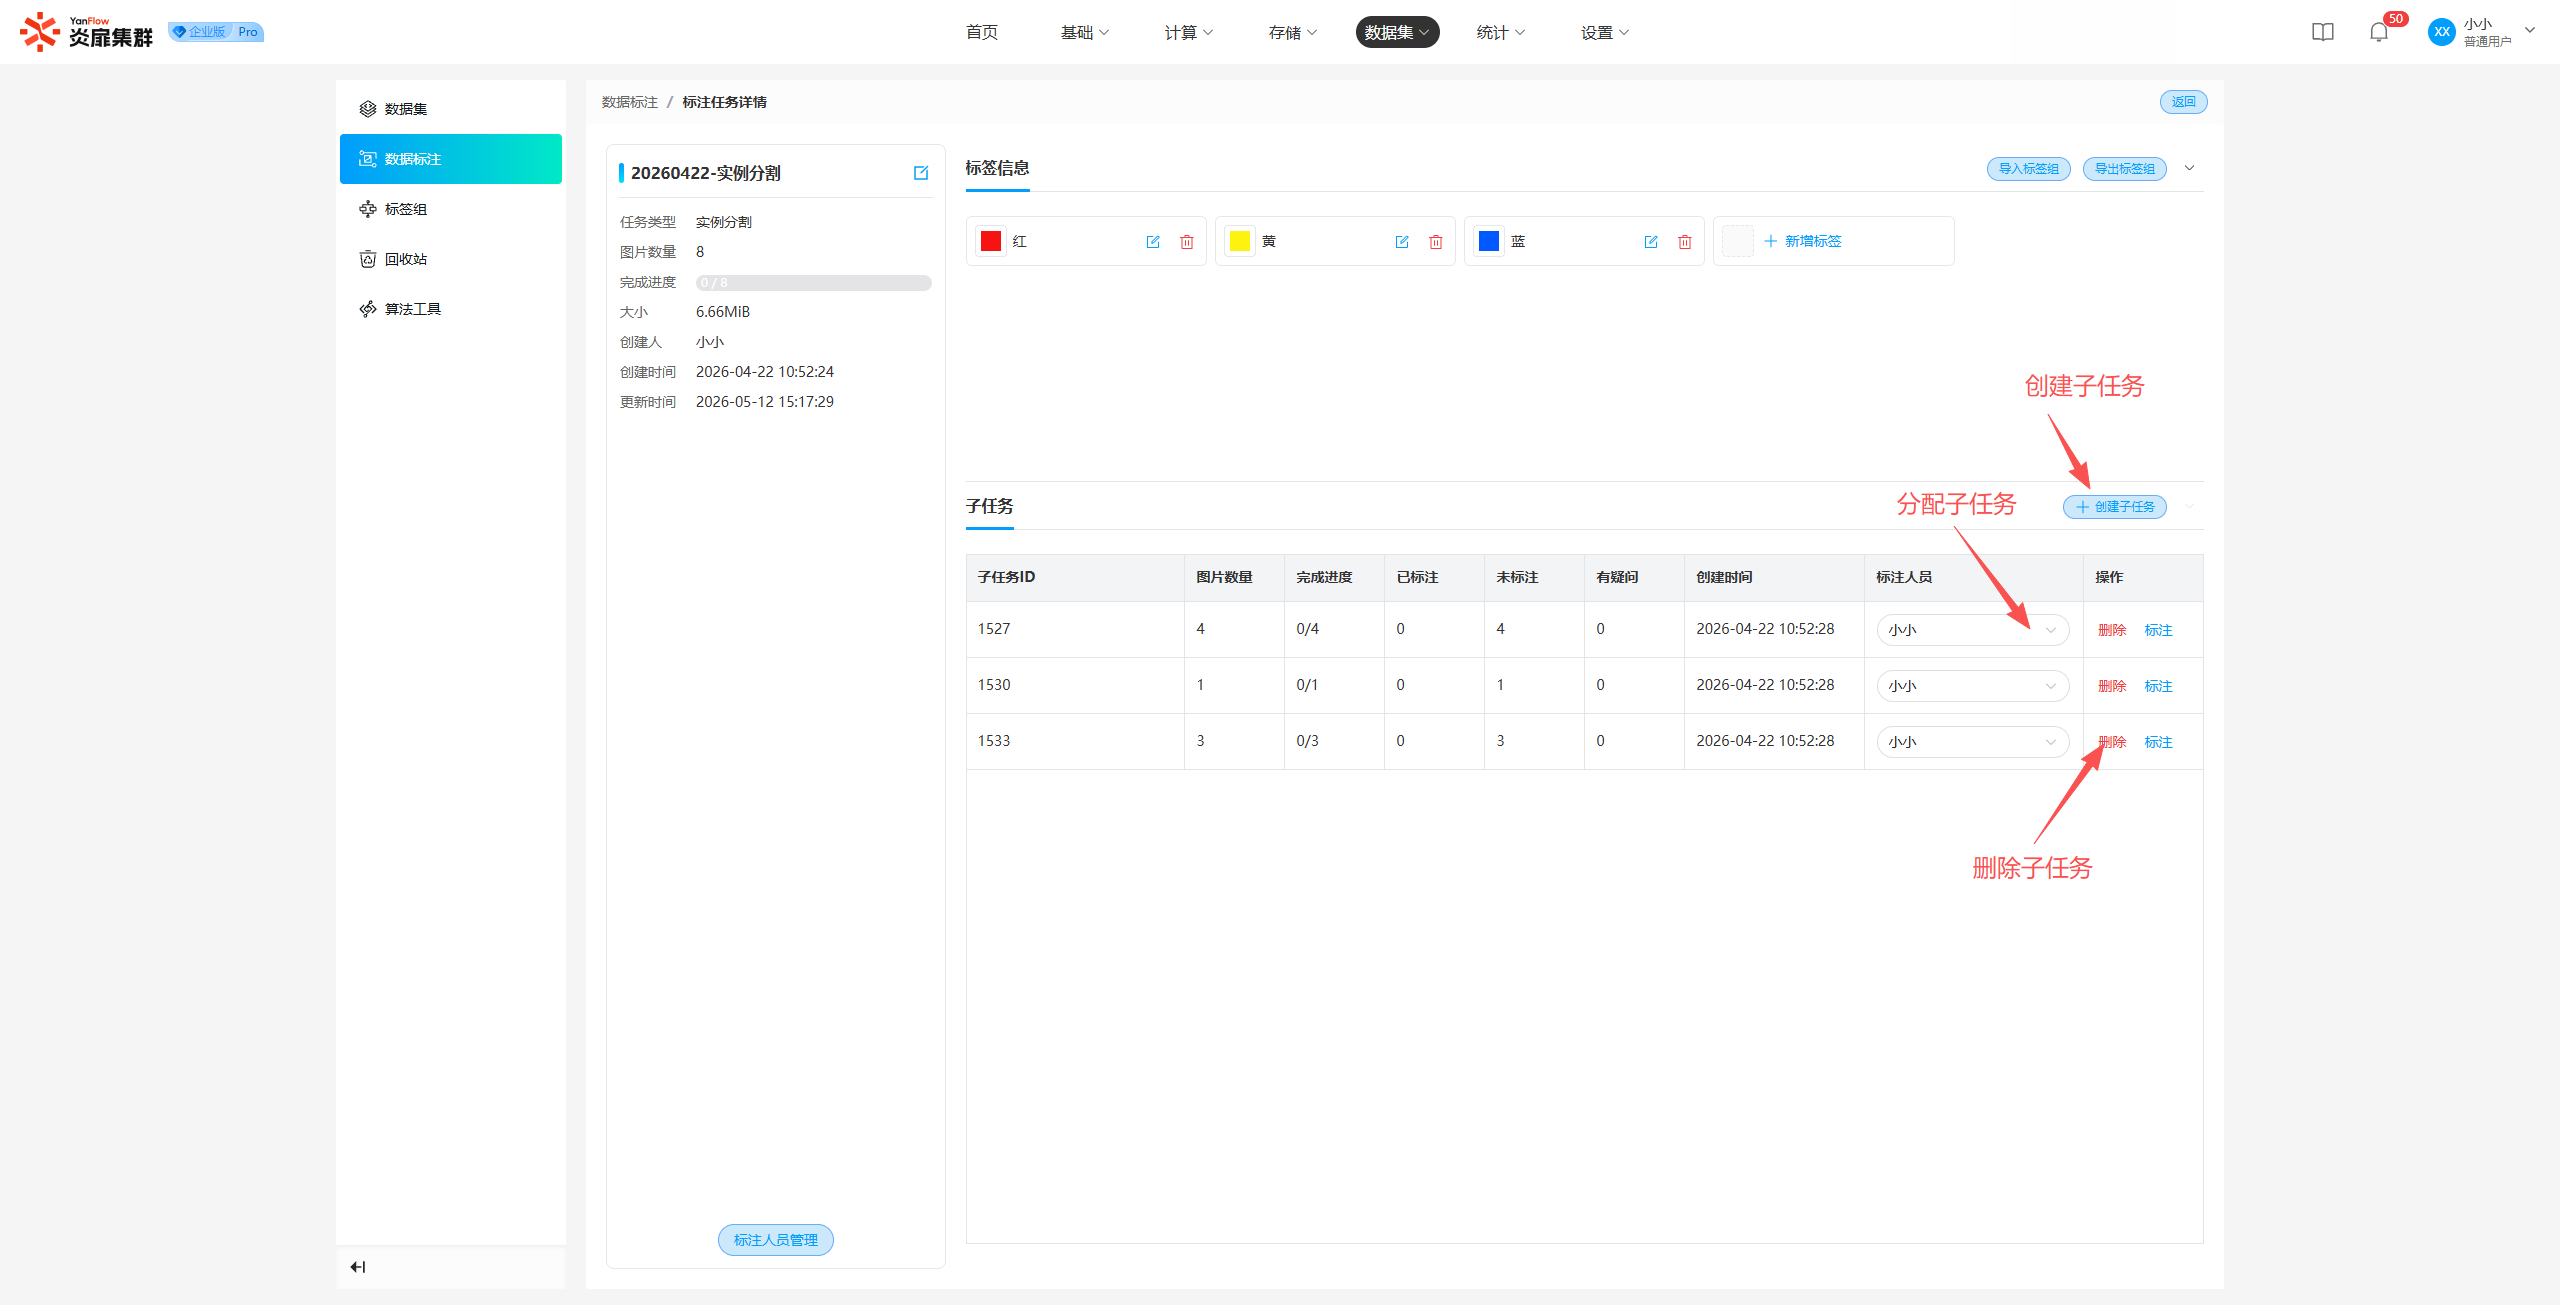
Note: Only the creator of the annotation task has the permission to create, assign, and delete subtasks.
Task Annotation
Select a subtask and click Annotate to open the annotation popup to perform annotation work.
"Object Detection" Task
Select a subtask and click Annotate to open the annotation popup to perform annotation work.
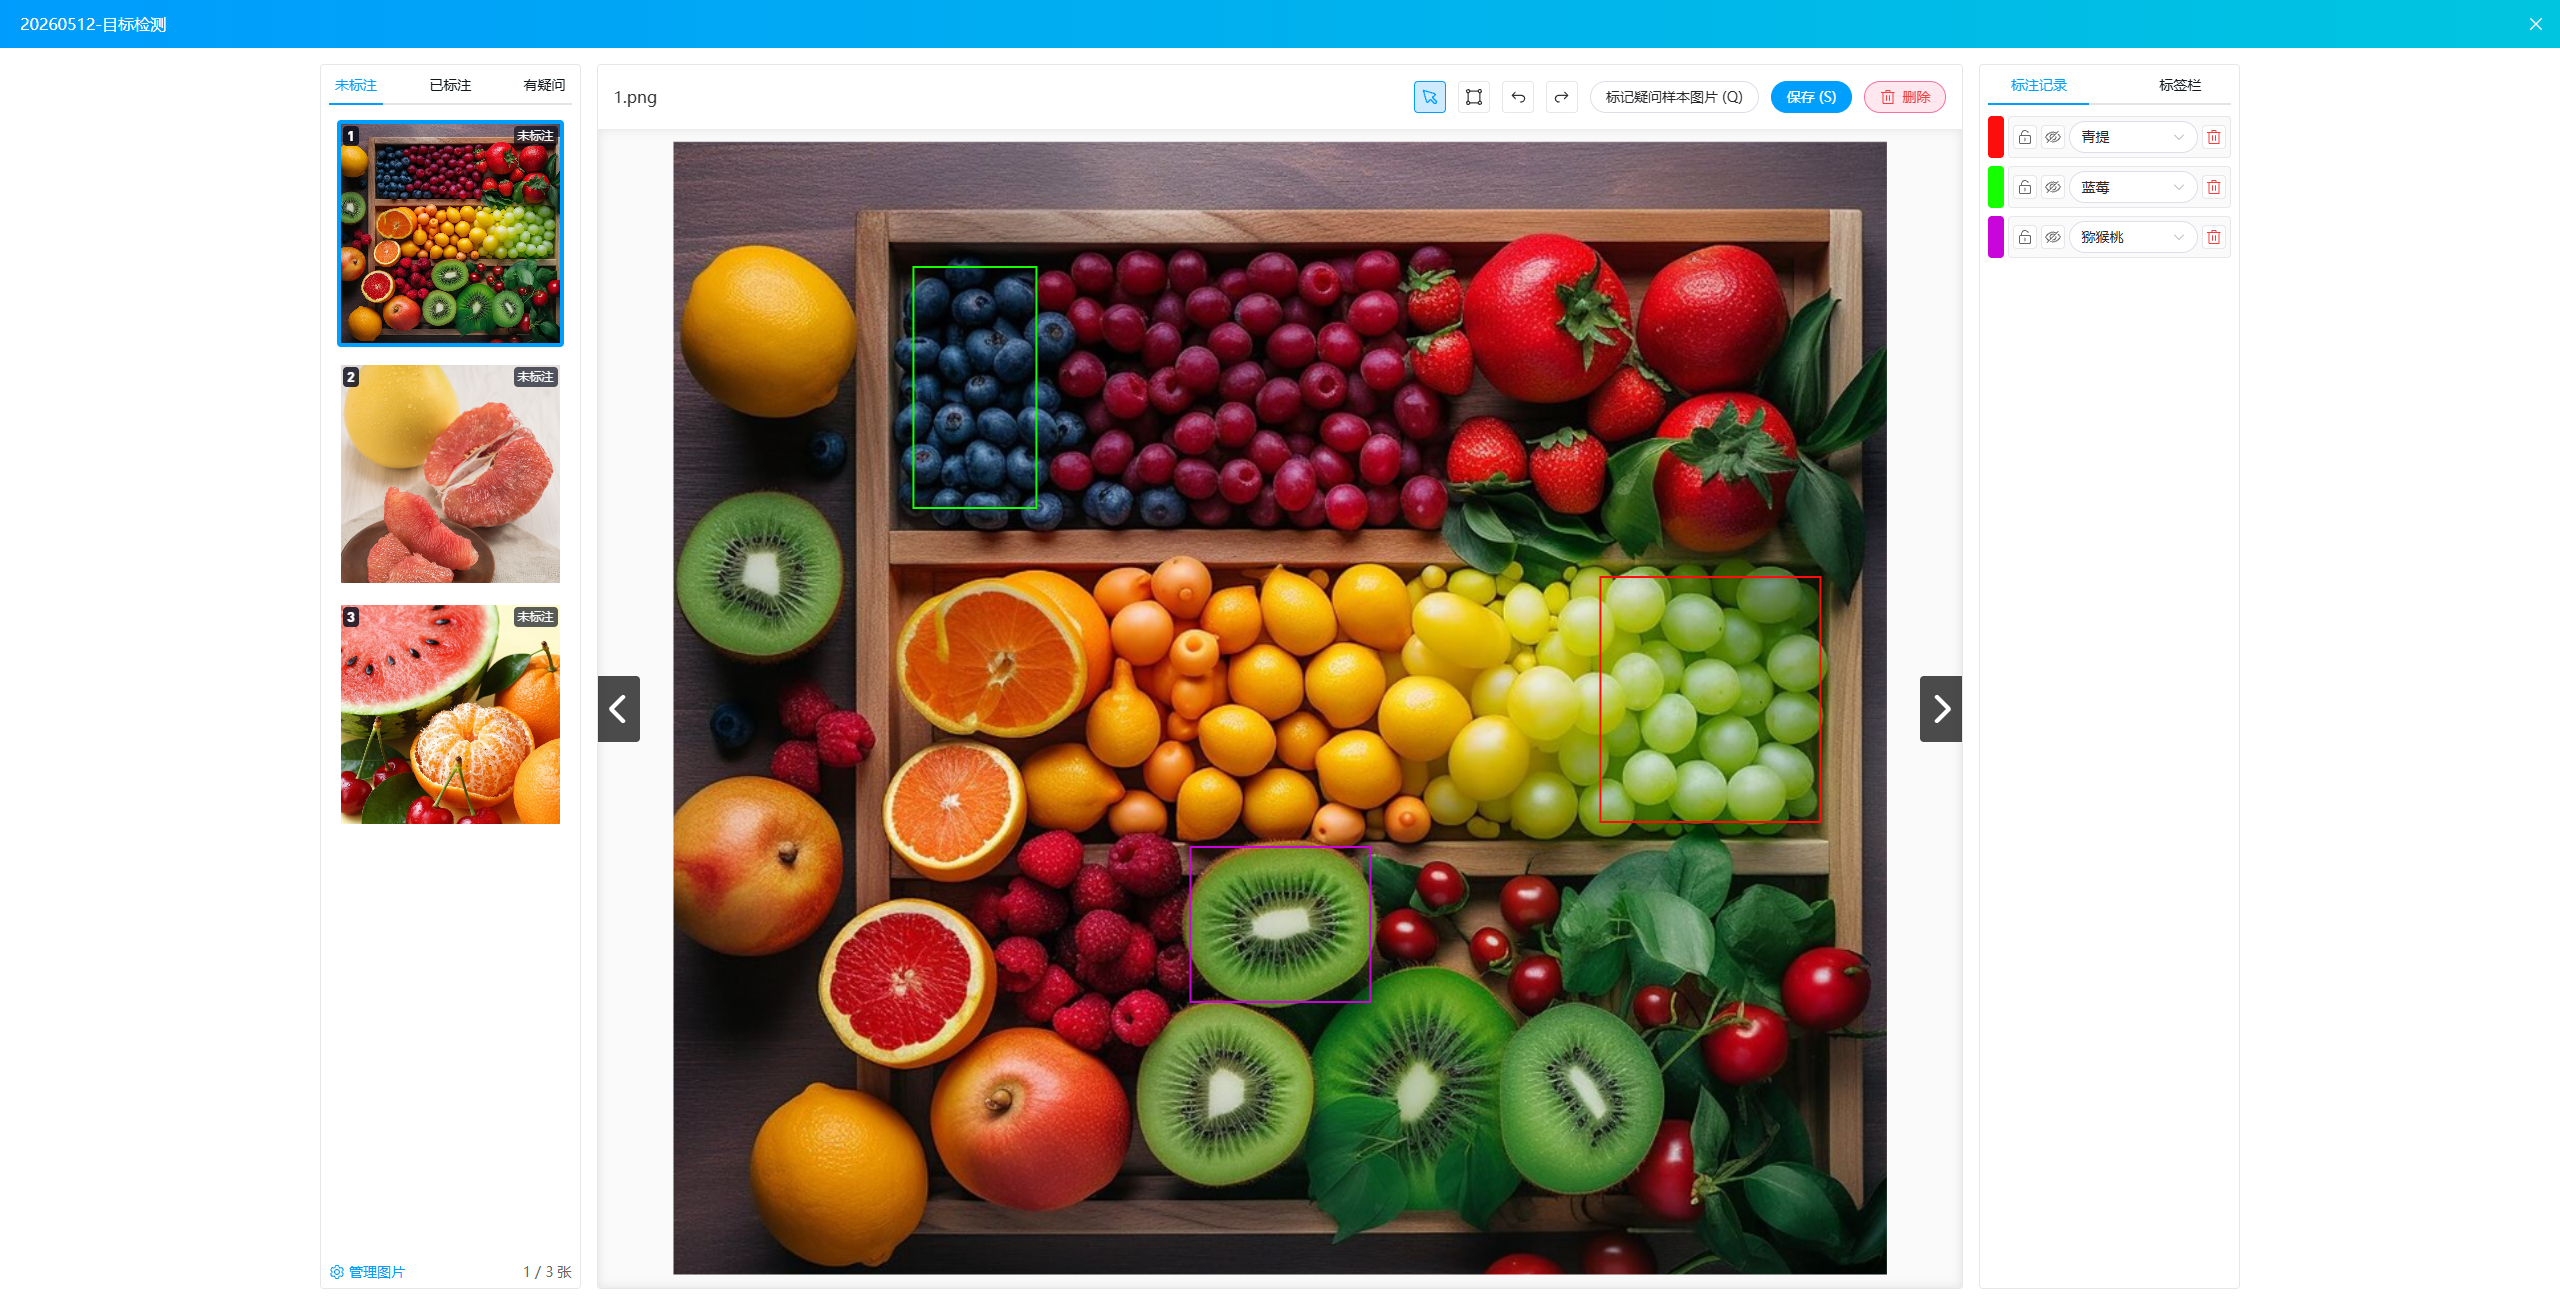
- Annotate: Click the
Rectangleicon at the top to draw a bounding box on the canvas, and use shortcuts to add tags. - Change Selection: Click the
Selecticon at the top to select a bounding box. You can move the selection or change its size, and also delete the selection's annotation information. - Save: After adding annotation information, click
Saveto save the current settings. - Mark as Doubtful Sample: Click
Mark Doubtful Sample Imageat the top to mark the image as a doubtful image. - Tag Records: Click the
Tag Recordstab to view all annotation information for the current image. It supportsLock,Show/Hide,Change, andDelete. - Tag Bar: Click the
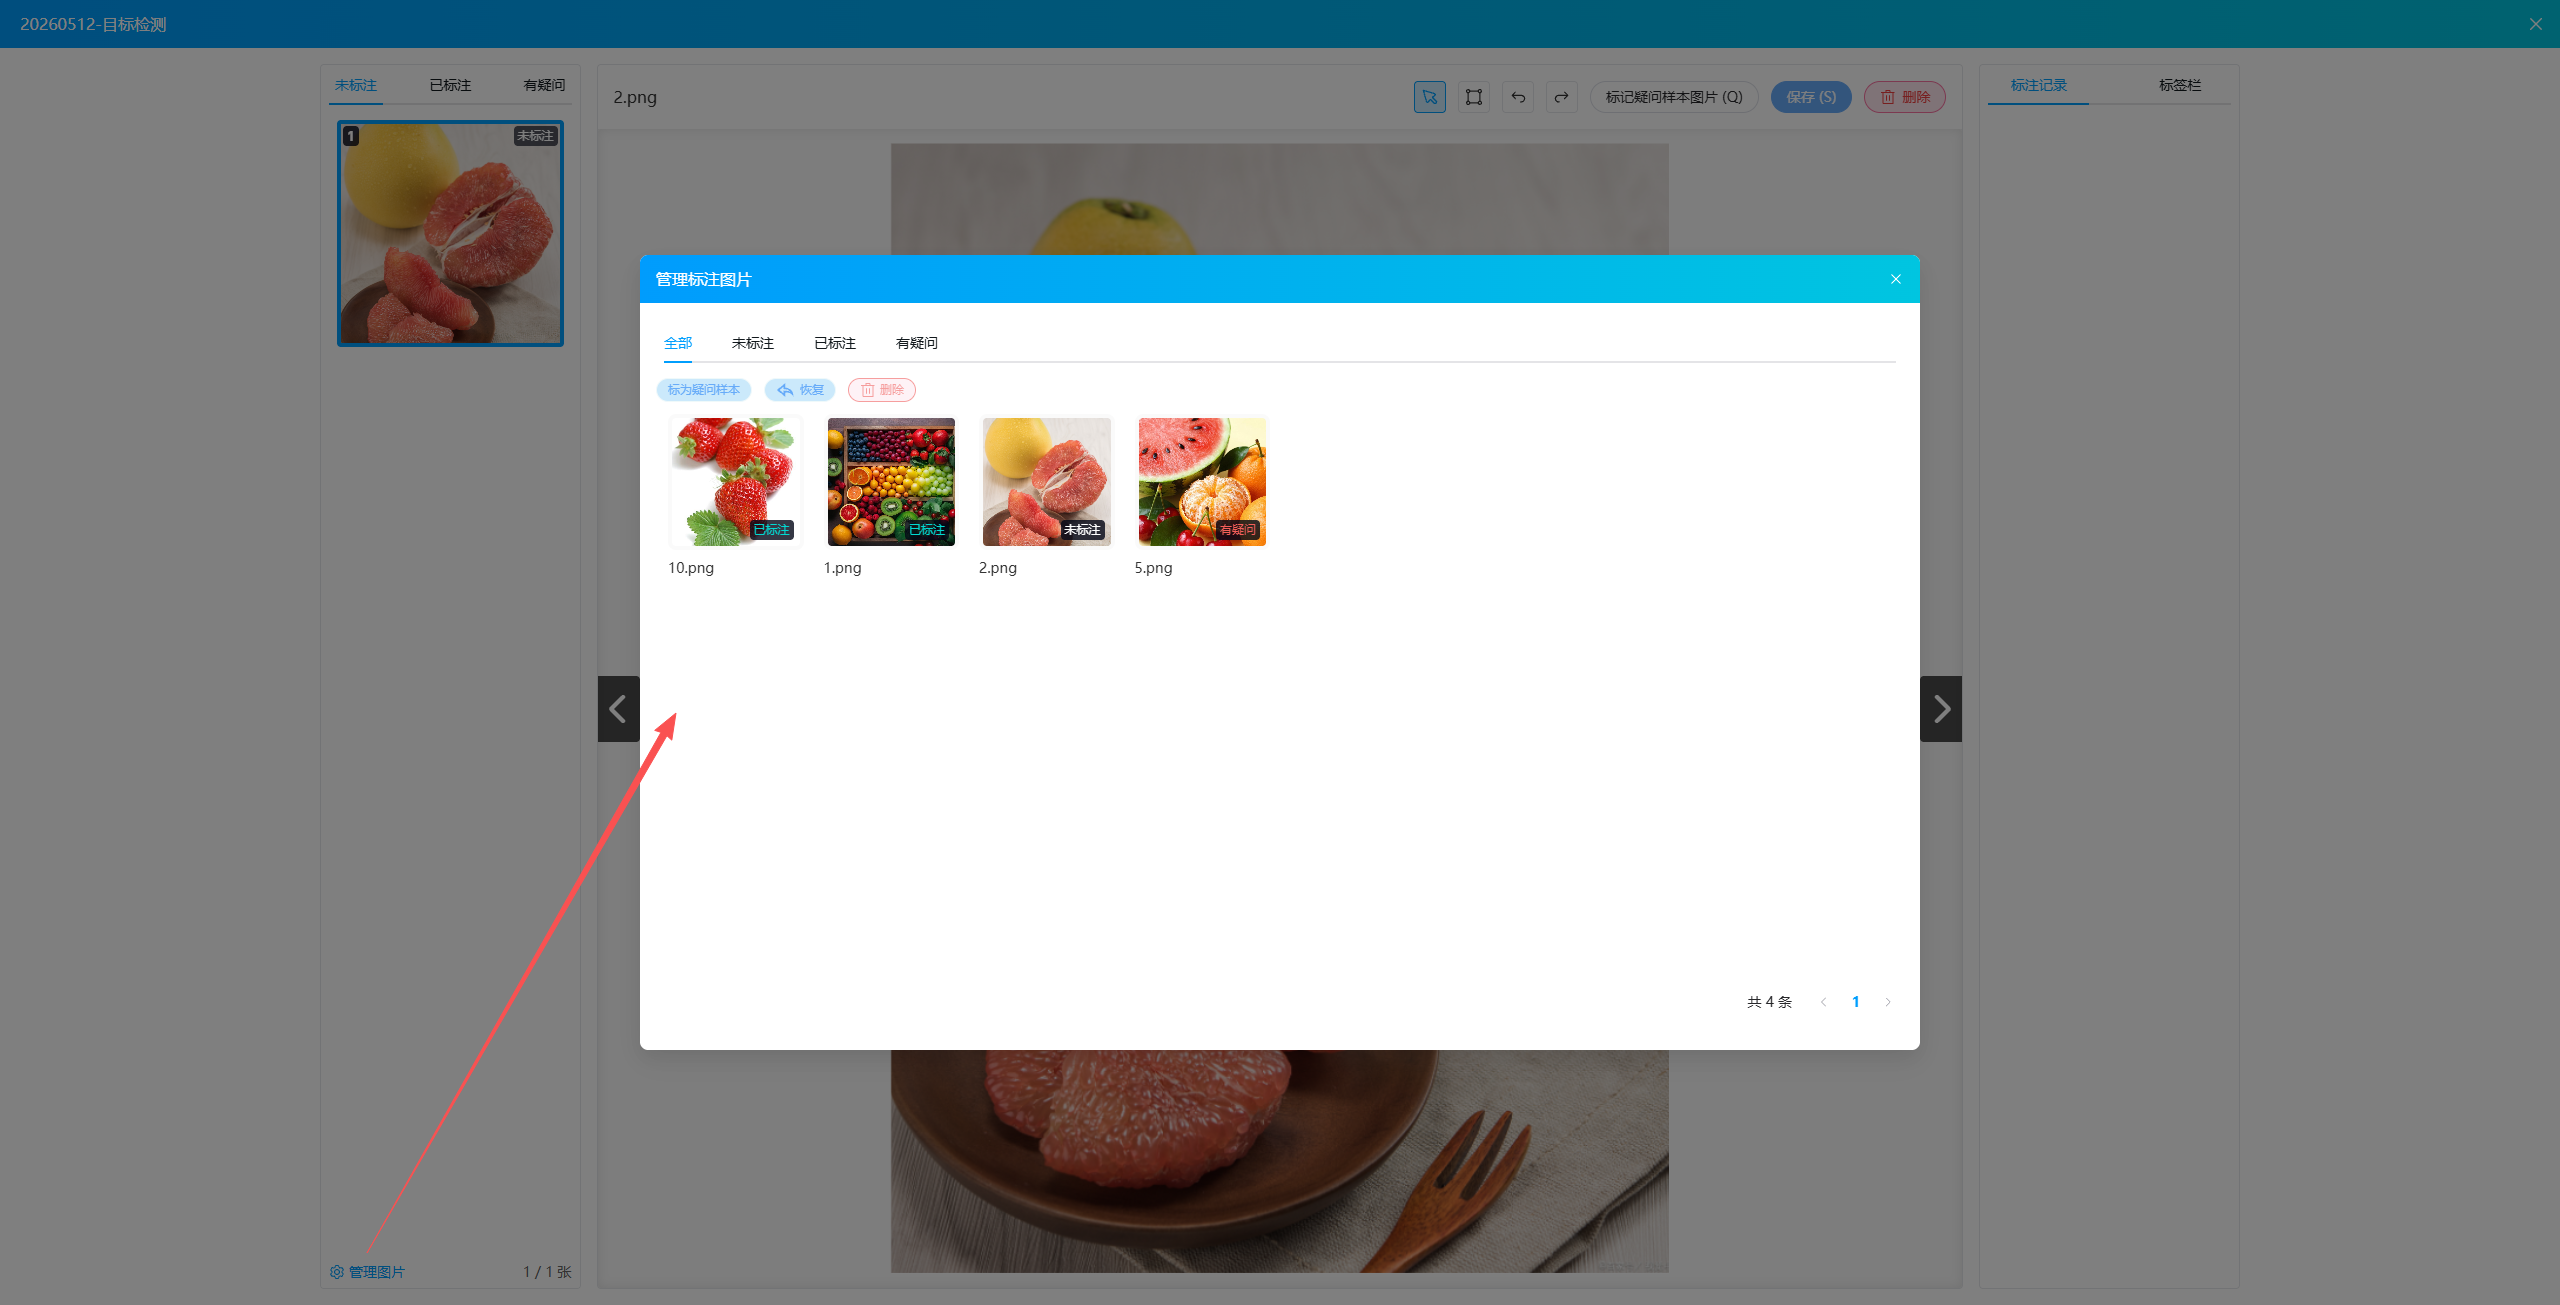
Tag Bartab to display the list of all current tags. It supportsAdd Tag,Import Tag Group, andExport Tag. - Manage Images: Click
Manage Imagesto display a management popup that categorizes all images. It supports managing images, including marking as doubtful, restoring doubtful images, and deleting images.
"Image Classification" Task
Select a subtask and click Annotate to open the annotation popup to perform annotation work.
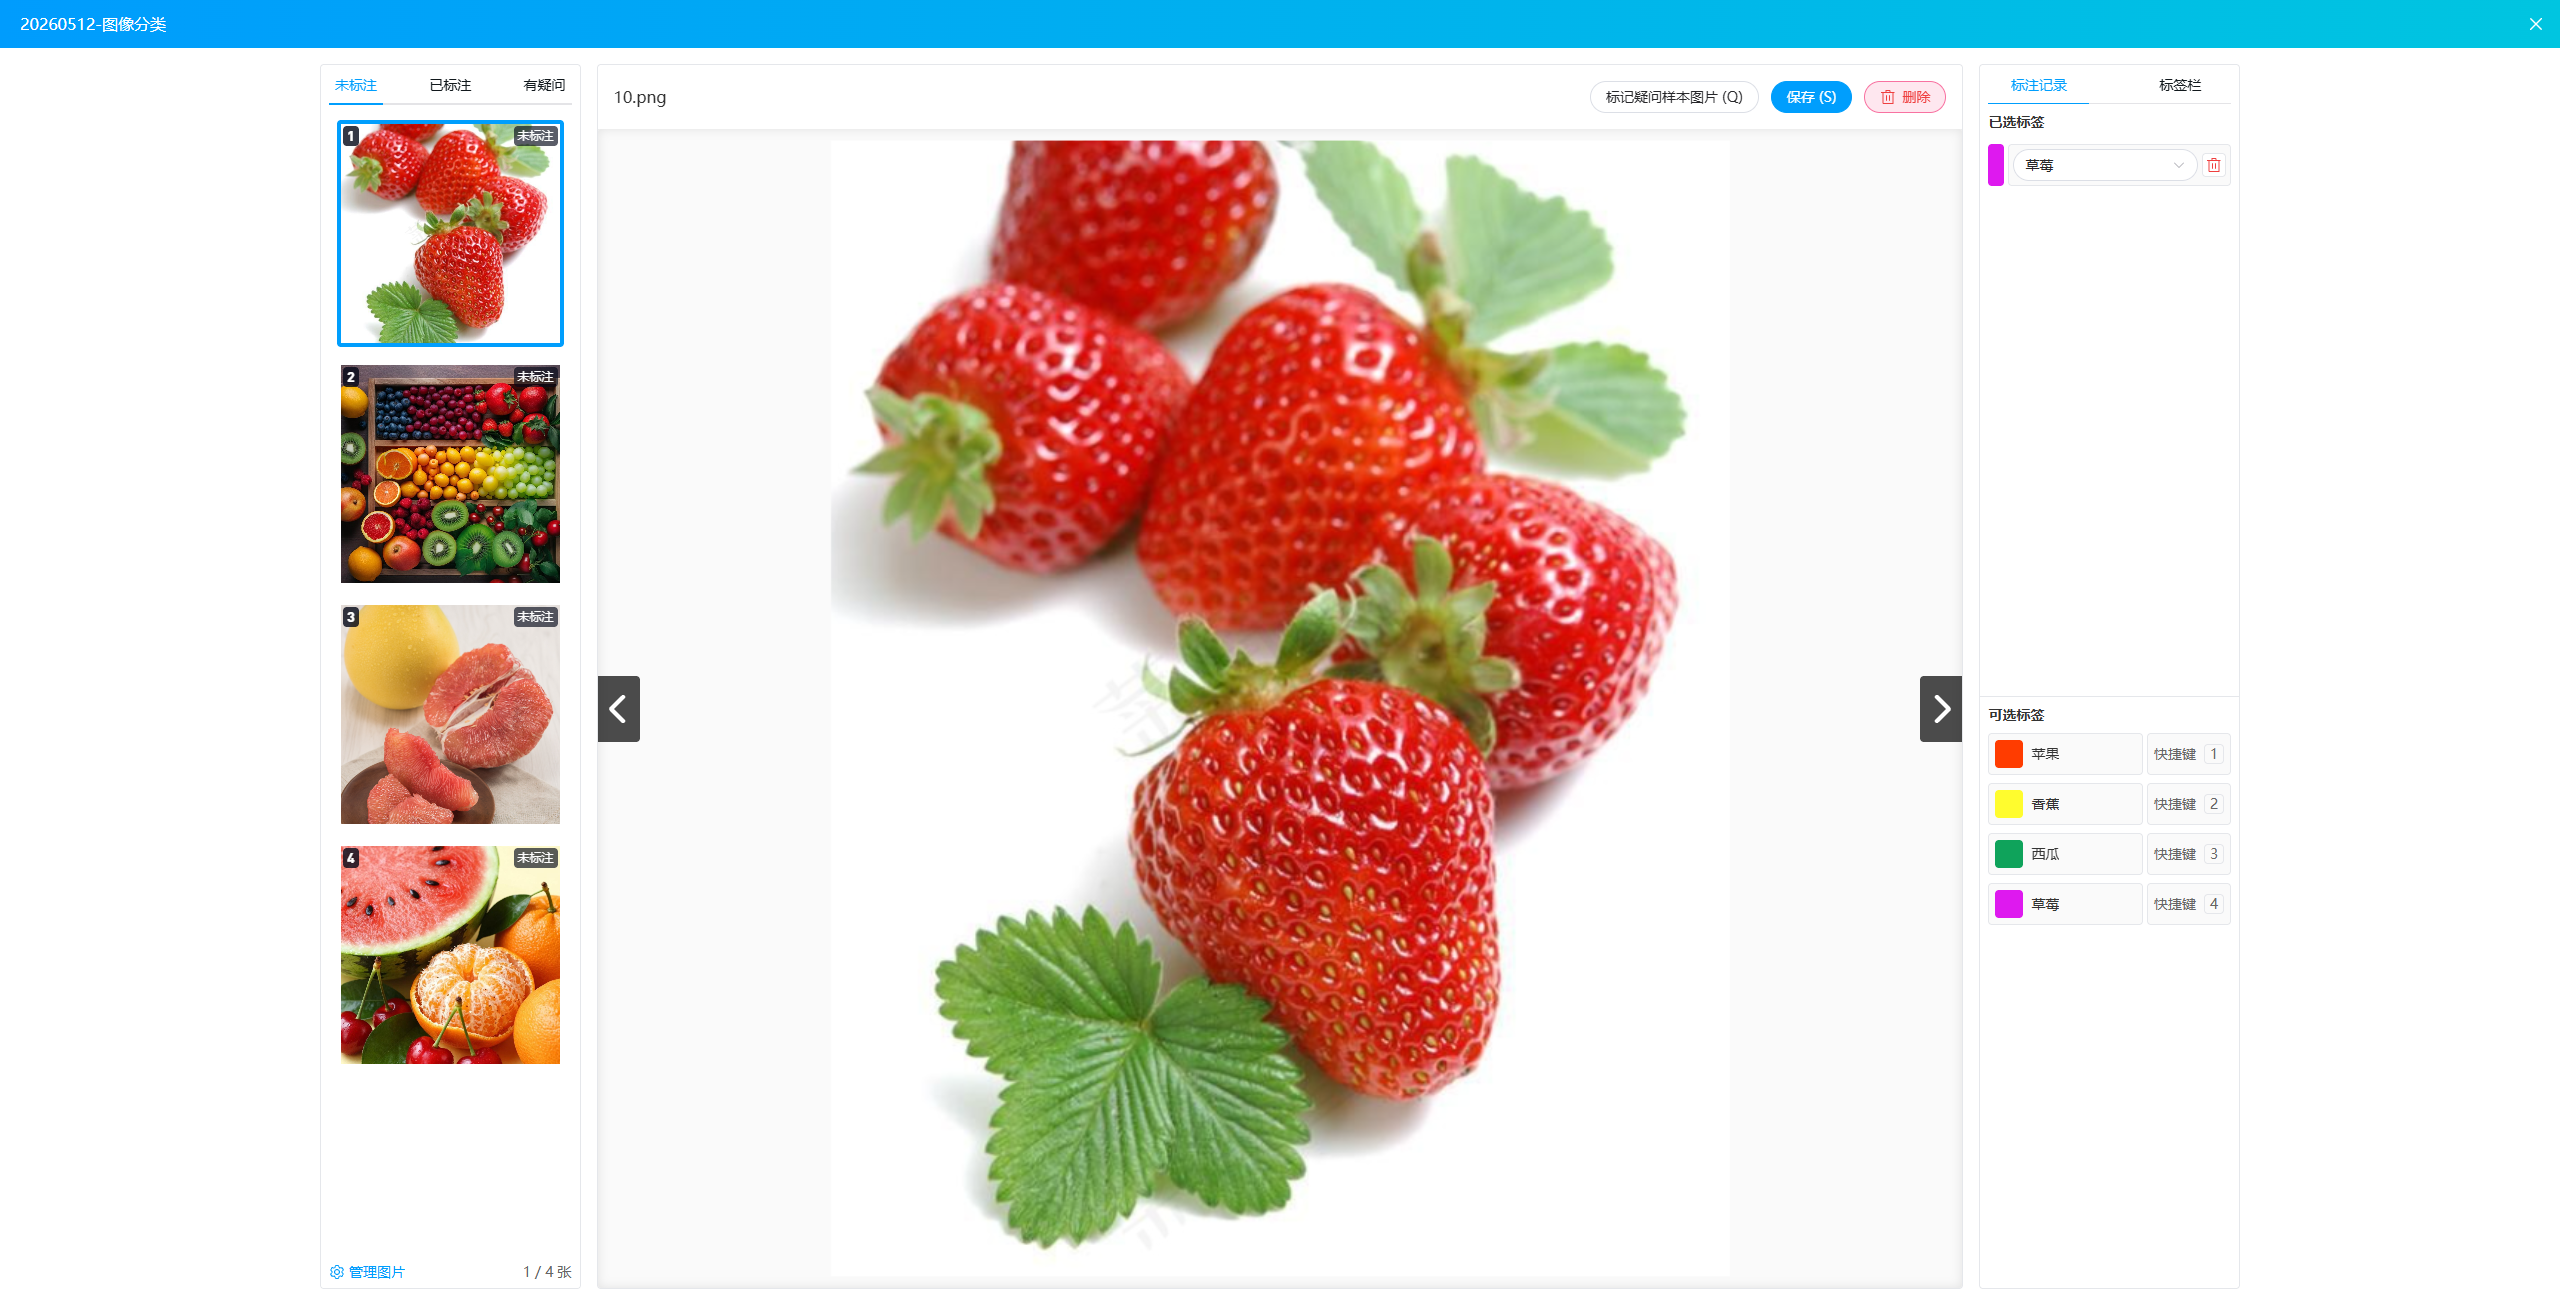
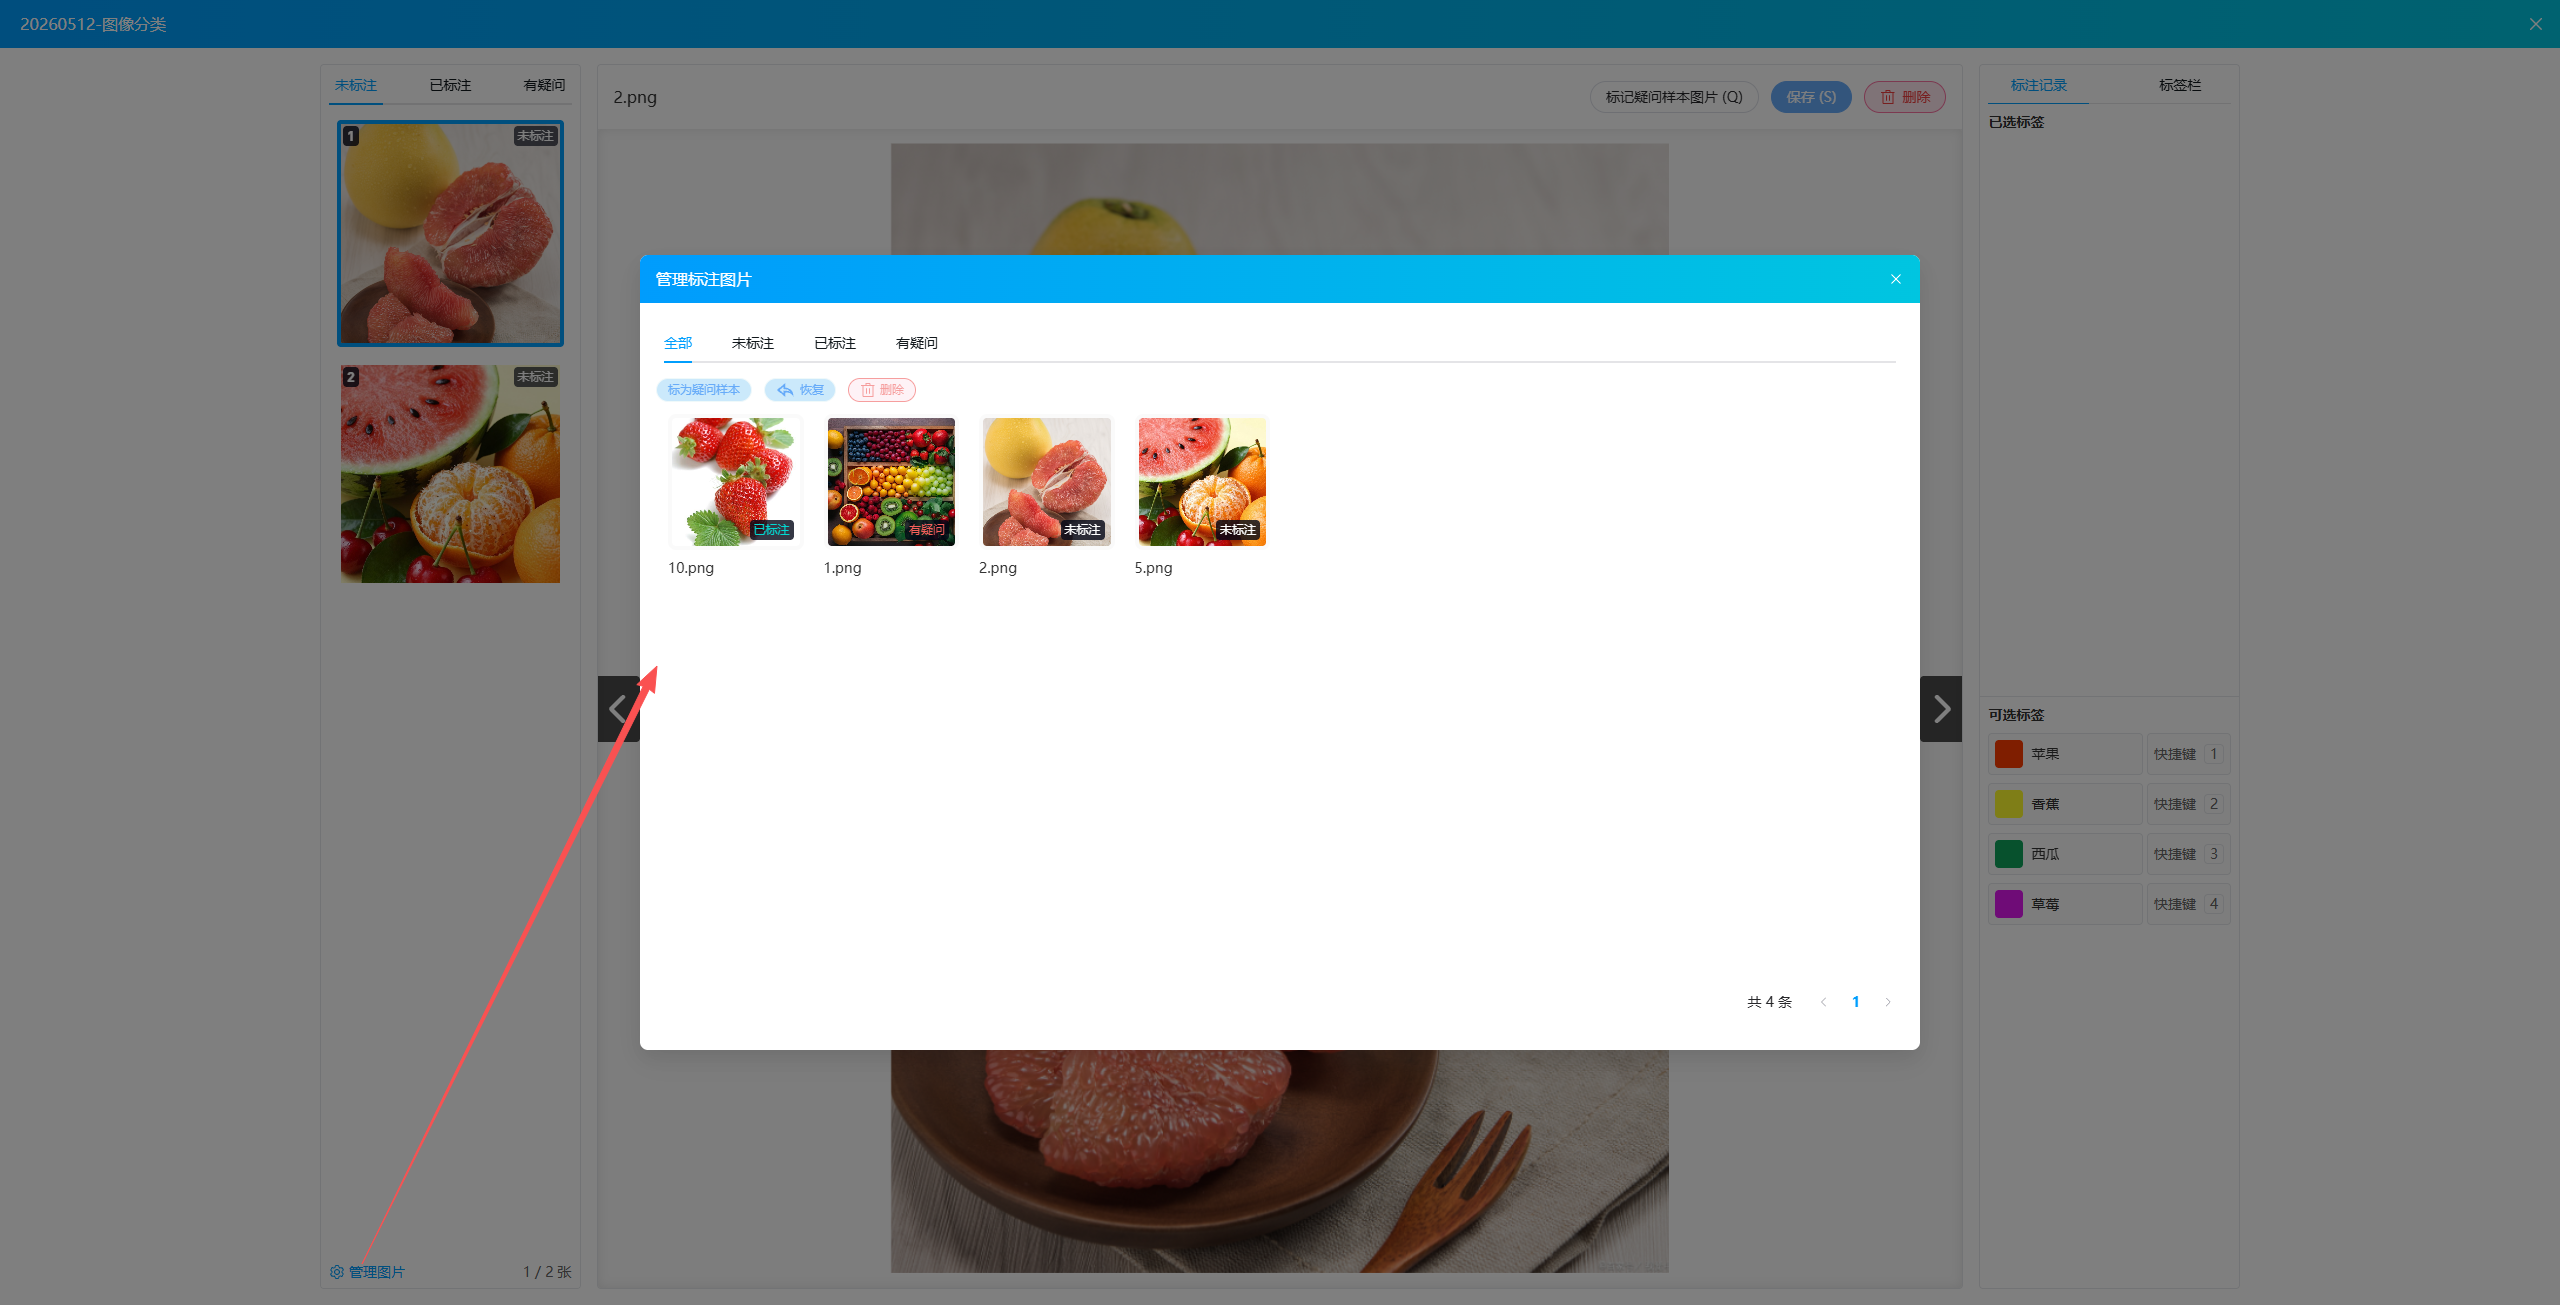
- Tag Records: Click the
Tag Recordstab to display the selected and available tags for the current image. It supportsChangeandDelete. - Tag Bar: Click the
Tag Bartab to display the list of all current tags. It supportsAdd Tag,Import Tag Group, andExport Tag. - Annotate: Add tags via shortcuts.
- Save: After adding annotation information, click
Saveto save the current settings. - Mark as Doubtful Sample: Click
Mark Doubtful Sample Imageat the top to mark the image as a doubtful image. - Manage Images: Click
Manage Imagesto display a management popup that categorizes all images. It supports managing images, including marking as doubtful, restoring doubtful images, and deleting images.
"Instance Segmentation" Task
Select a subtask and click Annotate to open the annotation popup to perform annotation work.
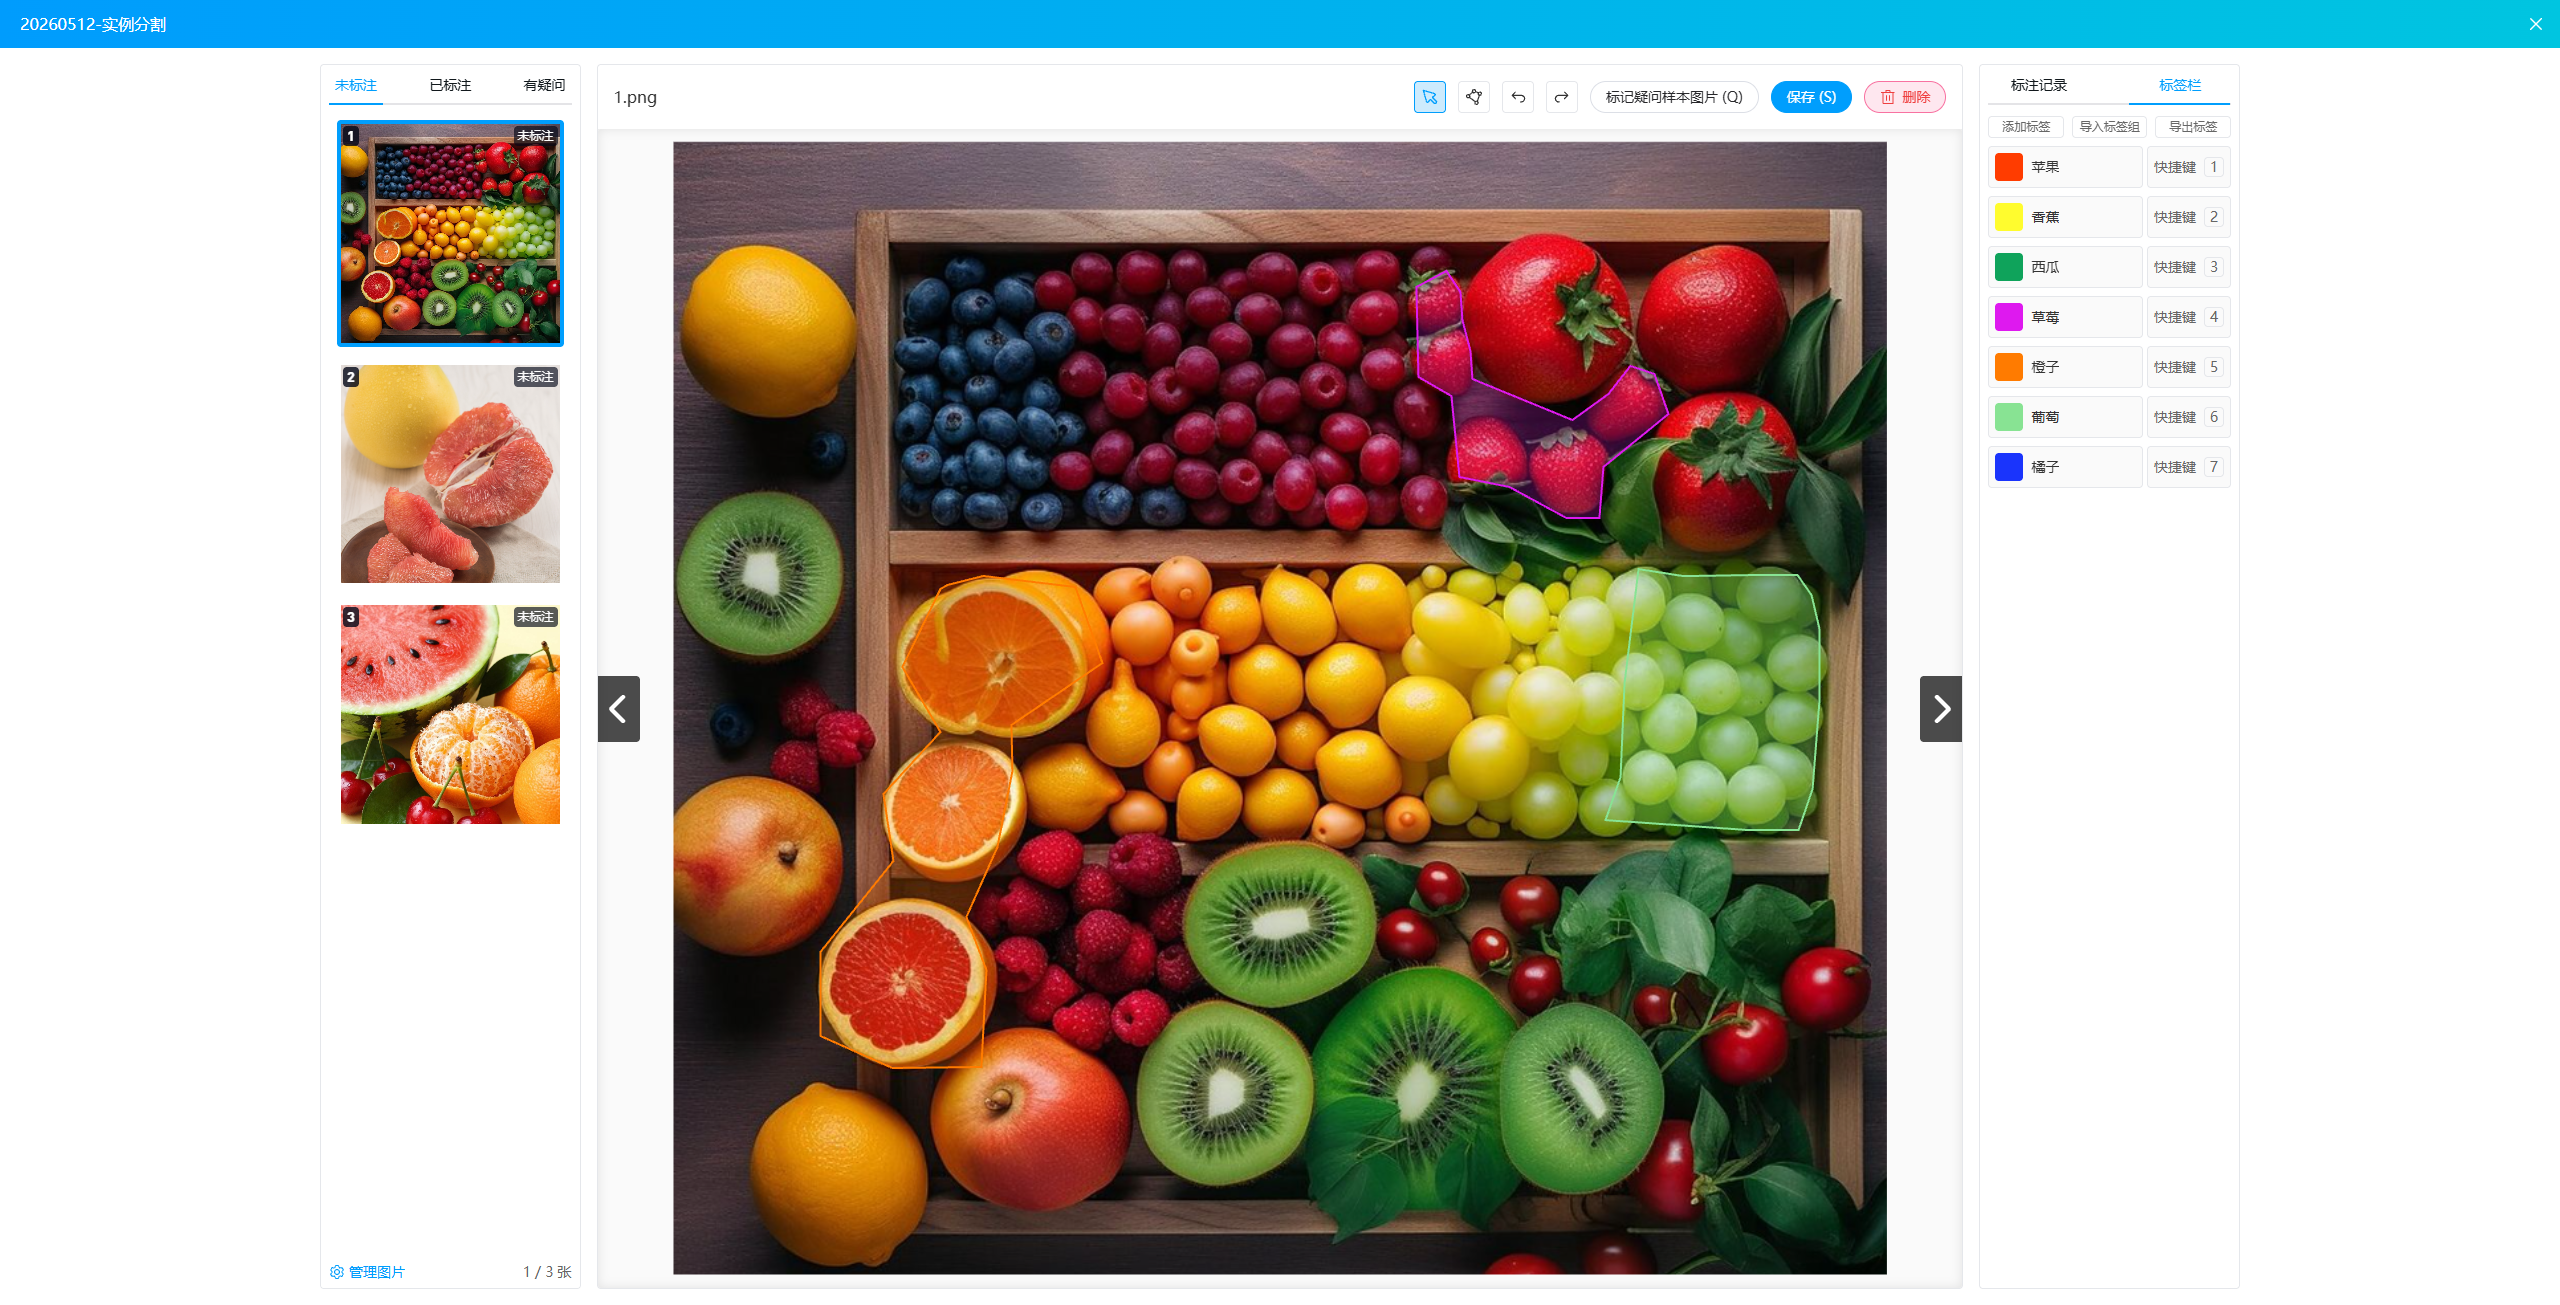
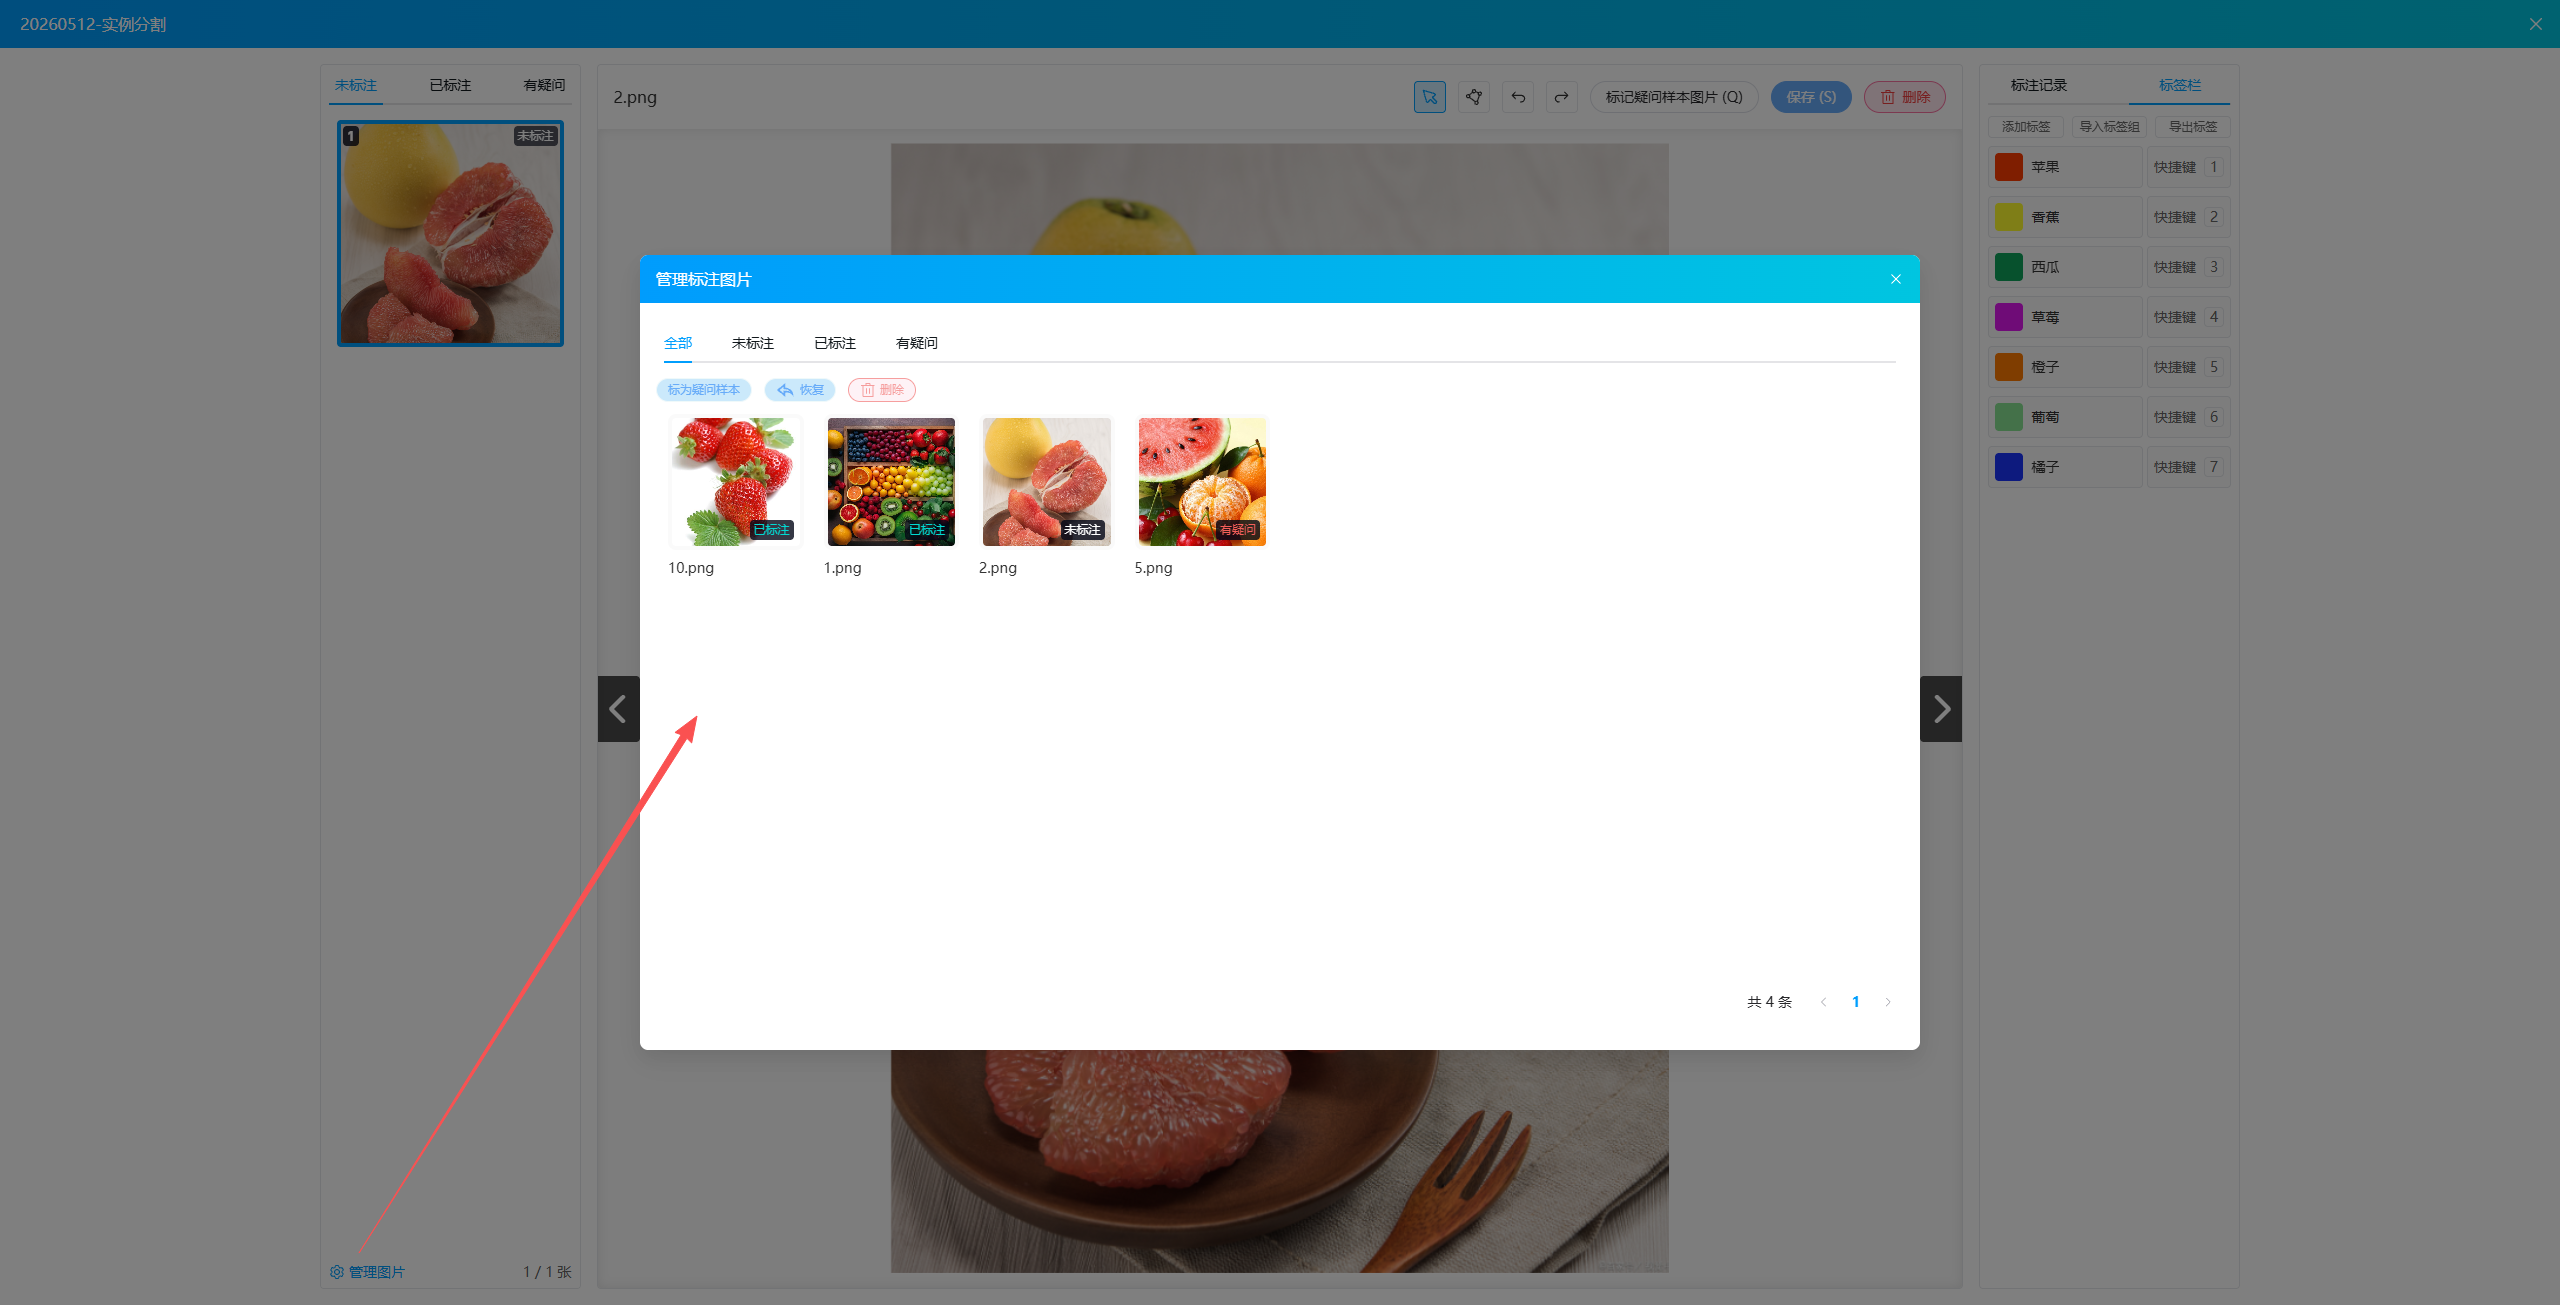
- Annotate: Click the
Polygonicon at the top to draw a region on the canvas, and use shortcuts to add tags. - Change Selection: Click the
Selecticon at the top to select a bounding box. You can move the selection or change its size, and also delete the selection's annotation information. - Save: After adding annotation information, click
Saveto save the current settings. - Mark as Doubtful Sample: Click
Mark Doubtful Sample Imageat the top to mark the image as a doubtful image. - Tag Records: Click the
Tag Recordstab to view all annotation information for the current image. It supportsLock,Show/Hide,Change, andDelete. - Tag Bar: Click the
Tag Bartab to display the list of all current tags. It supportsAdd Tag,Import Tag Group, andExport Tag. - Manage Images: Click
Manage Imagesto display a management popup that categorizes all images. It supports managing images, including marking as doubtful, restoring doubtful images, and deleting images.
Download Task
Click Download on an annotation task to download the annotation files to your local machine.
Generate Dataset
Supports regular users in generating datasets from their completed annotation tasks. Click Generate Dataset and click Confirm in the prompt popup to generate a dataset with the same name in the Datasets module.
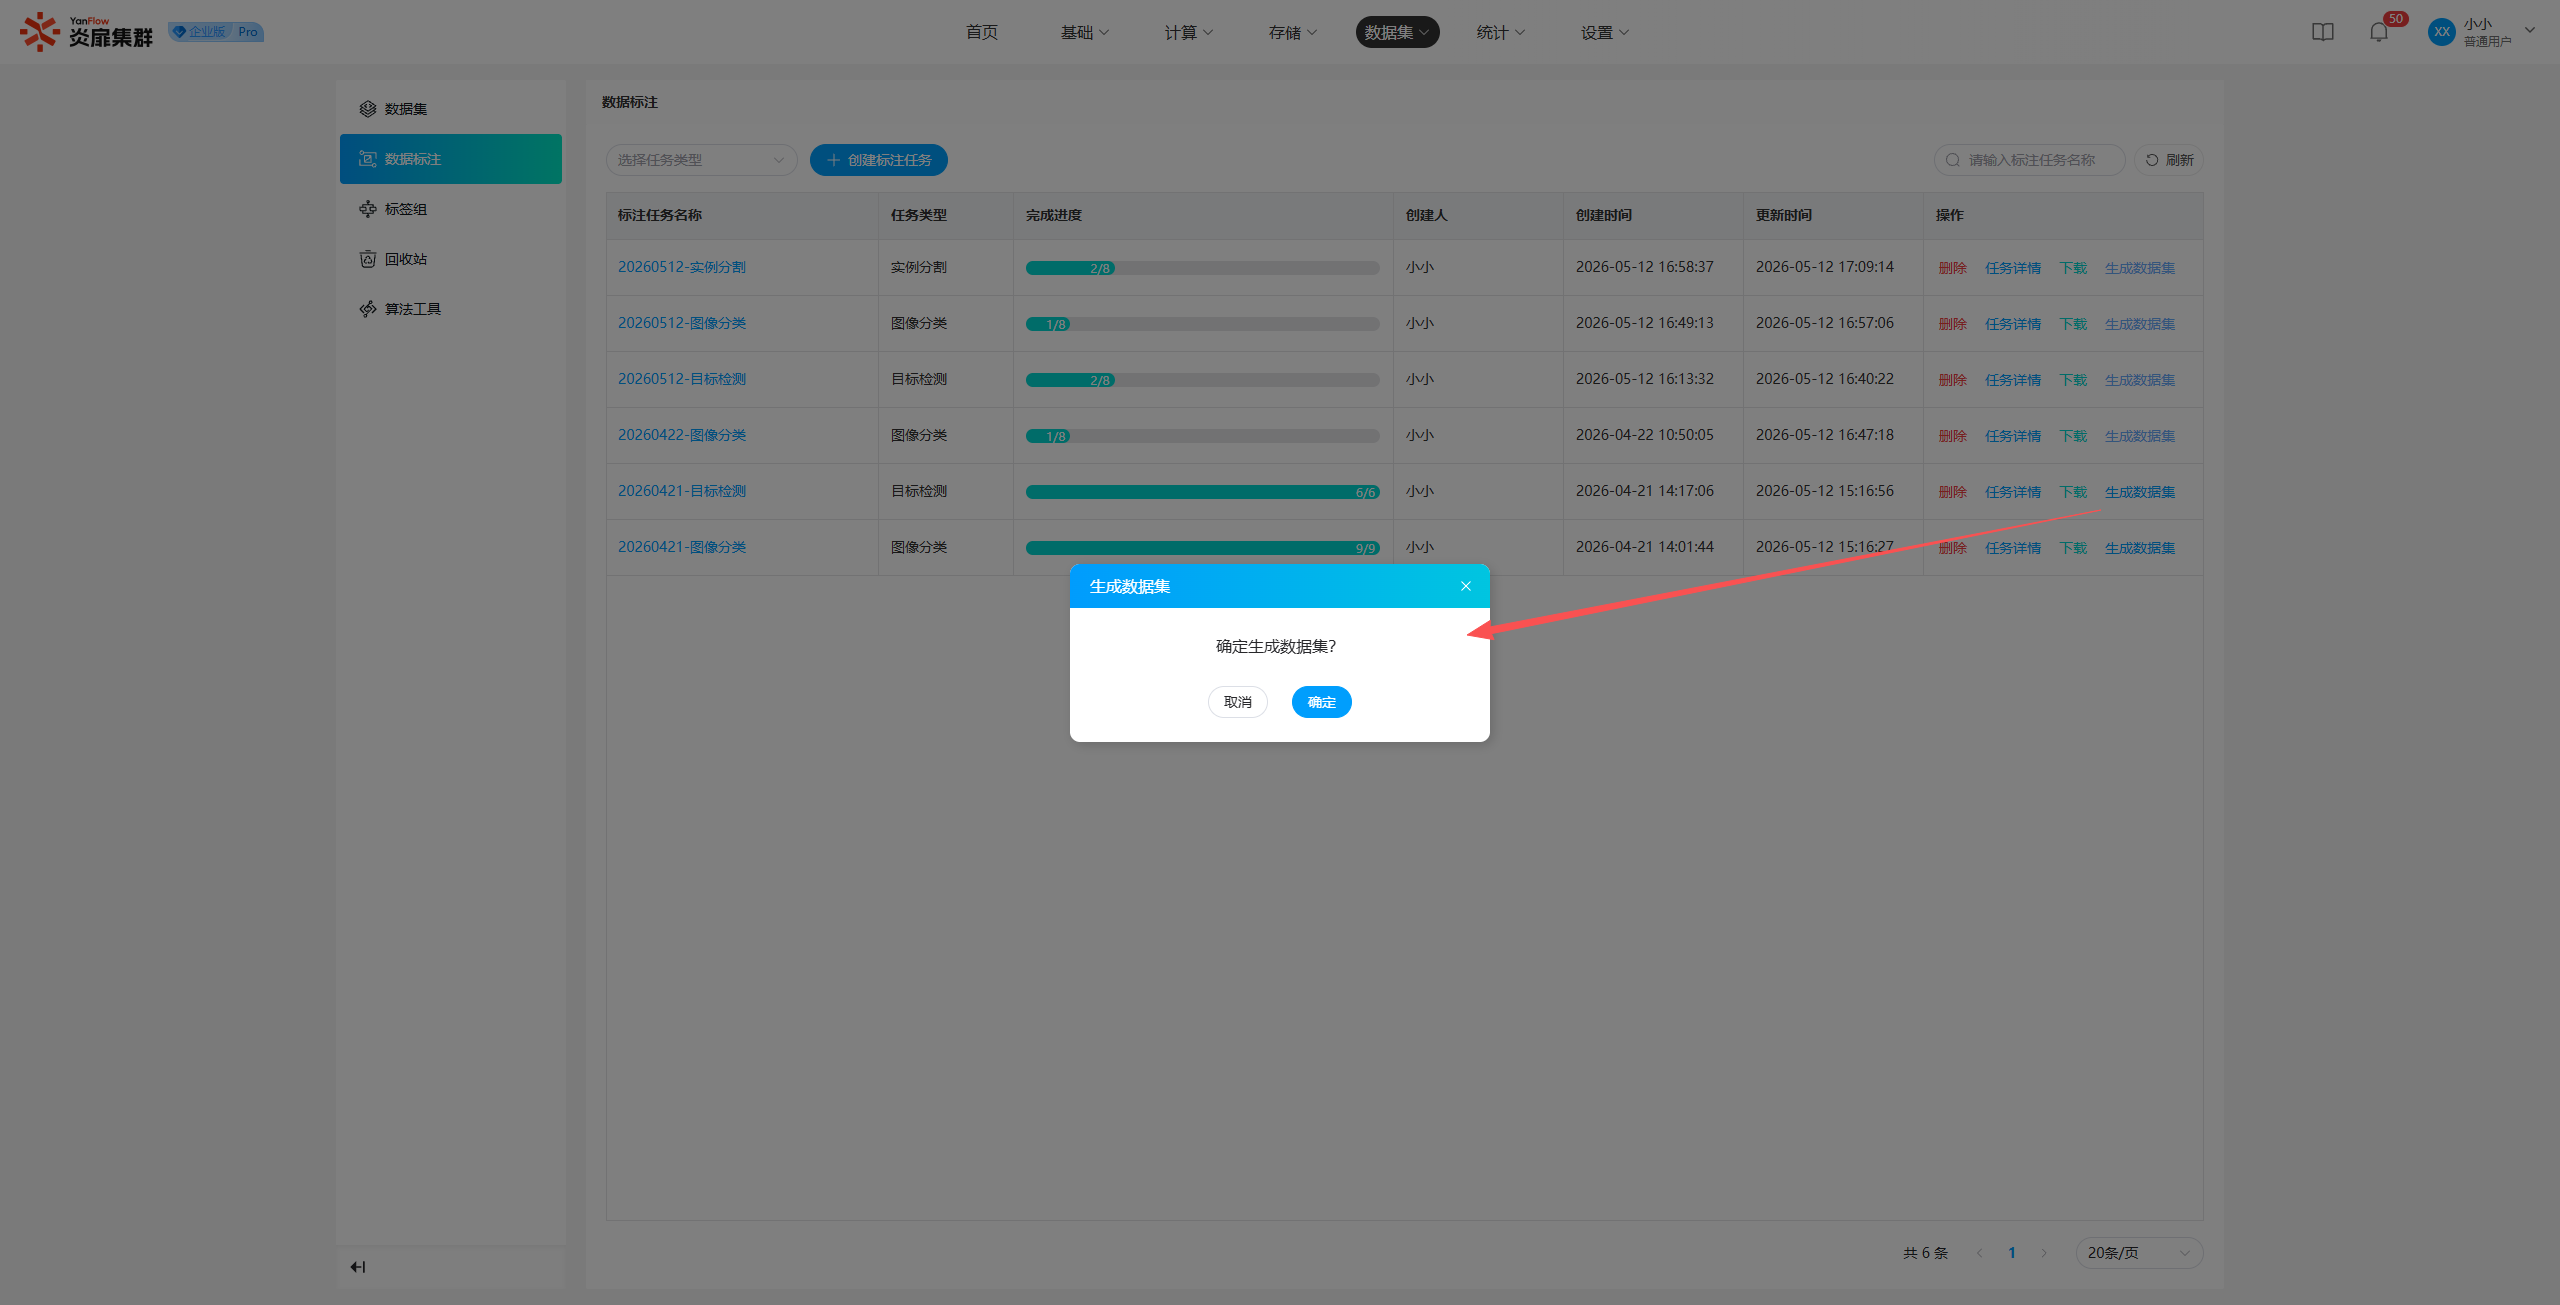
Note: Only annotation tasks created by yourself have the
Generate Datasetpermission.
Delete Task
Click Delete to display a prompt popup. Click Confirm to delete the task.
Note: Only annotation tasks created by yourself have the
Deletepermission.
Tag Groups
Regular users can create and manage tag groups and the tags within them, making it easy to import and use them quickly when creating annotation tasks.
Tag Group List
Displays all tag groups created by the user. Support for keyword search via image or pre-installed environment is provided.
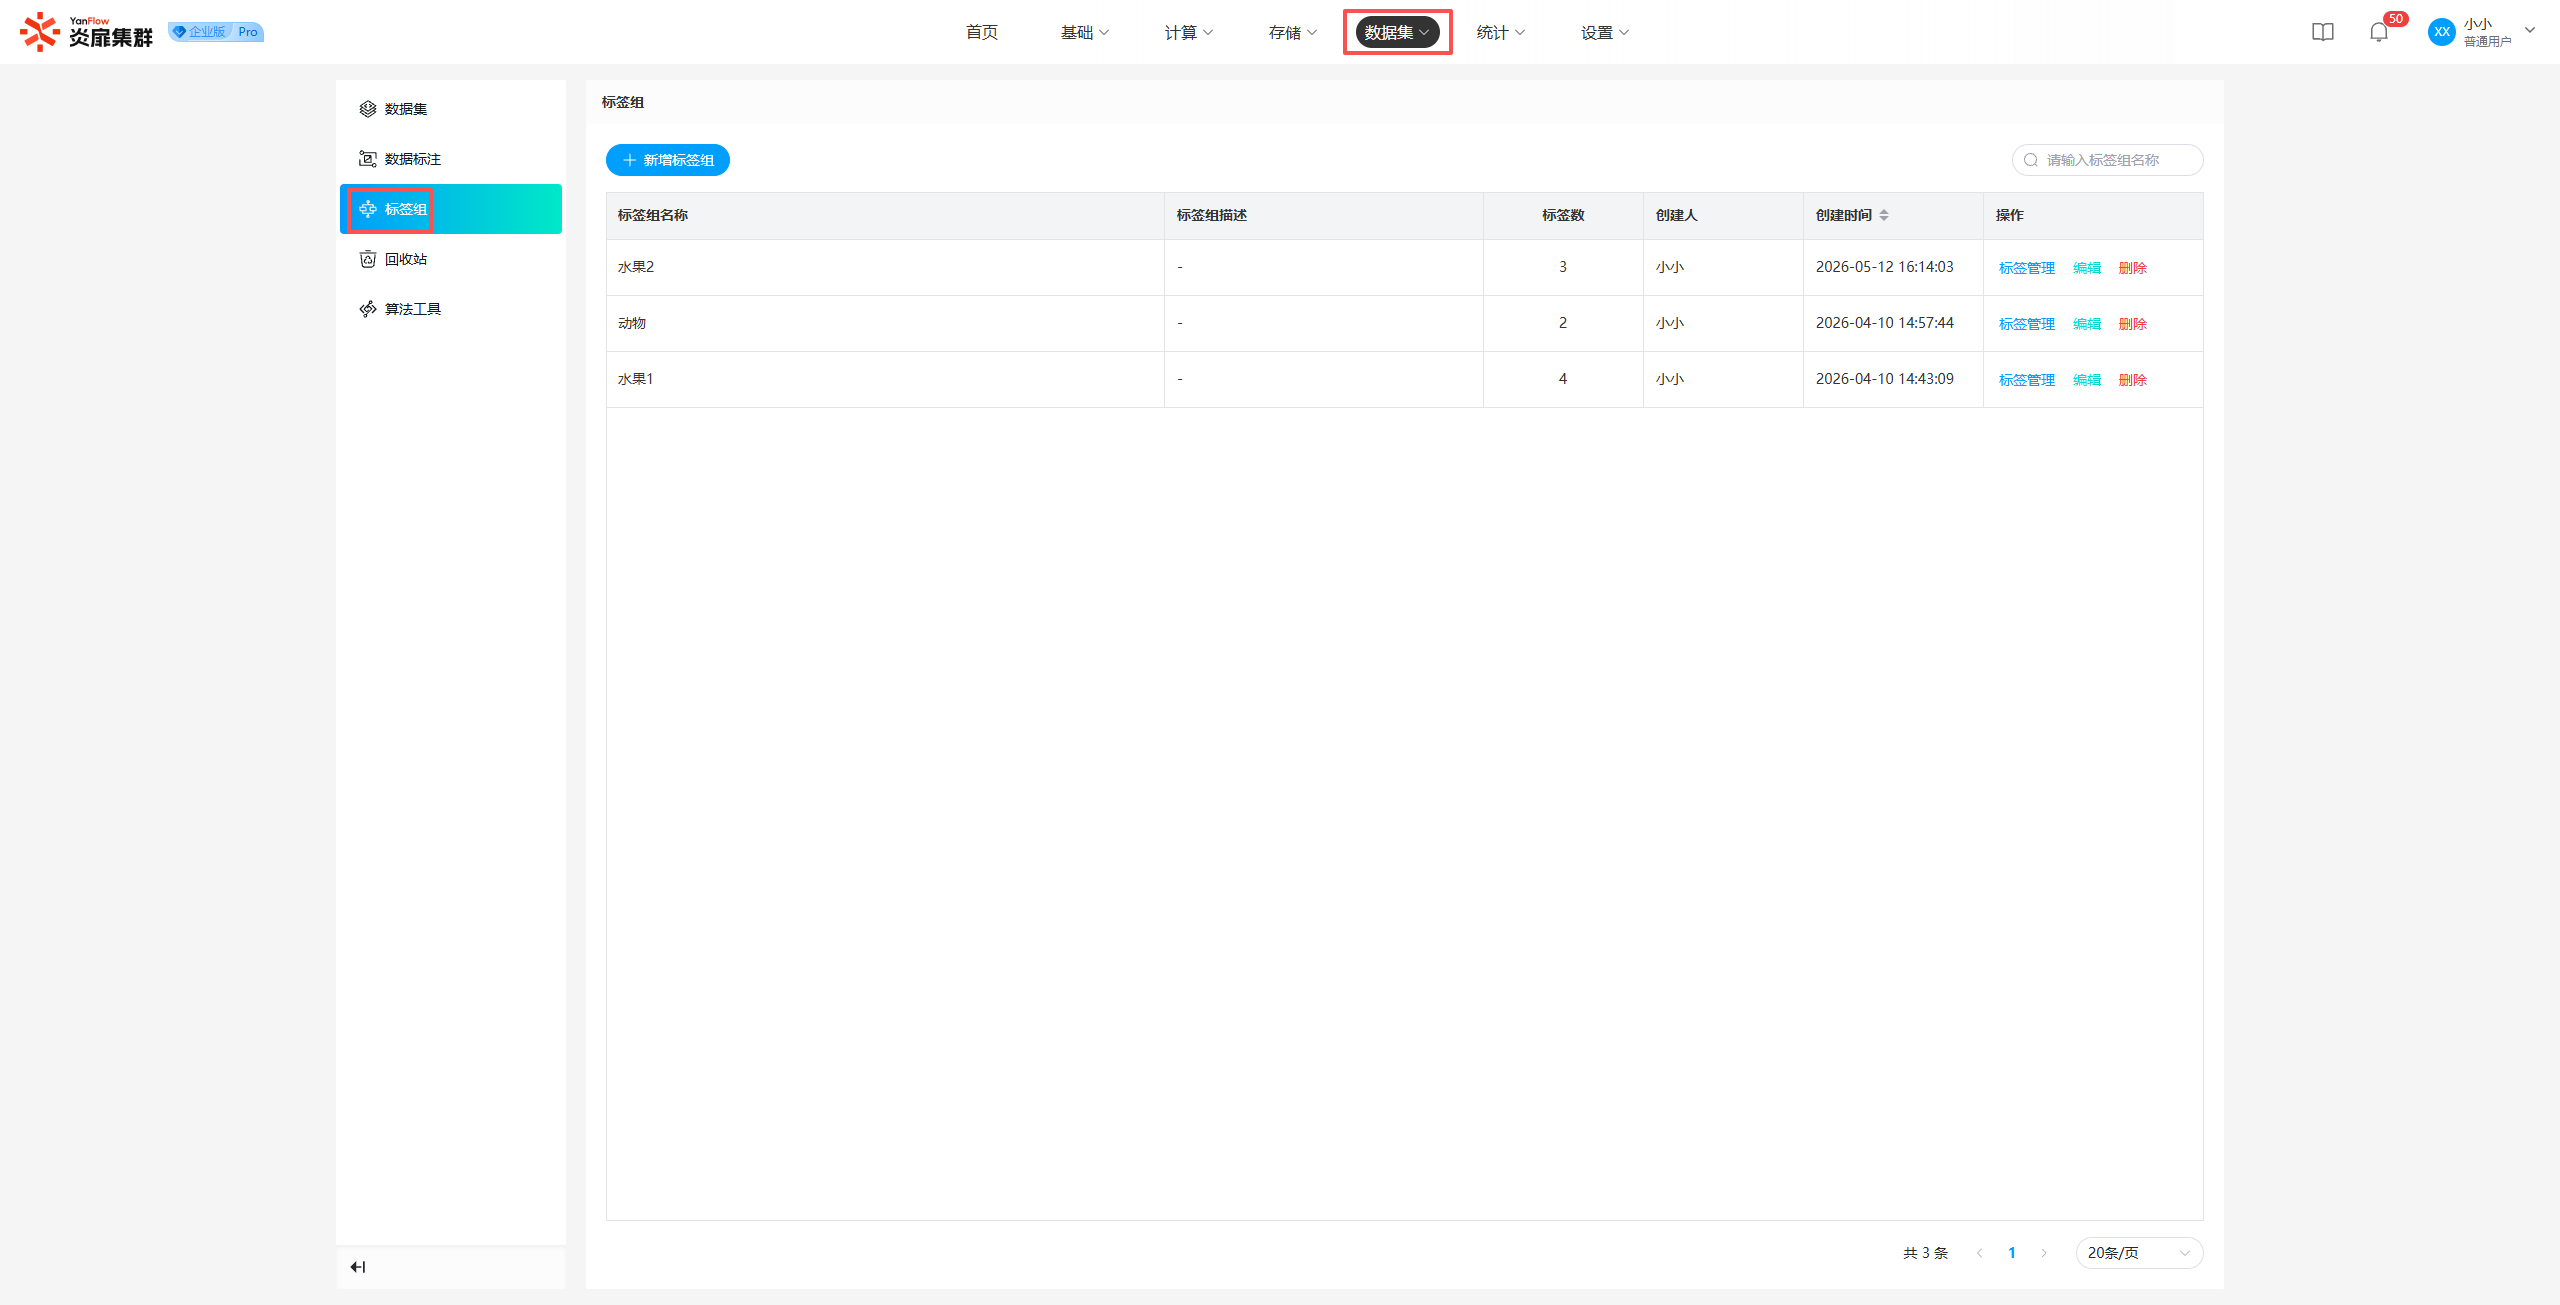
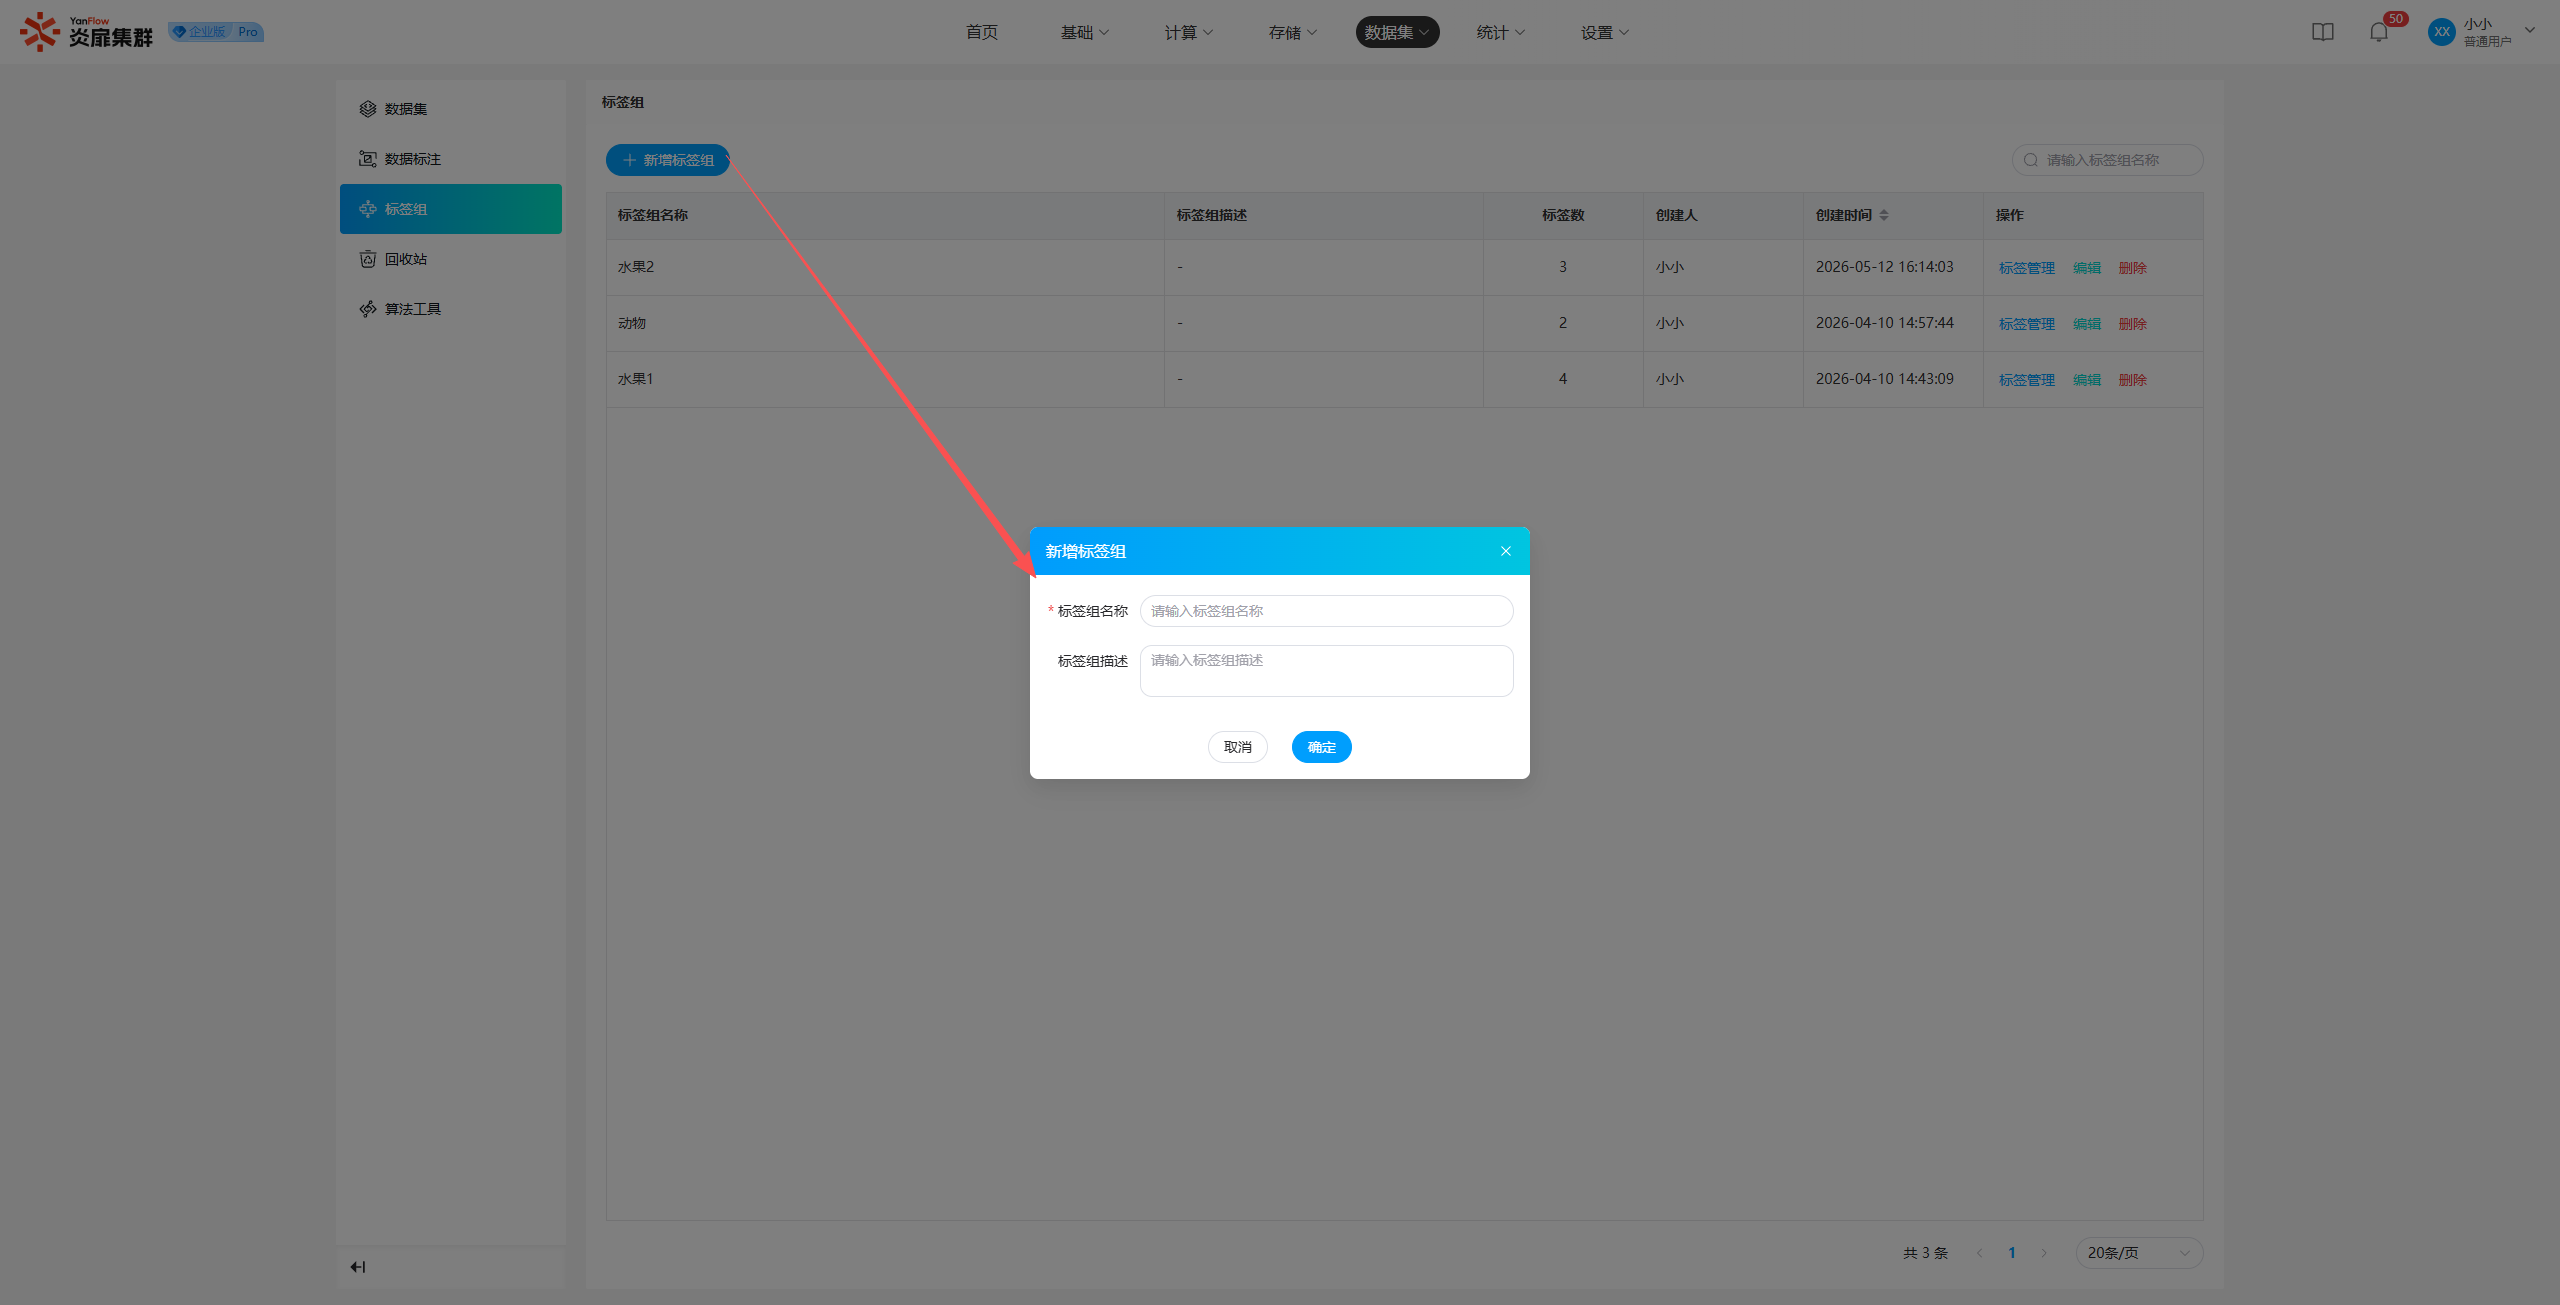
Add New Tag Group
Click Add New Tag Group to display the creation popup. Set the name and description, and click Confirm. If validation passes, a new tag group will be created.
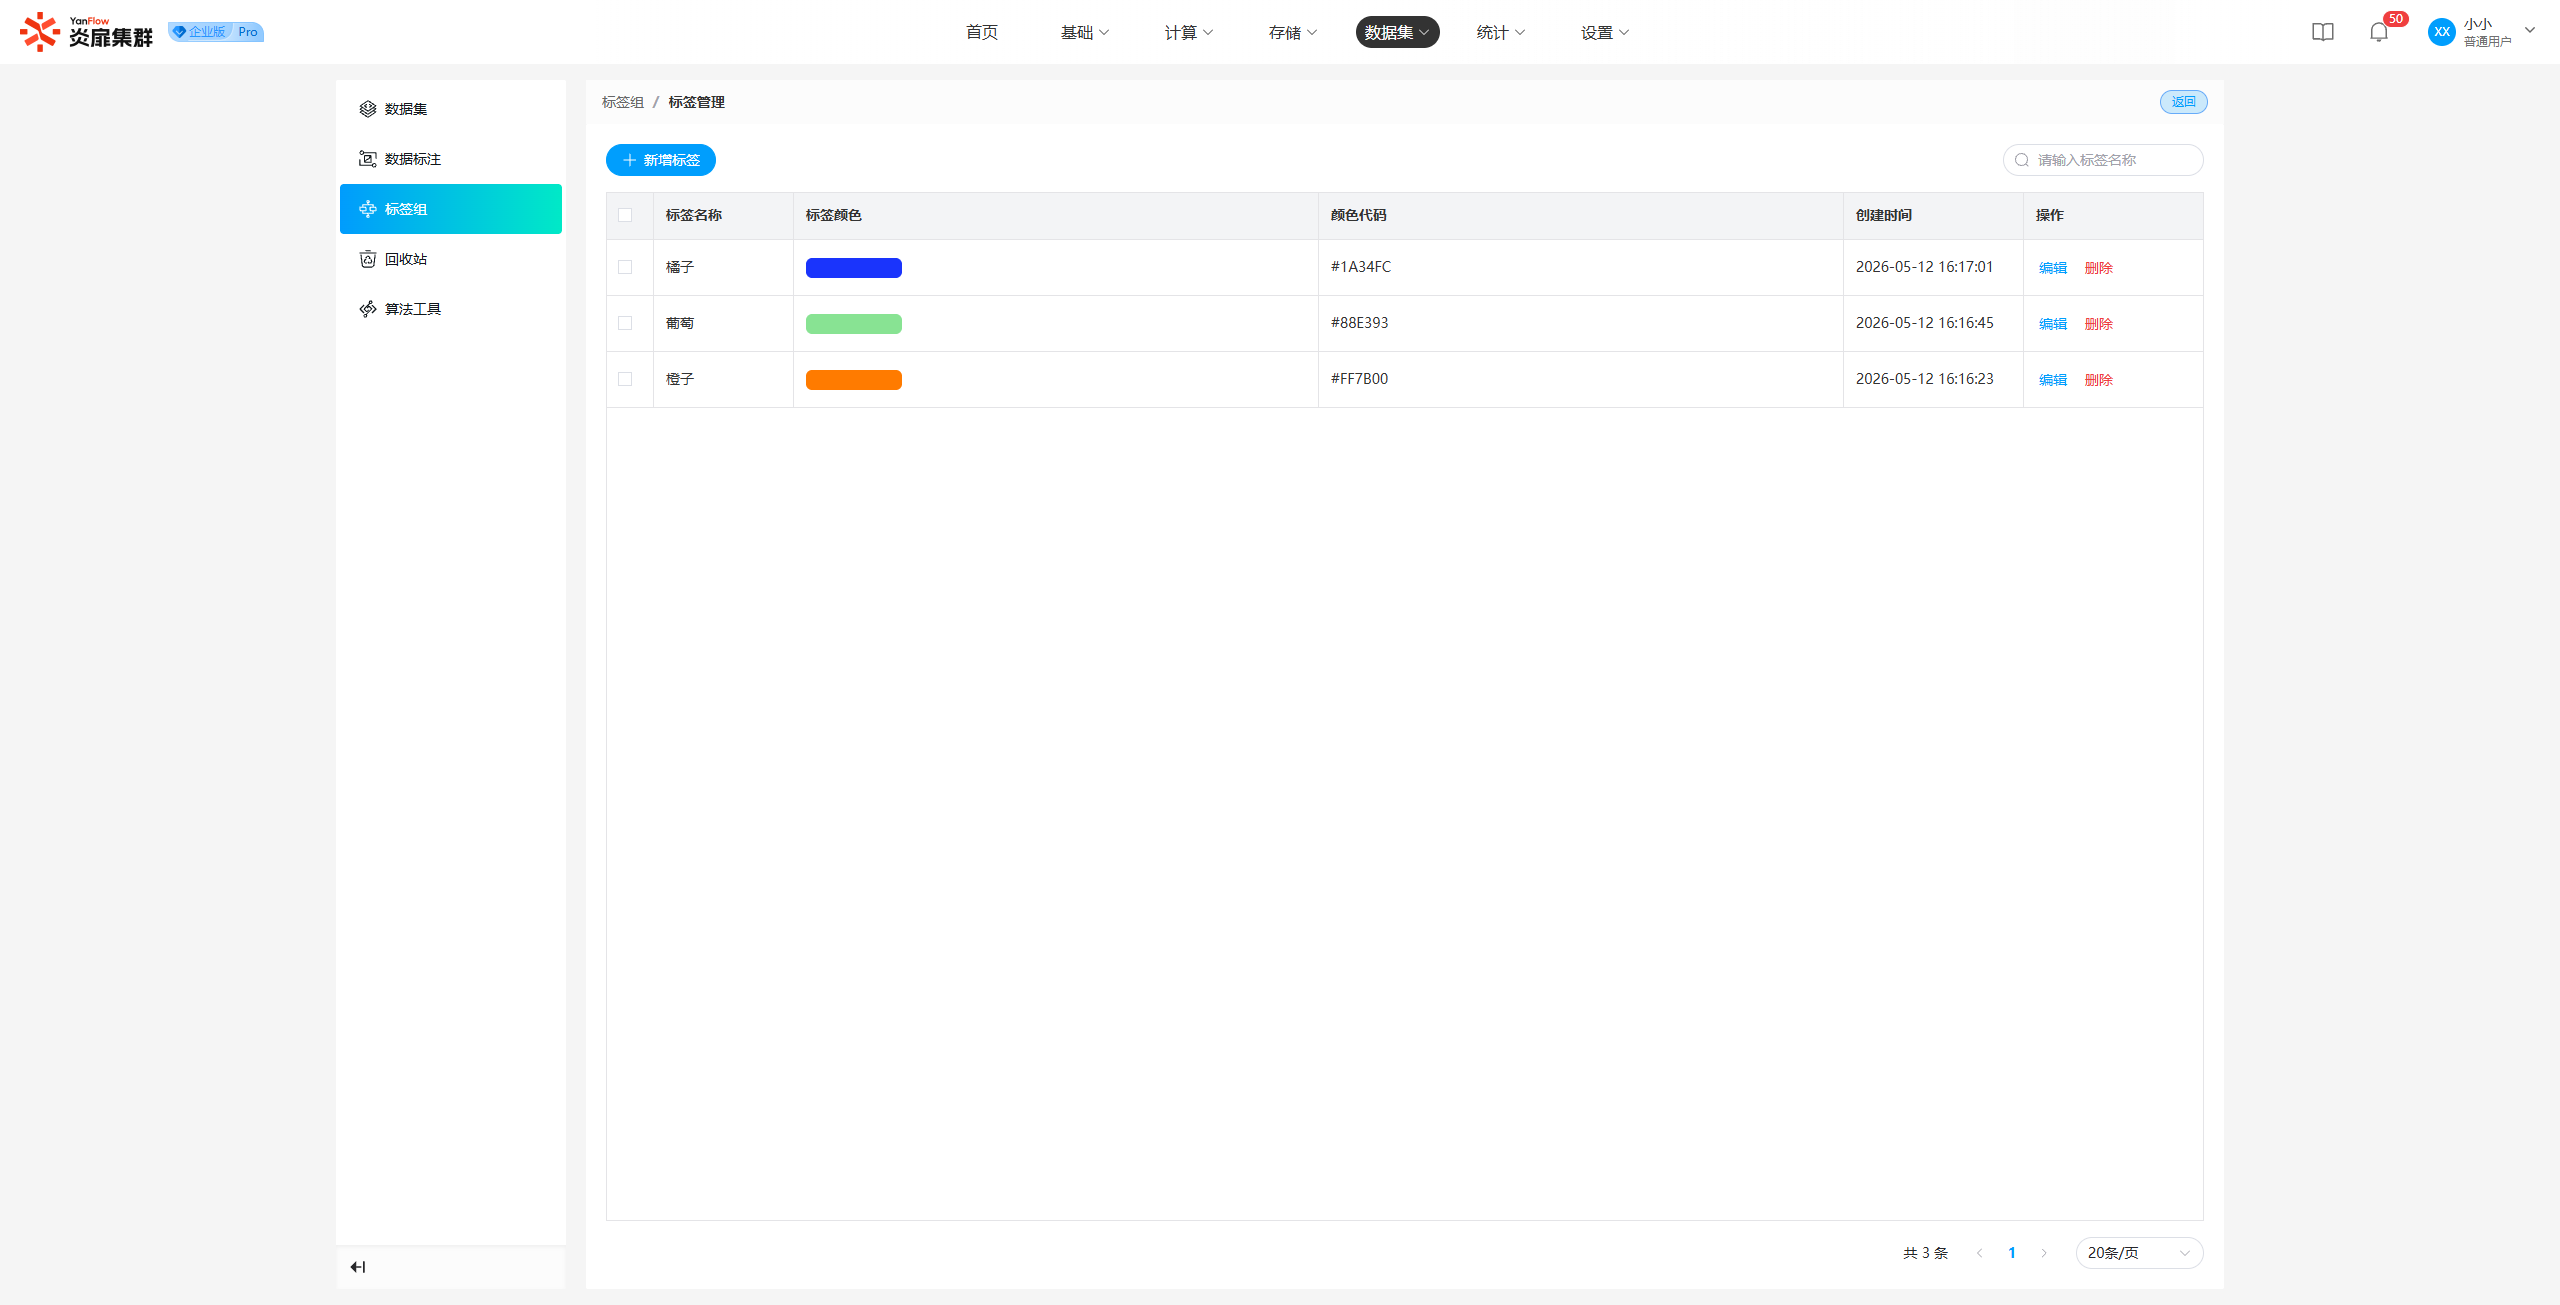
Tag Group Management
Edit Tag Group: Click Edit to display an editing popup. You can modify the name or description. Click Confirm to update the information.
Delete Tag Group: Click Delete to display a prompt popup. Click Confirm to delete the tag group.
Tag Management: Click Tag Management to enter the tag management page, where you can Add, Edit, or Delete tags within the group.
Recycle Bin
The Recycle Bin is used to recover deleted datasets. It supports recovering datasets from the recycle bin or deleting them permanently.
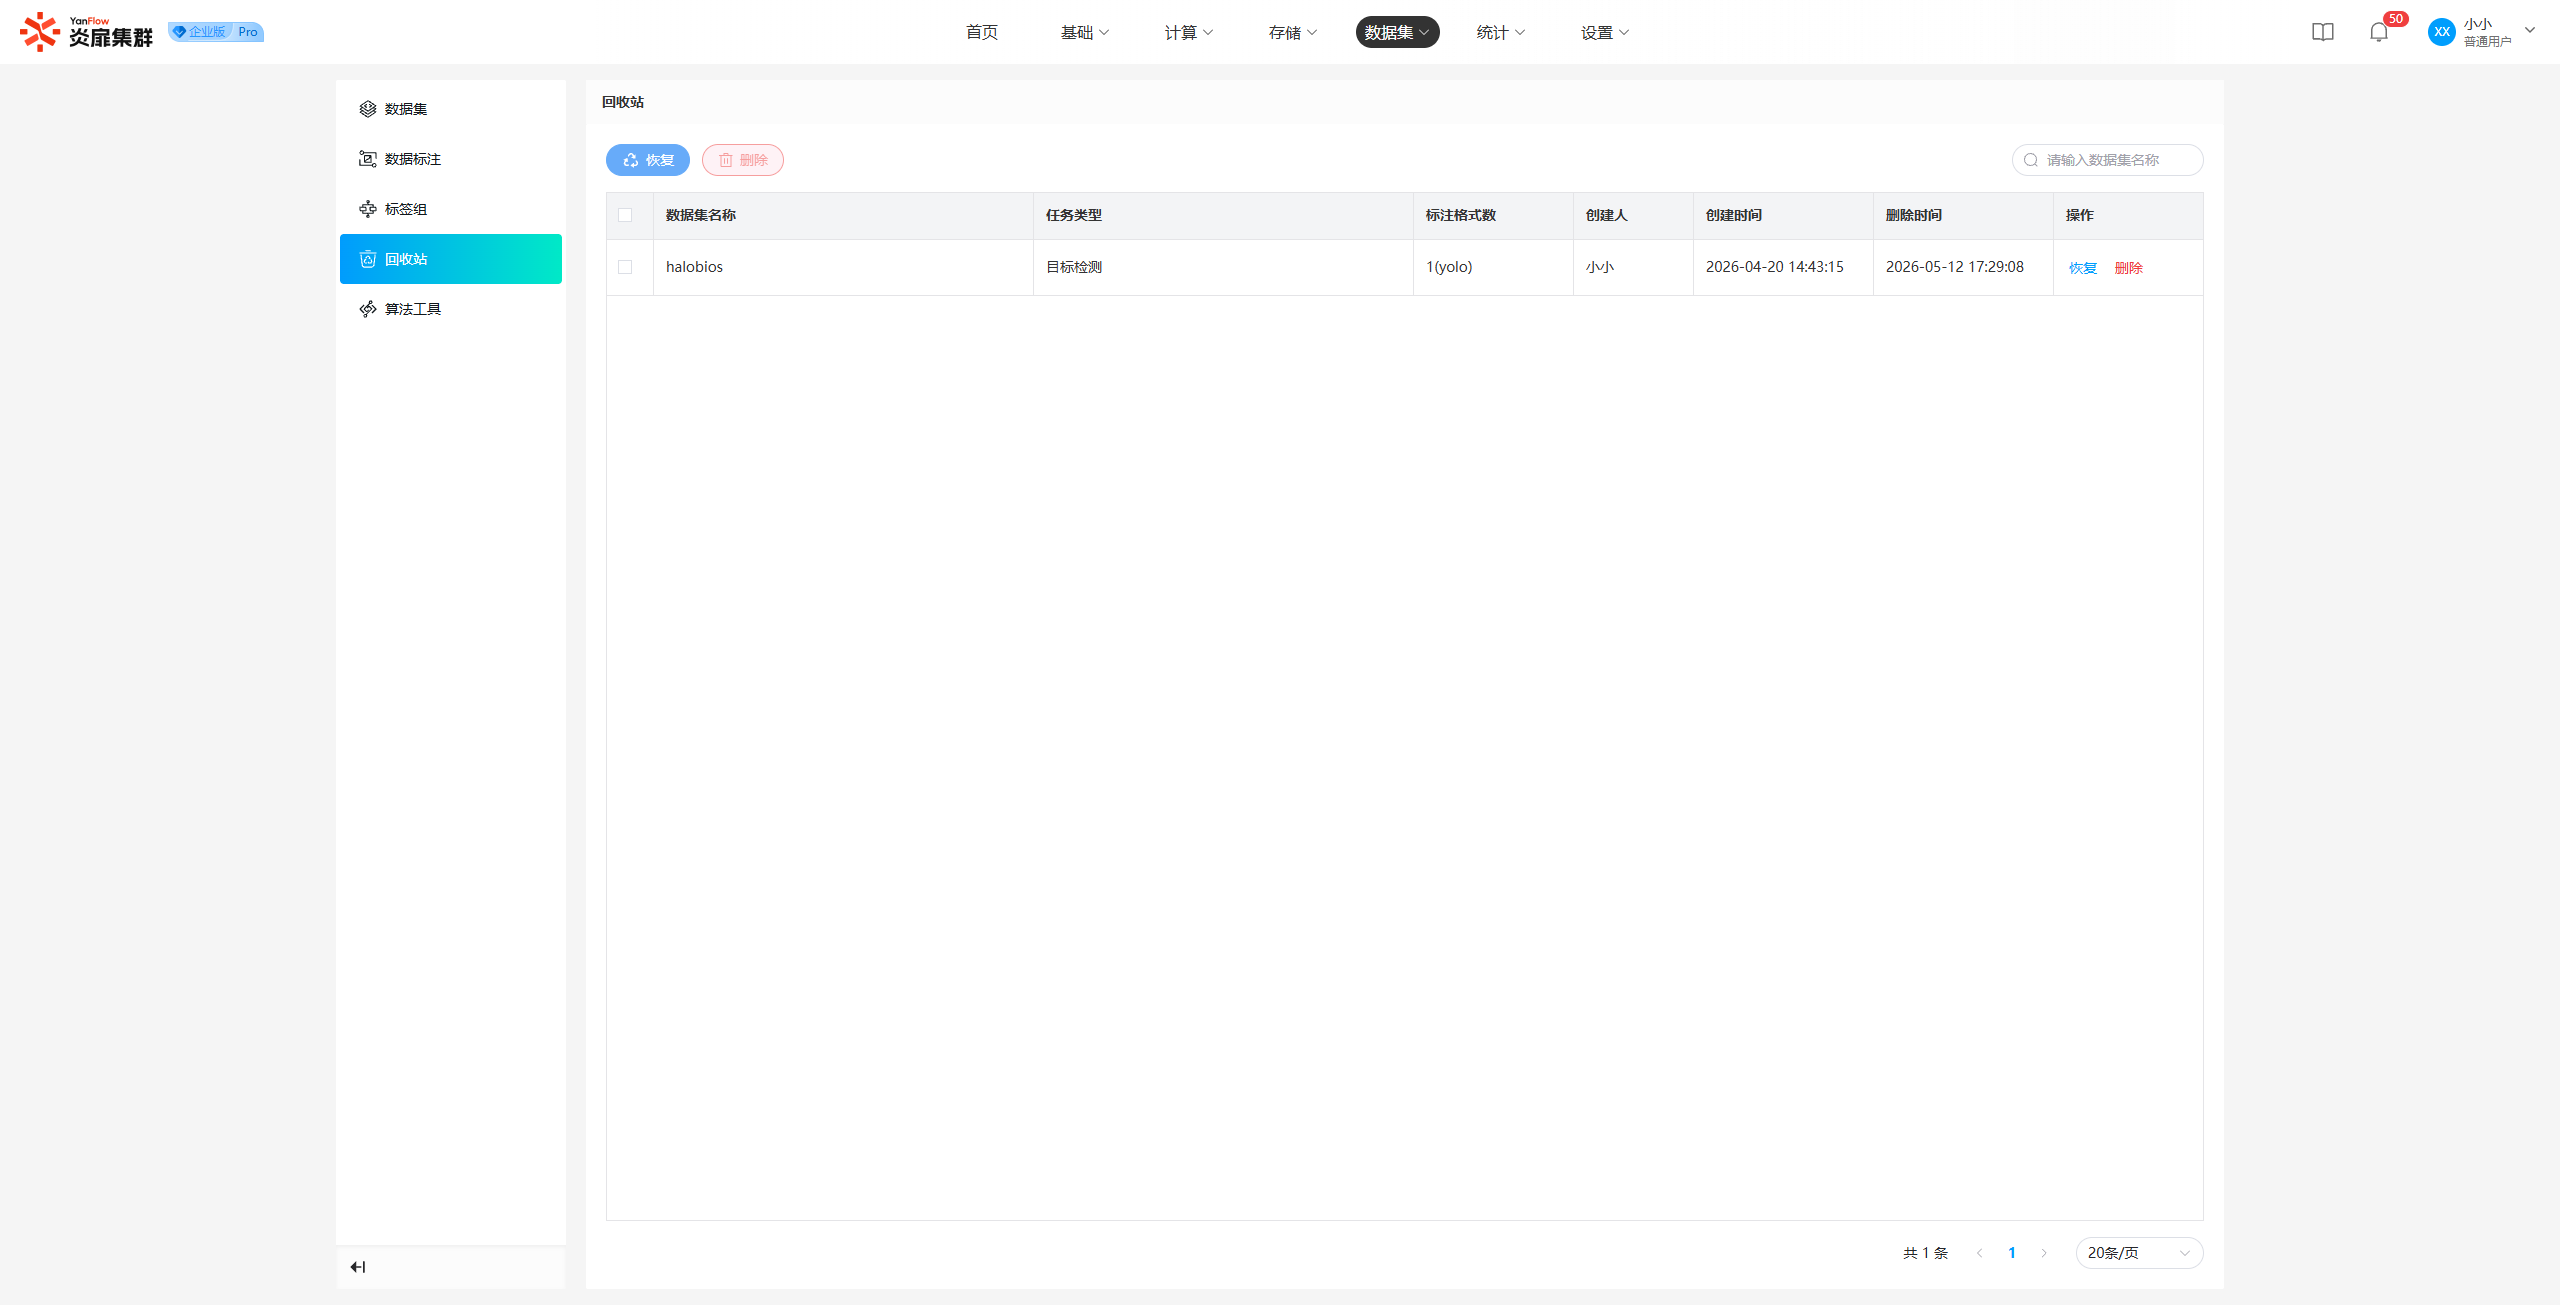
Restore: Click Restore on a dataset or check the datasets and click the Restore button at the top. Click Confirm in the prompt popup to restore the corresponding data from the Recycle Bin to the Datasets module.
Delete
Regular users can view all container node template images in the system. Support for keyword search via tag group name is provided.
Algorithm Tools
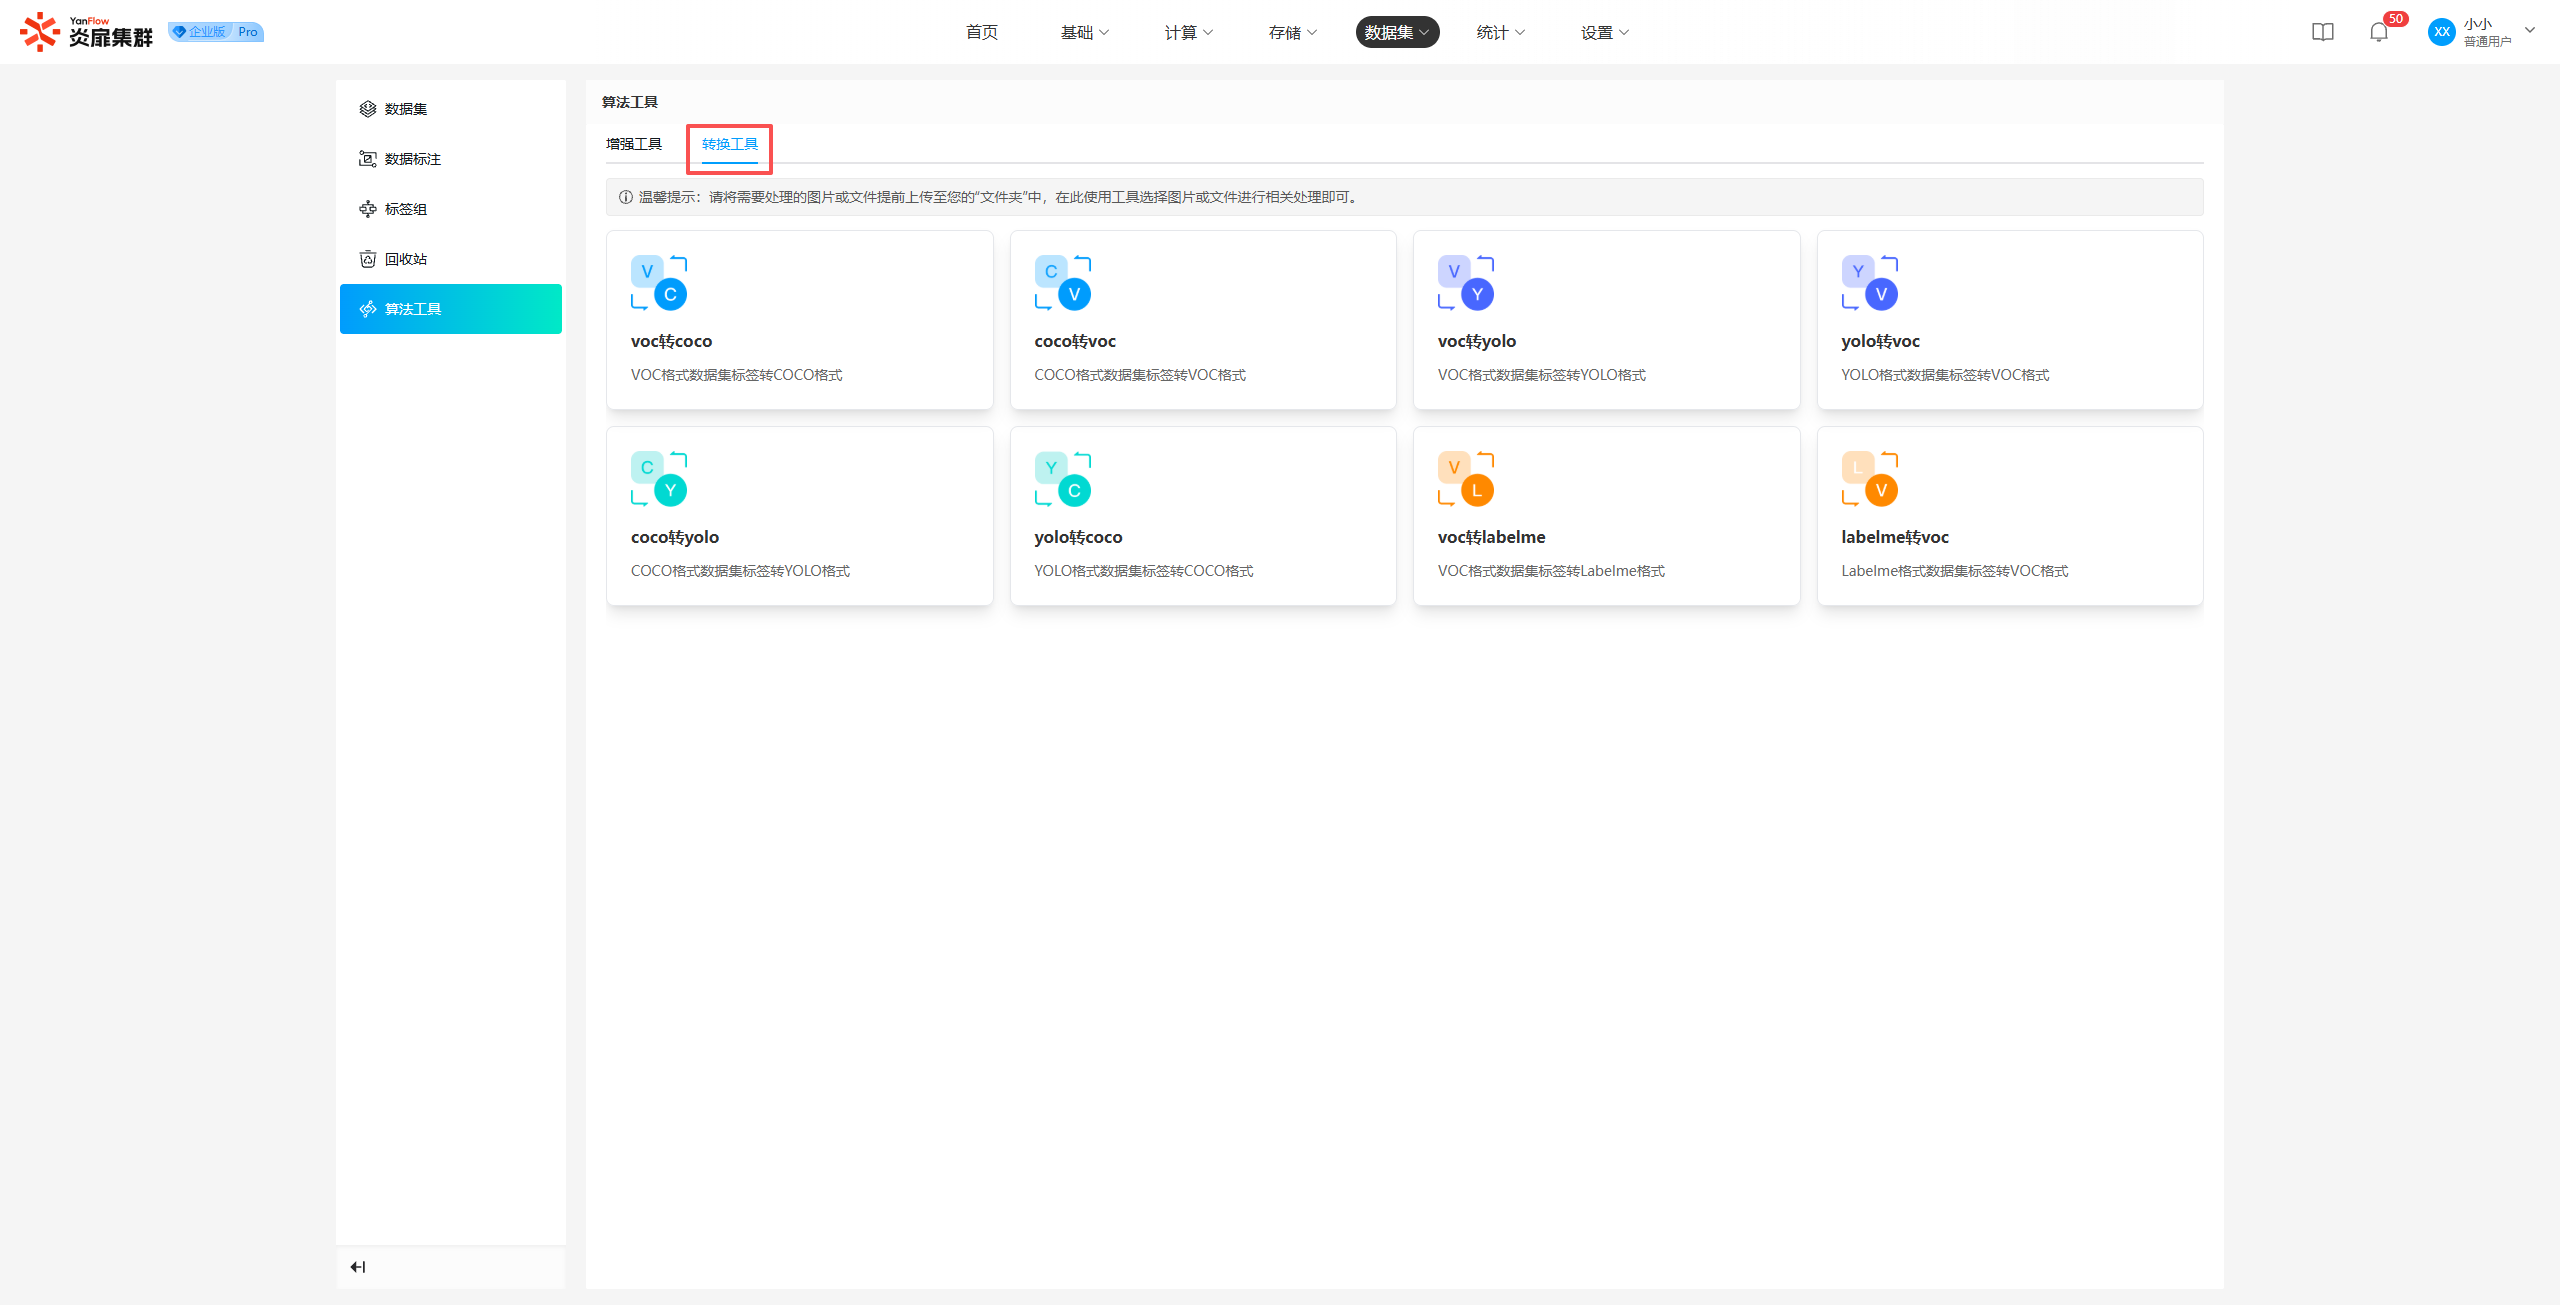
Regular users can view all algorithm tools provided by the system, including Enhancement Tools and Conversion Tools.
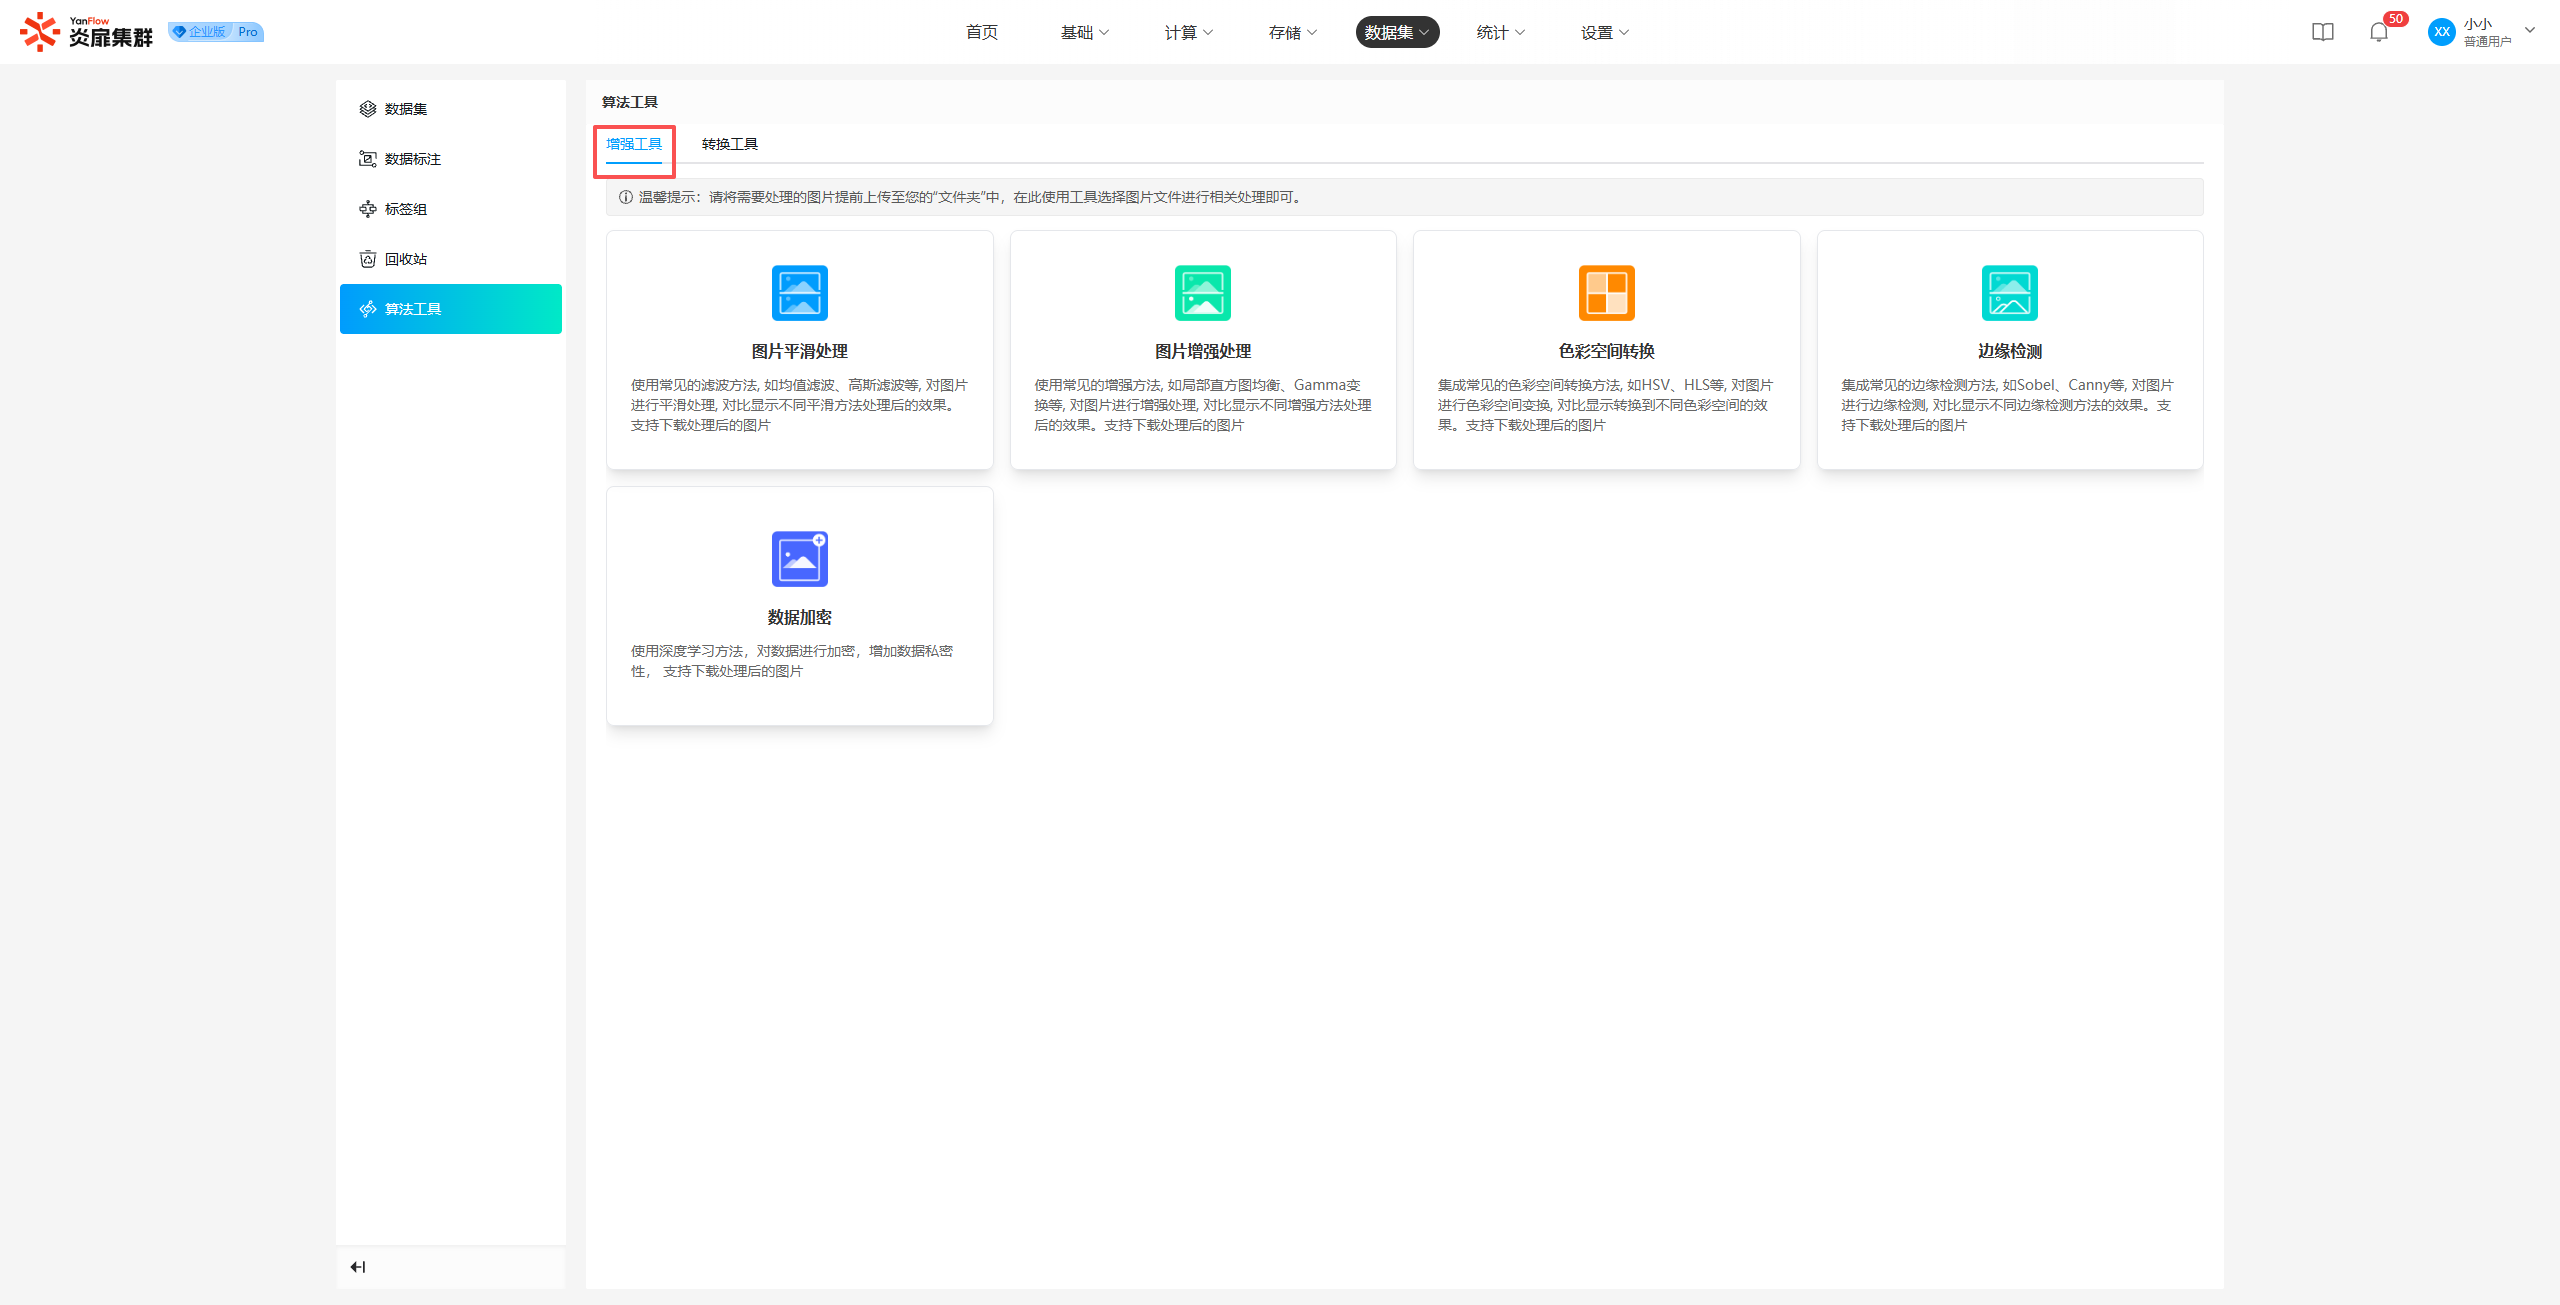
Enhancement Tools
Regular users can use enhancement tools to perform image enhancement processing.
Select an enhancement tool and follow the guided steps to perform operations. Support for downloading processed files to your local machine is provided.
Taking "Image Smoothing" as an example:
Conversion Tools
Regular users can use conversion tools to perform dataset format conversion.
Select a conversion tool and follow the guided steps to perform operations. Support for downloading processed files to your local machine is provided.
Taking "VOC to COCO" as an example:
Statistics
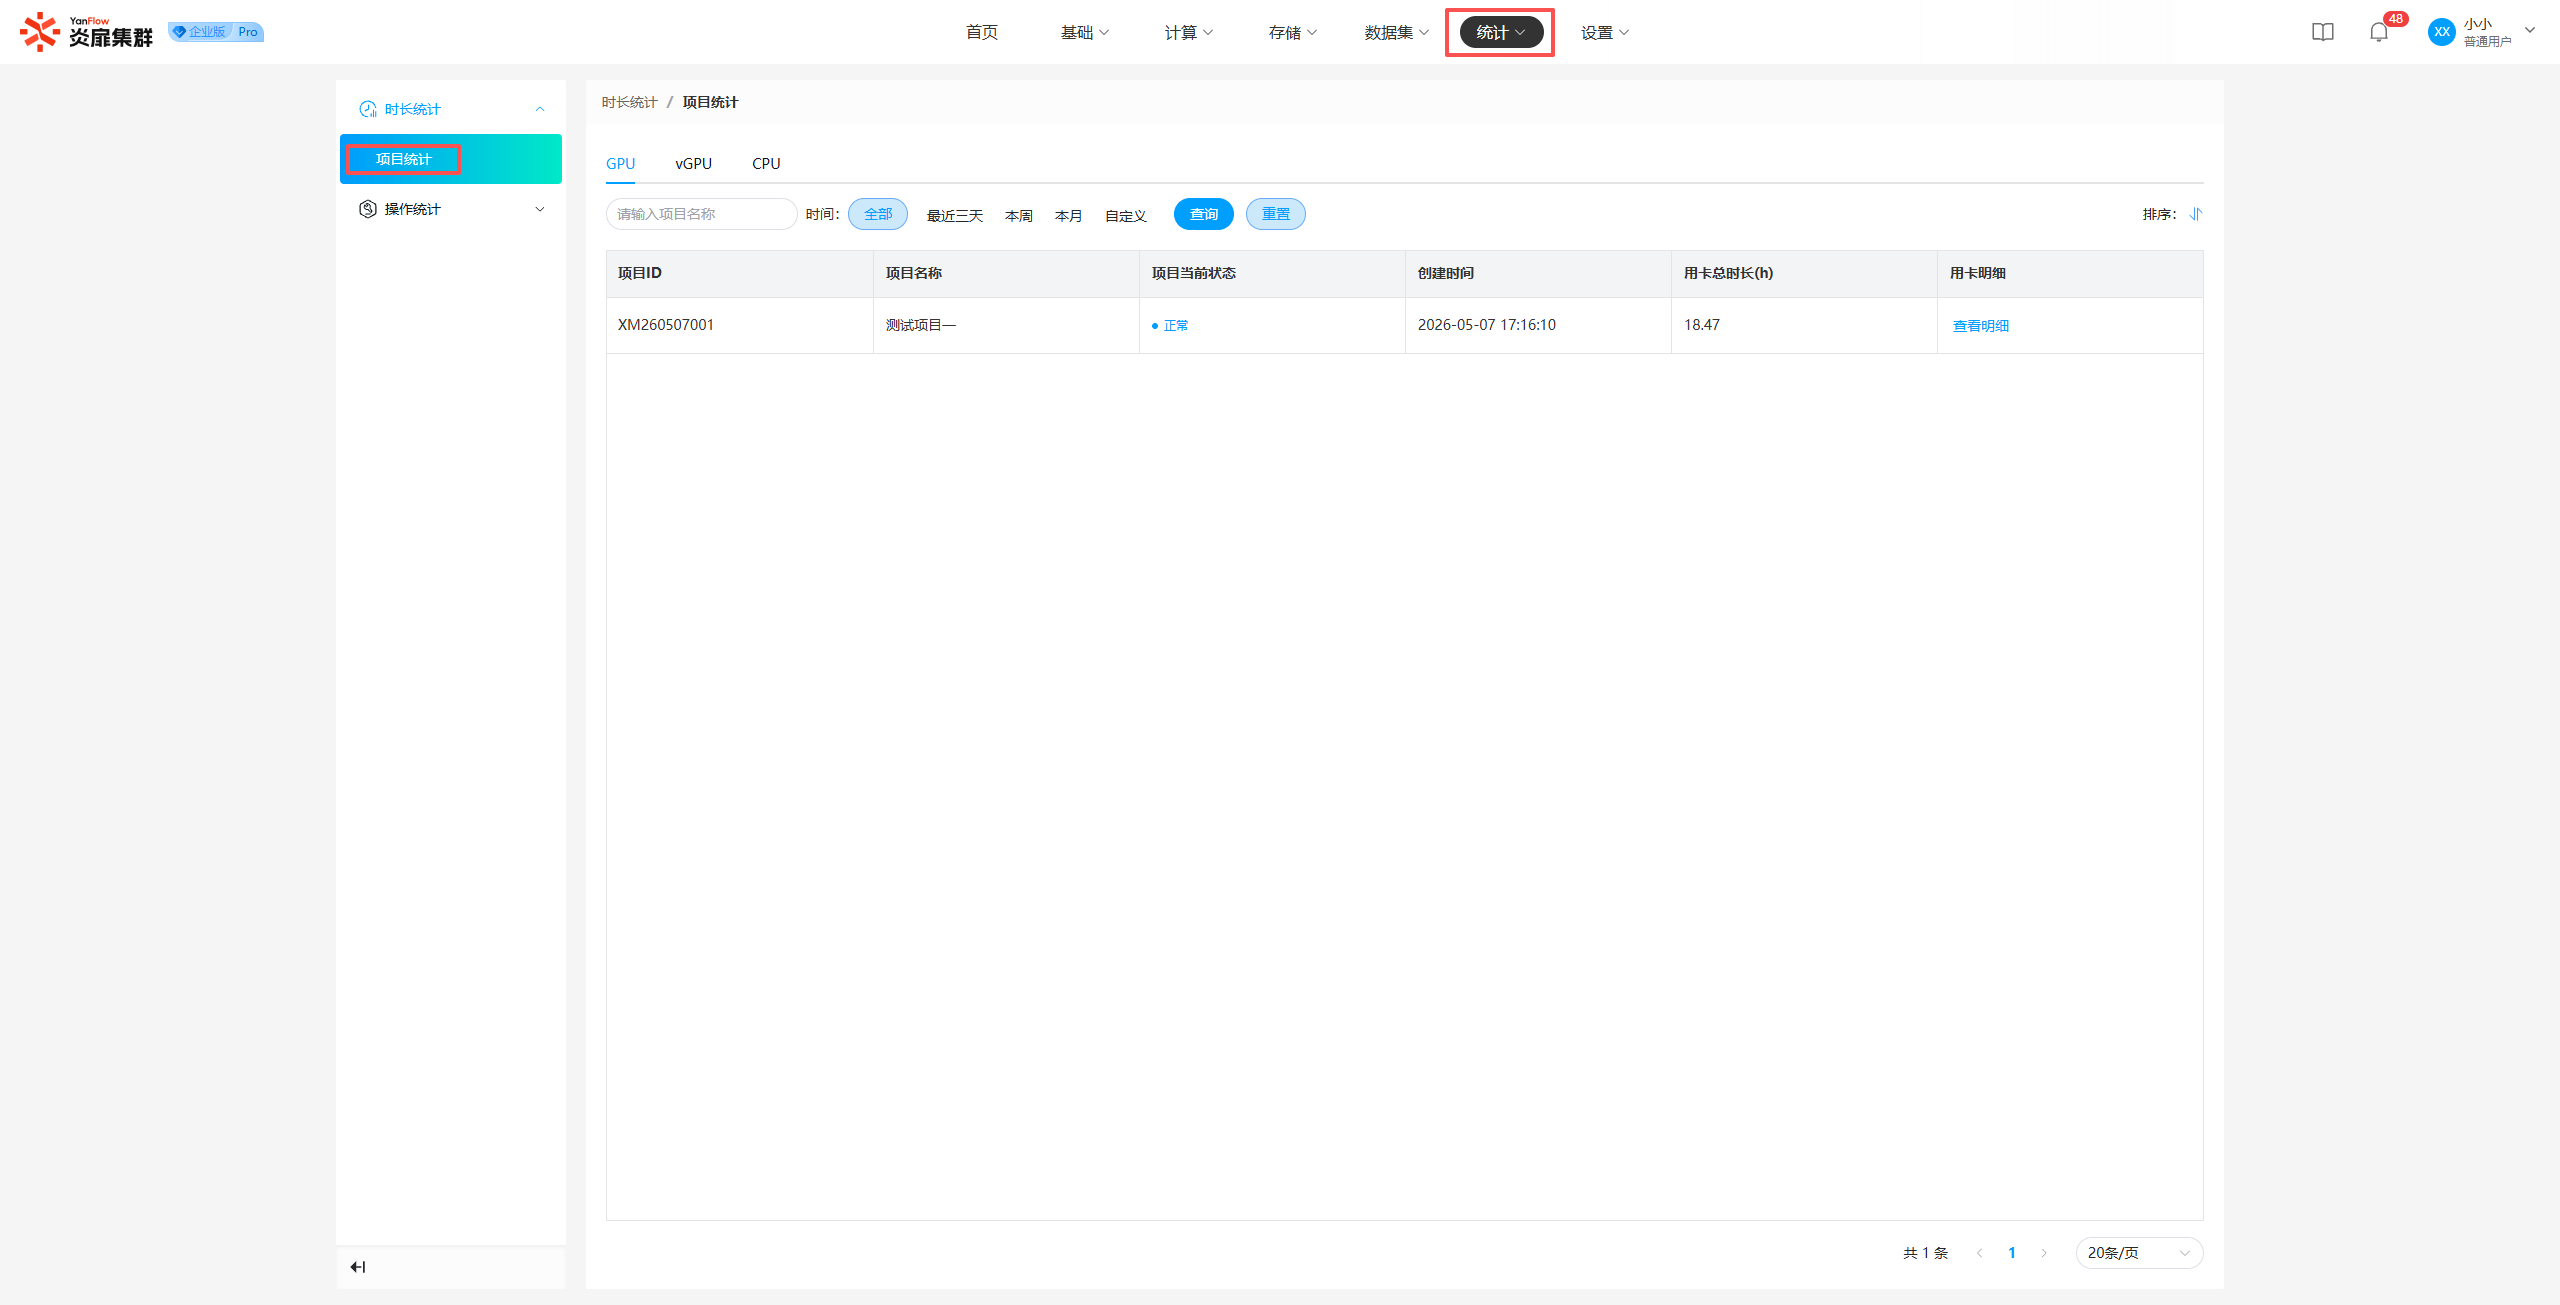
Project Duration Statistics
If the user is a Project Leader, they can view the resource usage duration of the projects they are responsible for. Statistics are provided for GPU, vGPU, and CPU types separately, including usage duration and details.
User Operation Logs
Regular users can view their own operation logs within the system.
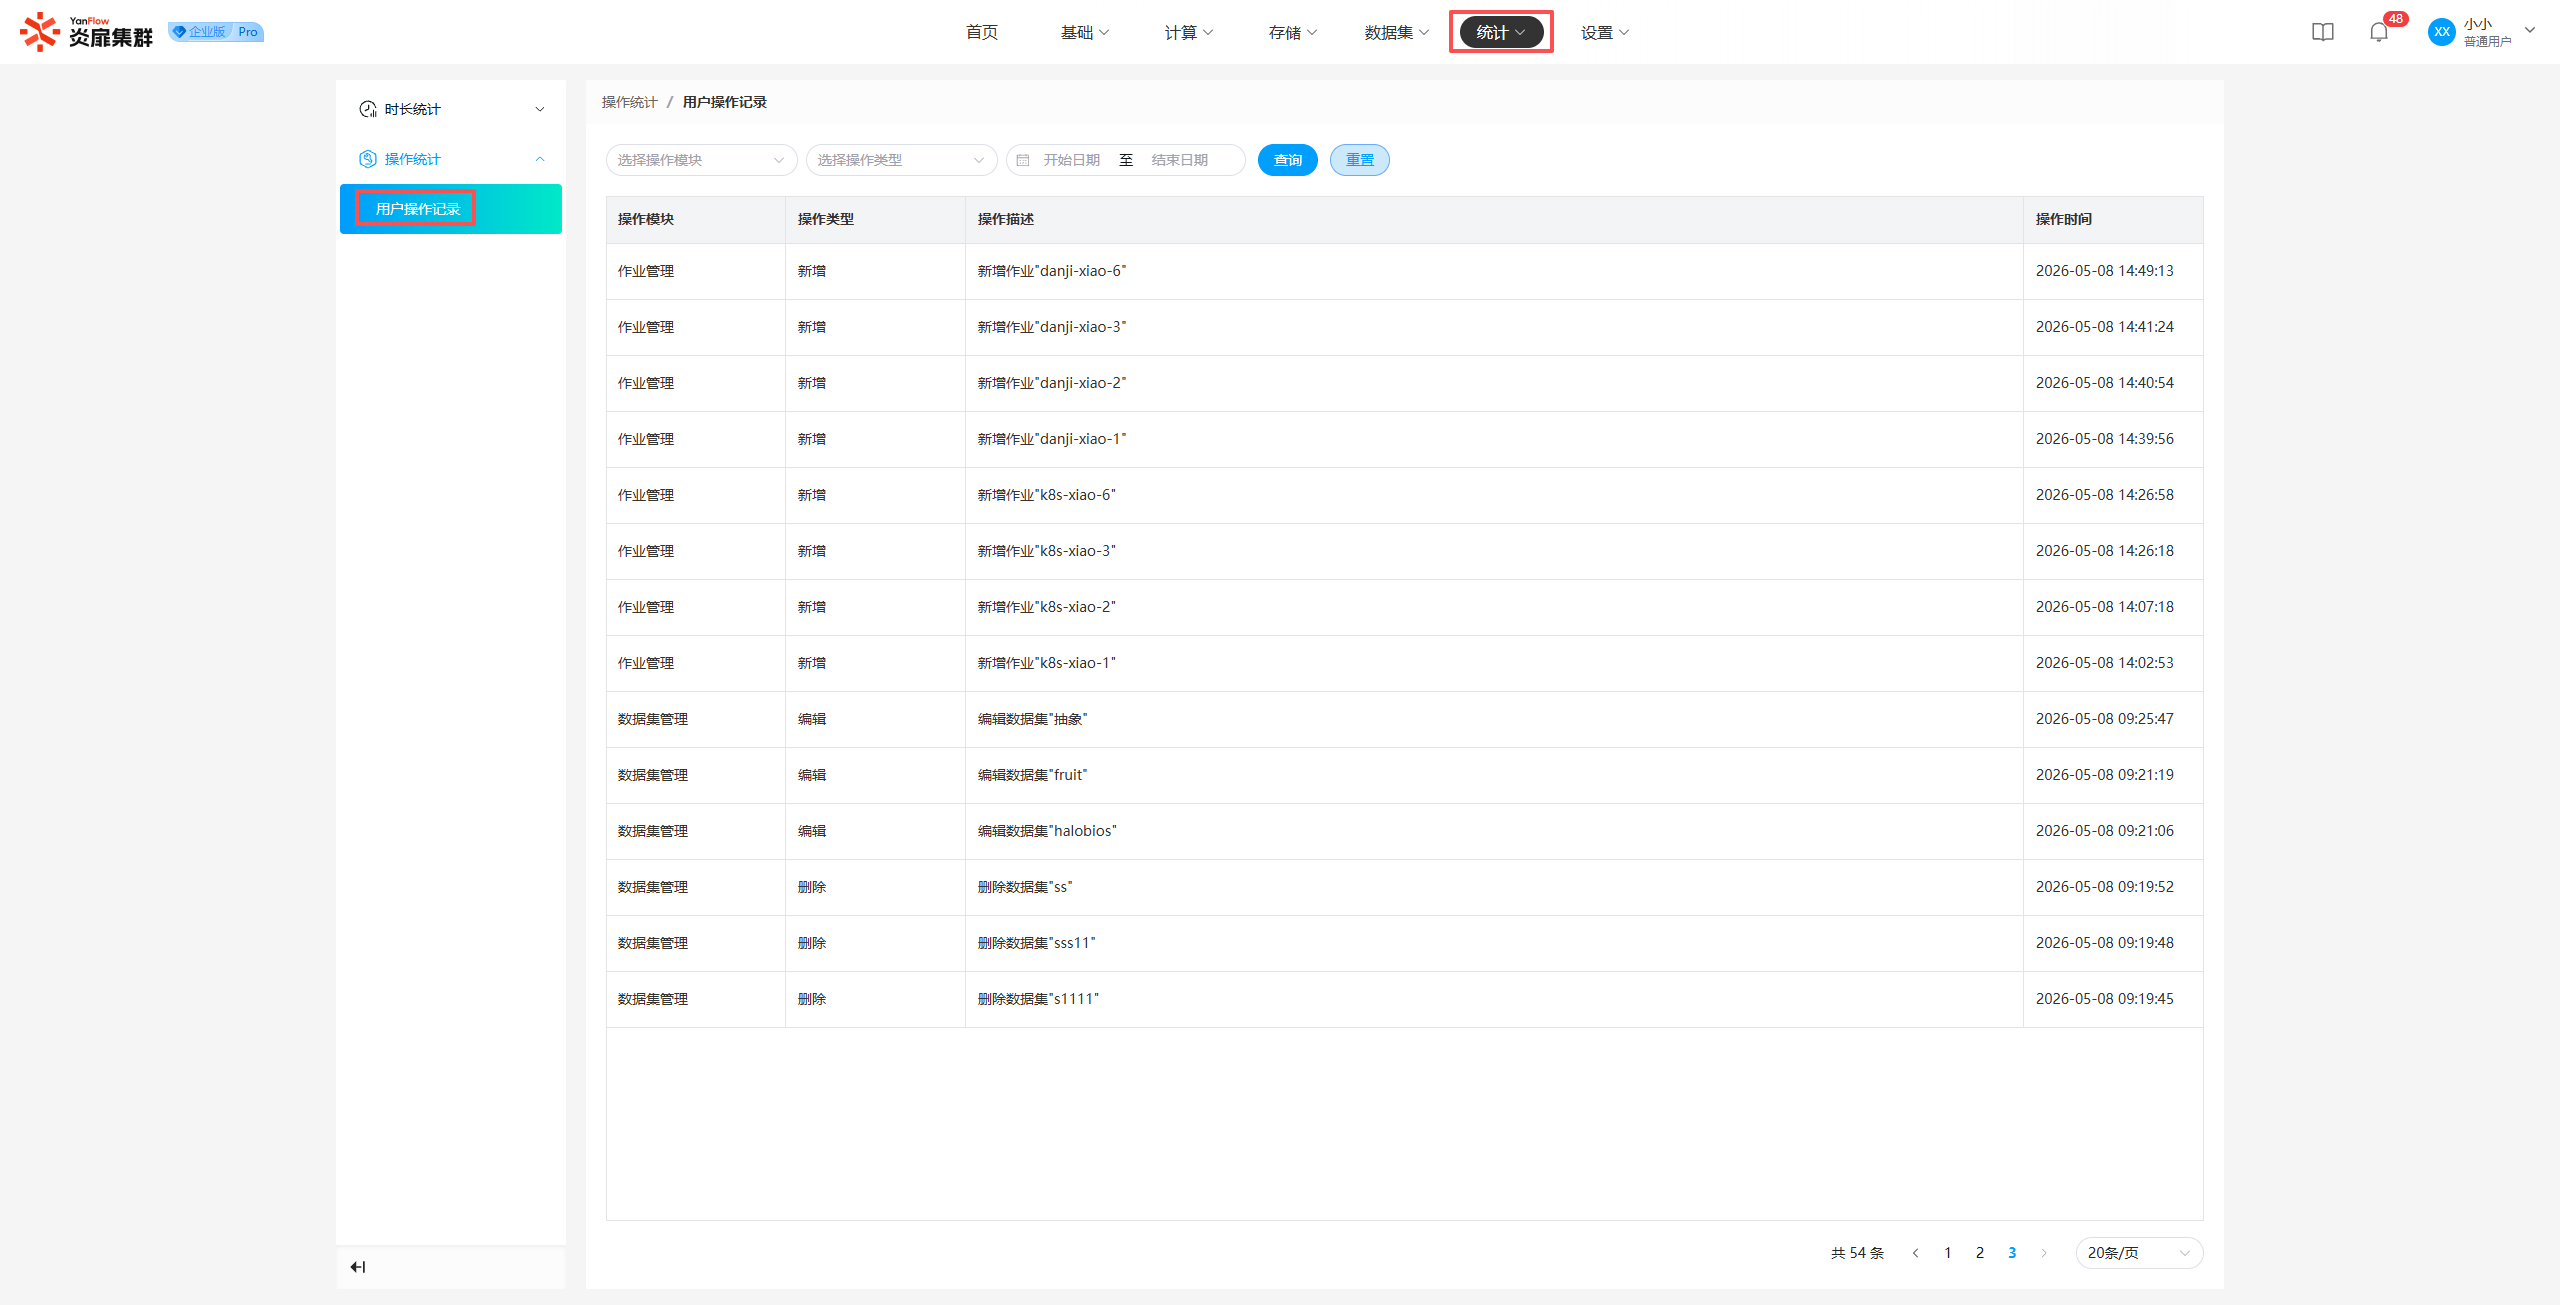
Note: The user operation log system is cleaned automatically on a regular basis. The retention period is configured by the System Administrator. Regular users can view this in Threshold Settings.
Settings
System Configuration
LLM Inference
Once the service is enabled, regular users can view port mapping information and access the service via Internal Network or External Network. Web-based ports can be accessed via WebUI.
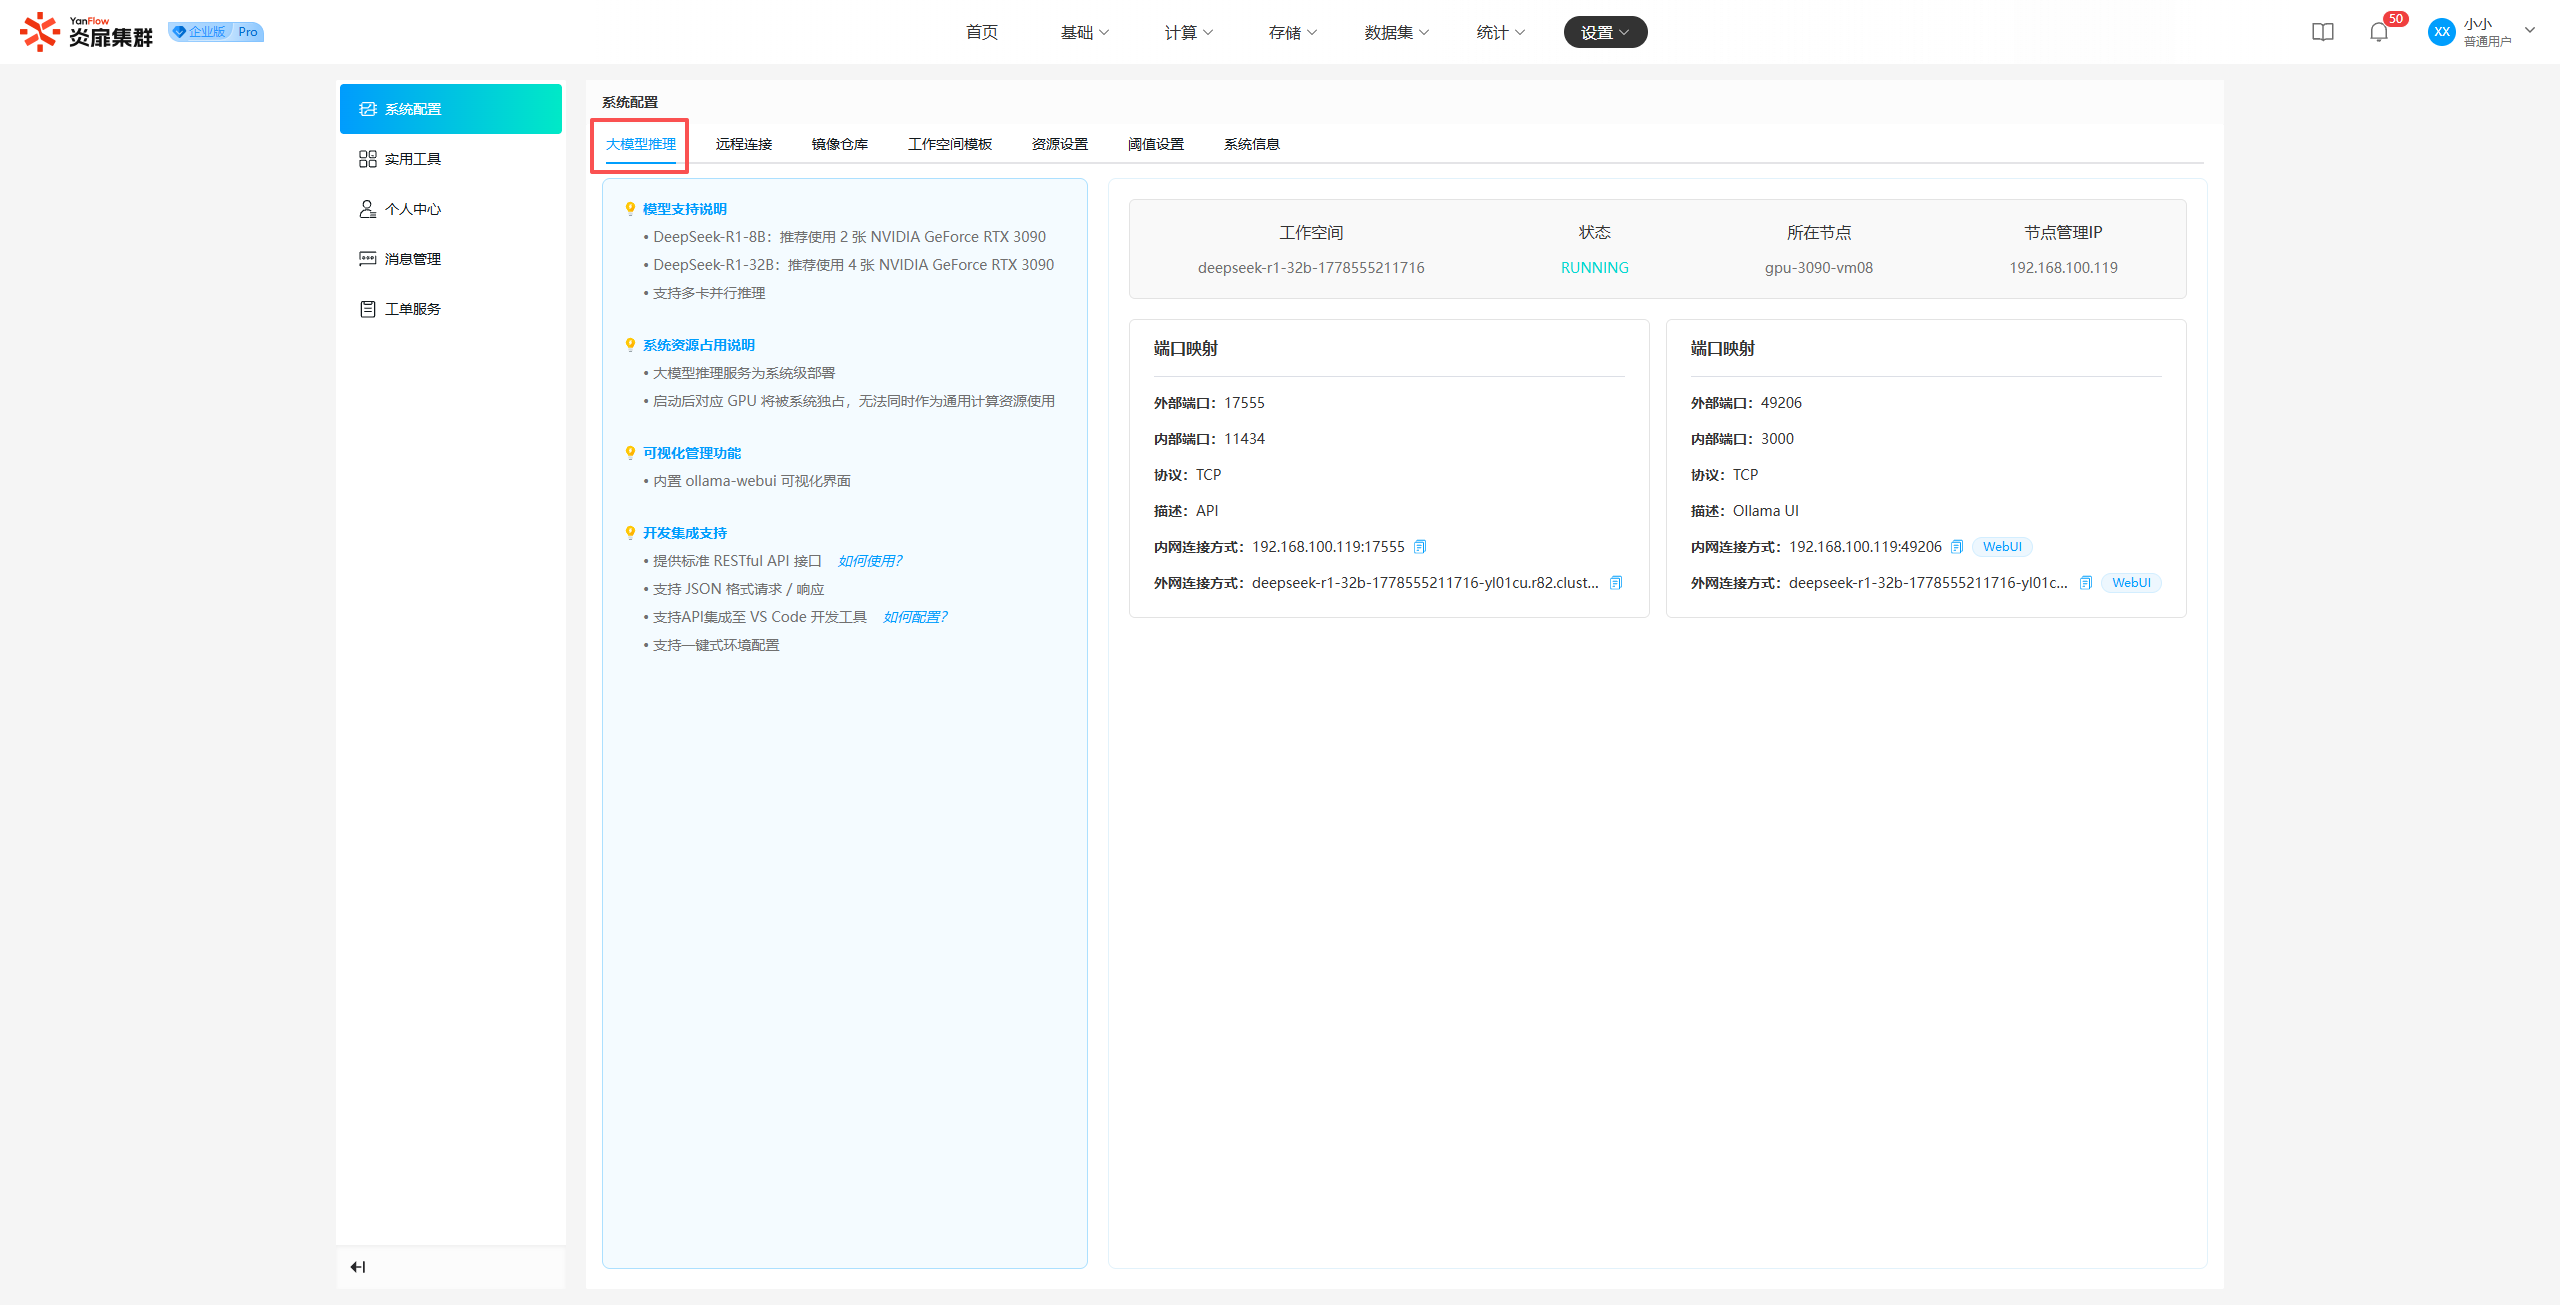
Note: The
EnableorDisableoperations for LLM inference services are performed by the System Administrator; regular users can only view or access them. When the system enables the Remote Connection service, the LLM inference service will have an External Network Connection method.
Remote Connection
Once remote connection is enabled, regular users can view relevant information and click Access Address to access the cluster system via a domain name. Hovering over the package name will display the package details.
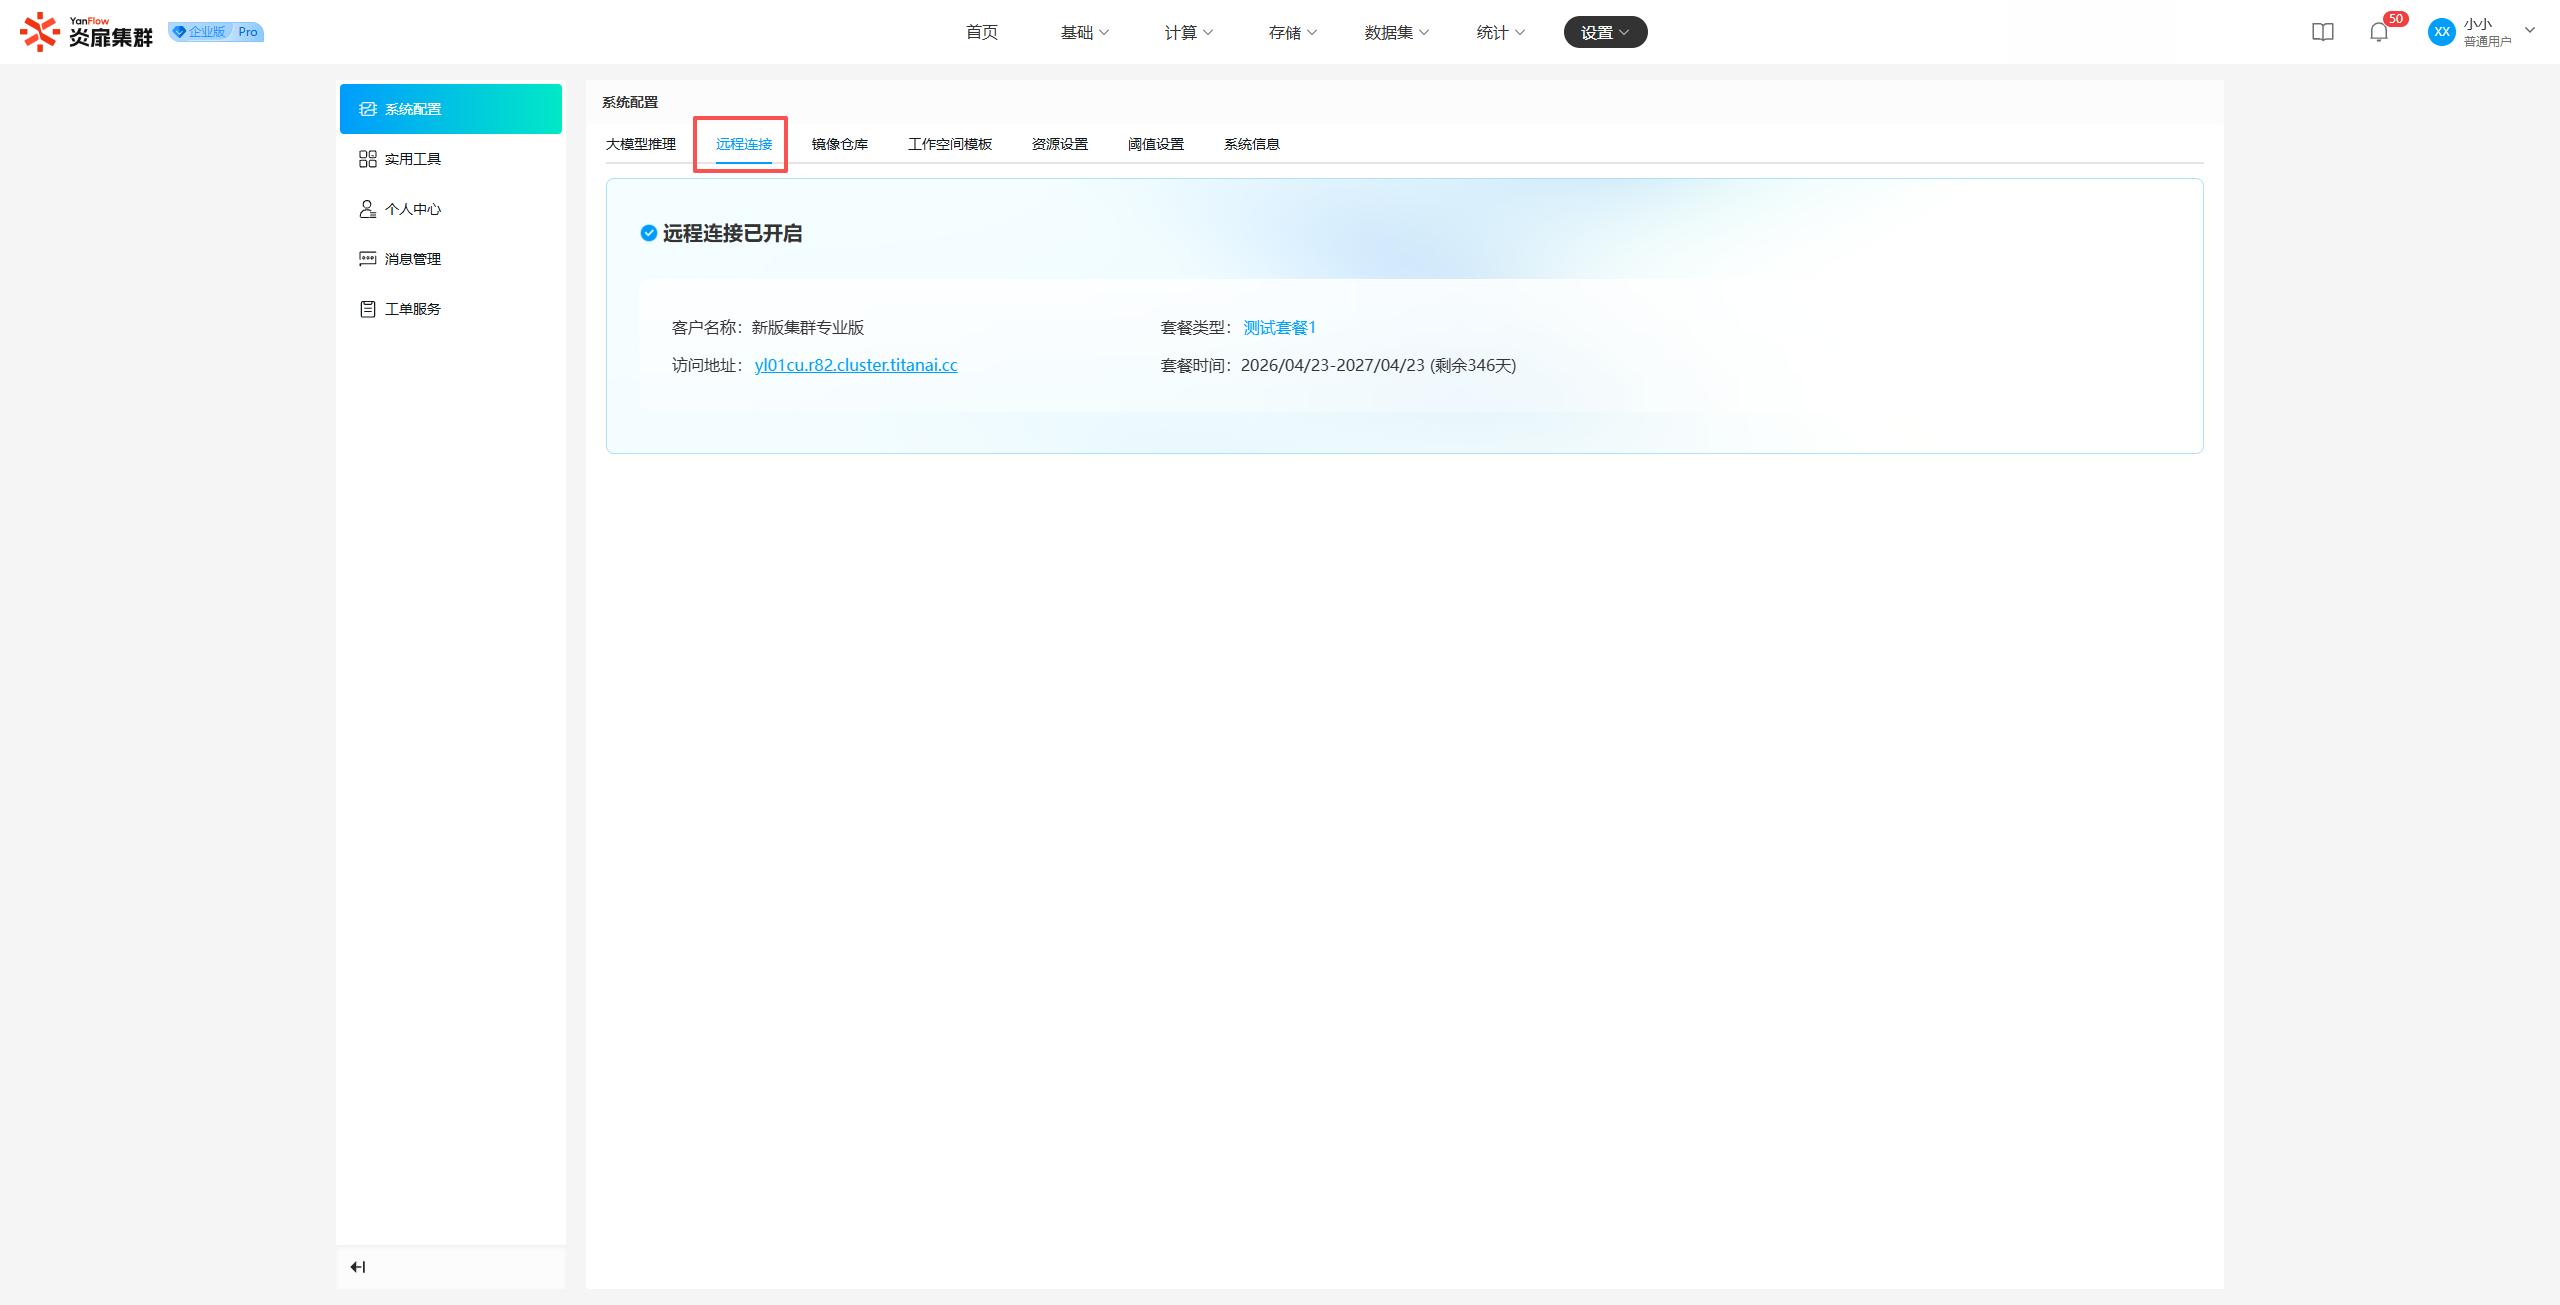
Note: The
EnableorDisableoperations for the remote connection service are performed by the System Administrator; regular users can only view or access them.
Image Repository
Regular users can view all image repositories in the system. Support for keyword search via repository name is provided.
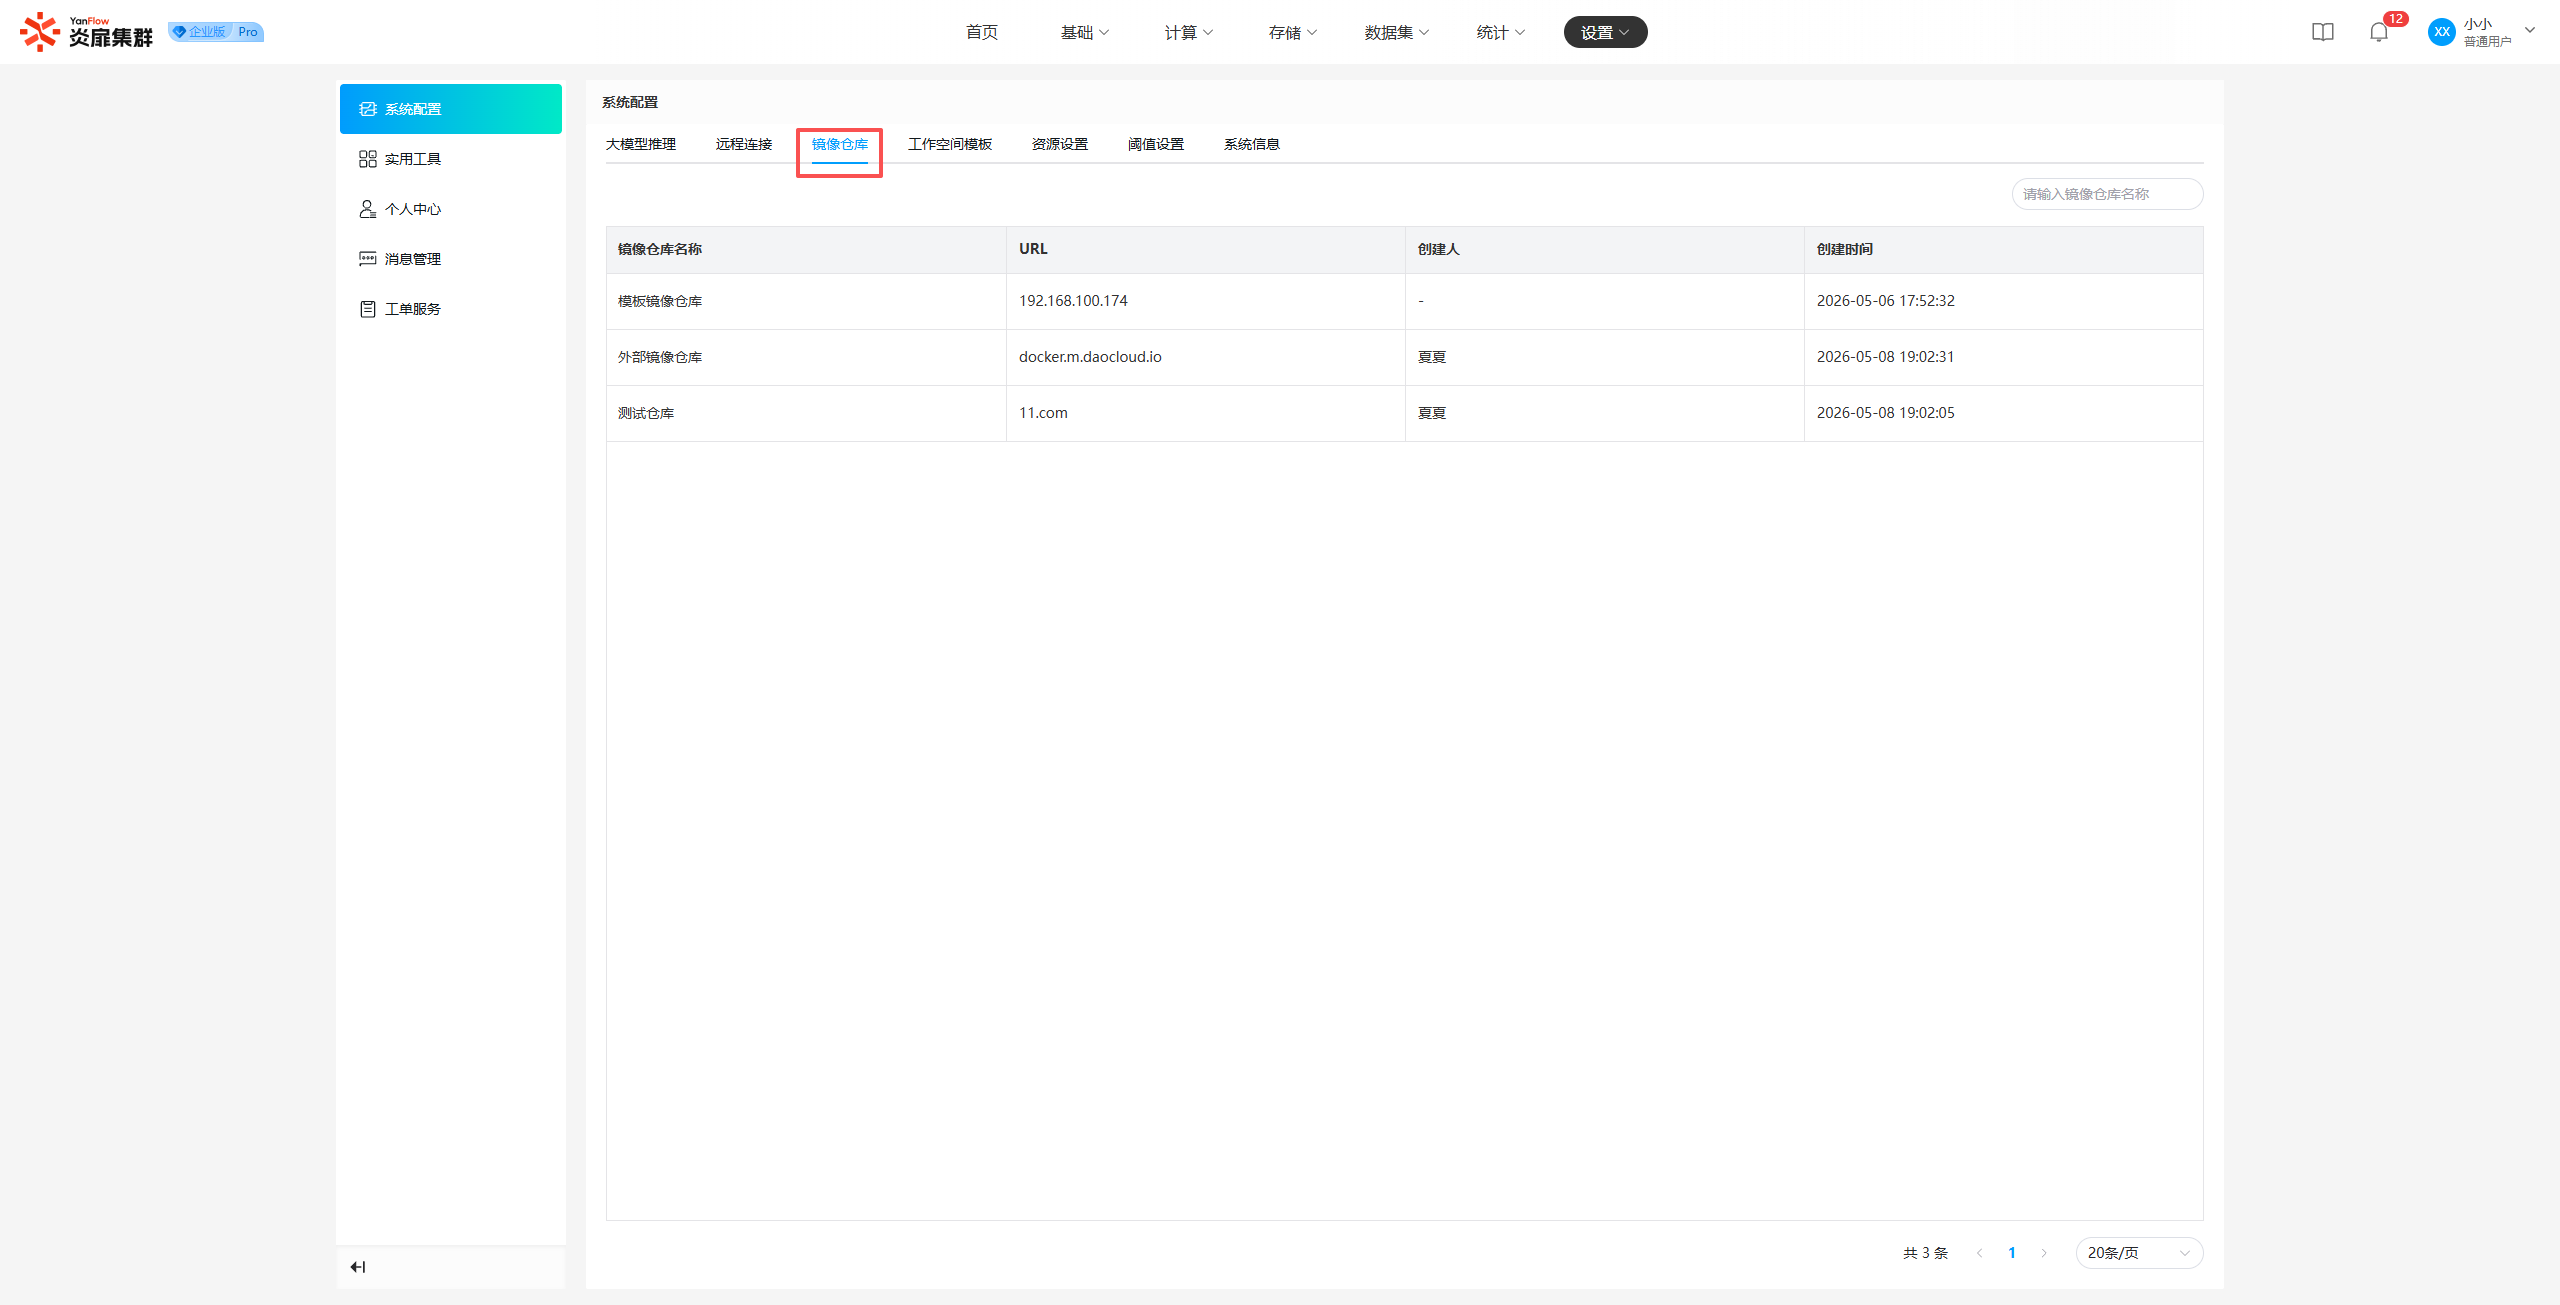
Note: Image repositories are maintained by the System Administrator; regular users can only view and use them.
Workspace Templates
Regular users can view all workspace templates and their details in the system. Support for keyword search via template name and filtered search by resource type is provided.
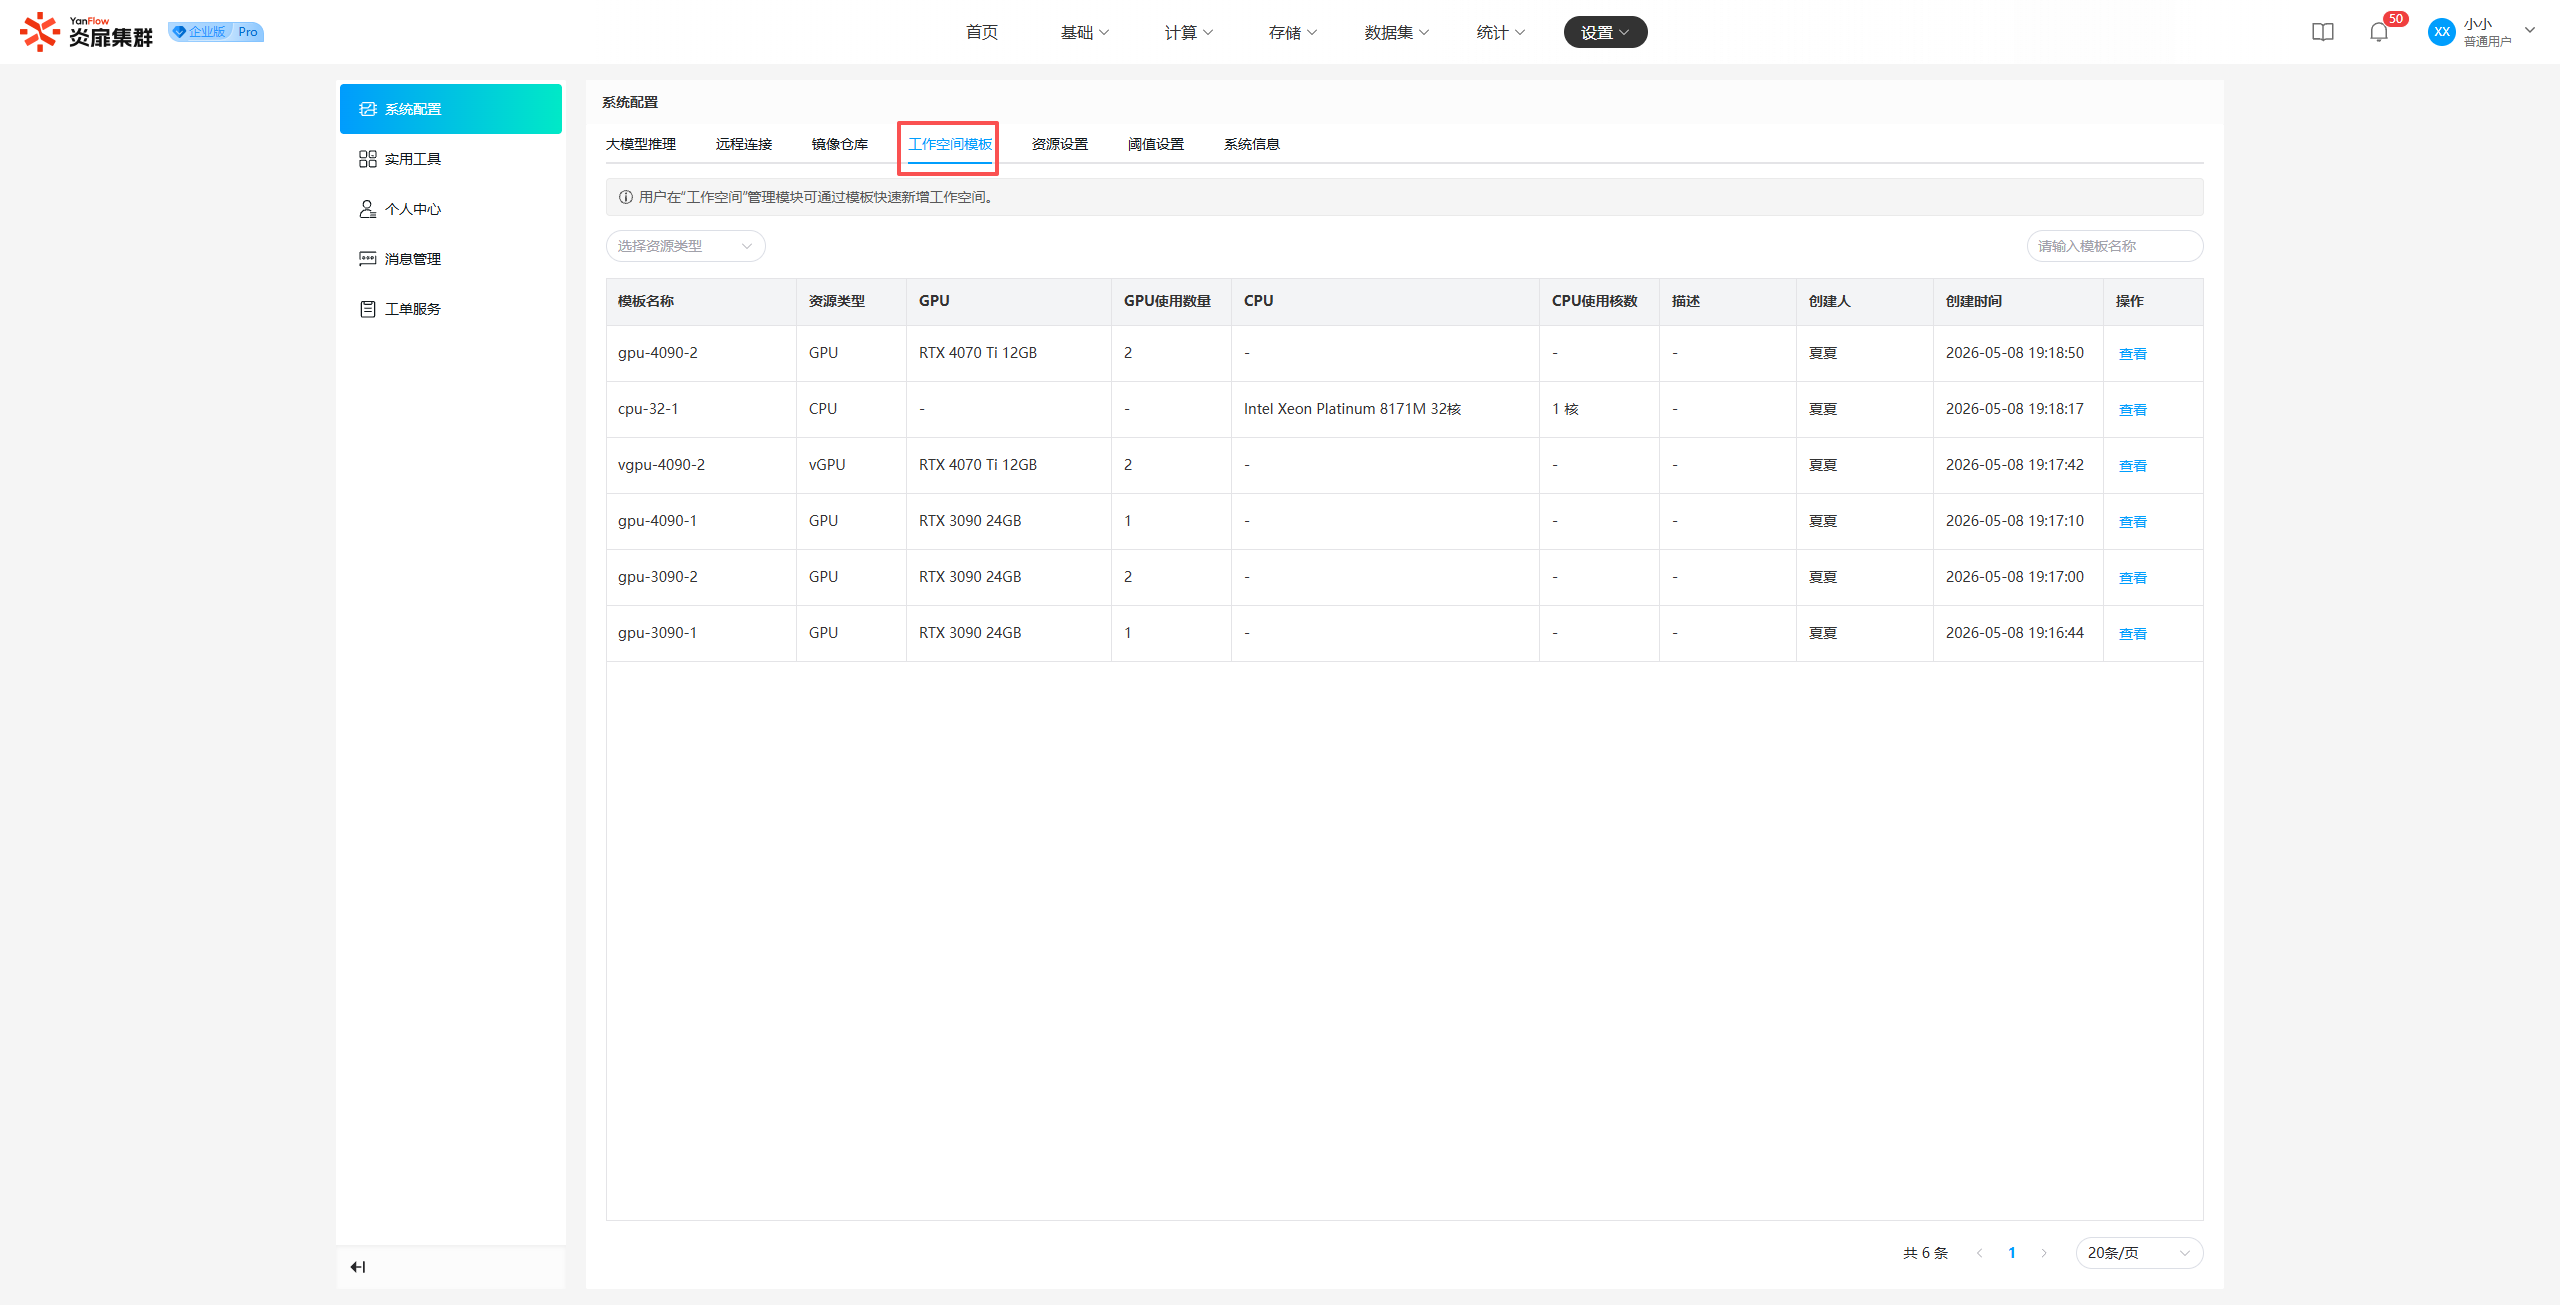
Note:
- Workspace templates are maintained by the System Administrator; regular users can only view them.
- Regular users can call templates via
Quick Addin the Workspace module to quickly start a workspace.
Resource Settings
Regular users can view the usage policies for memory sharing and vGPU.
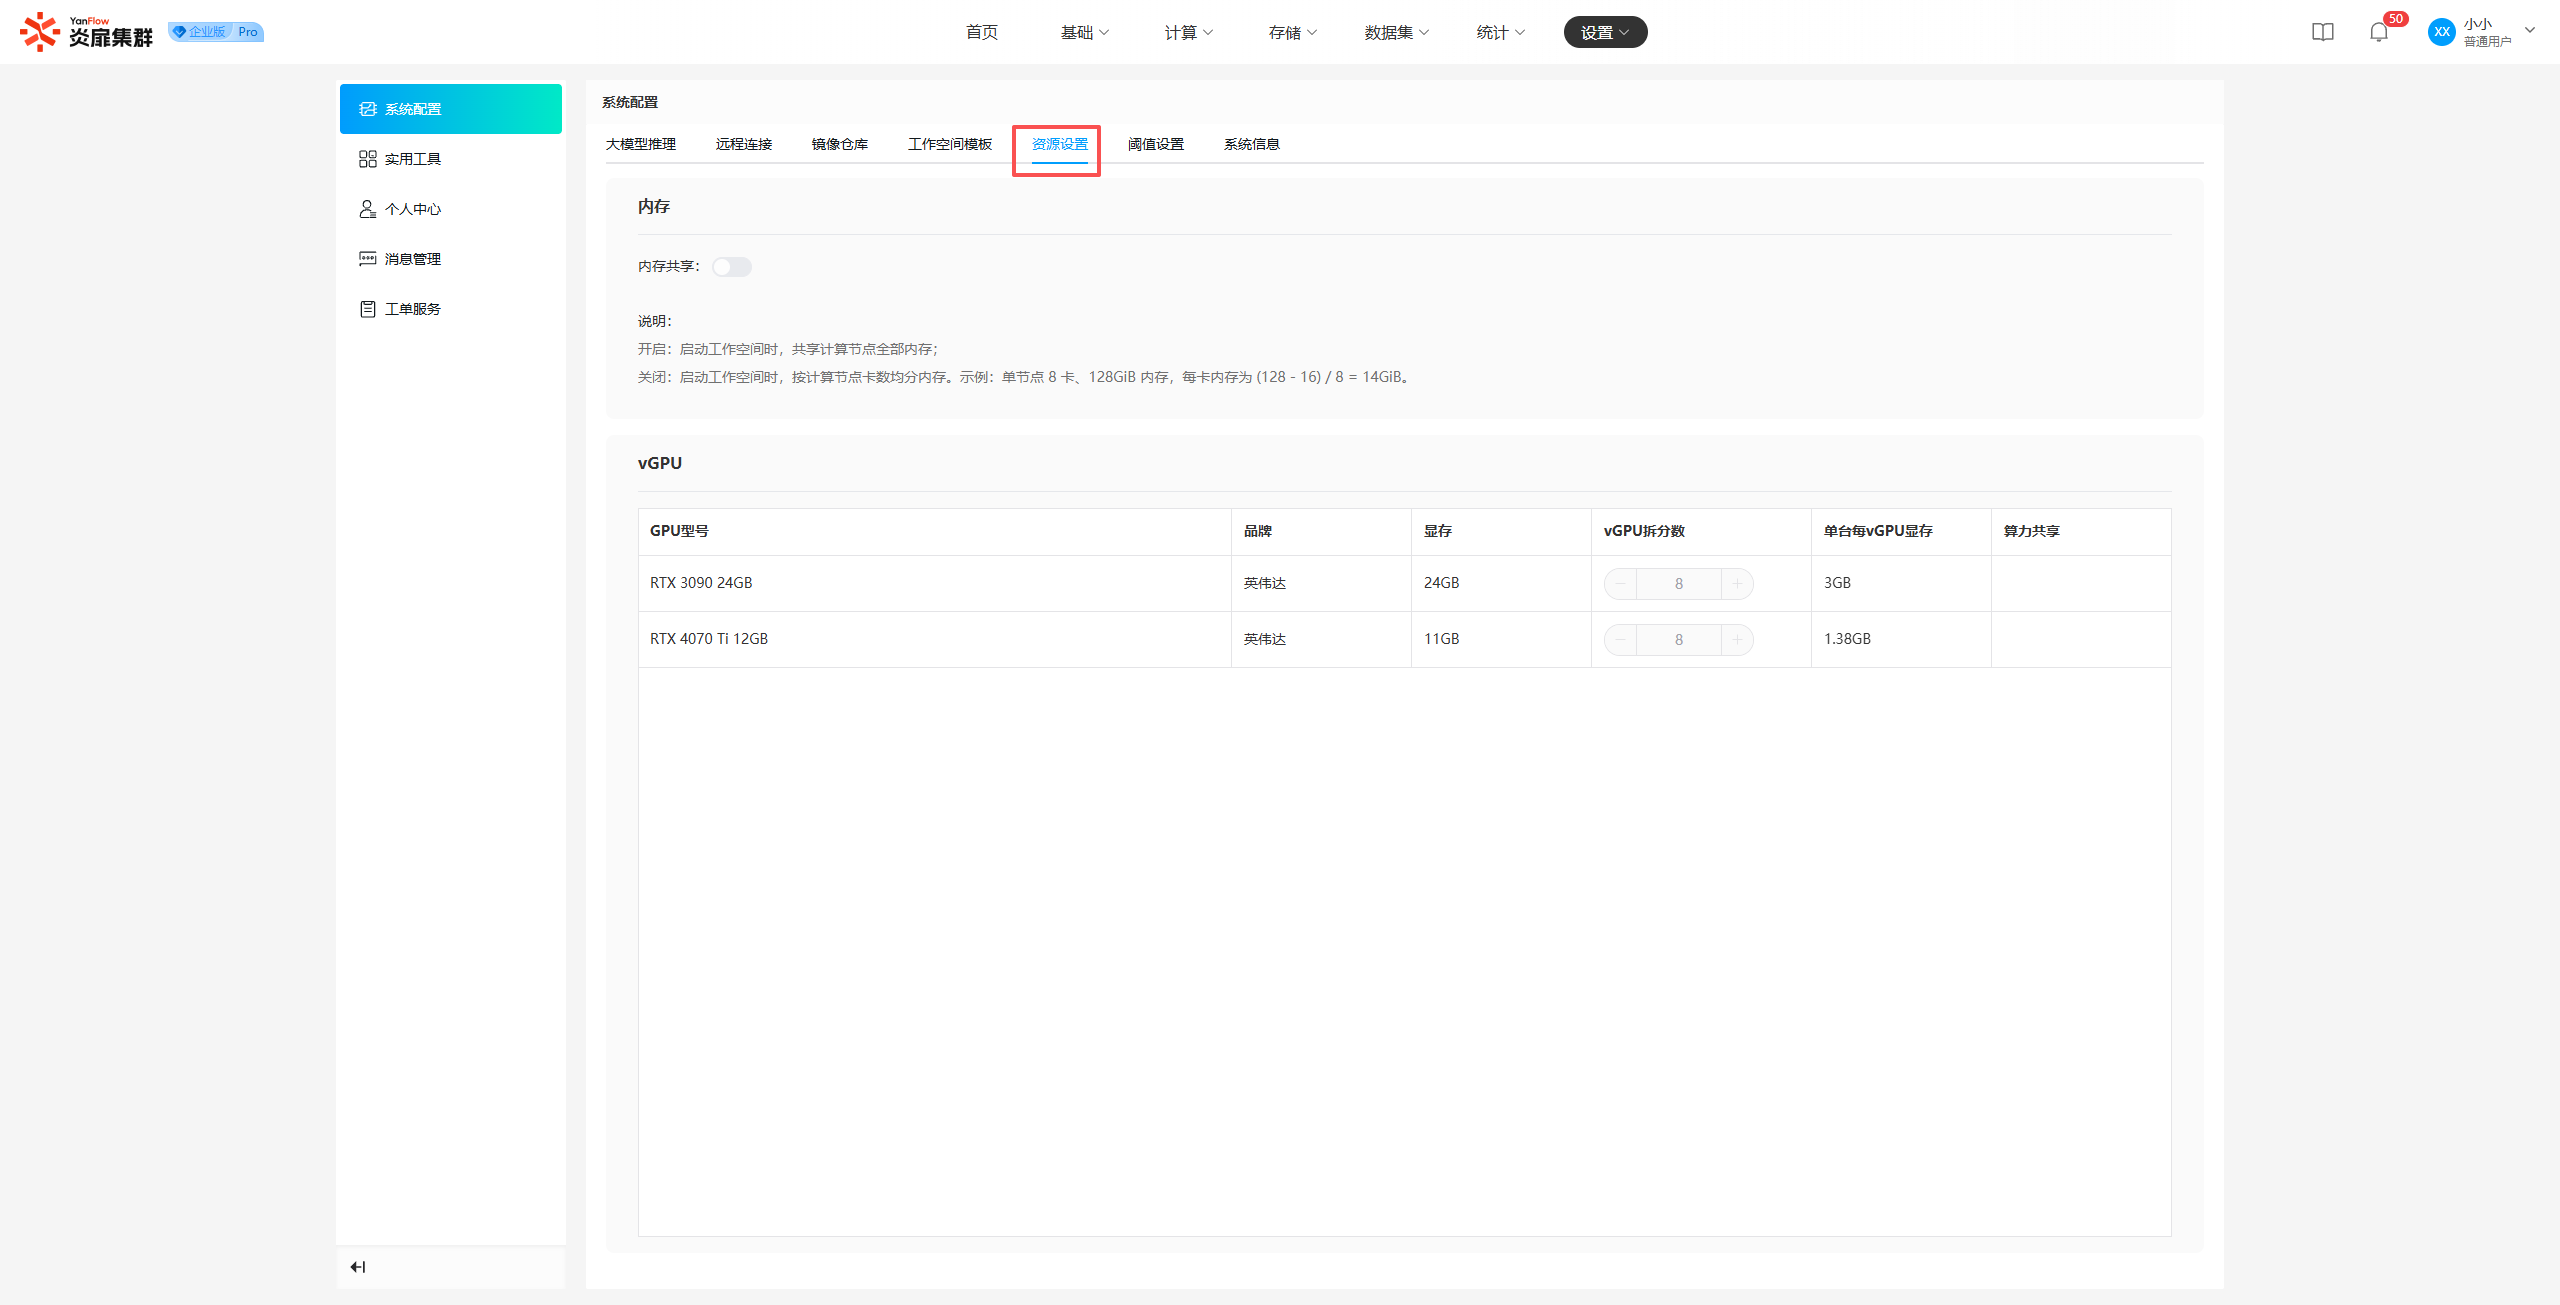
Note: Relevant settings are maintained by the System Administrator; regular users can only view them.
Threshold Settings
Regular users can view relevant system threshold parameters, including GPU Temperature Warning, Disk Space Warning, Node Image Log Retention Time, and User Operation Log Retention Time.
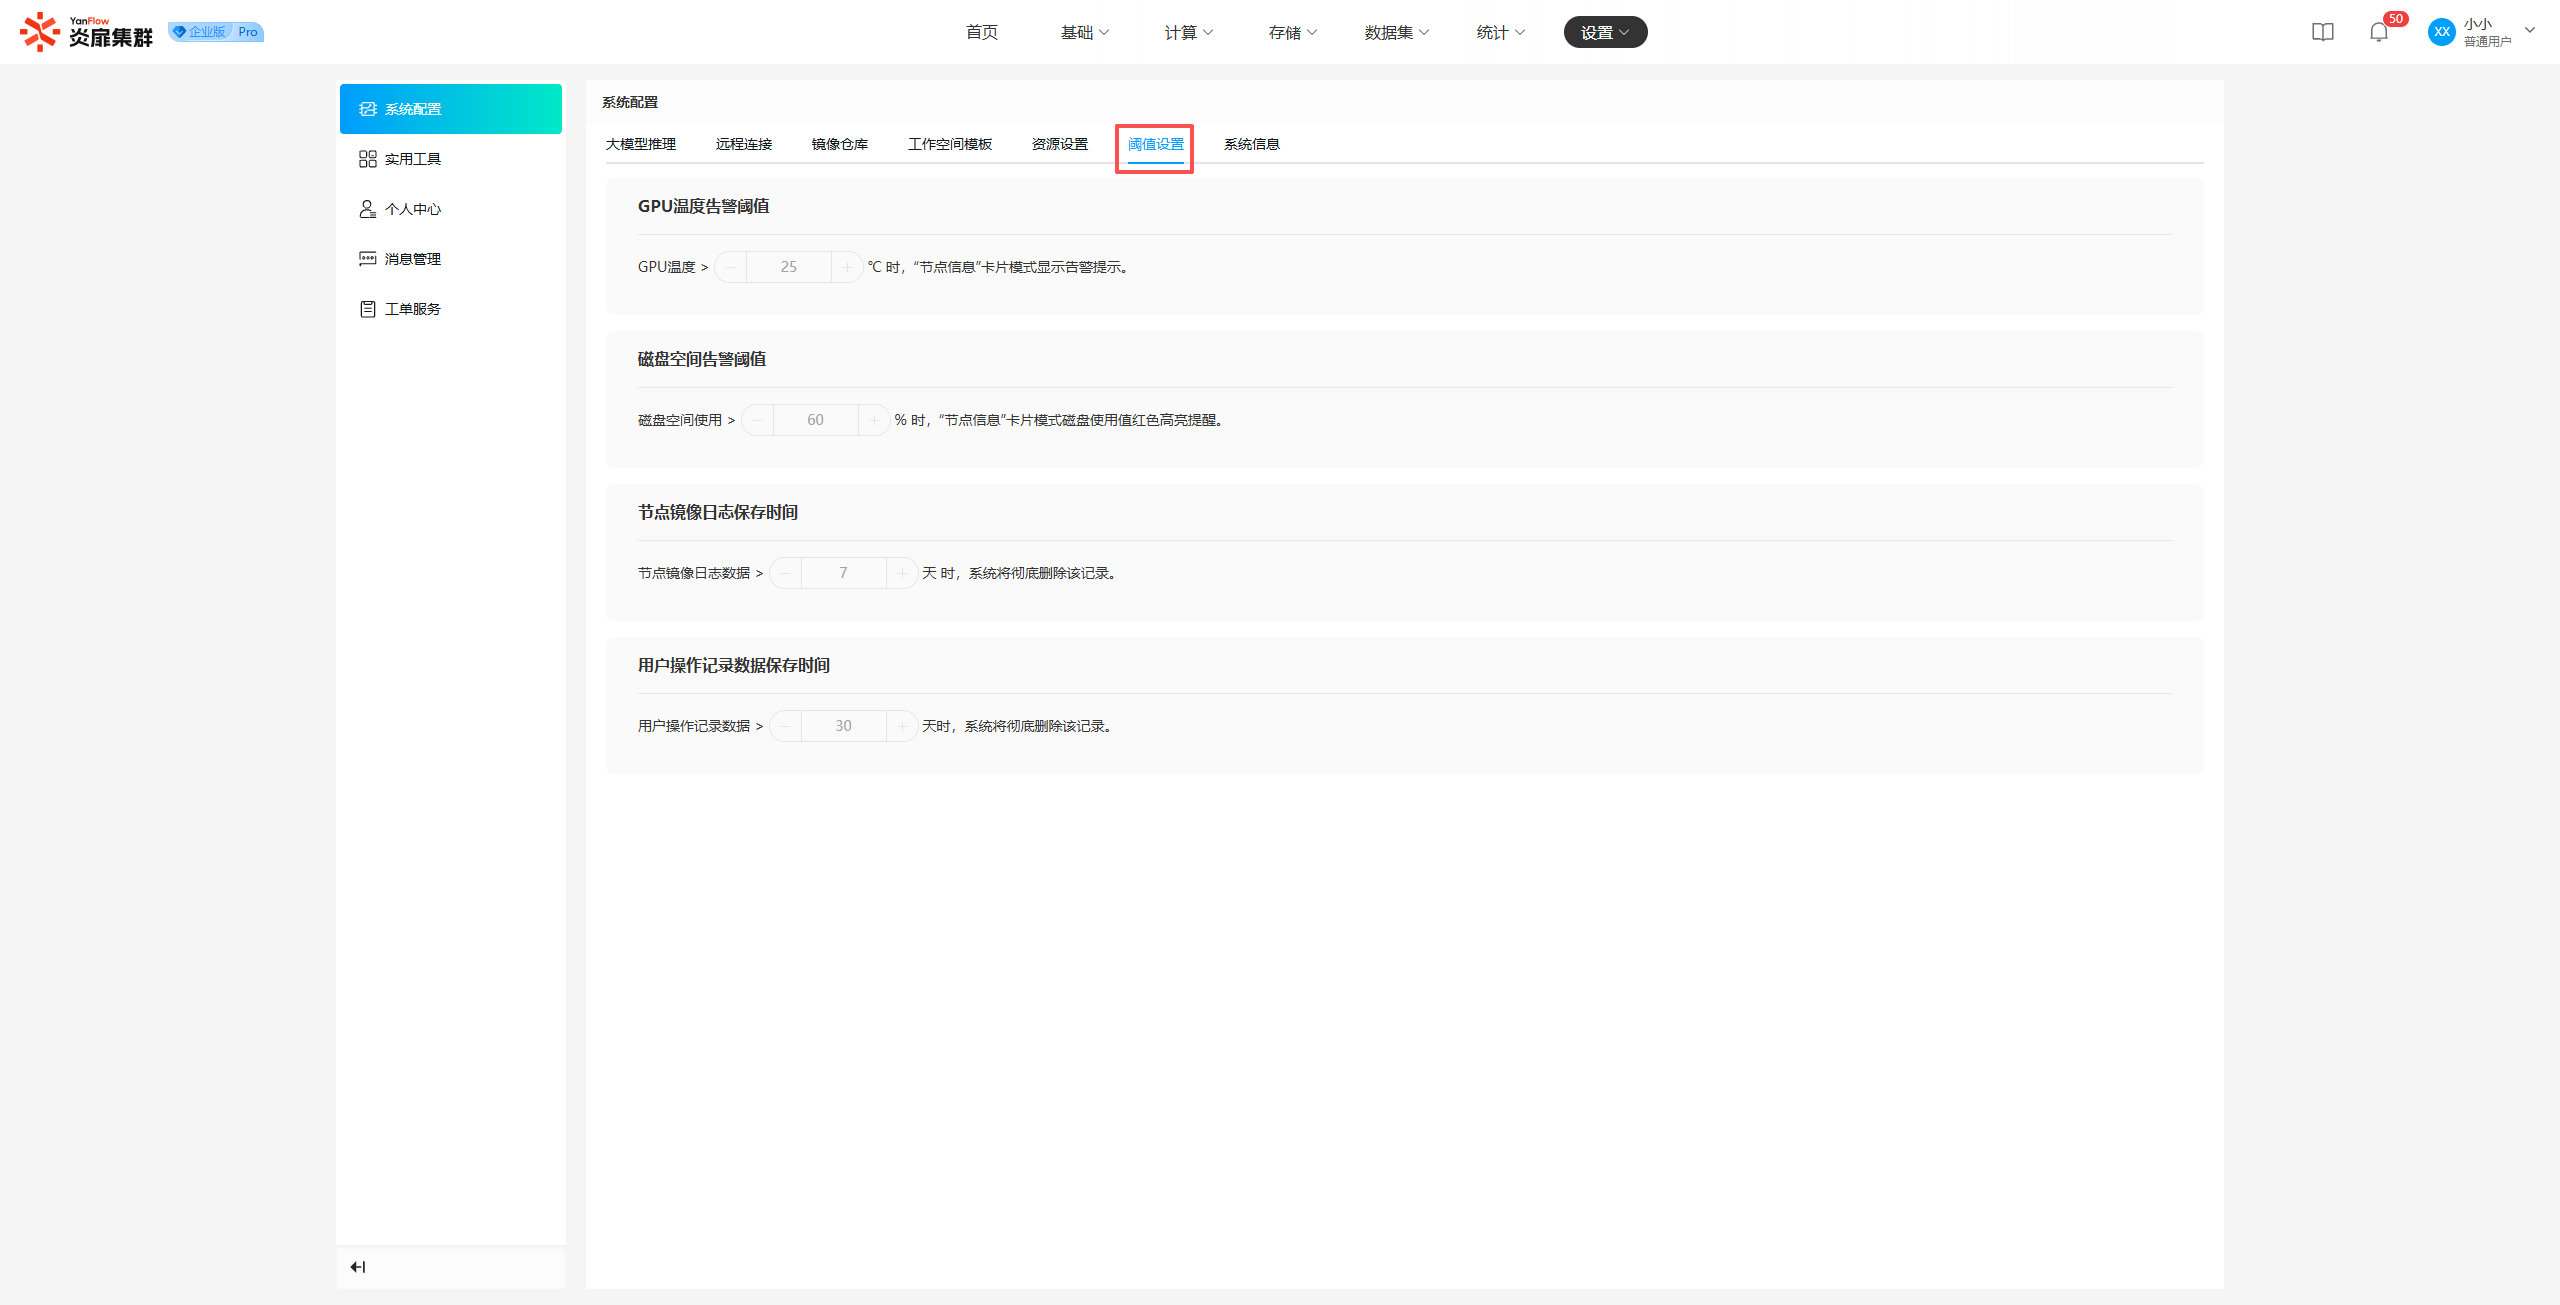
Note: Relevant settings are maintained by the System Administrator; regular users can only view them.
System Information
Displays basic system information, authorization information, and service information.
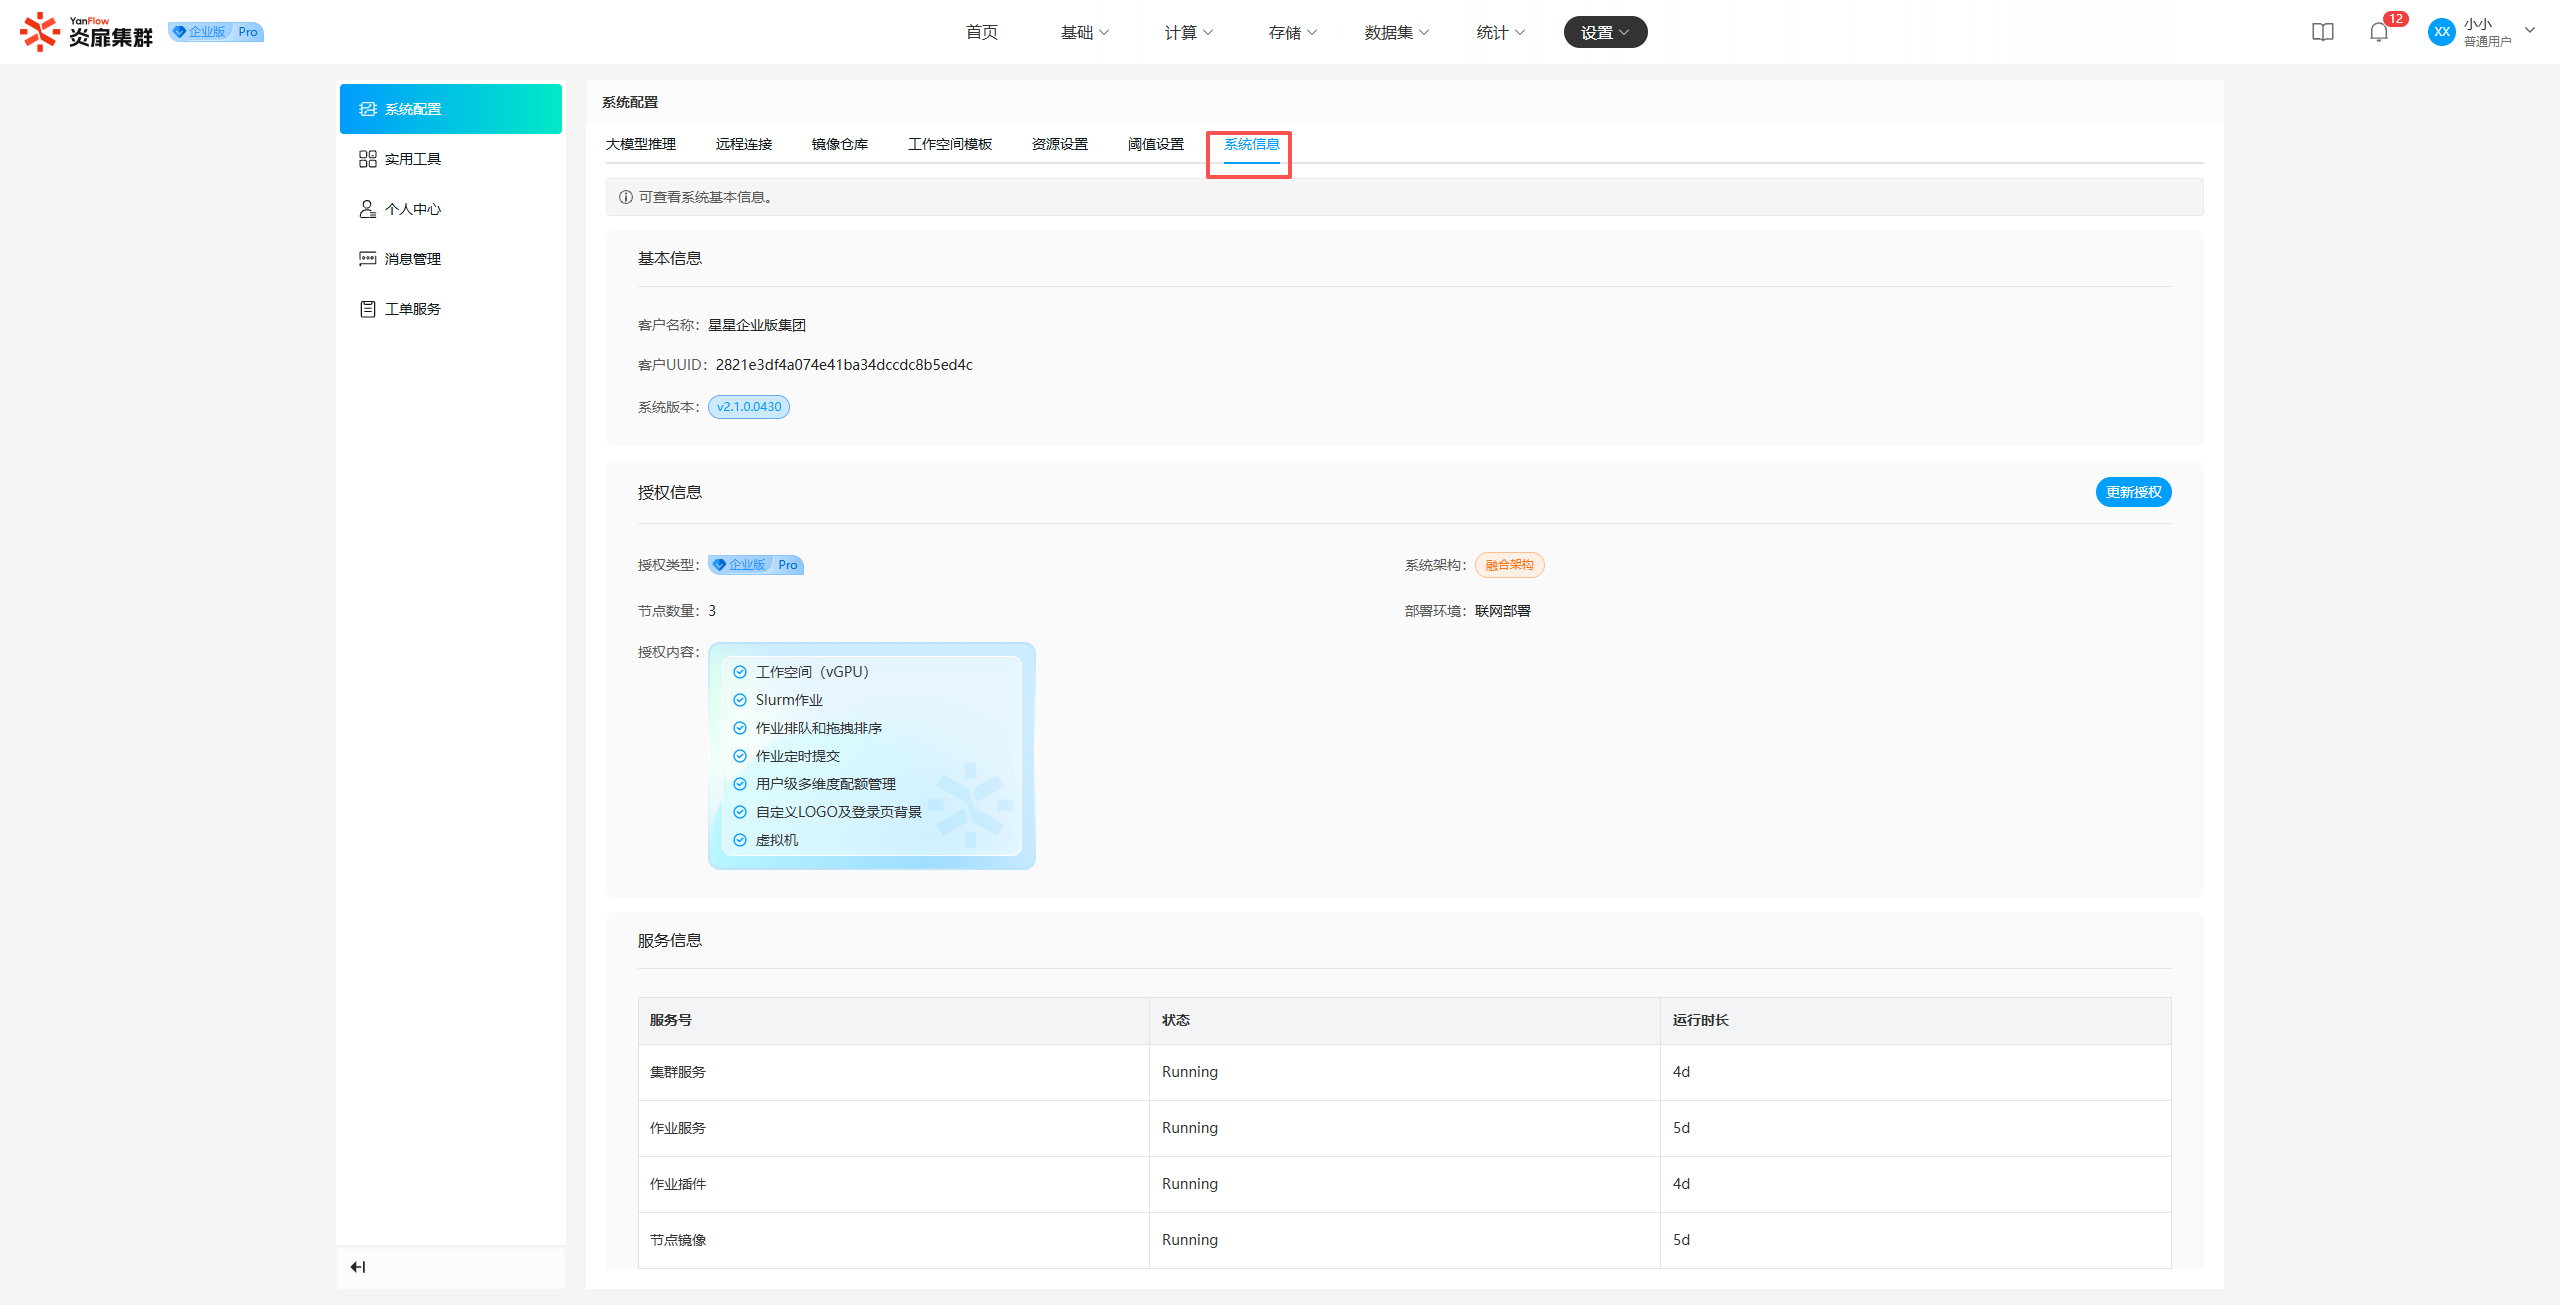
- Basic Information: Displays the customer name, customer UUID, and version information of the system purchaser.
- Authorization Information: Displays the current system authorization type, number of nodes, system architecture, deployment environment, and authorization content.
Update Authorization: Click to immediately fetch and update to the customer's latest authorization.Purchase Extension: This entry is only available for Enterprise Edition Free. Clicking it will take you to the Cluster Official Website to purchase extended functions. - Service Information: Displays relevant system service information.
Practical Tools
Regular users can view all practical tools in the system. Support for keyword search via tool name is provided. Click Download to immediately download the tool package to your local machine.
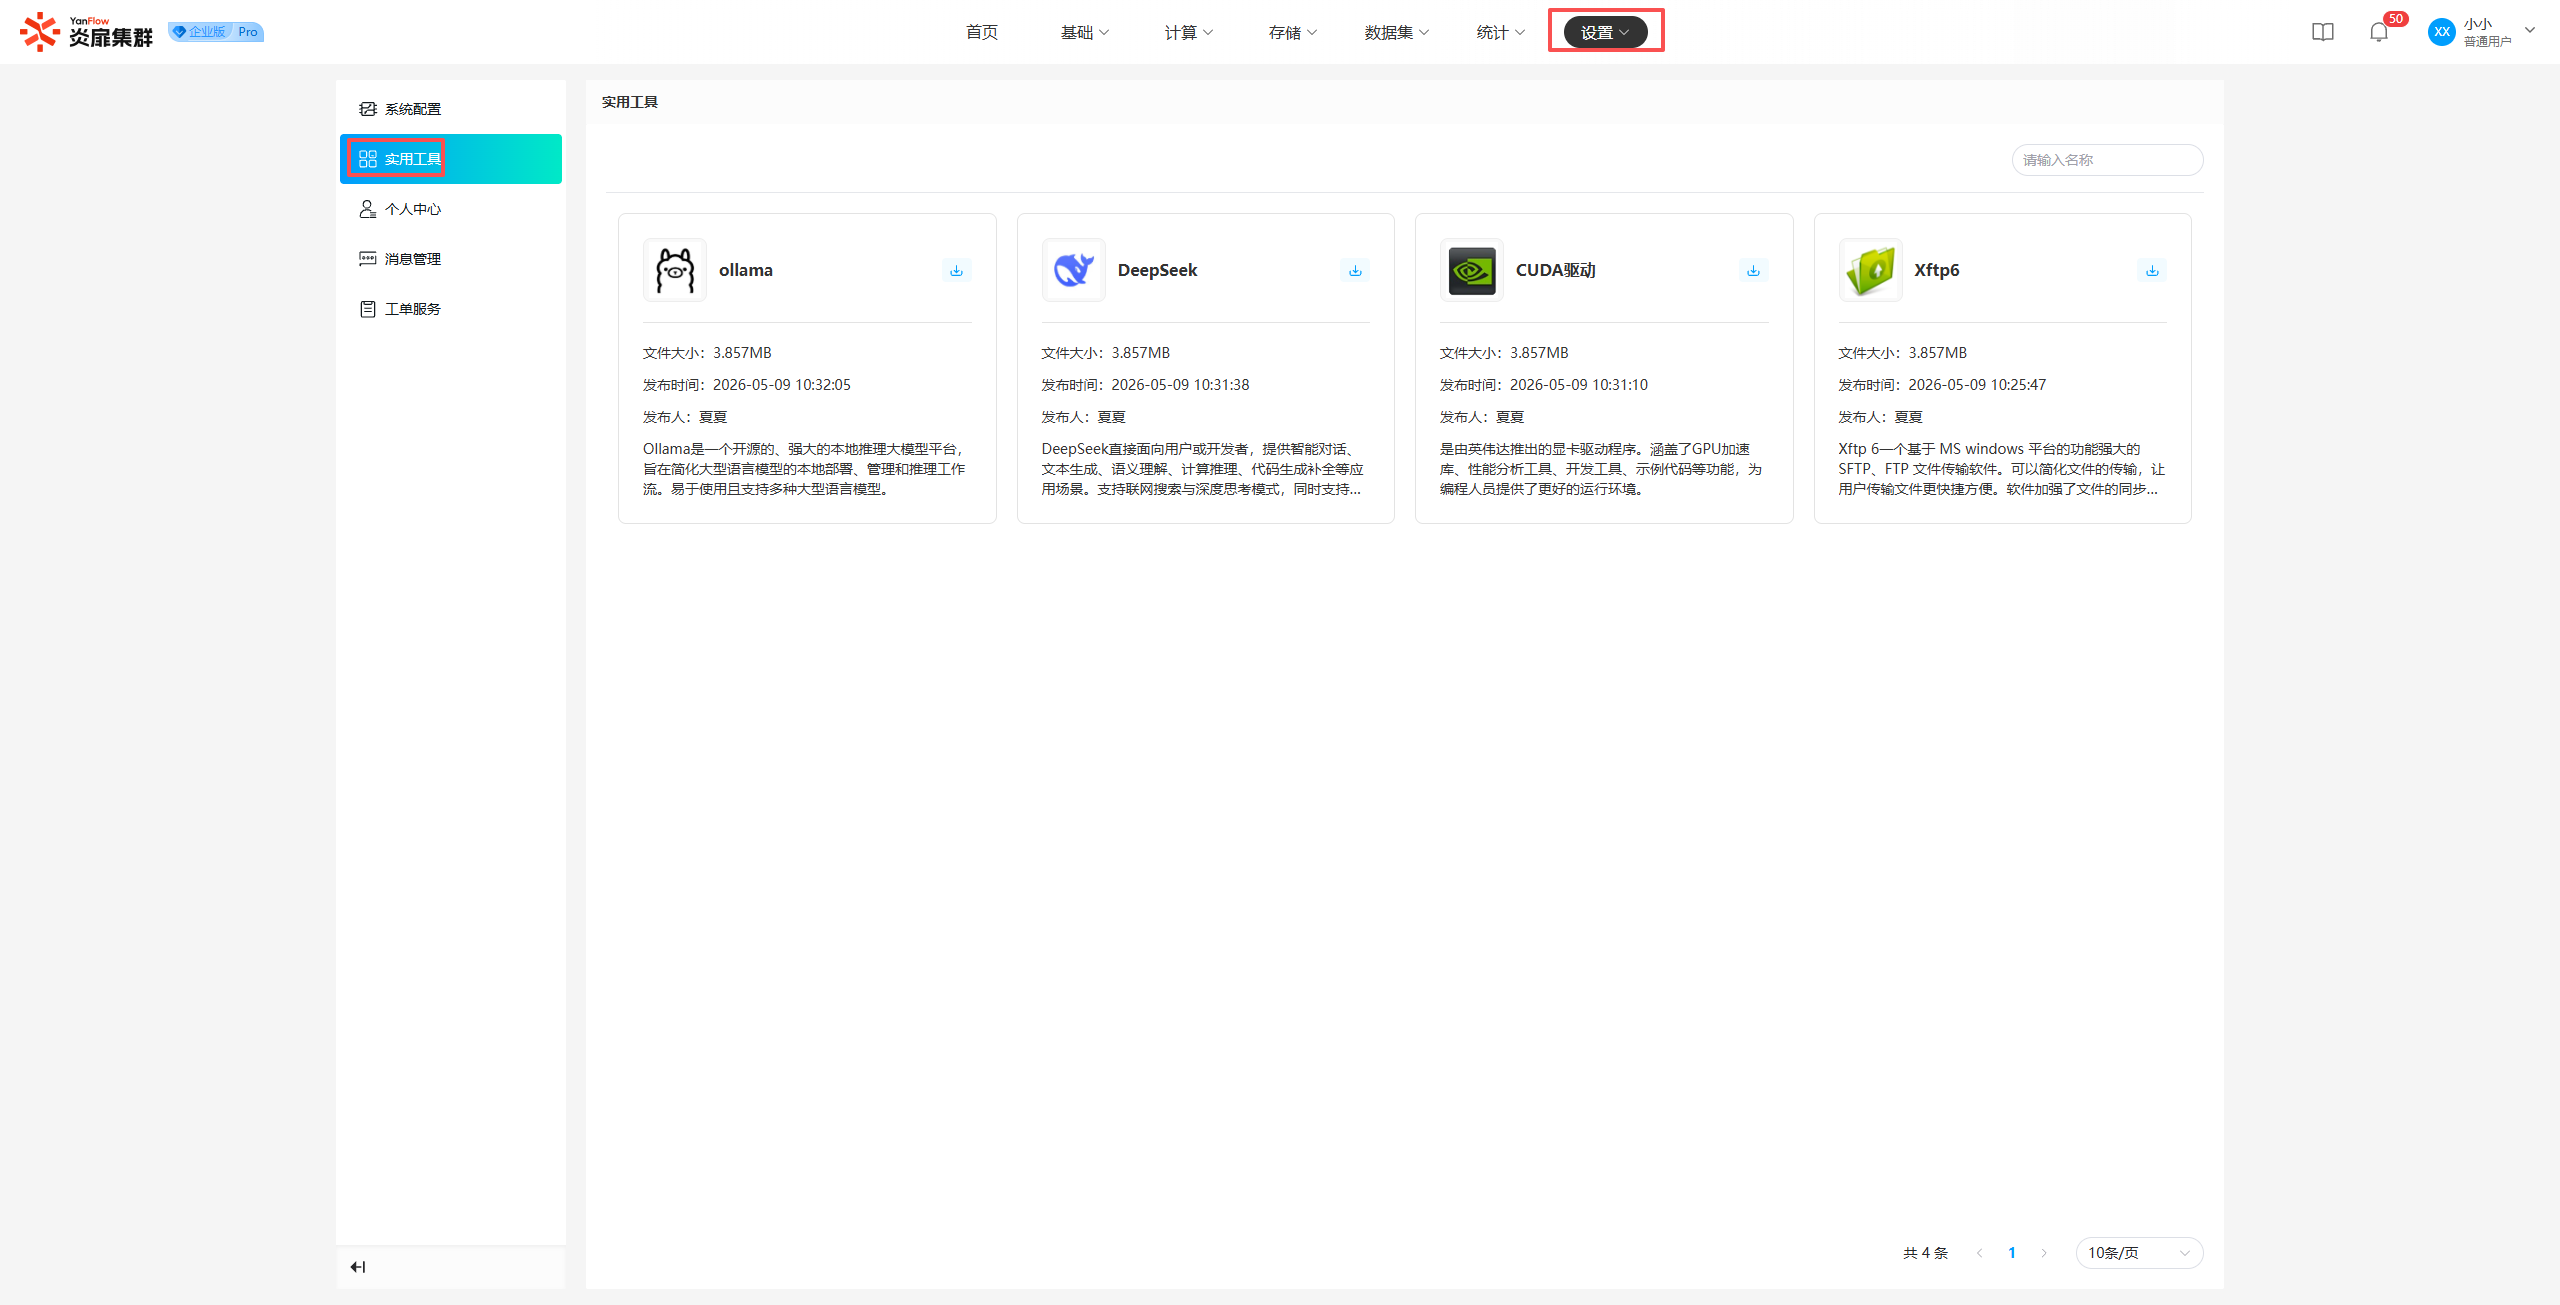
Personal Center
Click Settings - Personal Center or click Username - Personal Center in the top right corner to enter the Personal Center page.
Basic Information
You can view your account basic information and belonging project information.
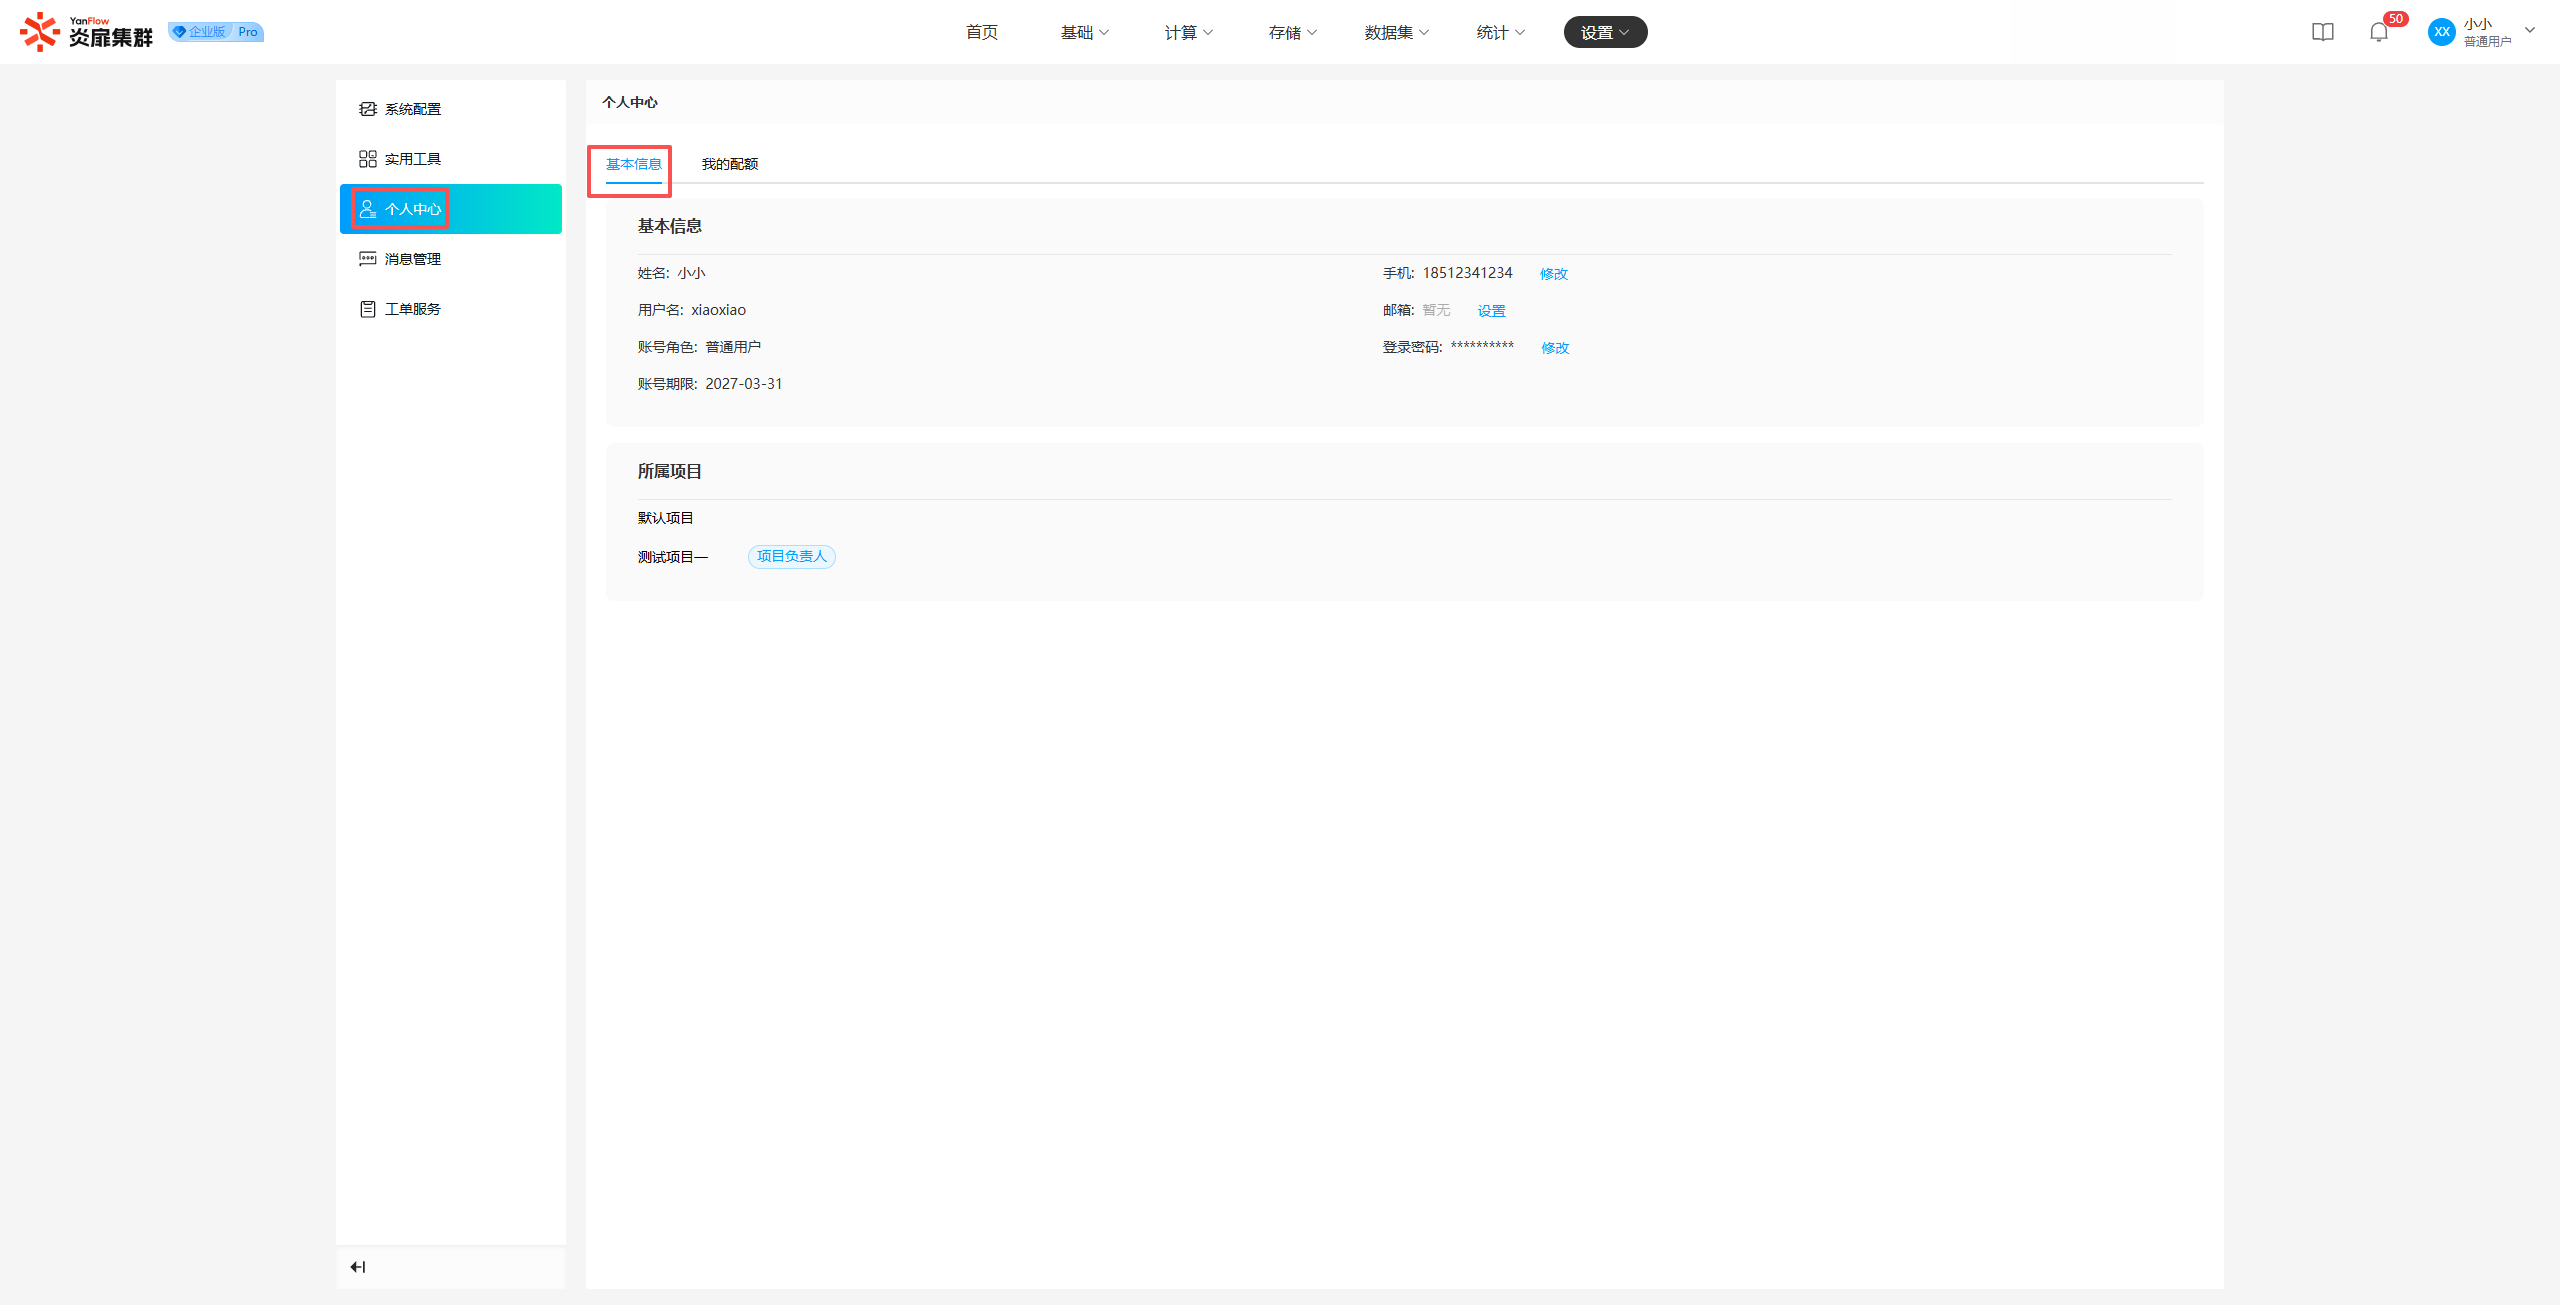
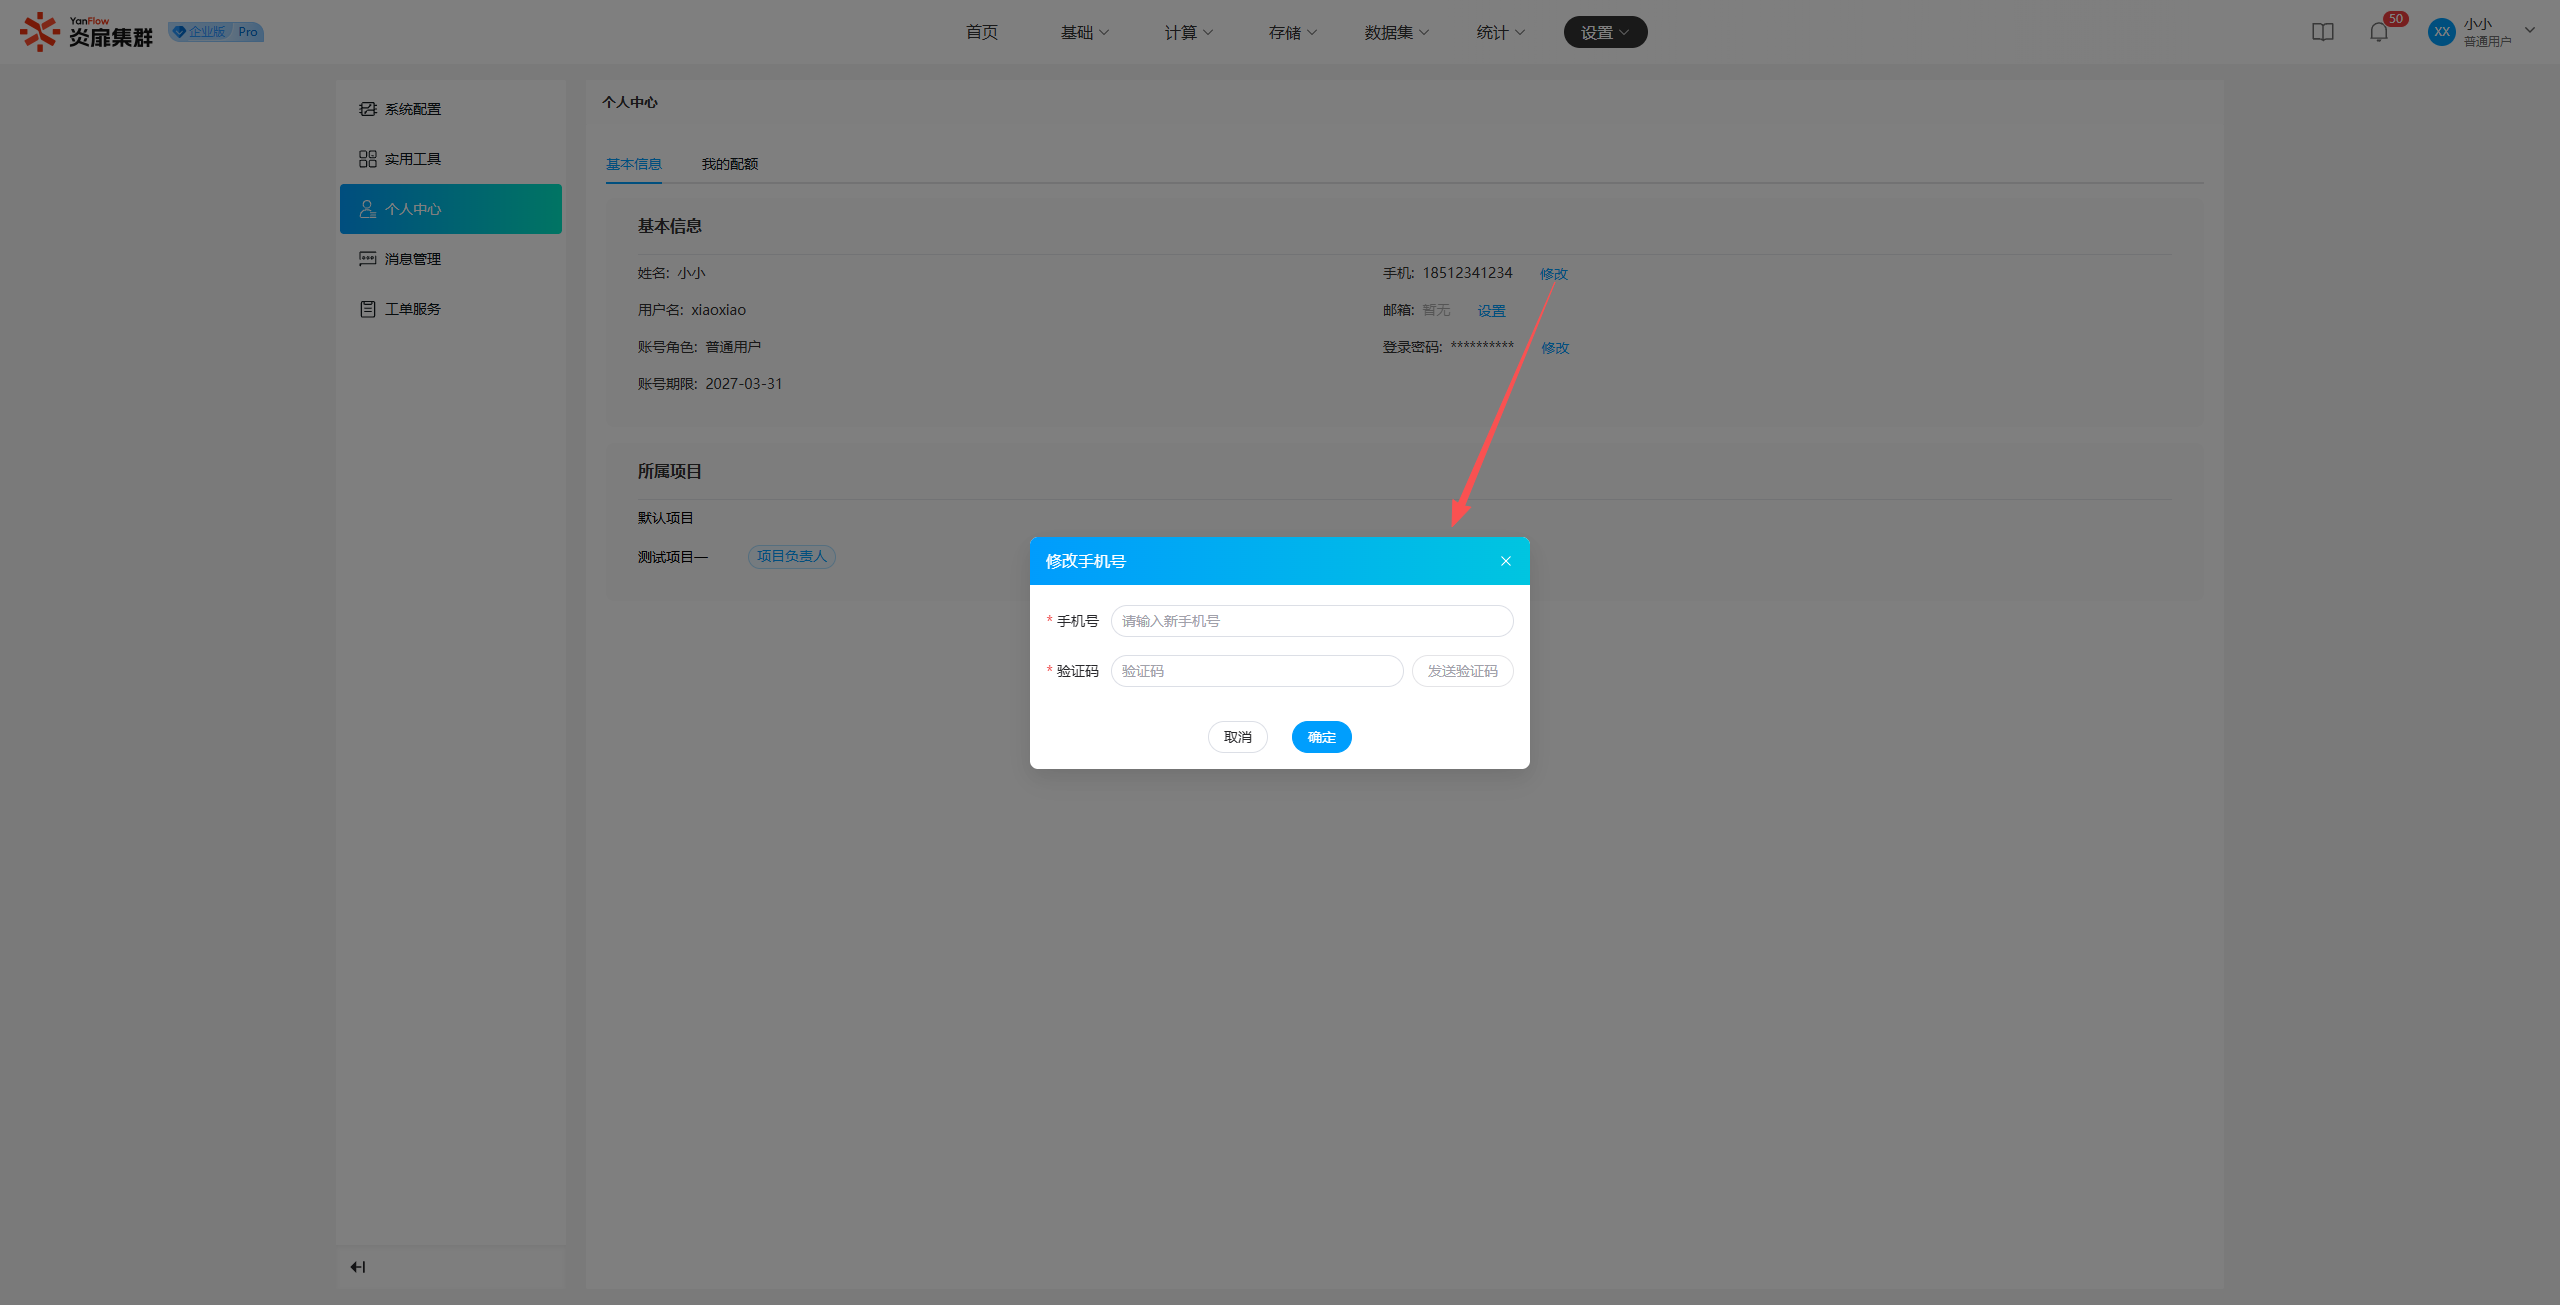
Set/Modify Mobile Number: Click Set or Modify next to the mobile number, enter the mobile number and verification code, and click Confirm. If validation passes, the setting or modification is complete.
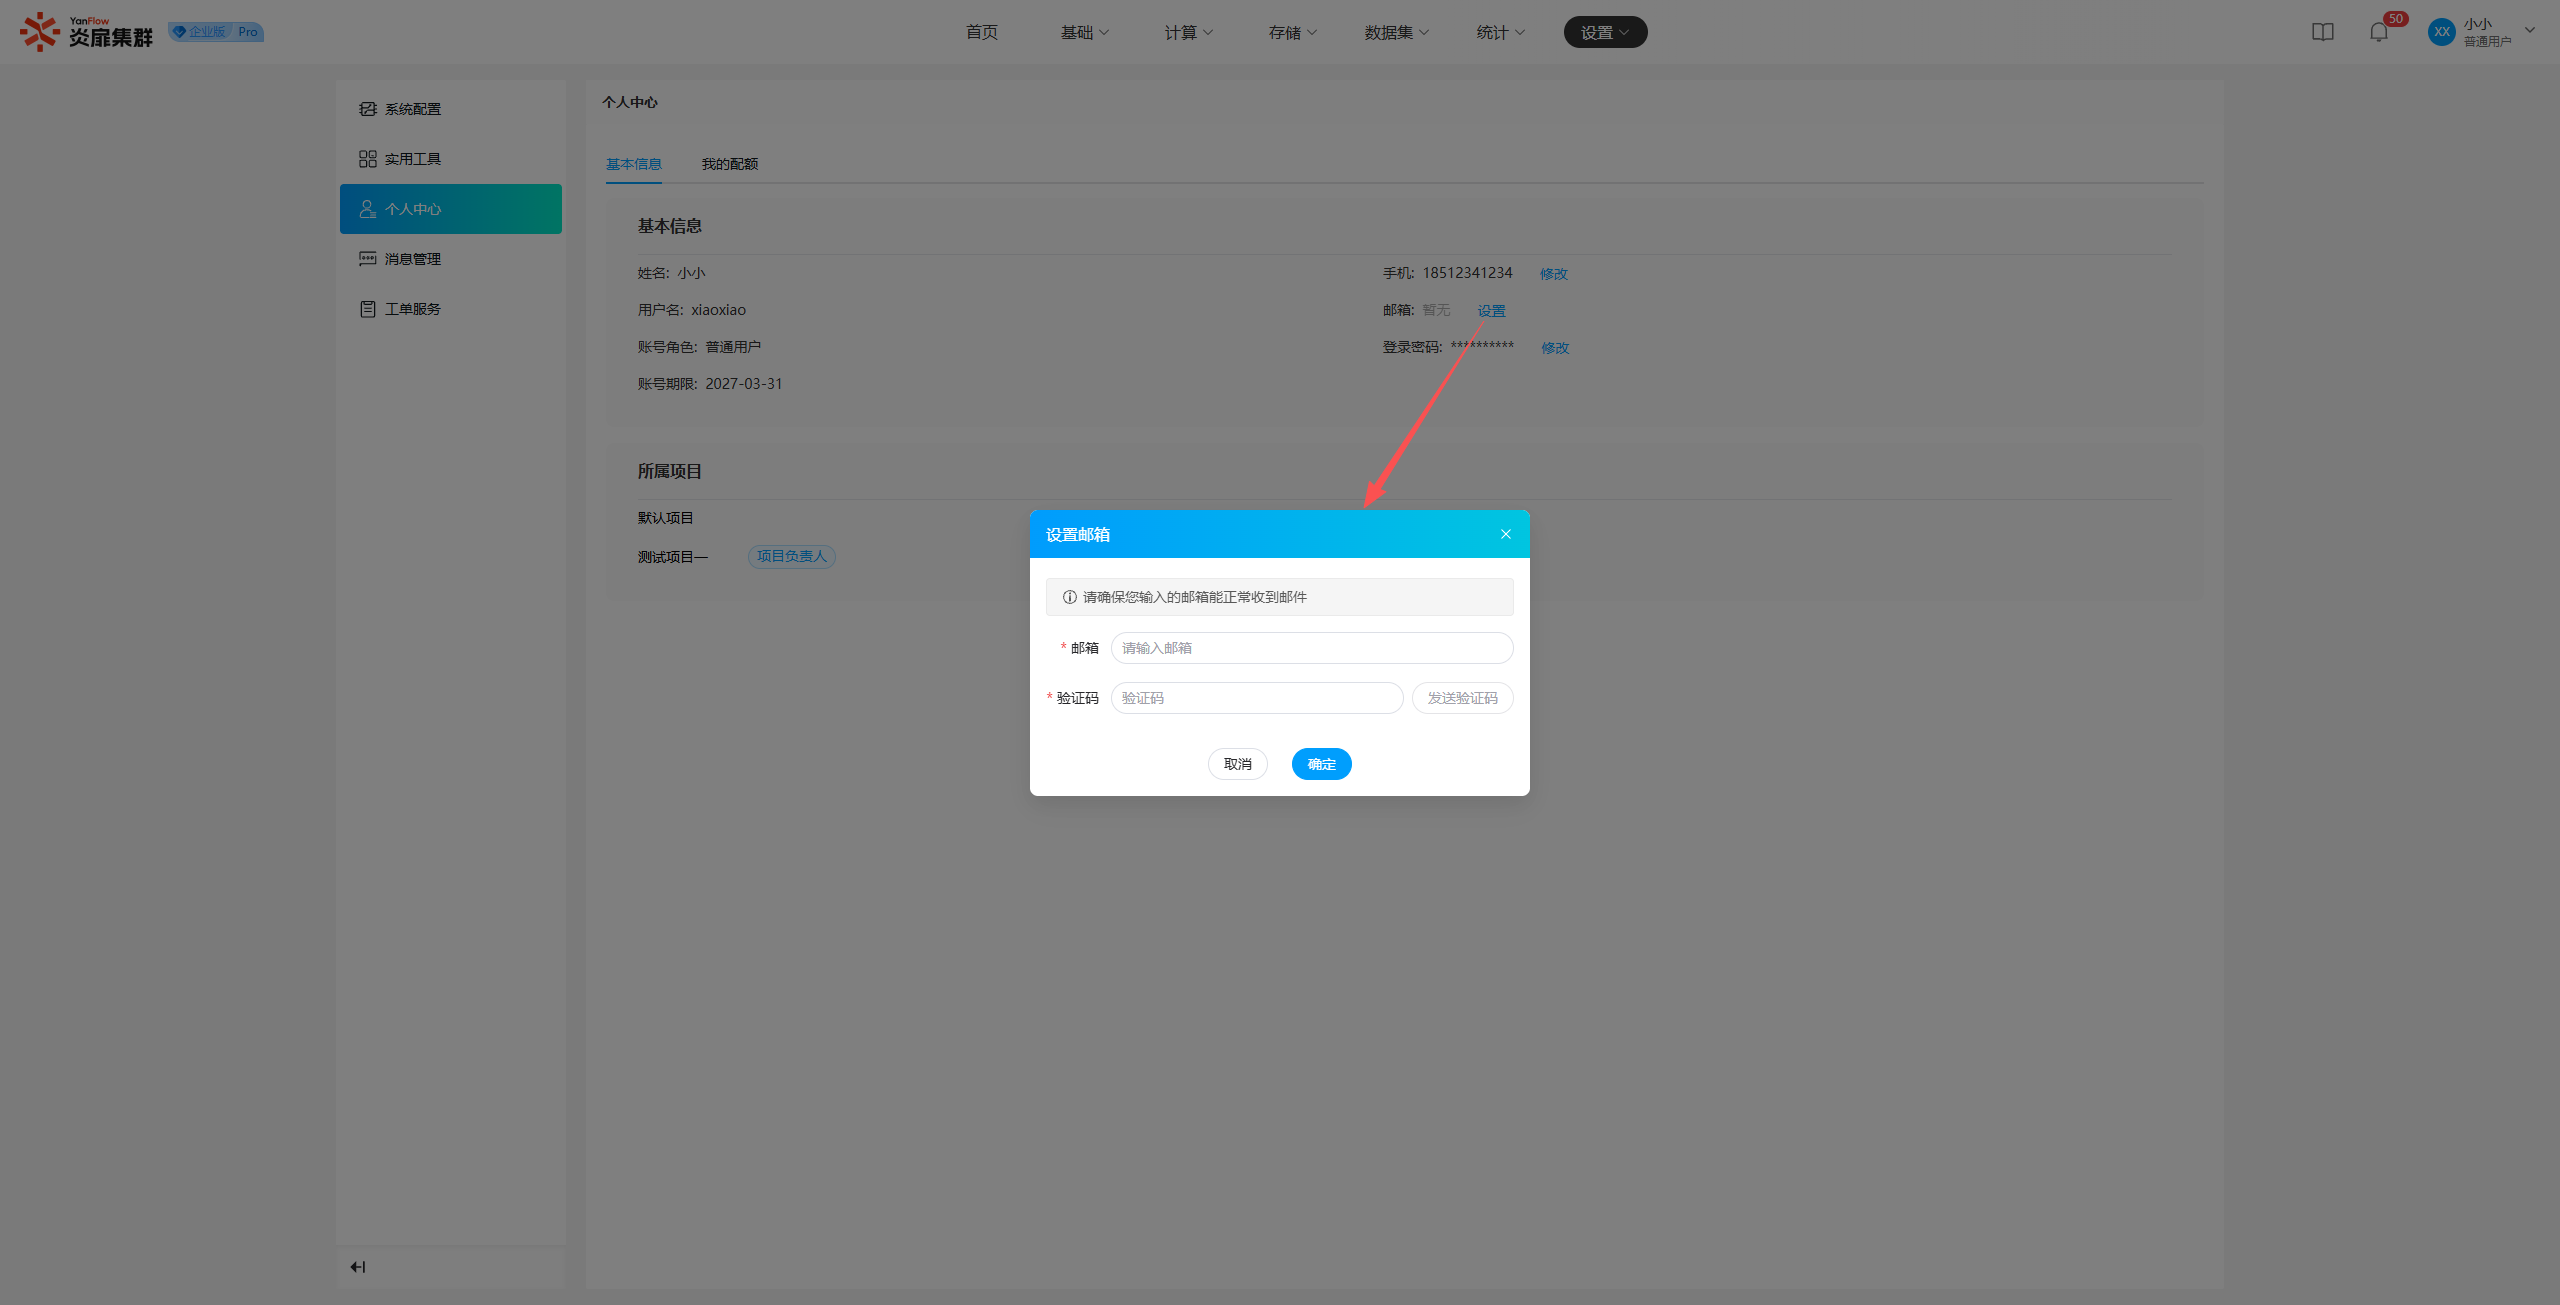
Set/Modify Email: Click Set or Modify next to the email, enter the email address and verification code, and click Confirm. If validation passes, the setting or modification is complete.
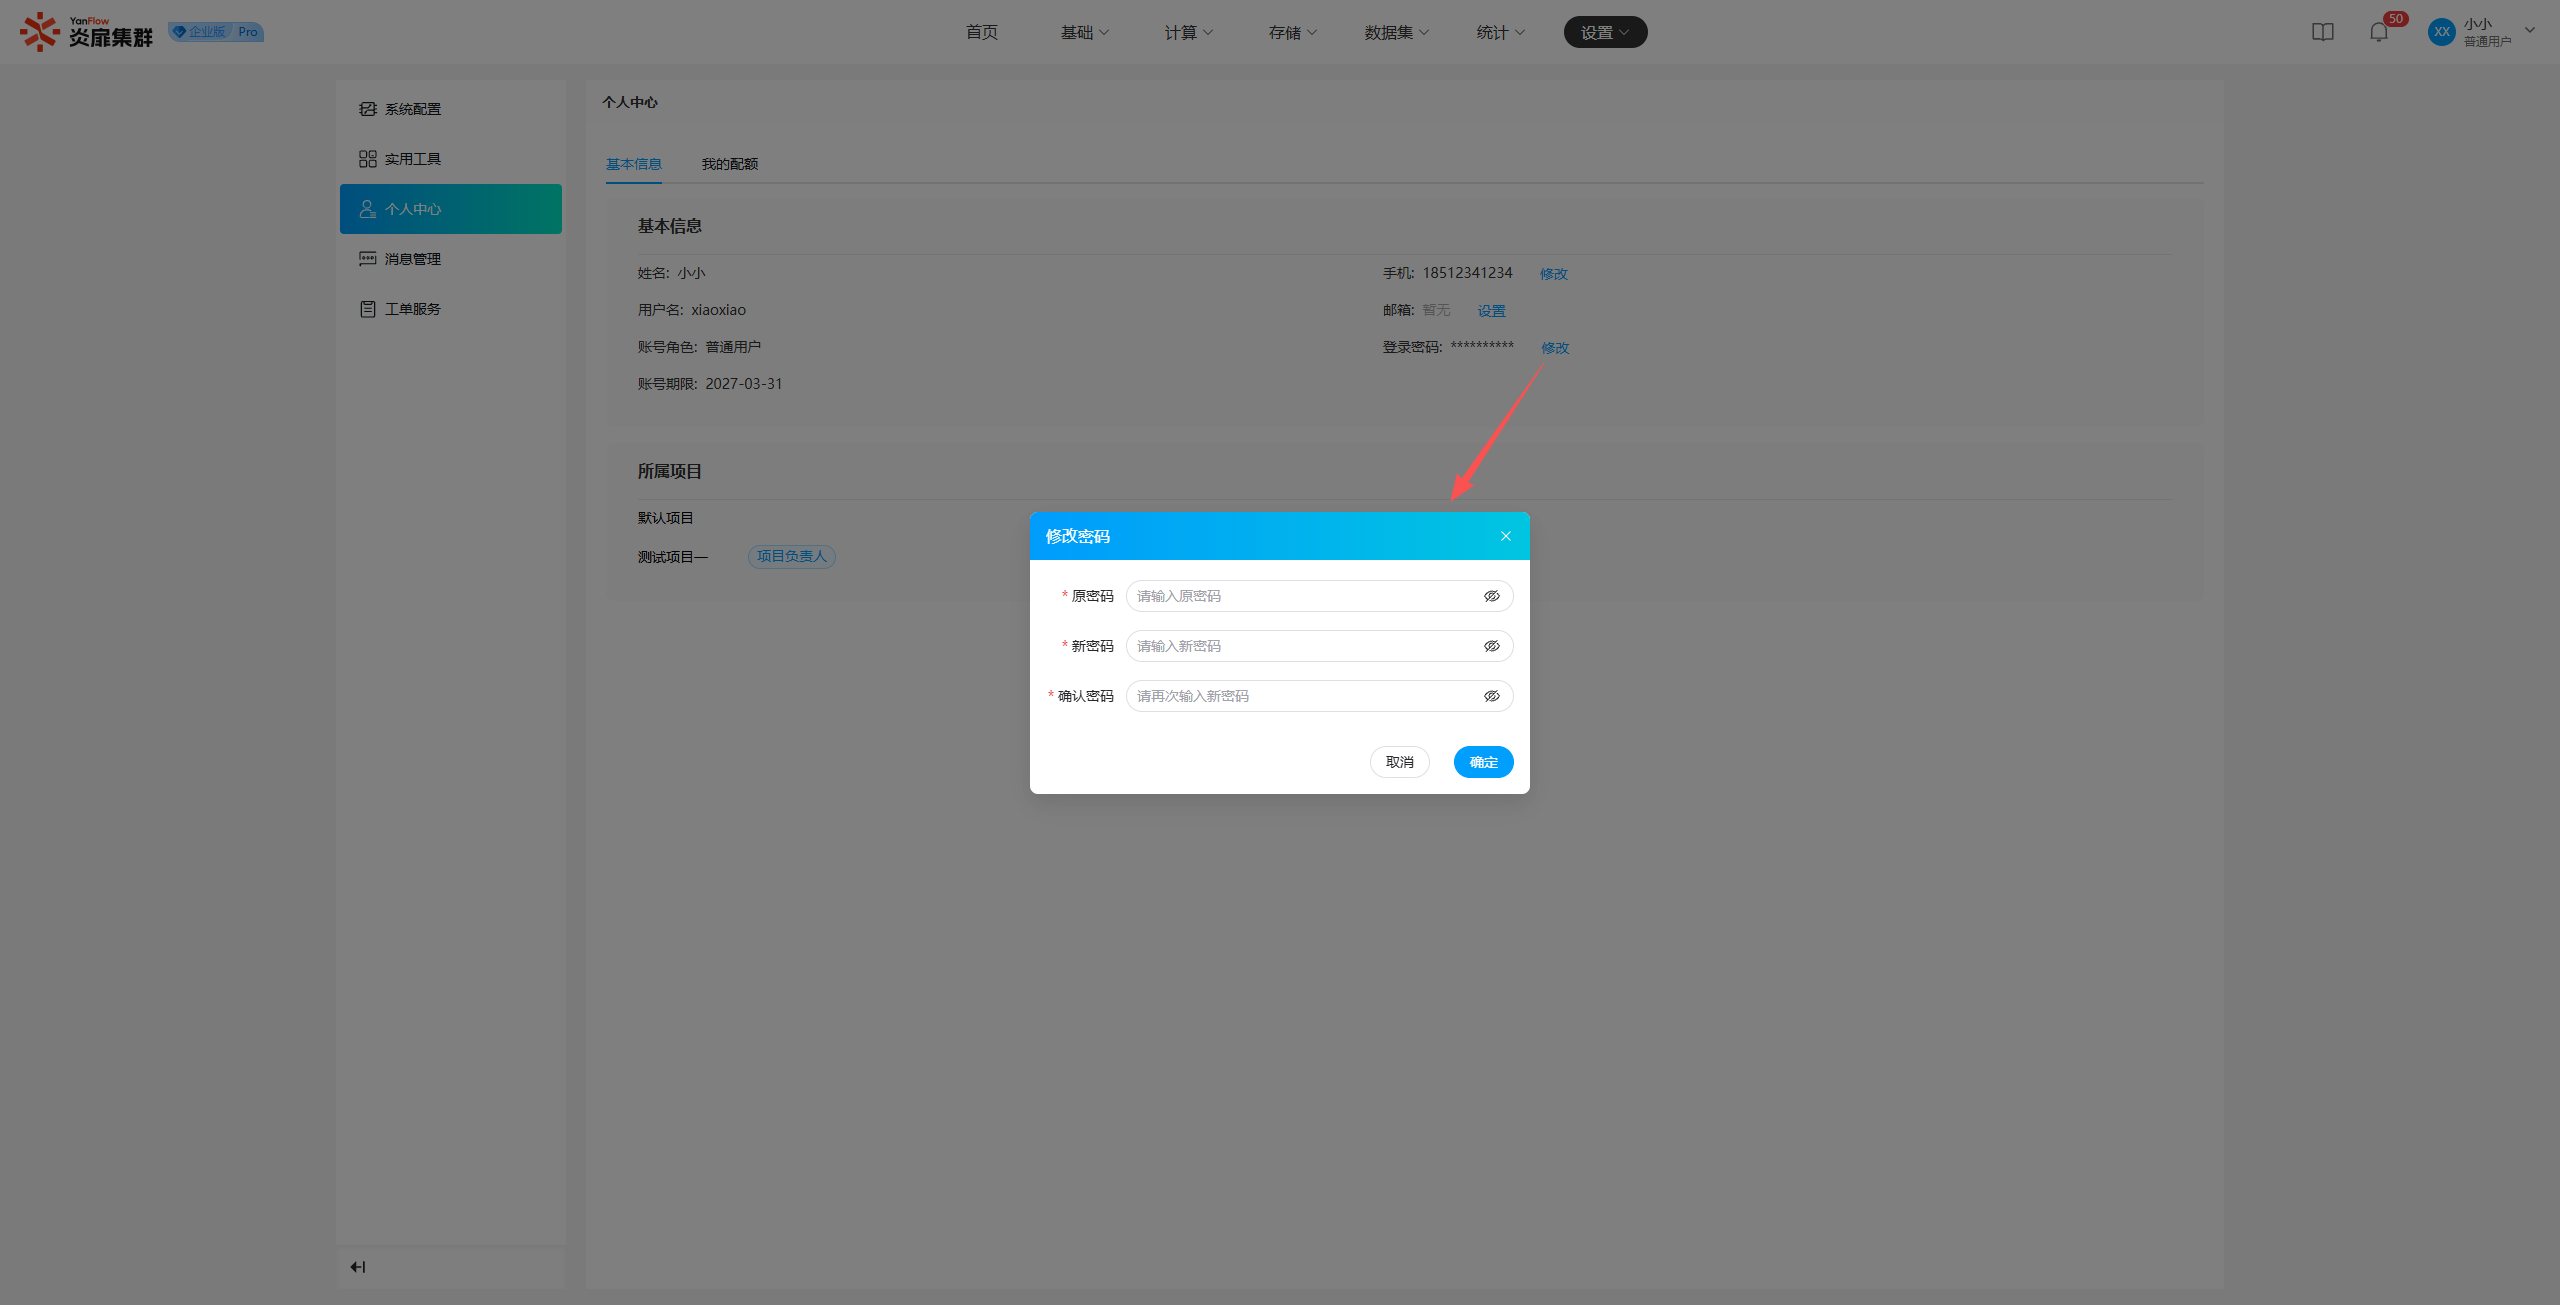
Modify Login Password: Click Modify next to the password, enter your Original Password, New Password, and Confirm New Password, and click Confirm. If validation passes, your login password will be modified. After a successful password change, you will be logged out and need to log in again.
My Quota
Users can view their current relevant quota information.
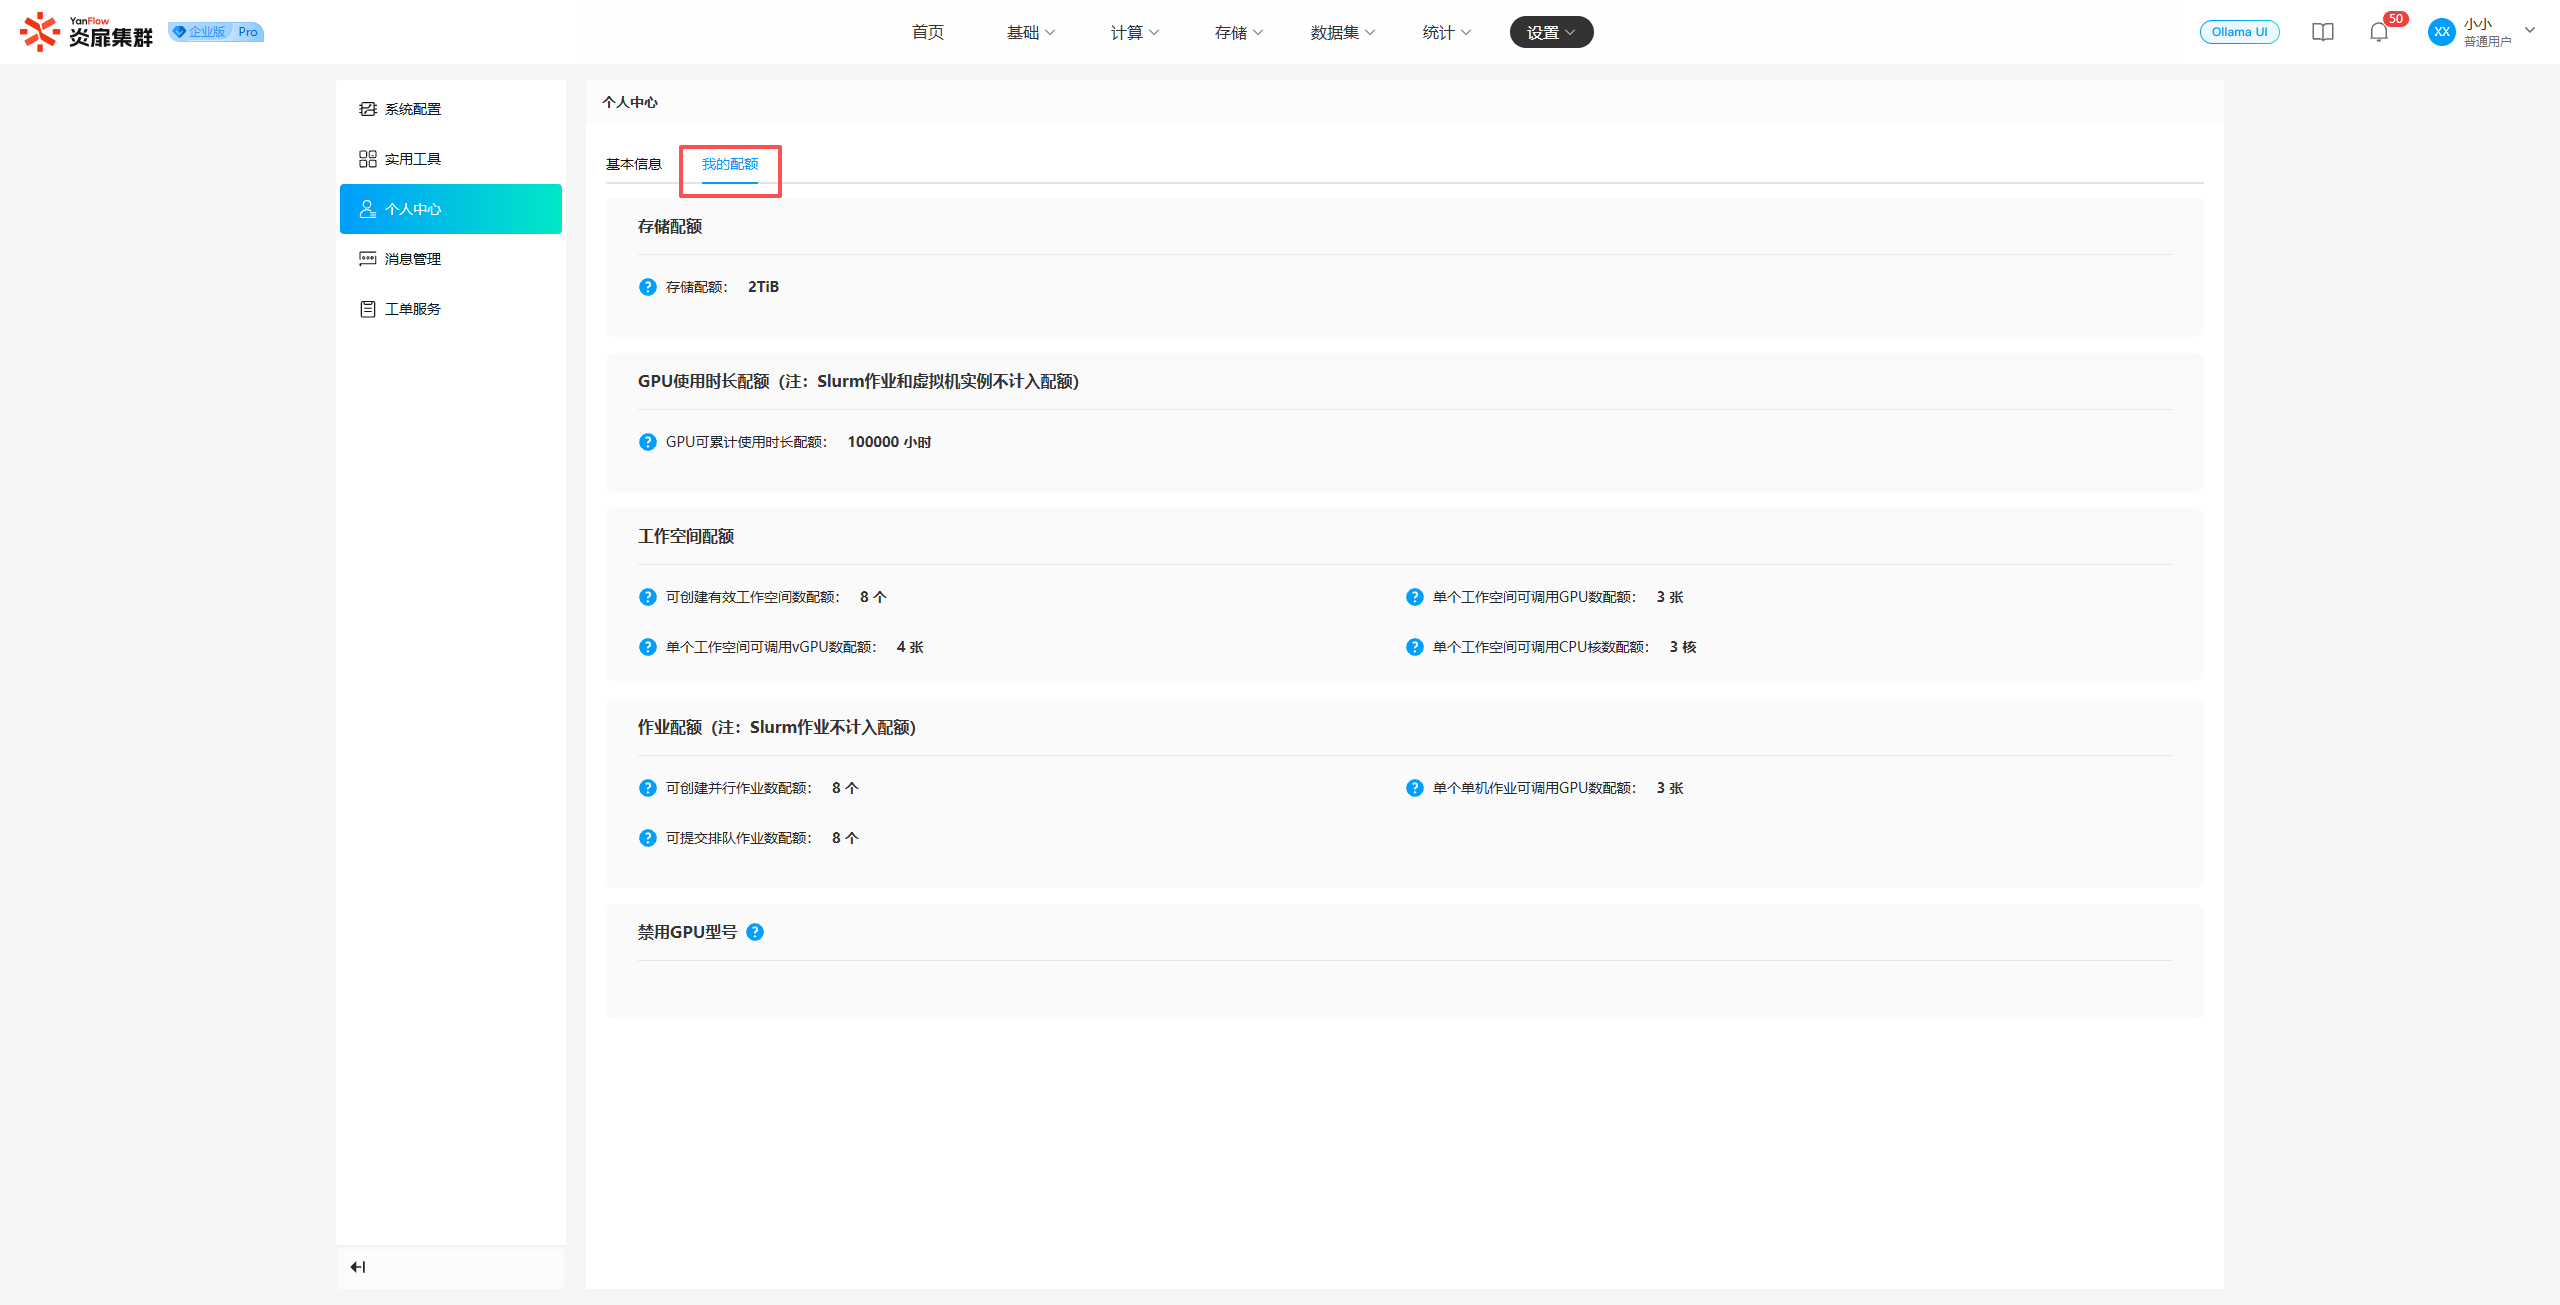
Note: Specific quotas for regular users are configured and managed by the System Administrator.
Message Management
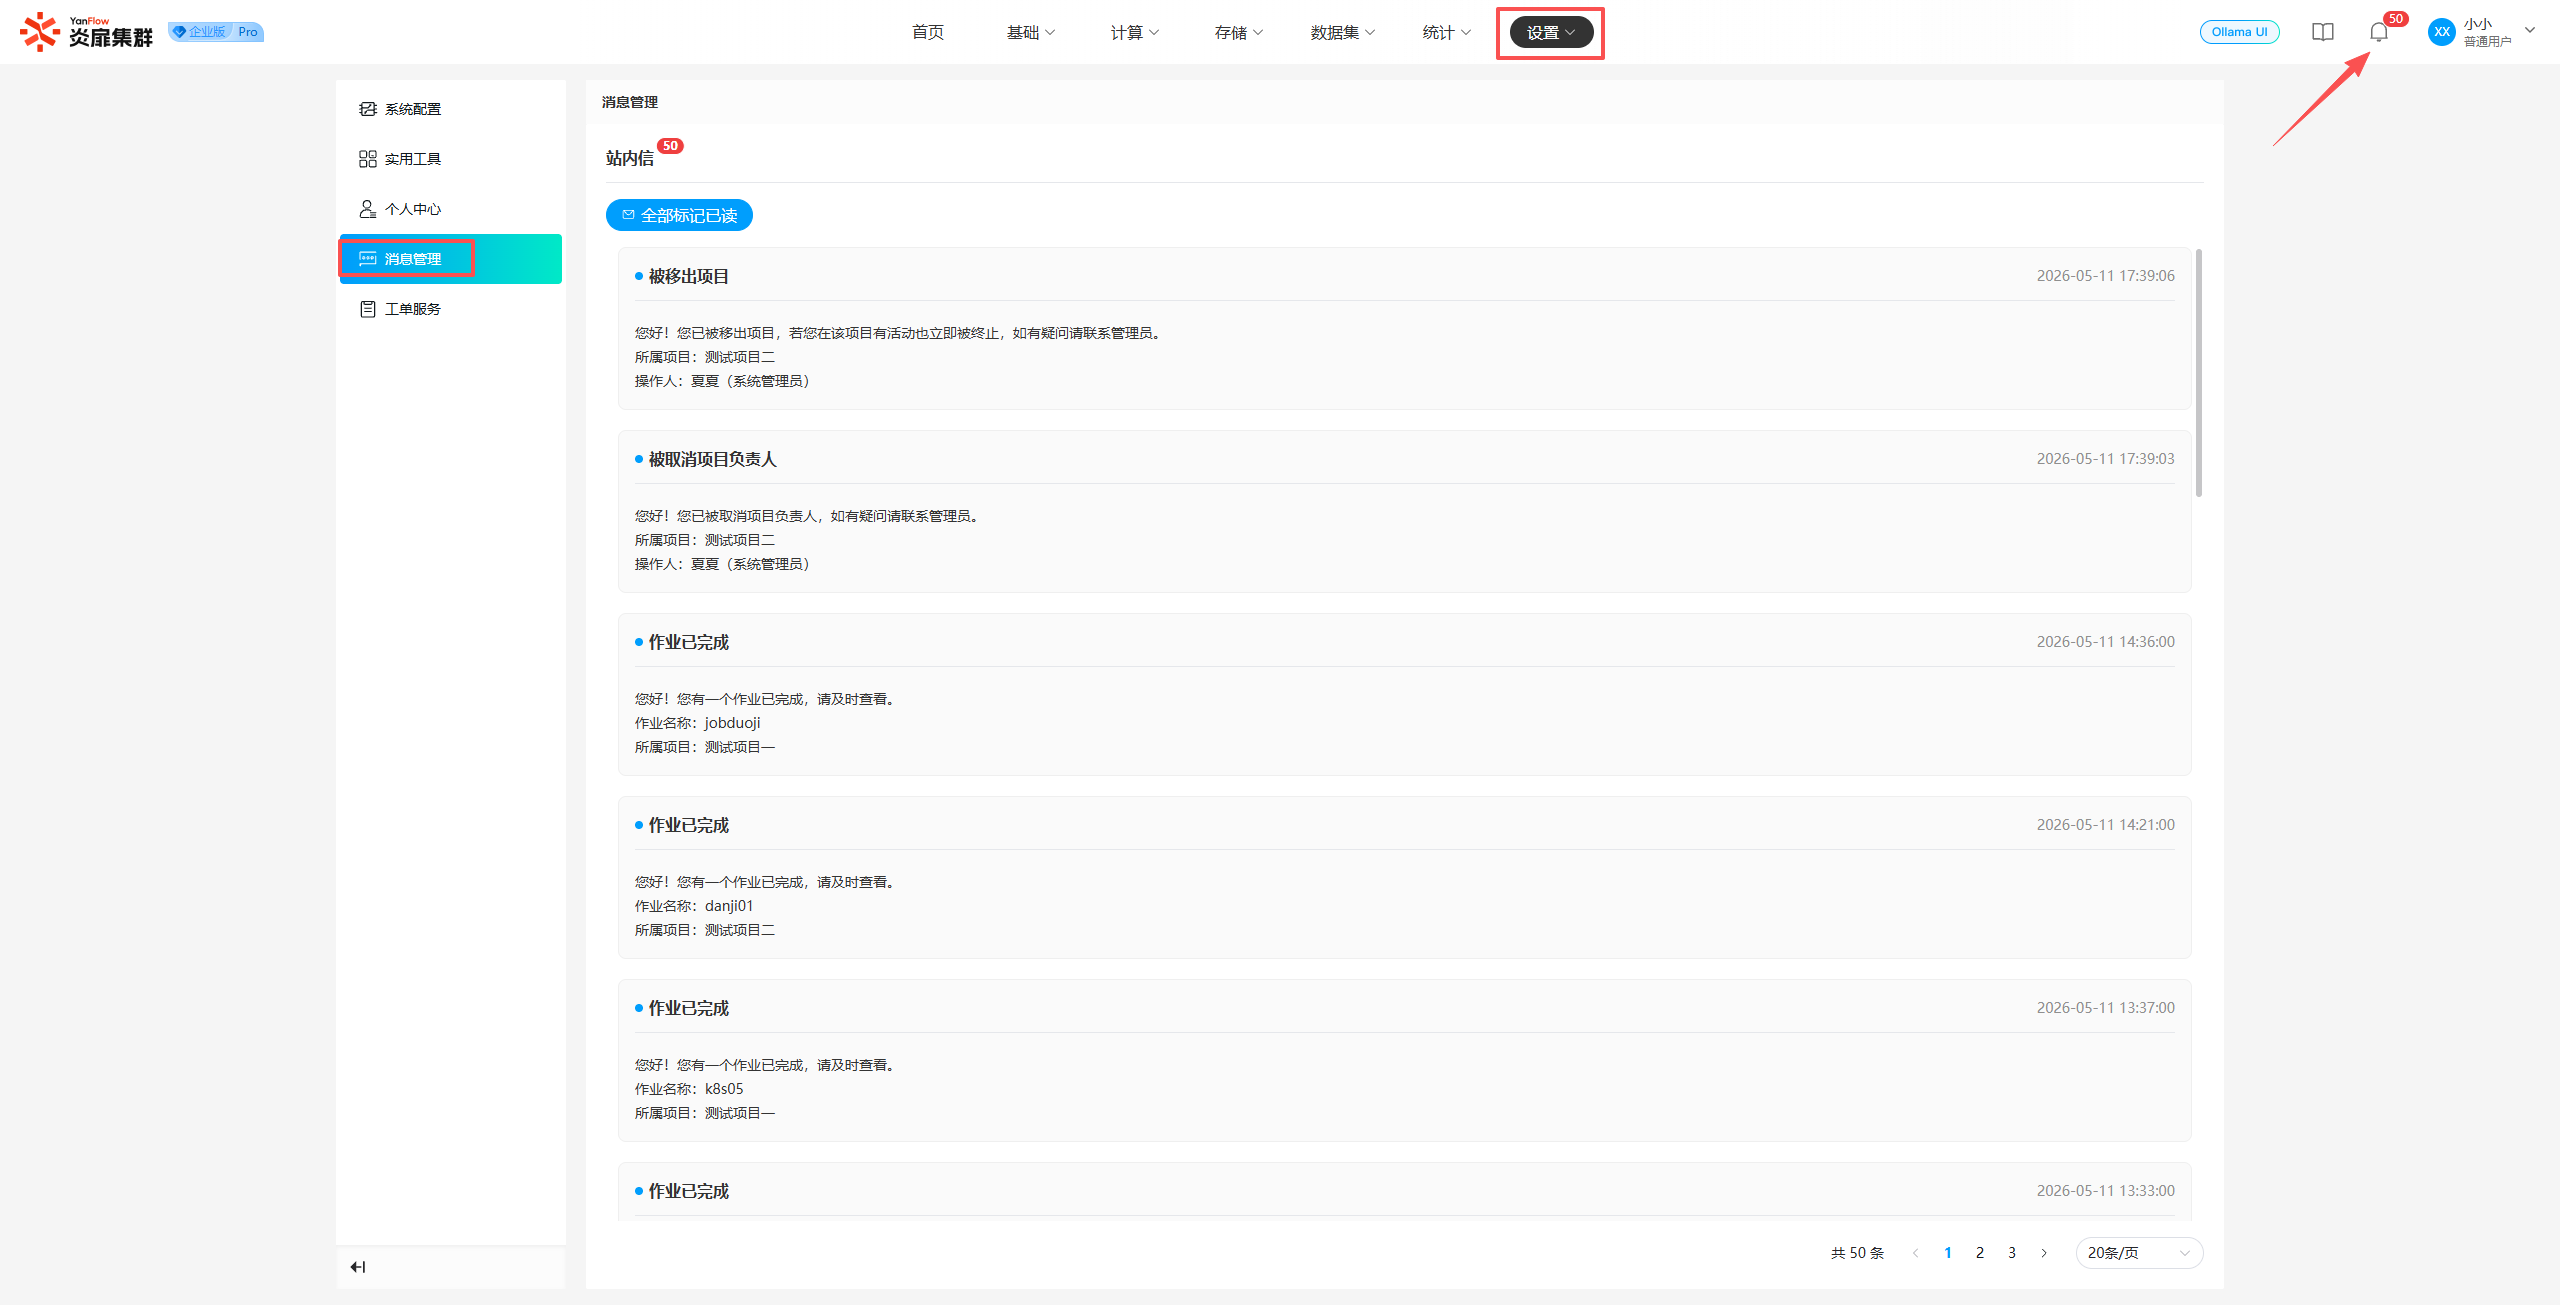
Click Settings - Message Management or click the Message Icon in the top right corner to enter the Message Management page, where you can view all messages pushed to you by the system. Unread messages are marked with an unread indicator. If there are unread messages, click Mark All as Read to set all unread messages to read.
Ticket Service
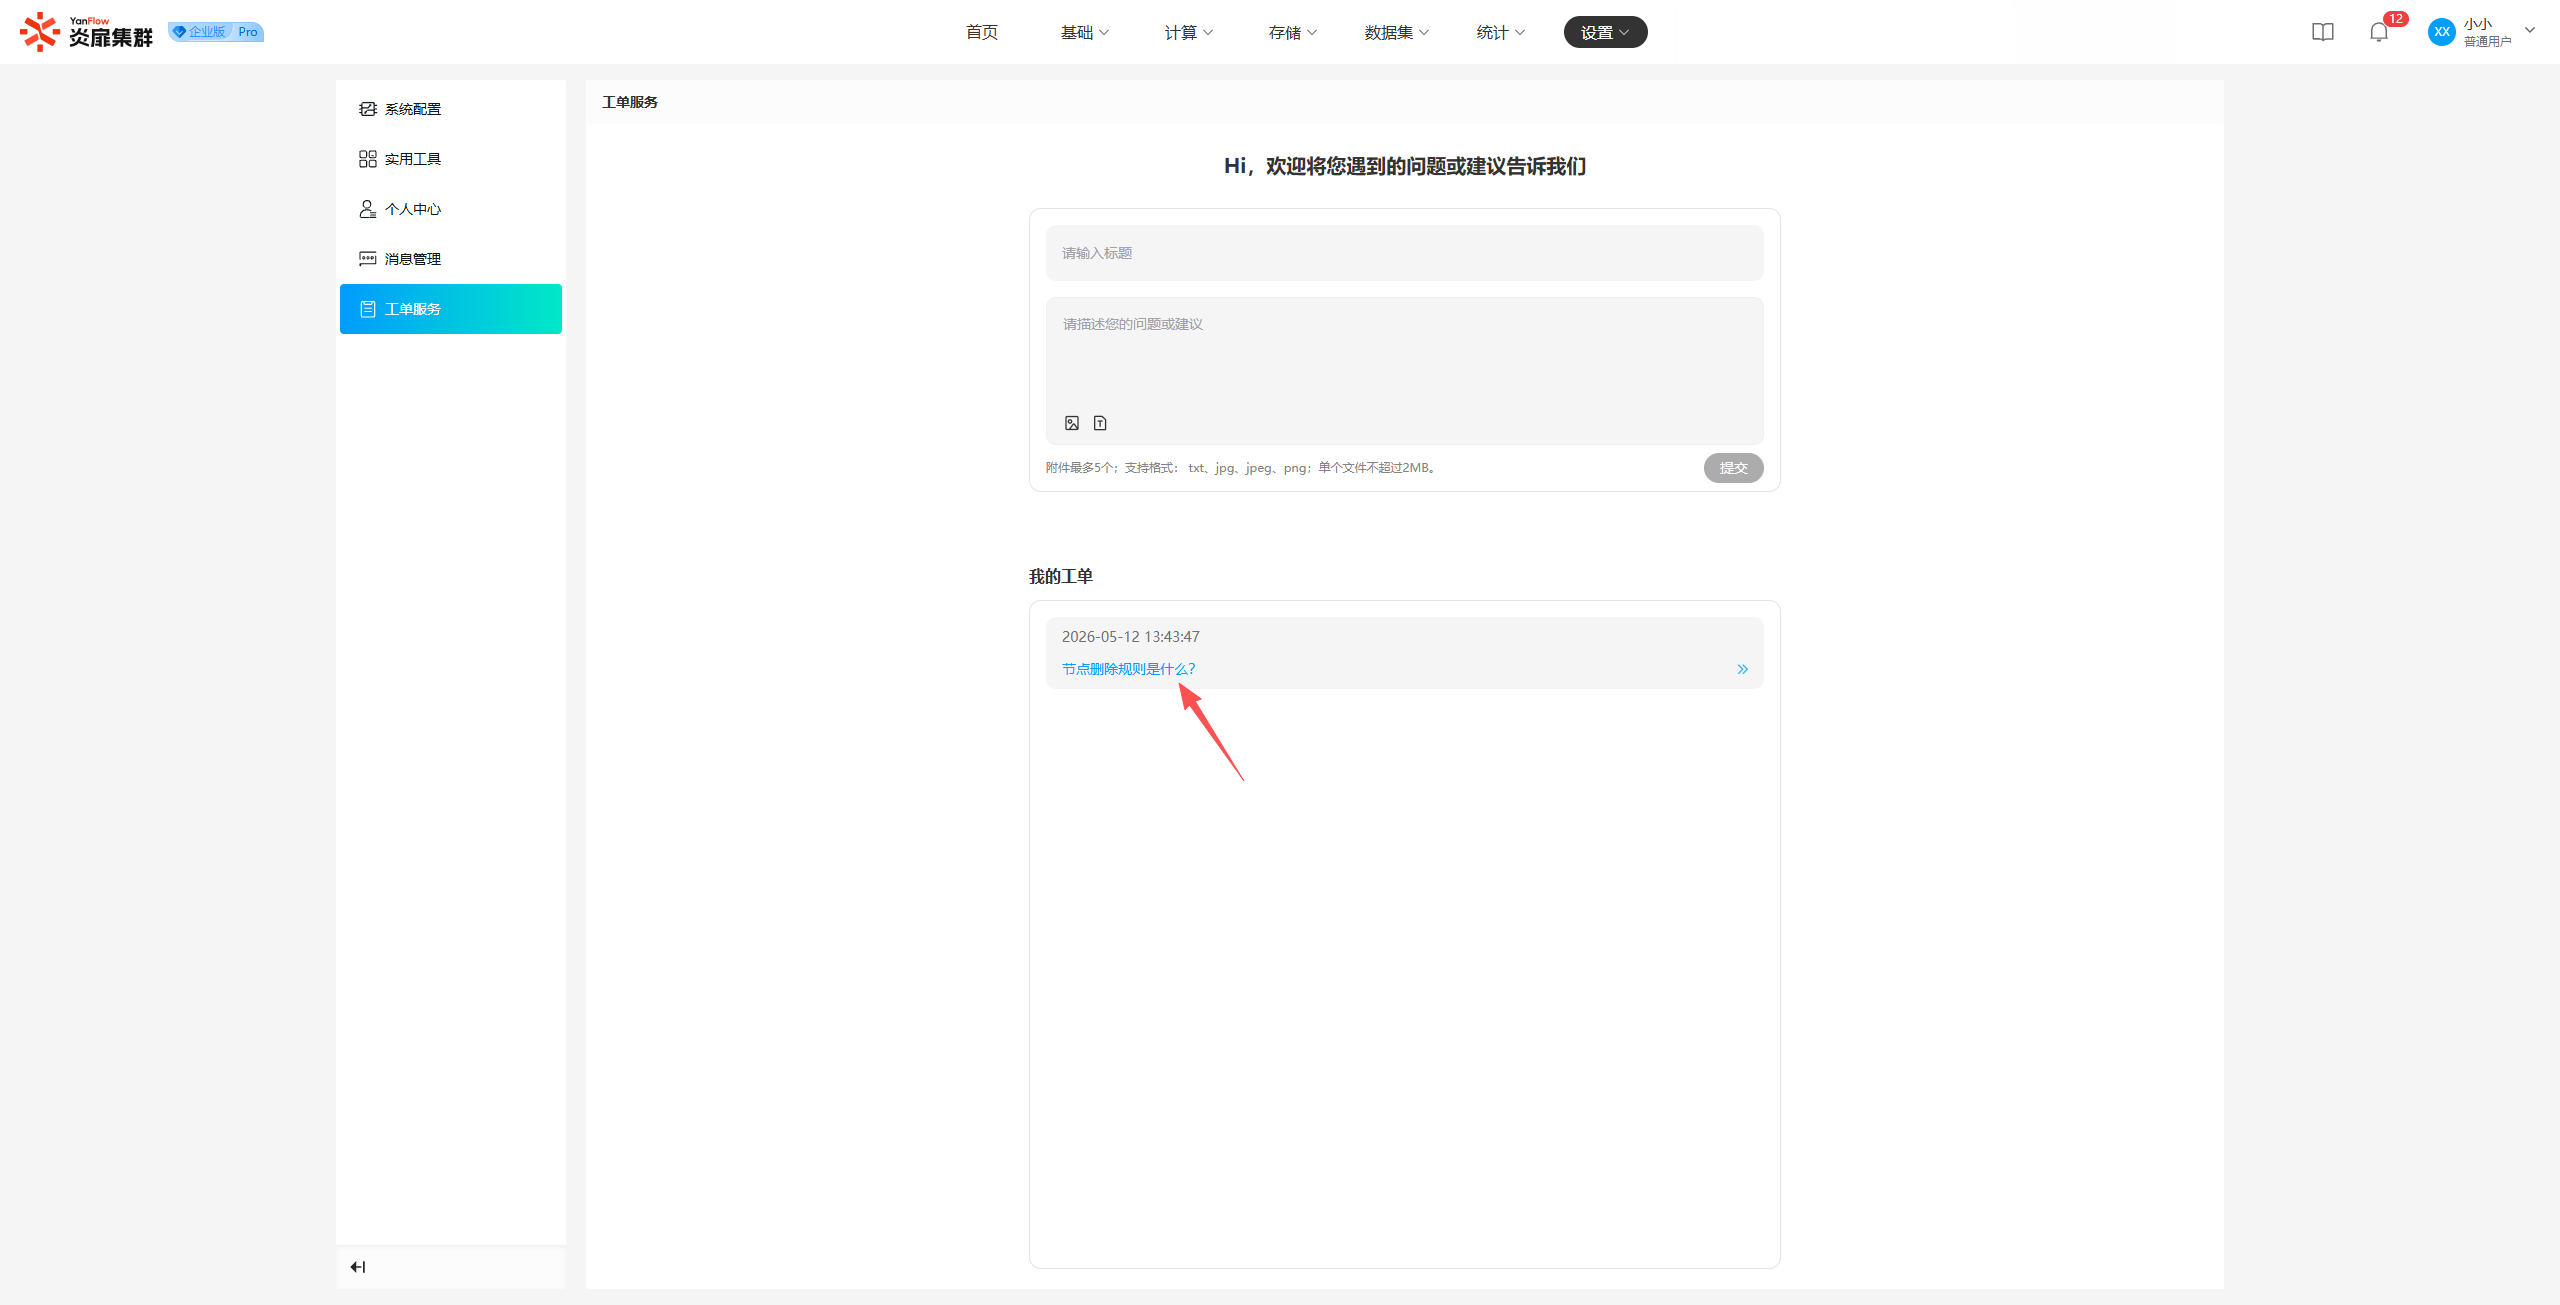
Submit Ticket: Click Settings - Ticket Service or Username - Ticket Service in the top right corner to enter the Ticket Service page. Enter a title and description, then click "Submit" to complete the ticket submission.
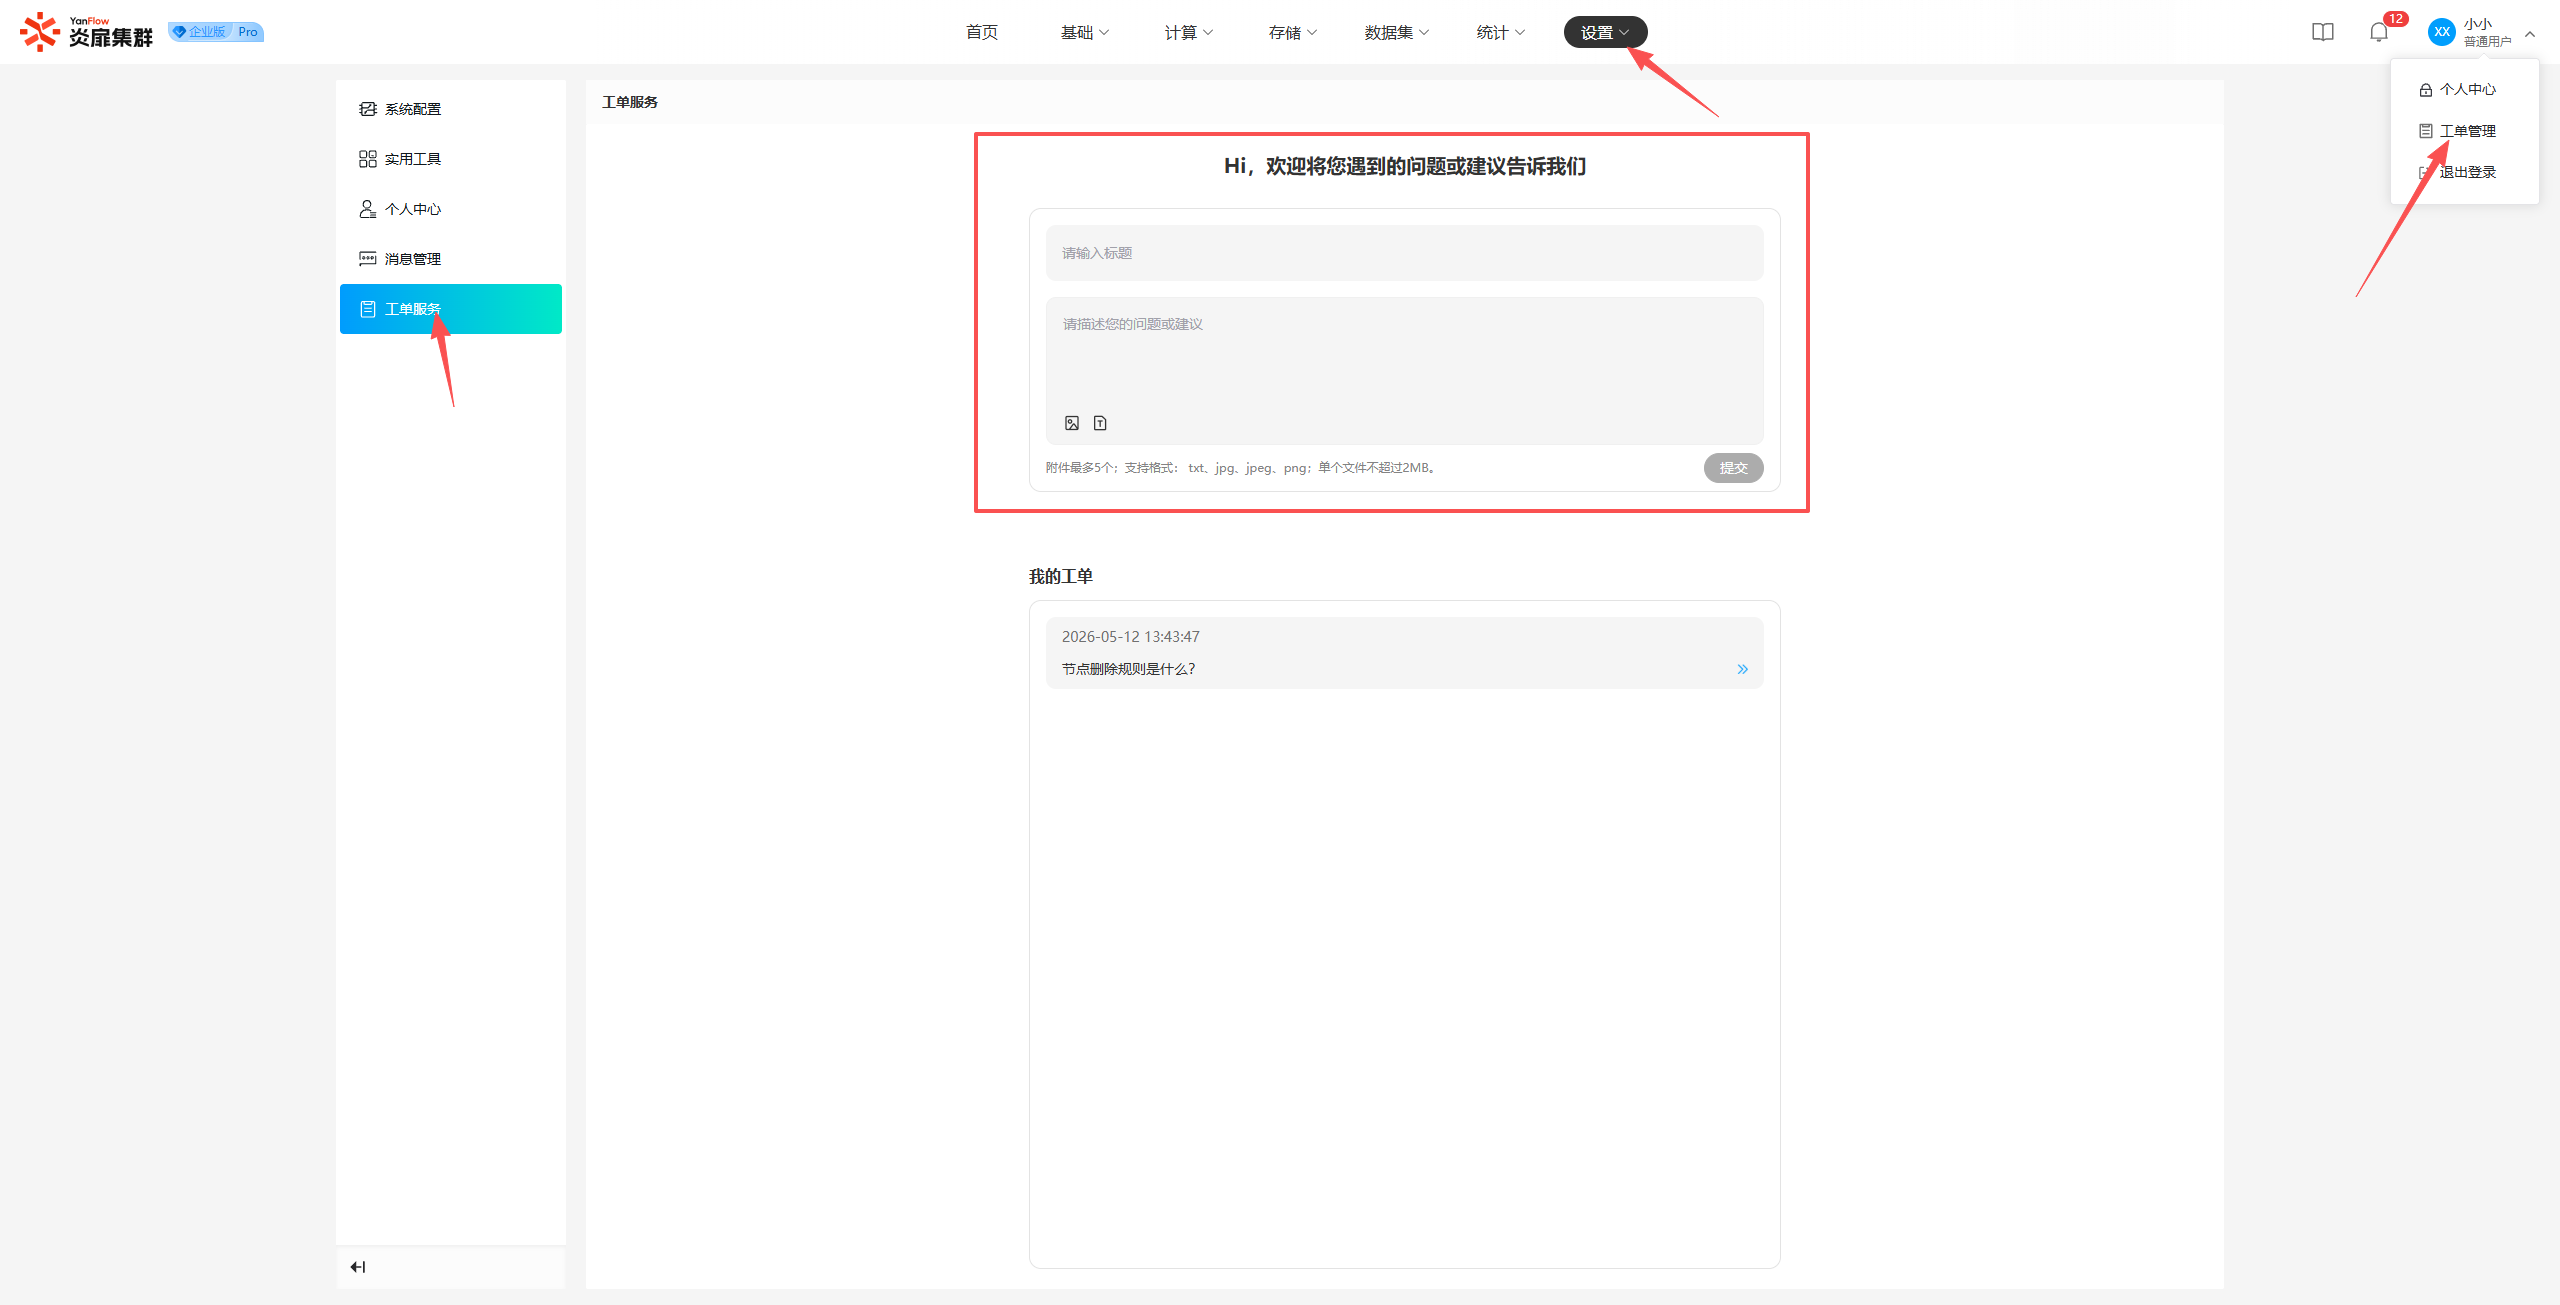
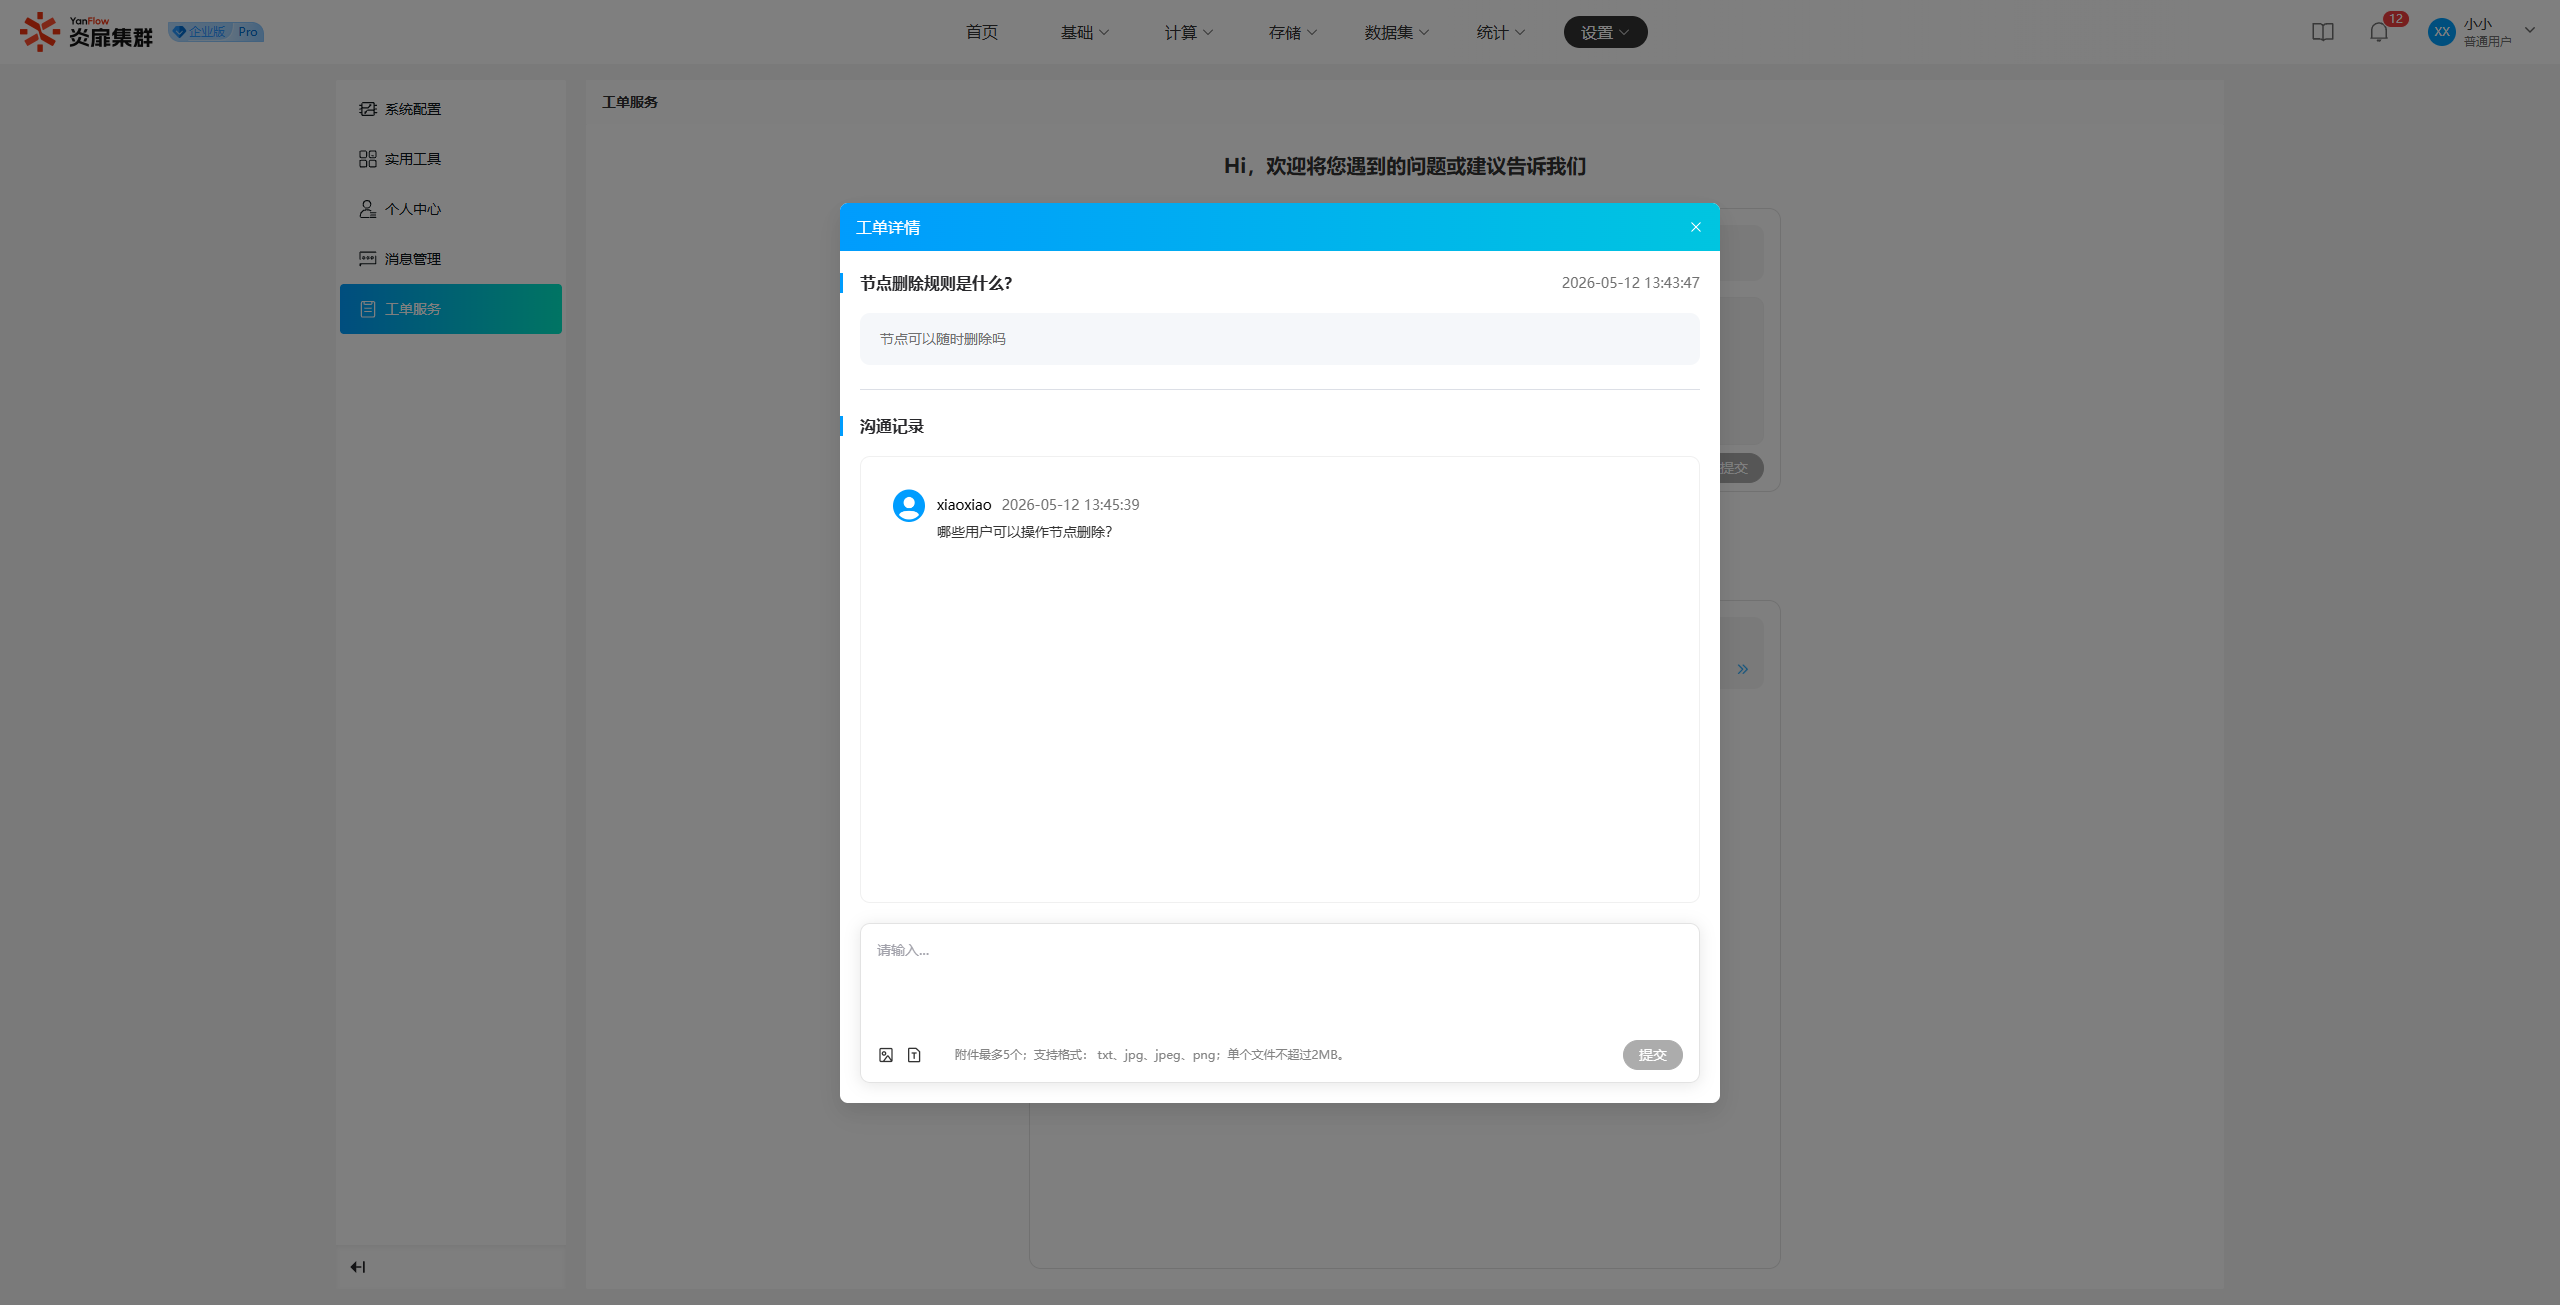
View Ticket: "My Tickets" displays the list of all historical tickets you have submitted. Click a ticket title to view its details, including the title, description, and communication records. Users and customer service can continue to leave messages and interact on historical tickets.