
System Administrator
This document is intended for users with the System Administrator role on the YanFlow Intelligent Computing Training Platform. System administrators are primarily responsible for managing teacher accounts, cluster nodes, and innovation projects, as well as configuring system basic information such as the academic calendar and schedule.
Login
User Login
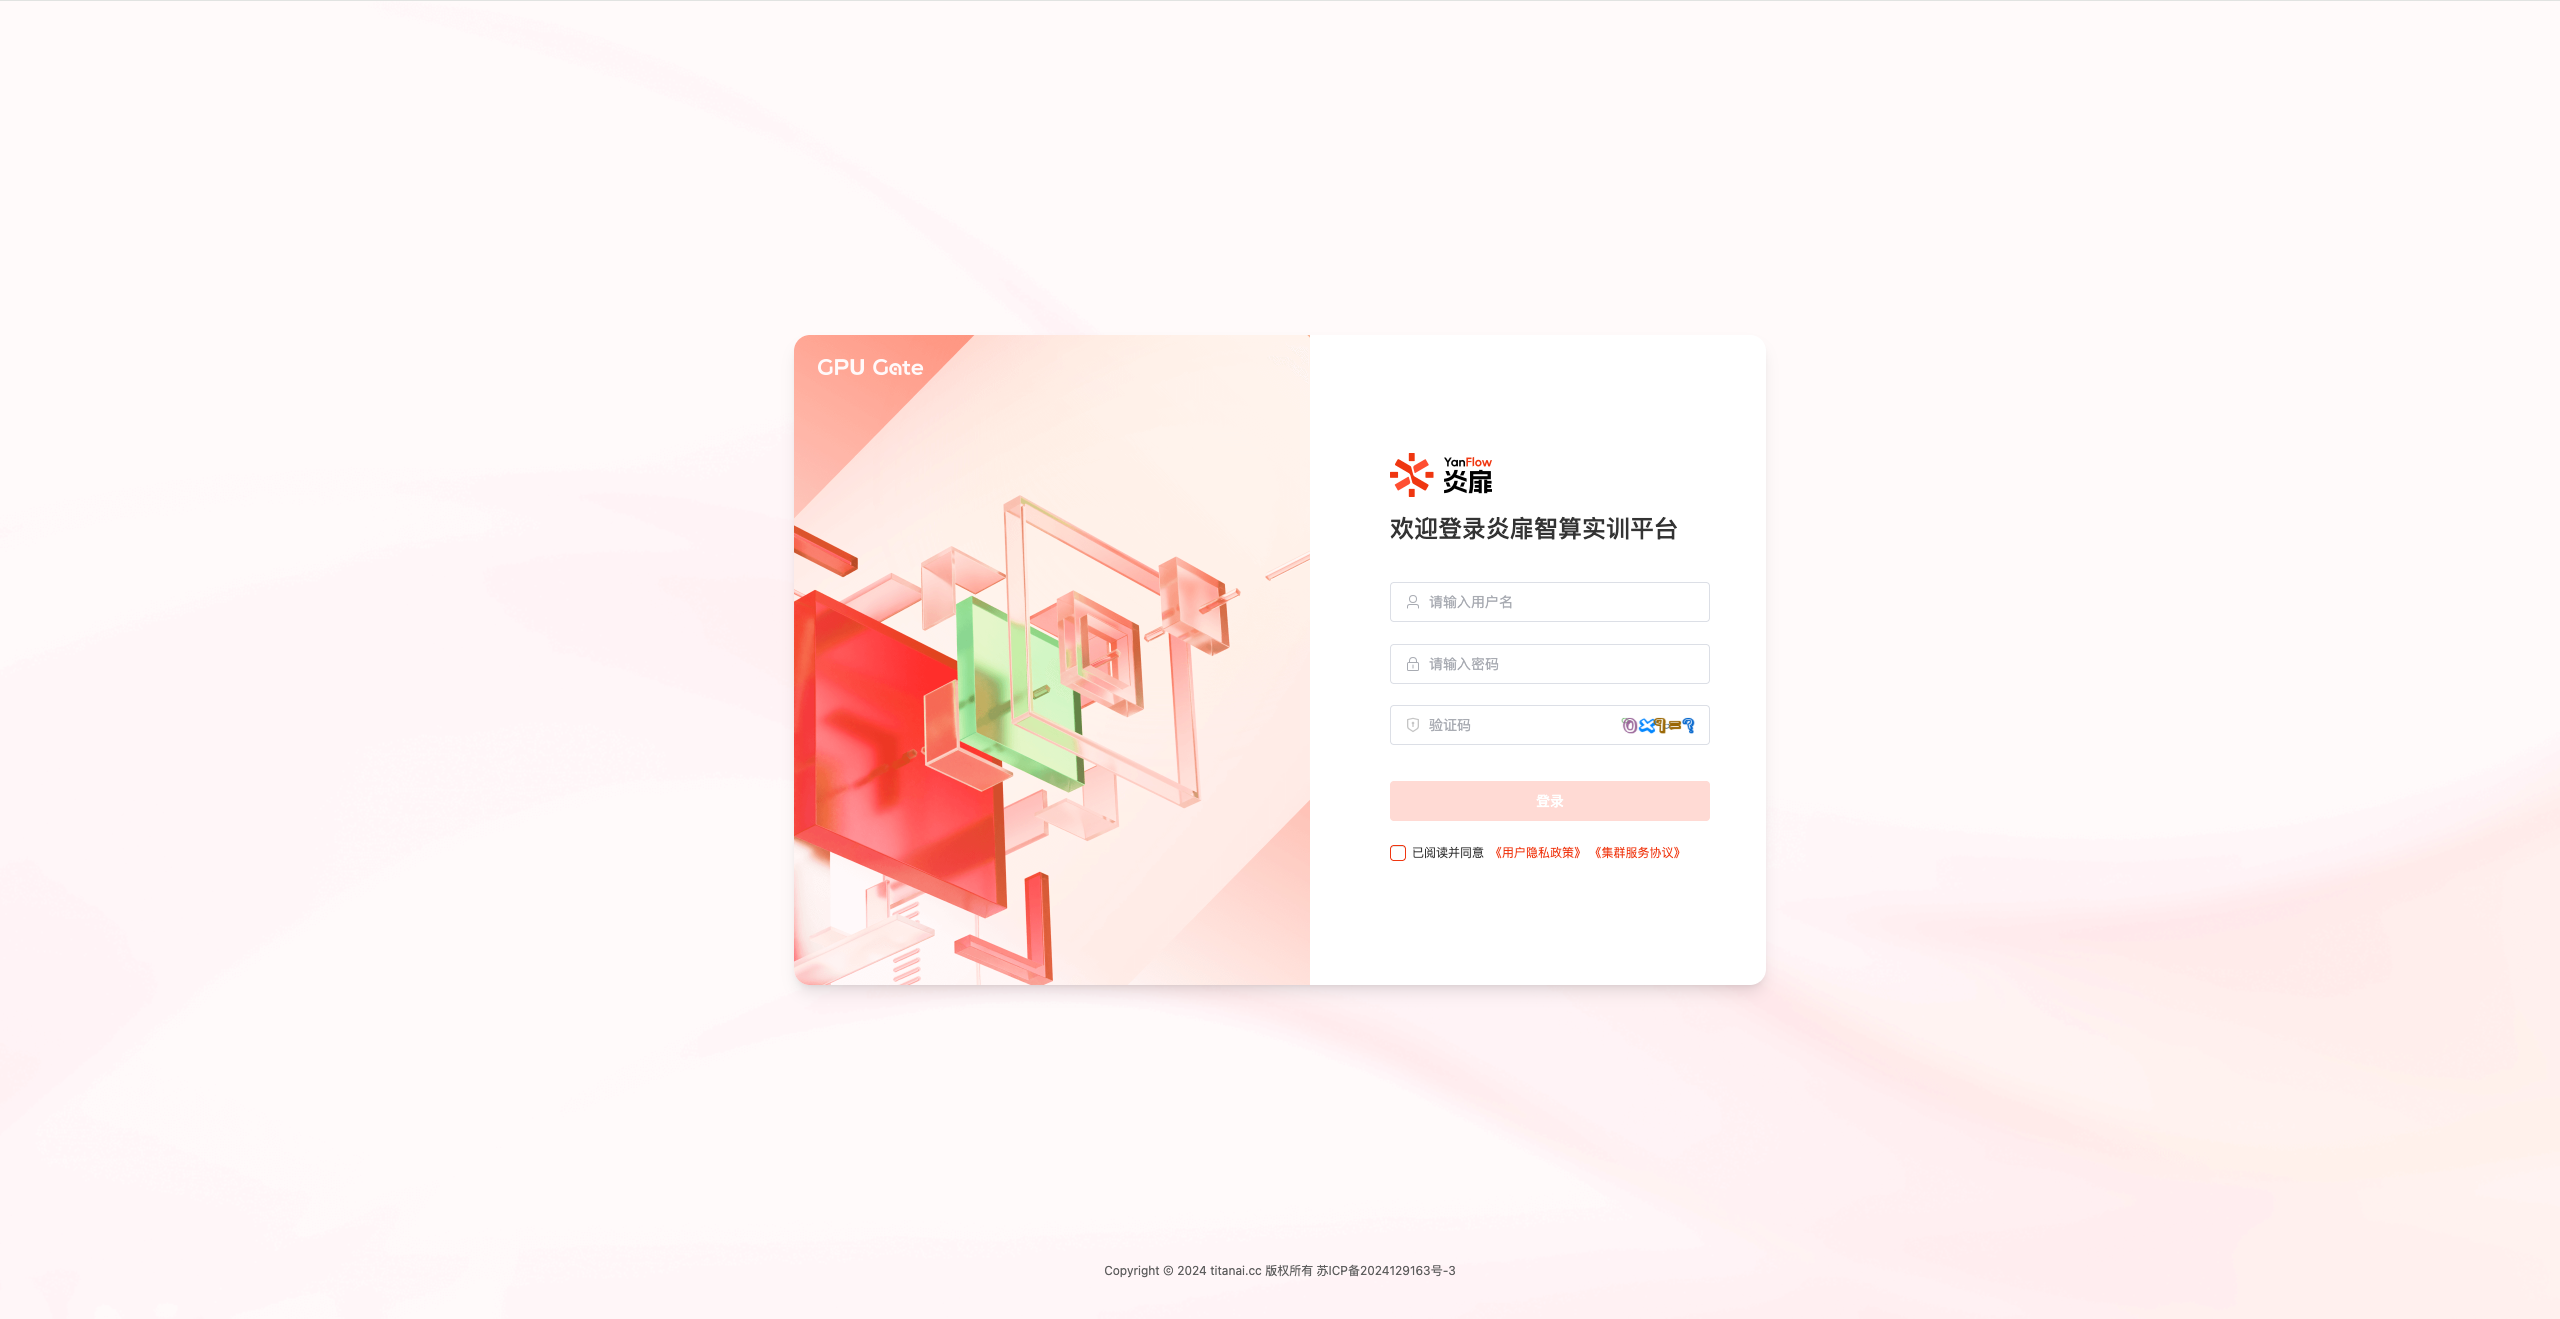
Enter your Username, Password, and Verification Code, check the agreement checkbox, and click the Login button. After successful verification, you will enter the system.
Logout
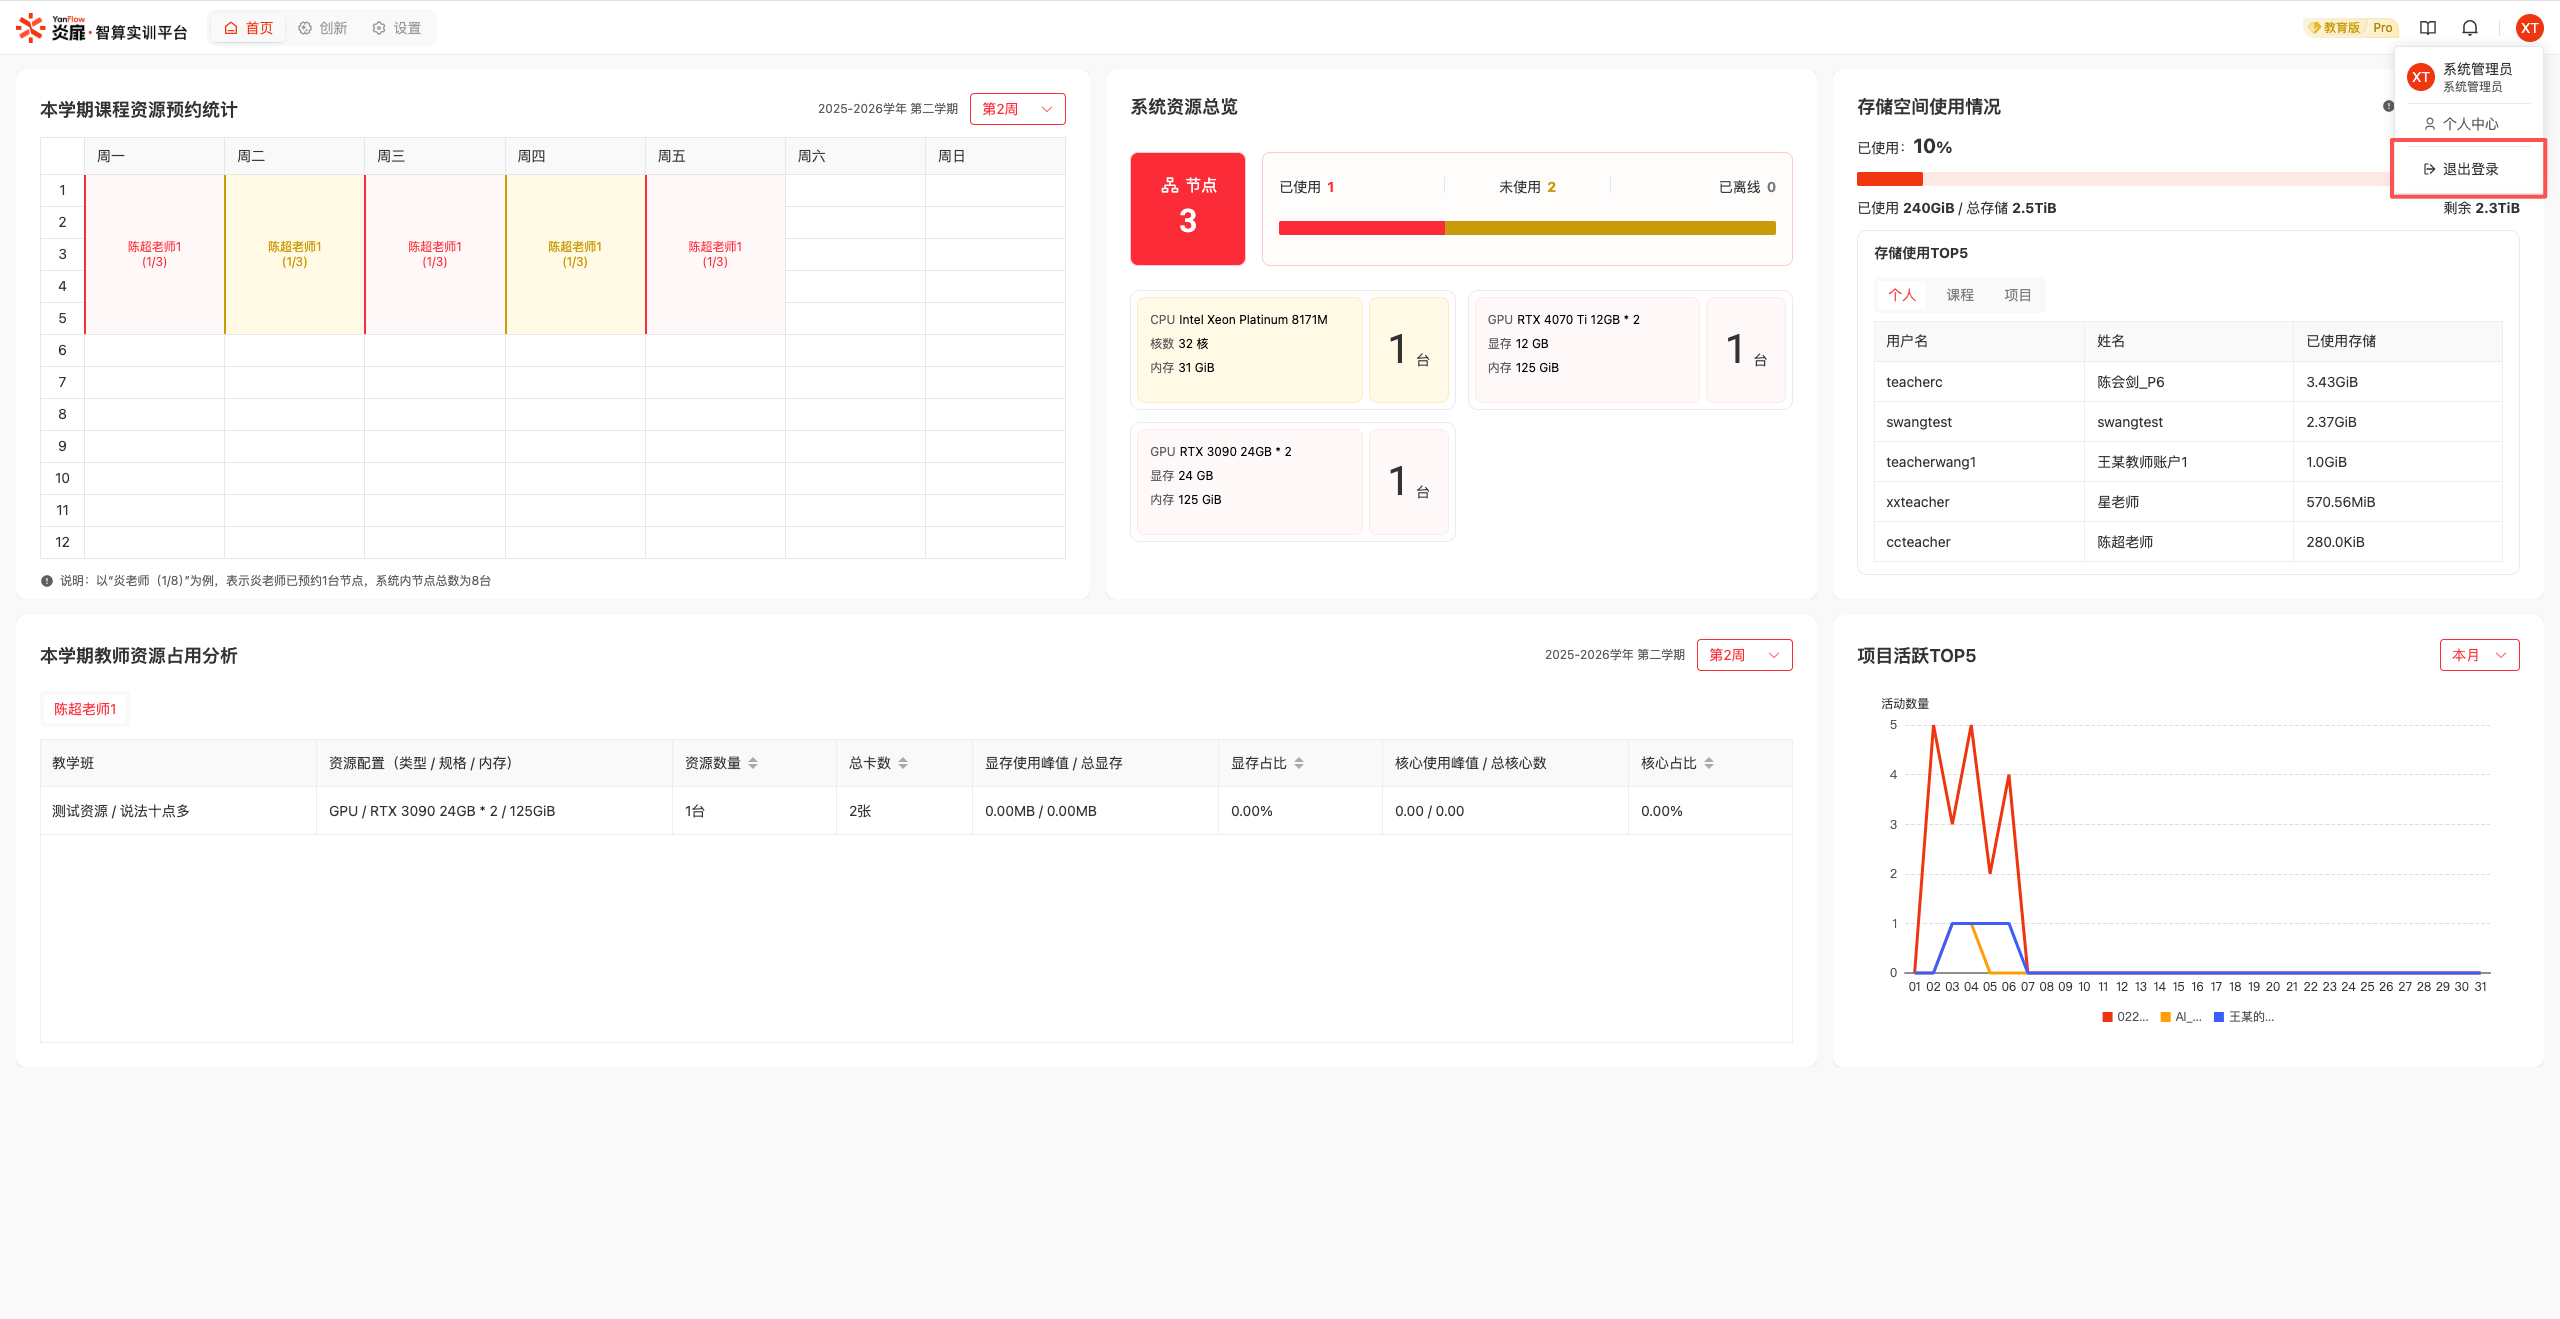
Click on the User Avatar in the top-right corner, select Logout, and click Confirm to log out and return to the login page.
Home
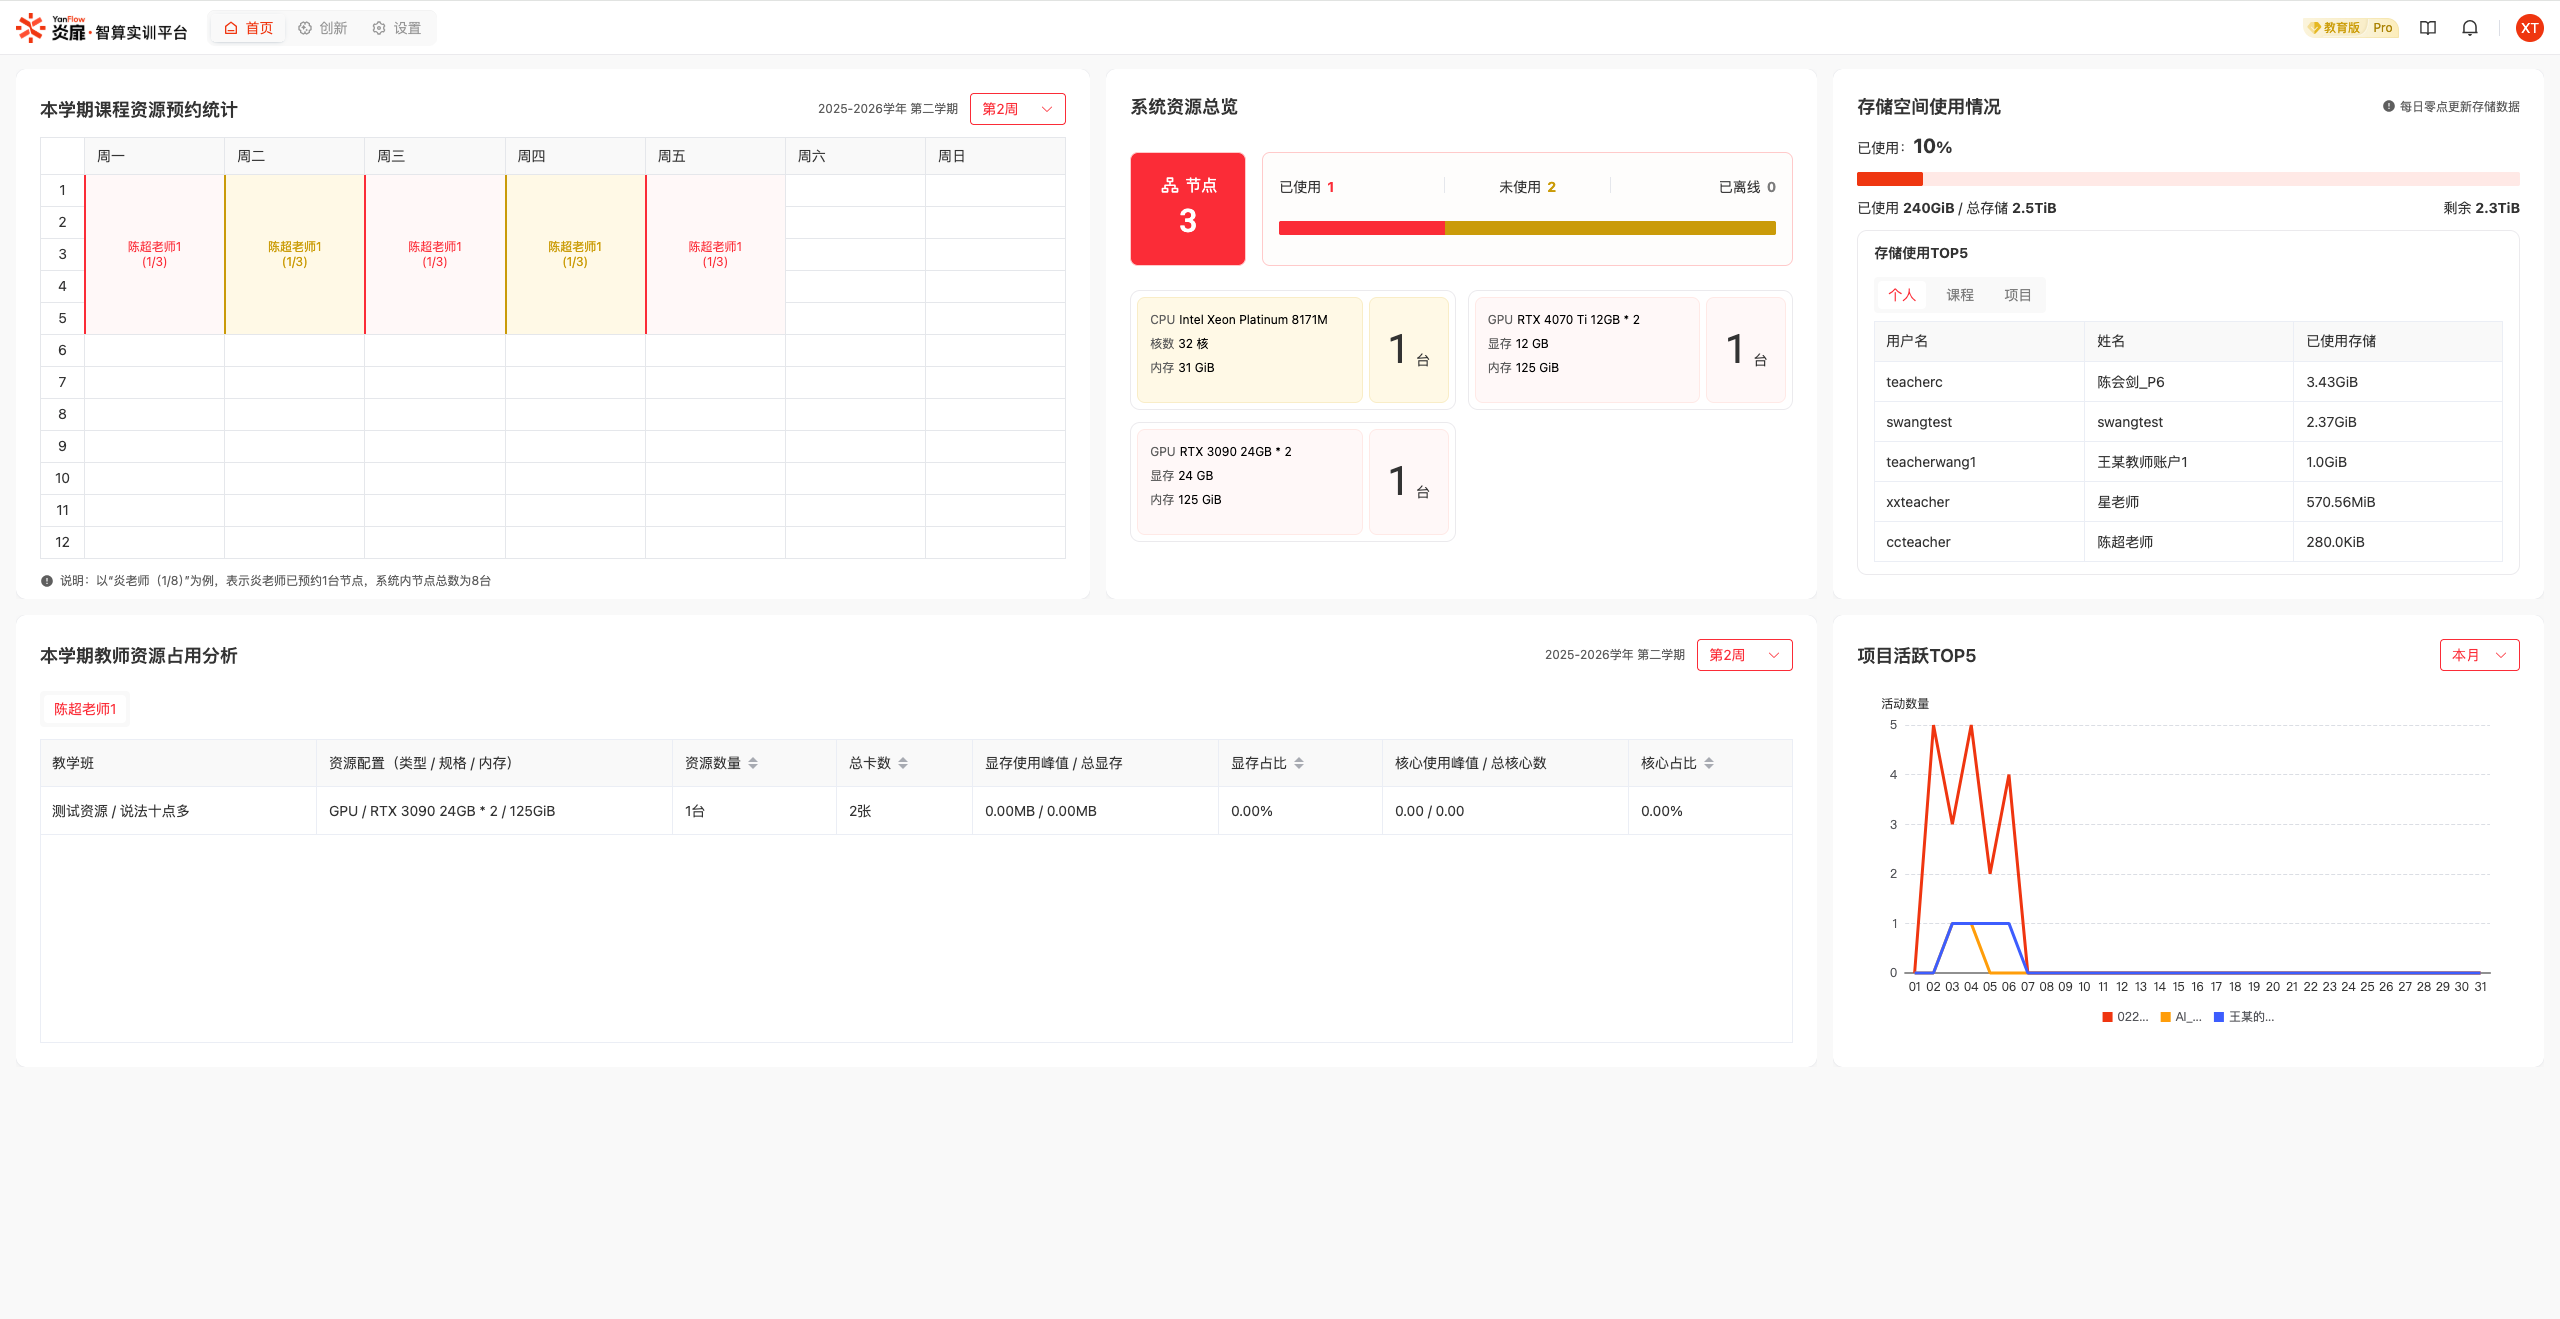
Users can quickly understand resource usage dynamics through the visual dashboard, providing intuitive data support for teaching arrangements and rational planning of innovation experiments.
Innovation
Project Management
Project List
Displays all project information in the system. Supports keyword search by Project Name.
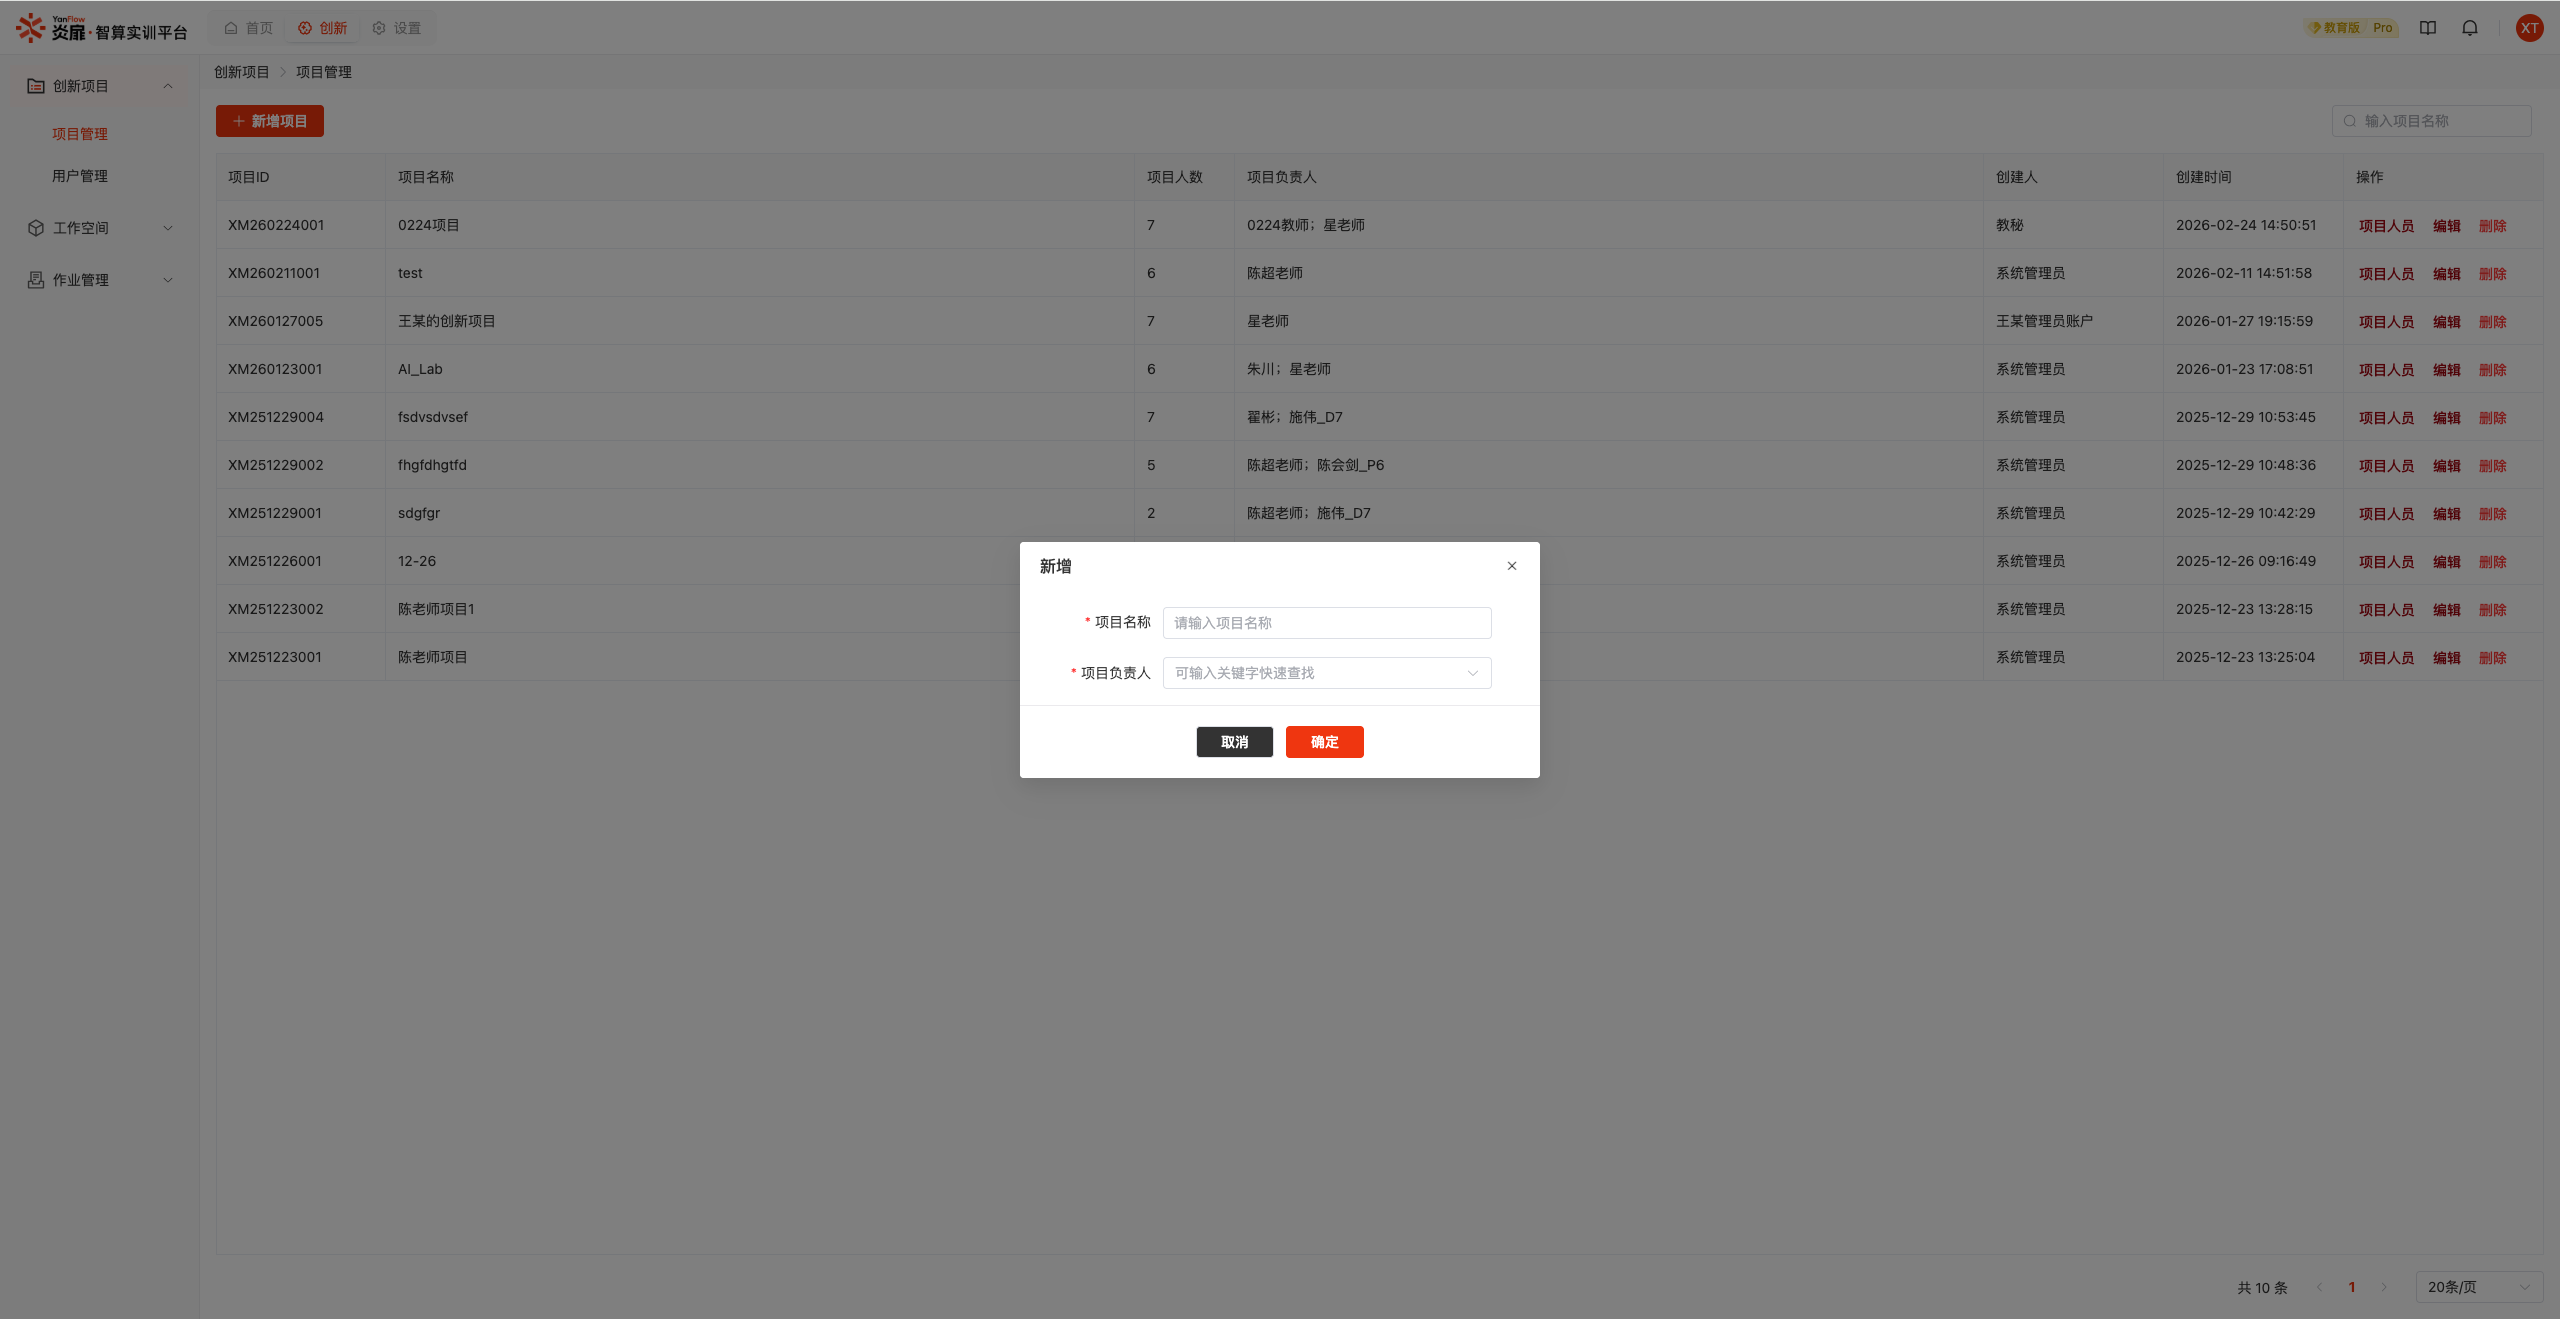
Add Project
Click the Add Project button to display the add dialog. Set relevant information and click the Confirm button to create an innovation project after validation.
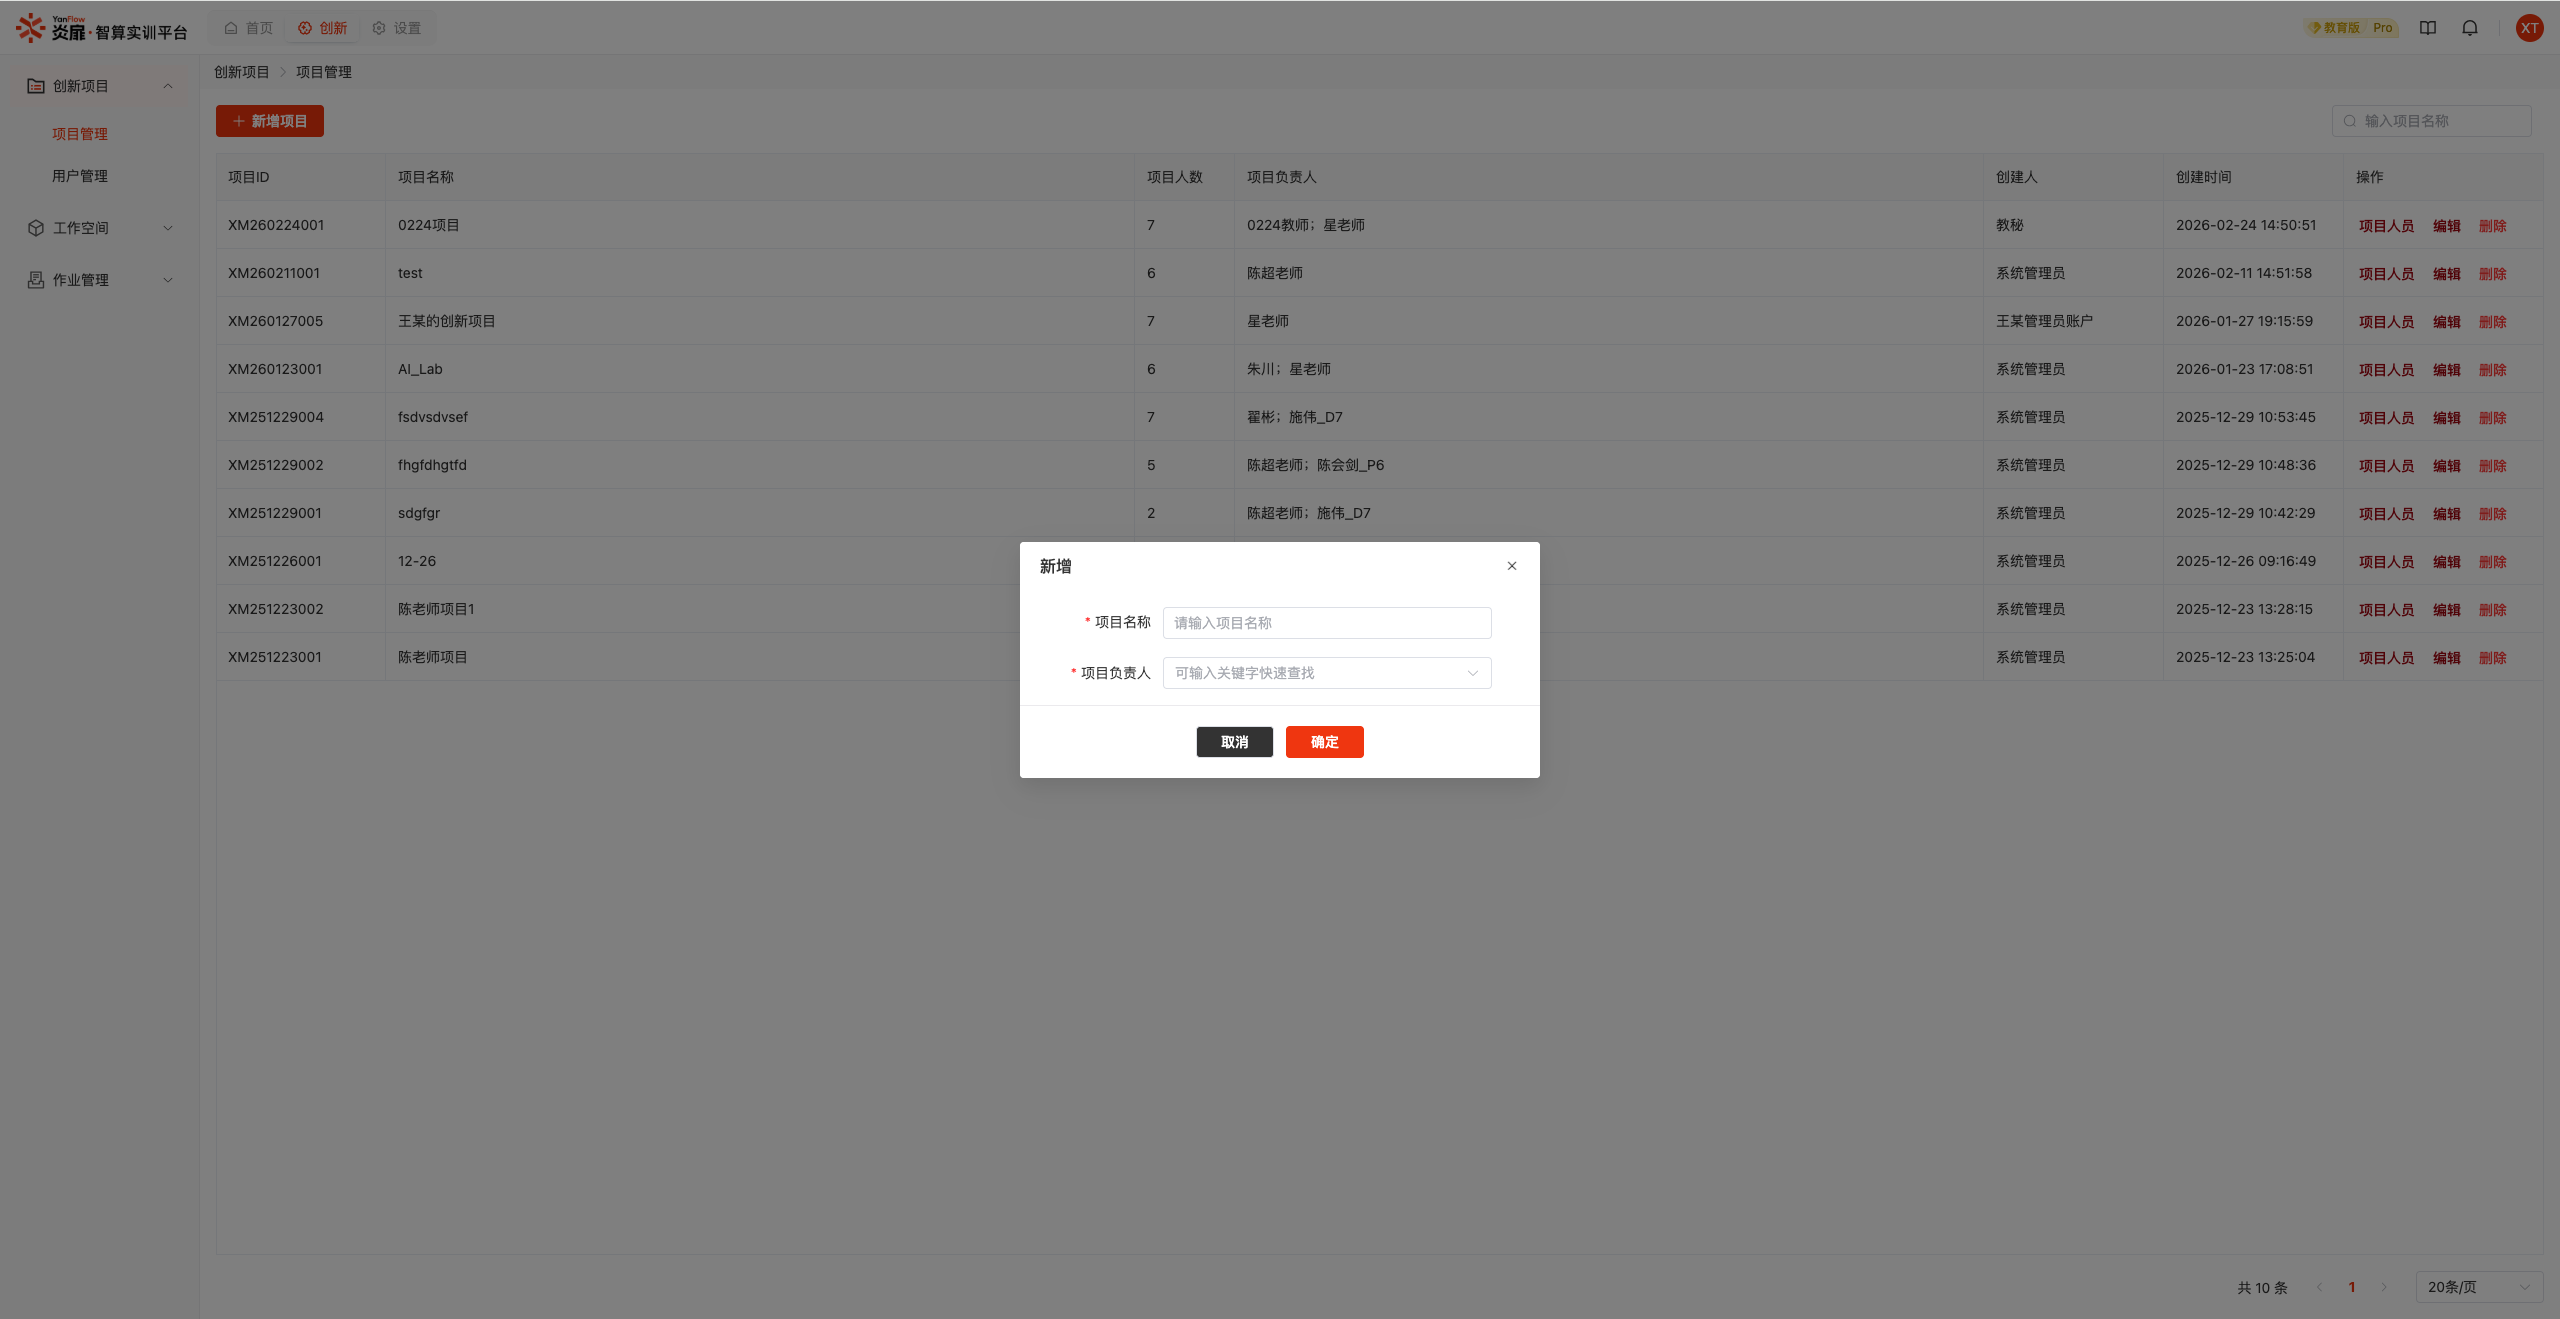
Note: Only Teachers can be designated as project leaders. Multiple leaders are supported.
Edit Project
Select a project and click the Edit button to display the edit dialog. Modify the information that needs to be changed and click the Confirm button to update the project information.
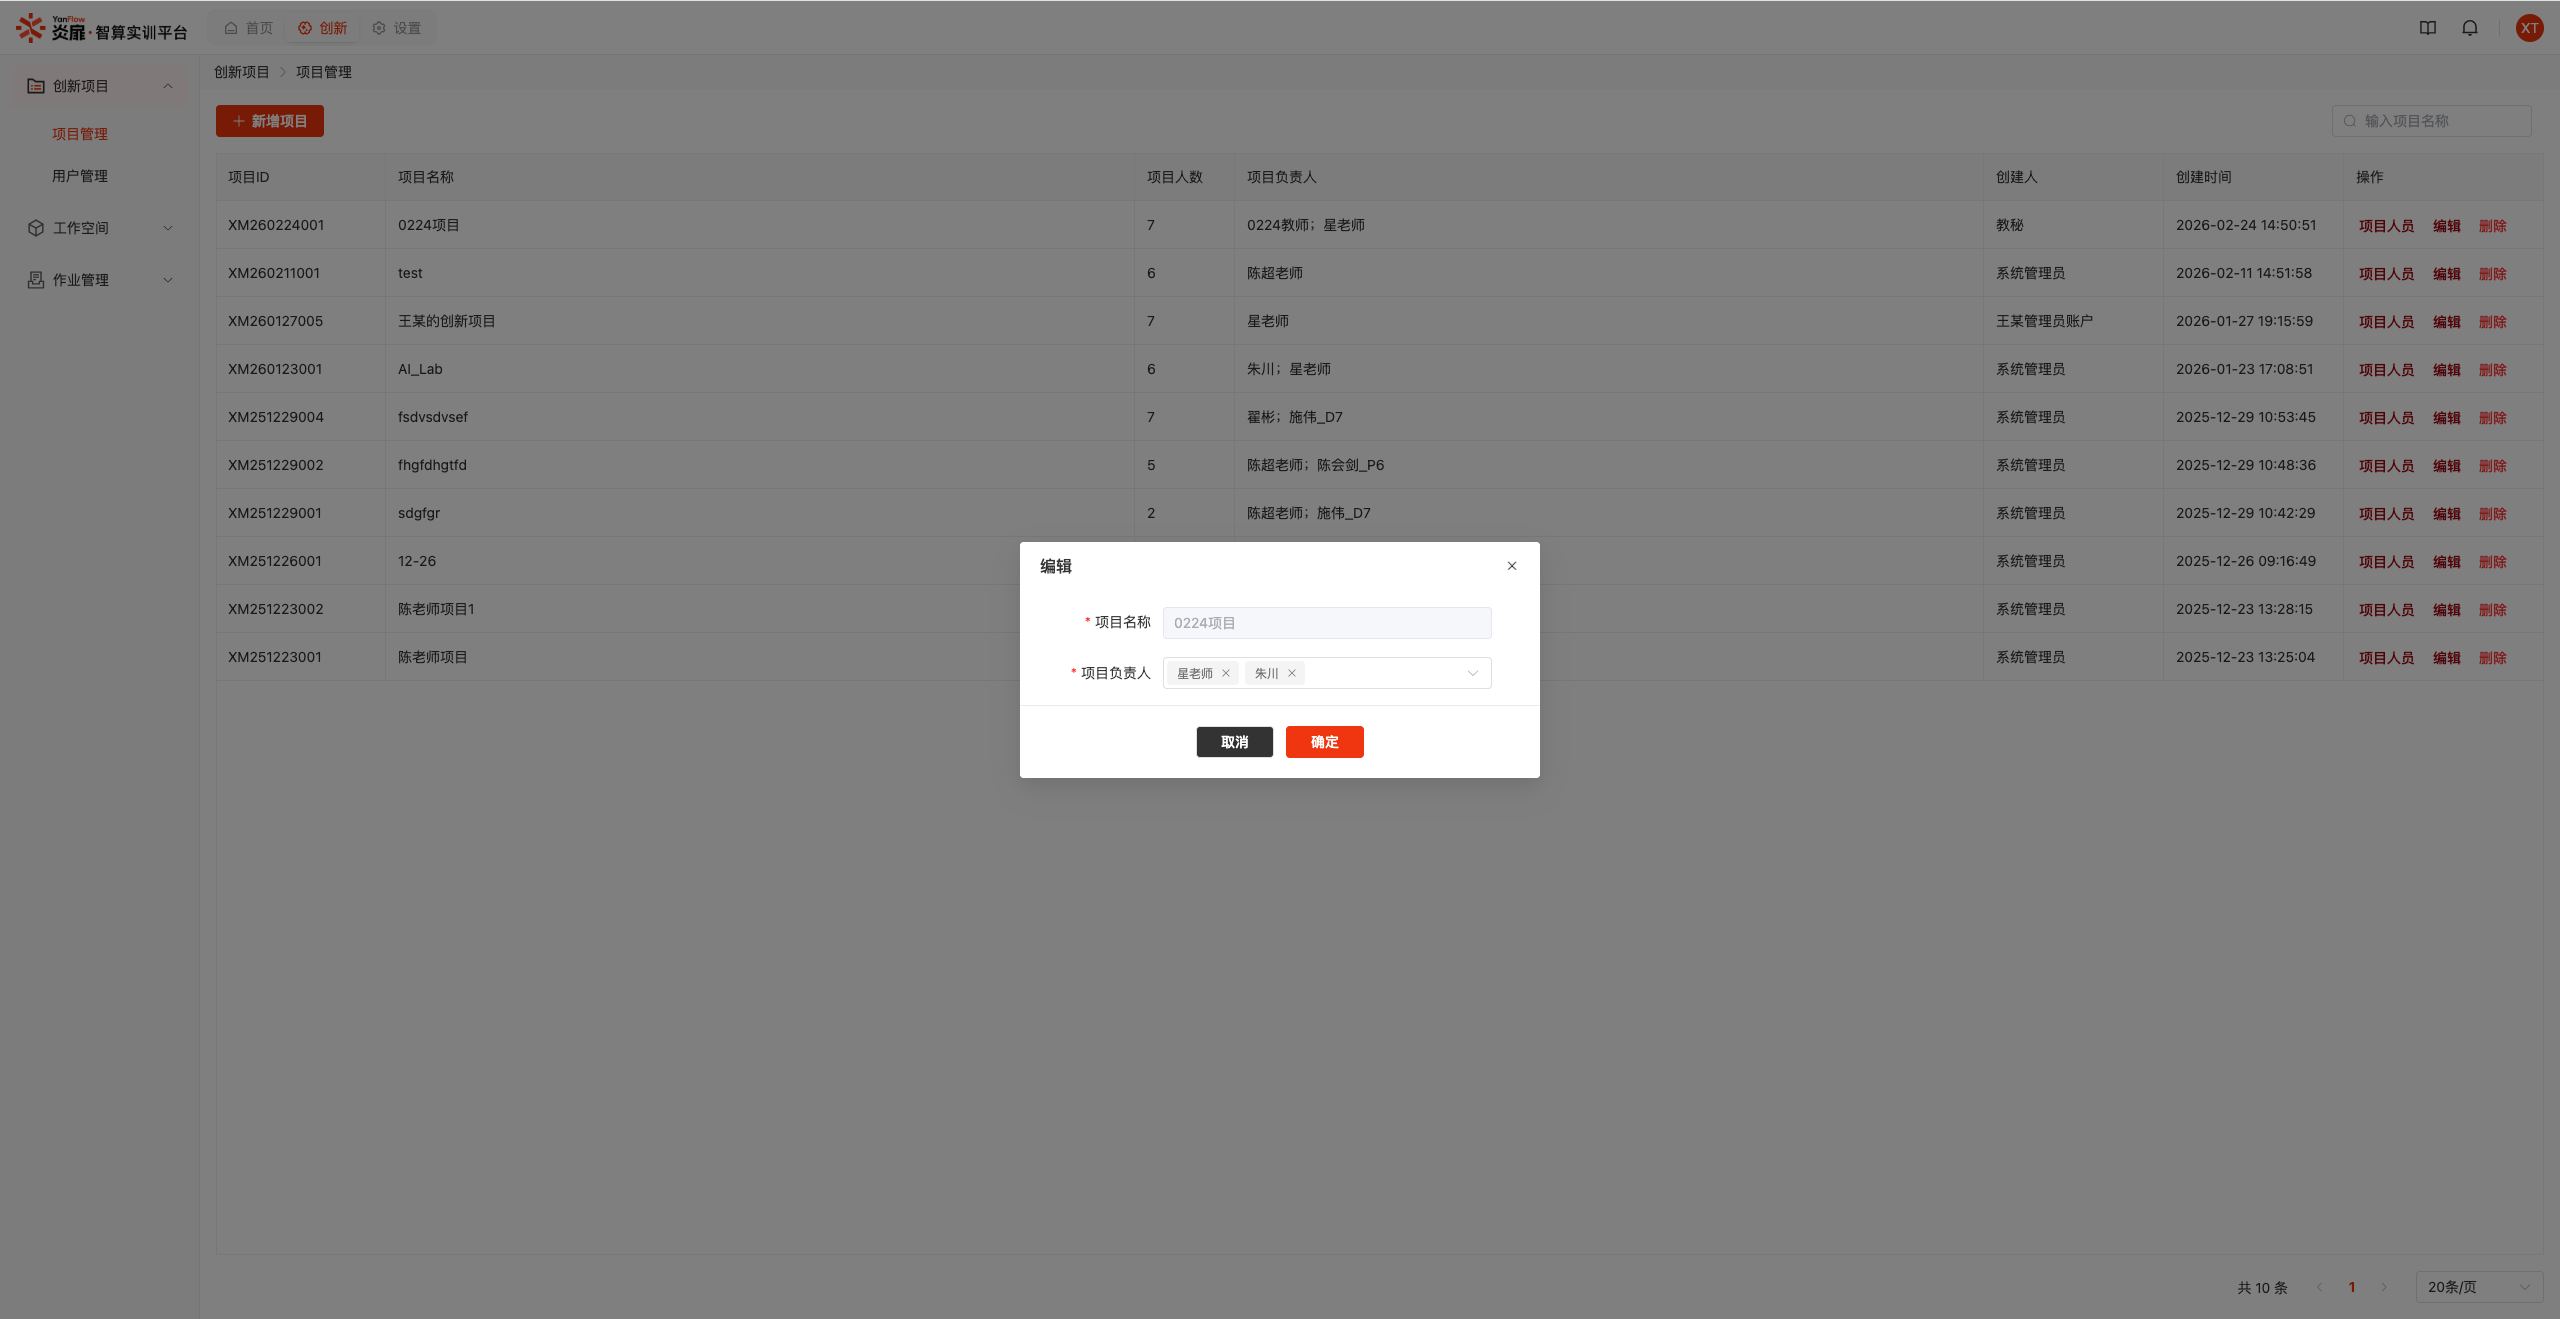
Delete Project
Click the Delete button to display a confirmation dialog. Click the Confirm button to delete.
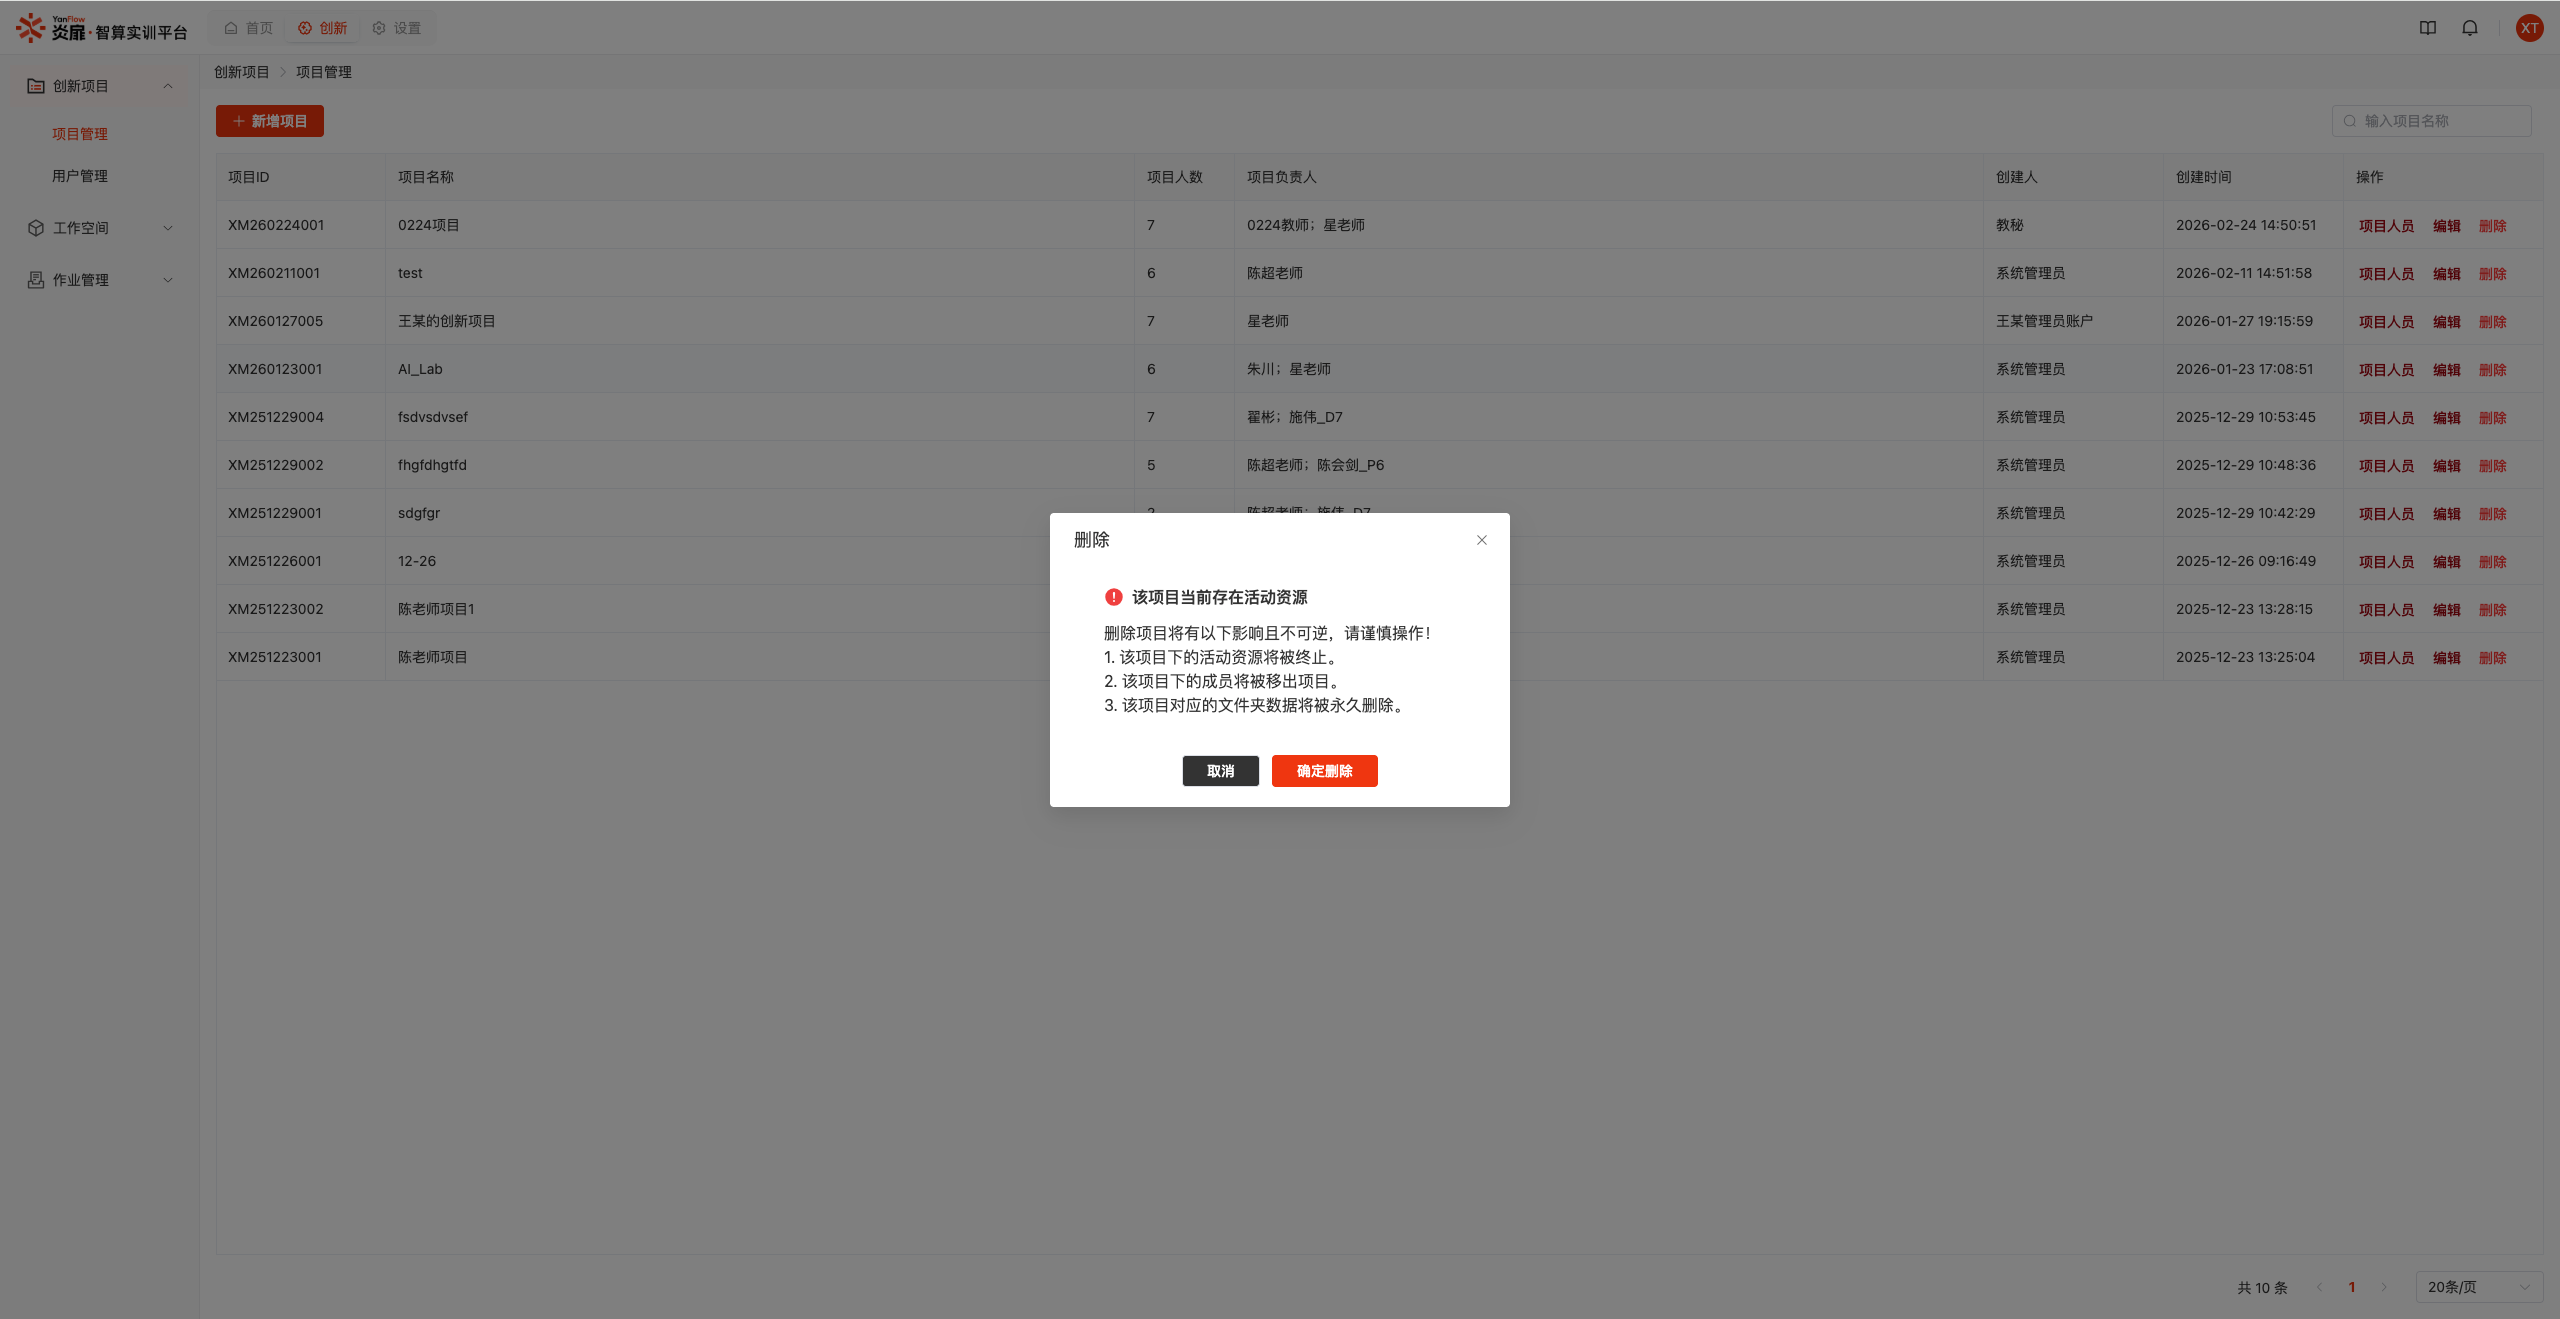
Note: After project deletion, the following effects will occur:
- Active resources under the project will be terminated.
- Project members will be automatically removed from the project.
- The project folder will be permanently deleted.
Project Members
Select a project and click the Project Members button to enter the project member management page for that project, where you can view and manage all personnel in the project.
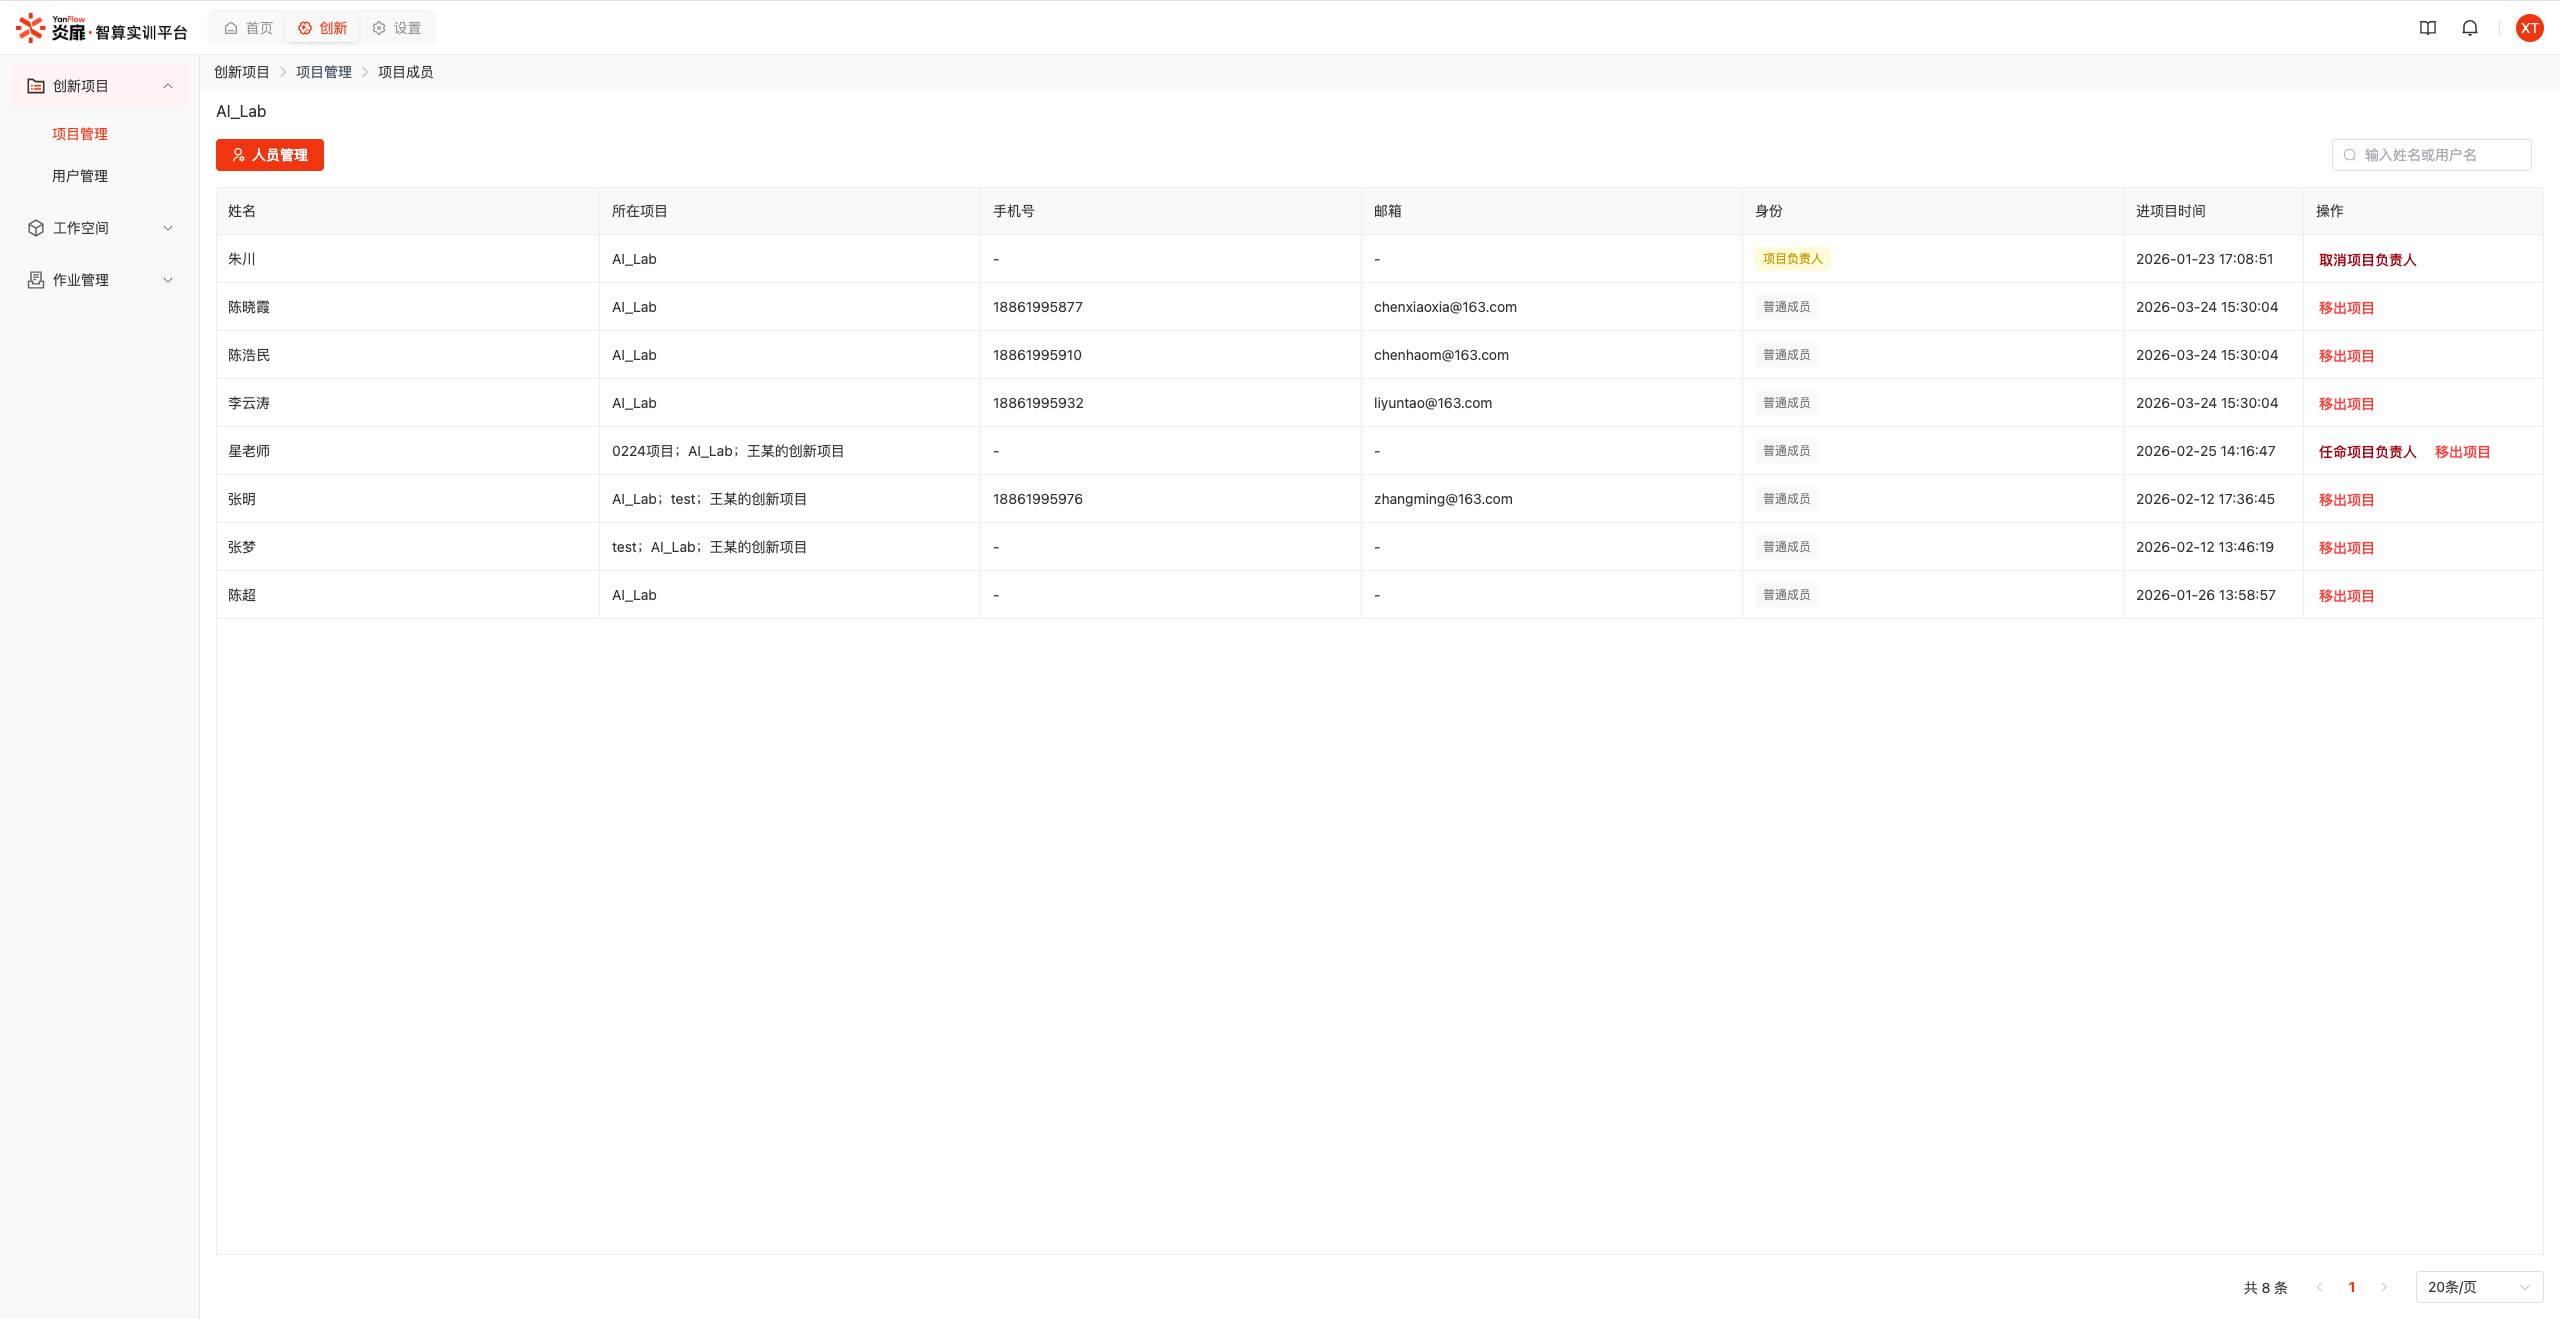
- Member Management: Click the
Member Managementbutton to display the project member management dialog, supporting adding/removing project members.- Add Members: In the project Available members list, check one or more users and click the
Joinbutton. After confirmation, the selected members can be added to the innovation project. - Remove Members: In the project Selected members list, check one or more users and click the
Removebutton. After confirmation, the selected members can be removed from the innovation project.
- Add Members: In the project Available members list, check one or more users and click the
- Appoint Project Leader: Click the
Appoint Project Leaderbutton to complete the appointment of the project leader after confirmation. - Remove Project Leader: Click the
Remove Project Leaderbutton to complete the removal of the project leader after confirmation.
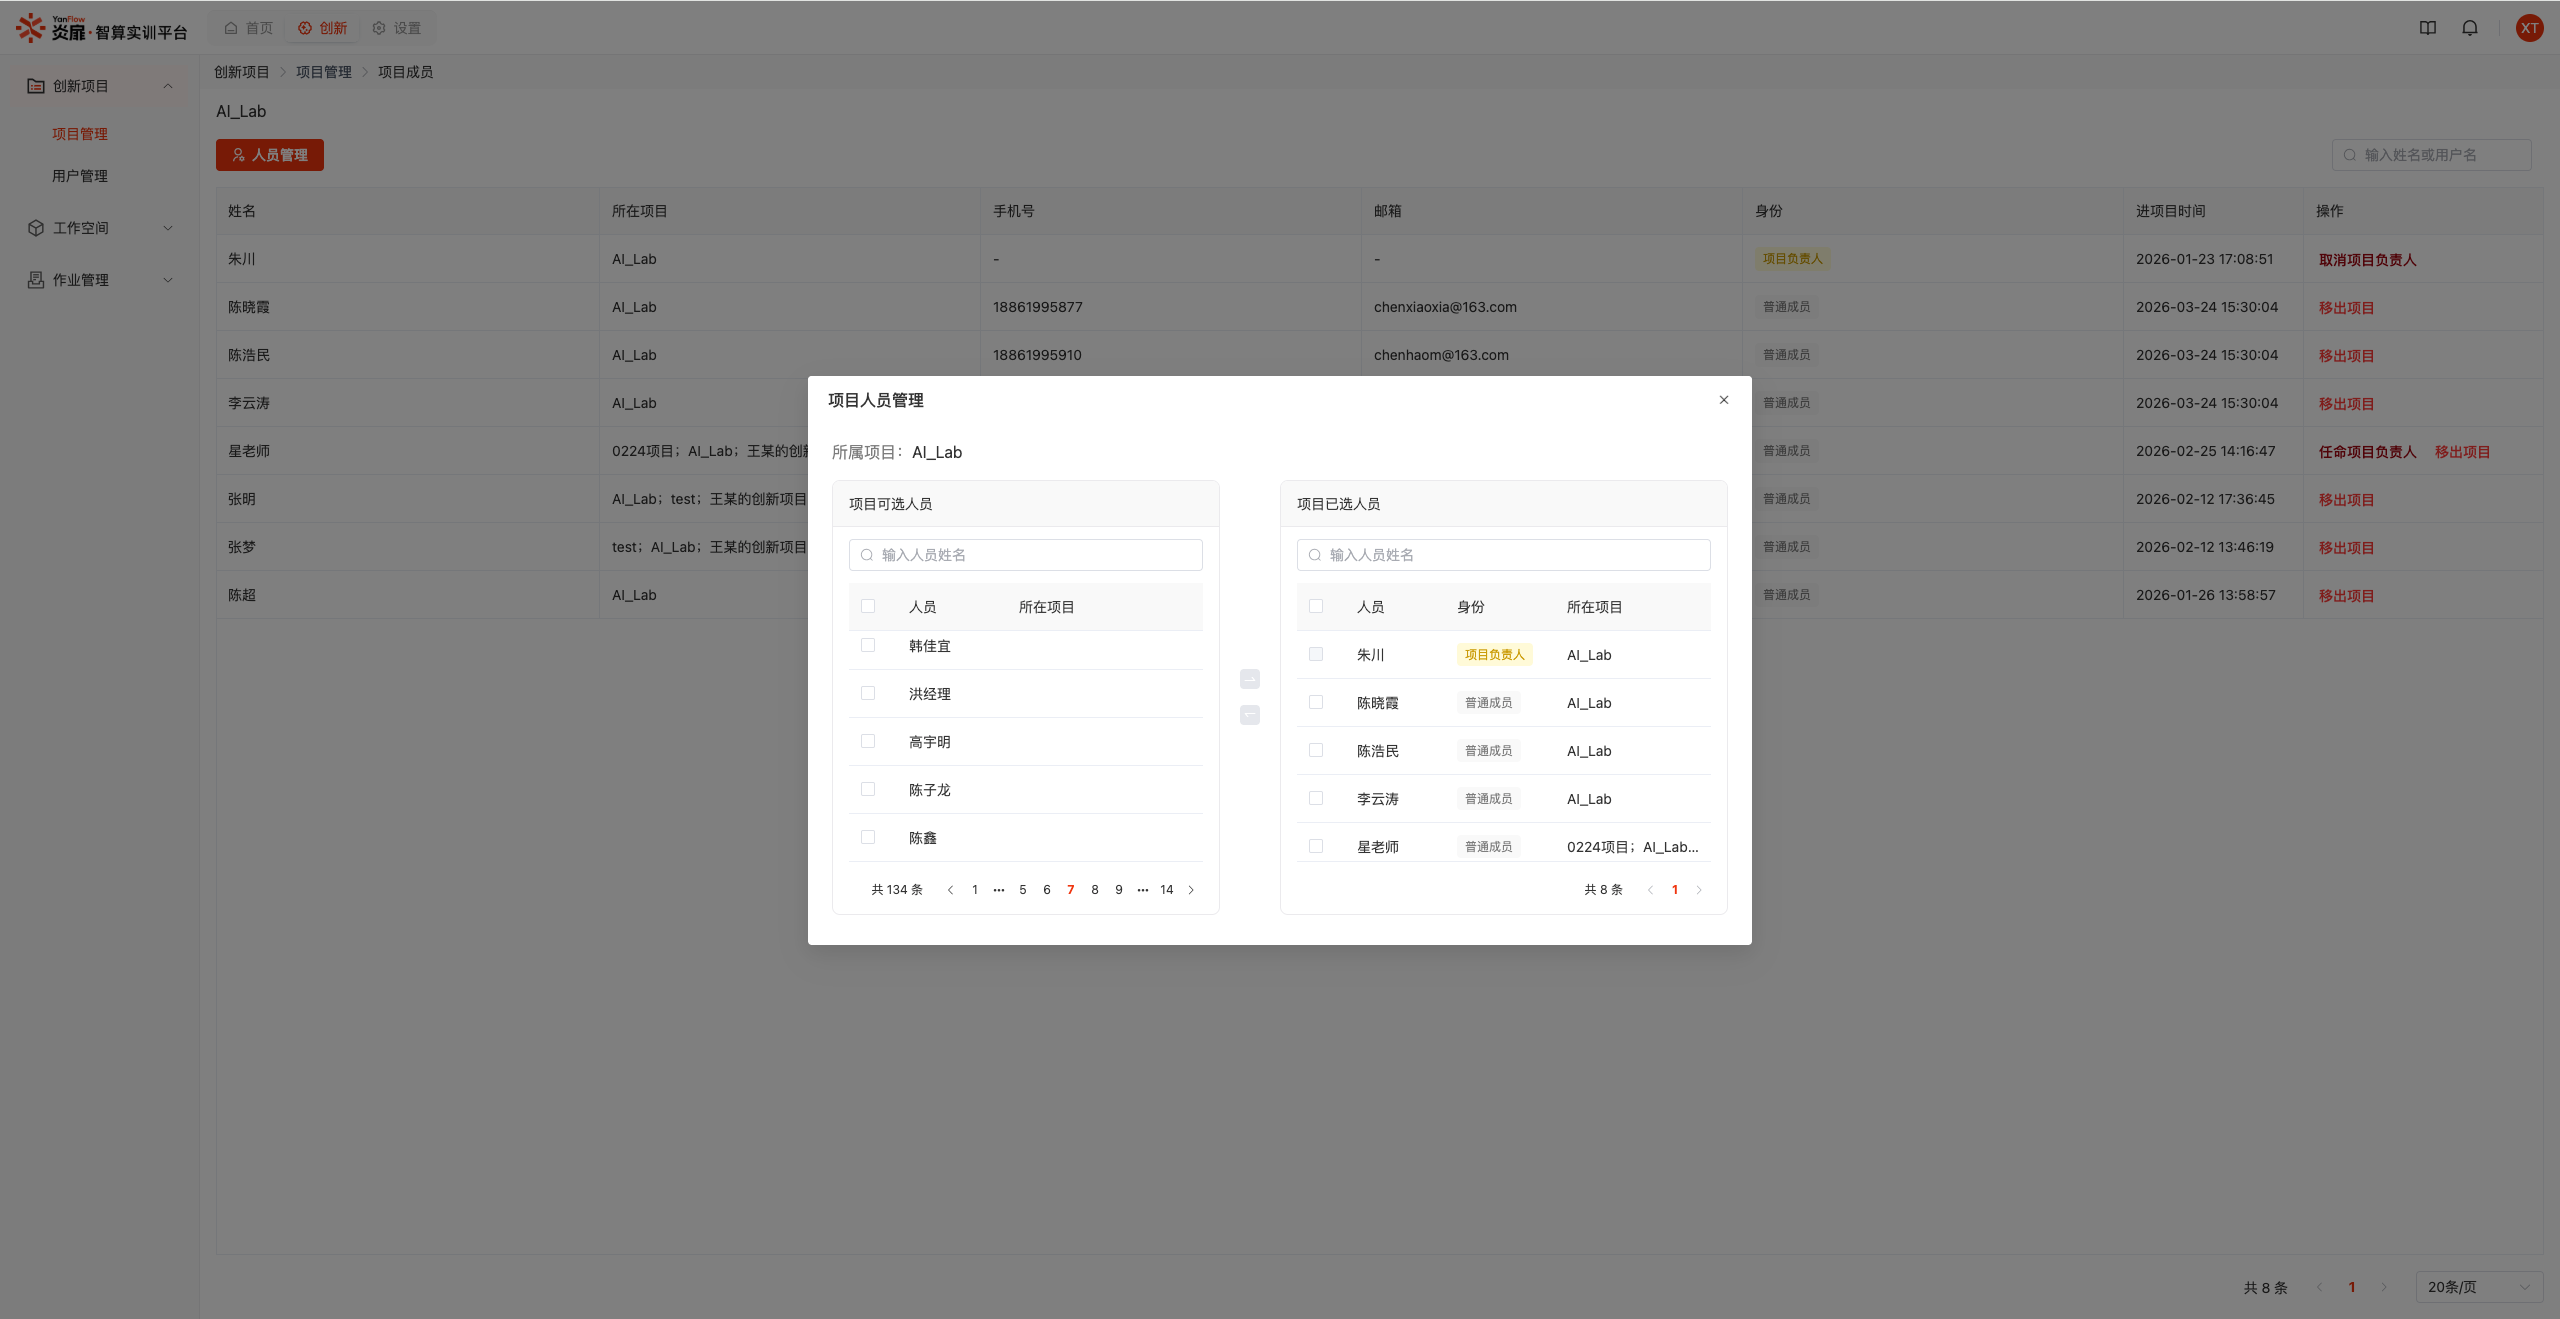
Note: Project leaders cannot be removed from the project. When other project members are removed, all their active resources in the project will be terminated.
User Management
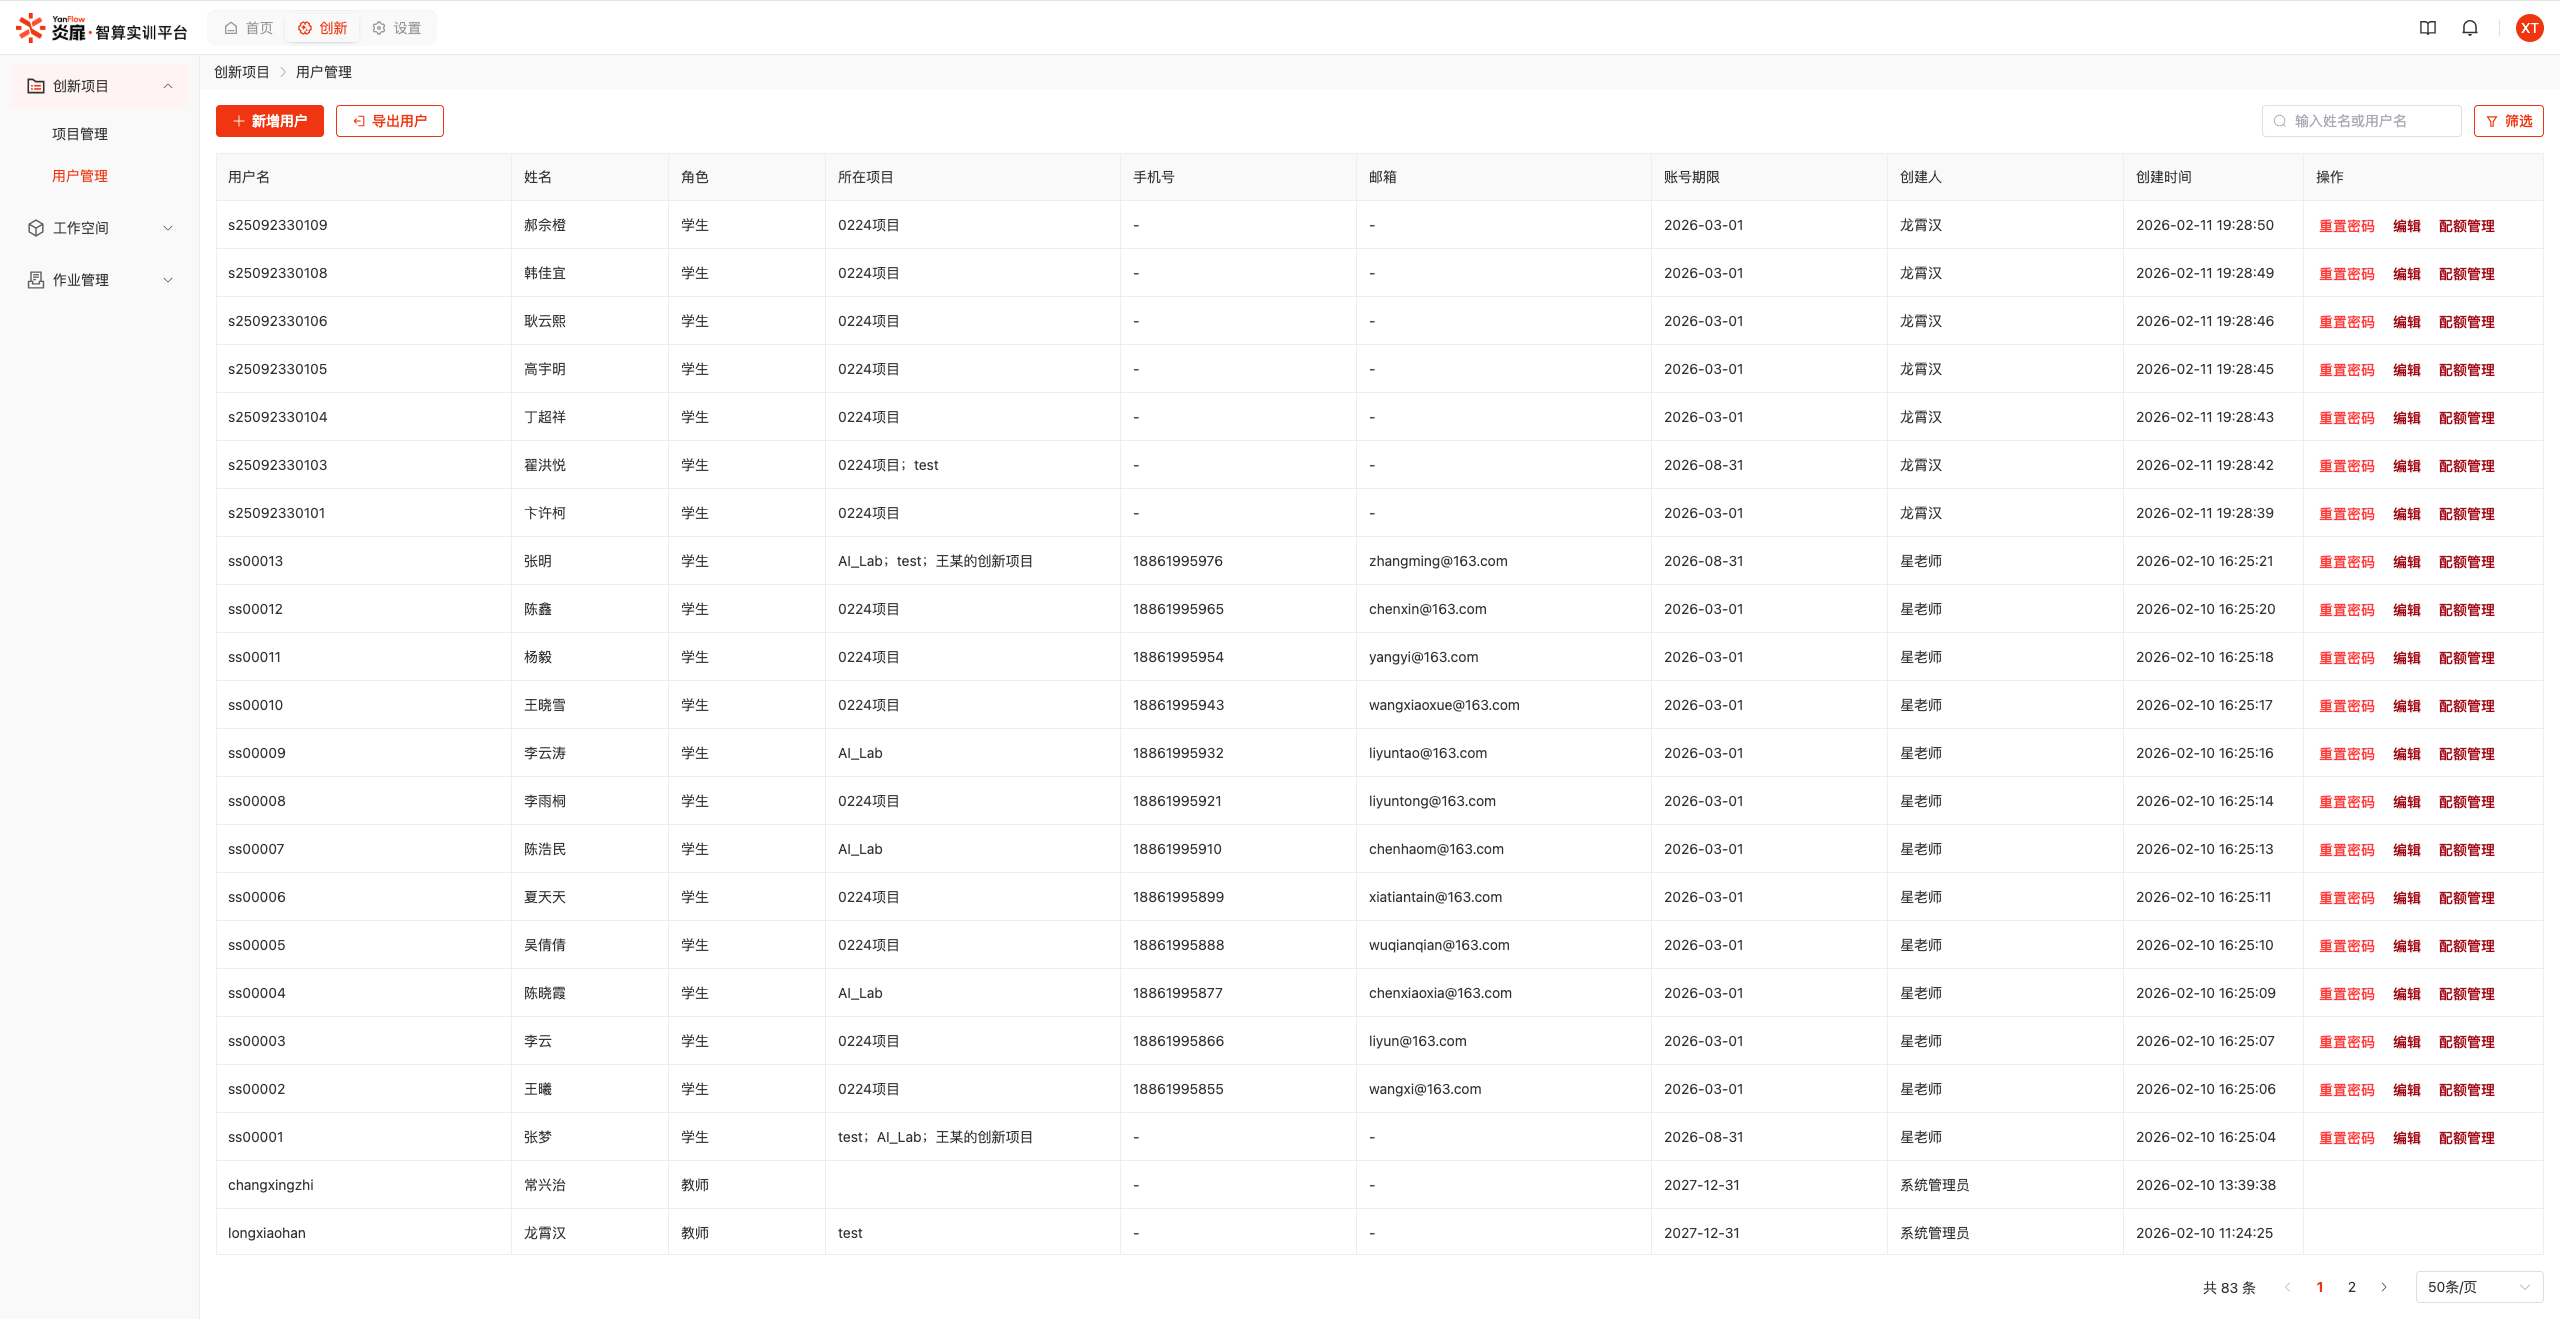
User List
Displays all Innovation Members in the system, including teachers and students. Supports keyword search by Name and Username.
Add User
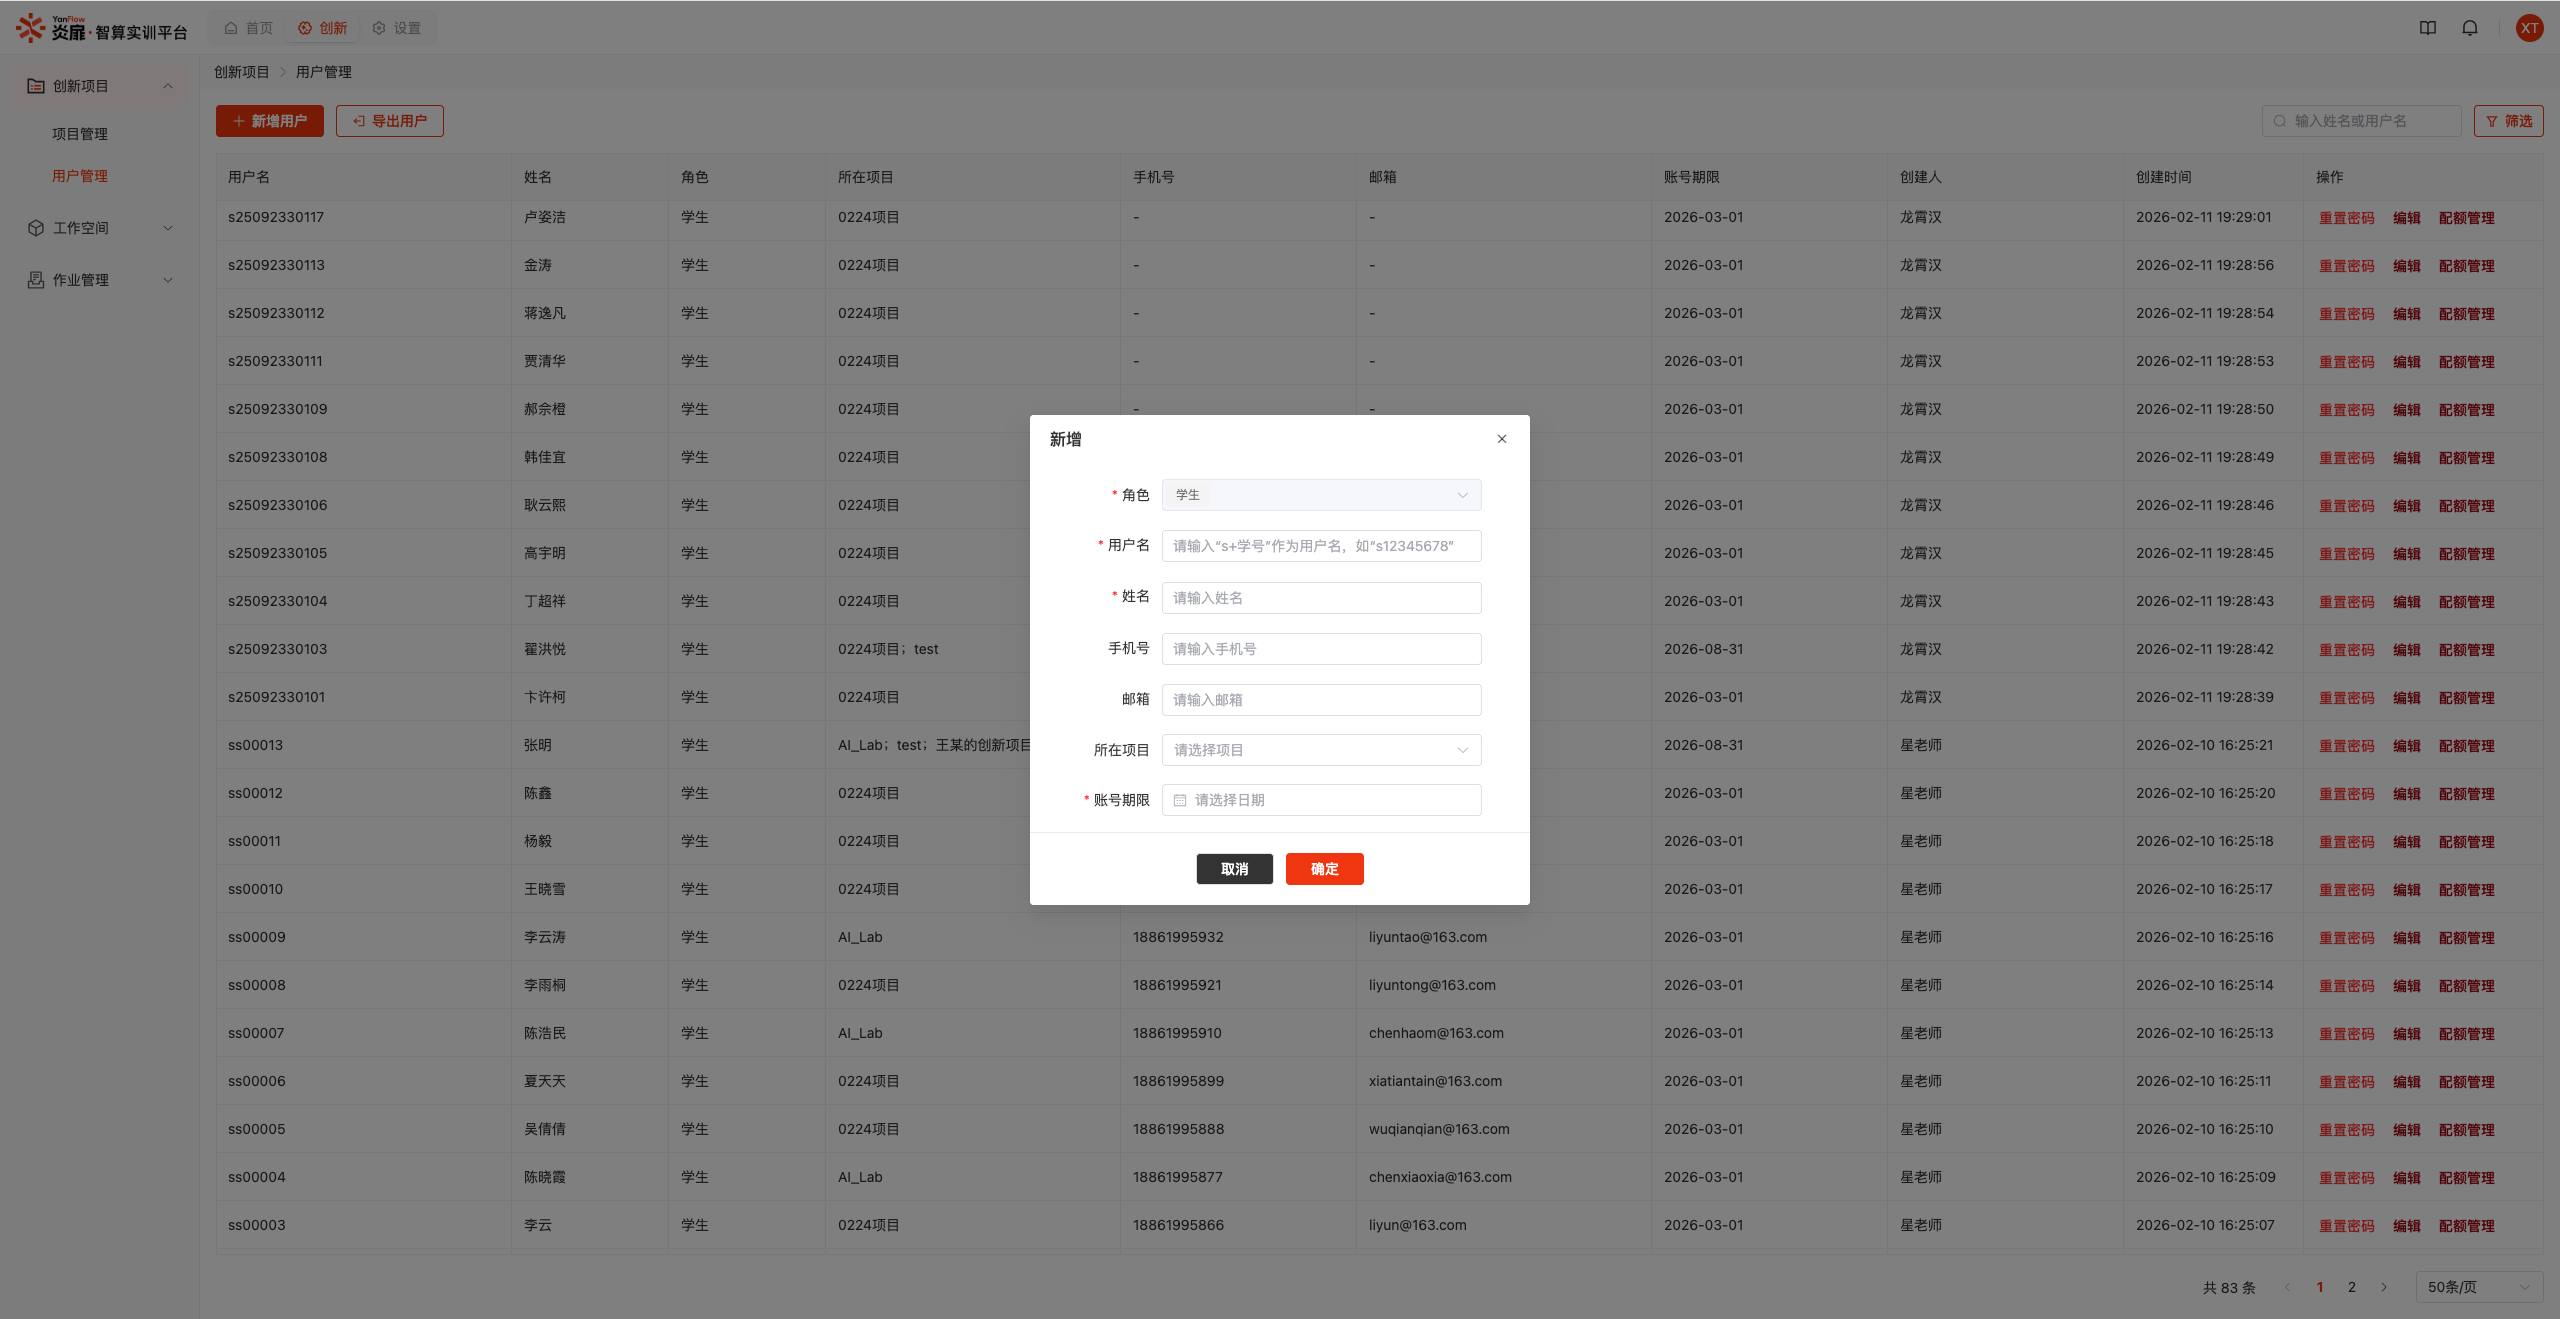
Click the Add User button to display the add dialog. Set relevant information and click the Confirm button to create a new innovation user after validation.
Note:
- Newly added users are Student-type innovation members. To create teacher users, please go to Teacher Management.
- The initial password for newly added users is their username.
Edit User
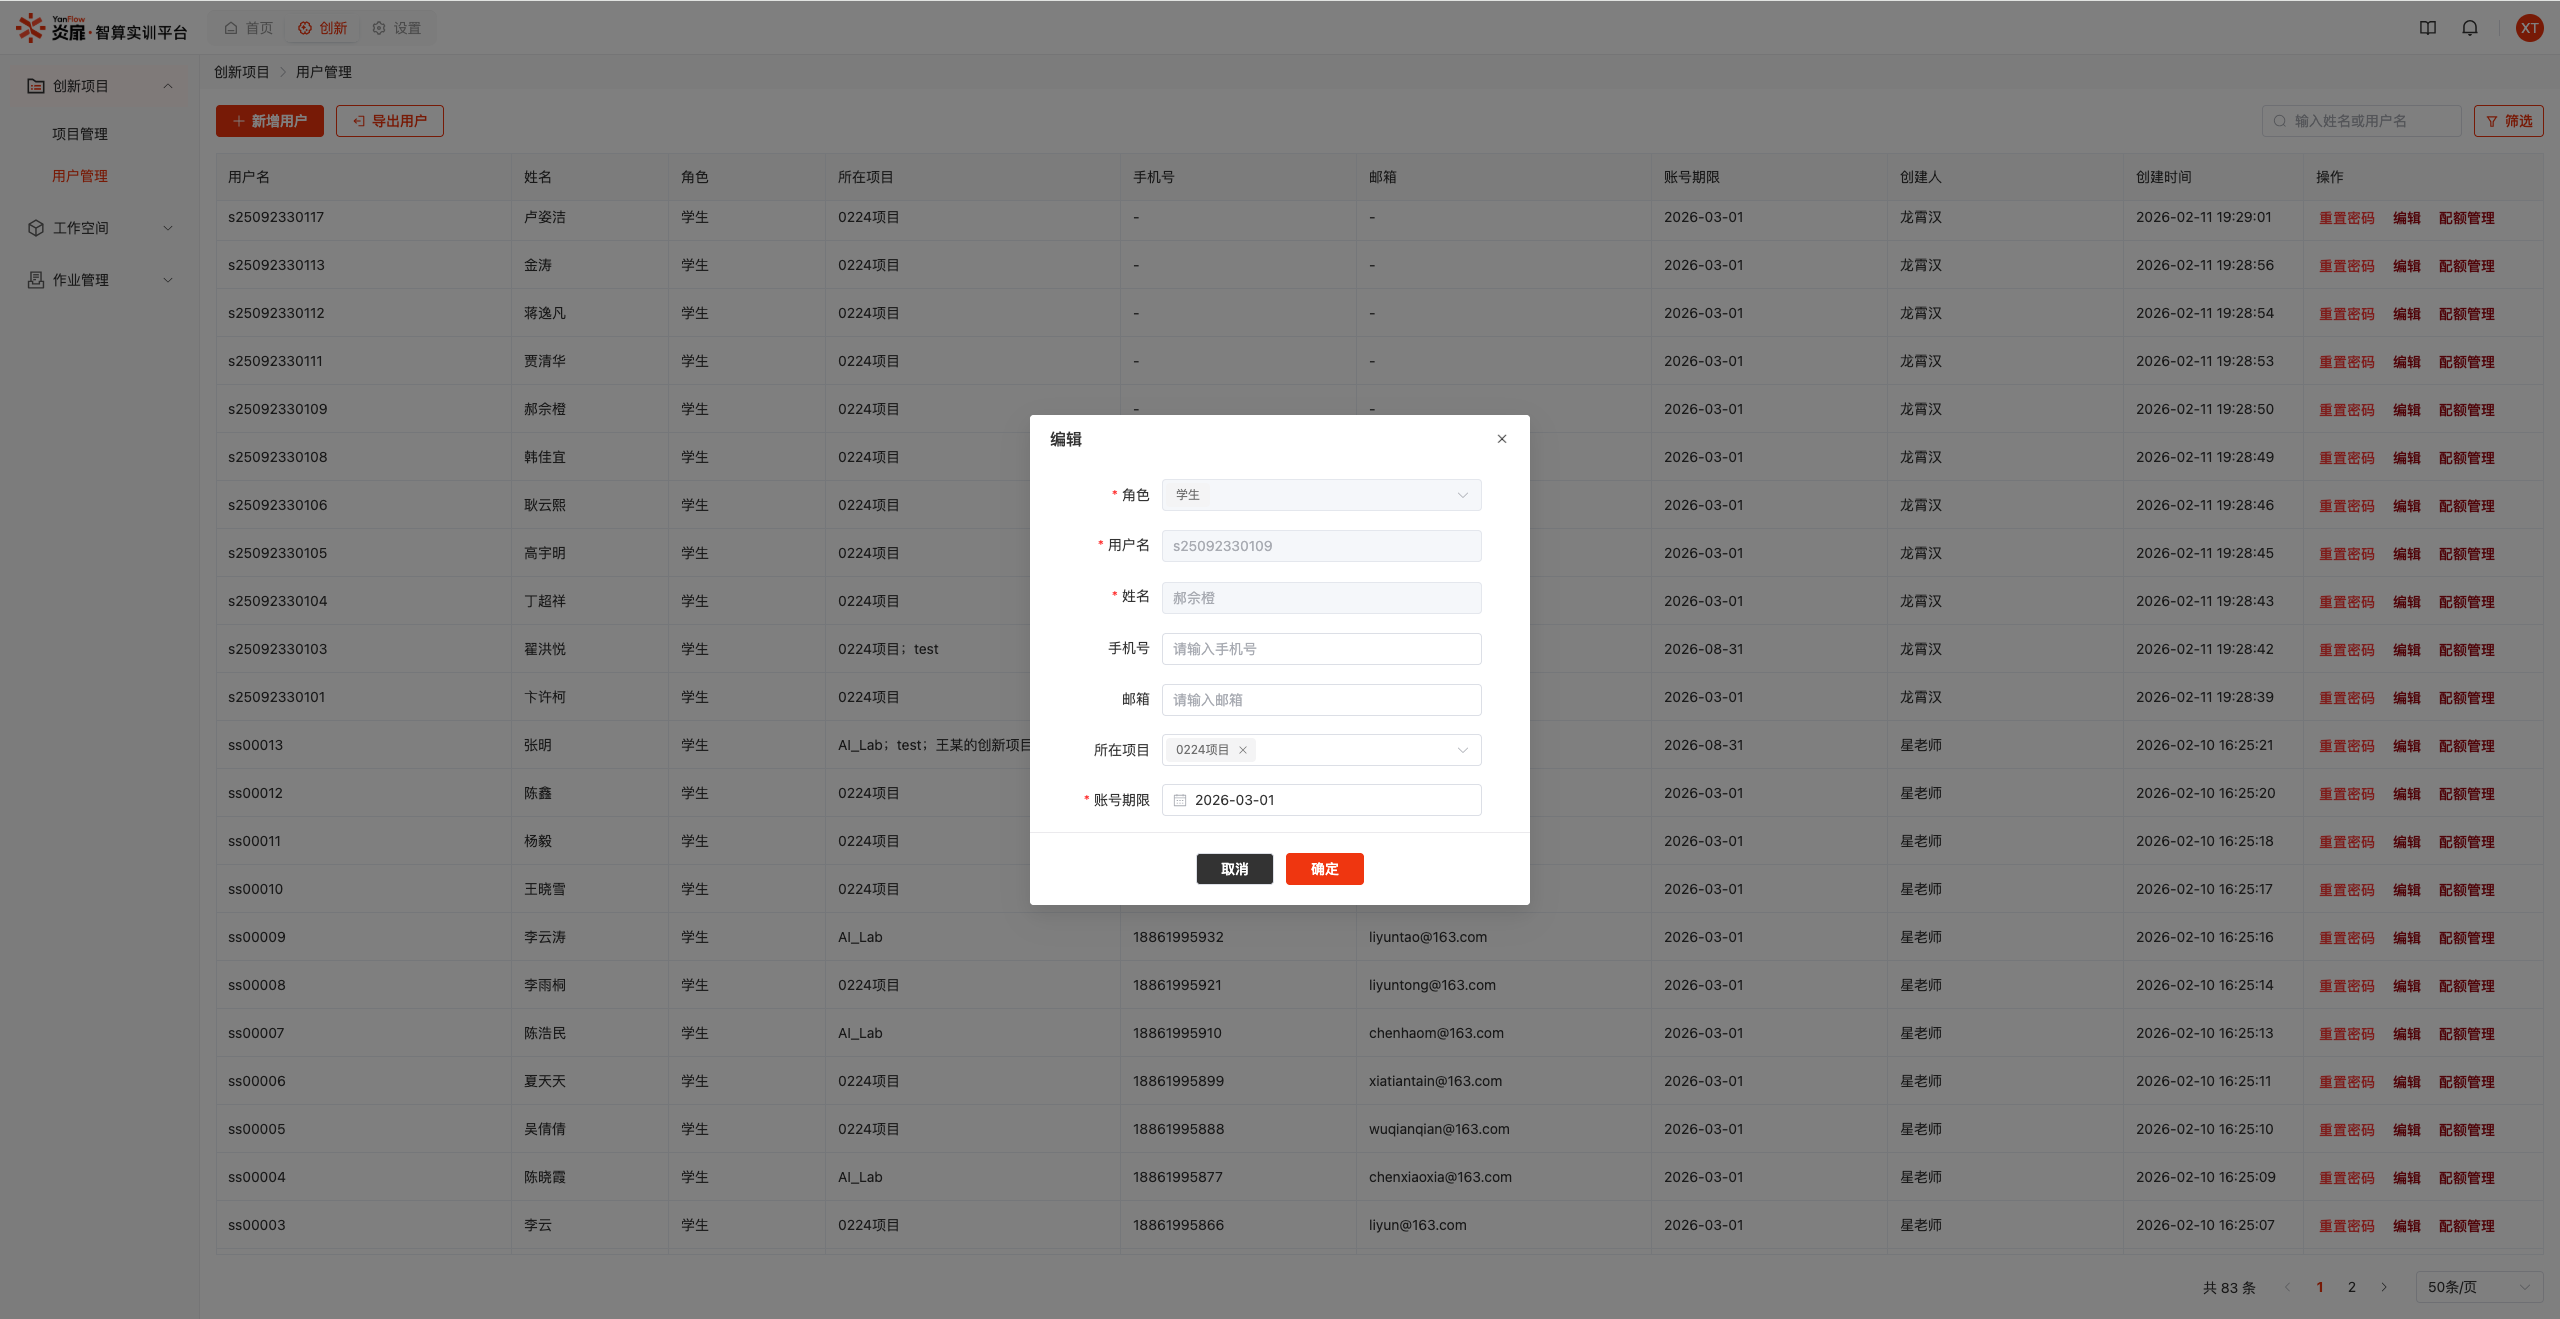
Select a user and click the Edit button to display the edit dialog. Modify the information that needs to be changed and click the Confirm button to update user information.
Note:
Role,Username, andNamecannot be modified. This page only supports modifying Student user information. To modify teacher user information, please go to Teacher Management.
Reset Password
Select a user and click the Reset Password button. After confirmation, the password reset will be completed.
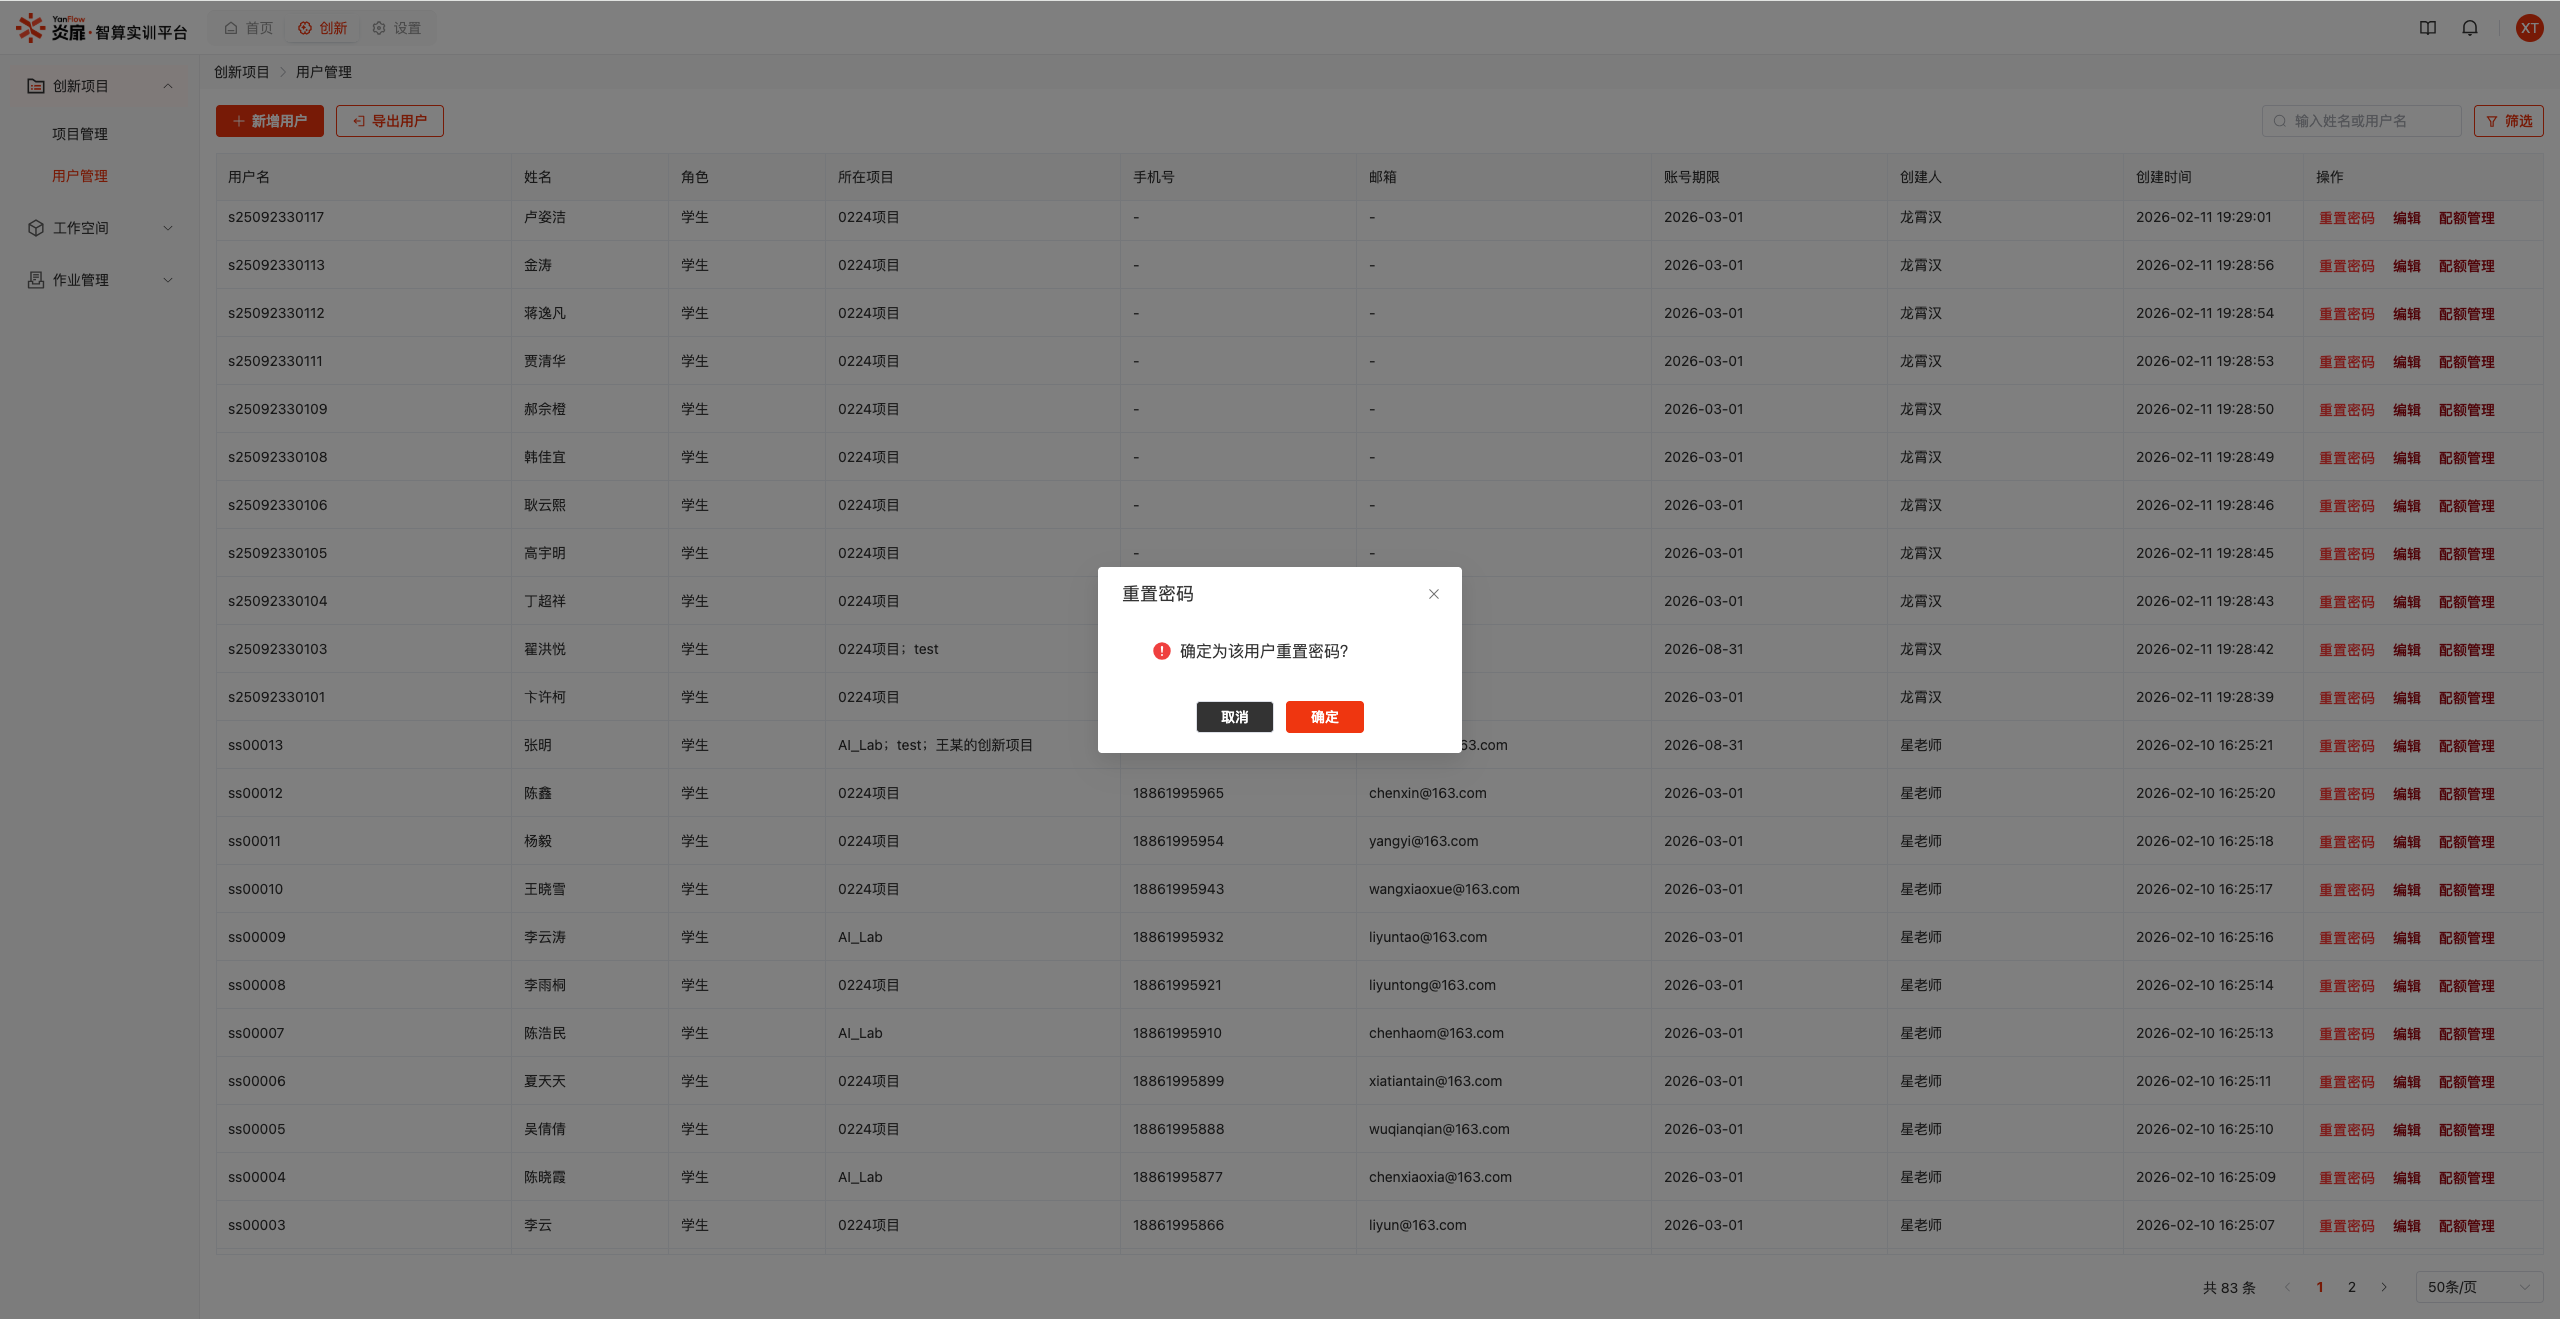
Note: The initial password after reset is the user's username.
Quota Management
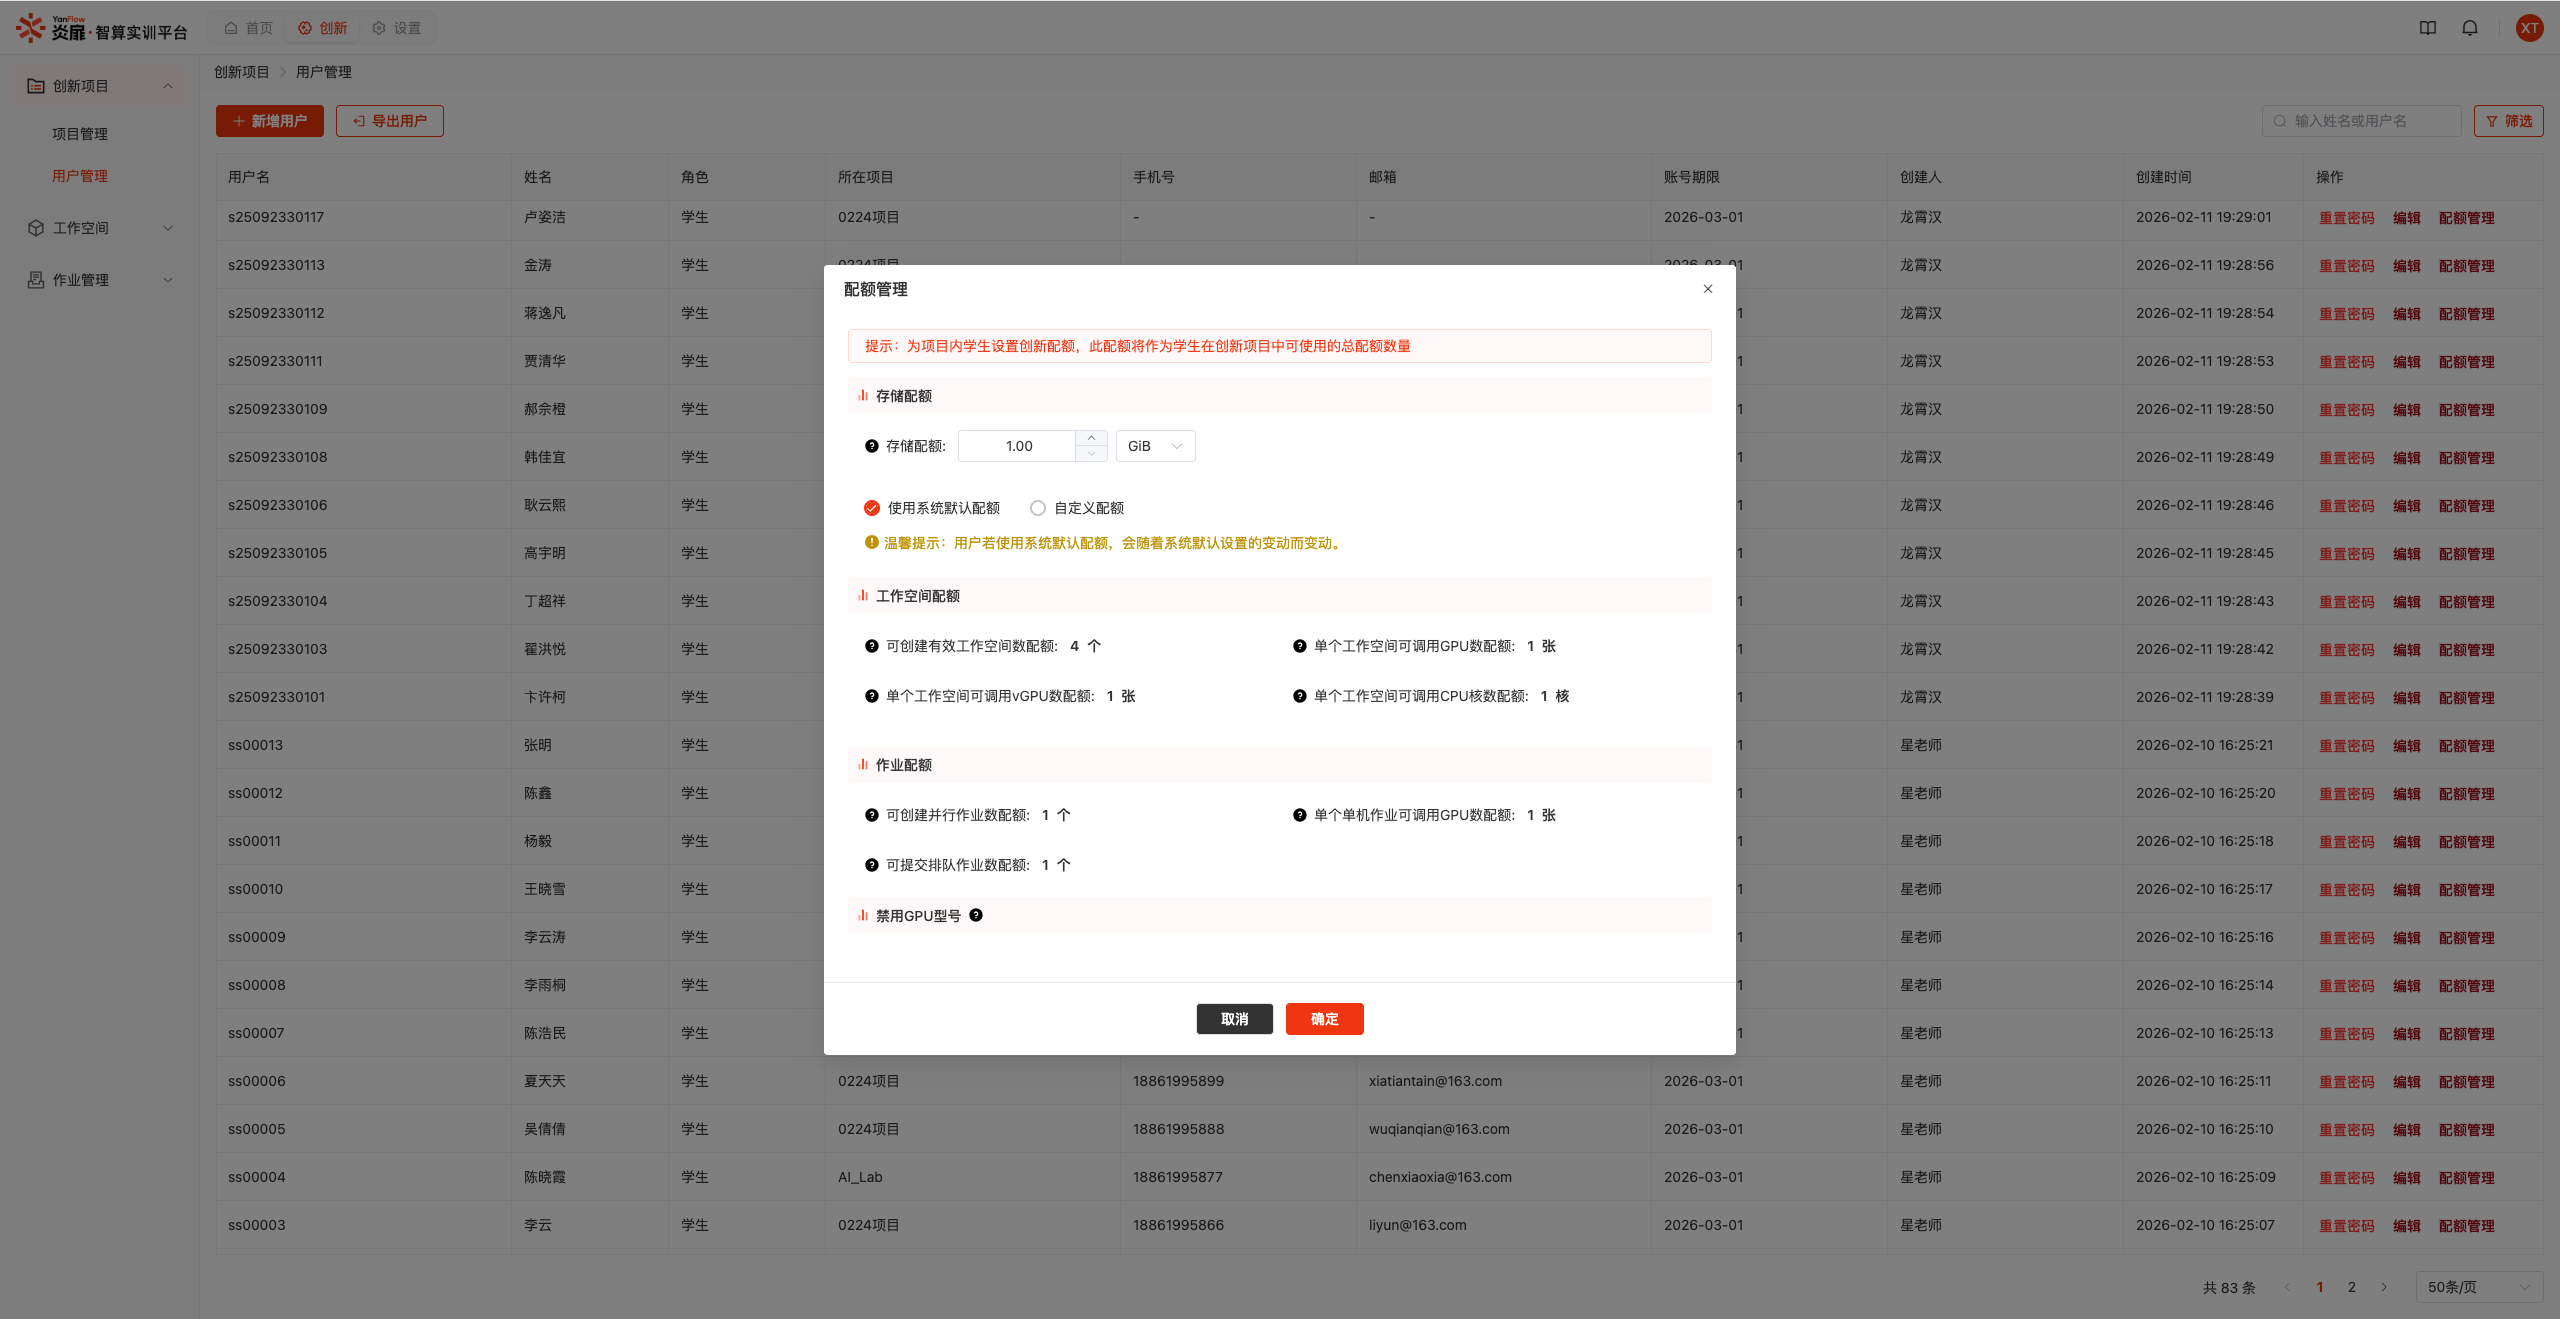
Select a user and click the Quota Management button to display the settings dialog. Set the corresponding innovation quota for the user.
Note:
- This page only supports setting quotas for Student users. To modify teacher quotas, please go to Teacher Management.
- Storage quota is a global system quota, shared between training and innovation.
- Other quotas (workspaces, jobs, disabled models) are exclusive quotas for the user in innovation projects.
Export Users
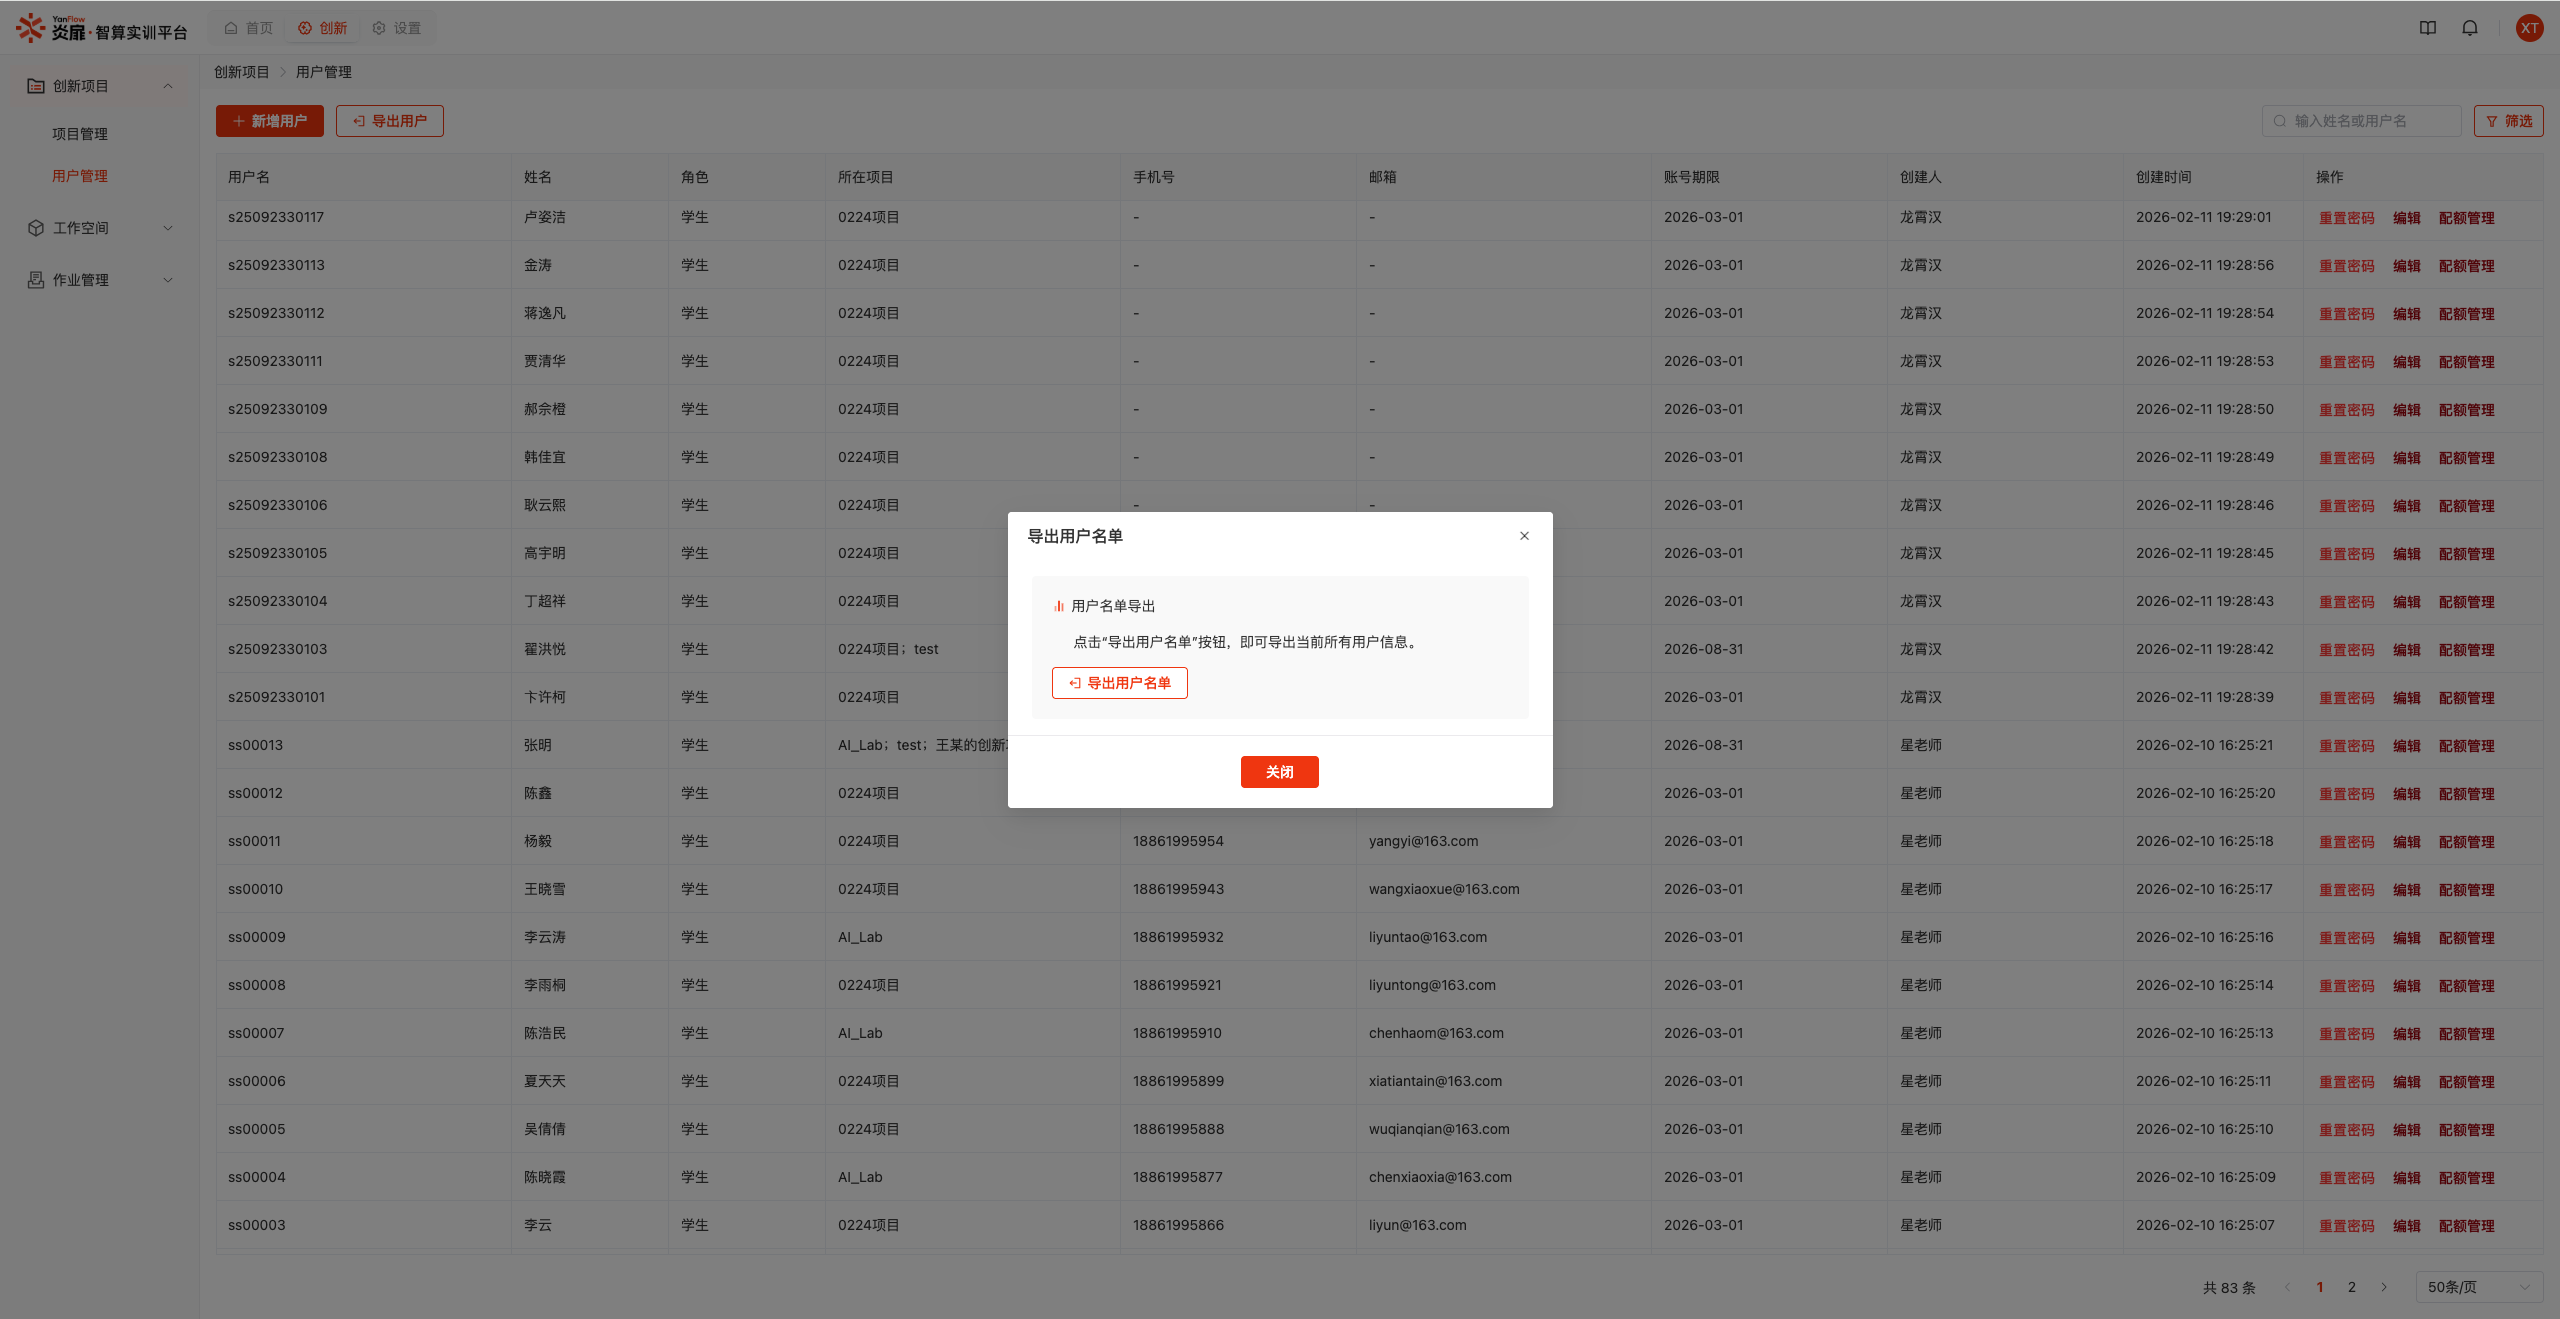
Click the Export Users button to export all innovation member users in the system to the local machine.
Workspaces
Workspace List
Displays workspaces created in the Innovation section. Supports filtering by Project, Workspace Type, Workspace Status, GPU Model, CPU Model, Node, and Creator Name. Also supports keyword search by Workspace Name.
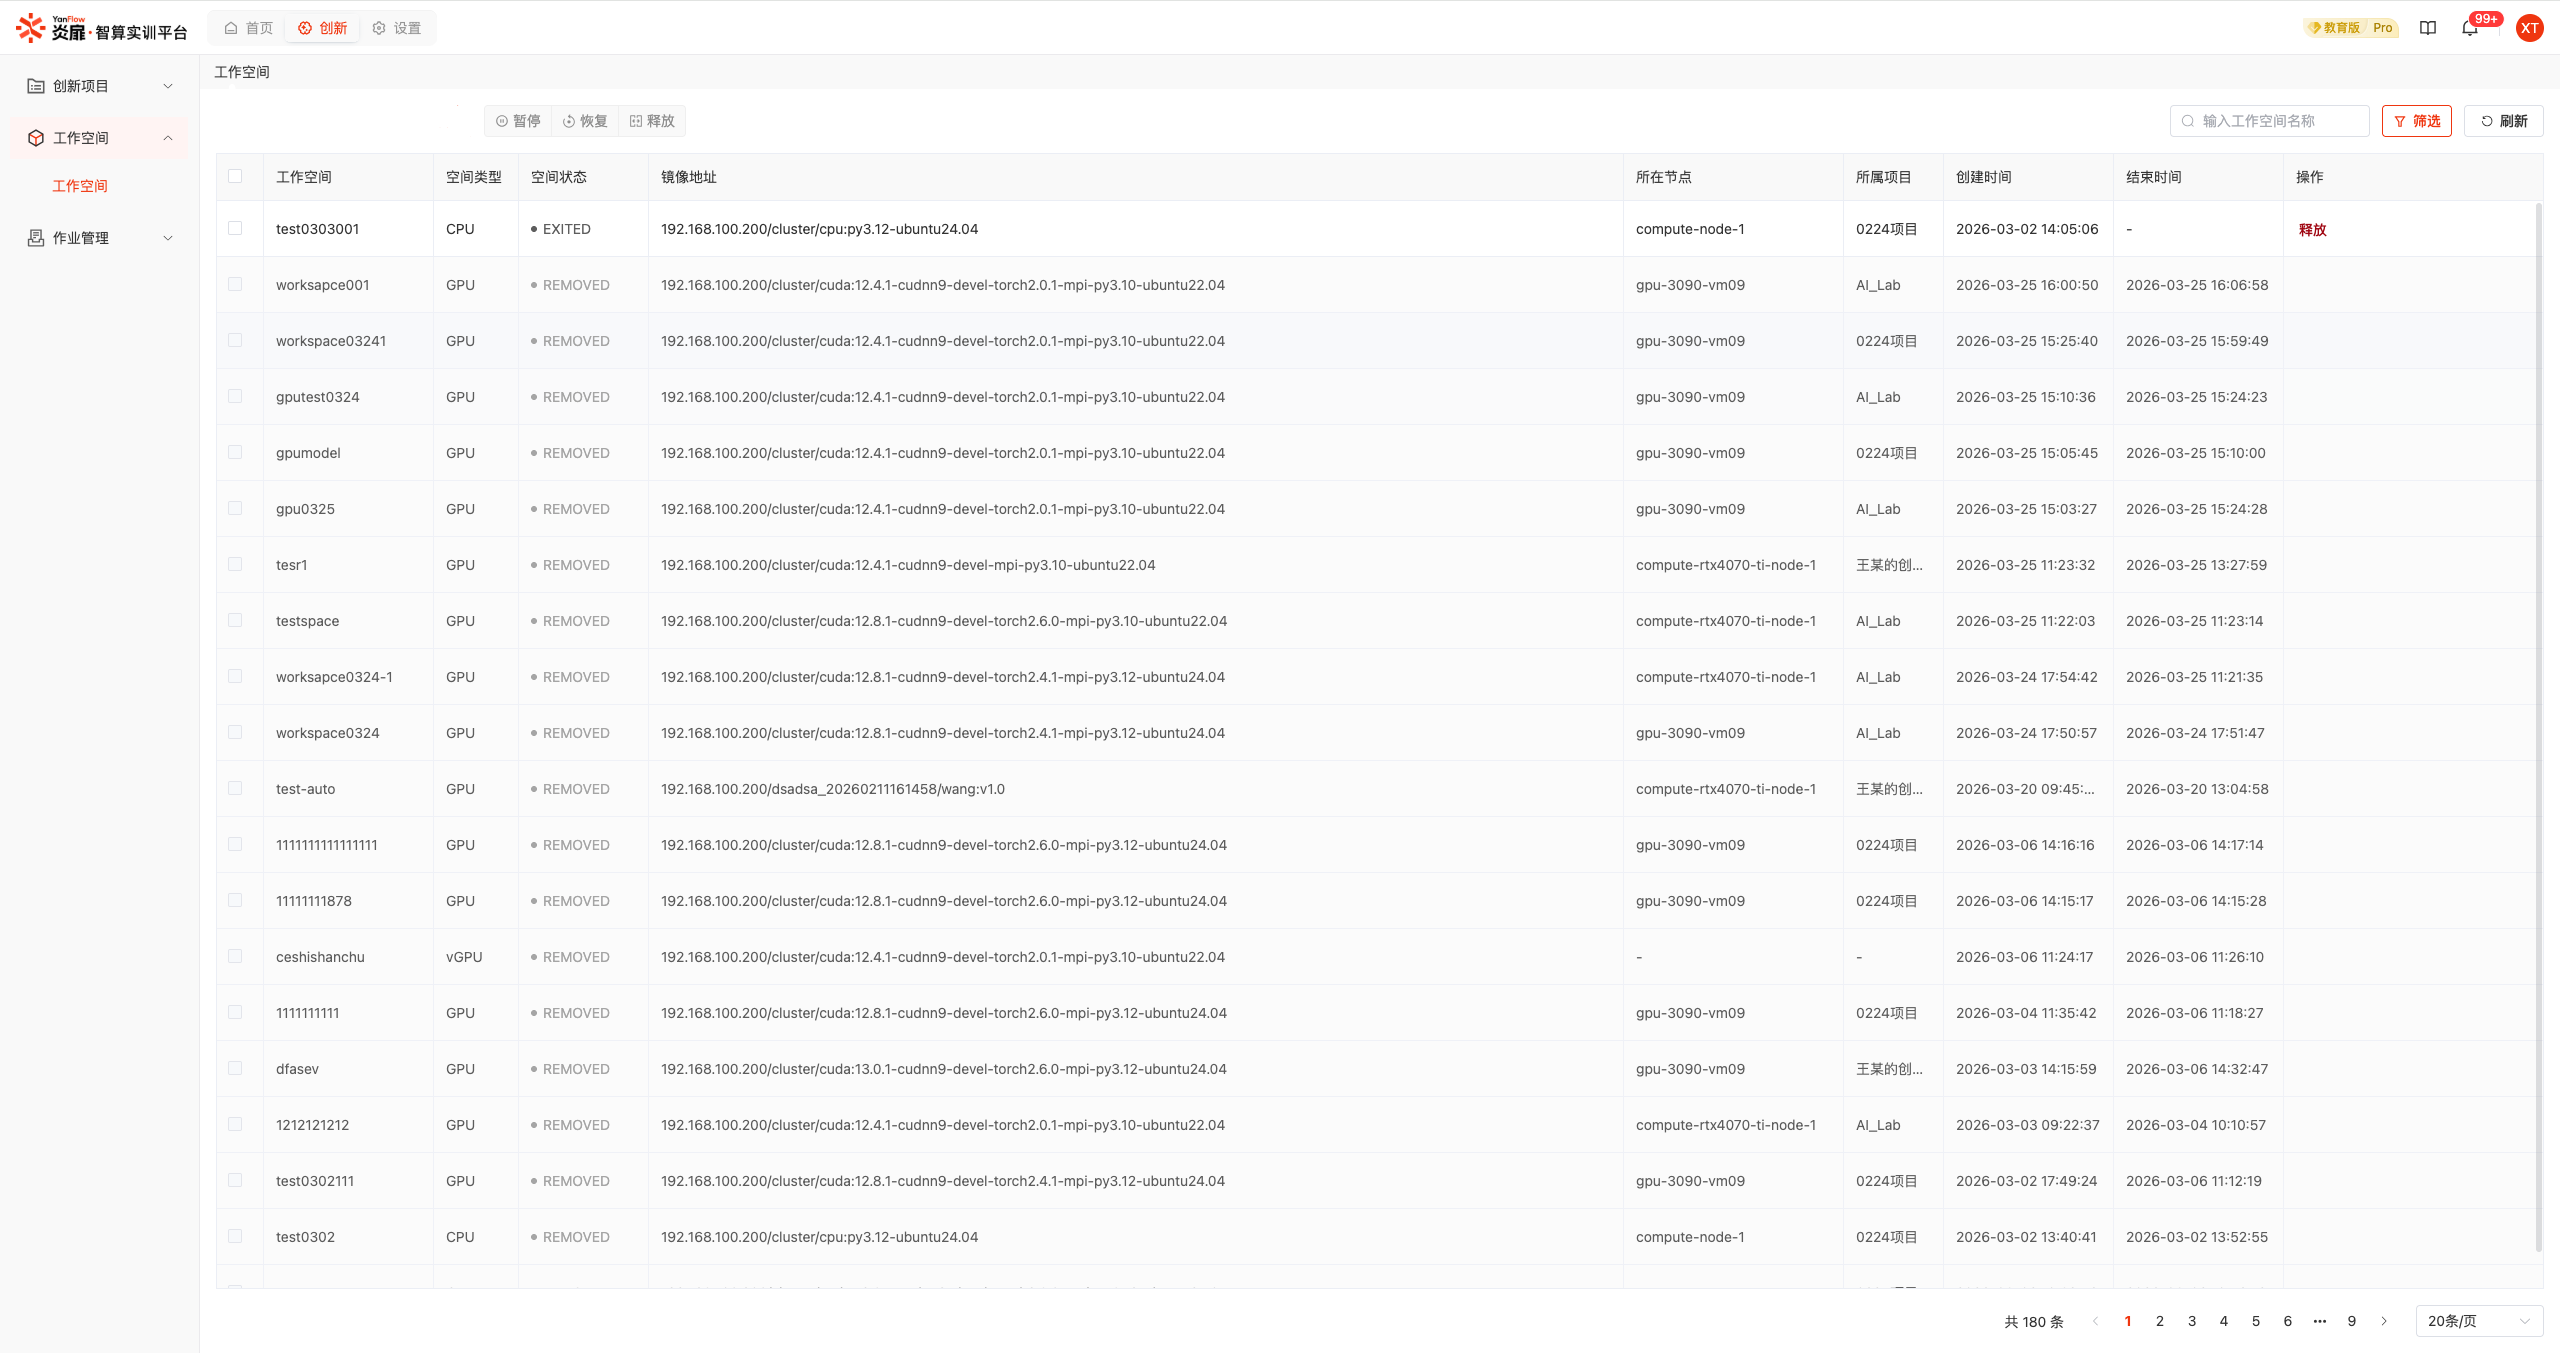
Workspace Details
Click the Details button to open the workspace details page and view detailed workspace information.
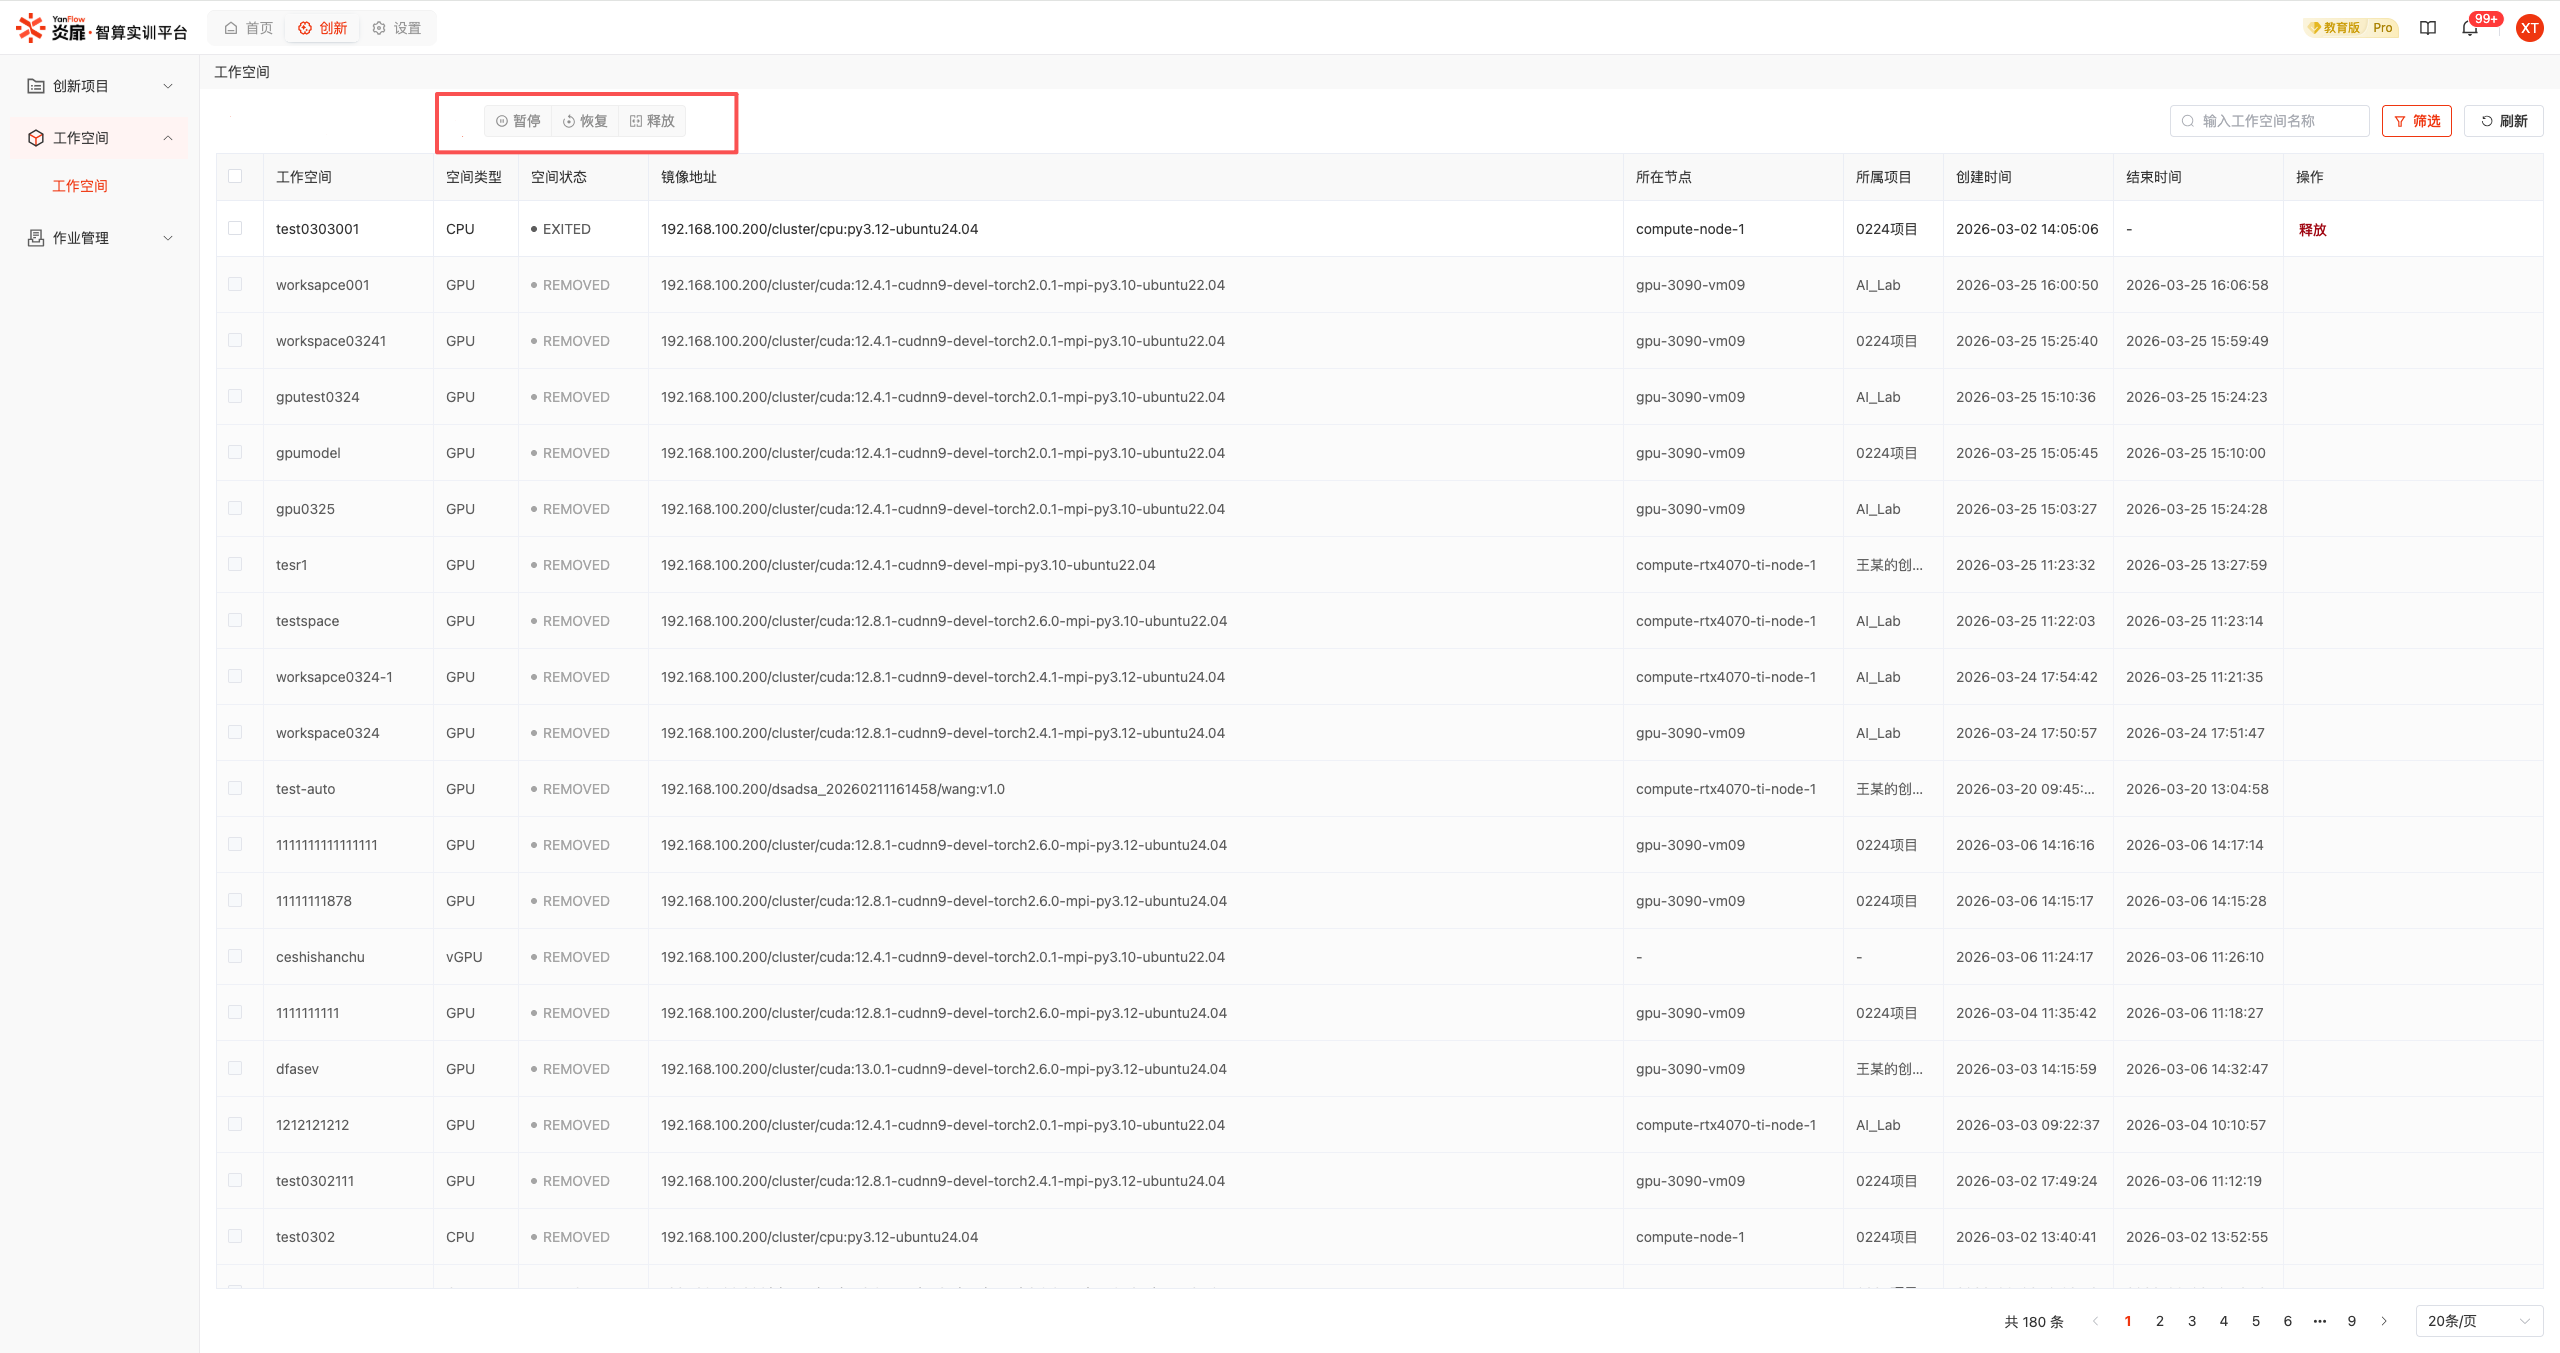
Suspend/Resume/Release
Select a workspace and click the Suspend, Resume, or Release button. A confirmation dialog will appear; click the Confirm button to complete the operation.
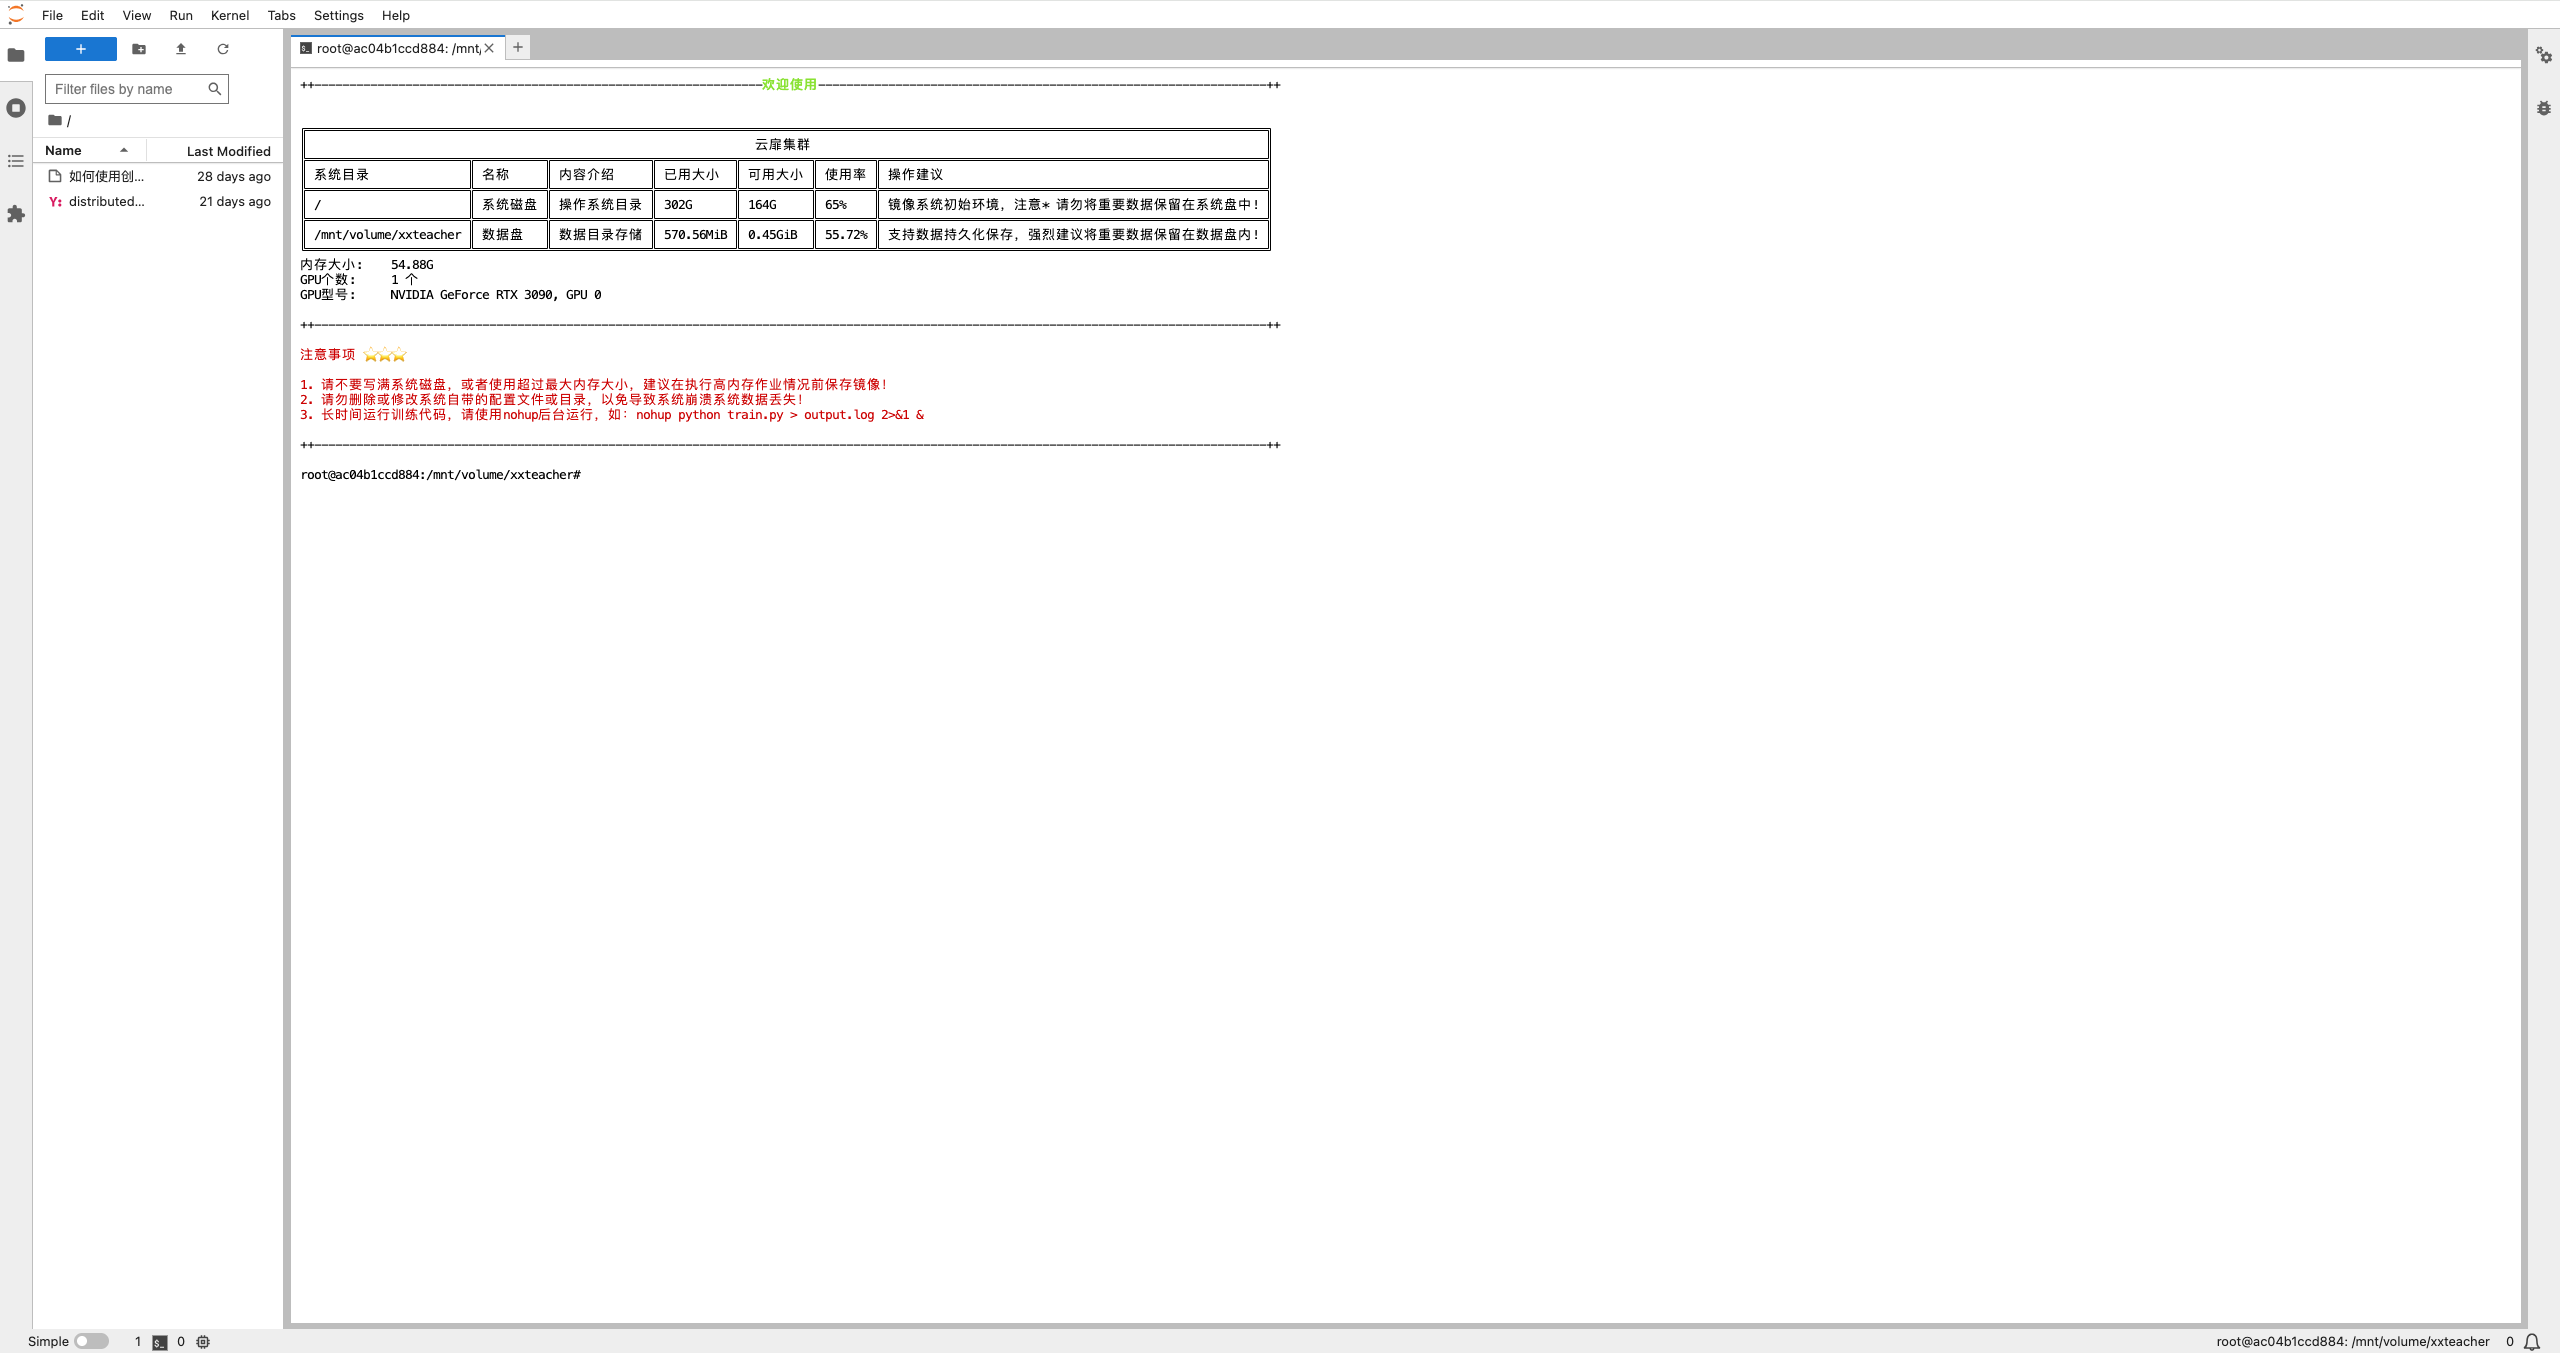
Port Mapping
Select a workspace and click the Port Mapping button. A dialog will appear showing the port mapping information for the workspace. Multiple connection methods are supported to access the container interior, and external network remote connection can be enabled.
Job Management
Slurm
Displays Slurm jobs created in the system. Supports filtering by Project, Type, Status, Creator Name, and Creation Time. Also supports keyword search by Node Name.
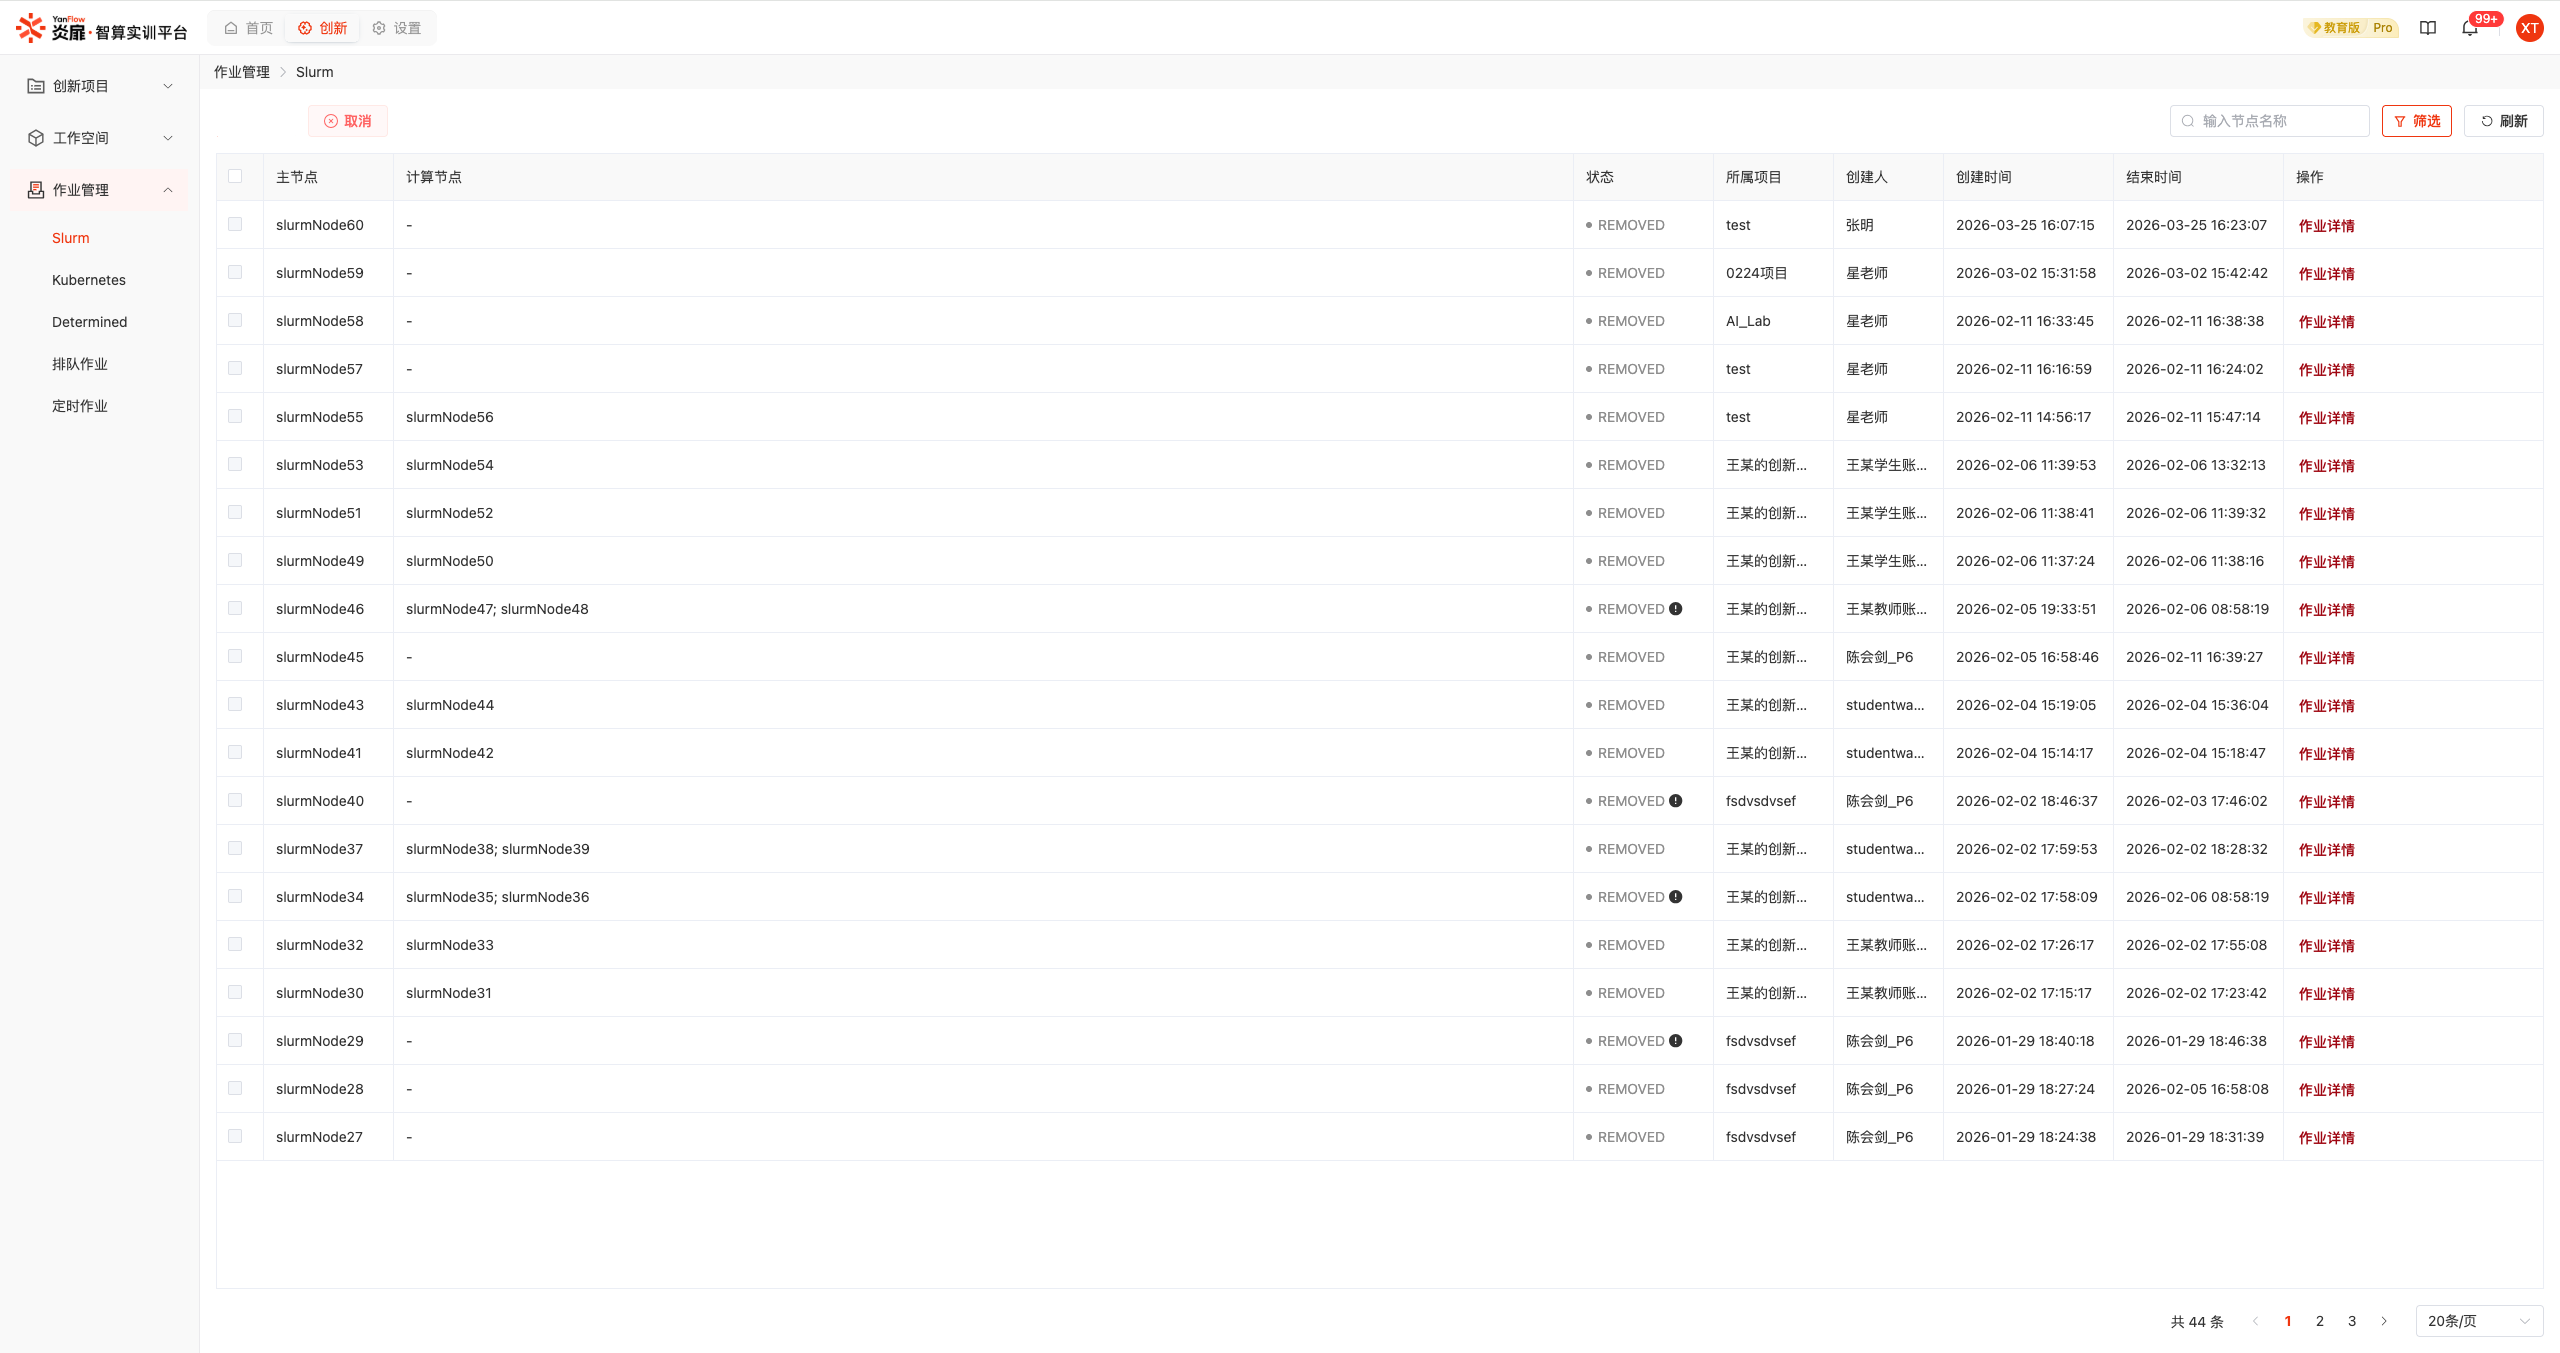
Cancel: Select a Slurm job and click the Cancel button to terminate the job and release resources. Supports viewing console and port information.
Job Details: Select a Slurm job and click the Job Details button to view all Slurm jobs within the container. Check one or more jobs and click Cancel to cancel them, changing their status to CANCELED.
Kubernetes
Displays Kubernetes jobs created in the system. Supports filtering by Project, Creator Name, and Creation Time. Also supports keyword search by Job Name.
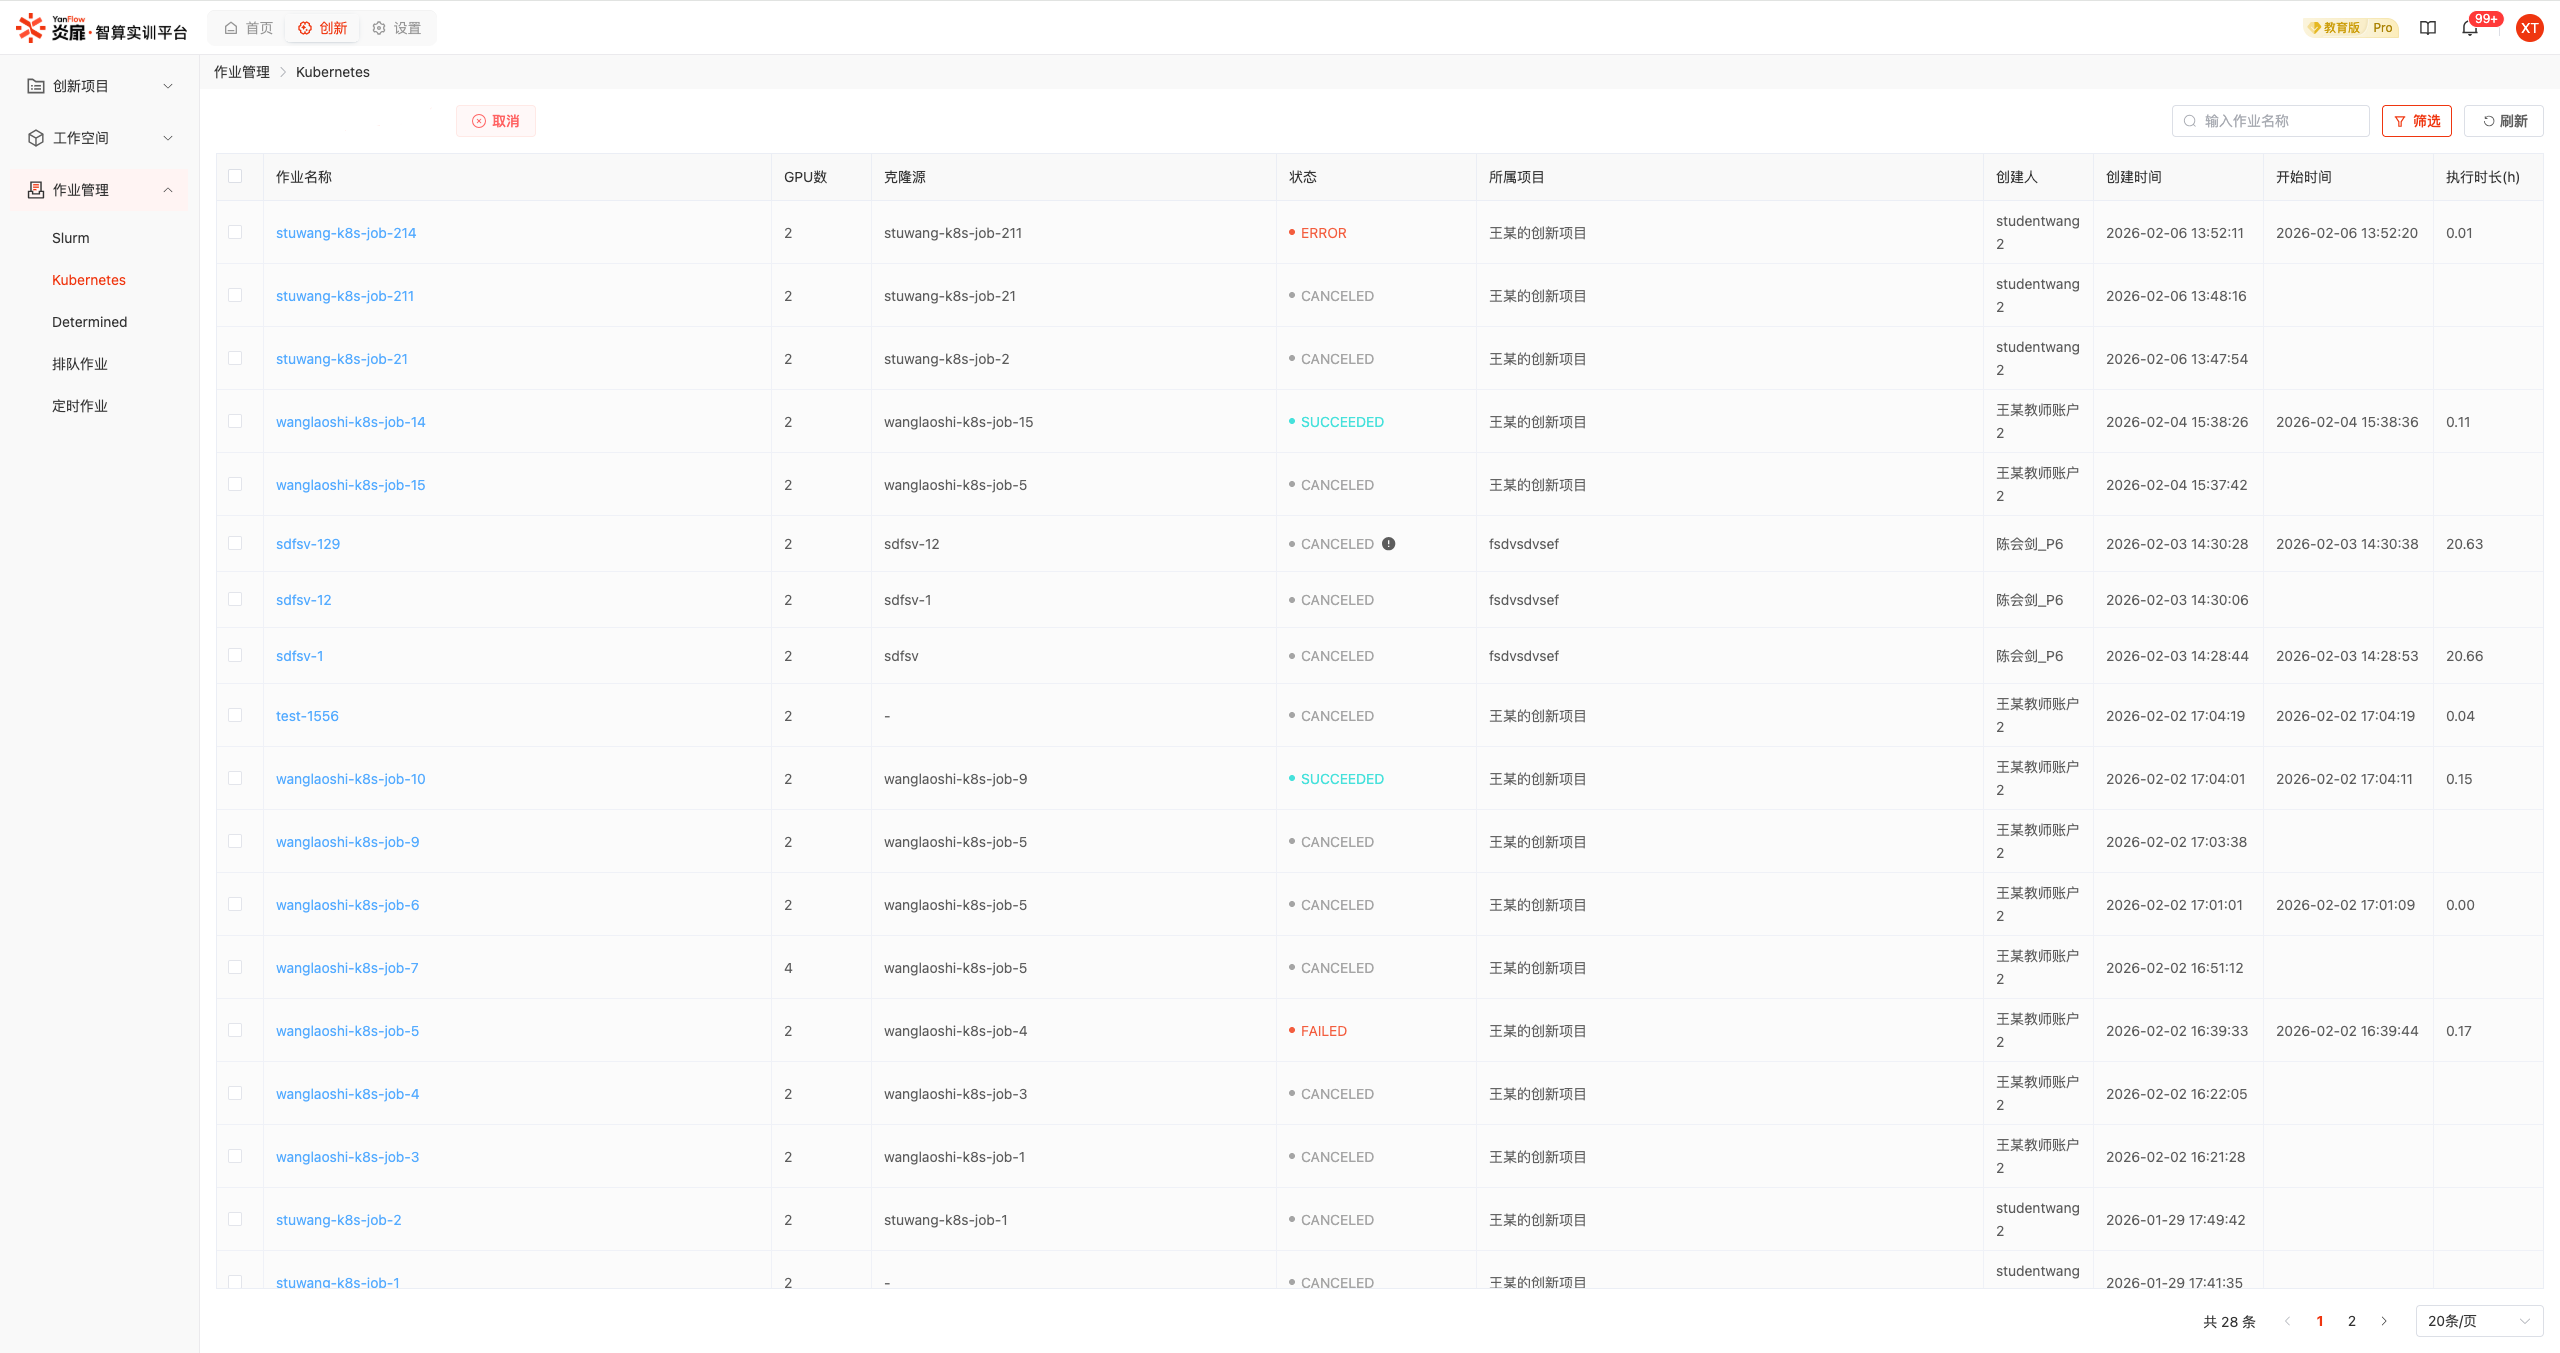
Job Details: Select a job and click the Job Name to view detailed job information, including logs and Console.
Cancel Job: Select a job and click the Cancel button to cancel a job.
Determined
Single-Machine Jobs
Displays single-machine jobs created in the system. Supports filtering by Project, Creator Name, and Creation Time. Also supports keyword search by Job Name.
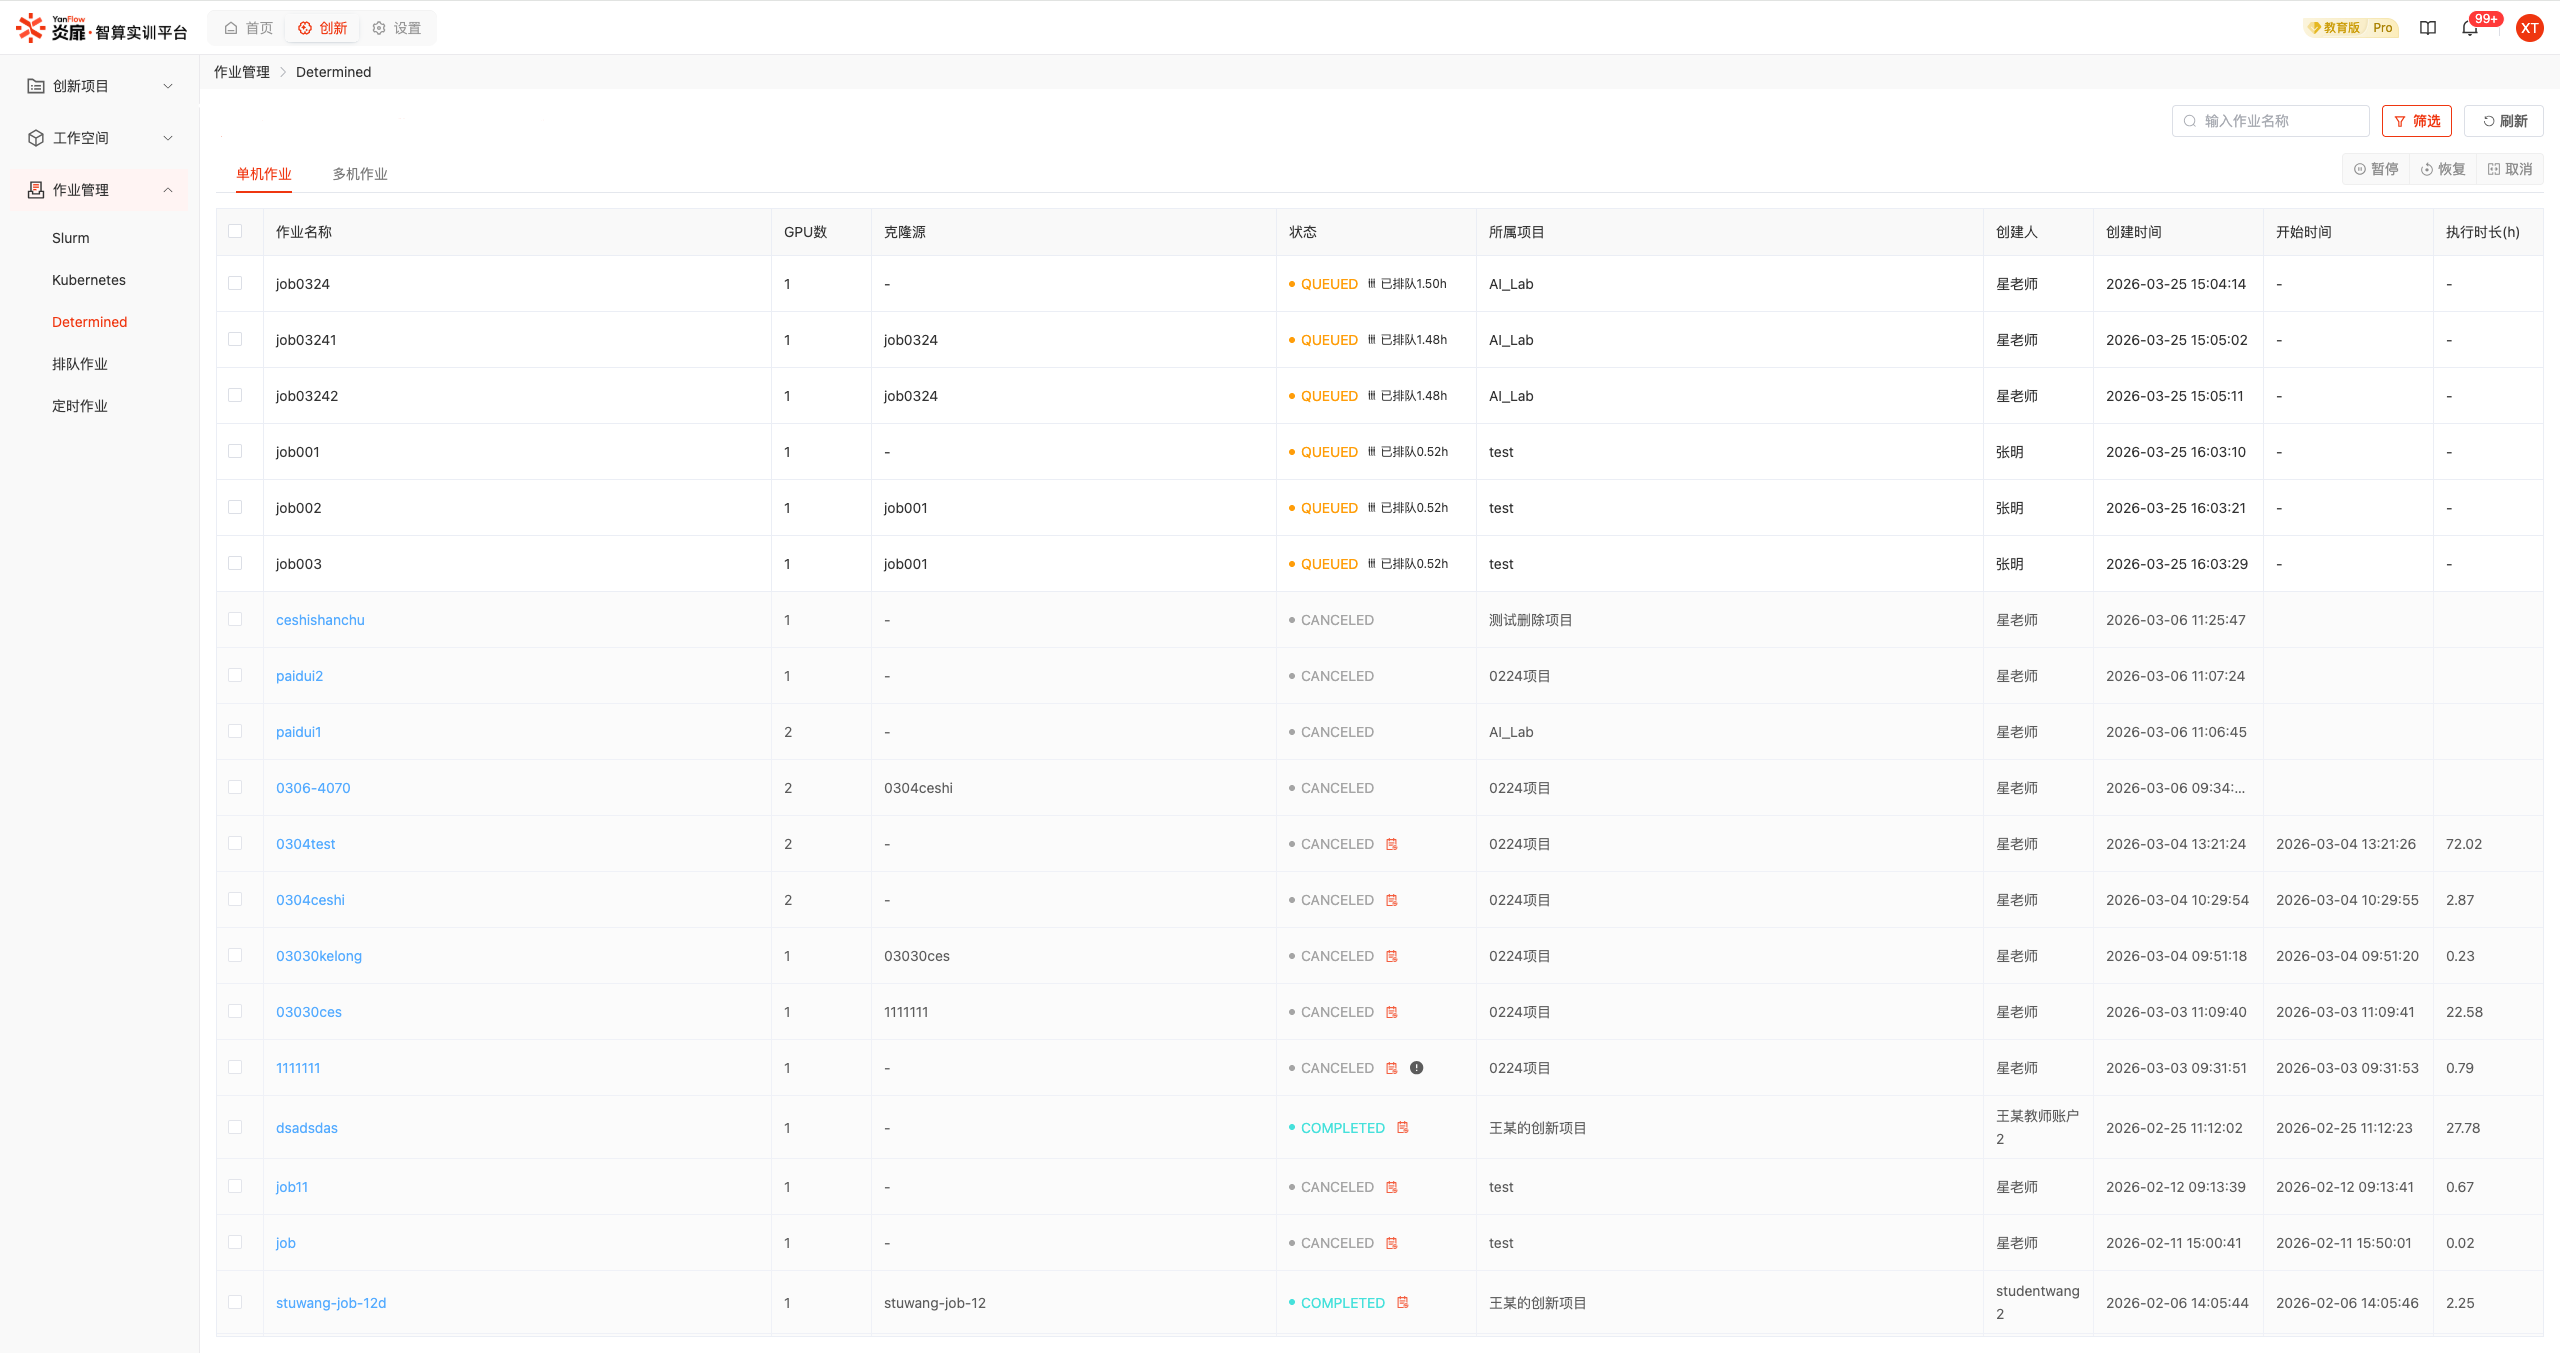
Job Details: Select a job and click the Job Name to view detailed job information.
Suspend/Resume/Cancel: Select a job and click the Suspend, Resume, or Cancel button. A confirmation dialog will appear; click the Confirm button to complete the operation.
Multi-Machine Jobs
Displays multi-machine jobs created in the system. Supports filtering by Project, Creator Name, and Creation Time. Also supports keyword search by Job Name.
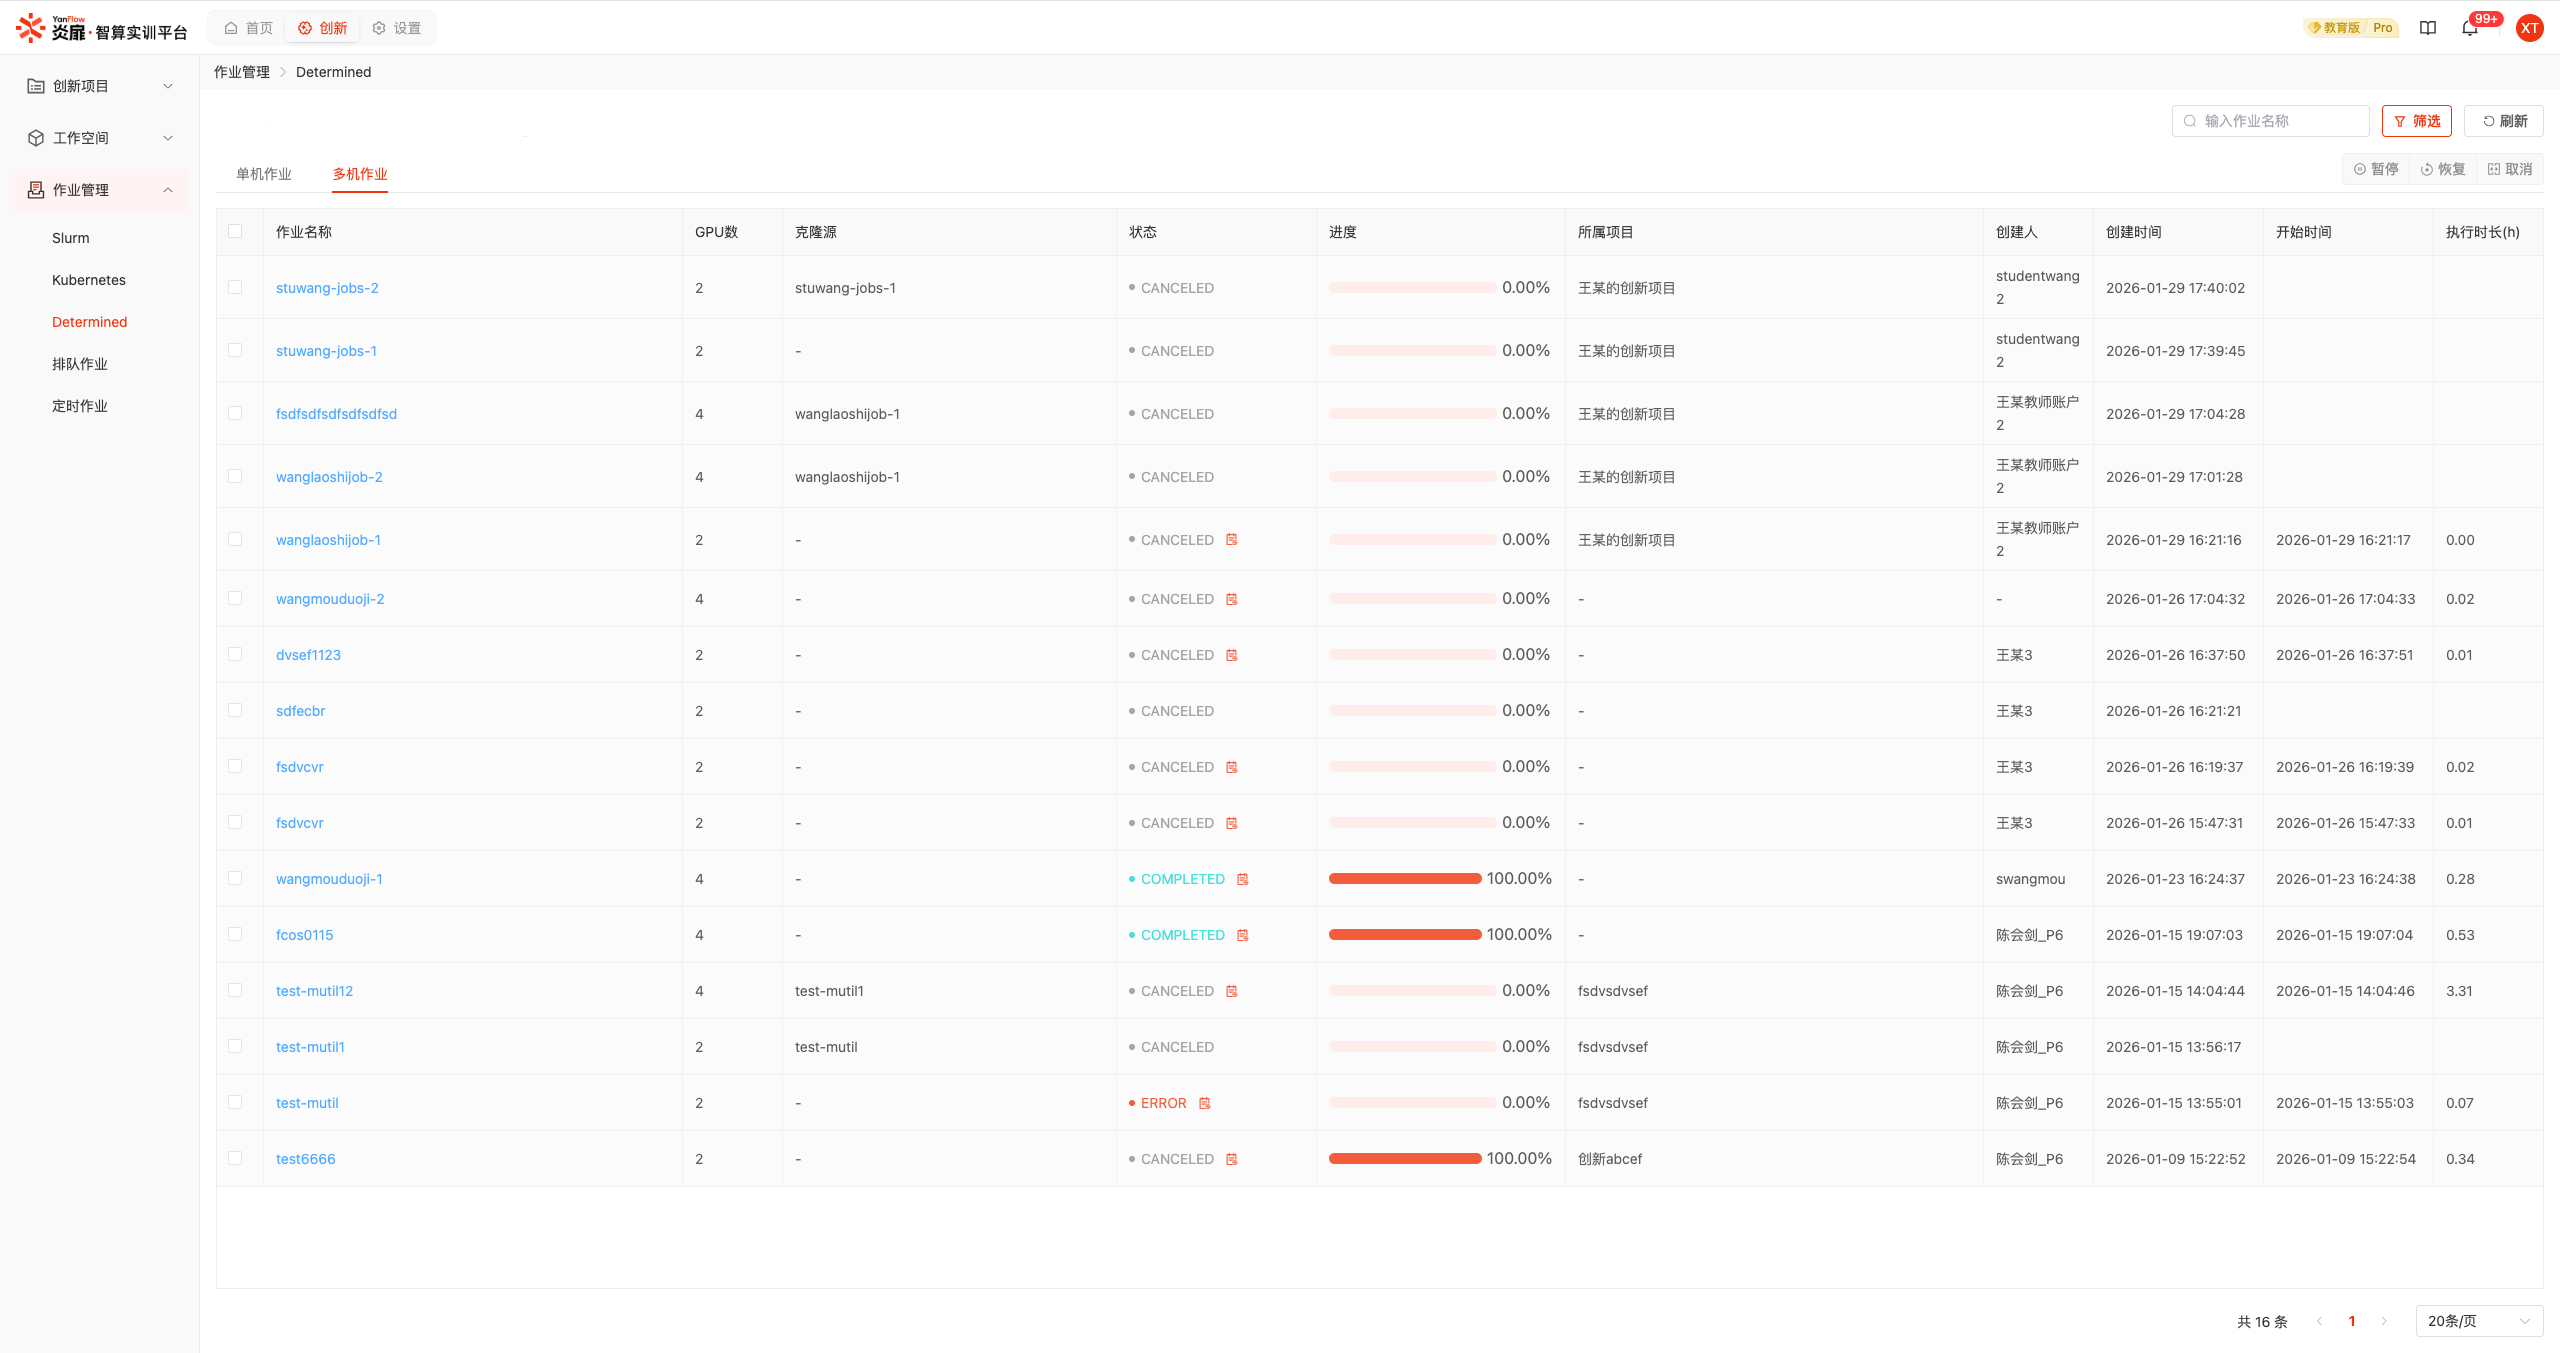
Job Details: Select a job and click the Job Name to view detailed job information.
Suspend/Resume/Cancel: Select a job and click the Suspend, Resume, or Cancel button. A confirmation dialog will appear; click the Confirm button to complete the operation.
Queued Jobs
Displays all queued jobs in the system. When resources meeting the conditions become available, queued jobs will run automatically. Supports filtering by Project and Creator Name. Also supports keyword search by Job Name.
If queuing is no longer needed, click the Cancel button to cancel the queued task. Project leaders can drag and adjust the queue order according to business needs.
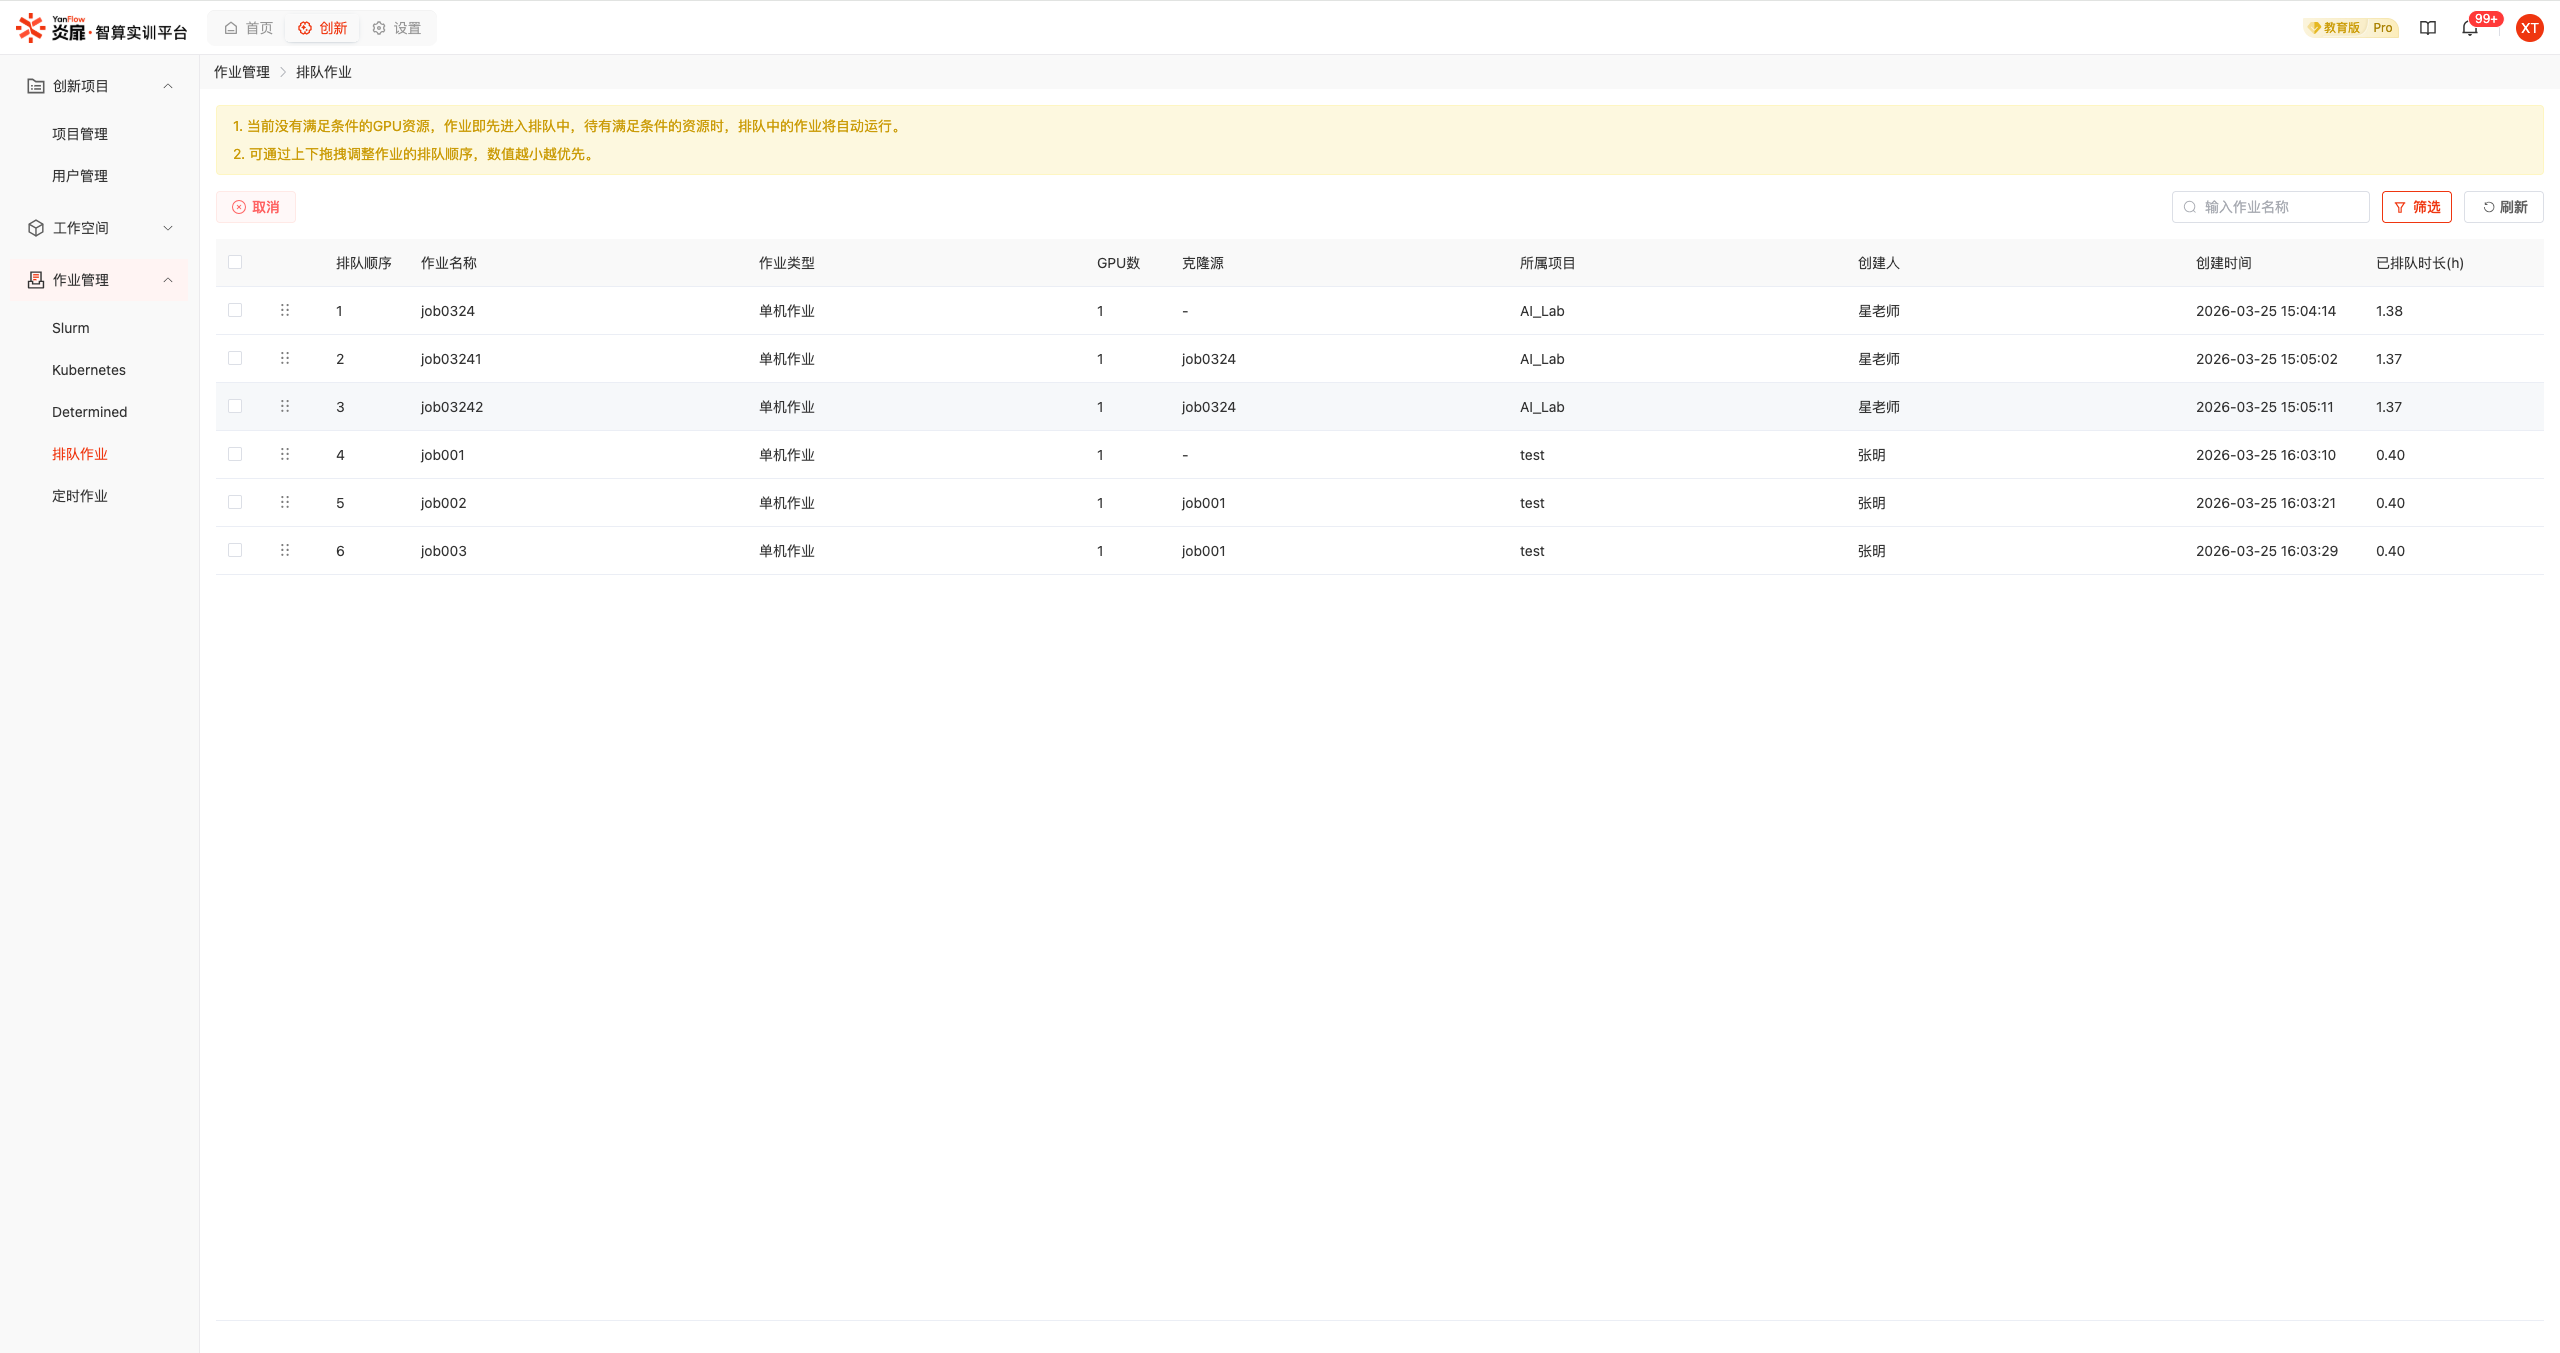
To ensure teaching training tasks, the system executes the following scheduling policy:
- Within the next N hours, if a teaching class requests similar resources, queued jobs will not be allocated and will remain in the queue until teaching resources are released.
- The value of parameter N is dynamically adjusted by the system administrator. For specific deadline values, please go to Configuration Management to view.
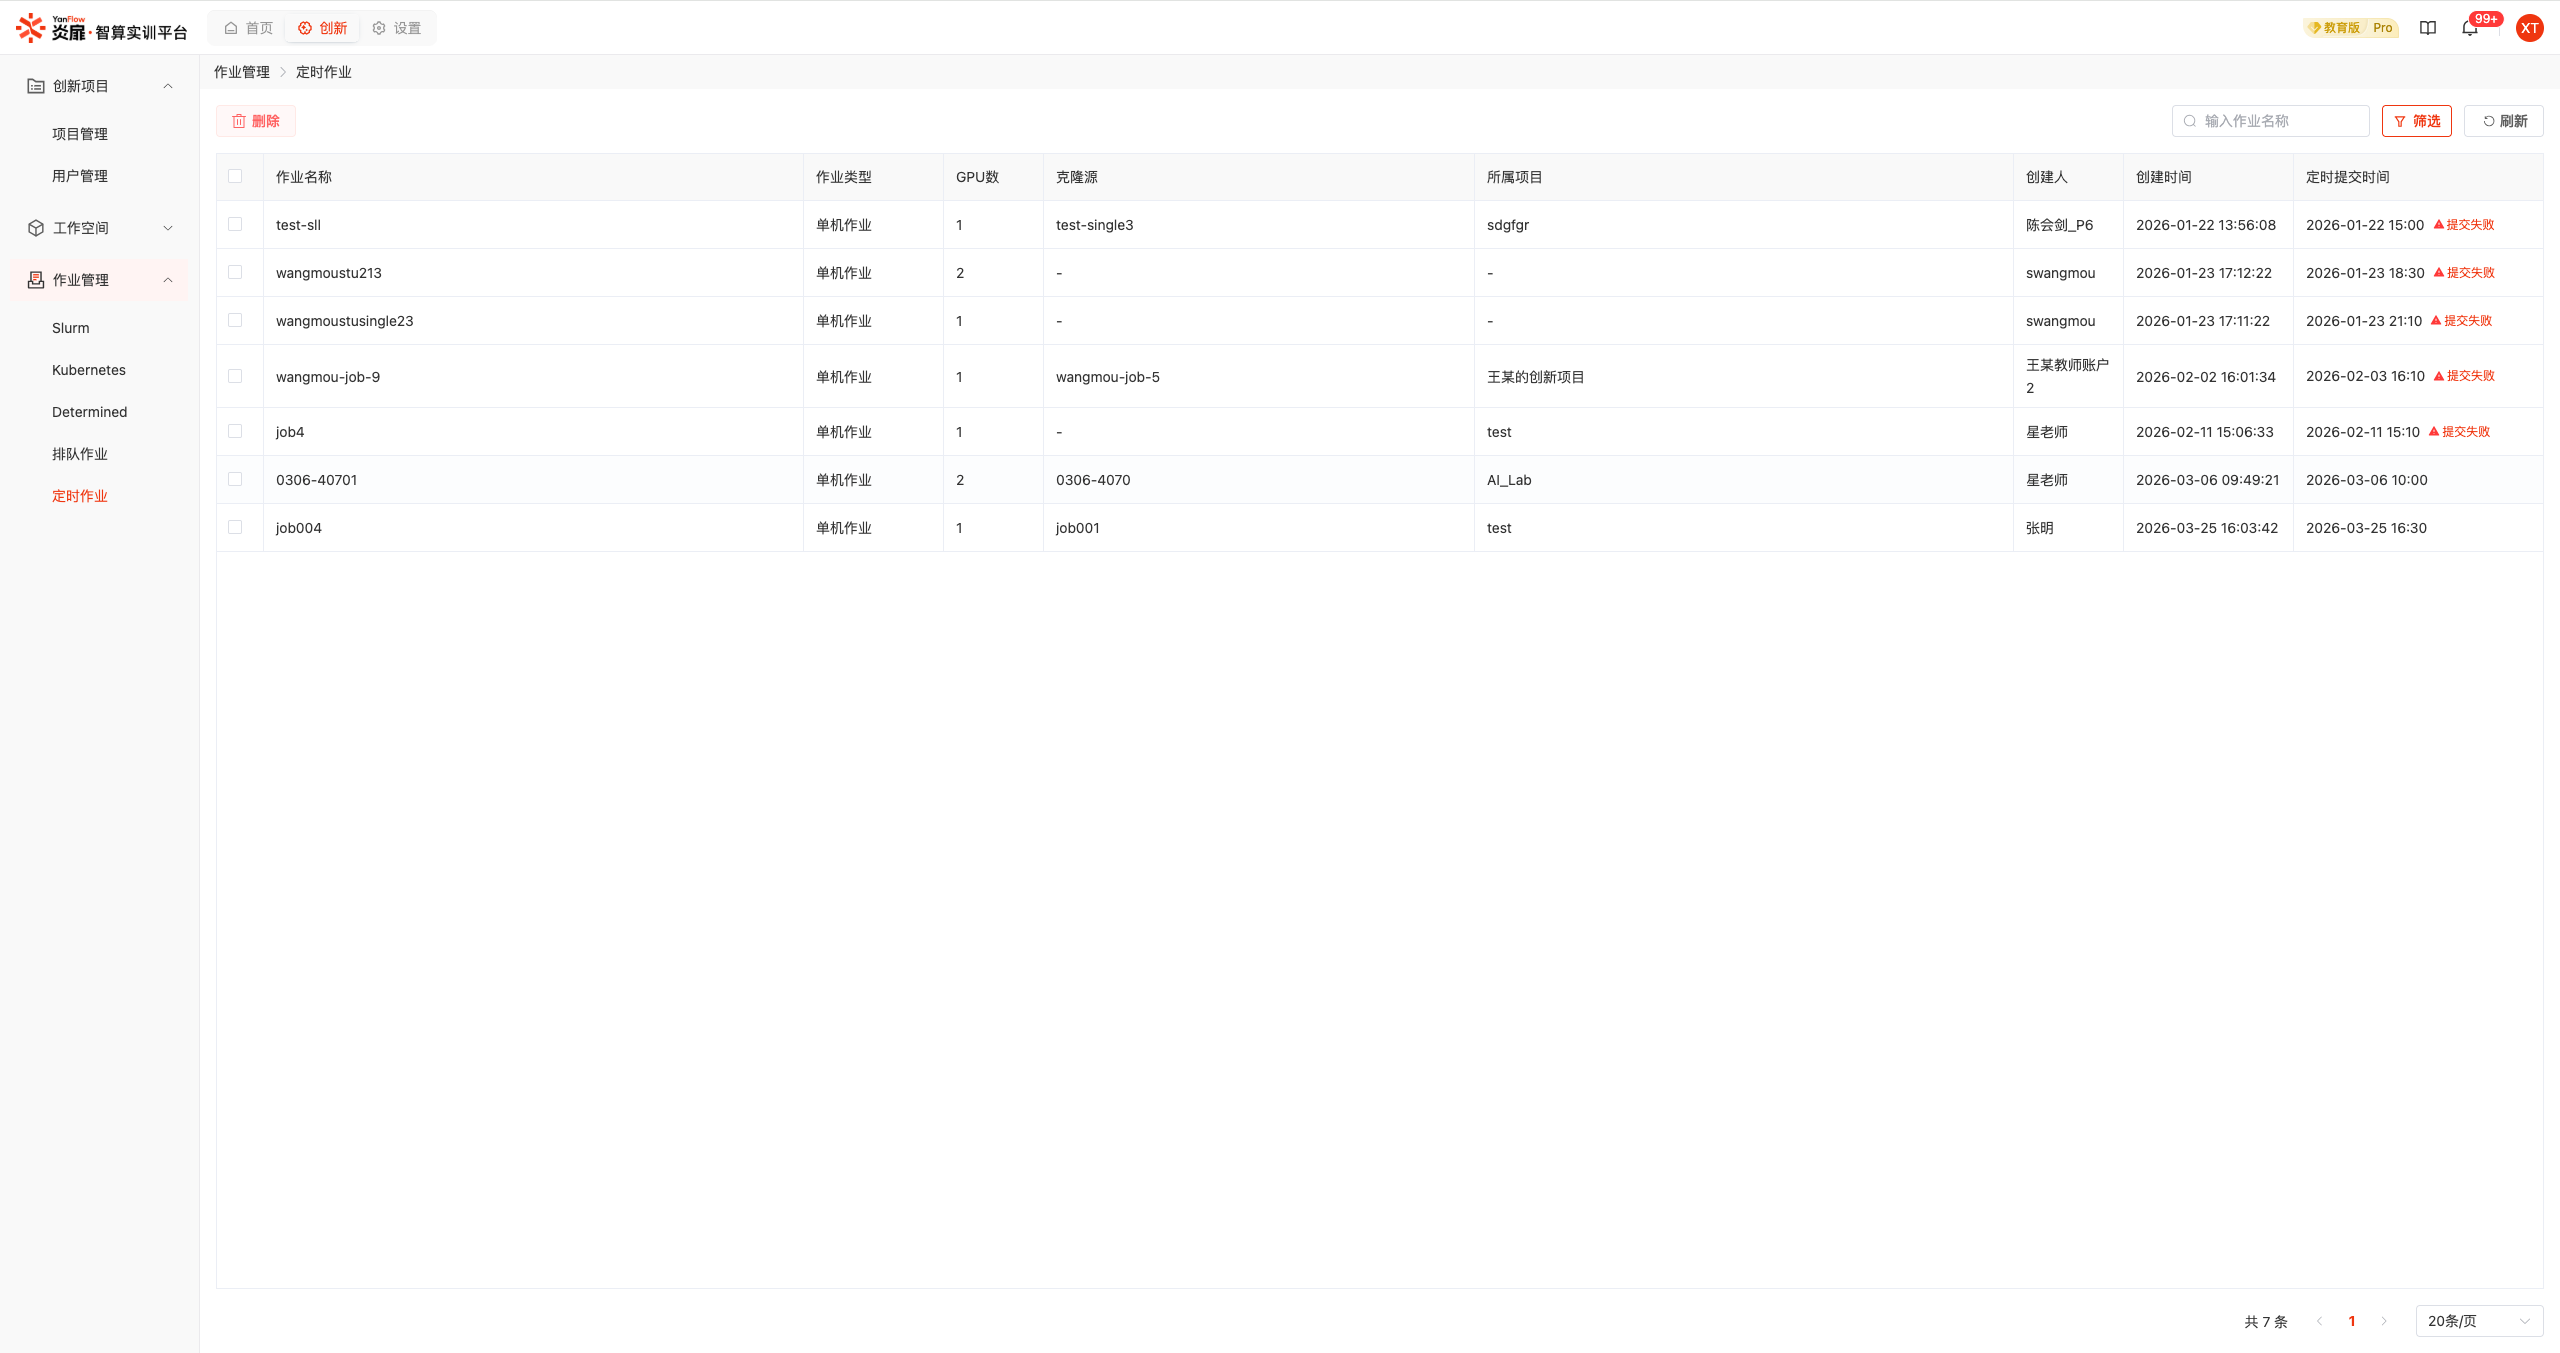
Scheduled Jobs
Displays all scheduled jobs in the system. Supports filtering by Project and Creator Name. Also supports keyword search by Job Name.
Settings
Teacher Management
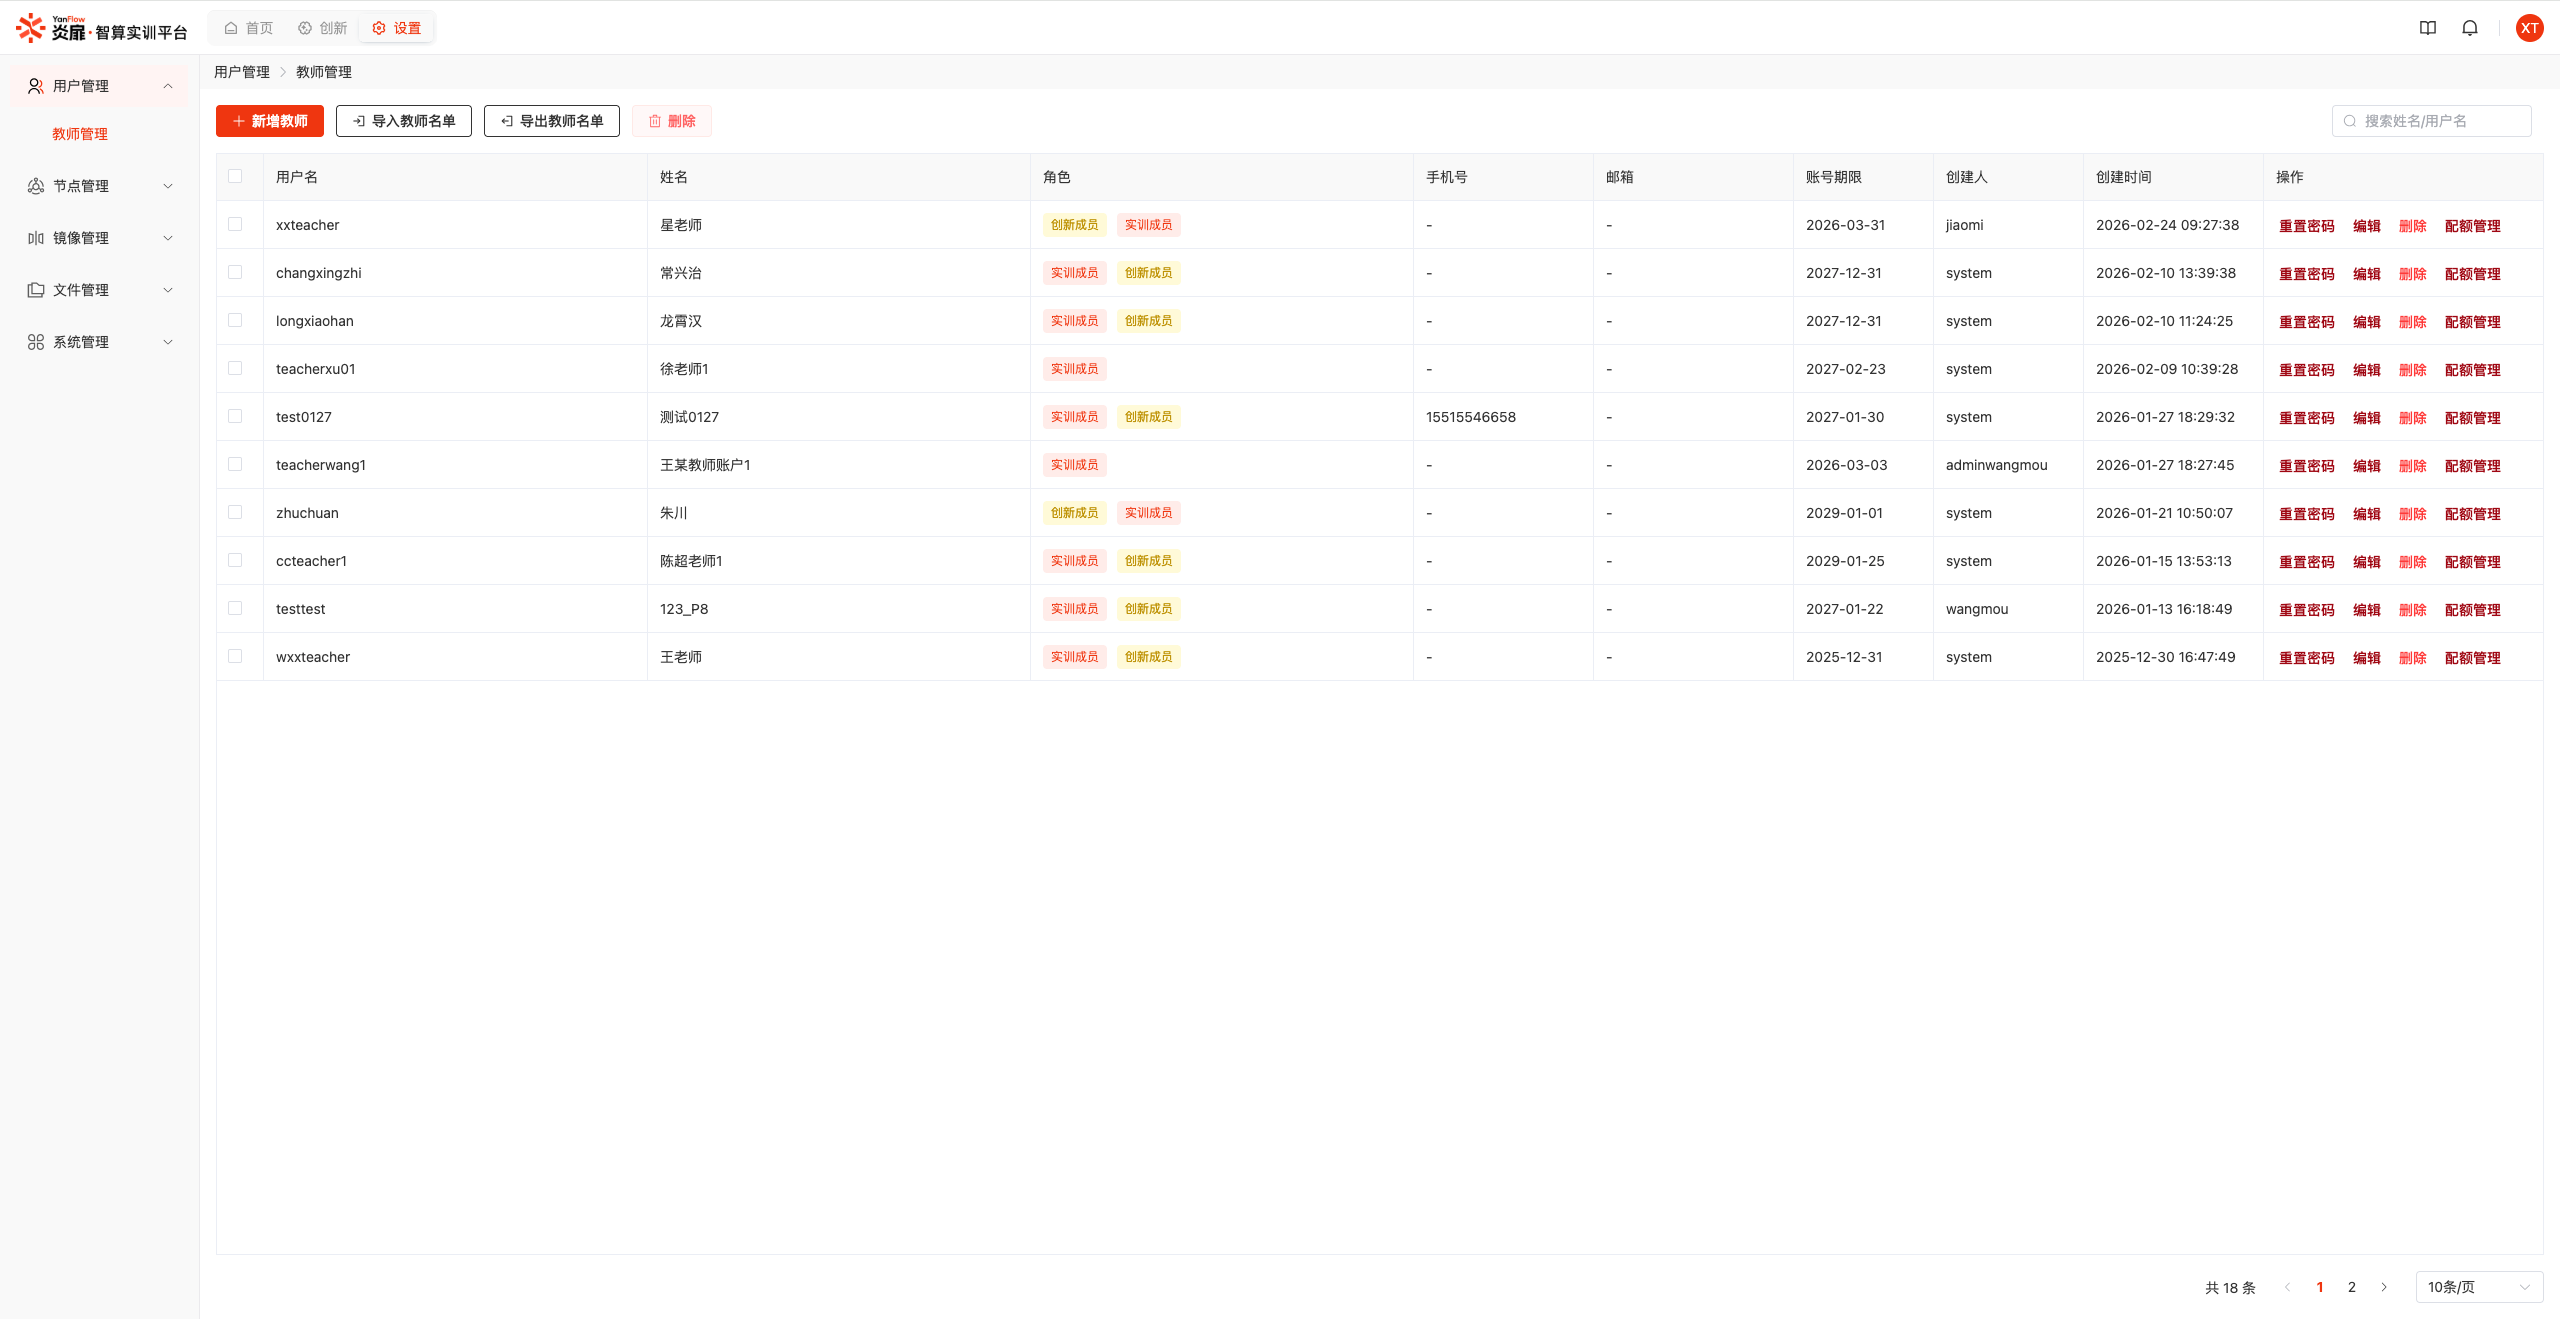
Teacher List
Displays all teacher users. Supports keyword search by Name and Username.
Add Teacher
Click the Add Teacher button to display the add dialog. Set relevant information and click the Confirm button to create a new teacher user after validation.
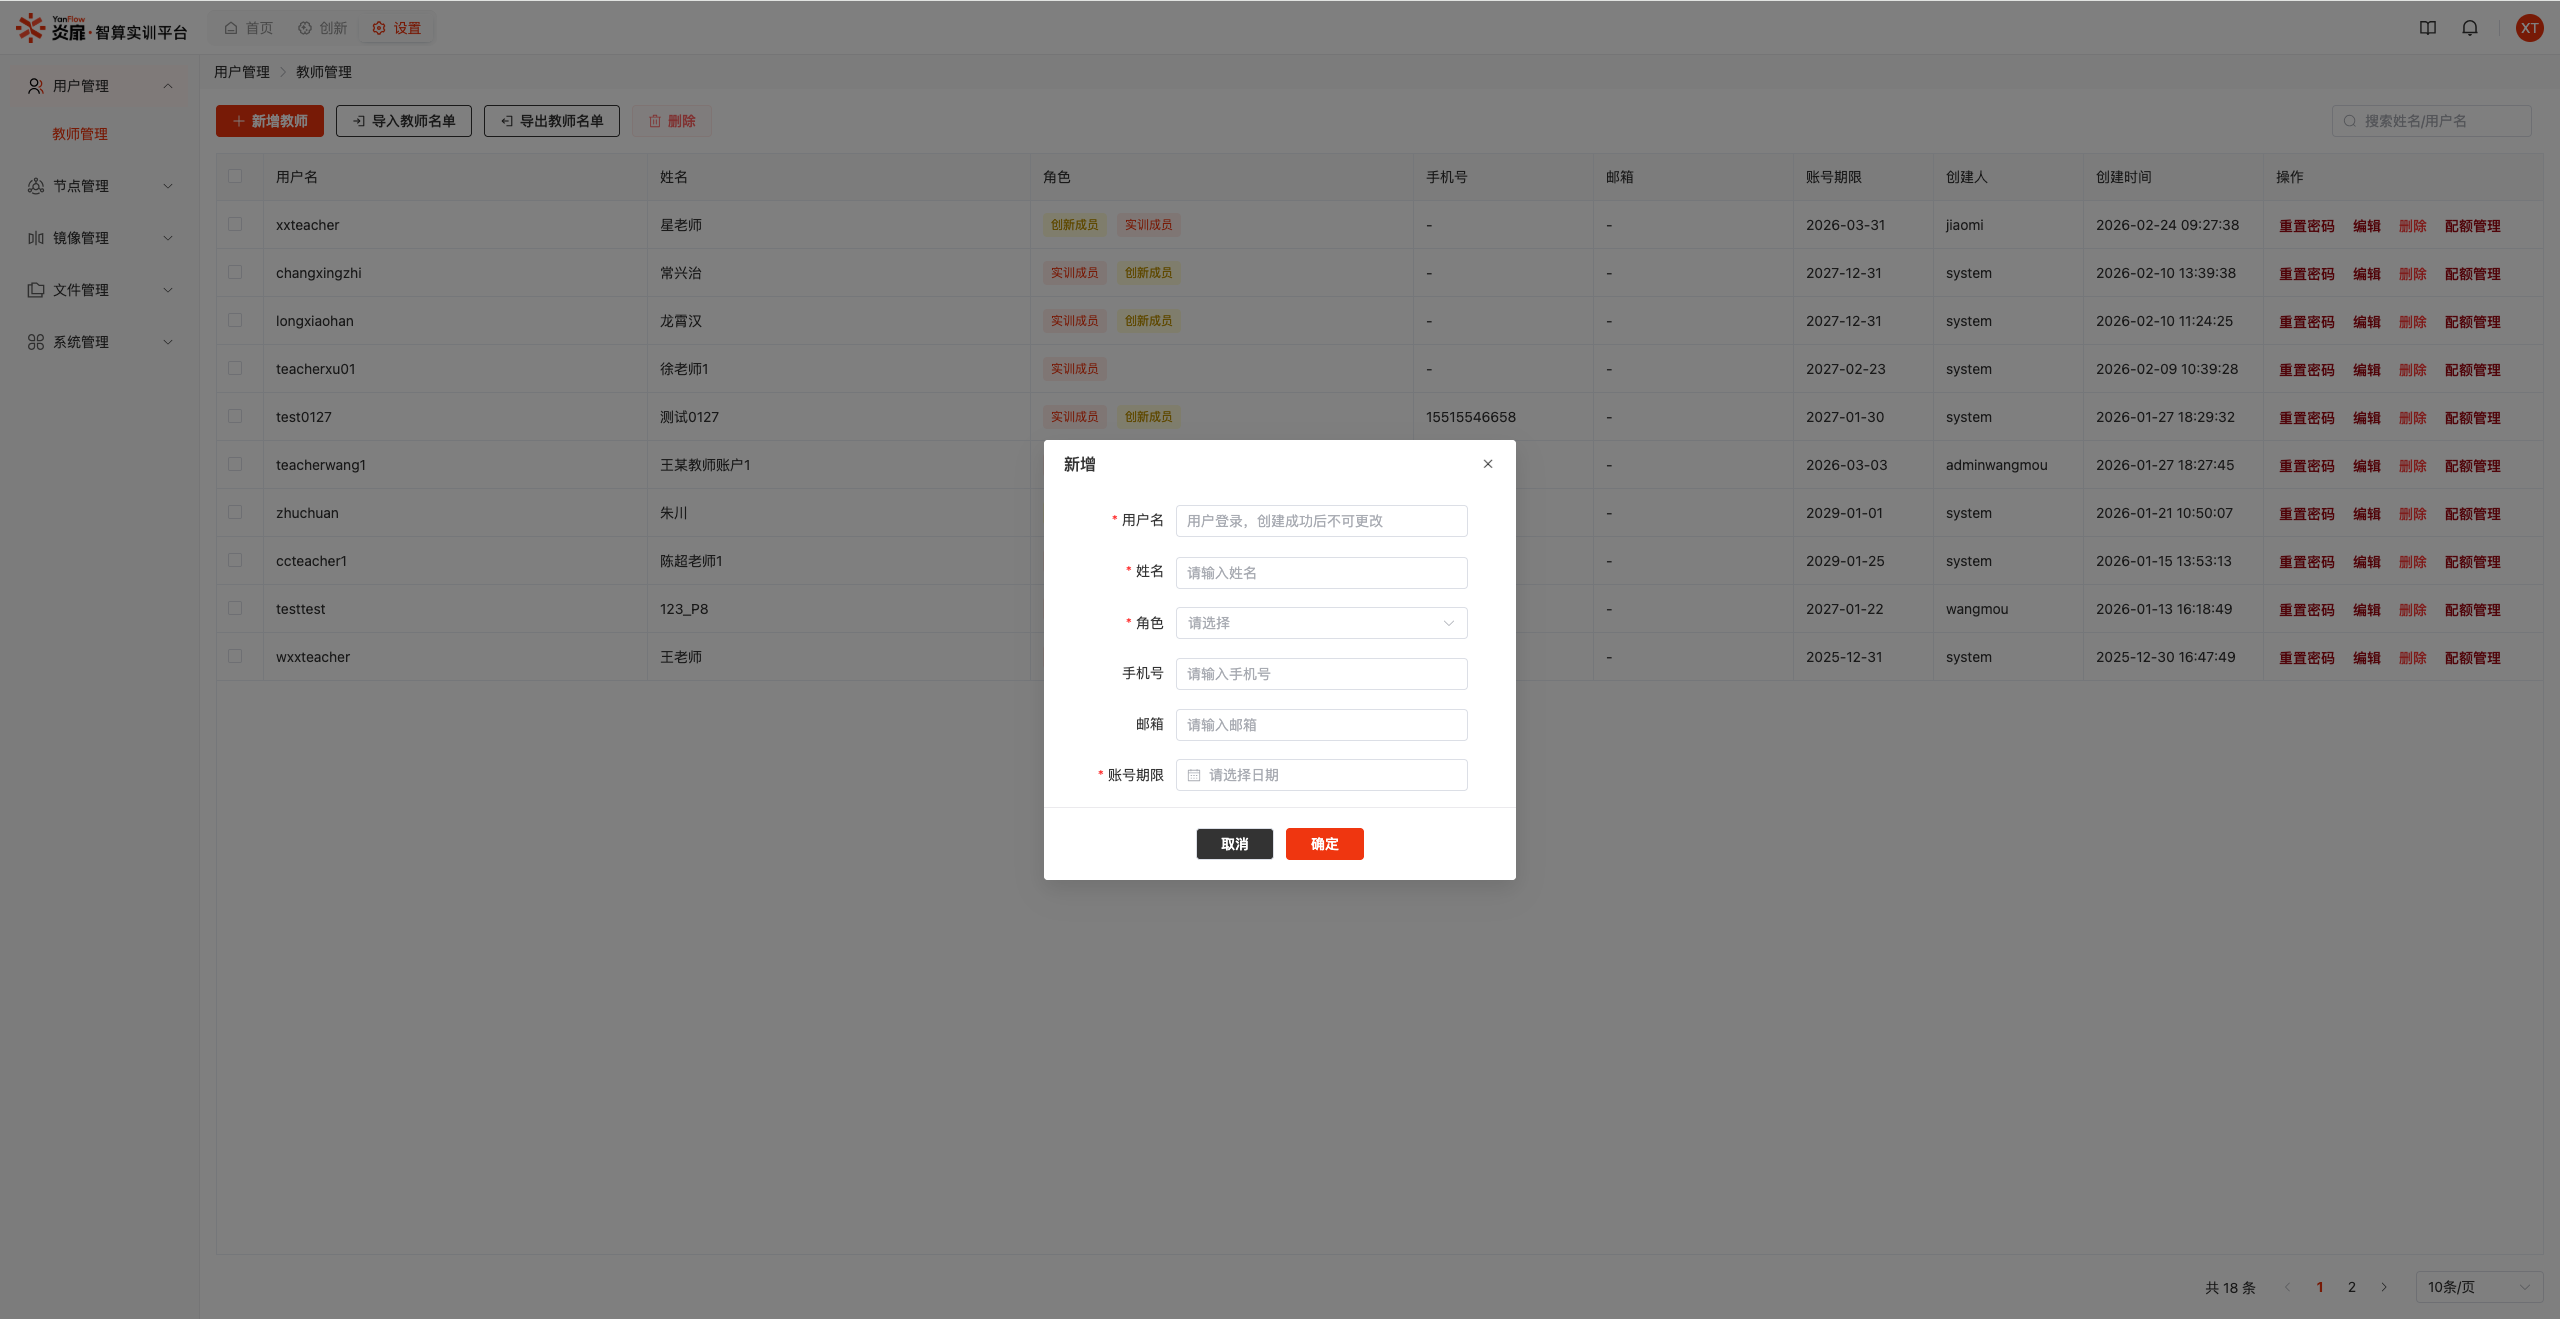
Note: The initial password for newly added users is their username.
Edit Teacher
Select a user and click the Edit button to display the edit dialog. Modify the information that needs to be changed and click the Confirm button to update user information.
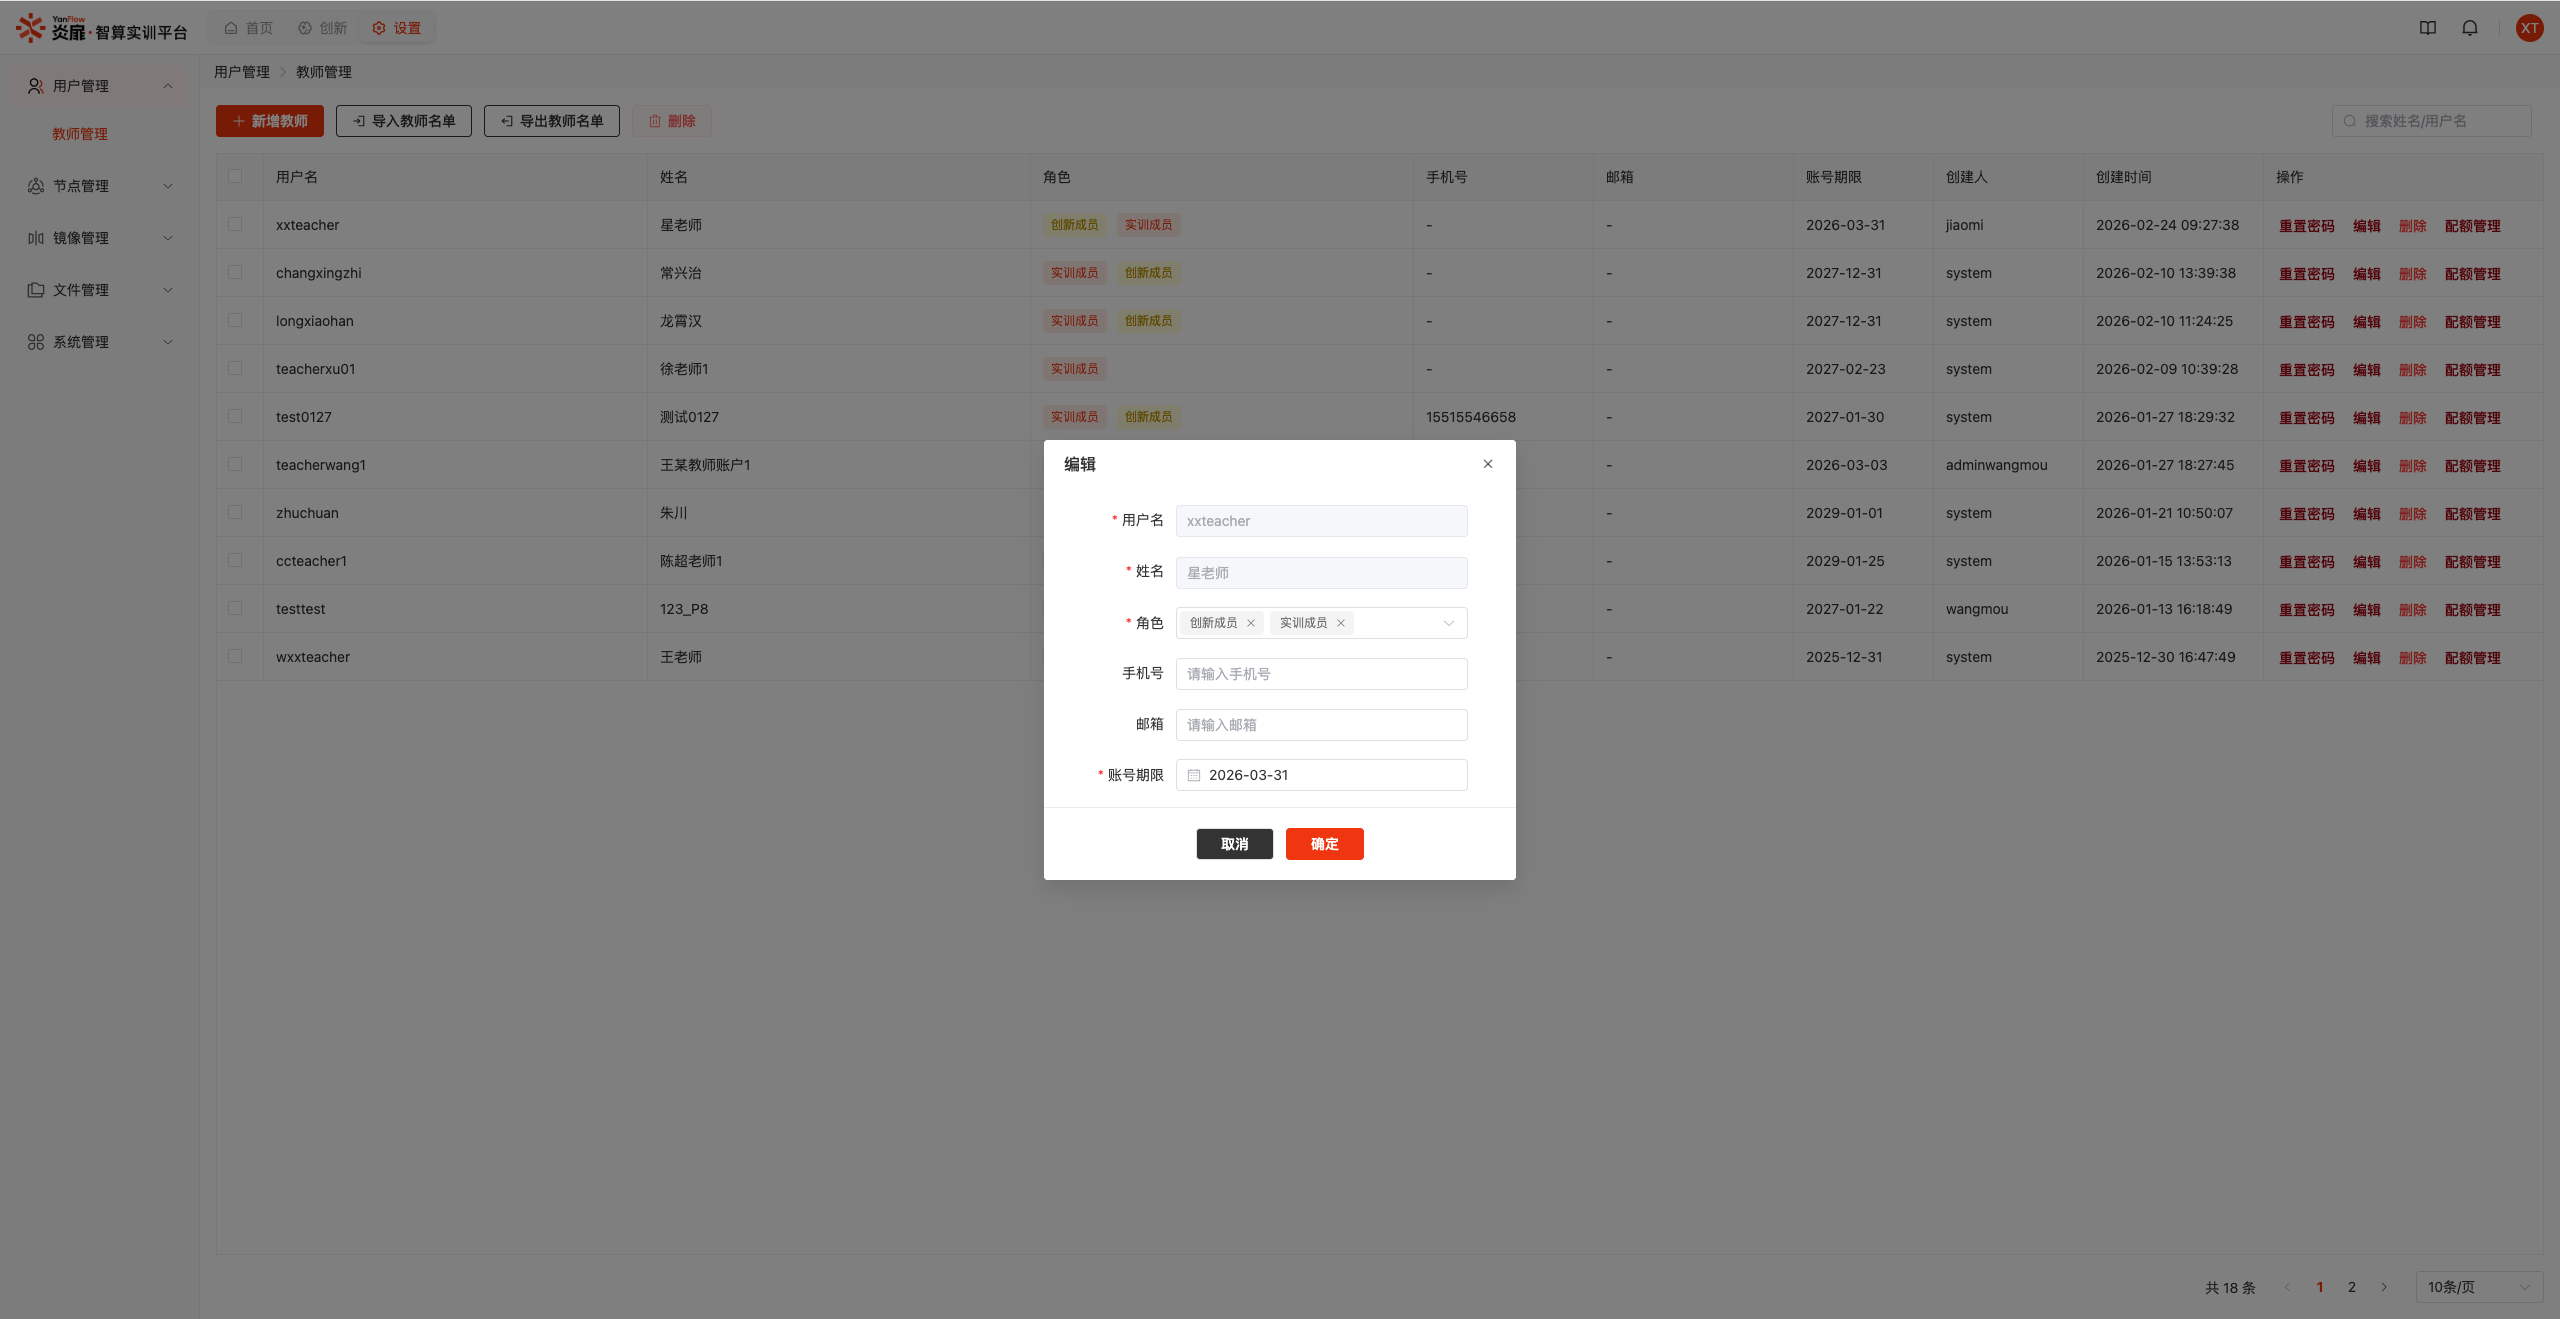
Note: If the teacher is the sole project leader of an innovation project, their innovation member permissions cannot be revoked to ensure normal project operation.
Delete Teacher
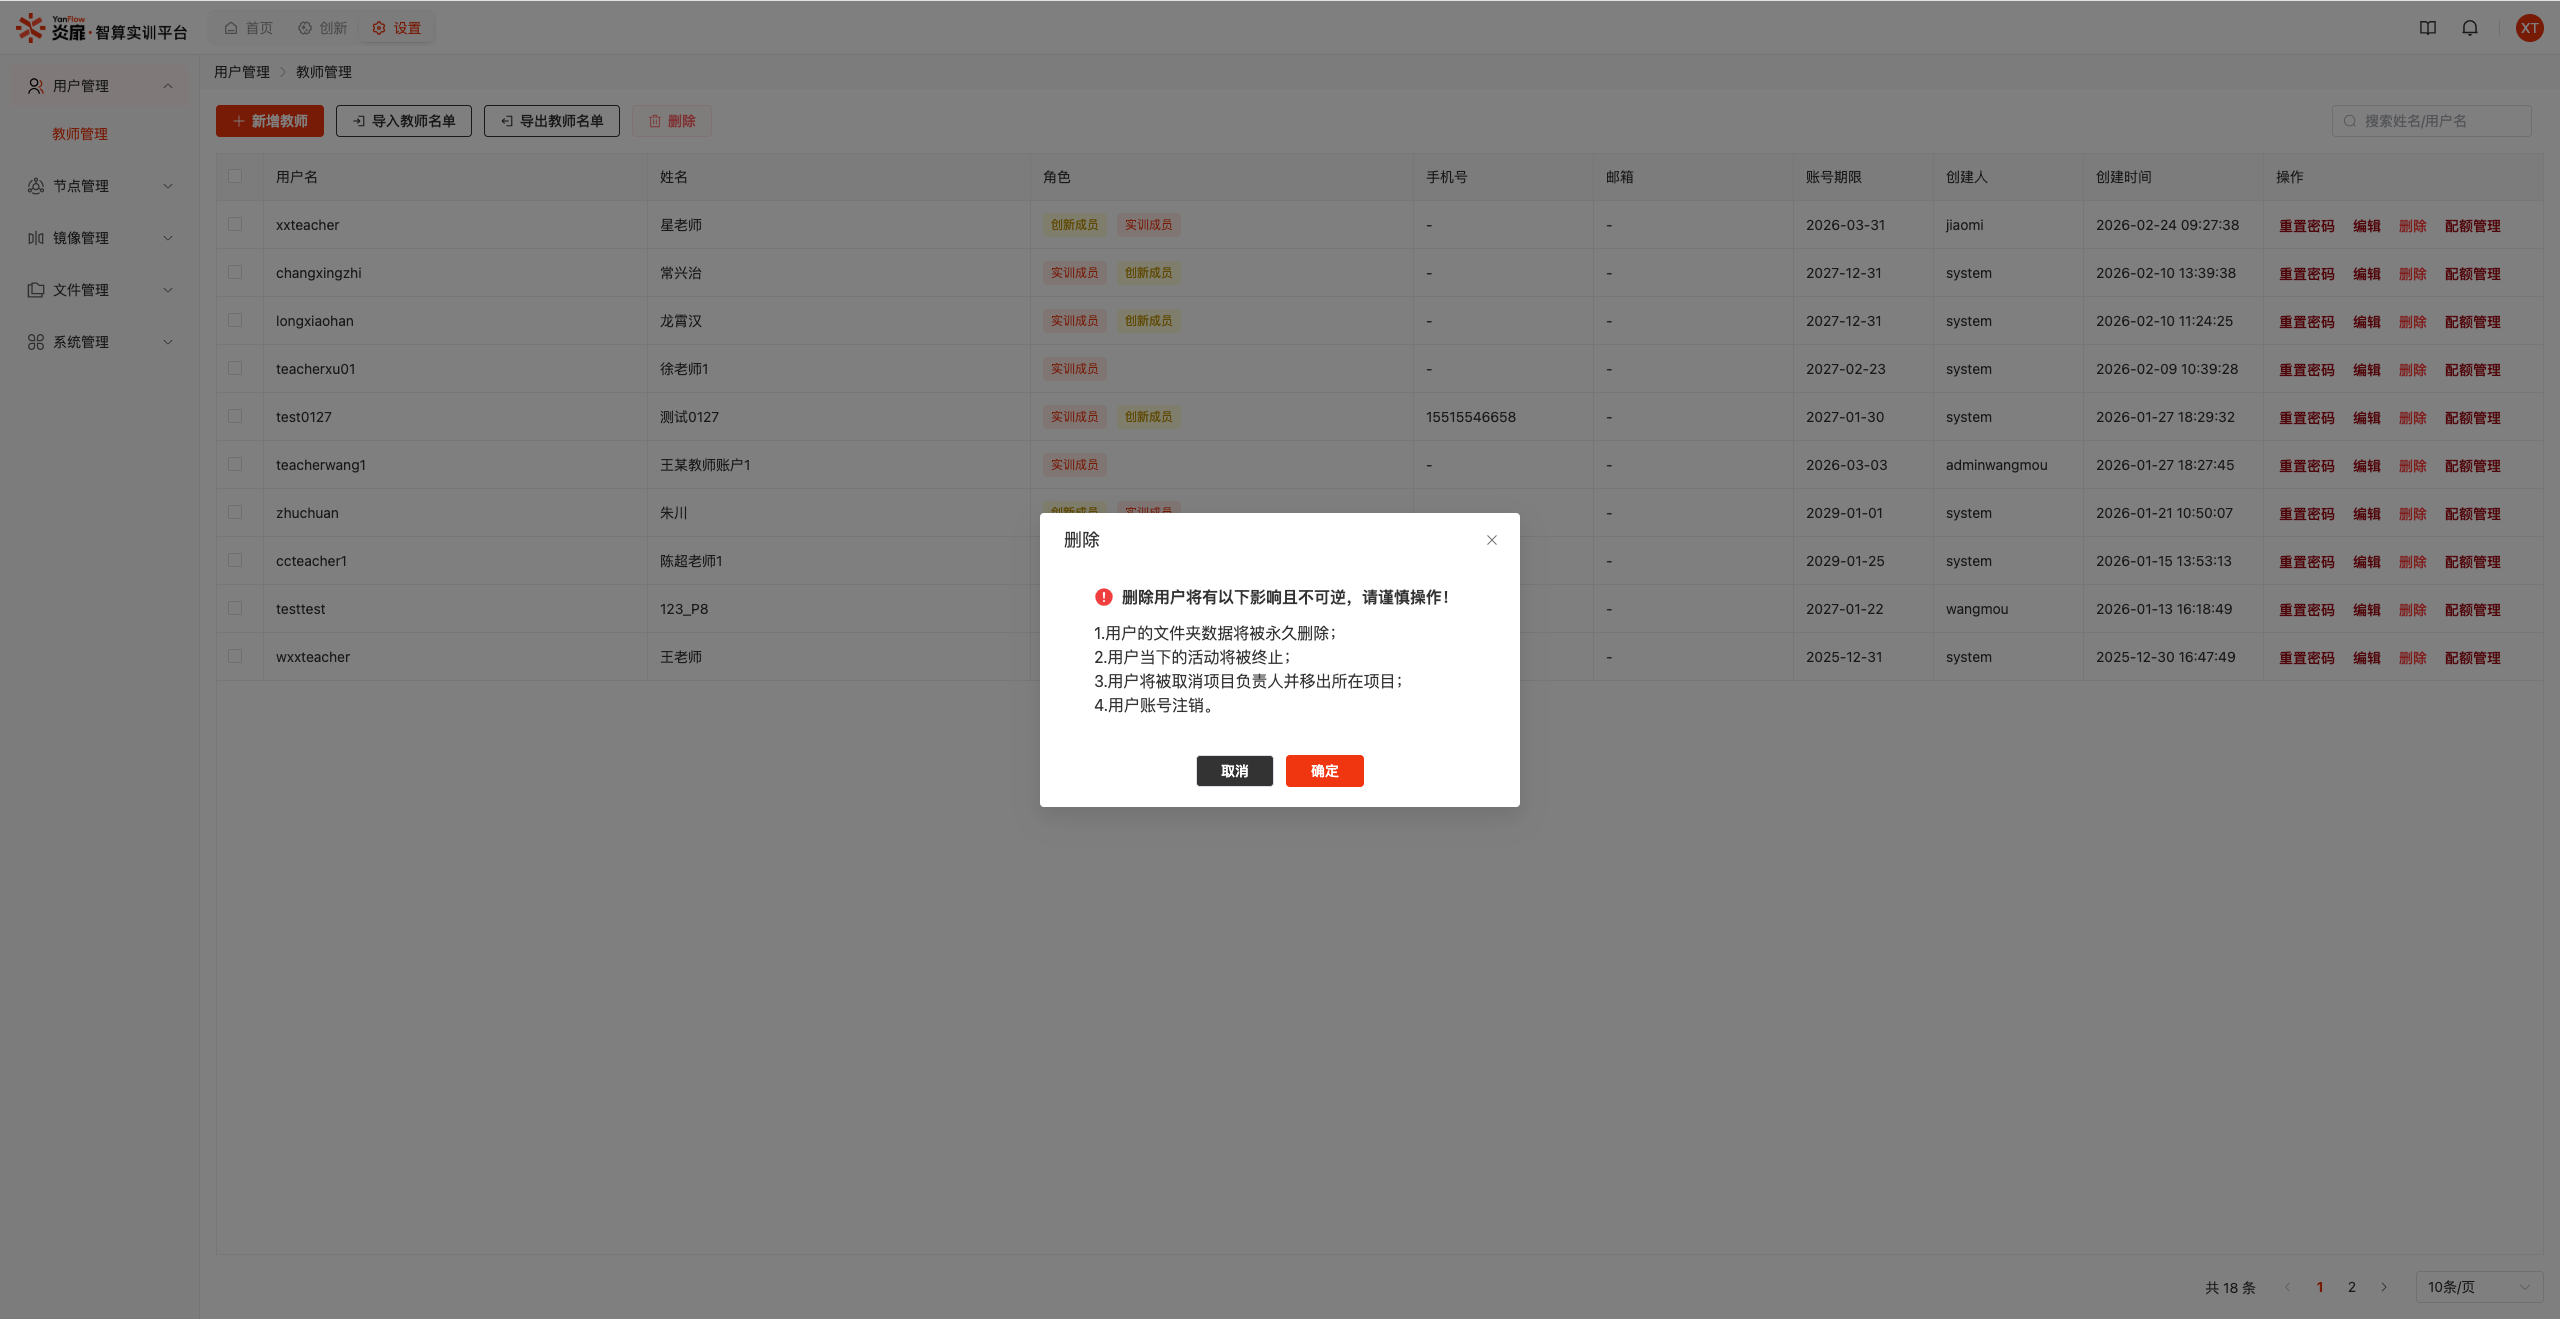
Select one or more users and click the Delete or Batch Delete button. A confirmation dialog will appear; click the Confirm button to delete.
Reset Password
Select a user and click the Reset Password button. After confirmation, the password reset will be completed.
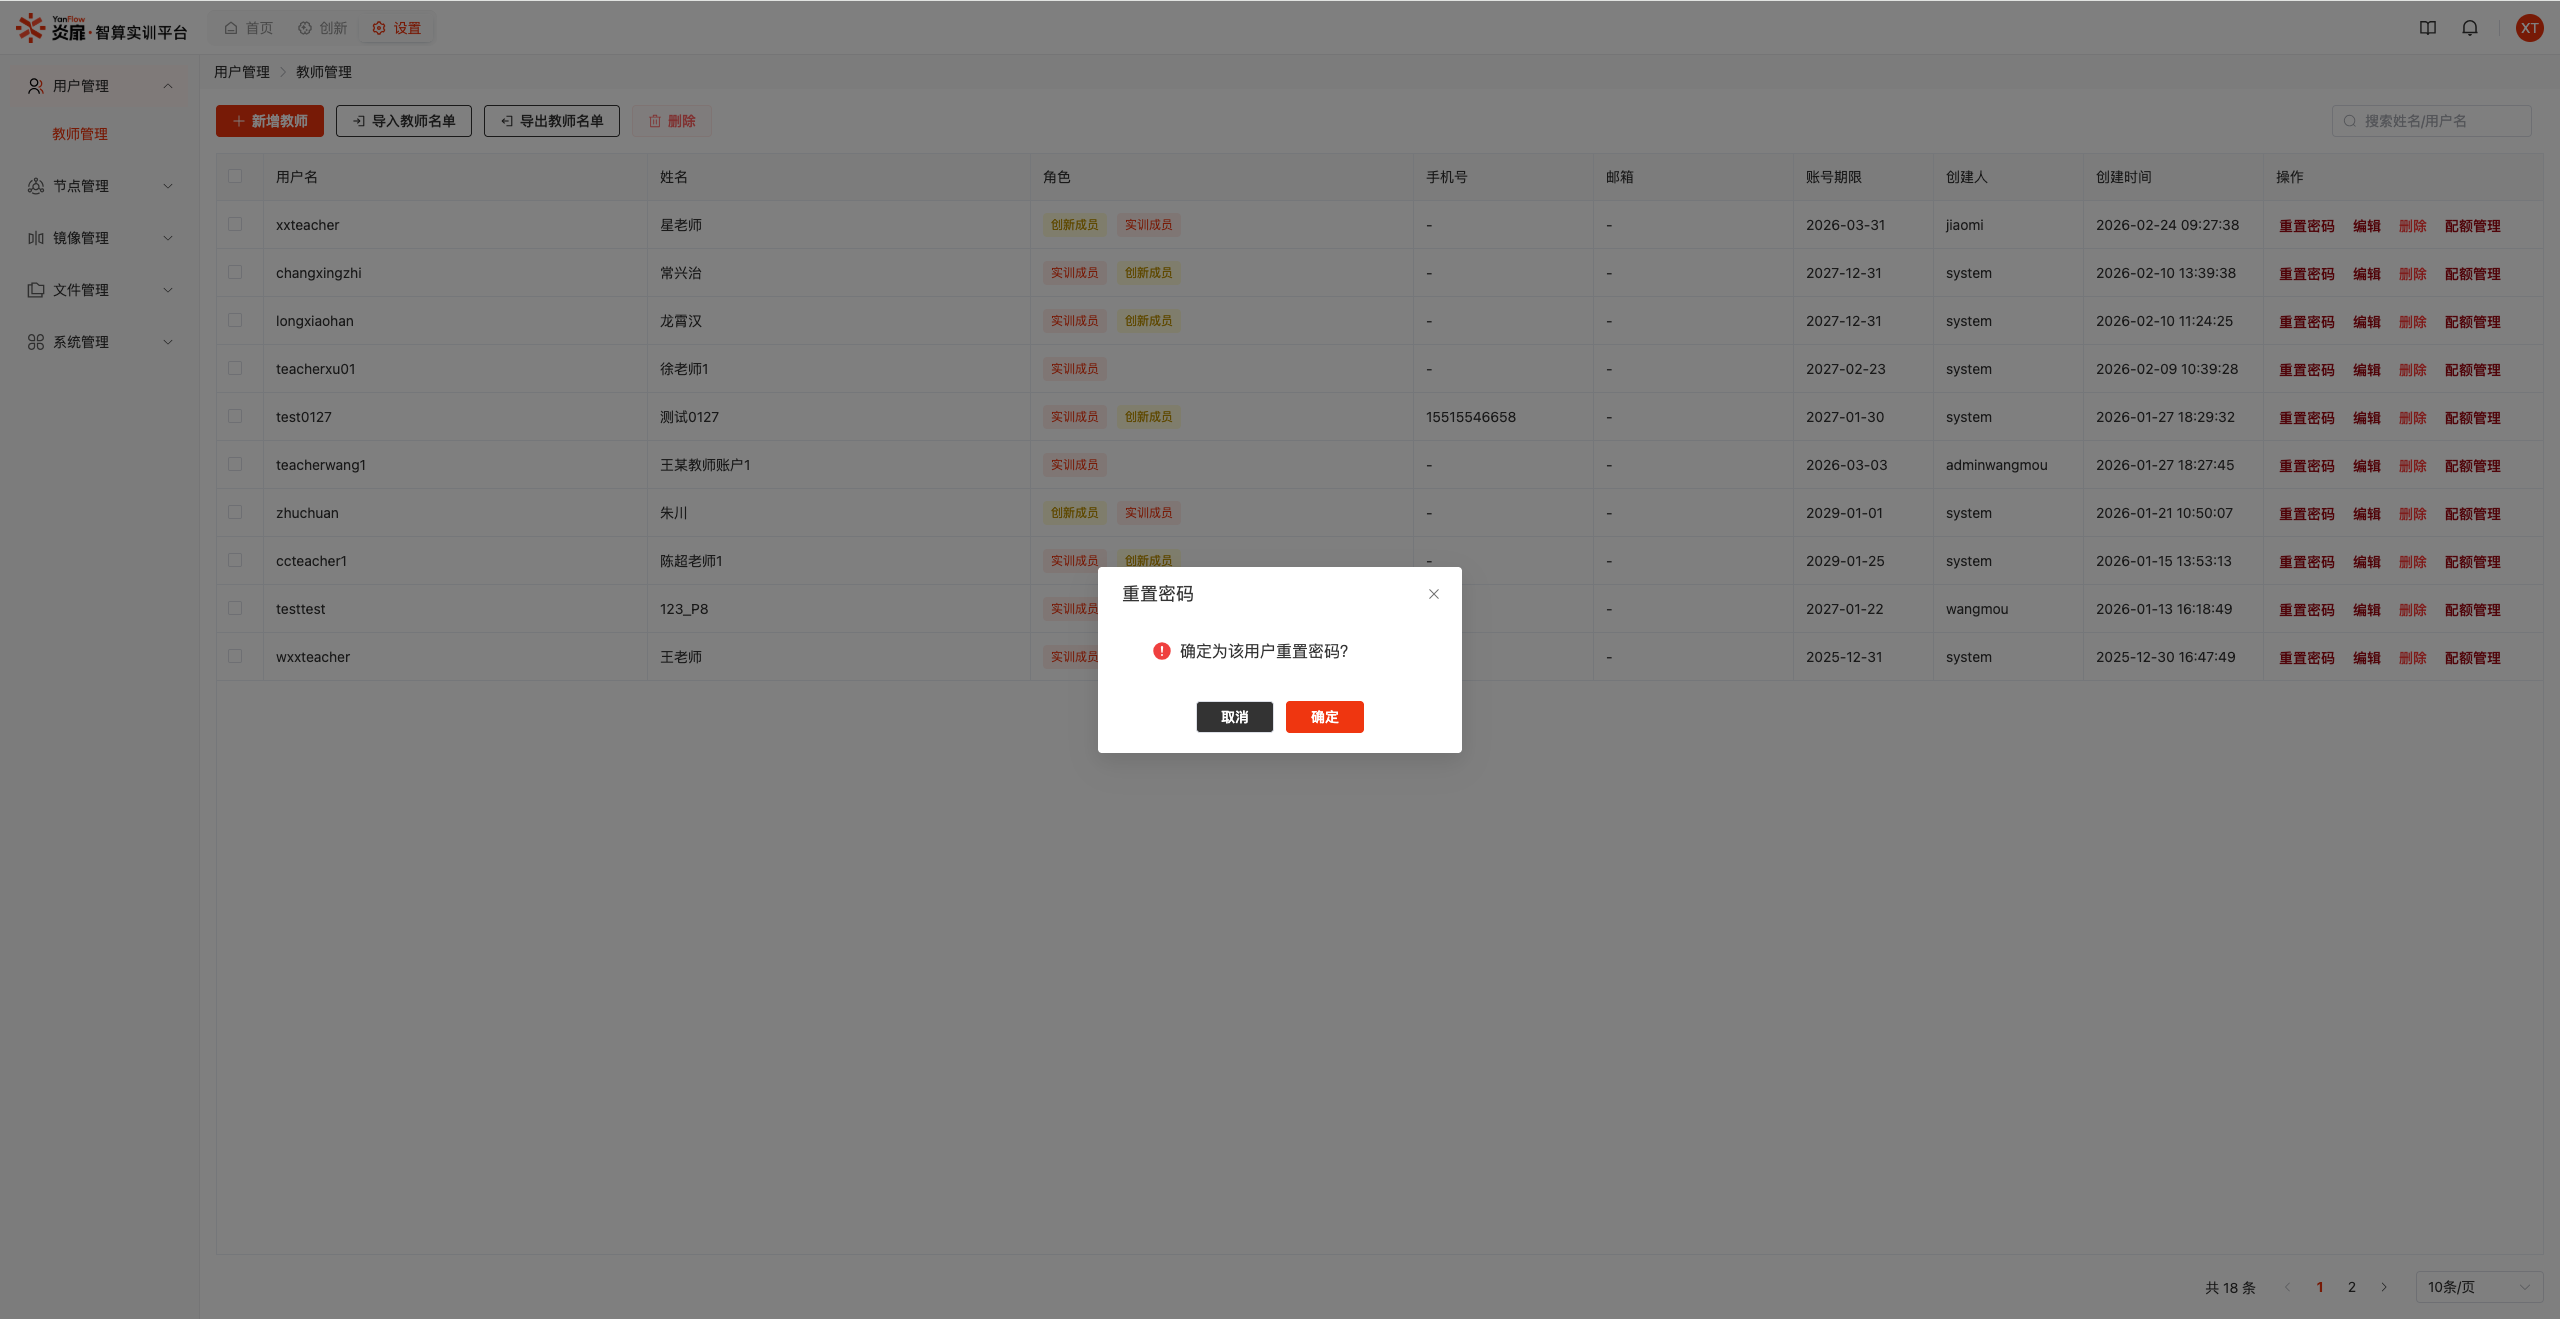
Note: The initial password after reset is the user's username.
Quota Management
Select a user and click the Quota Management button to display the settings dialog. Set the corresponding quota for the user.
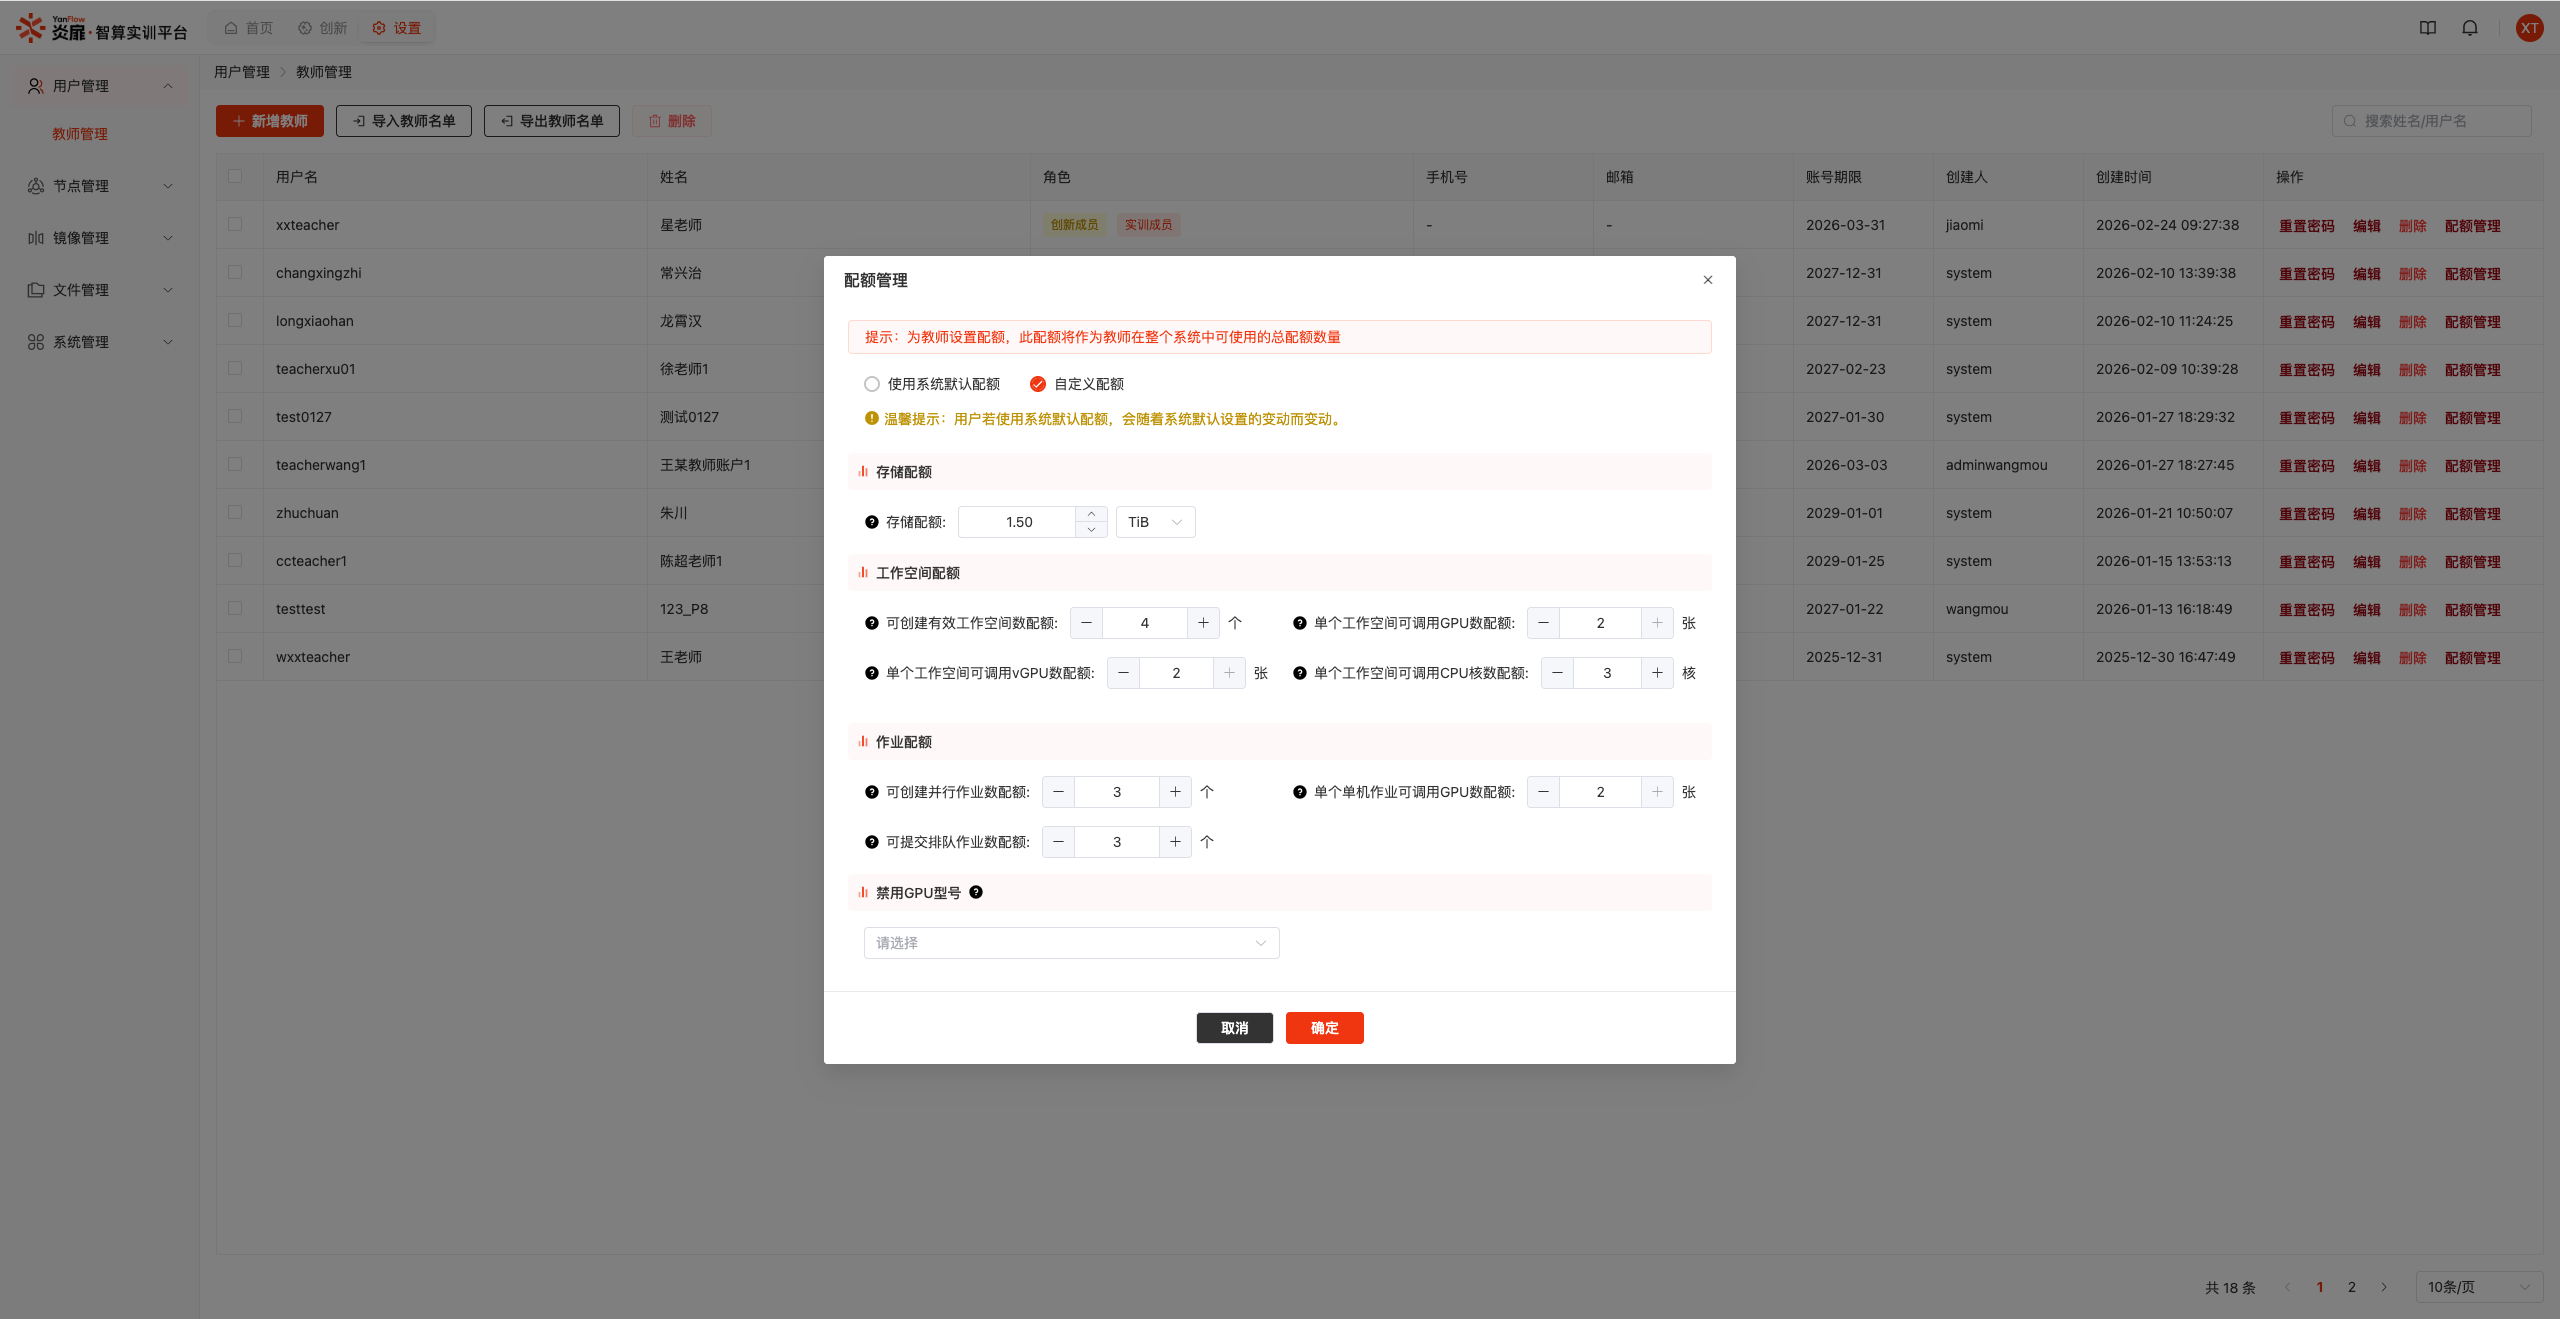
Note: Teacher quotas are global system quotas, shared between training and innovation.
Import/Export
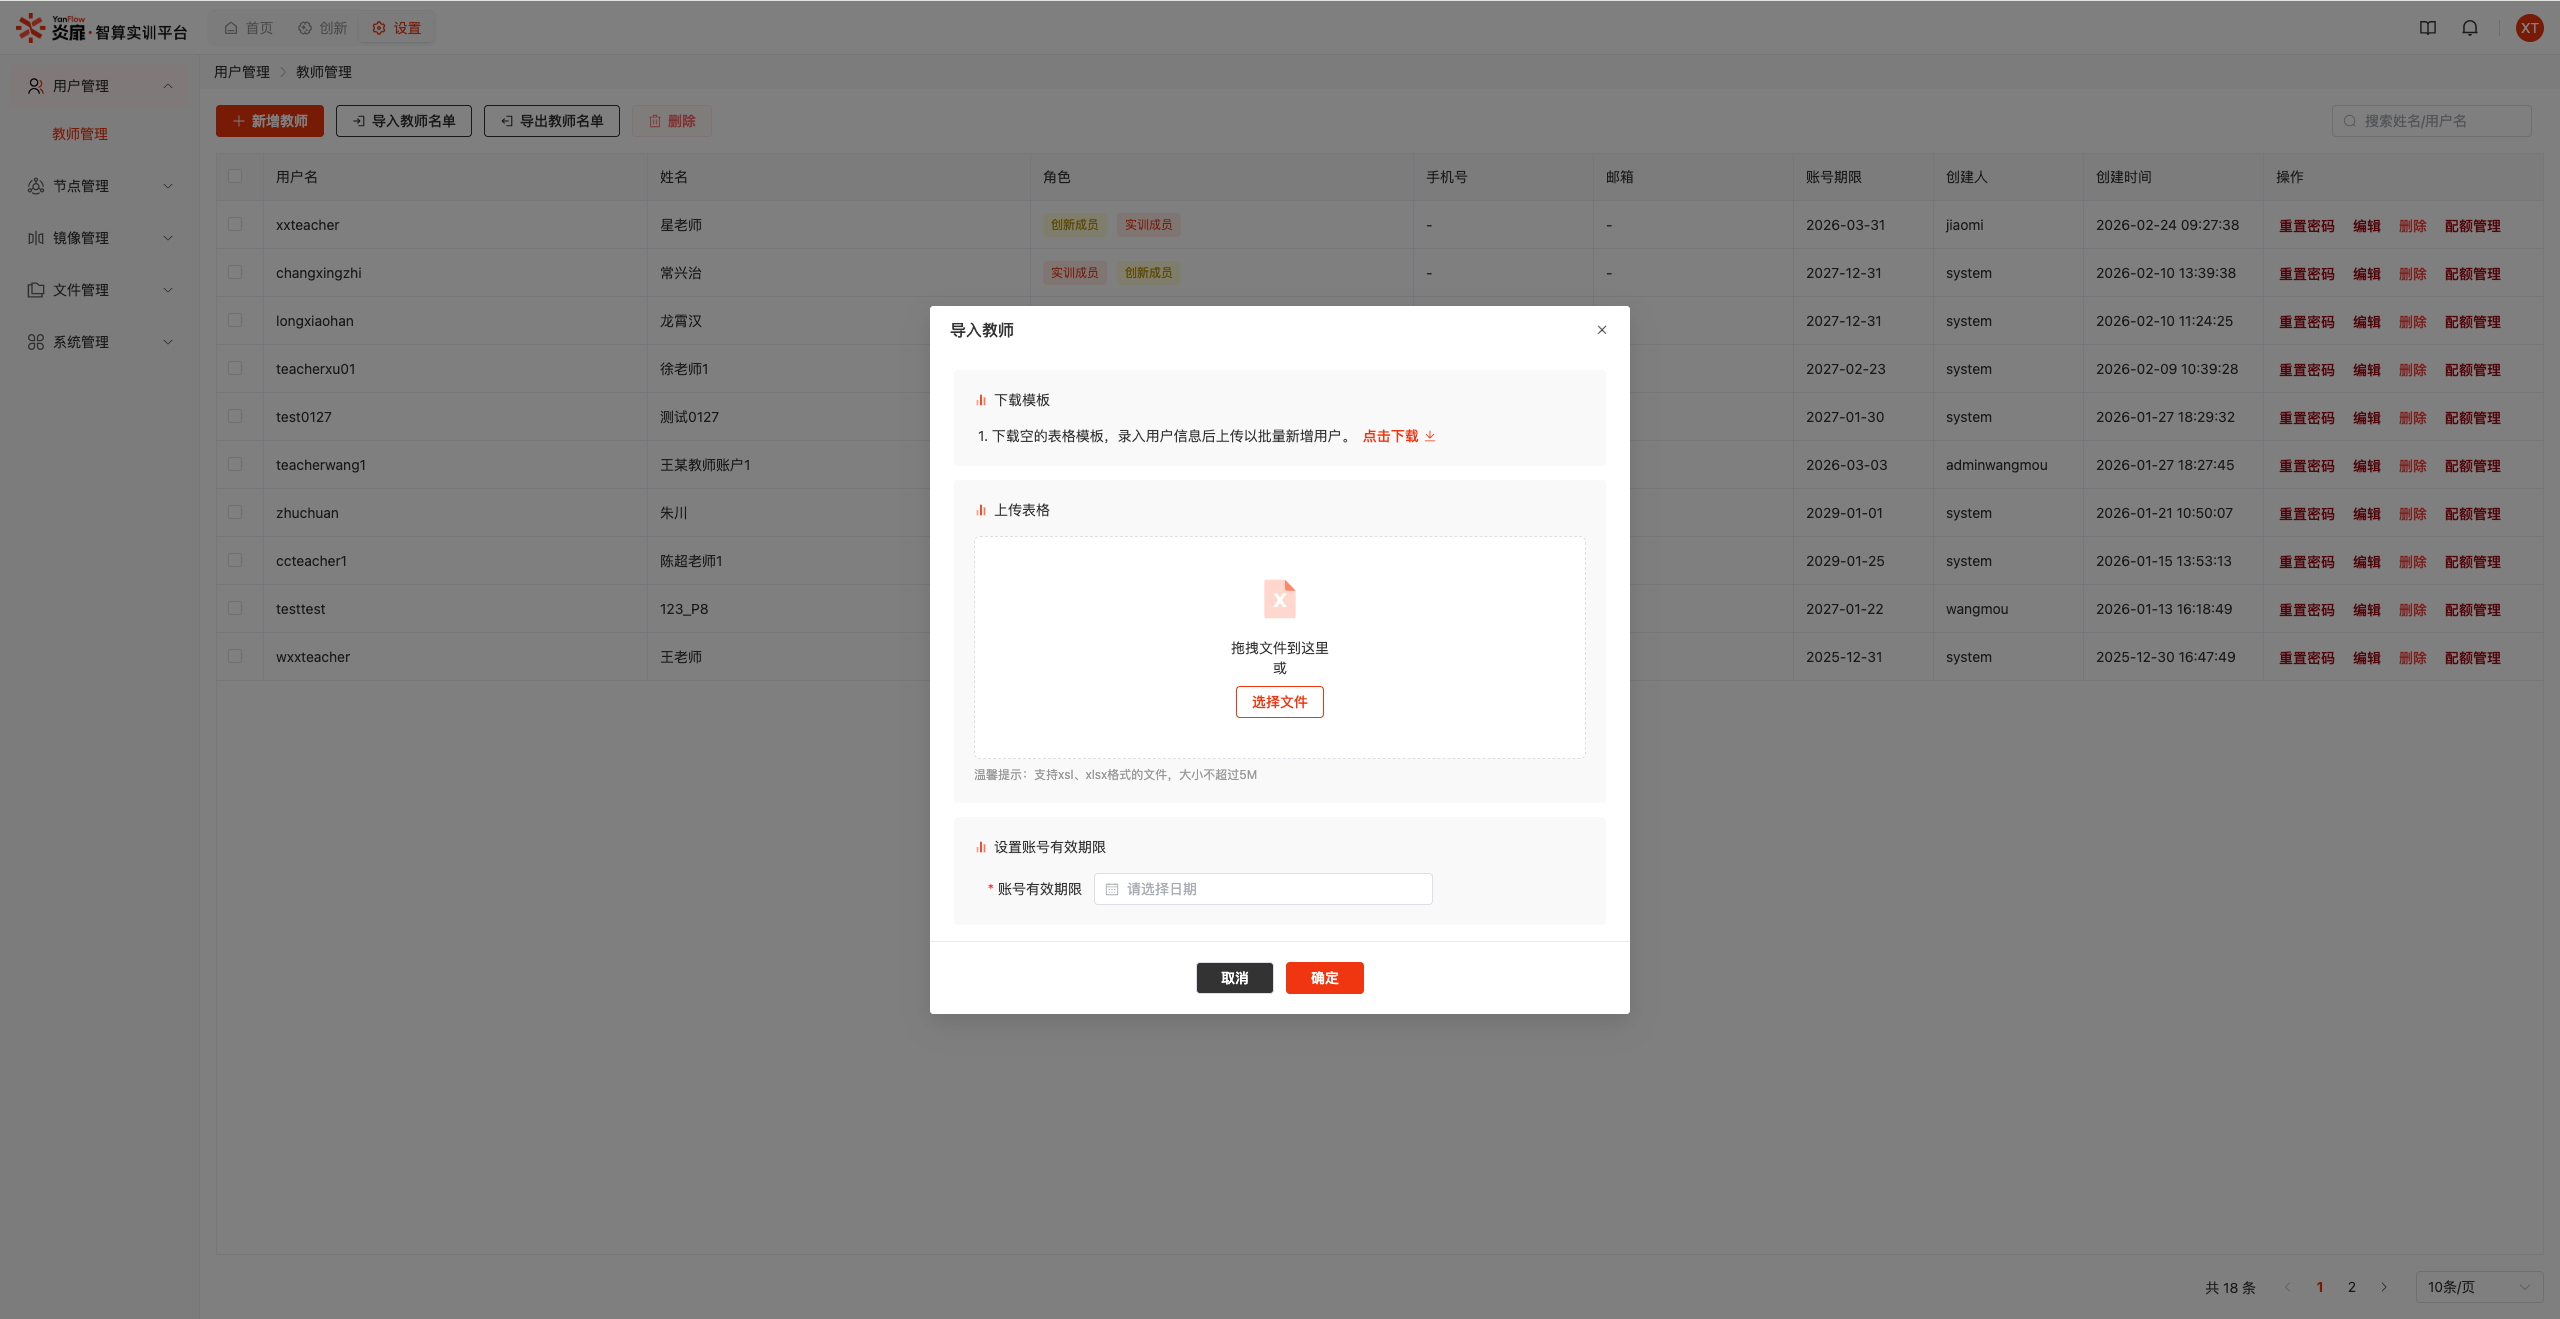
Import Teachers: Click the Import Teacher List button to download the import template. After completing the information, drag and drop the file or click the Select File button to upload, set the account validity period, and click the Confirm button to batch import users. If there are users that failed to import, click the Download Import Failure Information Table button to download the details of failed imports locally.
Export Teachers: Click the Export Teacher List button to export all teacher users in the system to the local machine.
Node Management
Node List
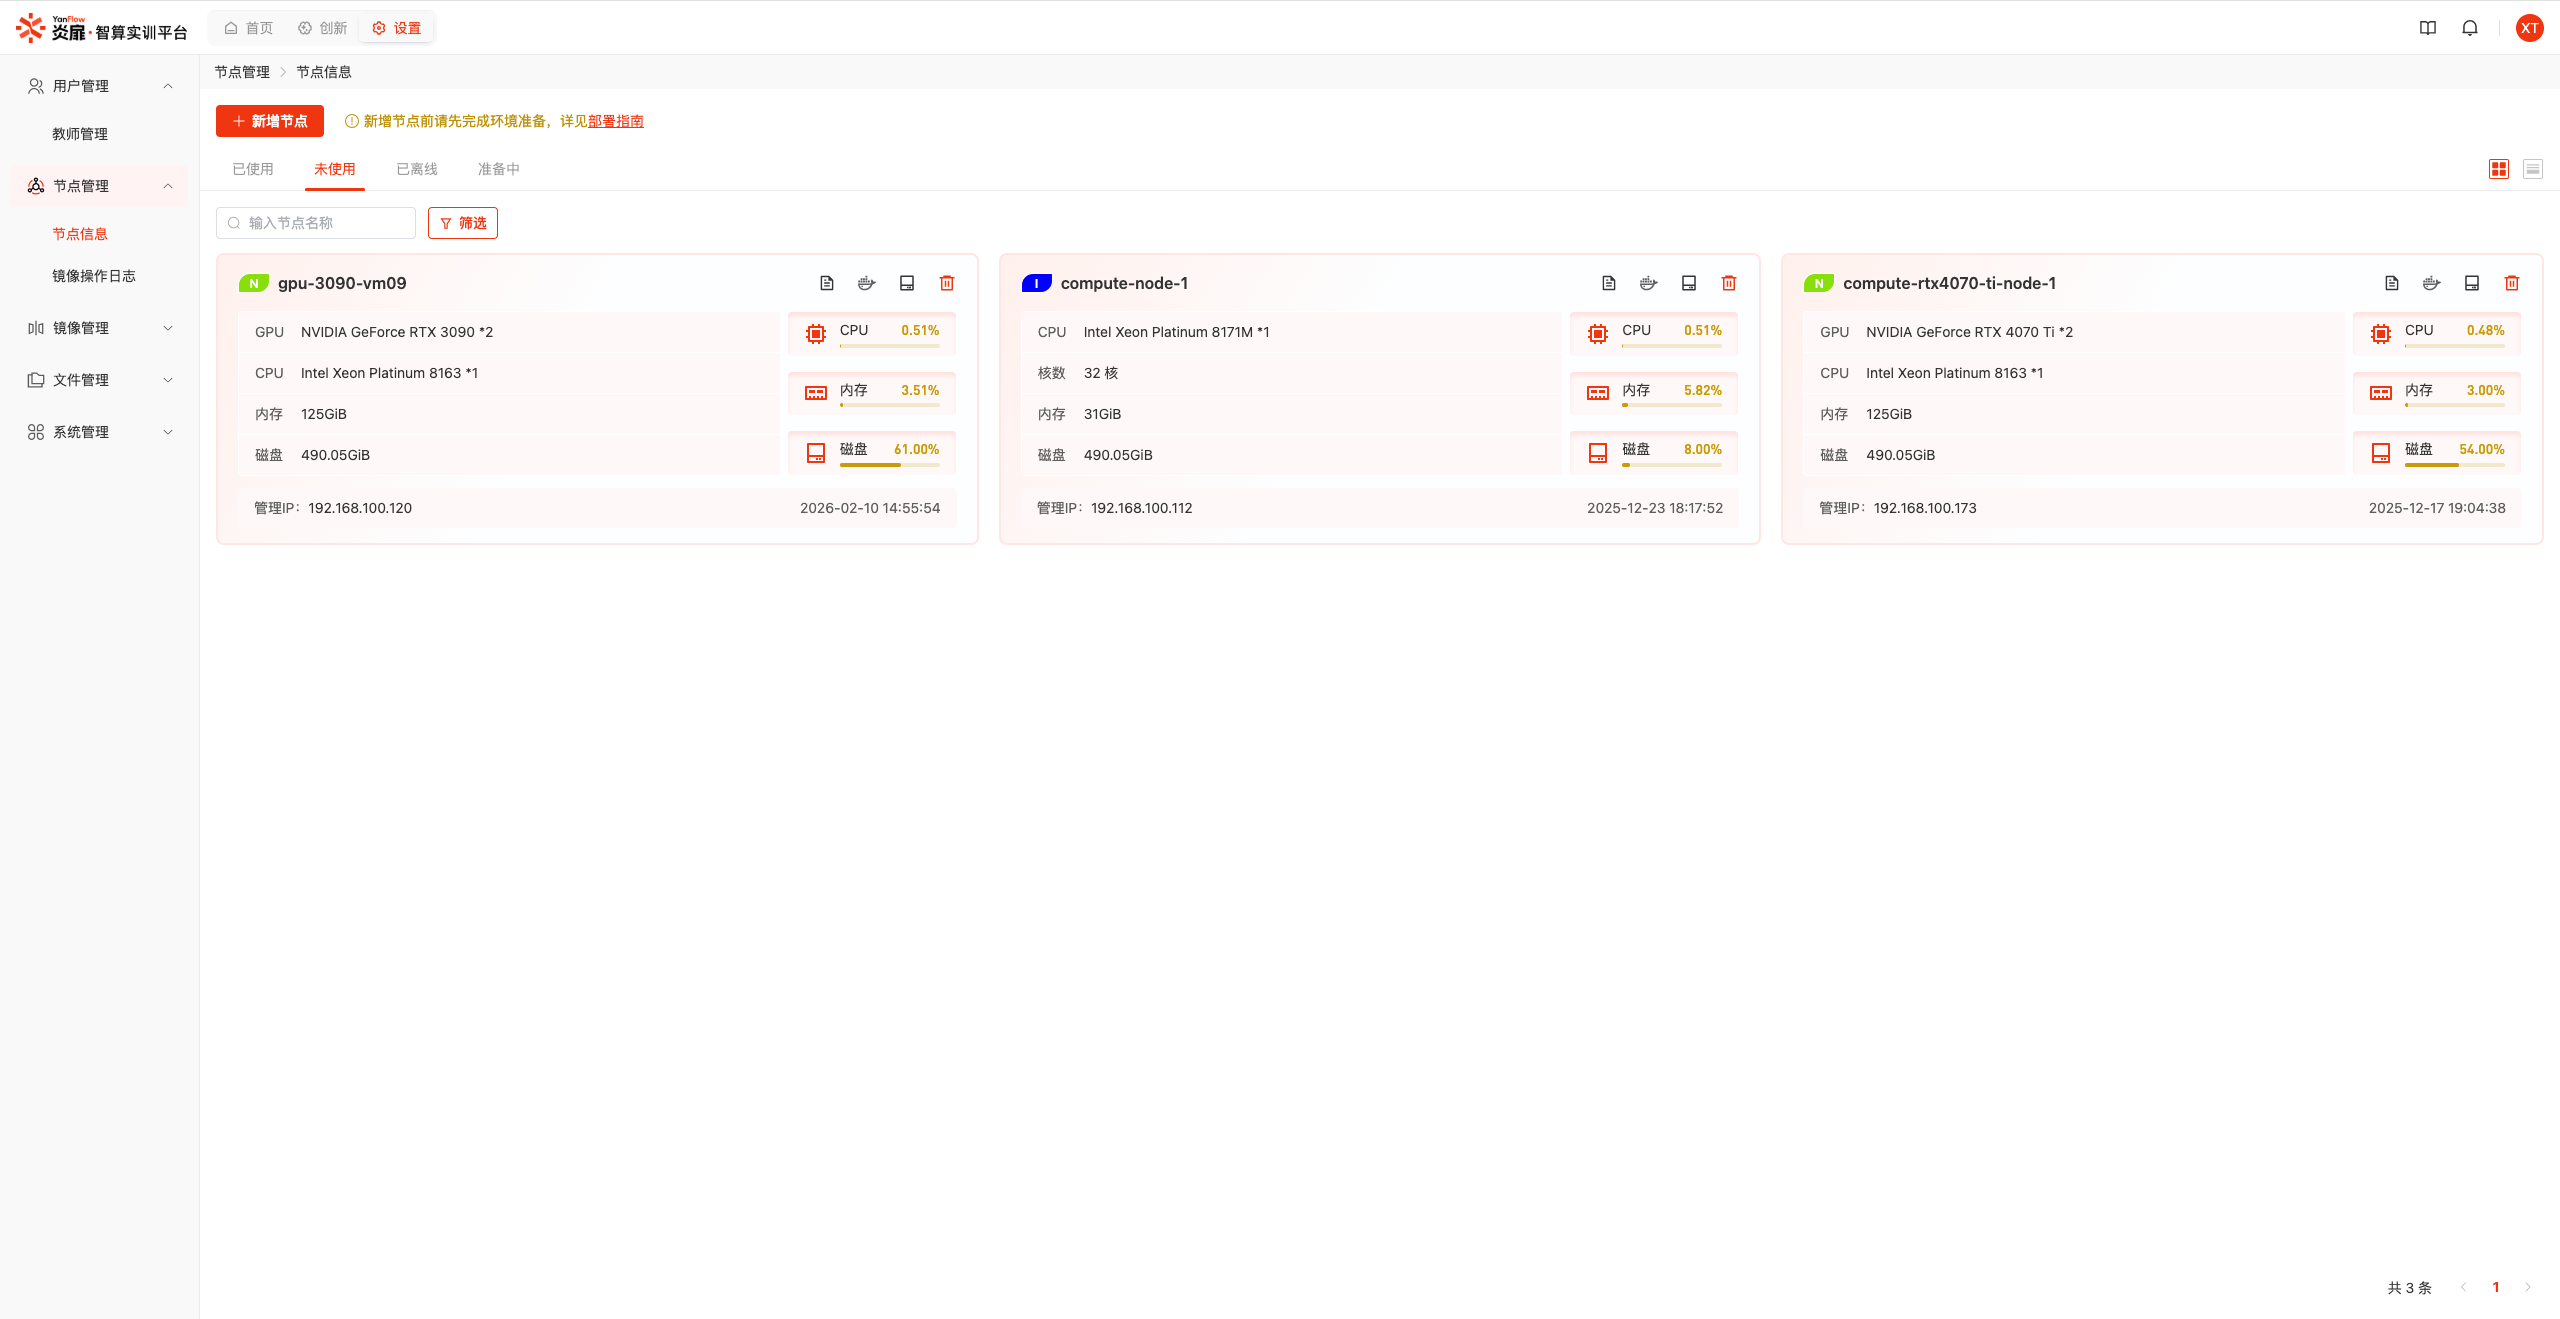
Supports displaying all nodes in the system in two formats: Card and Table. Supports filtering by Usage Scenario, Node Mode, GPU Model, and CPU Model. Also supports keyword search by Node Name.
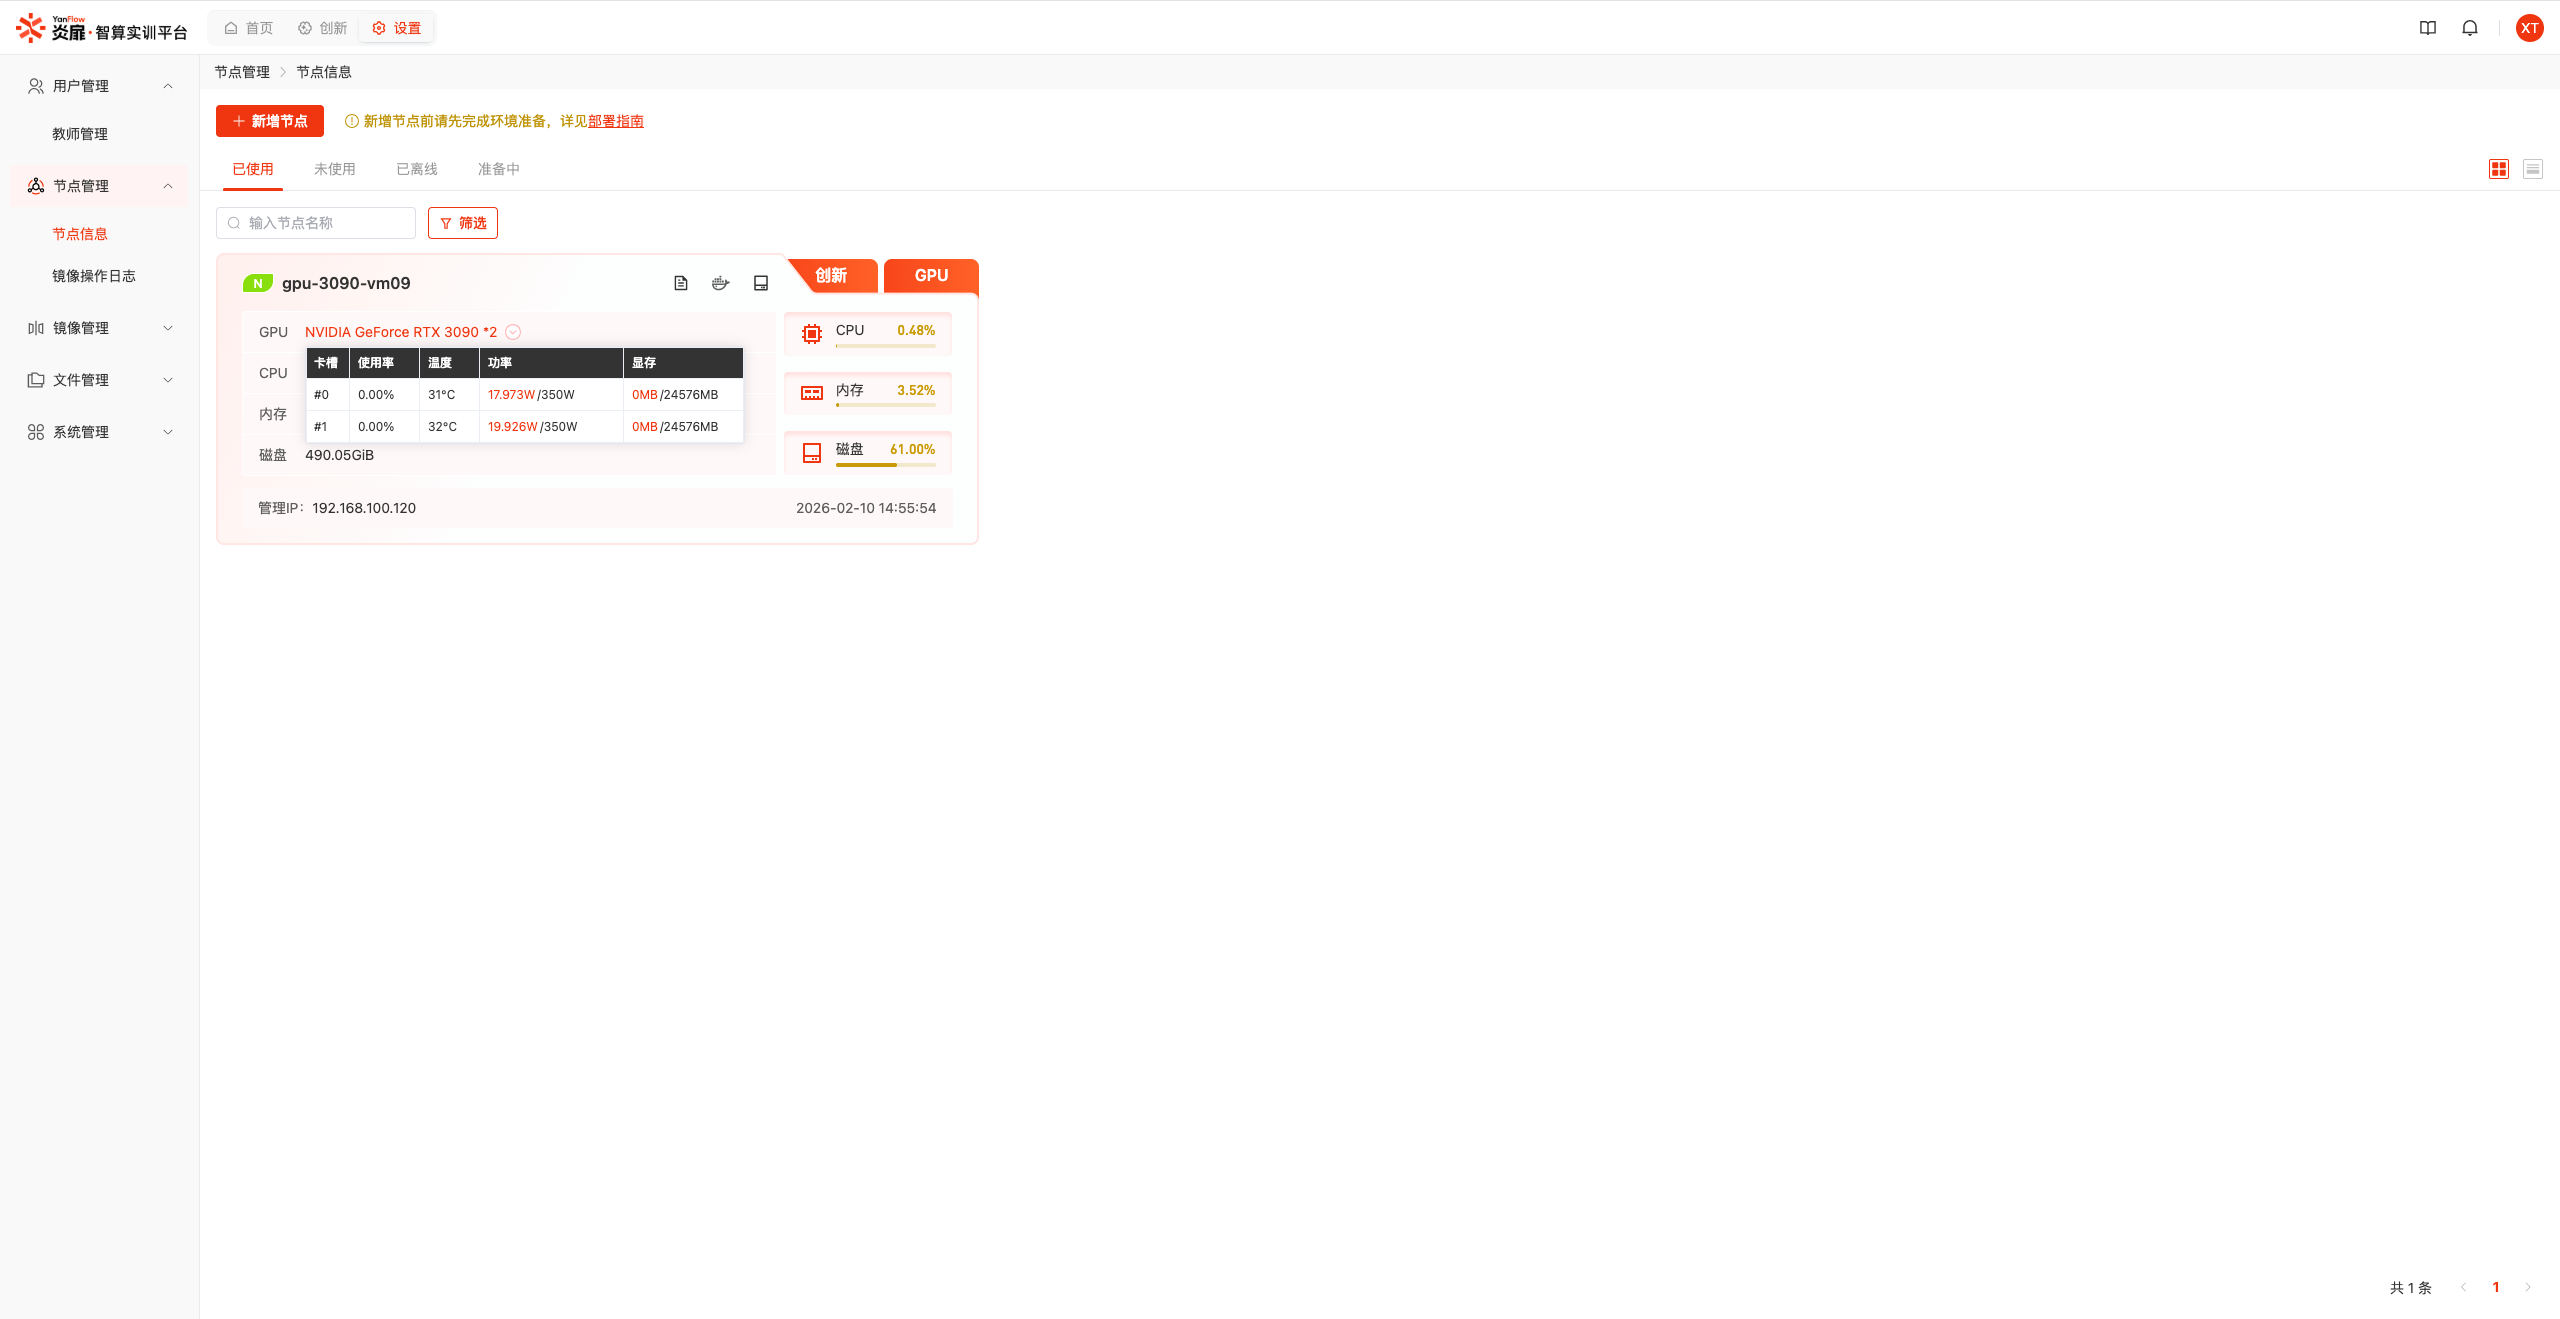
GPU Details: In Card format, click GPU Model to view GPU usage data.
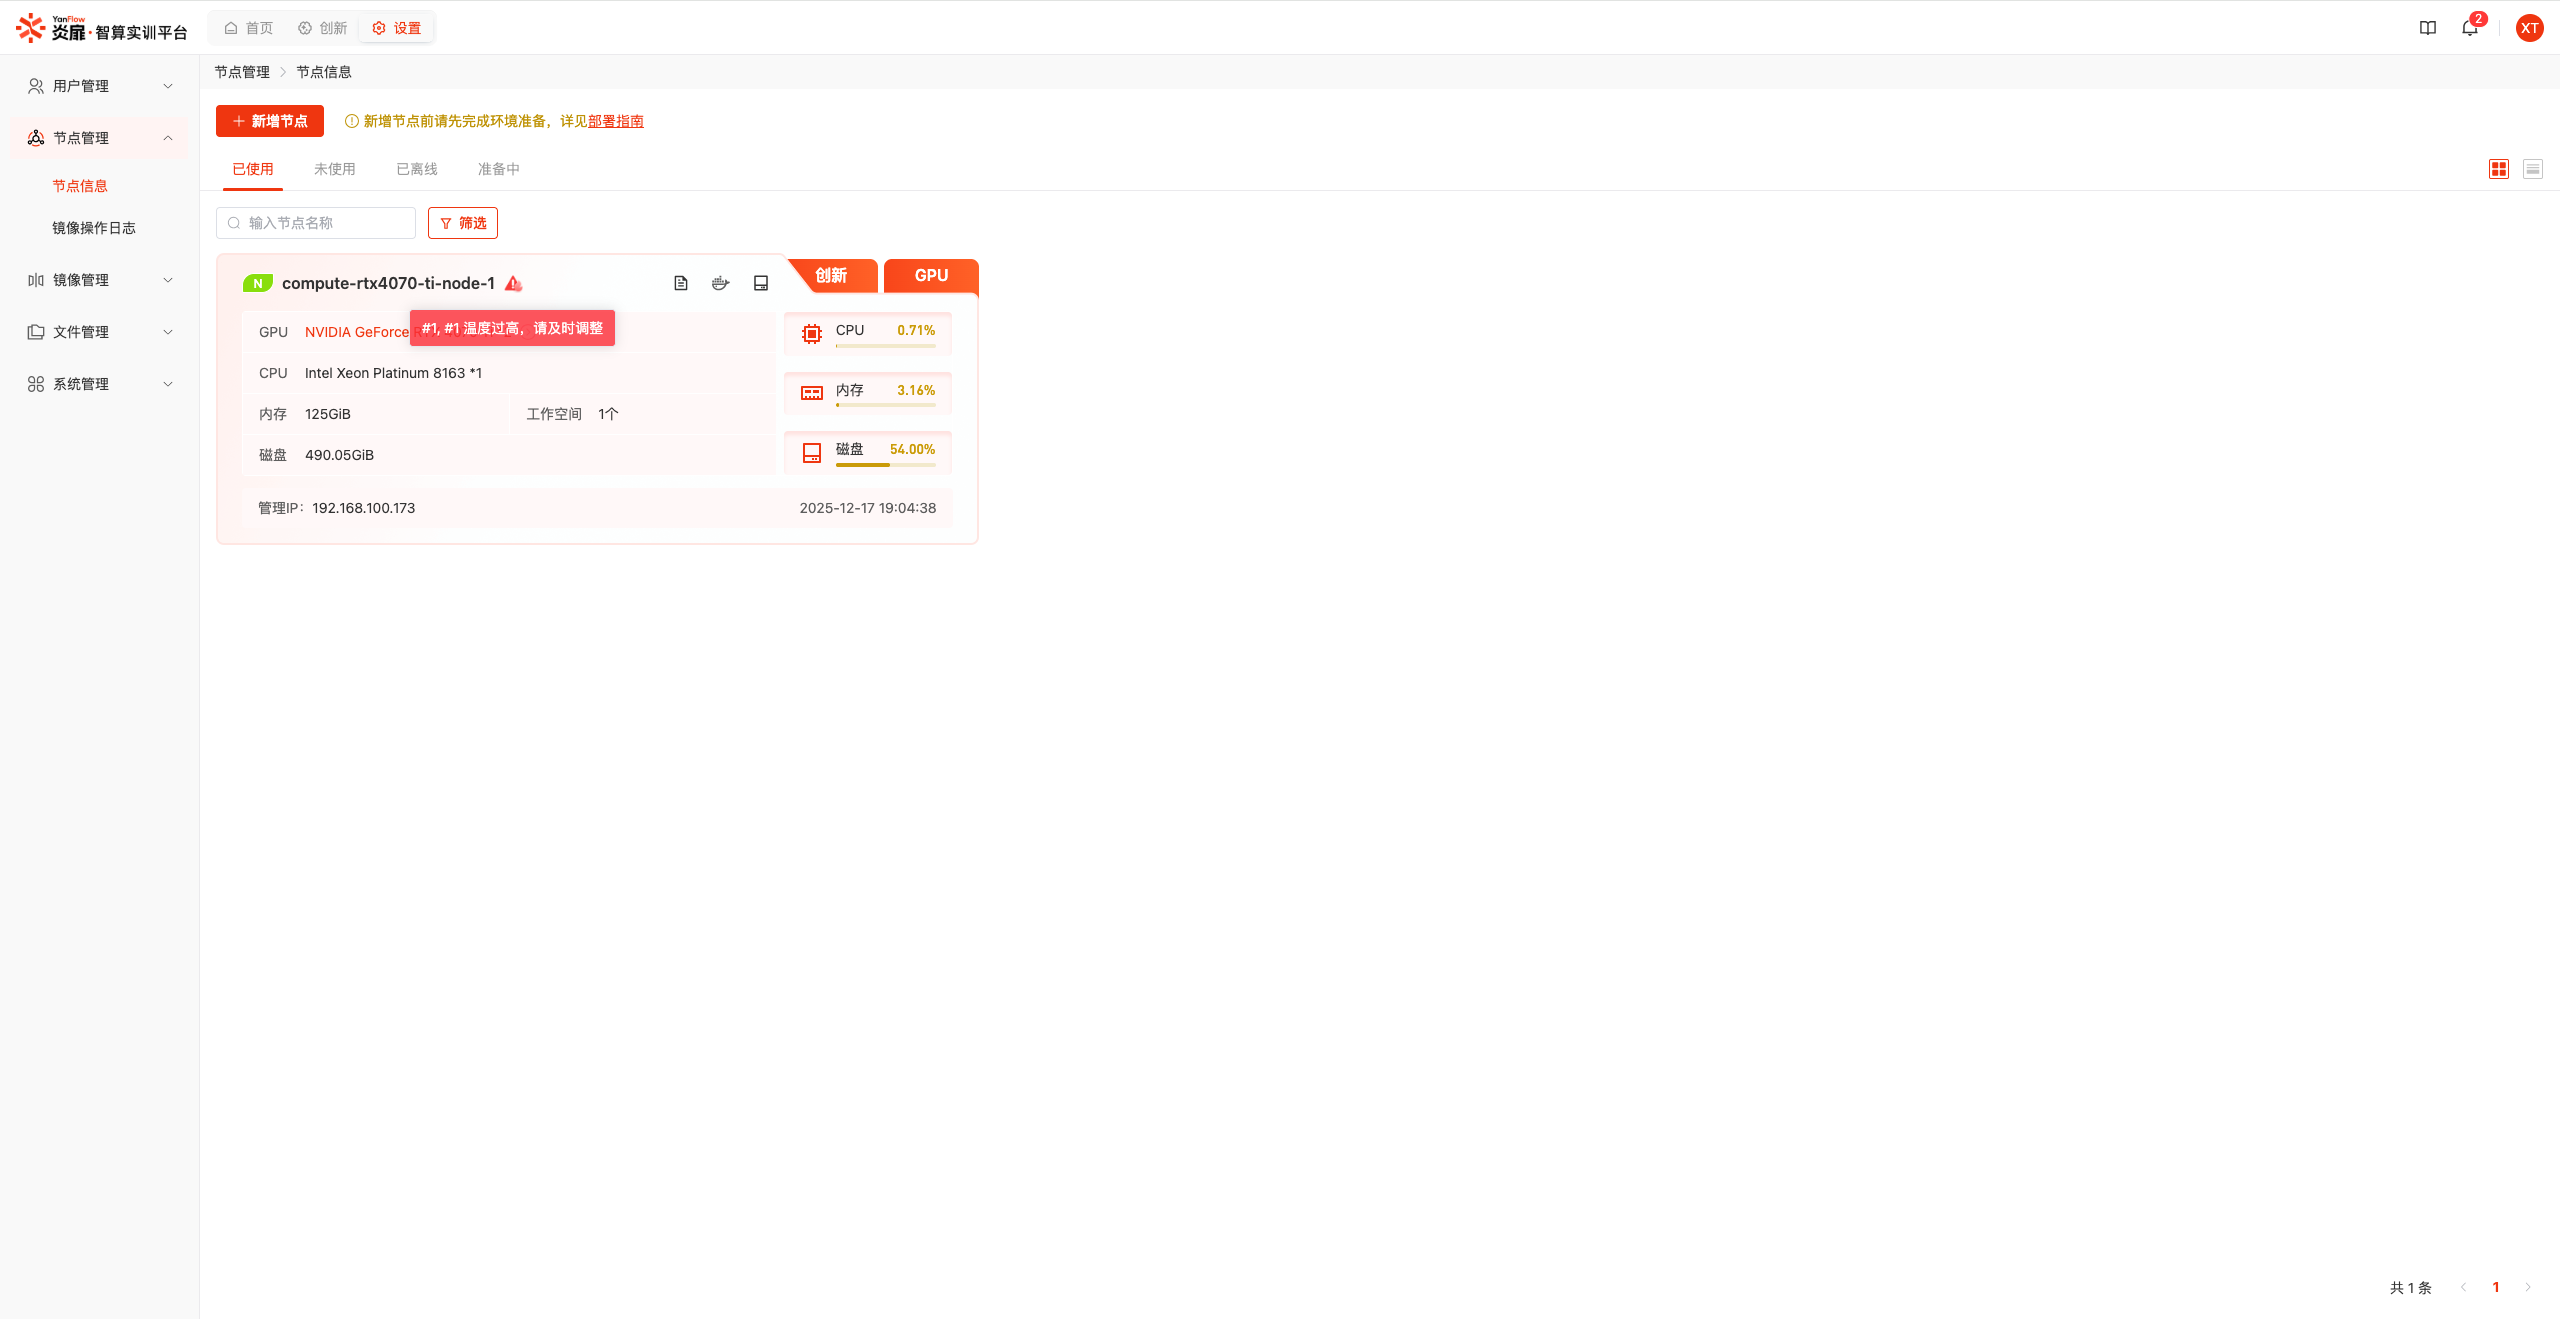
GPU Over-temperature: The system monitors node GPU temperature. If it exceeds the threshold, the node will display a warning icon. Click the icon to view the overheated GPU slots.
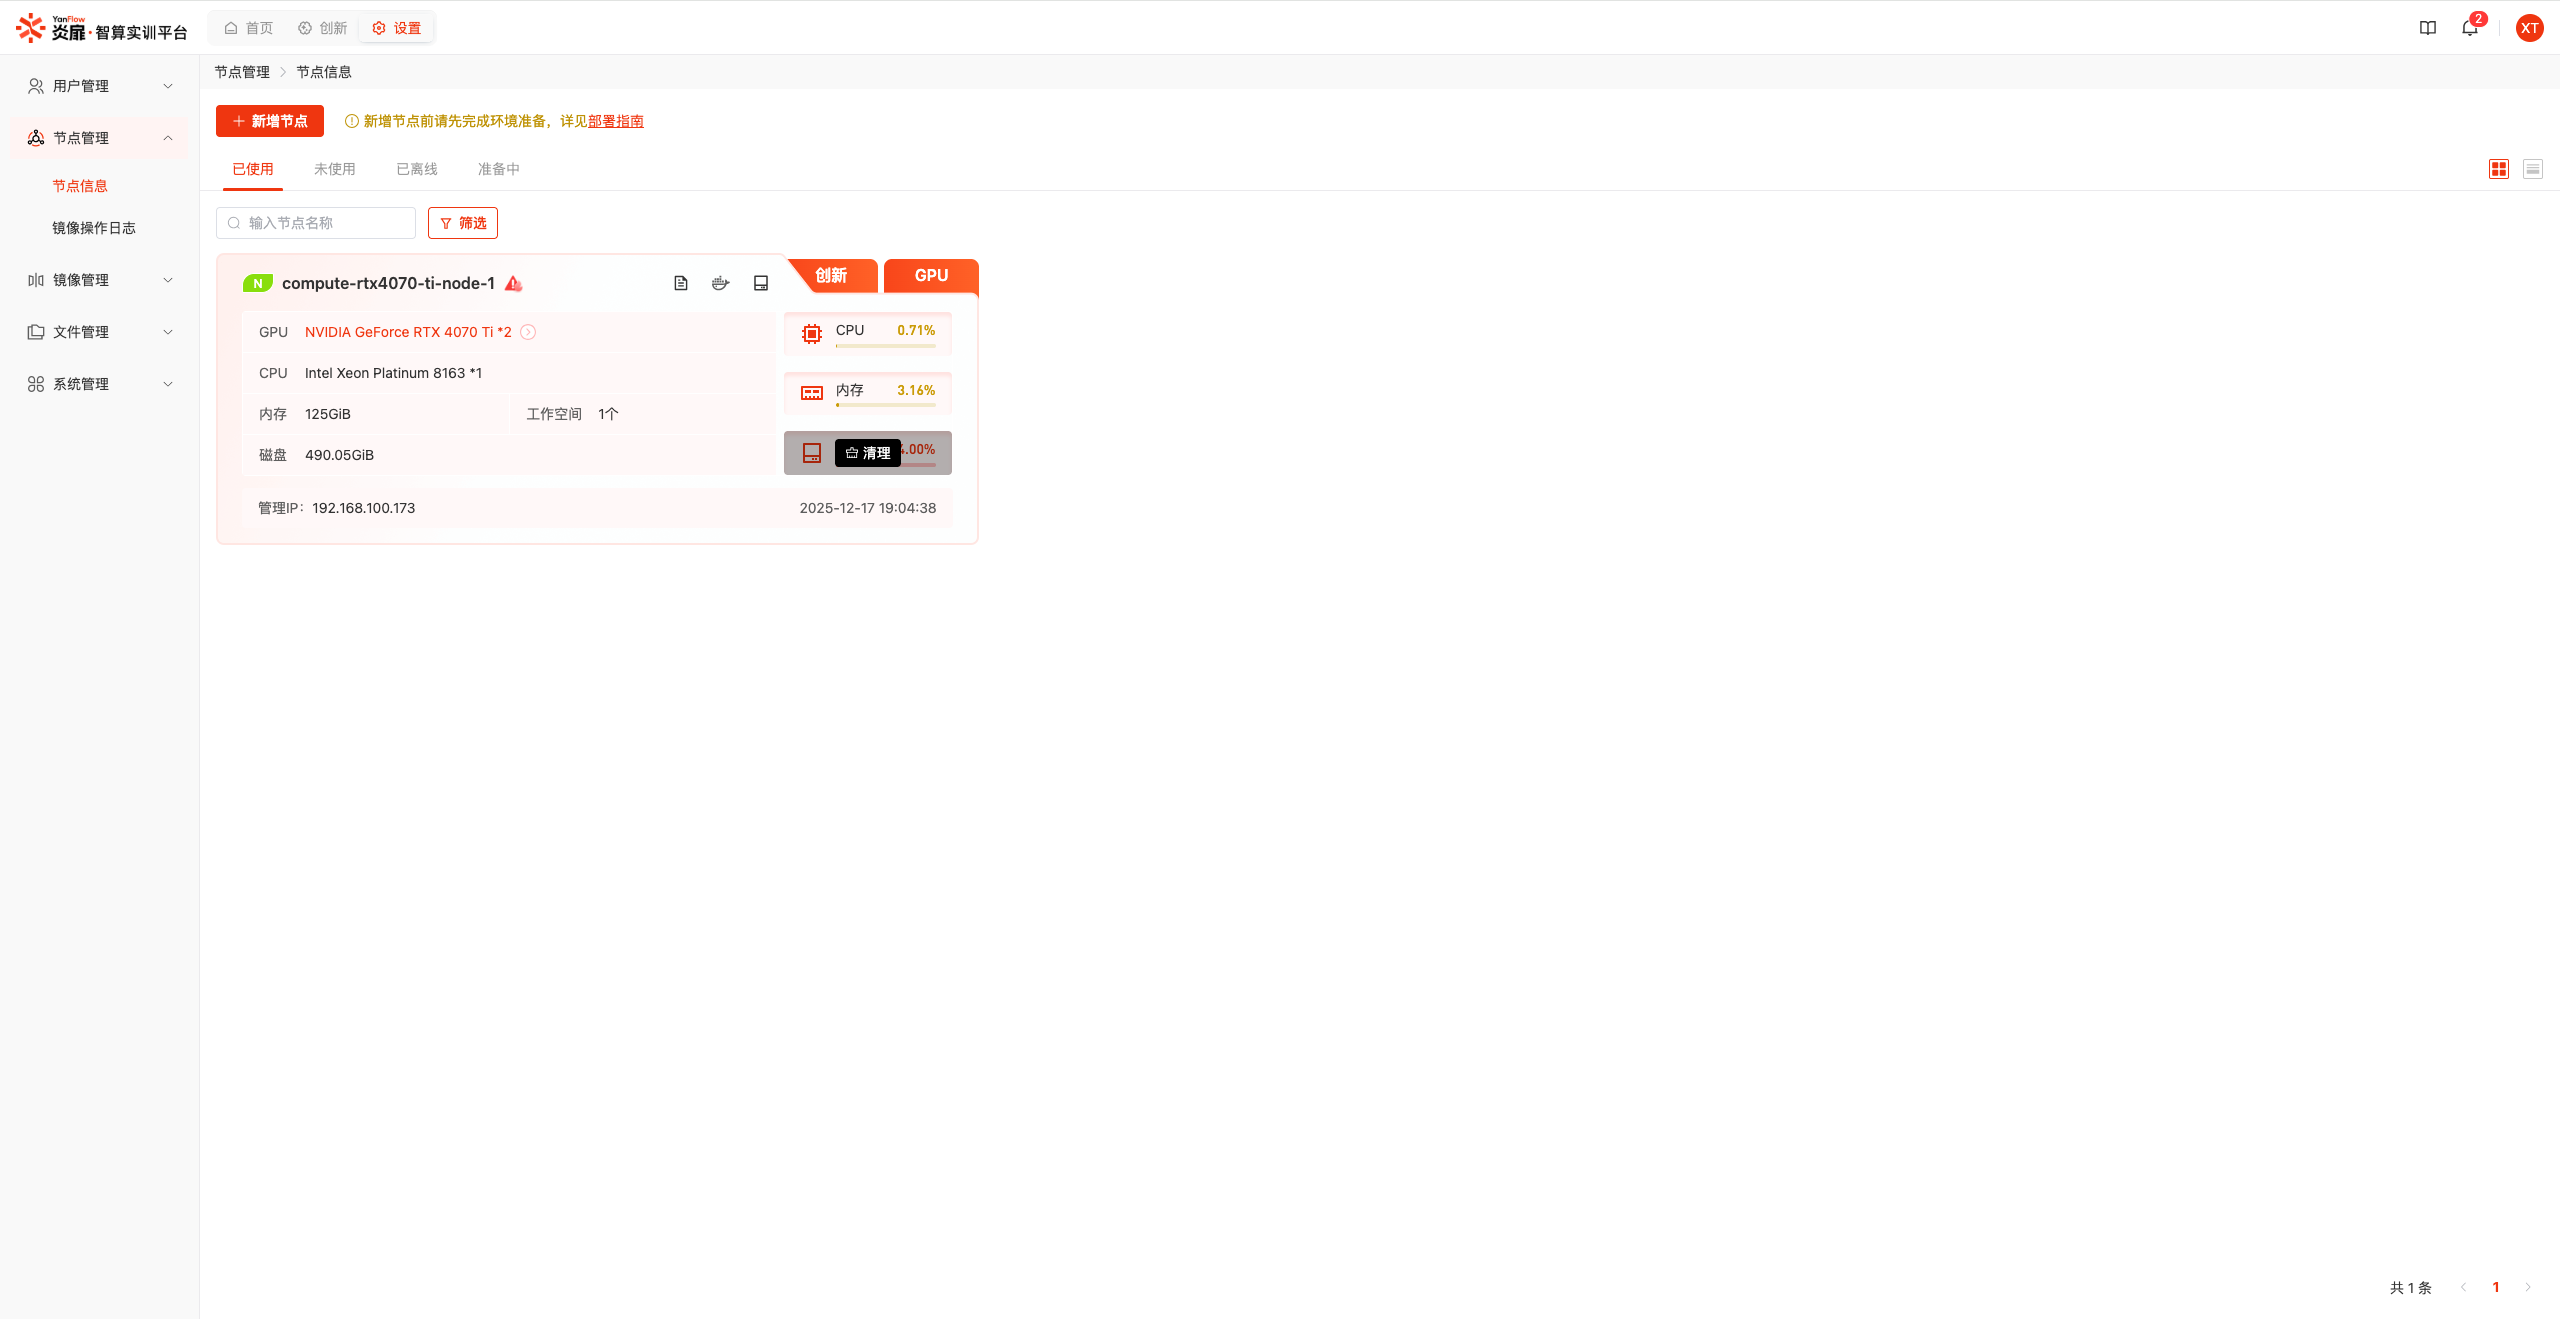
Disk Alert: In Card format, if disk usage on a node exceeds the threshold, it will be highlighted in red. Click the Clean button to immediately clean the disk.
Note:
- When a node is in use, the system will automatically mark its node mode, such as
GPU,vGPU,CPU,Job,LLM,Virtual.- To set Temperature Alert Threshold and Disk Alert Threshold, please go to Threshold Settings.
Add Node
Click the Add Node button to display the add worker node dialog. Enter basic information: Brand, Node Management IP, Node Storage IP, Port, root Password, etc. Click the Node Verification button. After successful verification, the node name will be echoed back.
Click the Get Machine Configuration button to display the machine configuration of the new node and system-recommended configuration. Click the Confirm Add button to execute the addition. After successful addition, the node information will be refreshed.
Note: If your machine configuration is below the recommended requirements, the system still supports adding the node, but performance issues or abnormal operation may occur. For the best experience, we recommend upgrading your machine to the recommended configuration or higher.
Disk Management
Used Nodes: Click the Disk Management button to display the disk management dialog. Hover the mouse to view detailed disk information.
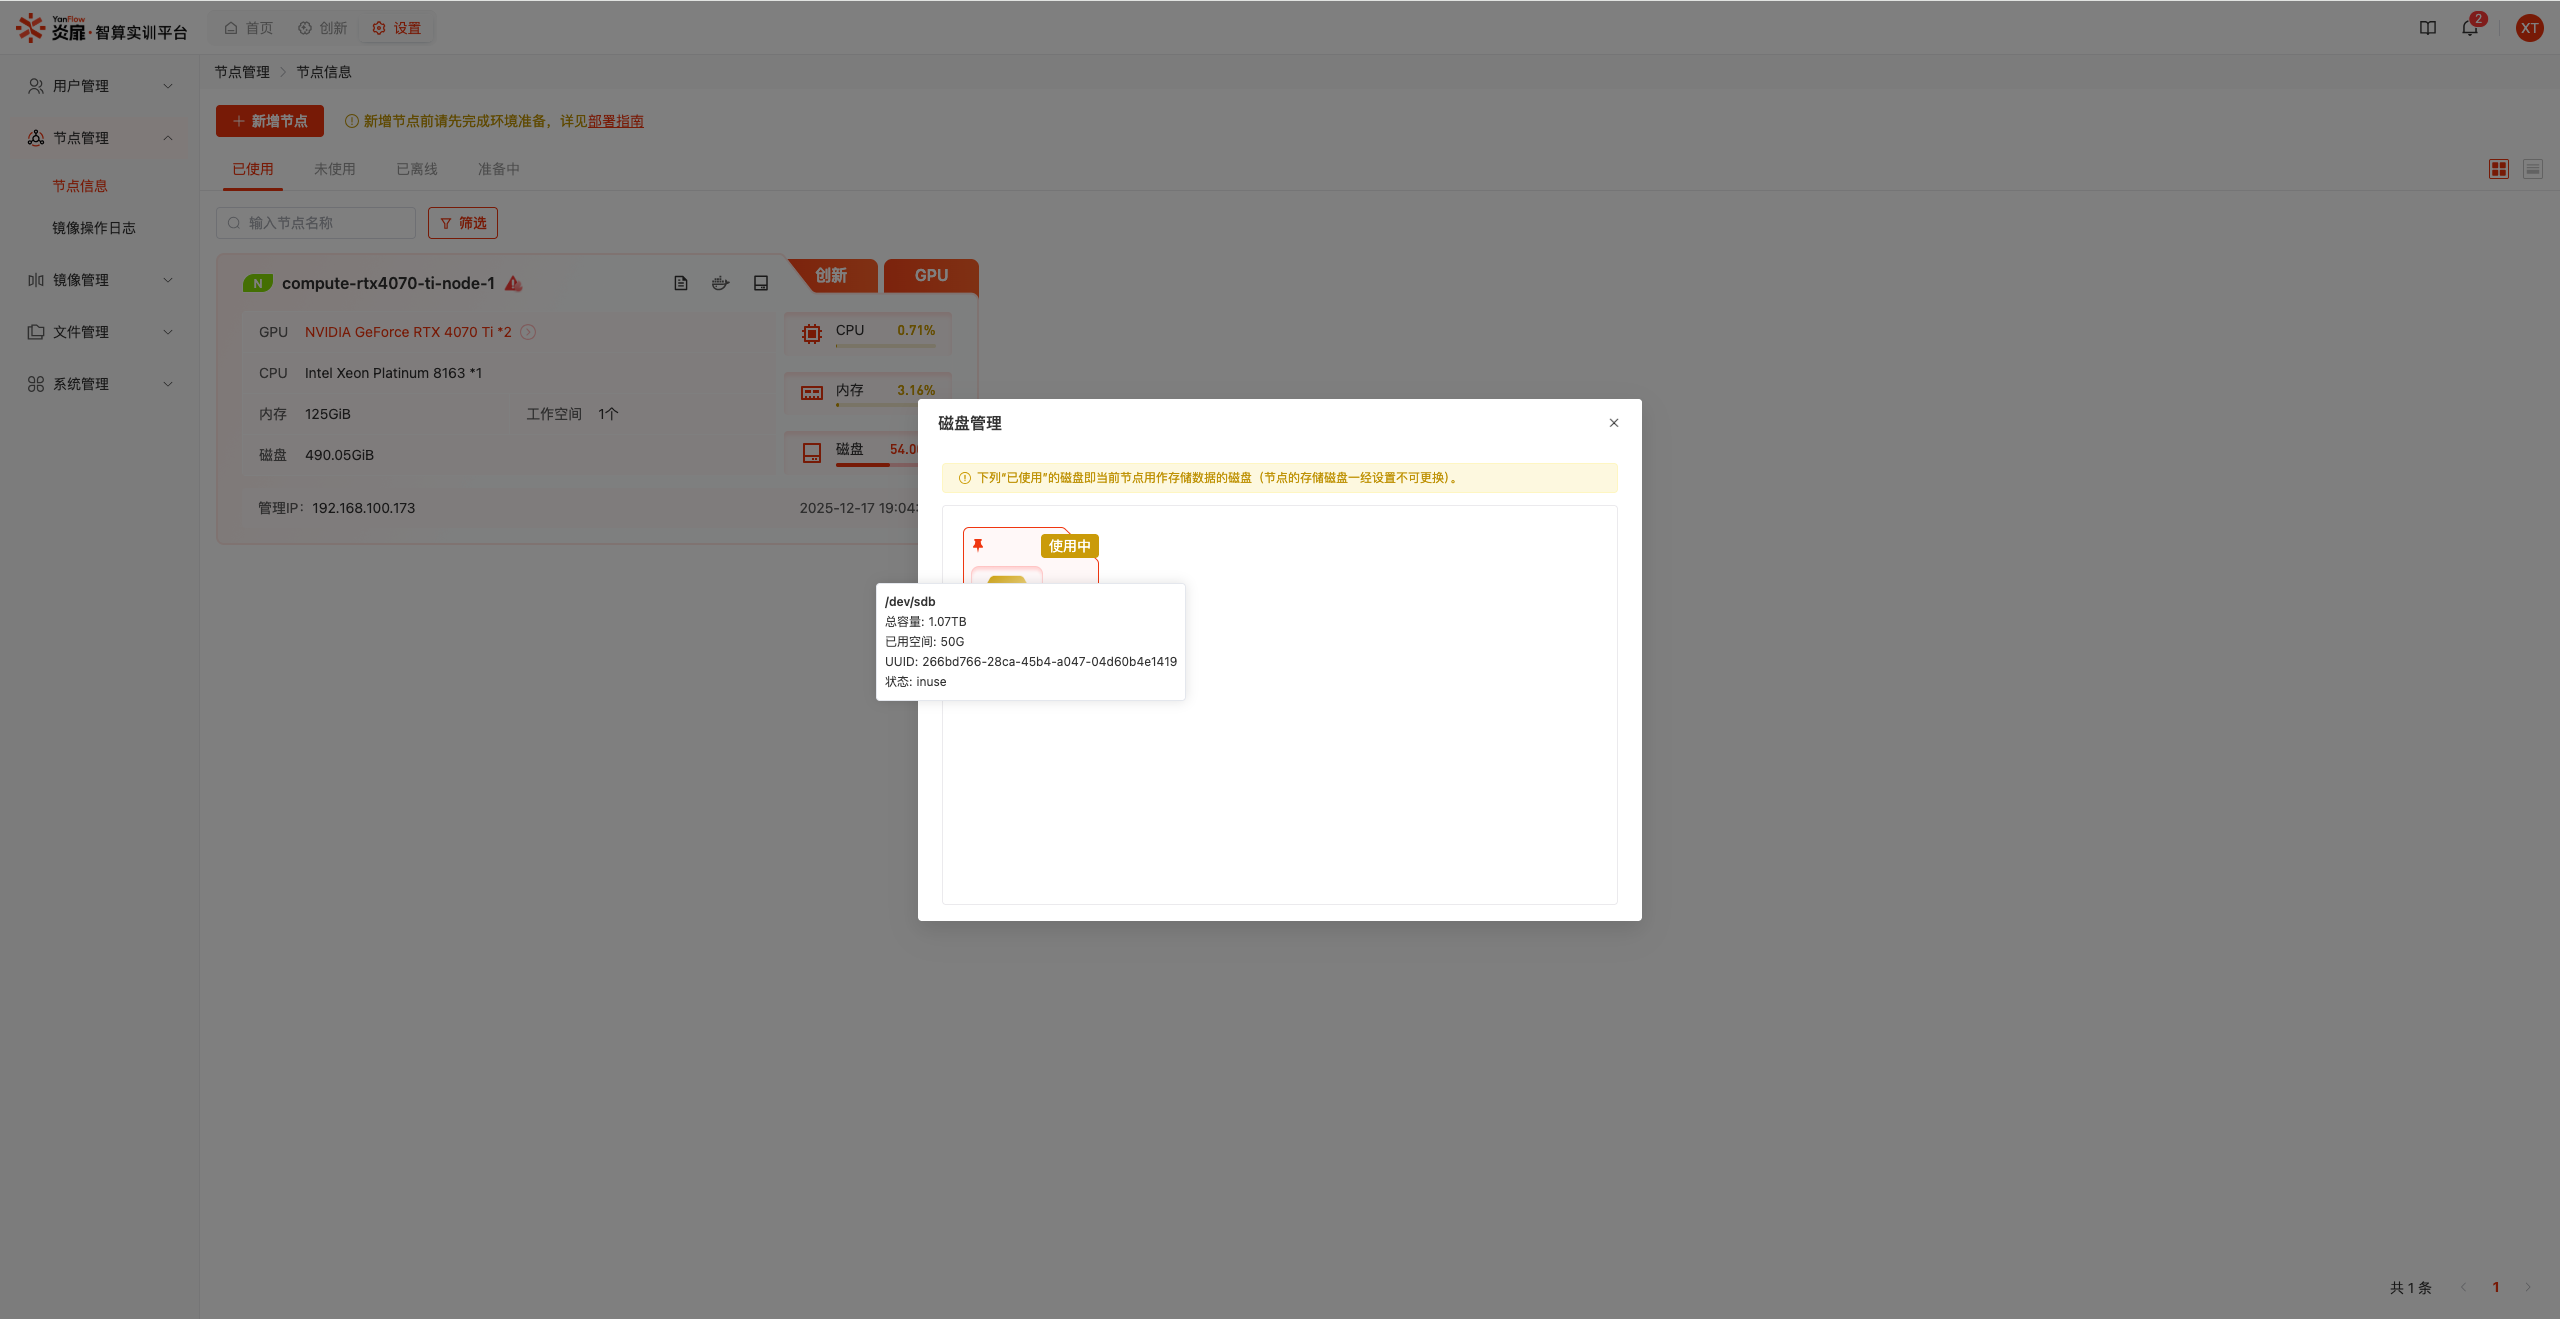
Unused Nodes: Click the Disk Management button to display the disk management dialog, where you can set data disks for storing data.
Step 1: Select the disk as needed and click the
ClearorInitializebutton to clear or initialize the disk.Step 2: Click the
Nextbutton to select one or more disks with Unused status from the list. After confirmation, the data disk configuration will be completed. The selected disks can be used for data storage in the cluster.
Note:
- To manage node disks, ensure the Converged Architecture is used. This feature is unavailable in Professional Architecture.
- After a data disk is added, it cannot be replaced.
Node Details
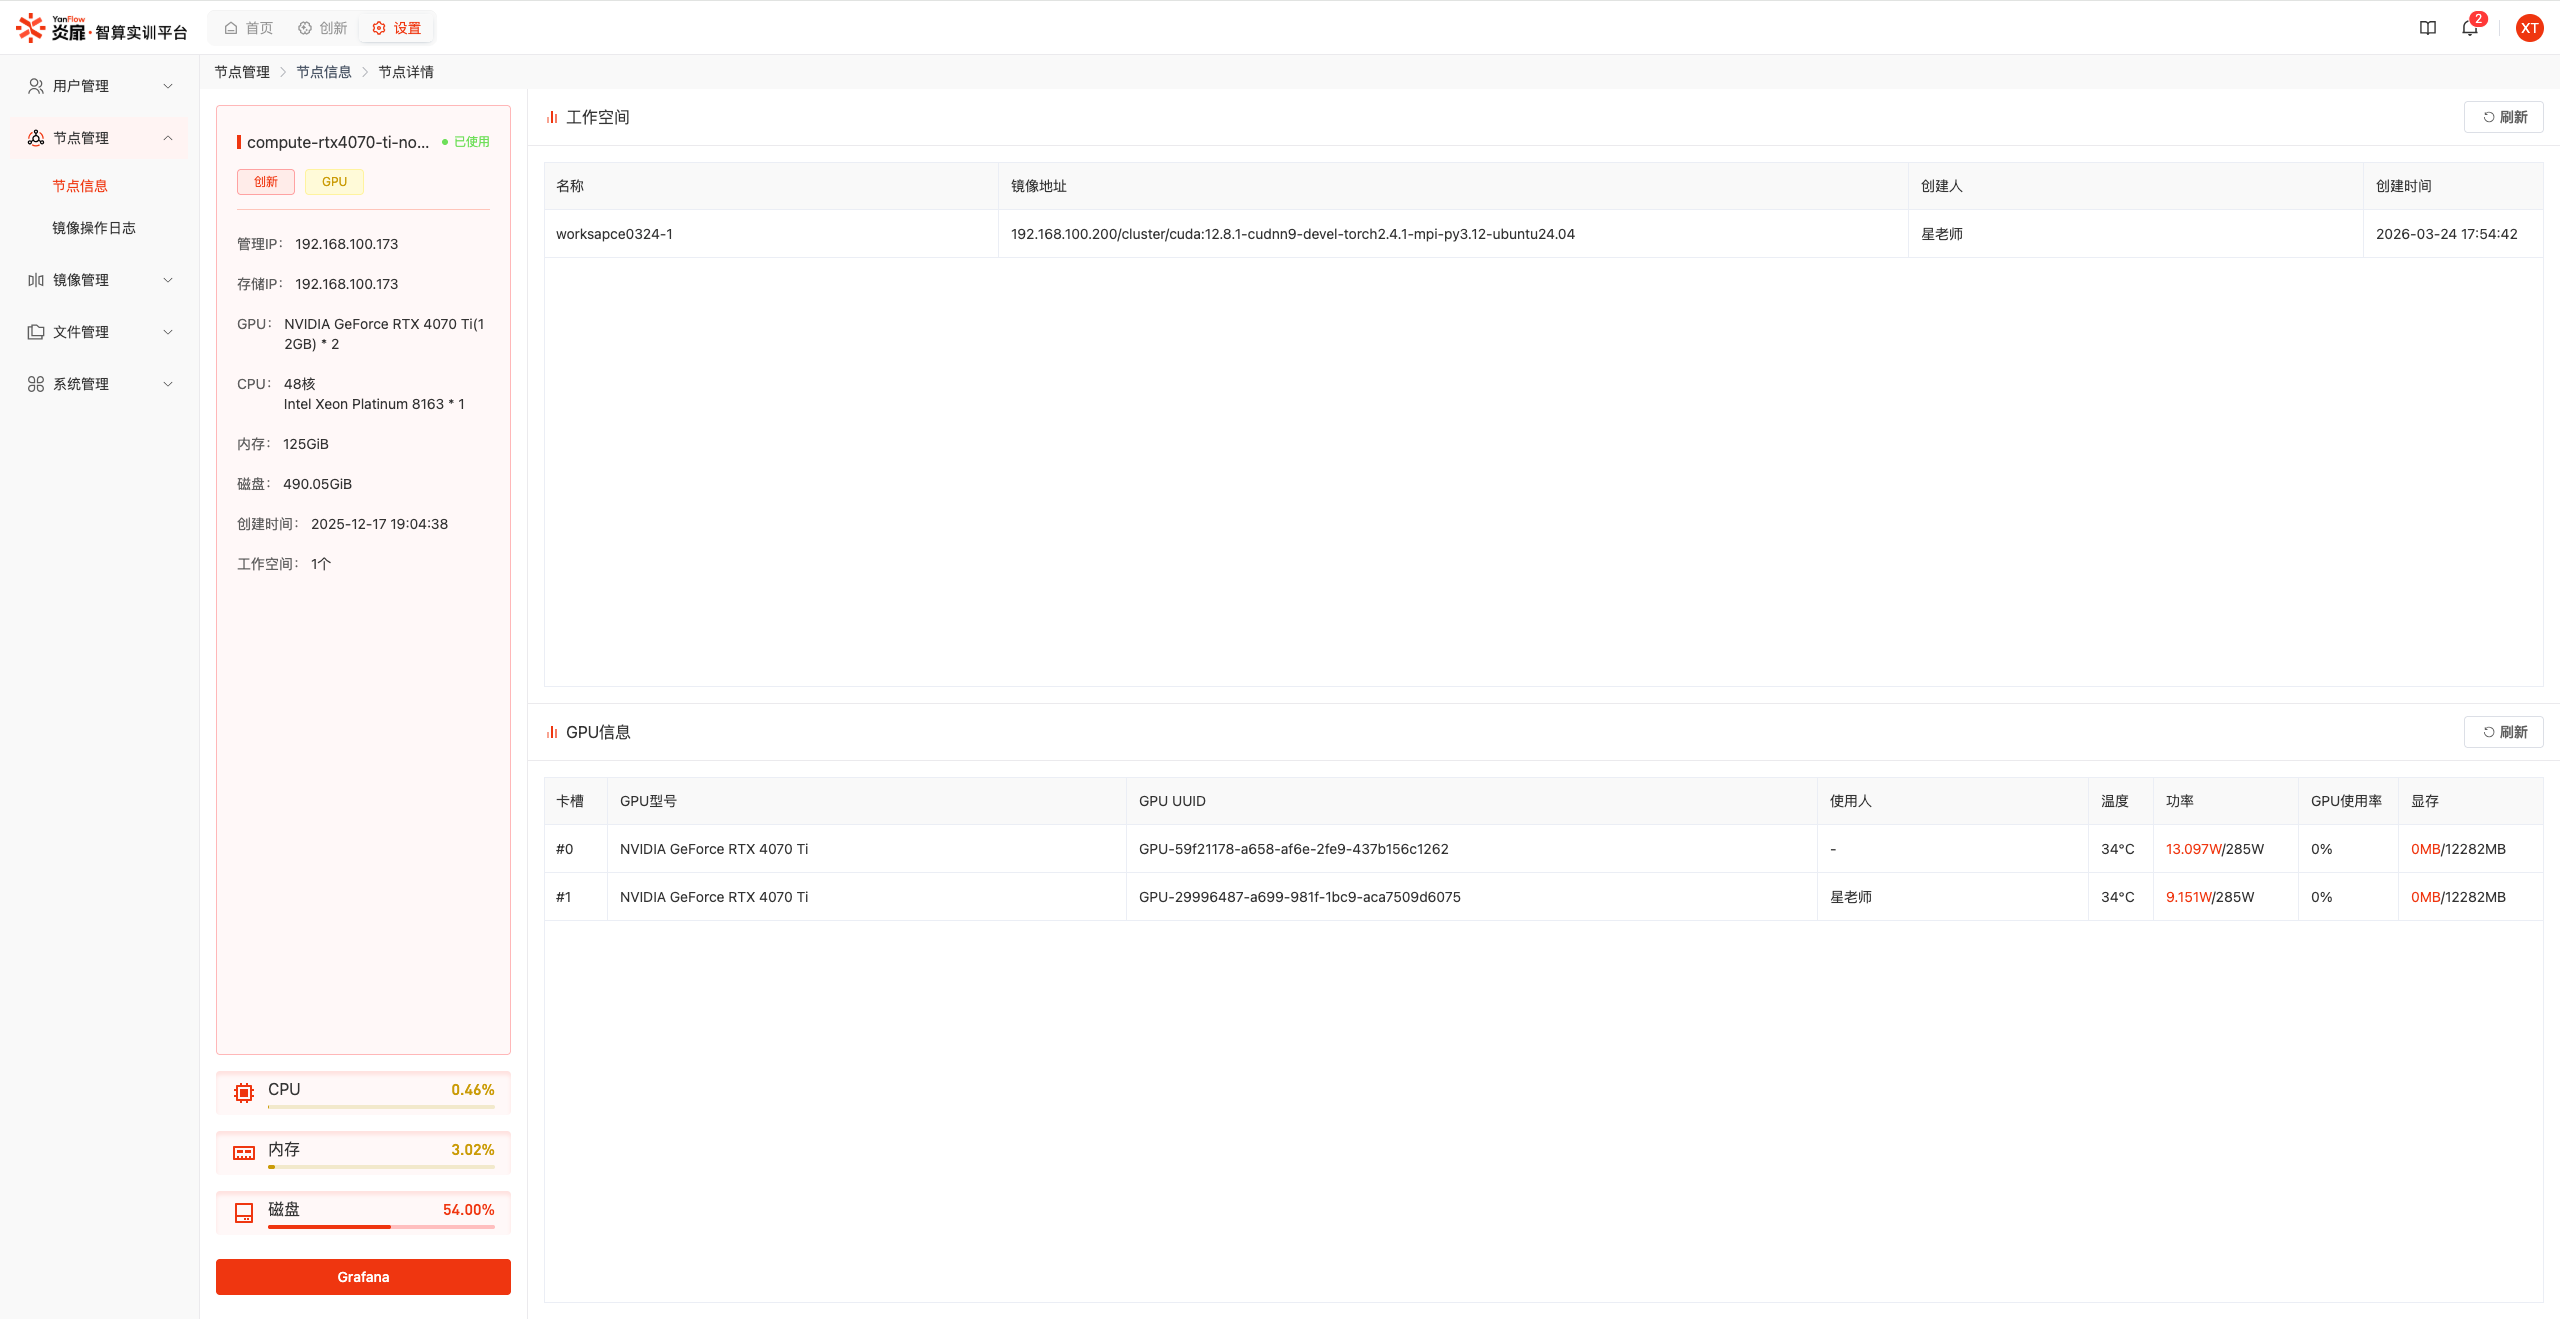
Select a node and click the Details button to view detailed information about that node. Click the Grafana button to display the Grafana monitoring dashboard.
Node Image List
Select a node and click the Image button to view all image information in that node. When there is more than one image address, supports keyword search by Image Address and Image ID.
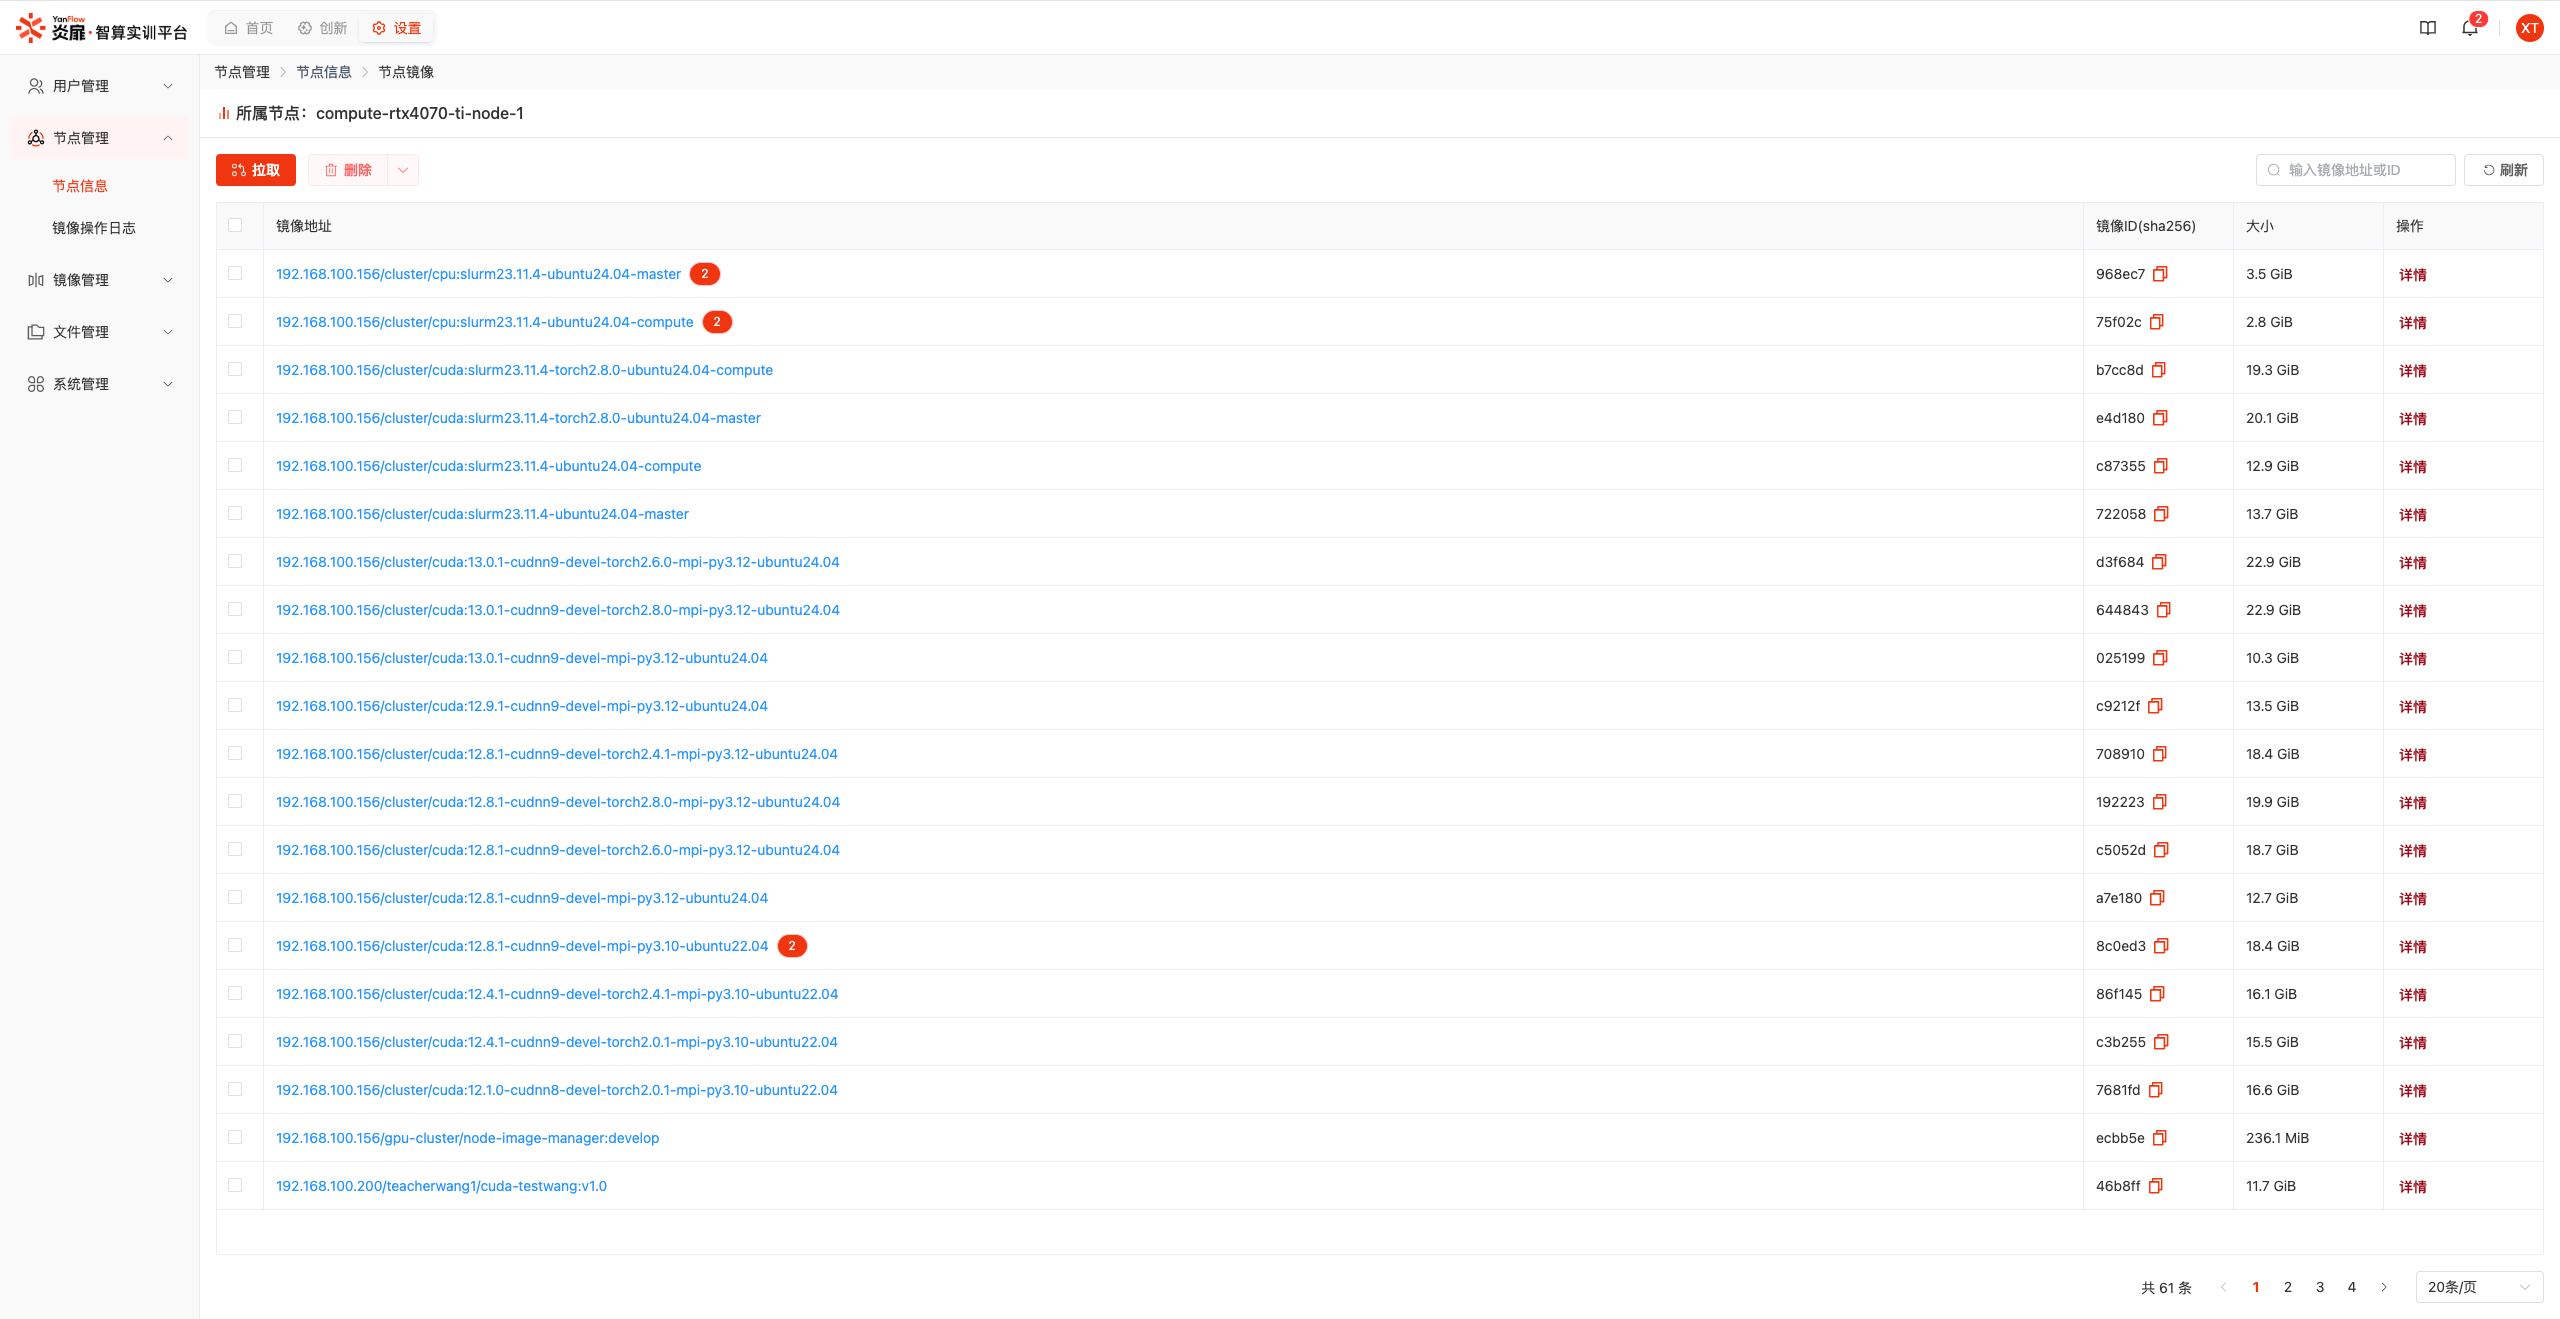
Copy Image ID: Click the Copy button for the image ID to copy the complete image ID.
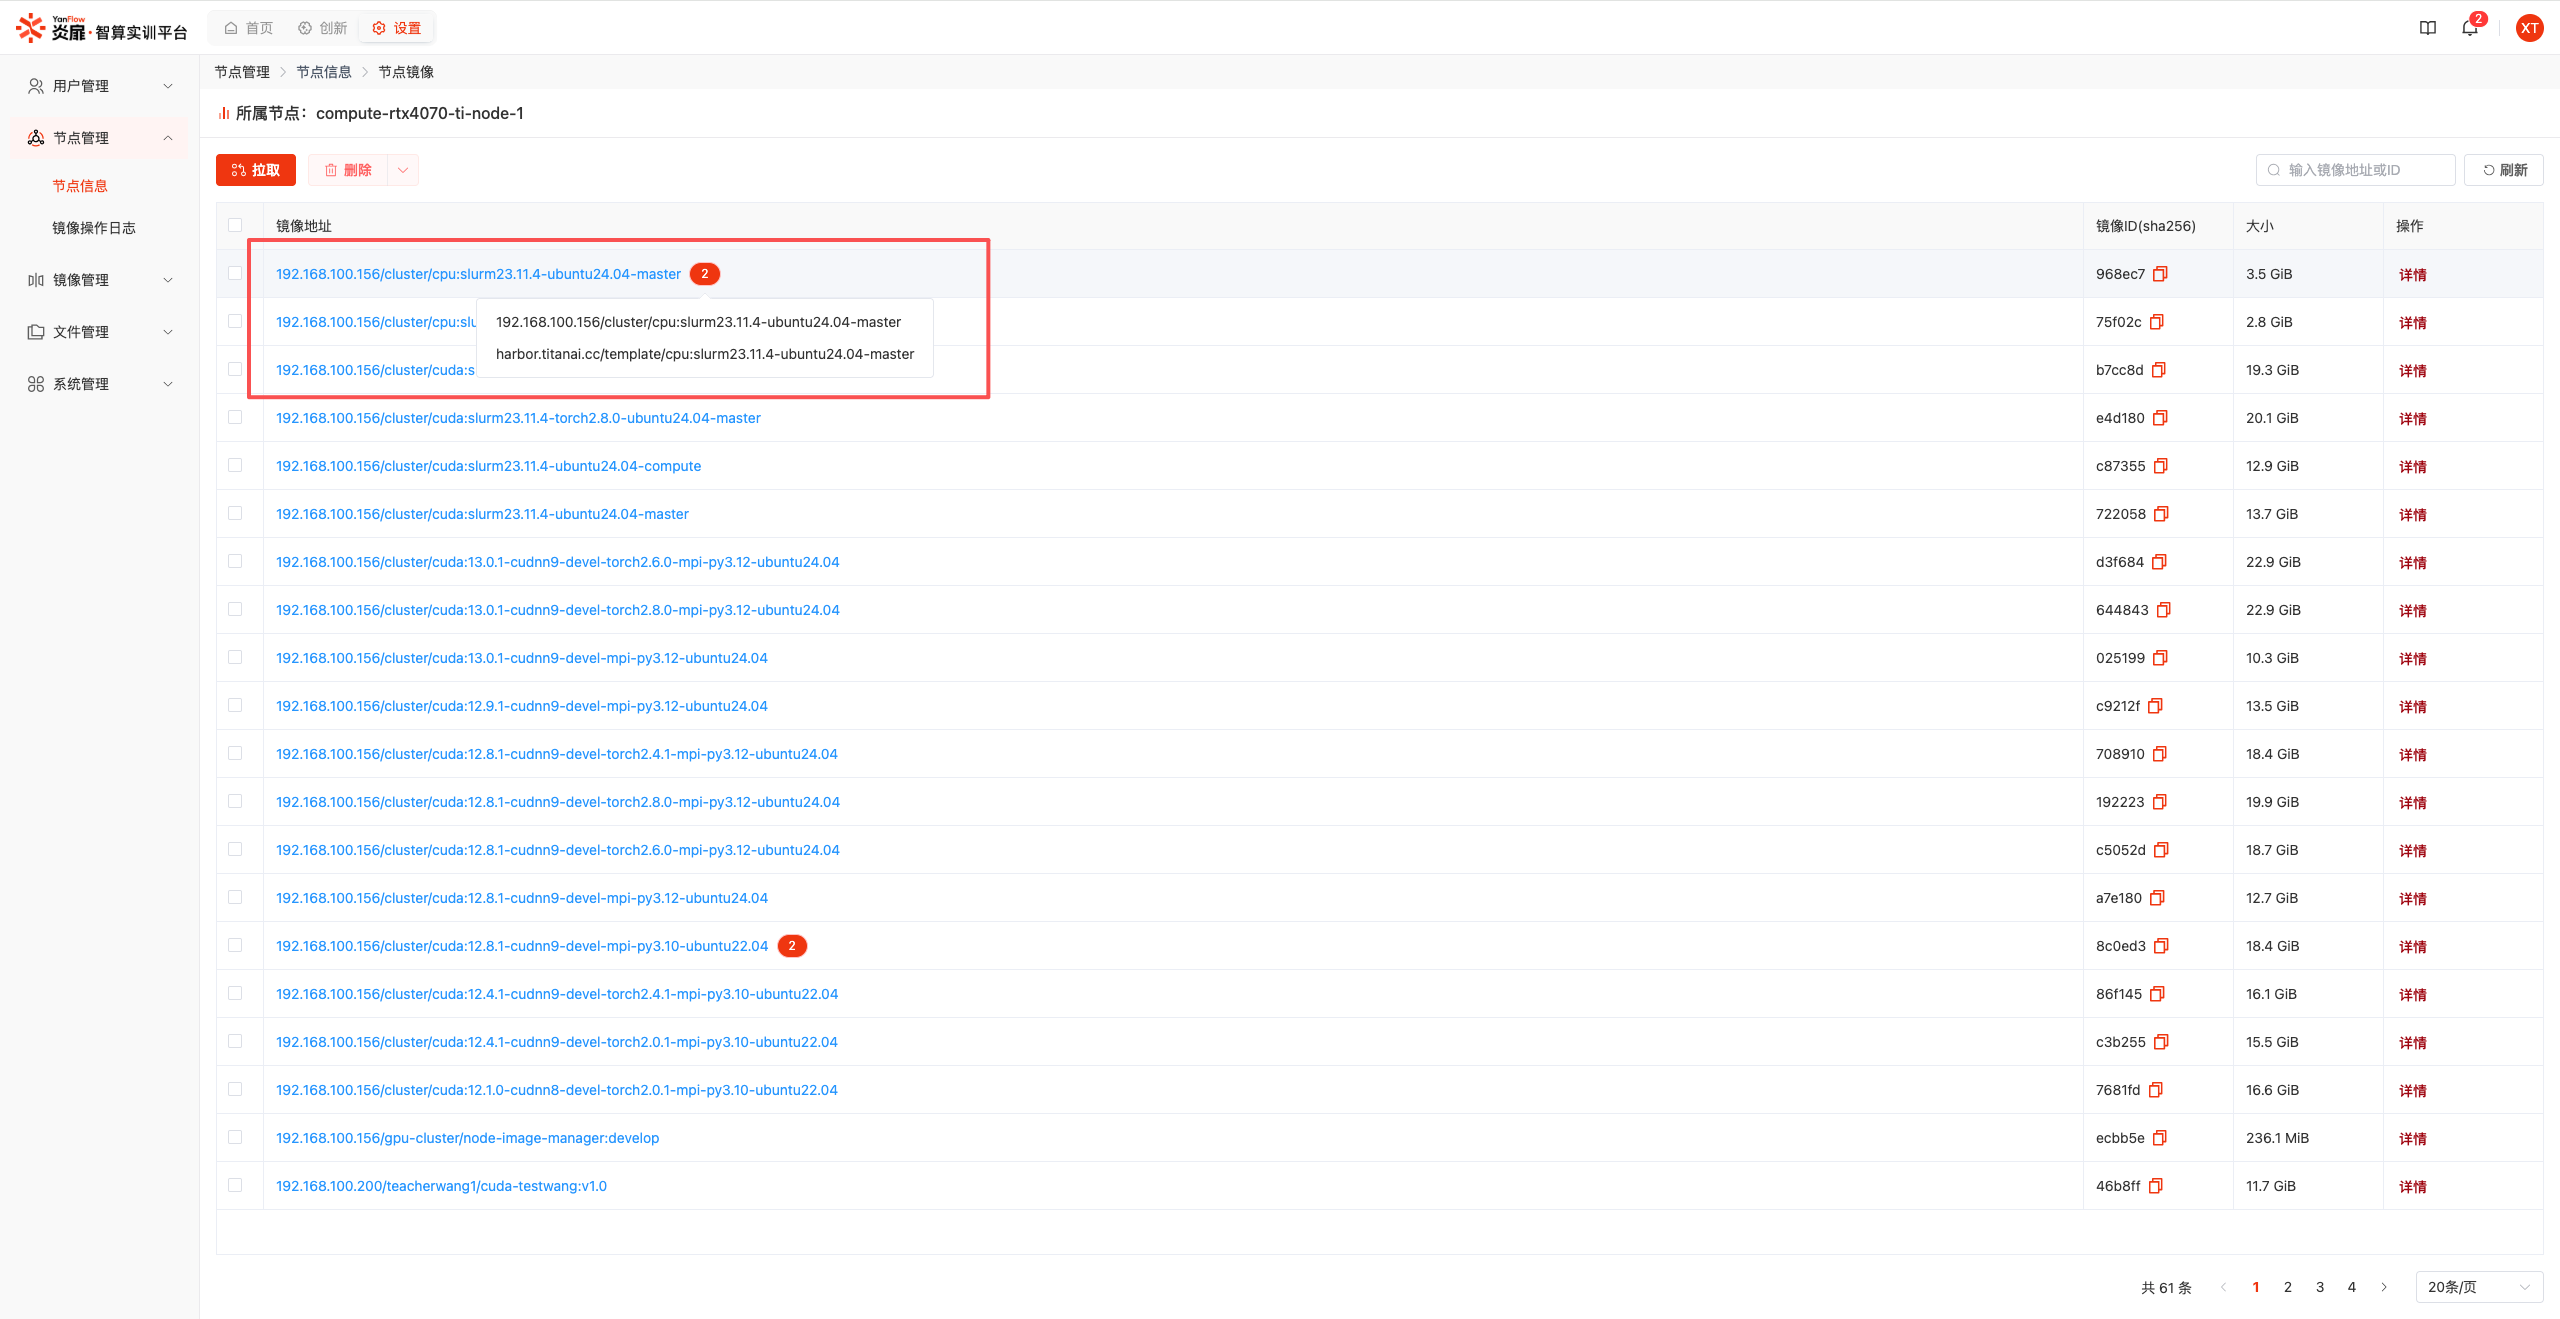
View Image Address: When more than one image address is associated, a number badge will be displayed. Hover the mouse to view all associated image addresses in the floating layer.
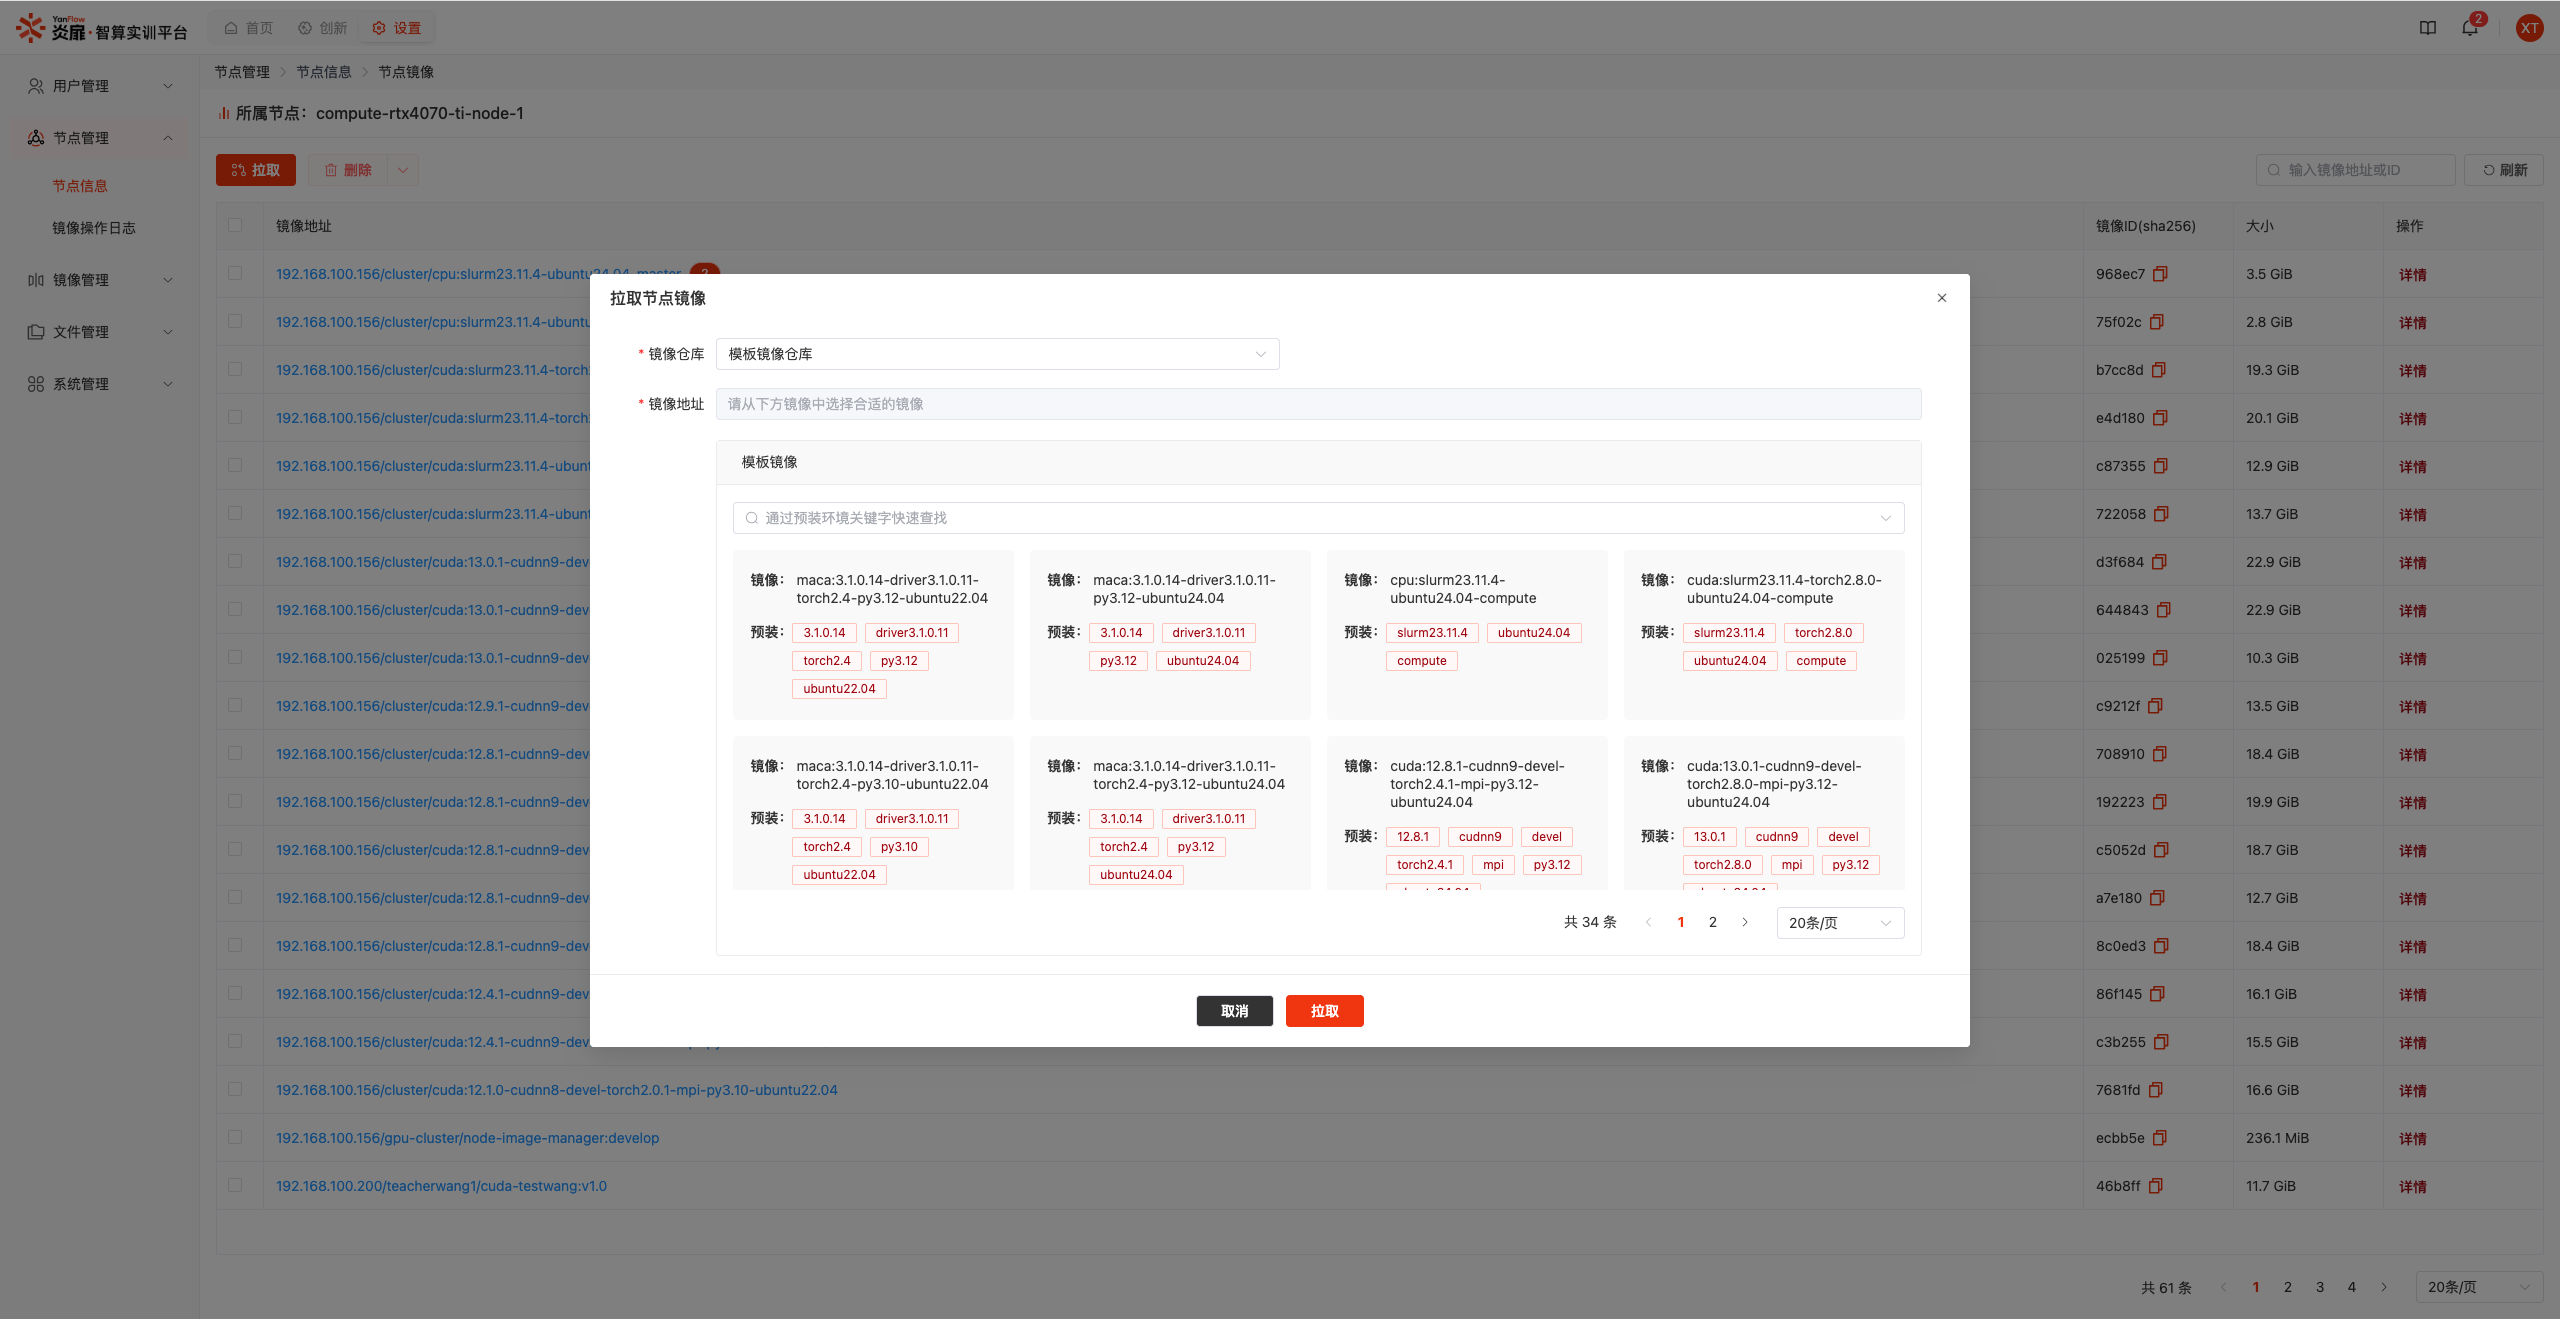
Pull Image: Click the Pull button to display the pull node image dialog. If Template Image Repository is selected, you can quickly select an image from the template image list. If Other Image Repository is selected, enter the image address. After confirmation, the image address will be authenticated. Upon successful authentication, the image will be pulled on that node.
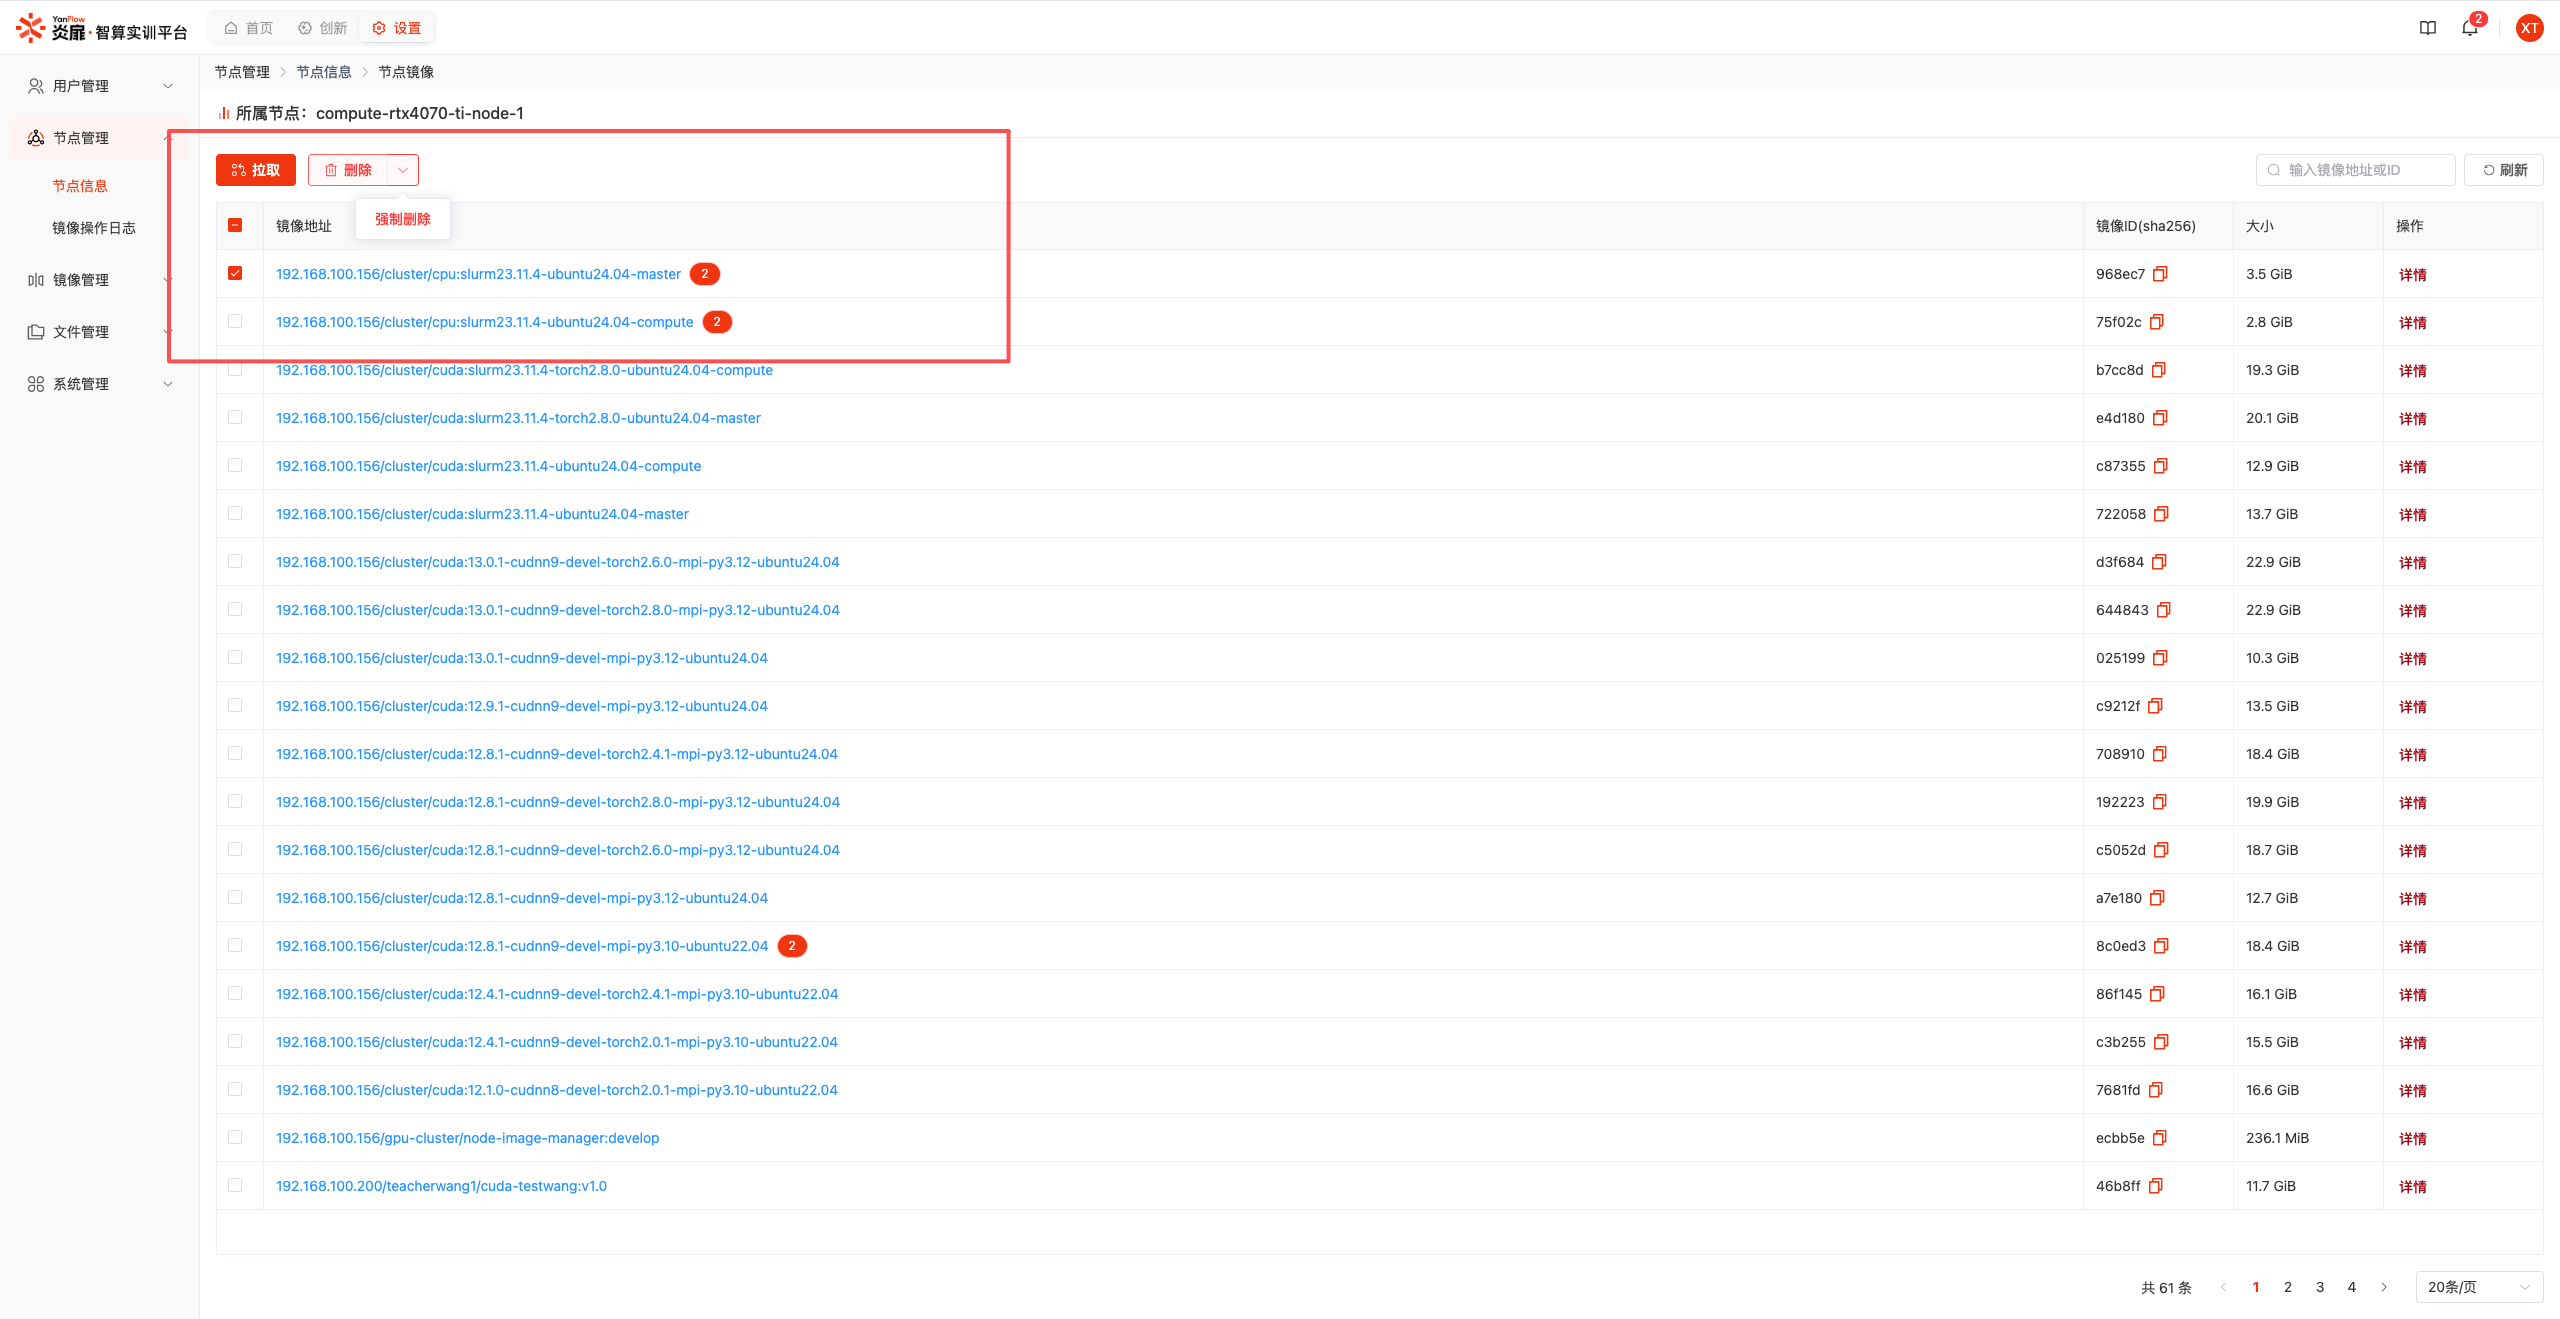
Delete/Force Delete: Check one or more images and click the Delete or Force Delete button. After confirmation, the images on the node can be deleted.
Node Image Details
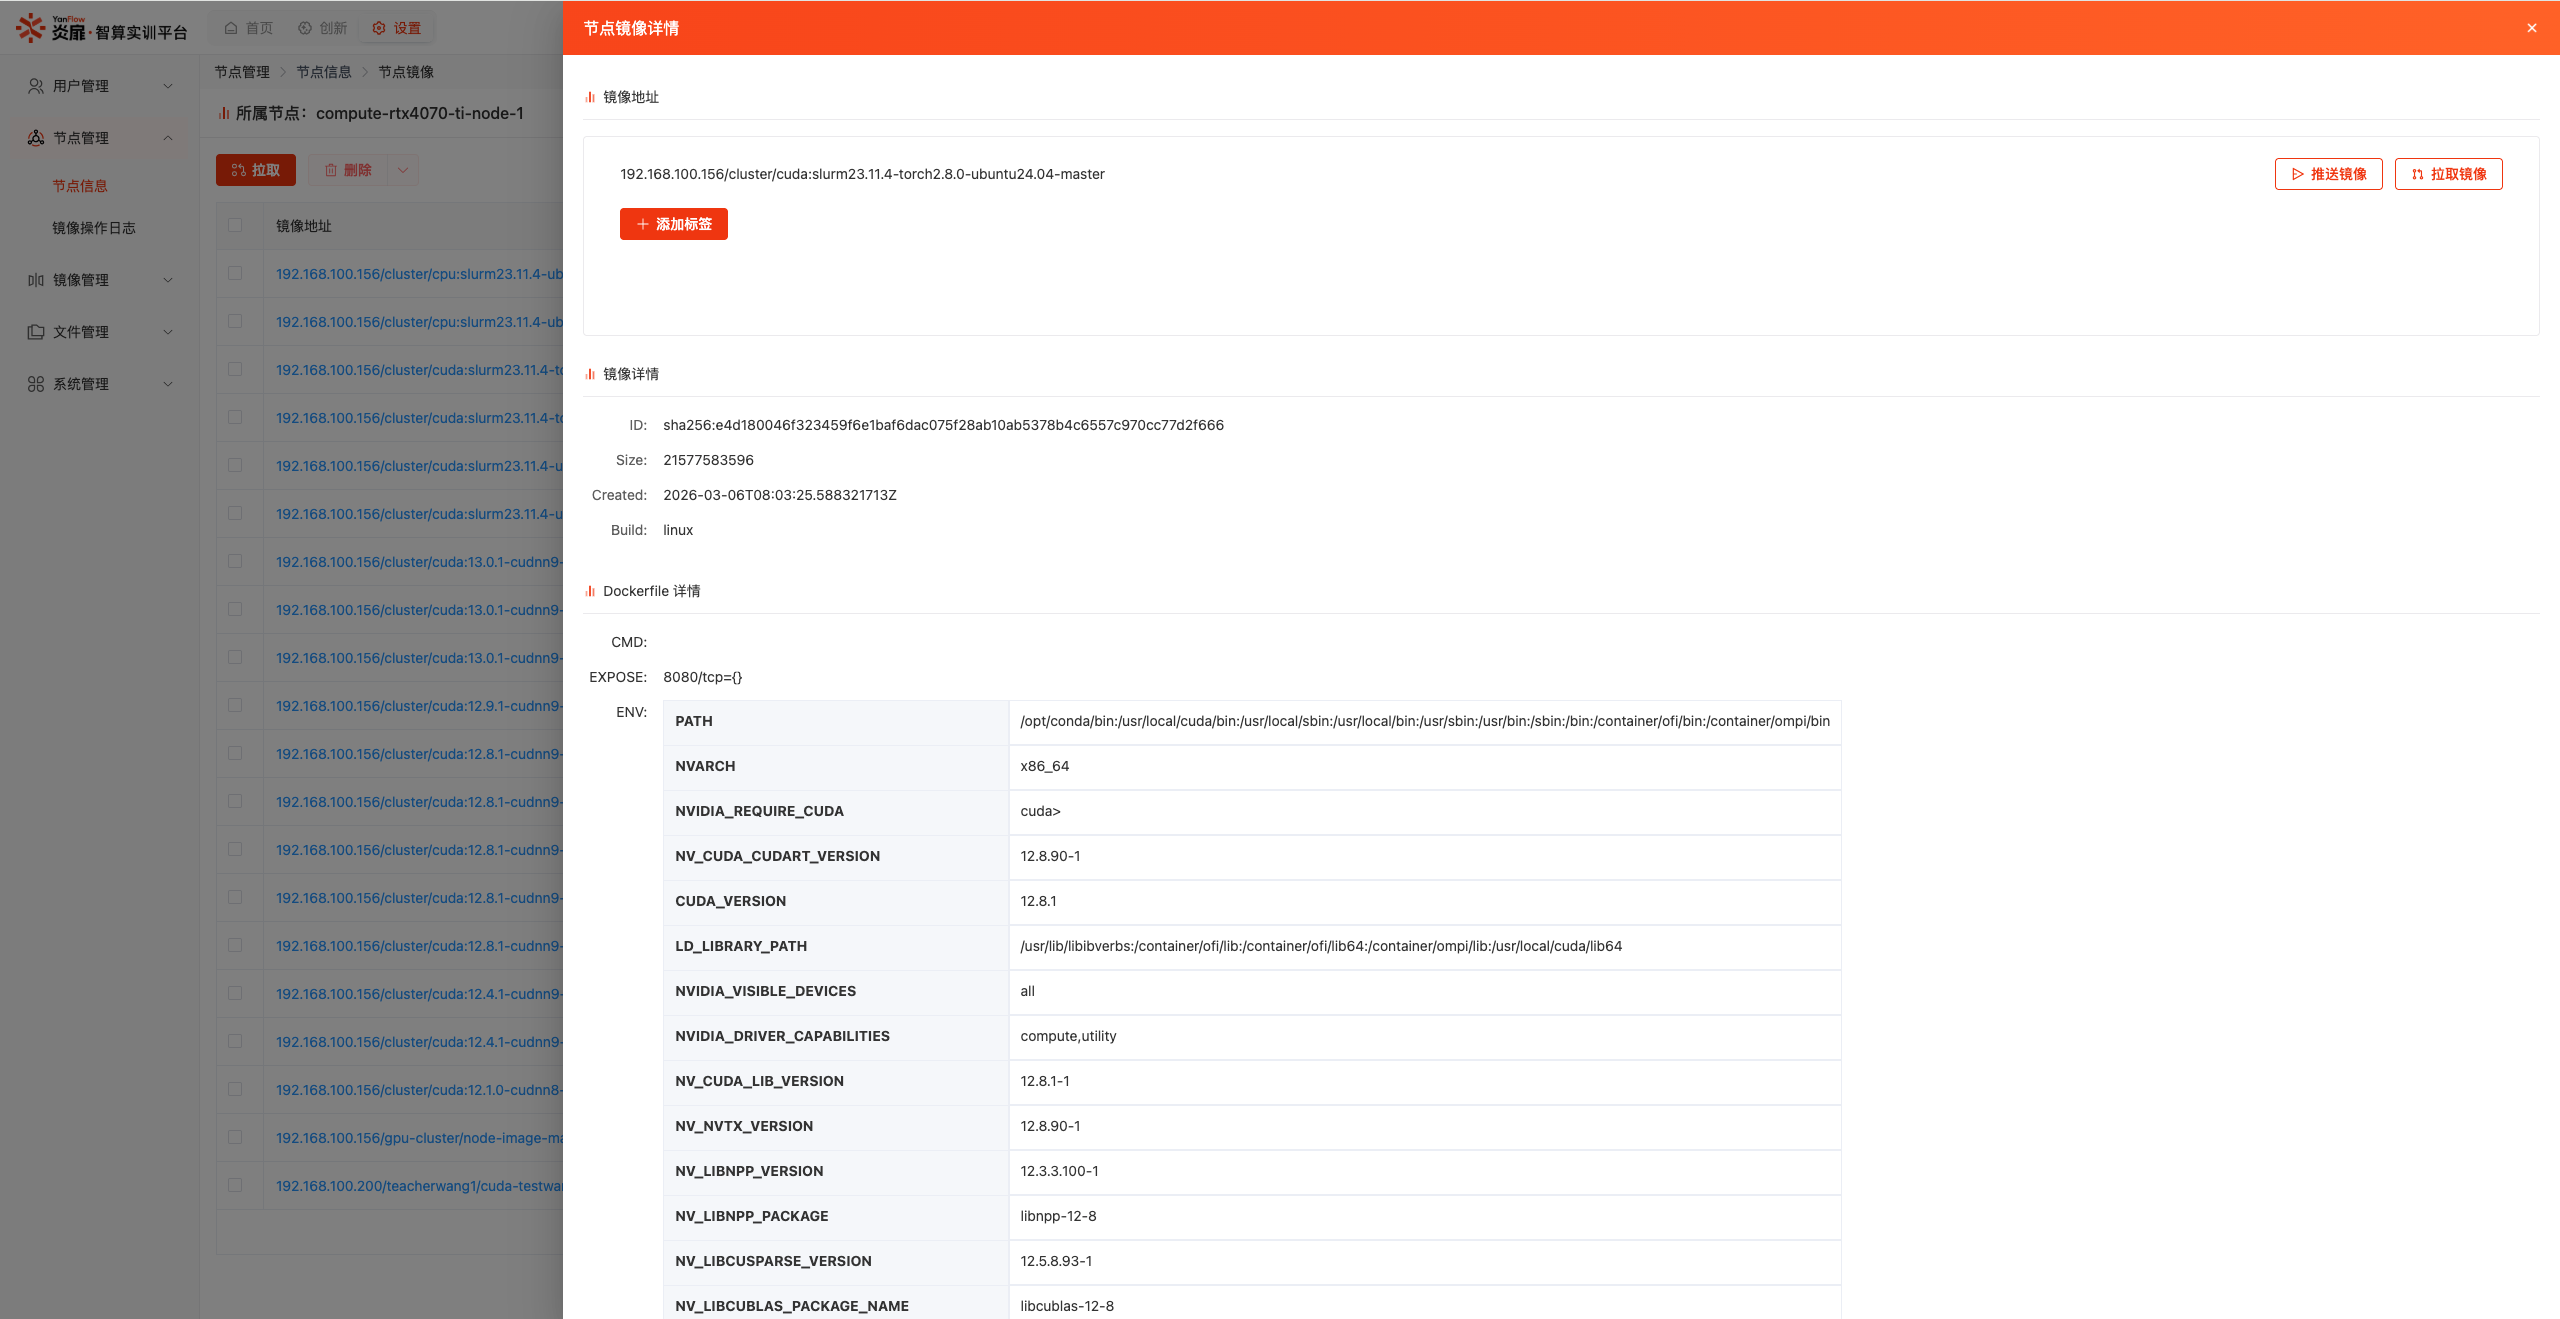
Select an image and click the Details button to view node image details, including image address, image details, and Dockerfile details.
Click the Add Tag button to add tag information according to specifications. You can also click the Push Image or Pull Image button to push and pull images.
Delete Node
In the Unused node list, select a node and click the Delete button. A confirmation dialog will appear; click the Confirm button to delete.
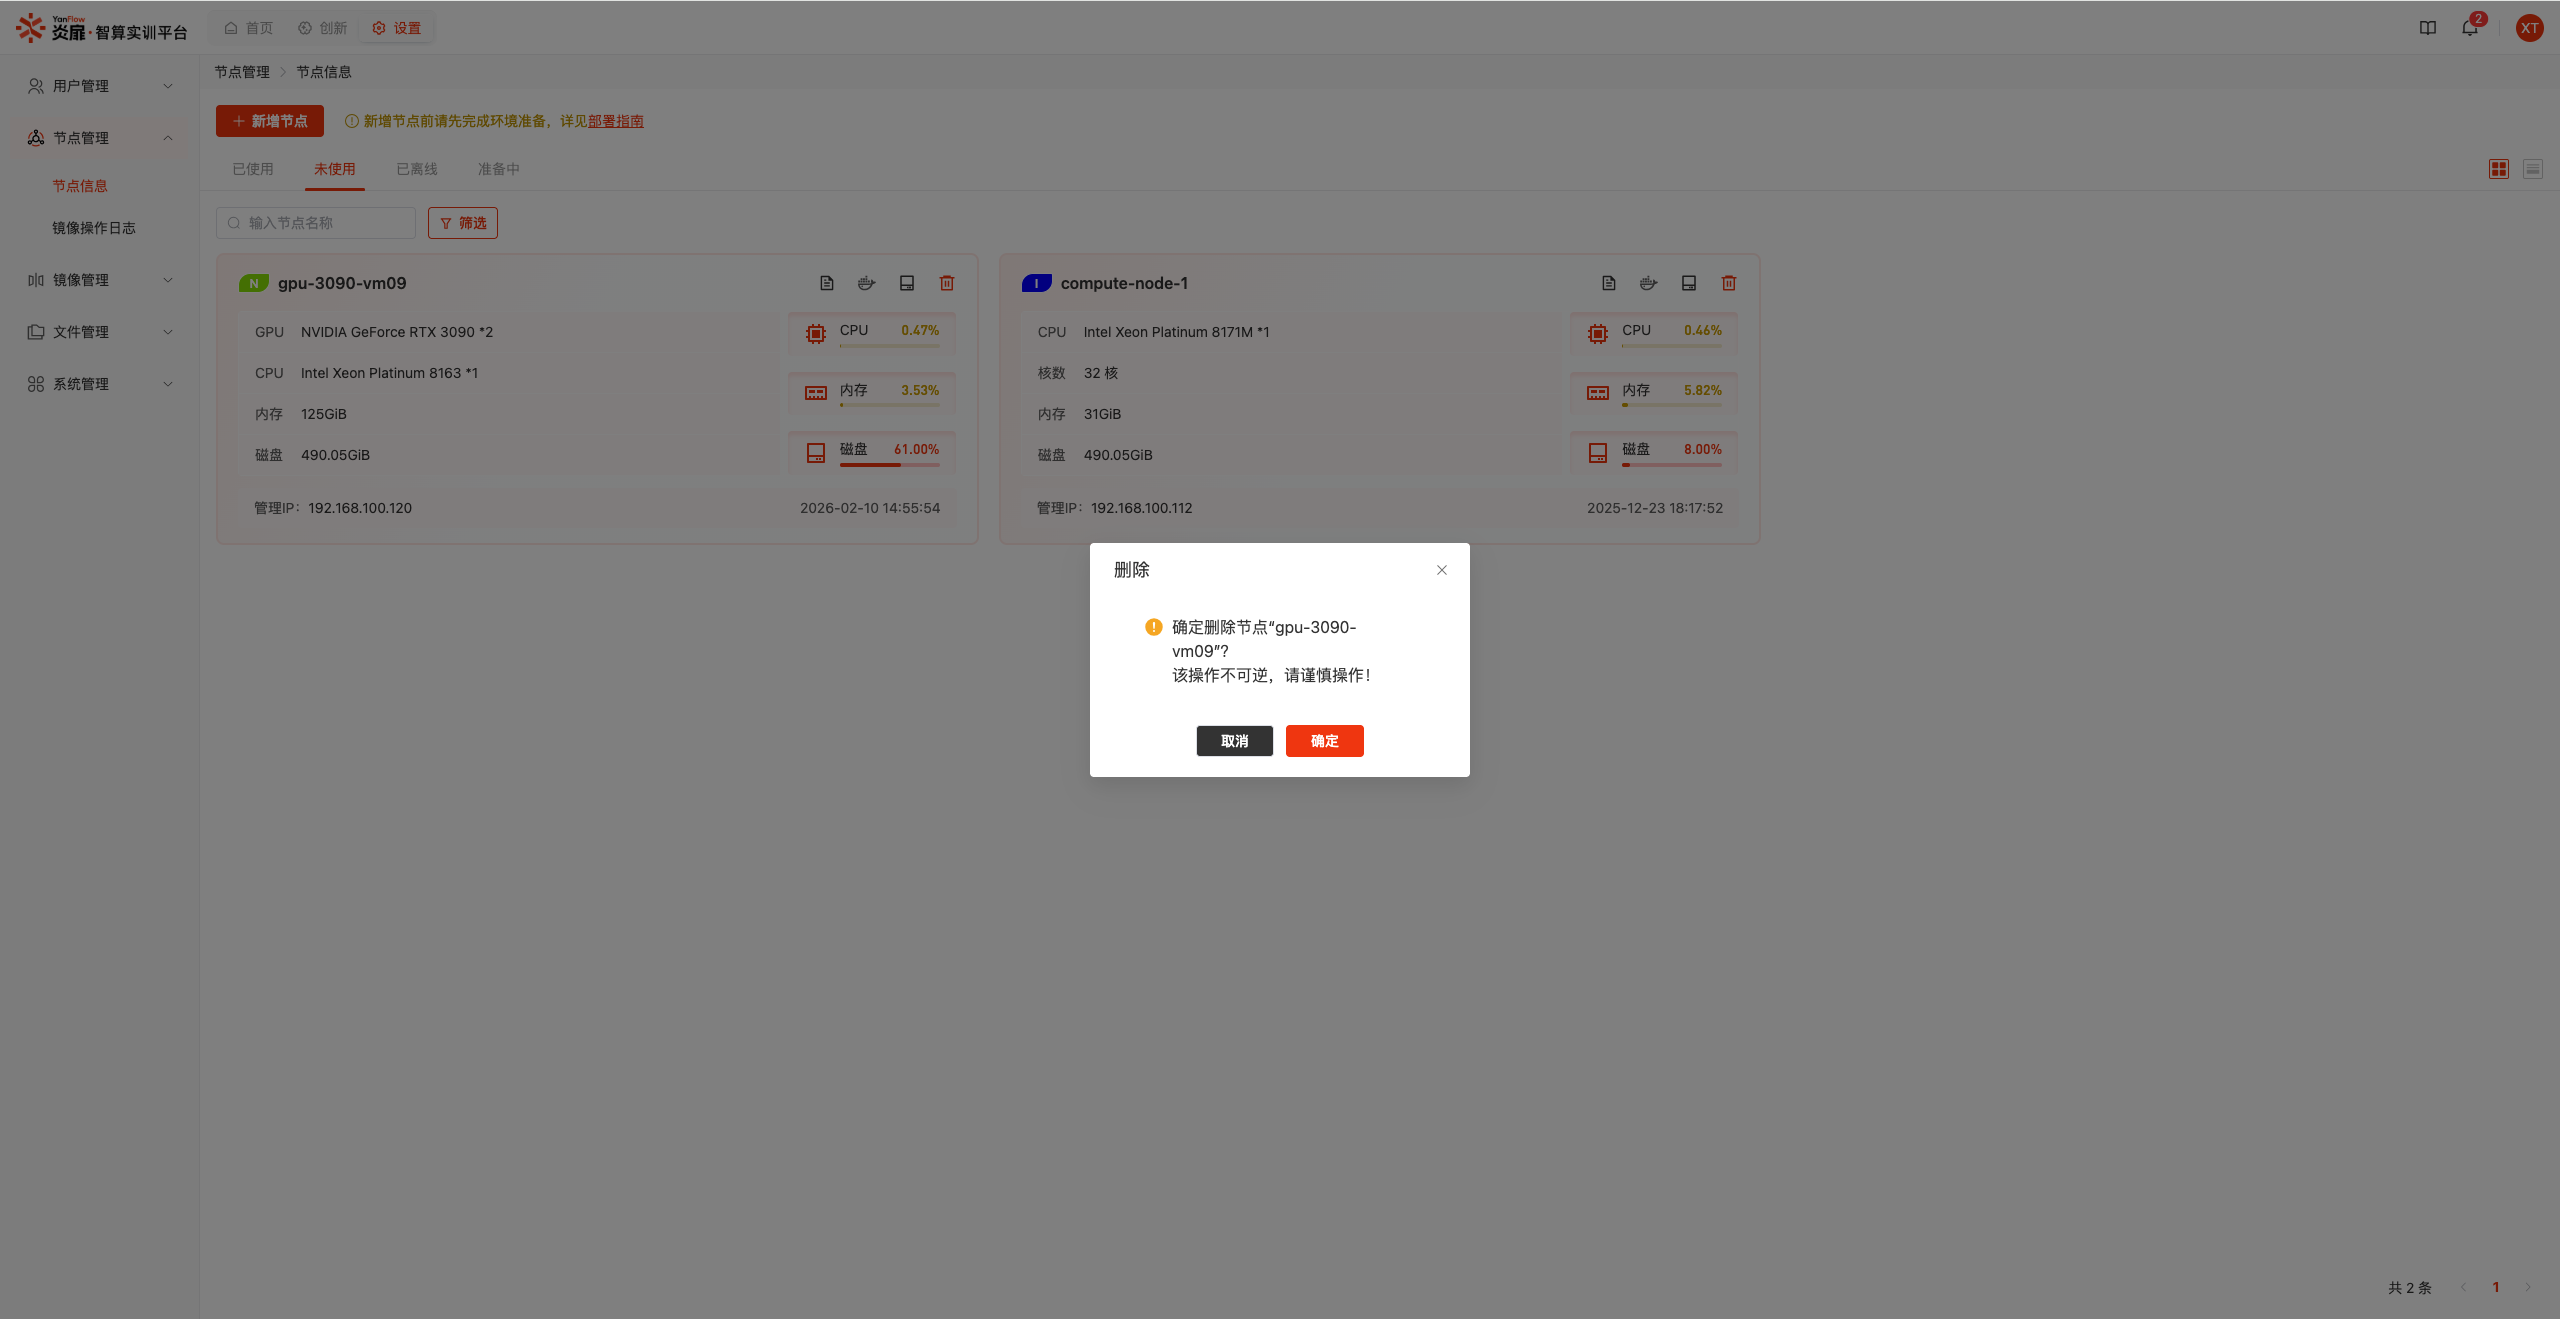
Note: Nodes can only be deleted when they are in
Unusedstatus and have no stored data.
- If the node already has stored data, it cannot be deleted.
- If the node is the last storage node, it cannot be deleted.
Image Operation Logs
Displays image operation logs for all nodes. Supports querying by Operator Name, Operation Type, Operation Status, and Operation Time. Click the Log button to view specific log content.
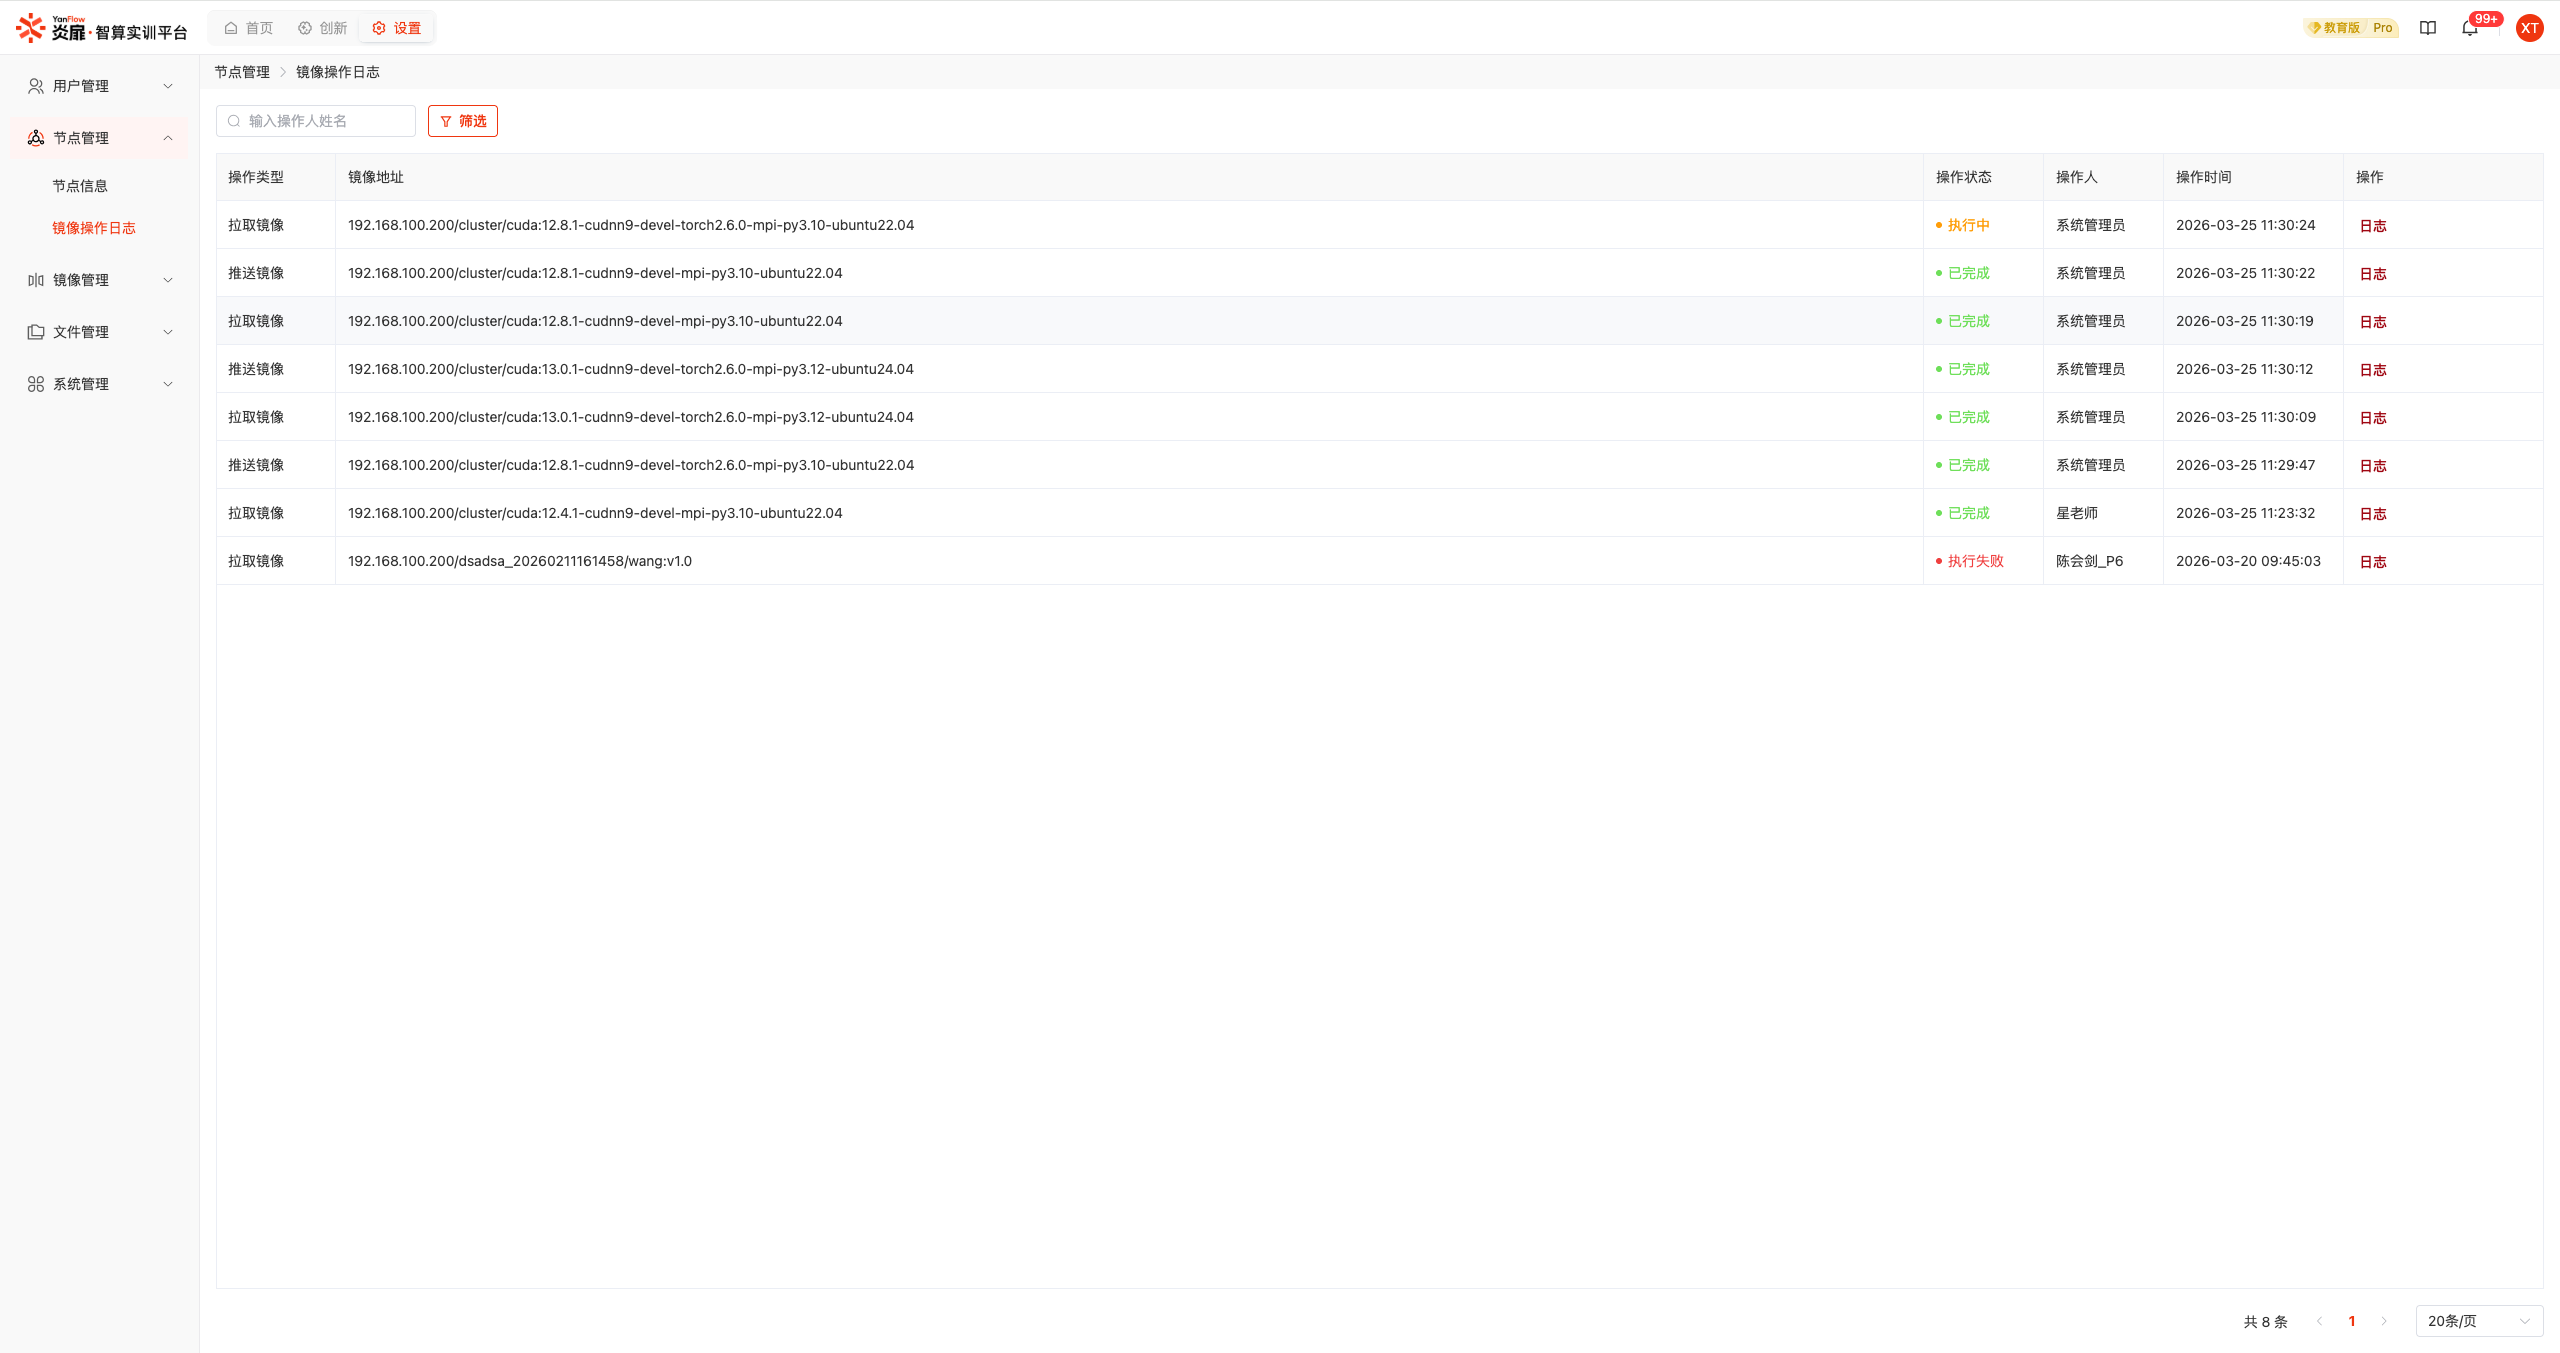
Image Management
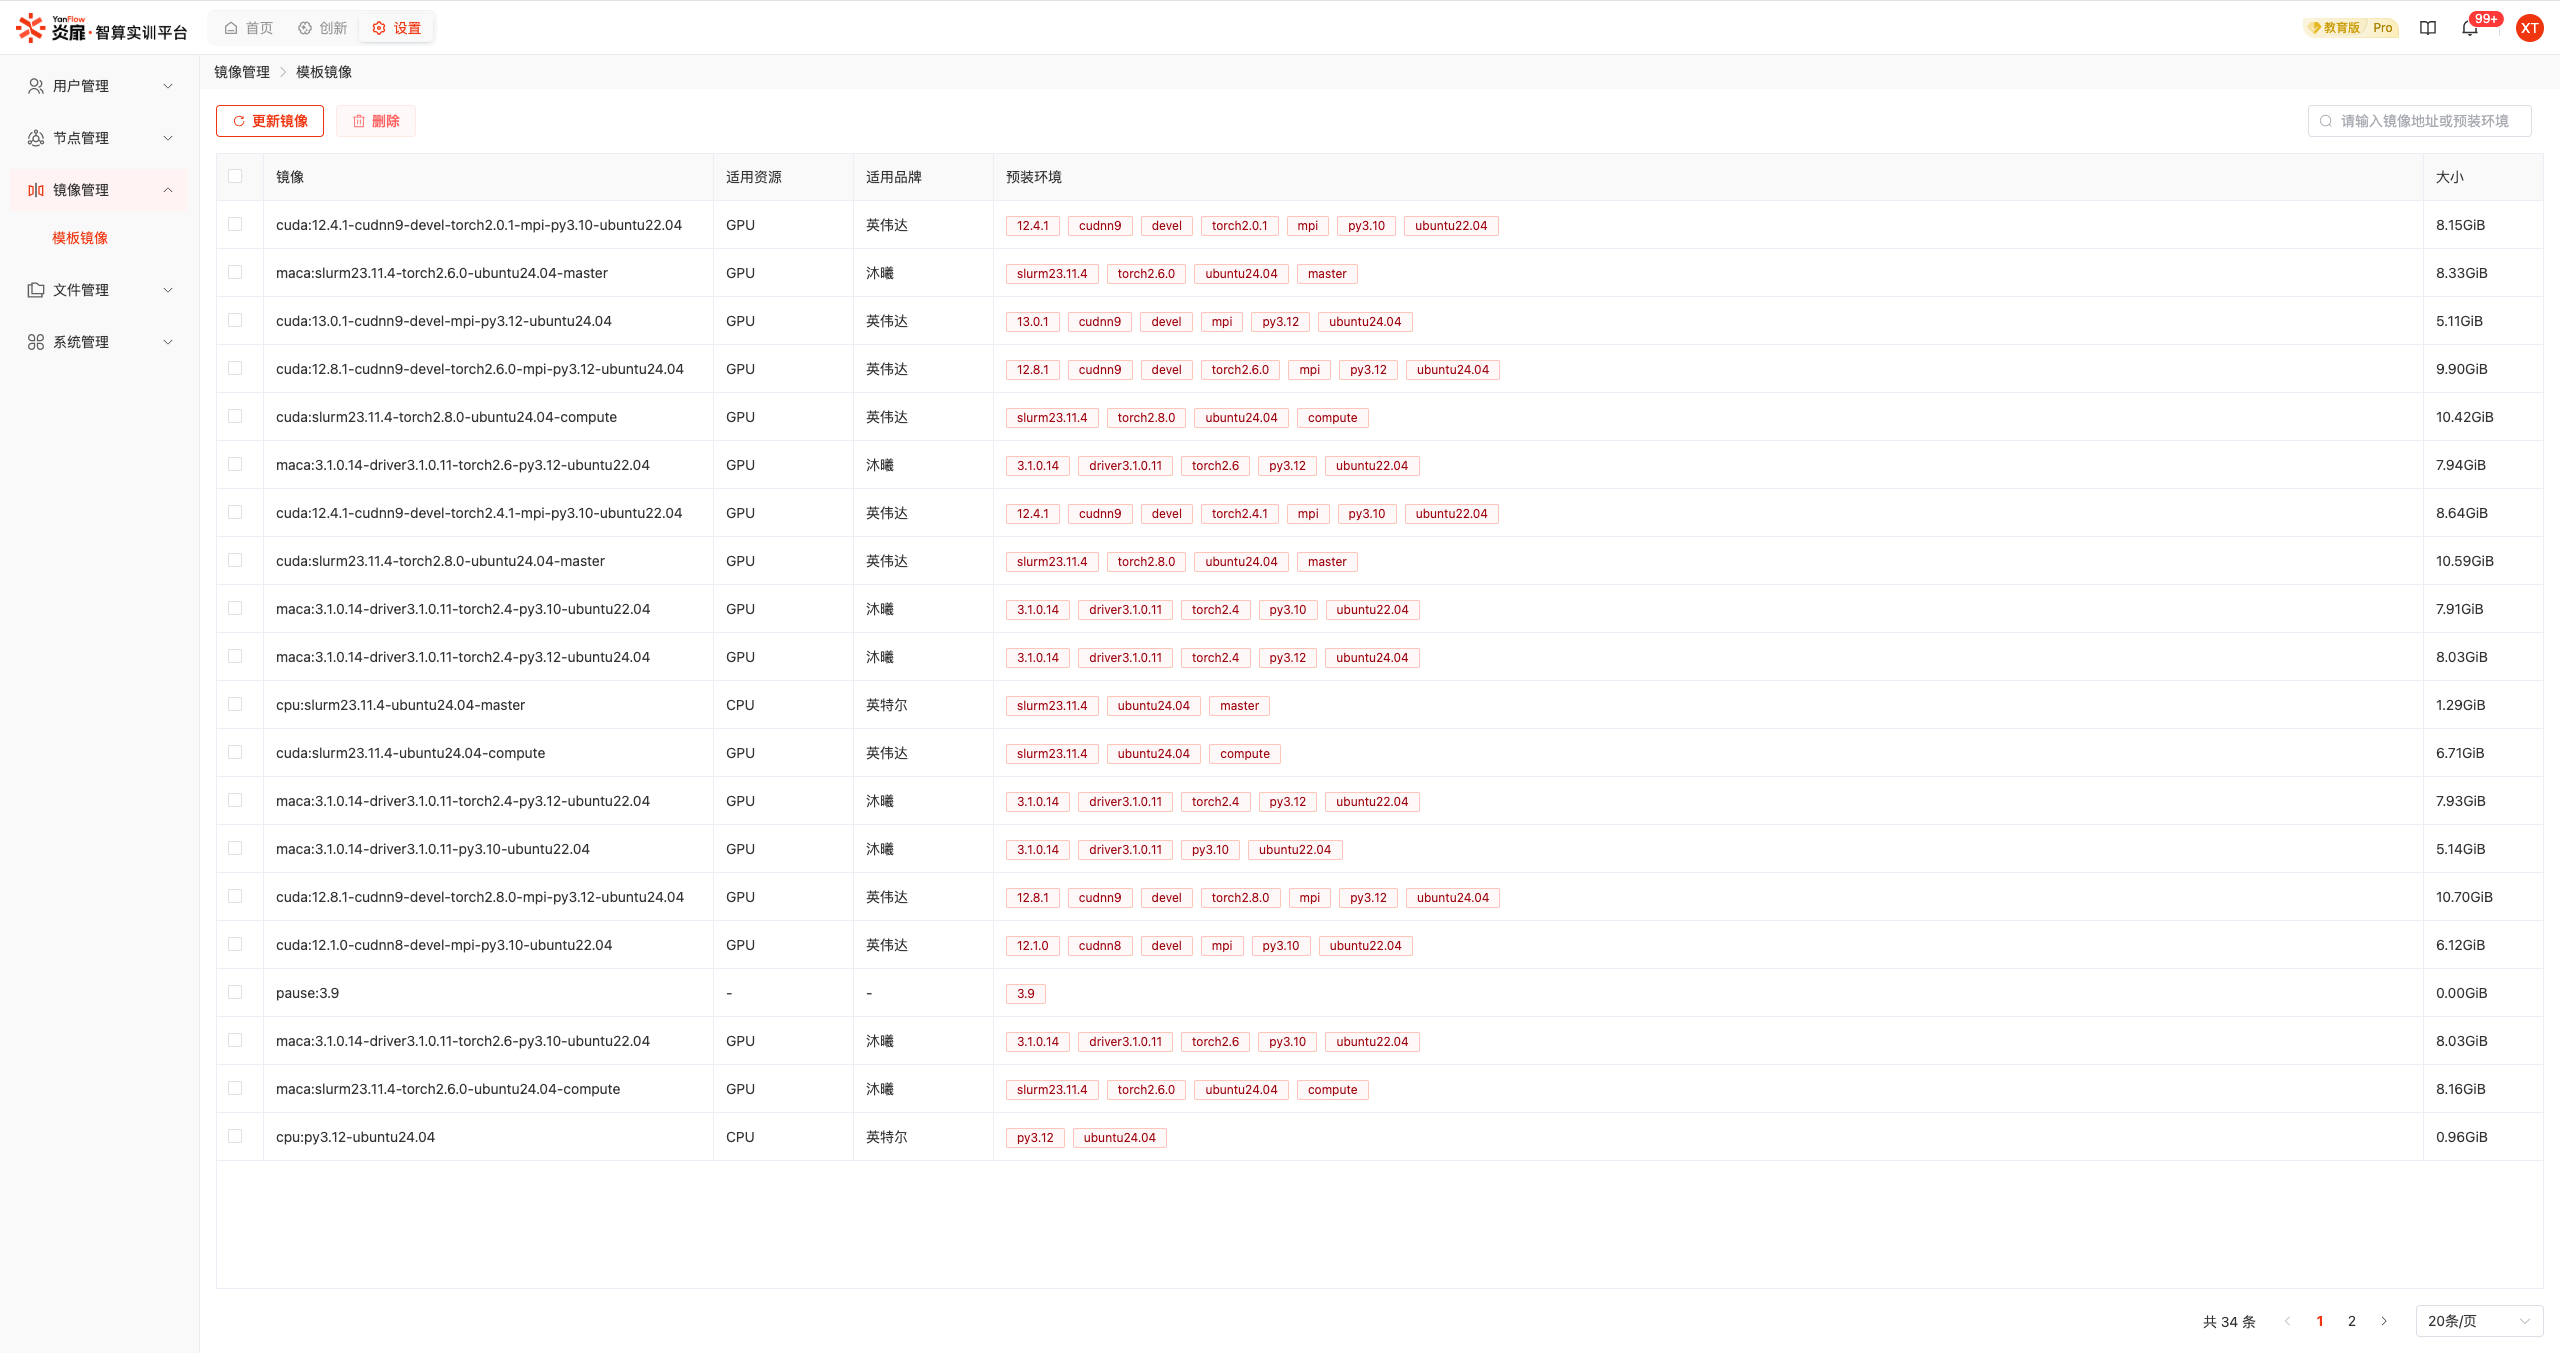
Template Images
Displays template images in the system. Supports keyword search by Image Address and Pre-installed Environment. Click the Update Image button to get the latest template images. Select an image and click the Delete button to delete the image.
File Management
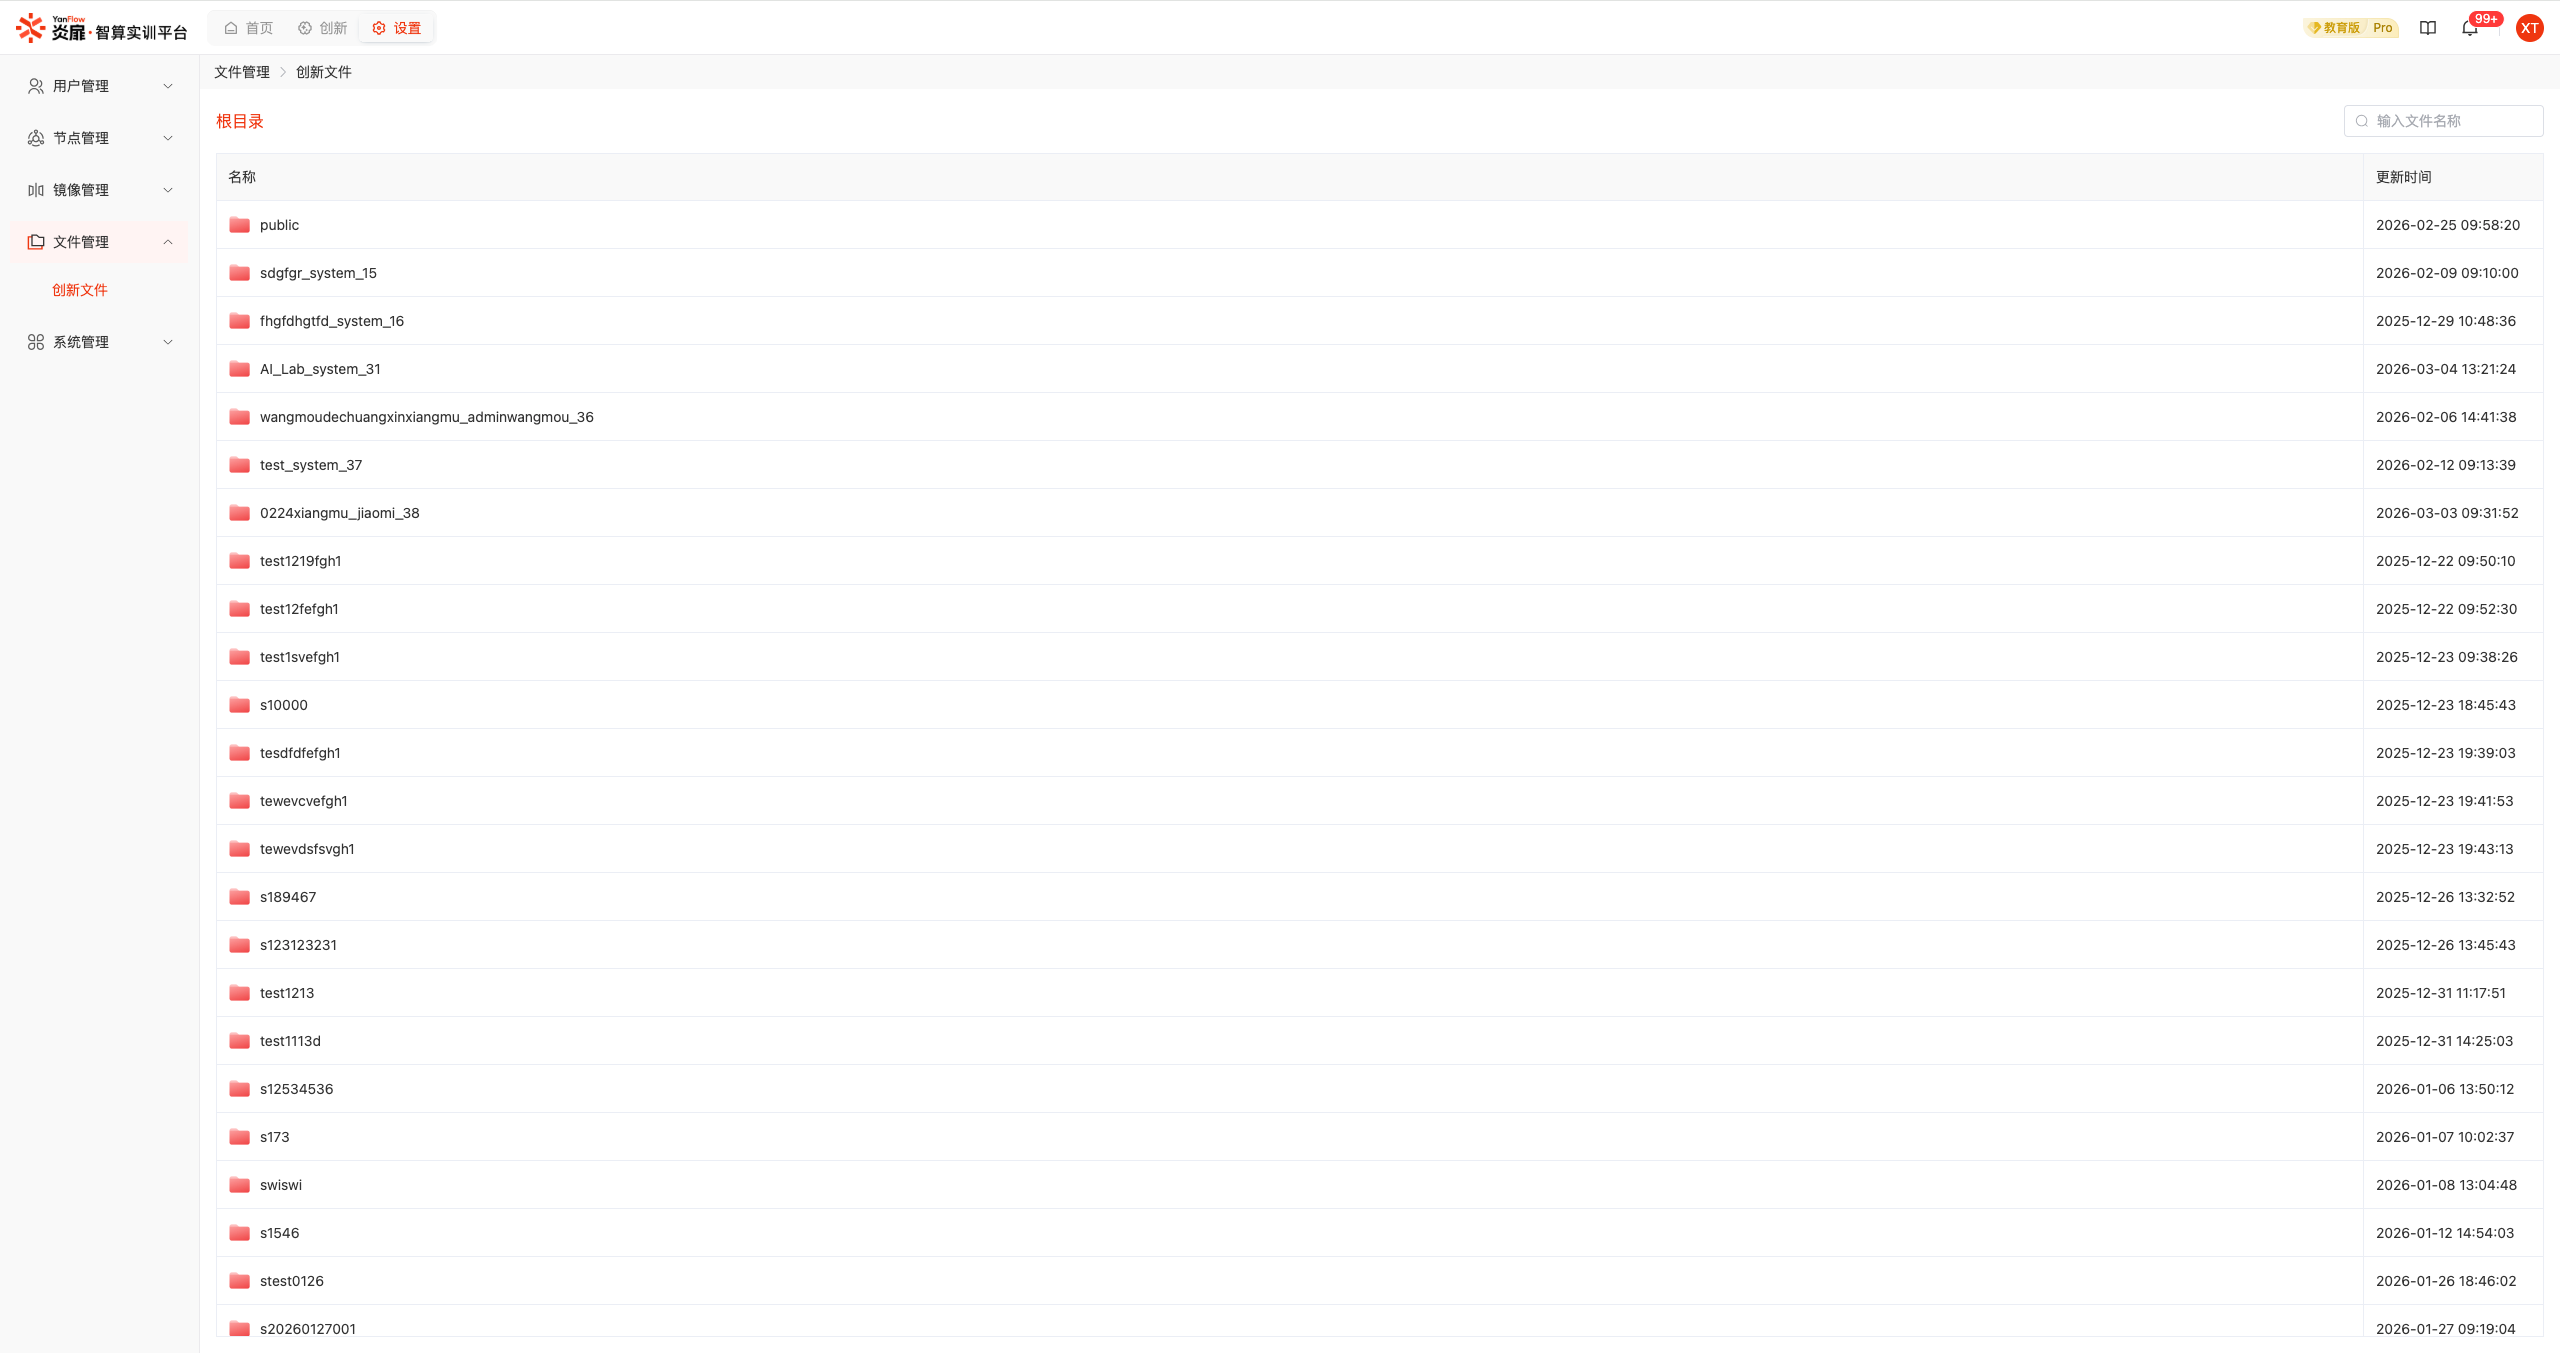
Innovation Files
Displays all files in the innovation platform. Supports keyword search by Folder Name.
Public Folder: System administrators can view and manage all subfolders or files in the public folder, including Create, Copy, Upload, Download, Rename, Move, Extract, Delete, and more.
Project Folder: System administrators can view all project folders and support downloading files within the folders.
User Folder: System administrators can view all innovation members' personal folders and support downloading files within the folders.
System Management
Application Management
Displays all applications in the system. Supports keyword search by Application Name. Applications can be Published, Edited, Downloaded, and Deleted.
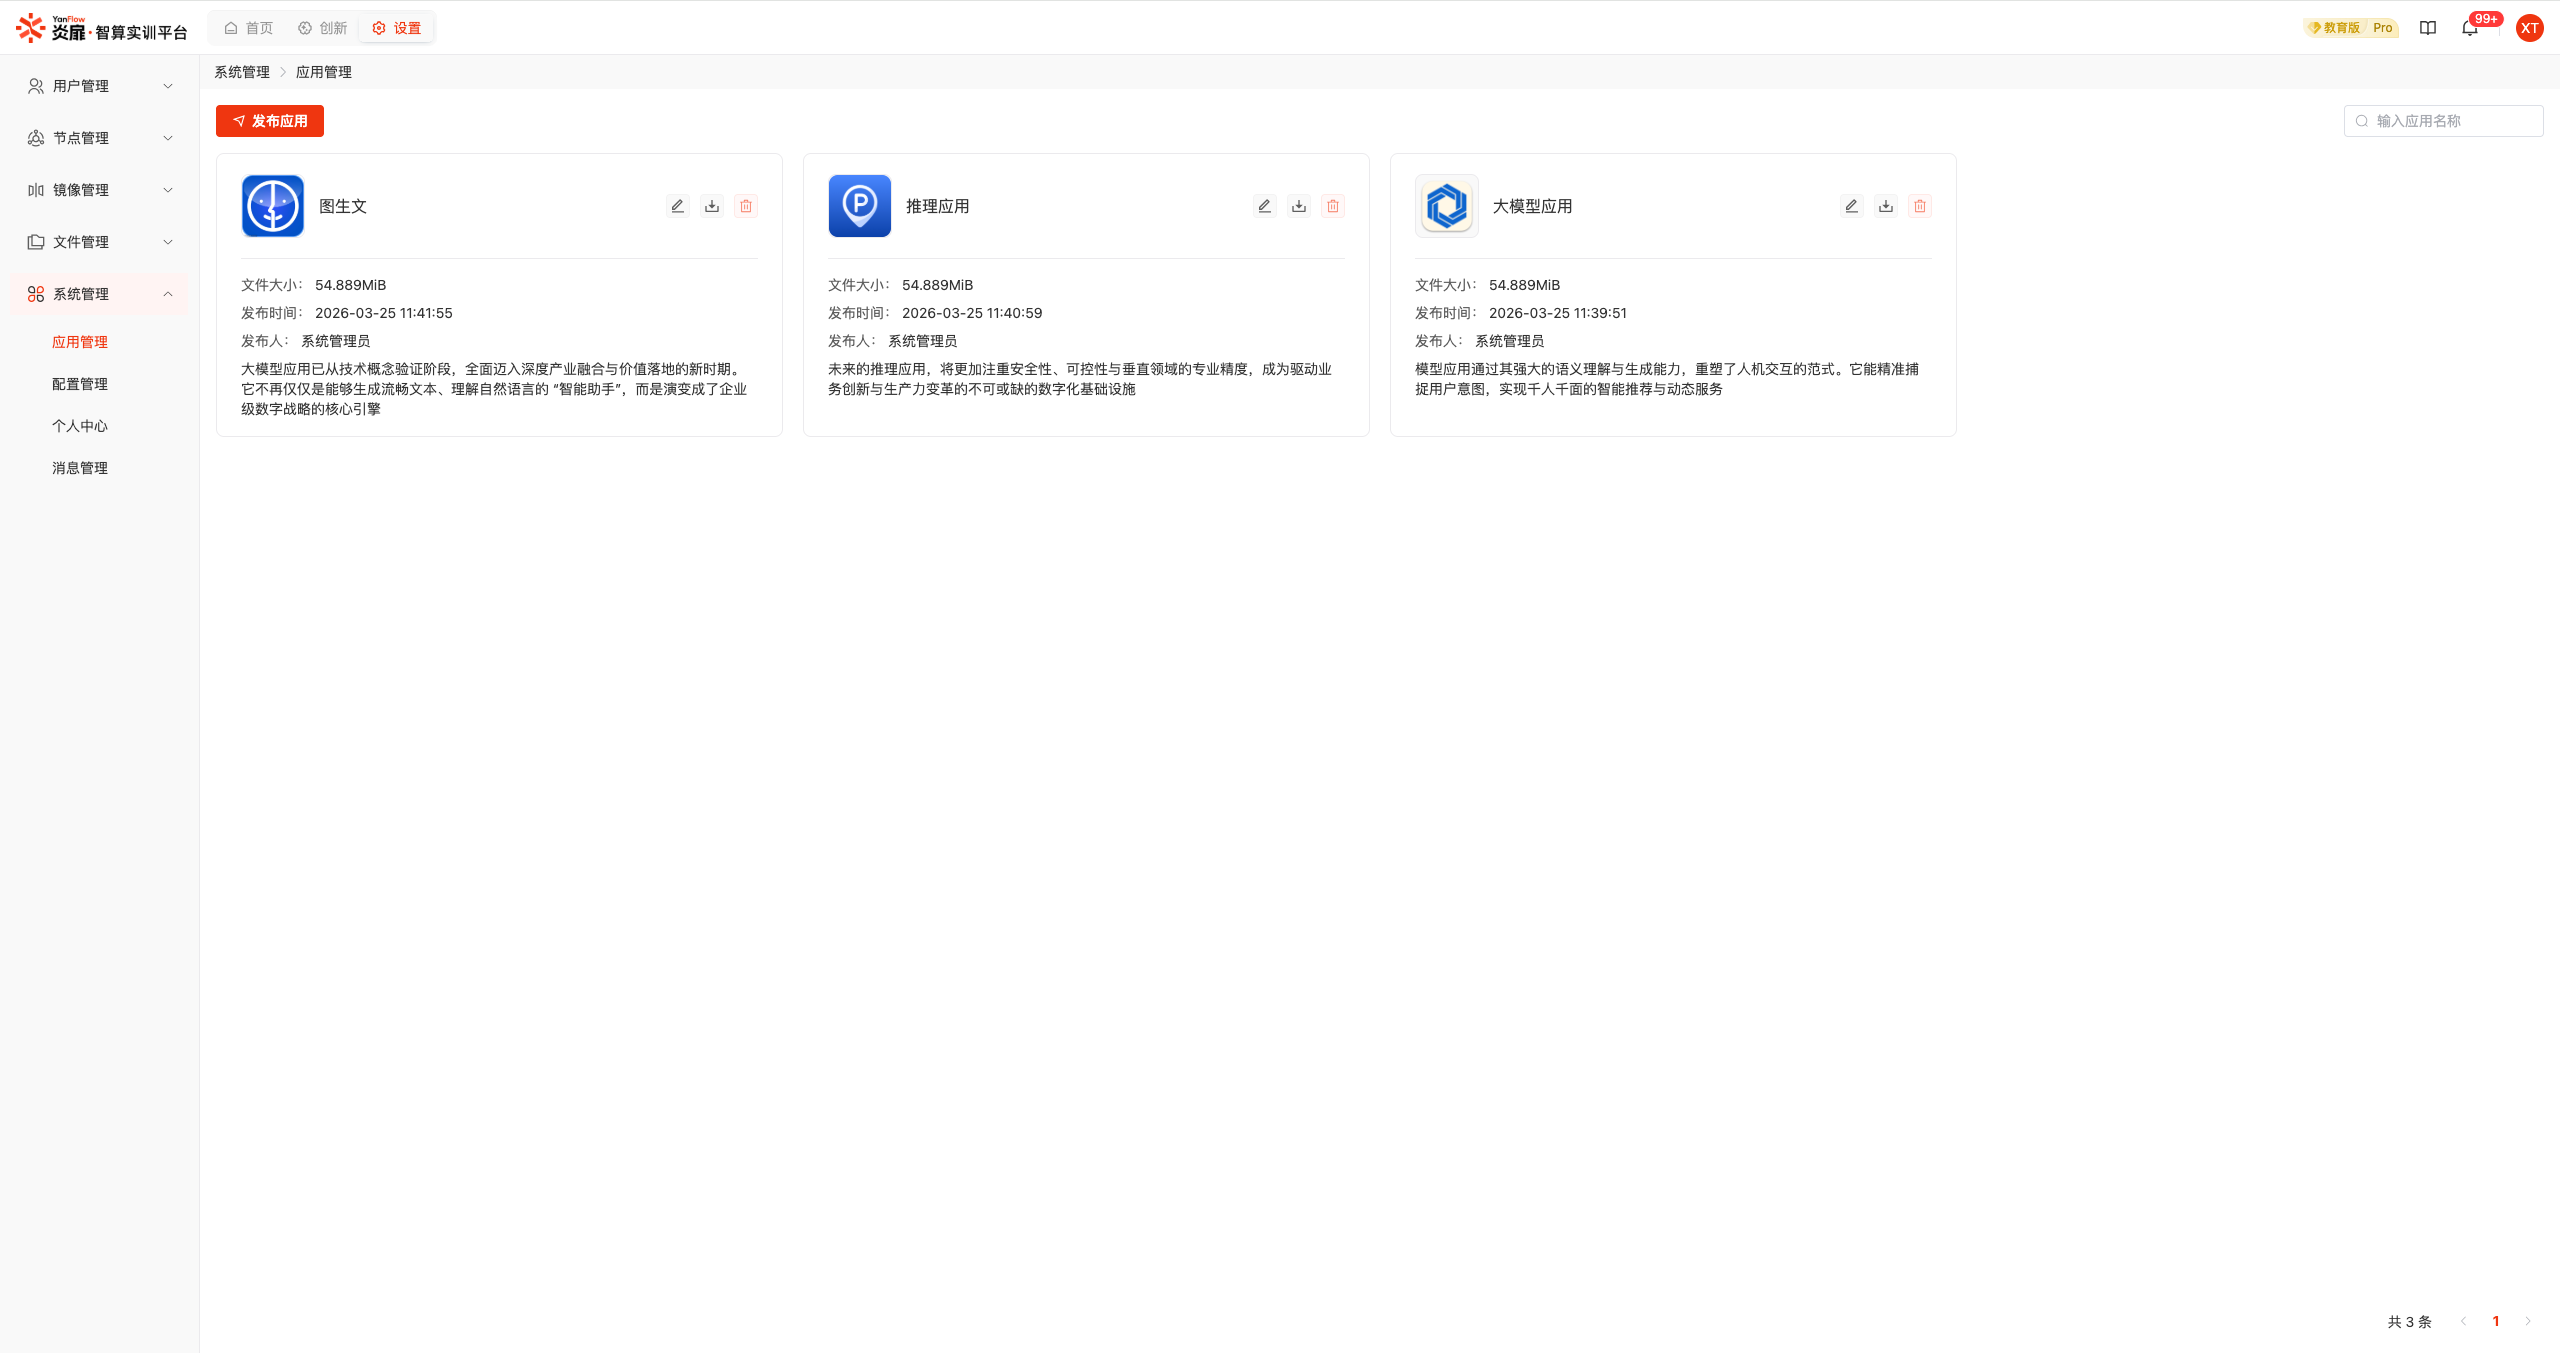
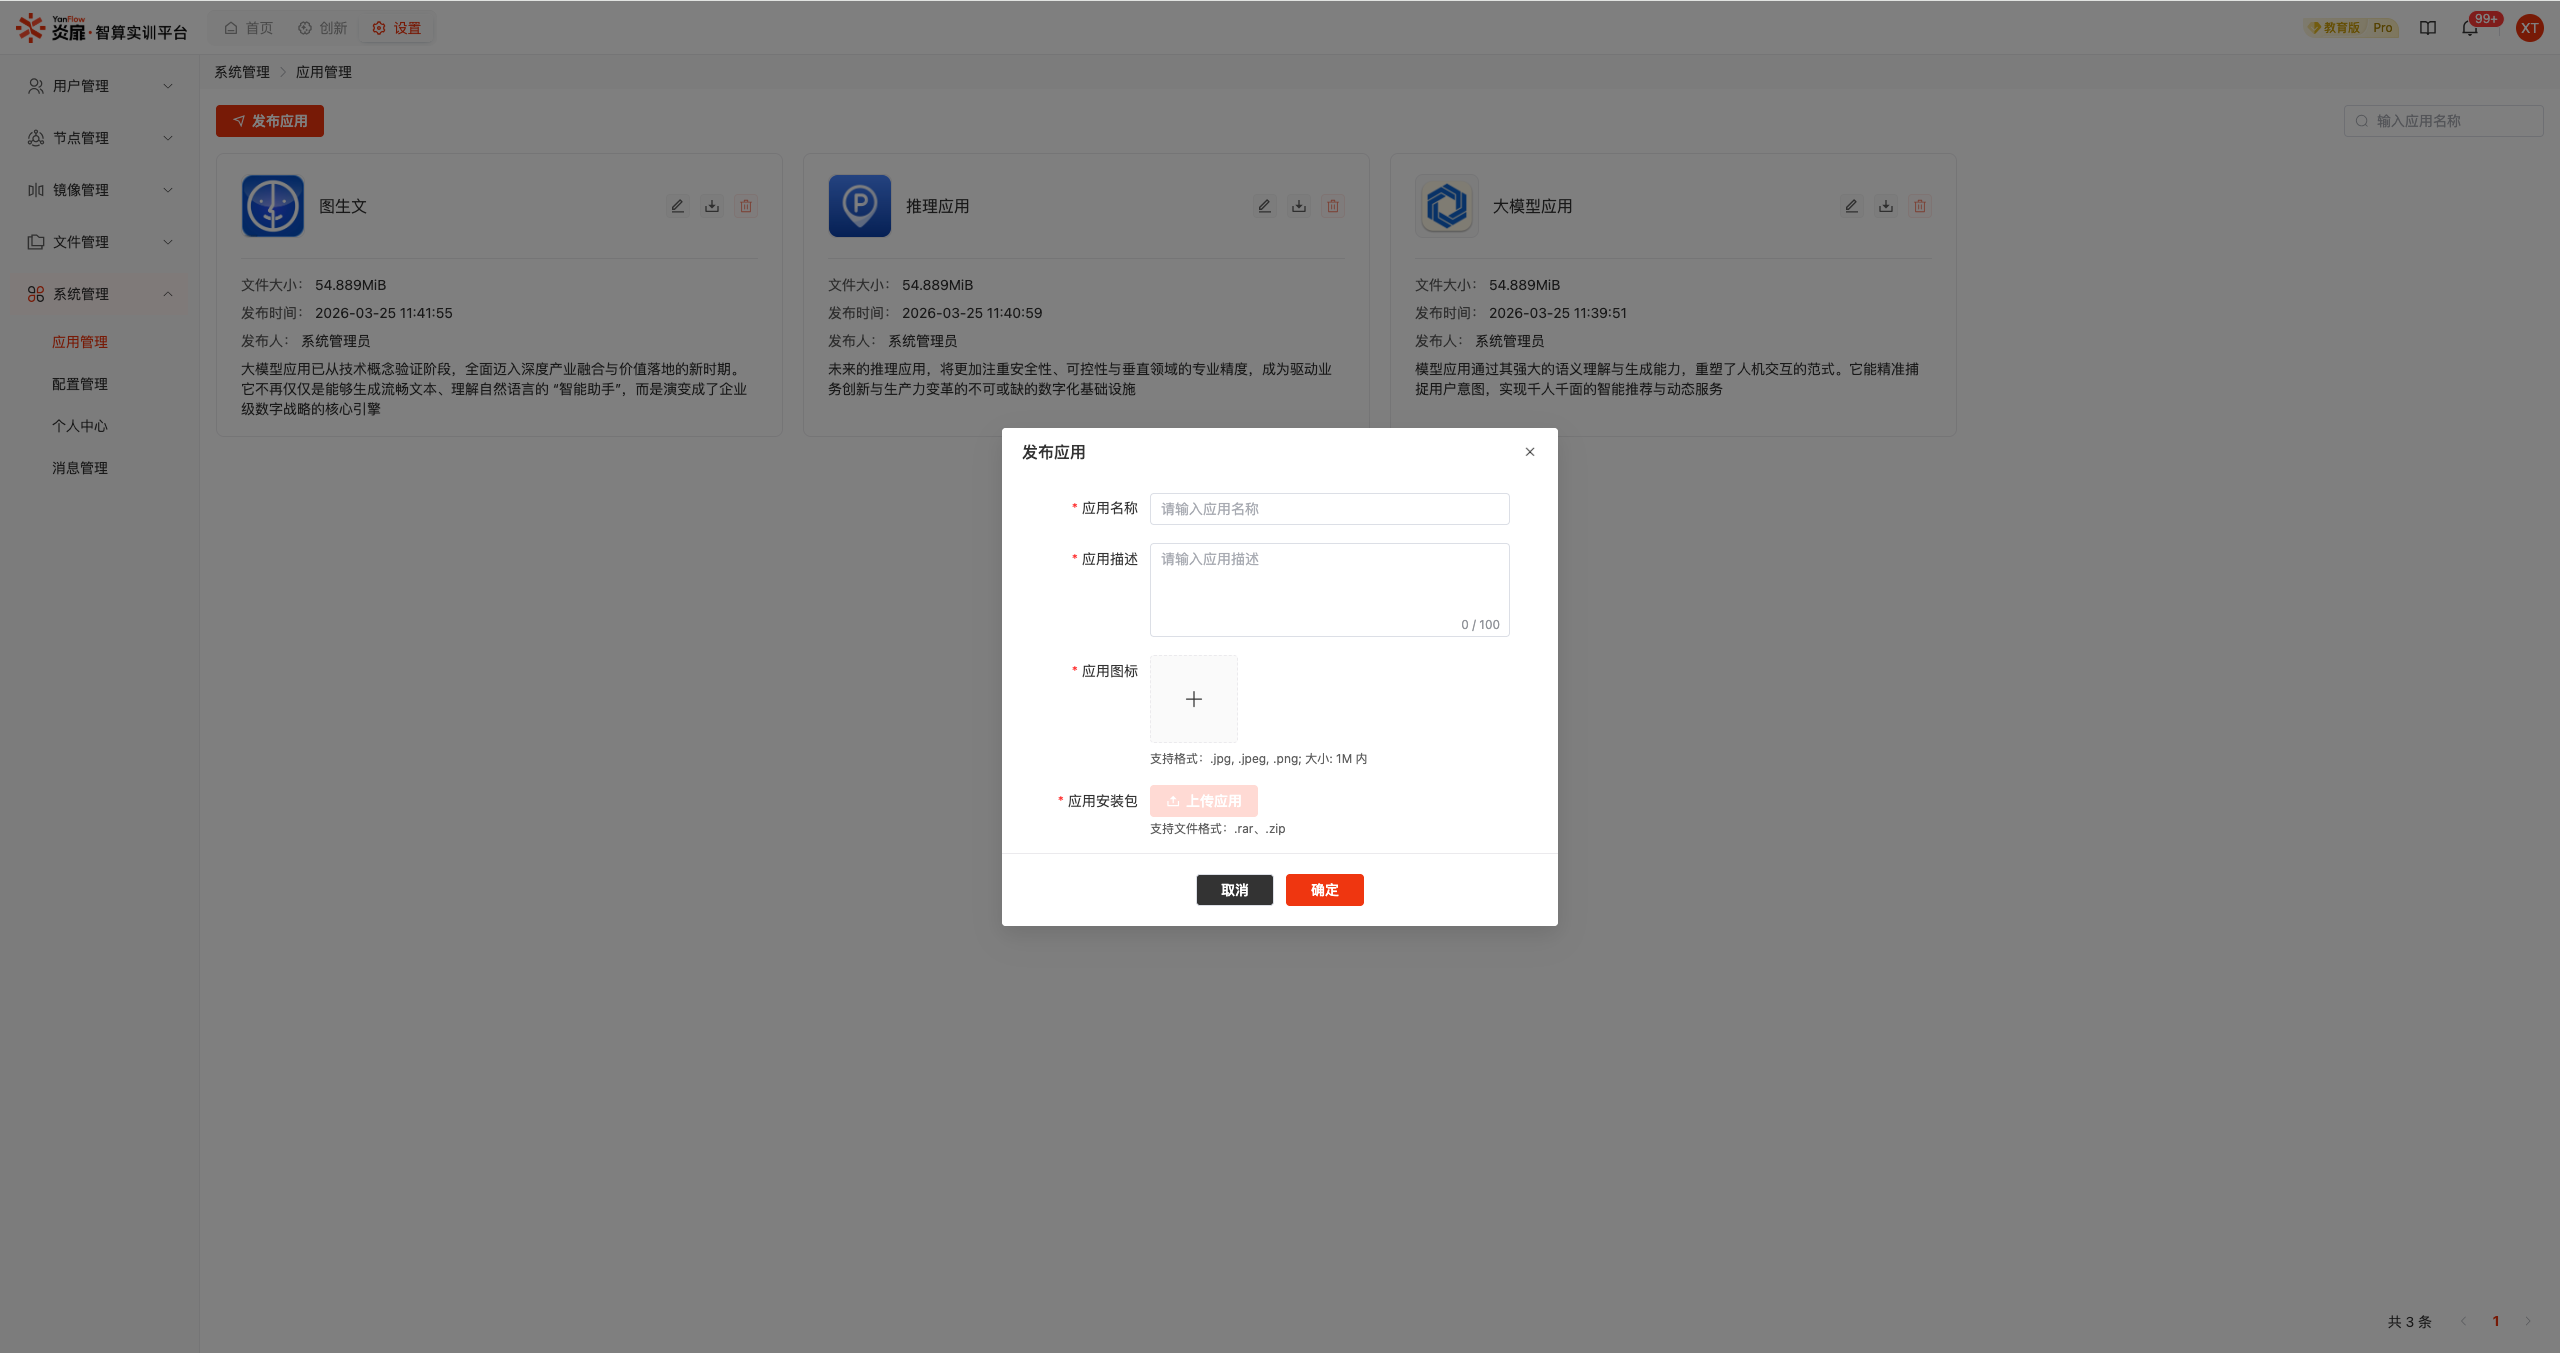
Publish Application: Click the Publish Application button to display the publish dialog. Set relevant information and click the Confirm button to publish a new application after validation.
Edit Application: Click the Edit Application button to display the edit dialog. Modify the information that needs to be changed and click the Confirm button to update application information.
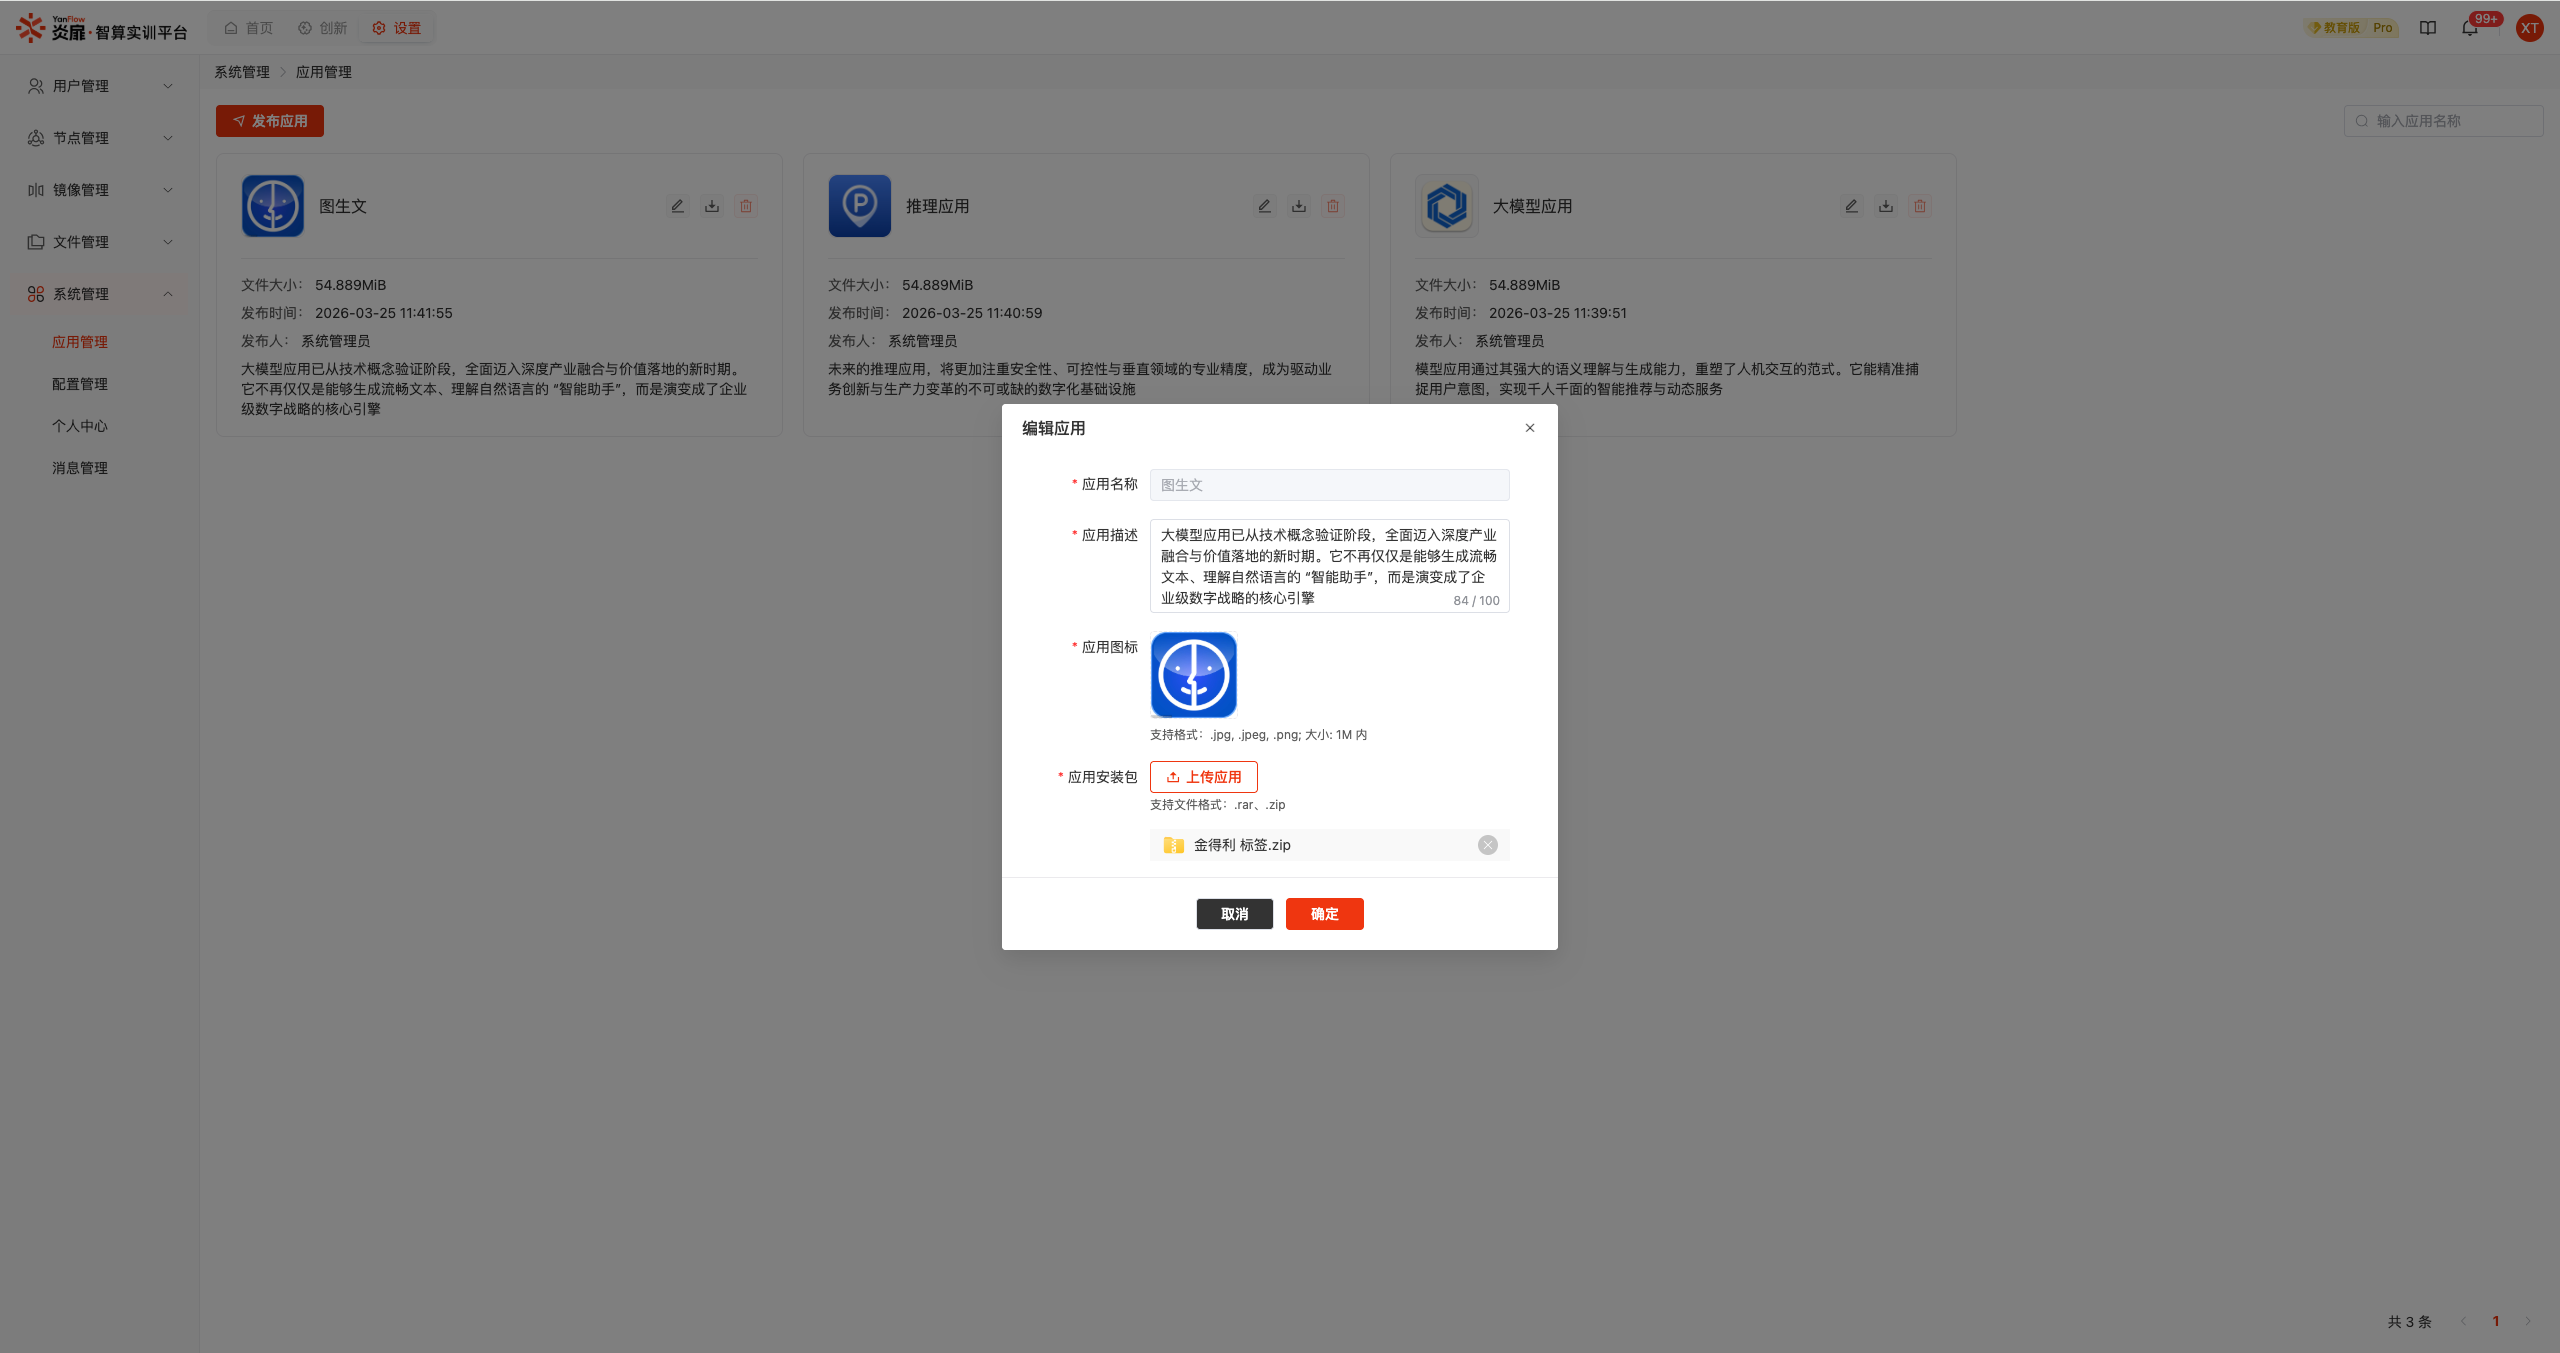
Note: When editing an application, the application name cannot be modified.
Configuration Management
Academic Calendar Settings
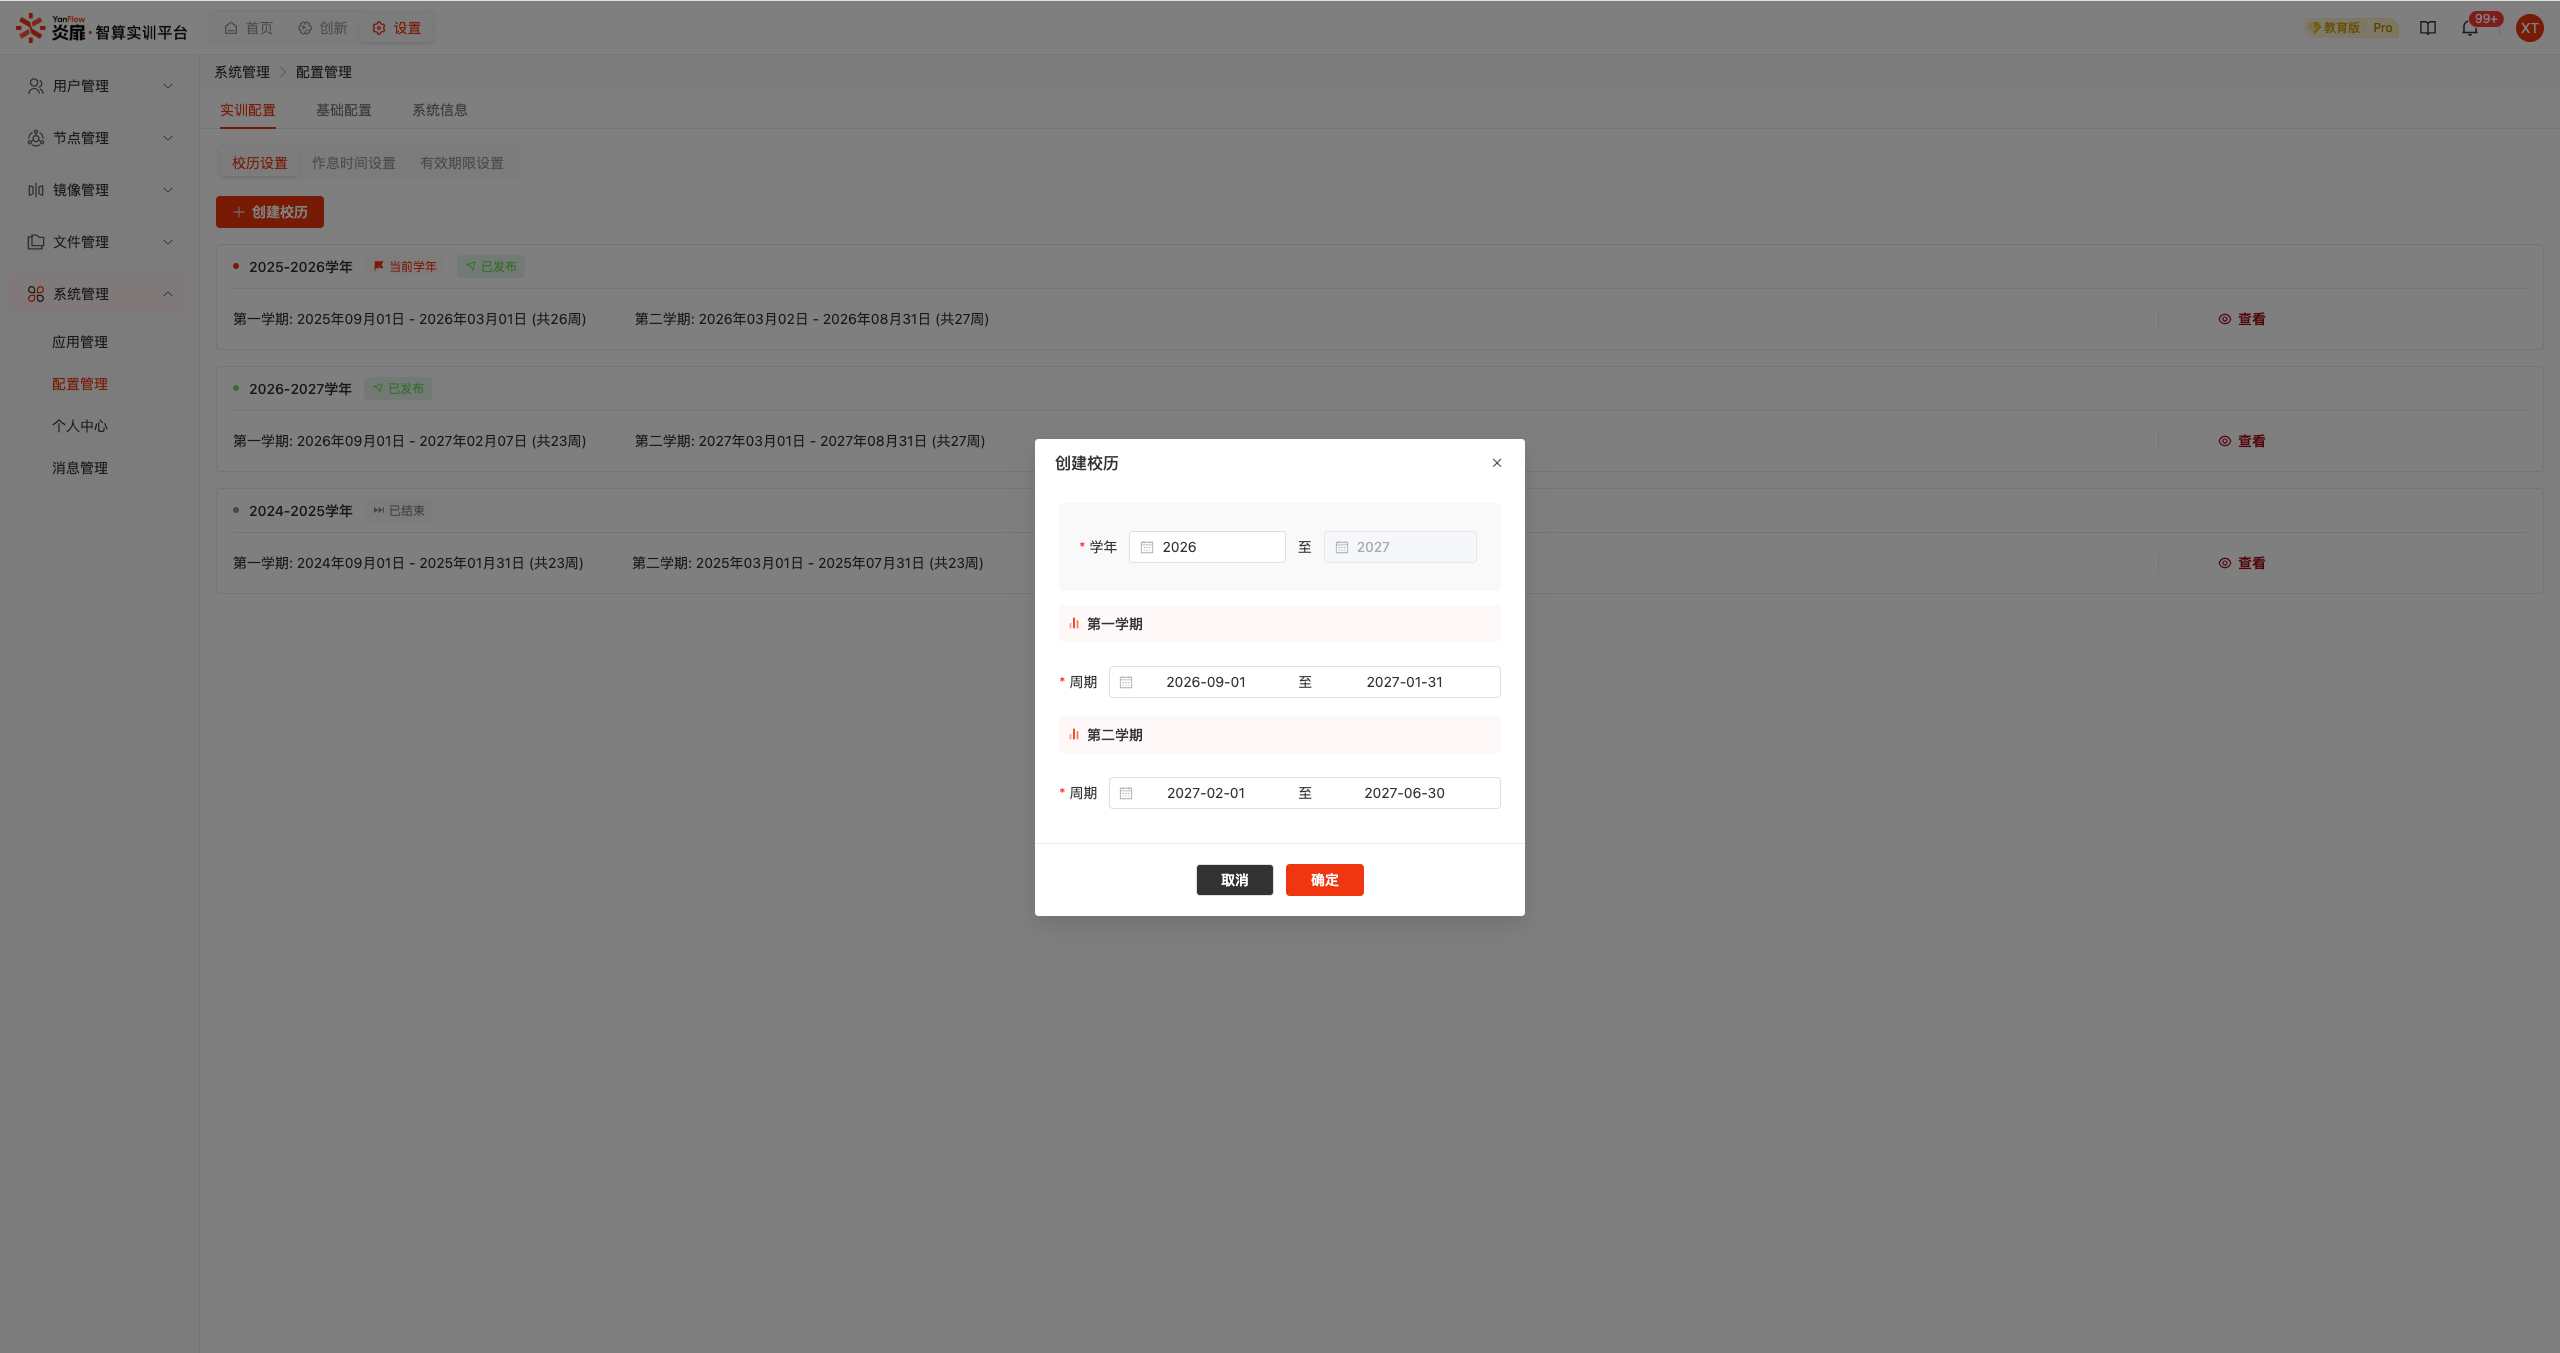
Create Academic Calendar: Click the Create Academic Calendar button to display the create dialog. Set the academic year and semester period, and click the Confirm button to create a new academic calendar after validation.
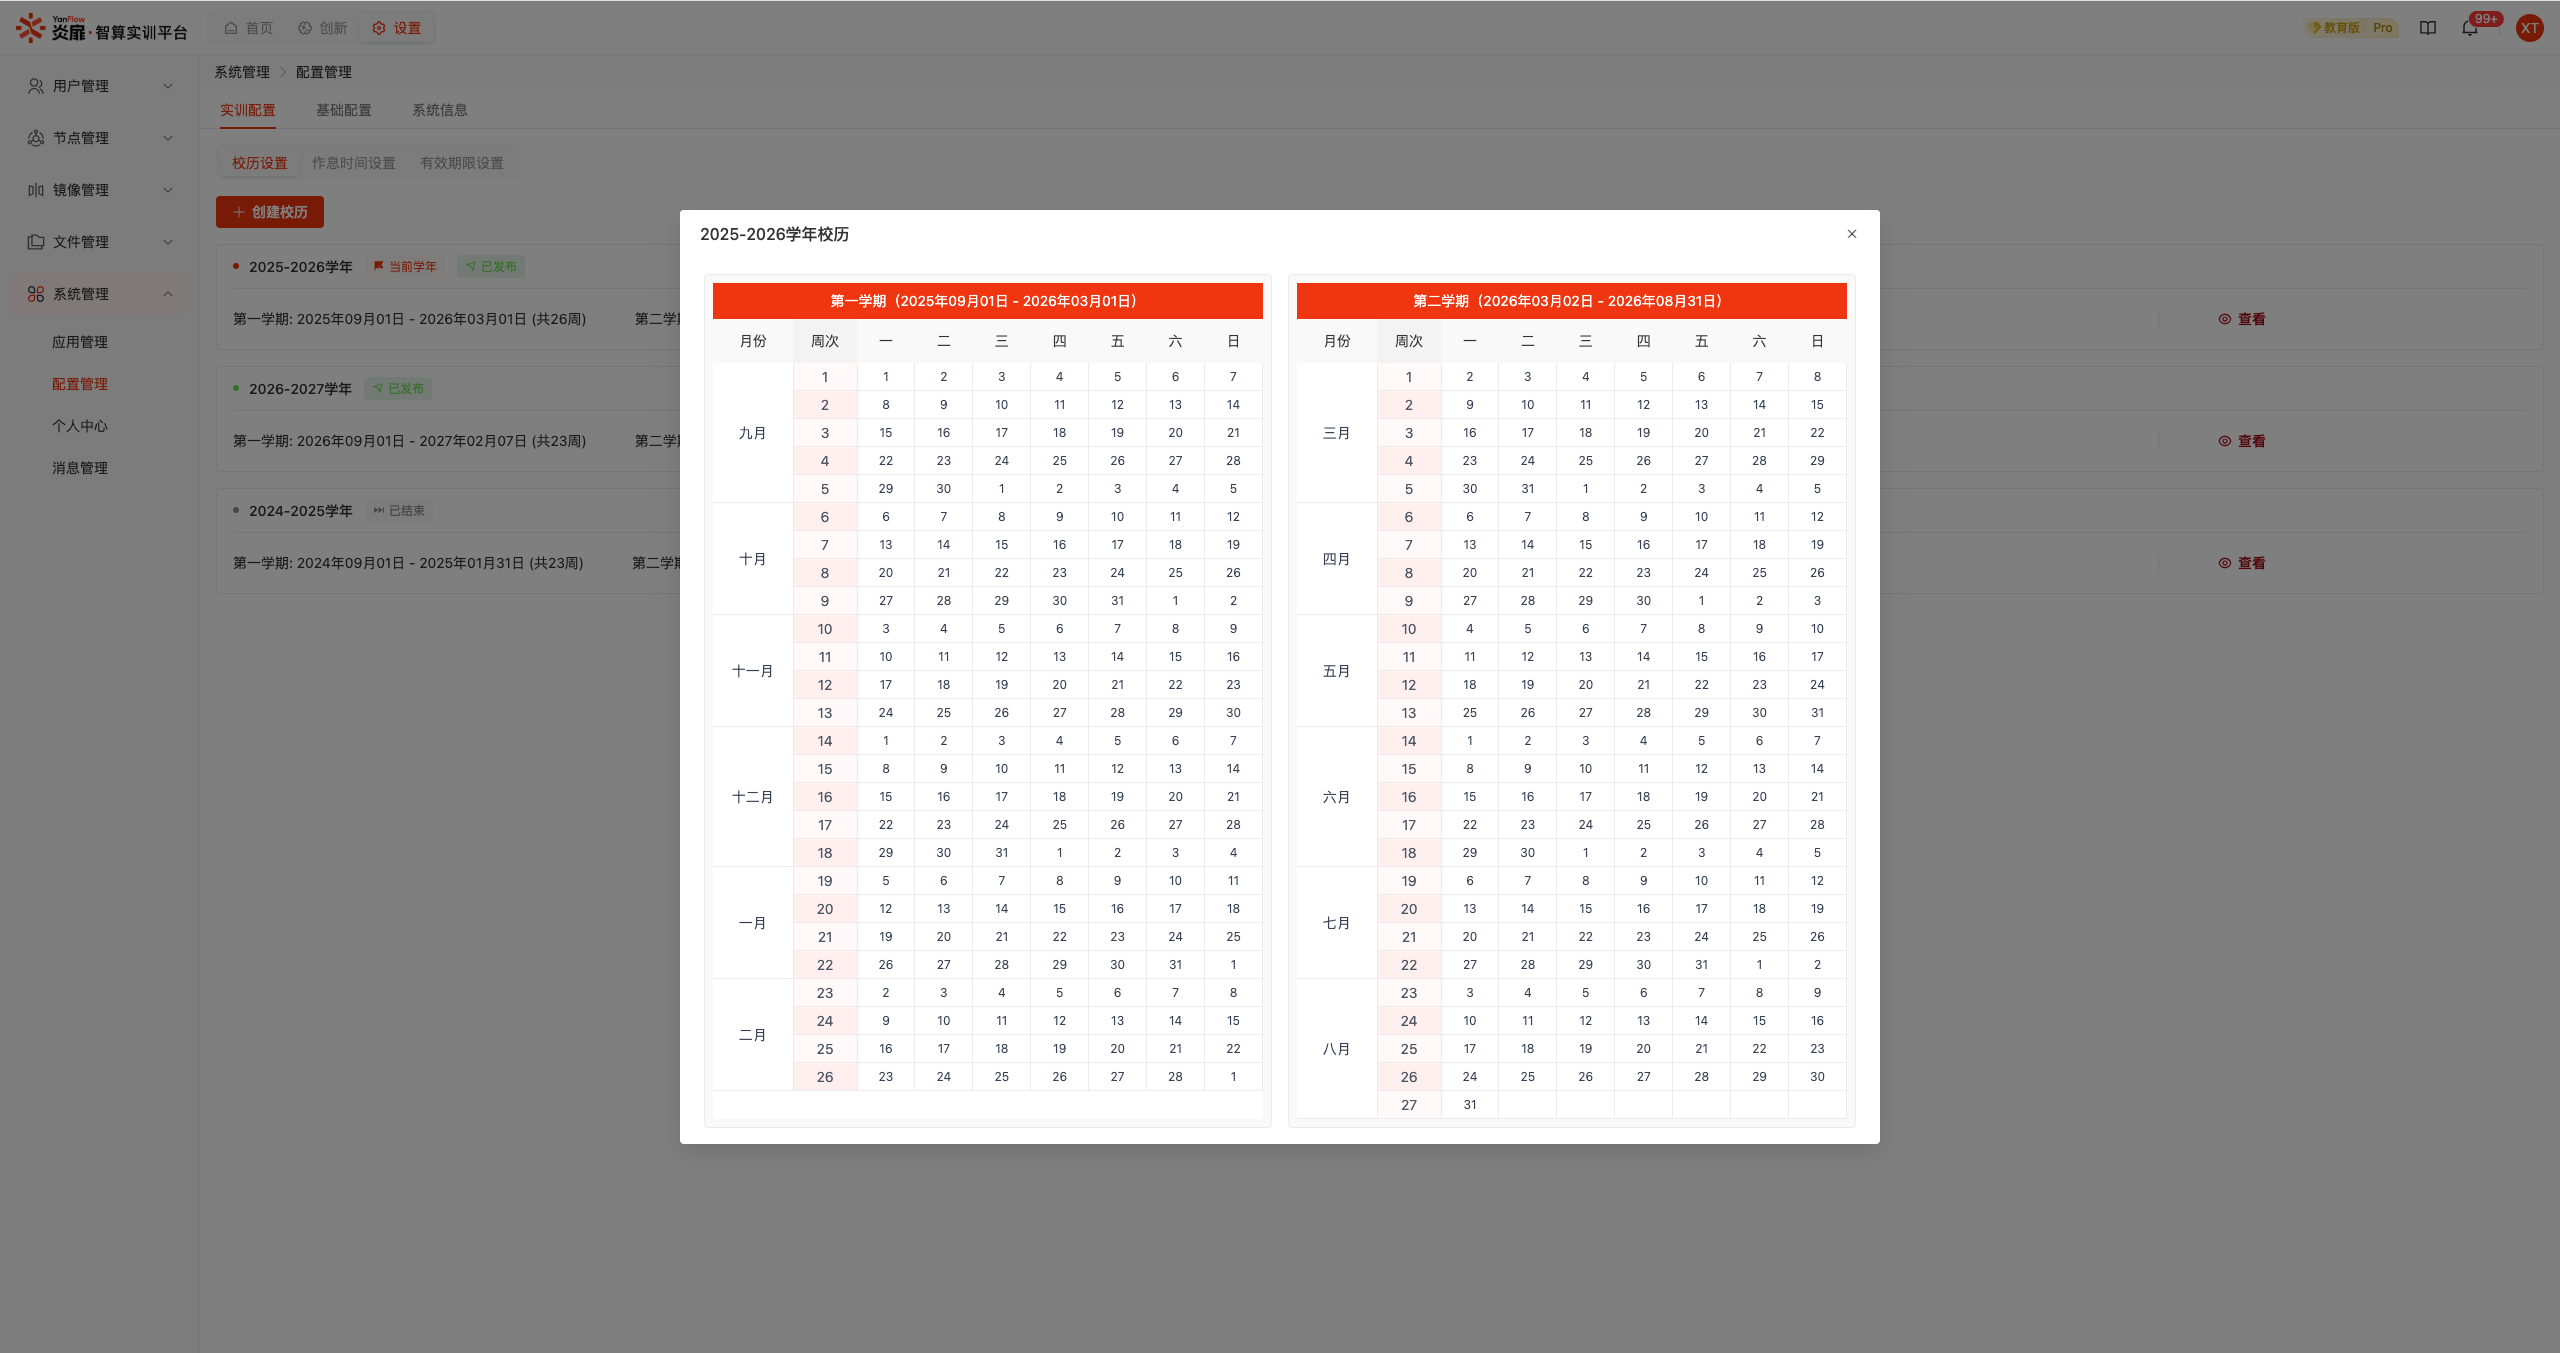
View Academic Calendar: Click the View button to preview the academic calendar.
Edit Academic Calendar: Click the Edit button to display the edit dialog. Modify the information that needs to be changed and click the Confirm button to update academic calendar information.
Delete Academic Calendar: Click the Delete button to display a confirmation dialog. Click the Confirm button to delete.
Publish Academic Calendar: Click the Publish button to display a confirmation dialog. Click the Confirm button to publish.
Note:
- Academic calendars in Draft status support editing and deletion; after publishing, only viewing is supported.
- When creating training courses, teaching courses can be created based on Published academic calendars.
Schedule Settings
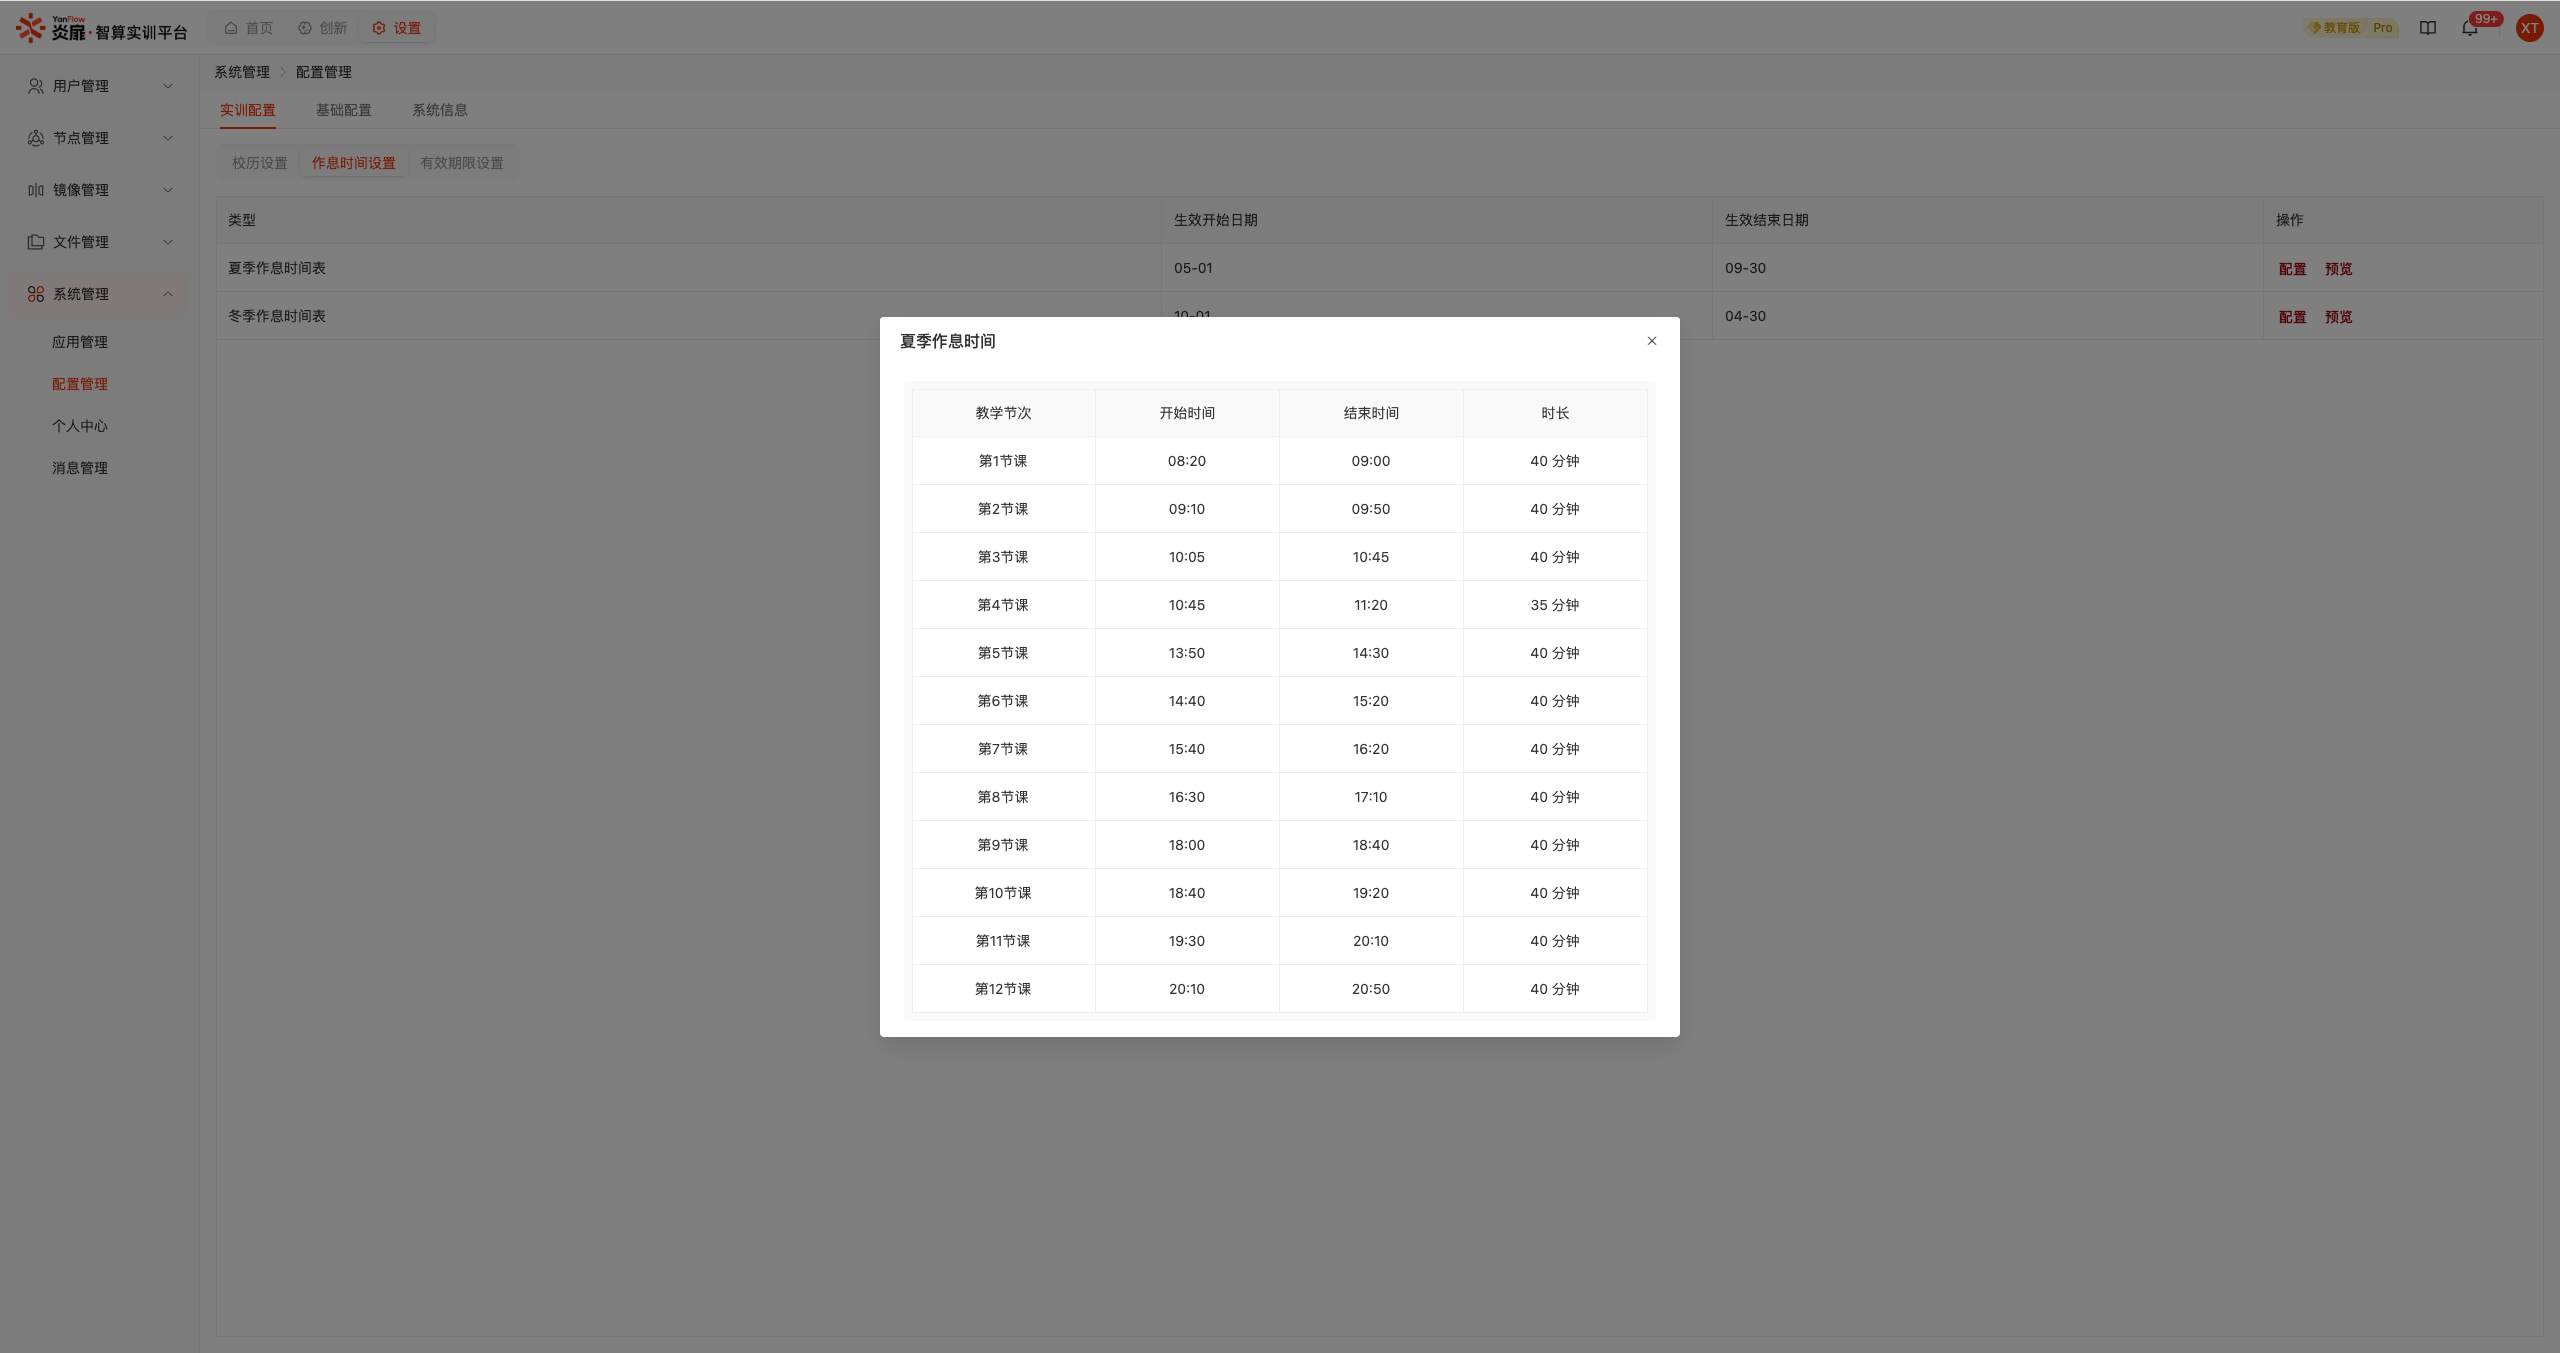
Configure Schedule: Click the Configure button to set the effective period and class start/end times for each class for winter/summer schedules separately. After confirmation, the schedule configuration will be completed.
Preview Schedule: Click the Preview button to view the schedule.
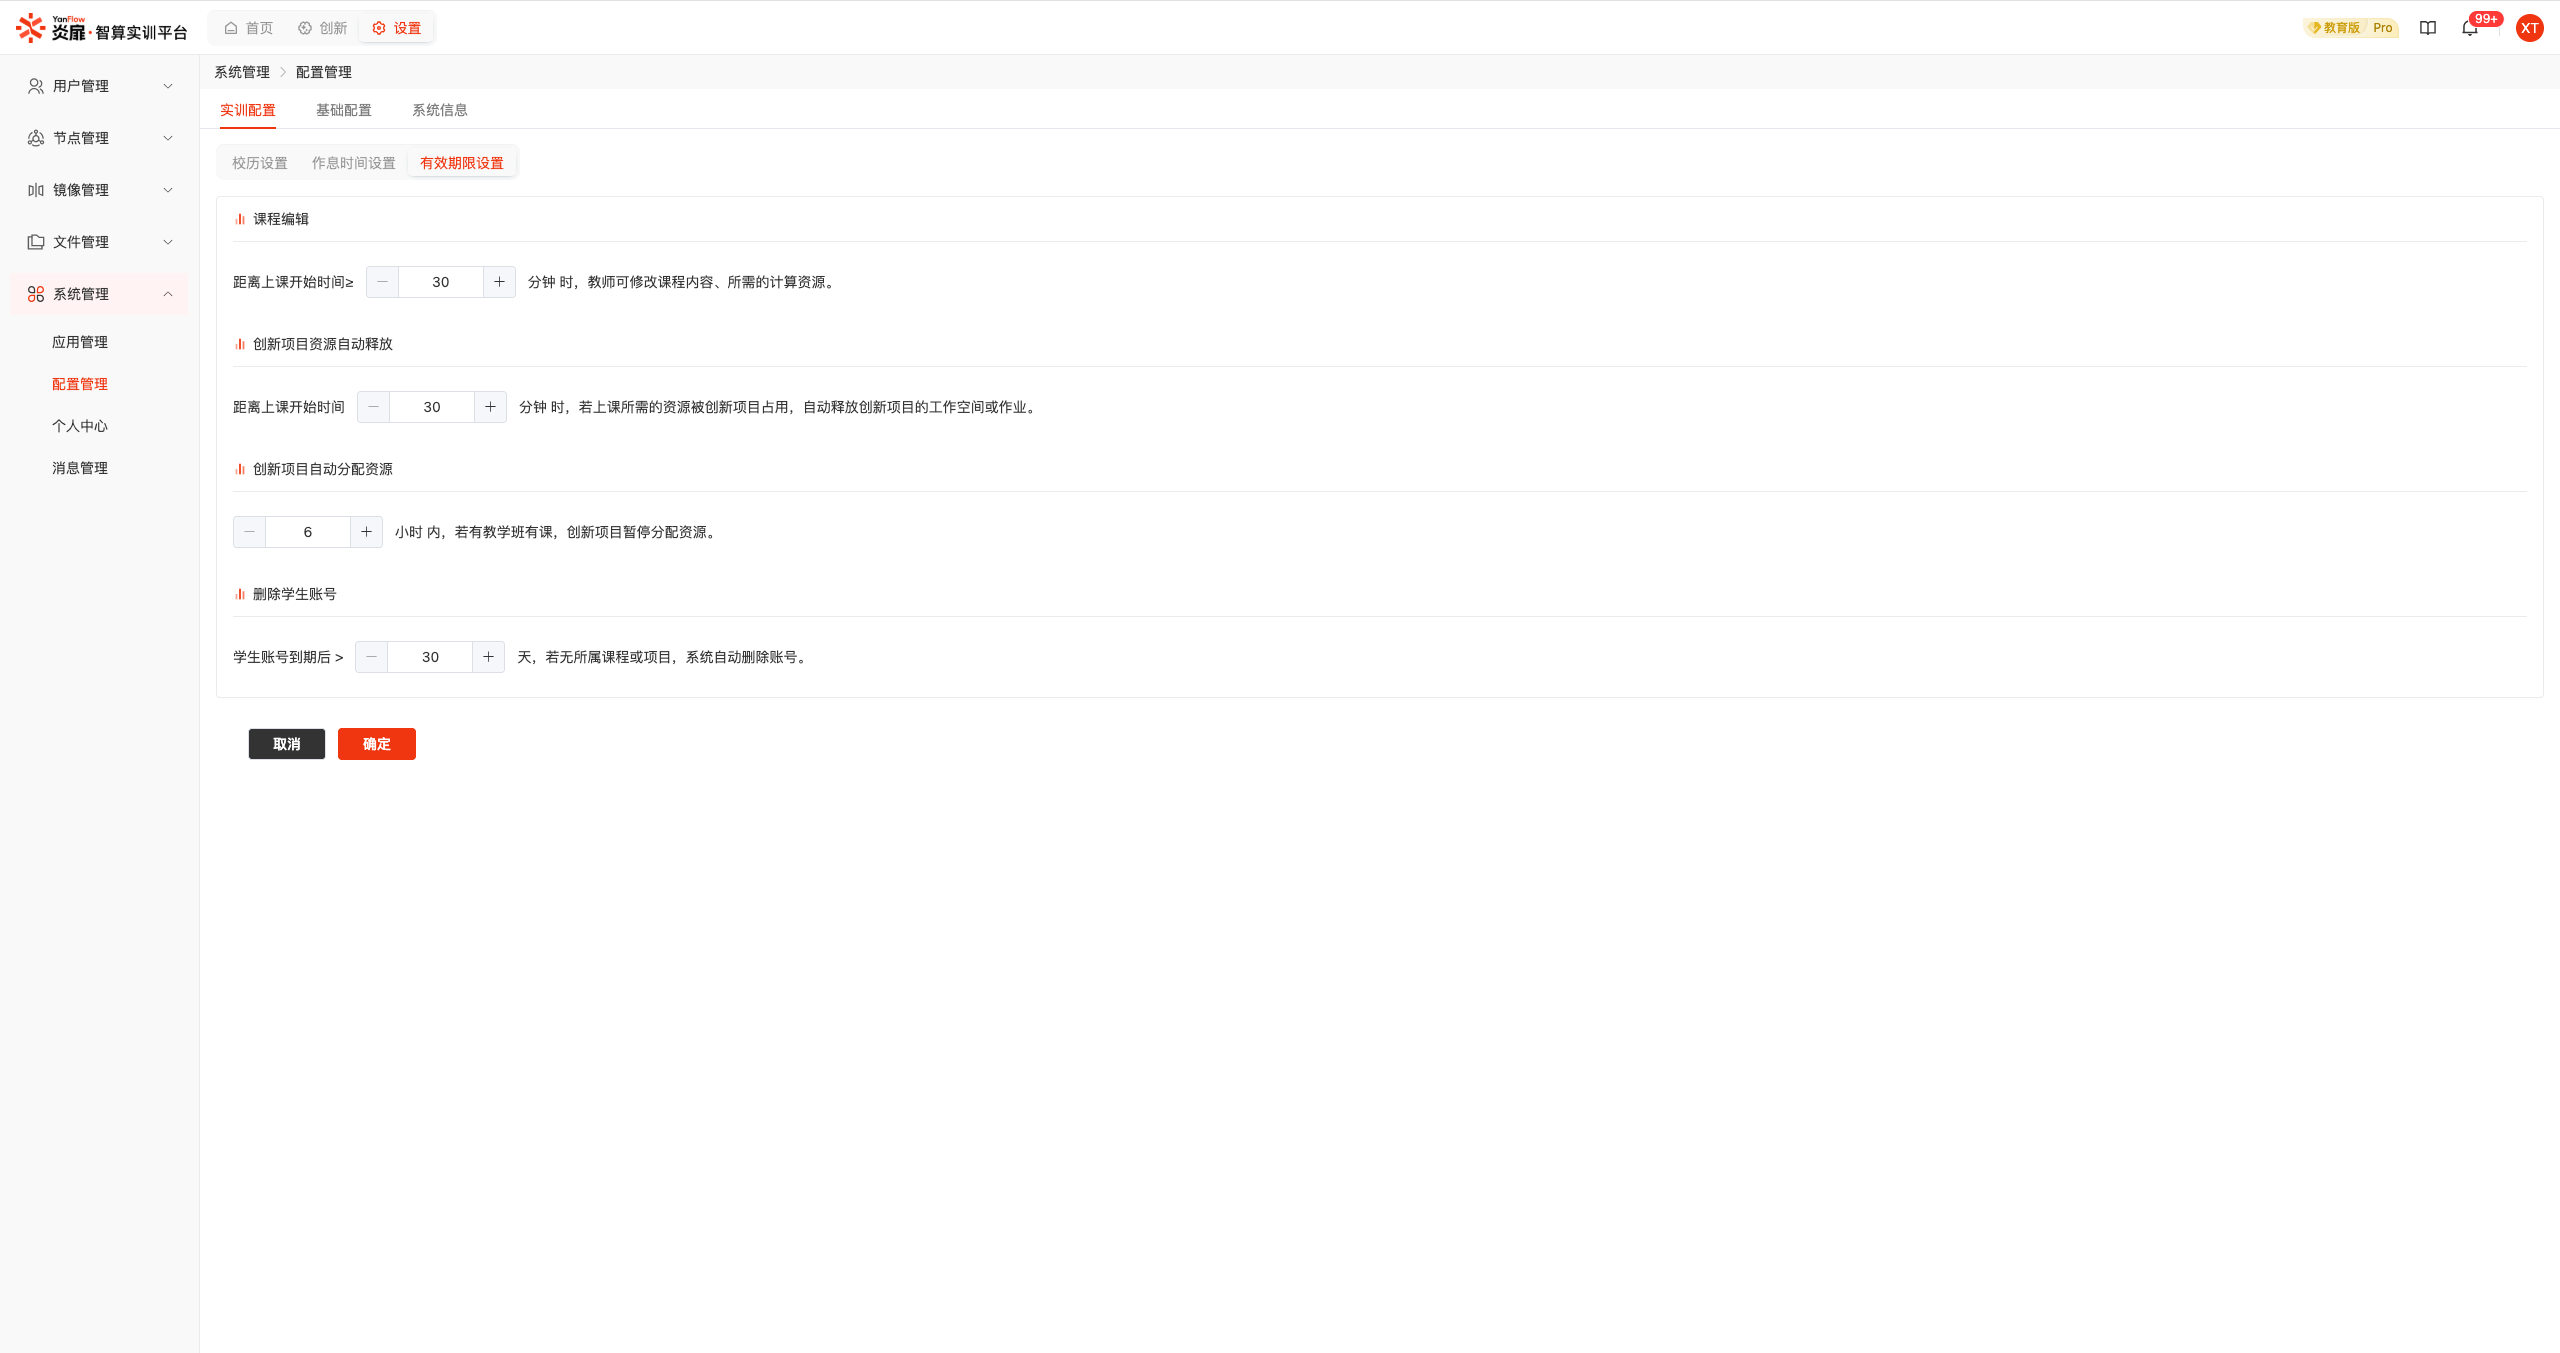
Validity Period Settings
Set relevant validity period values and click the Confirm button to complete the configuration.
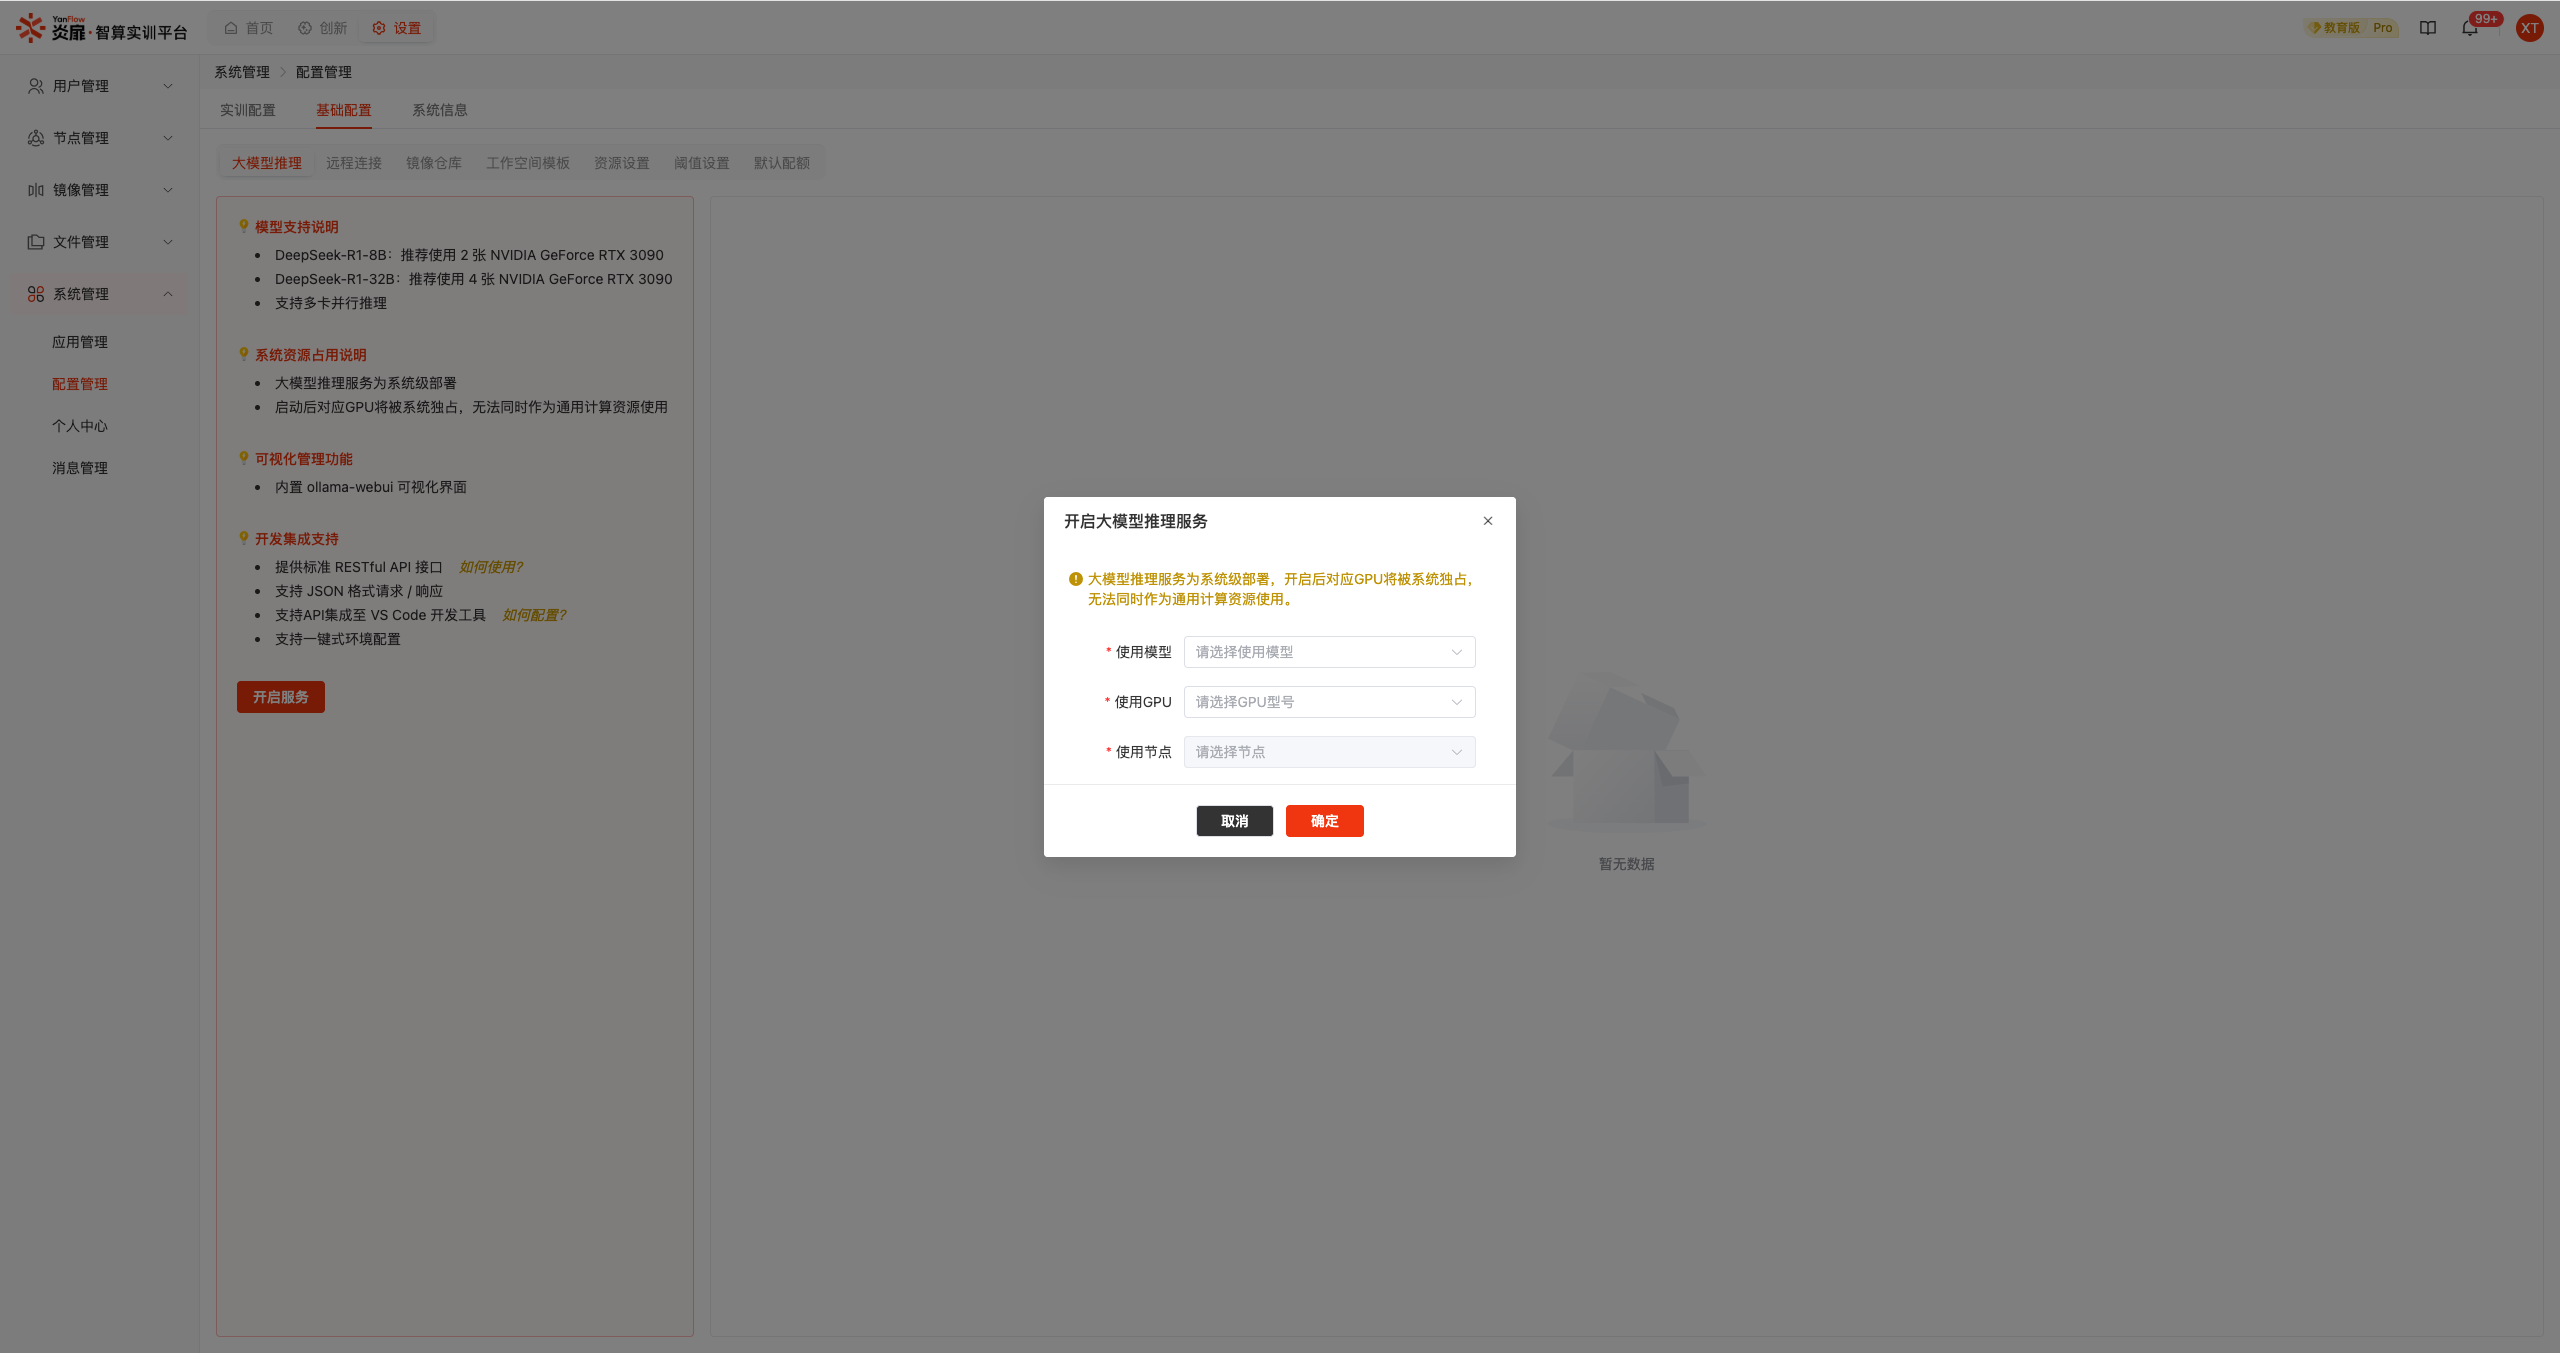
Large Model Inference
Enable Service: Click the Enable Service button to select an appropriate Model, GPU Model, and Node, then click the Confirm button to enable the large model inference service.
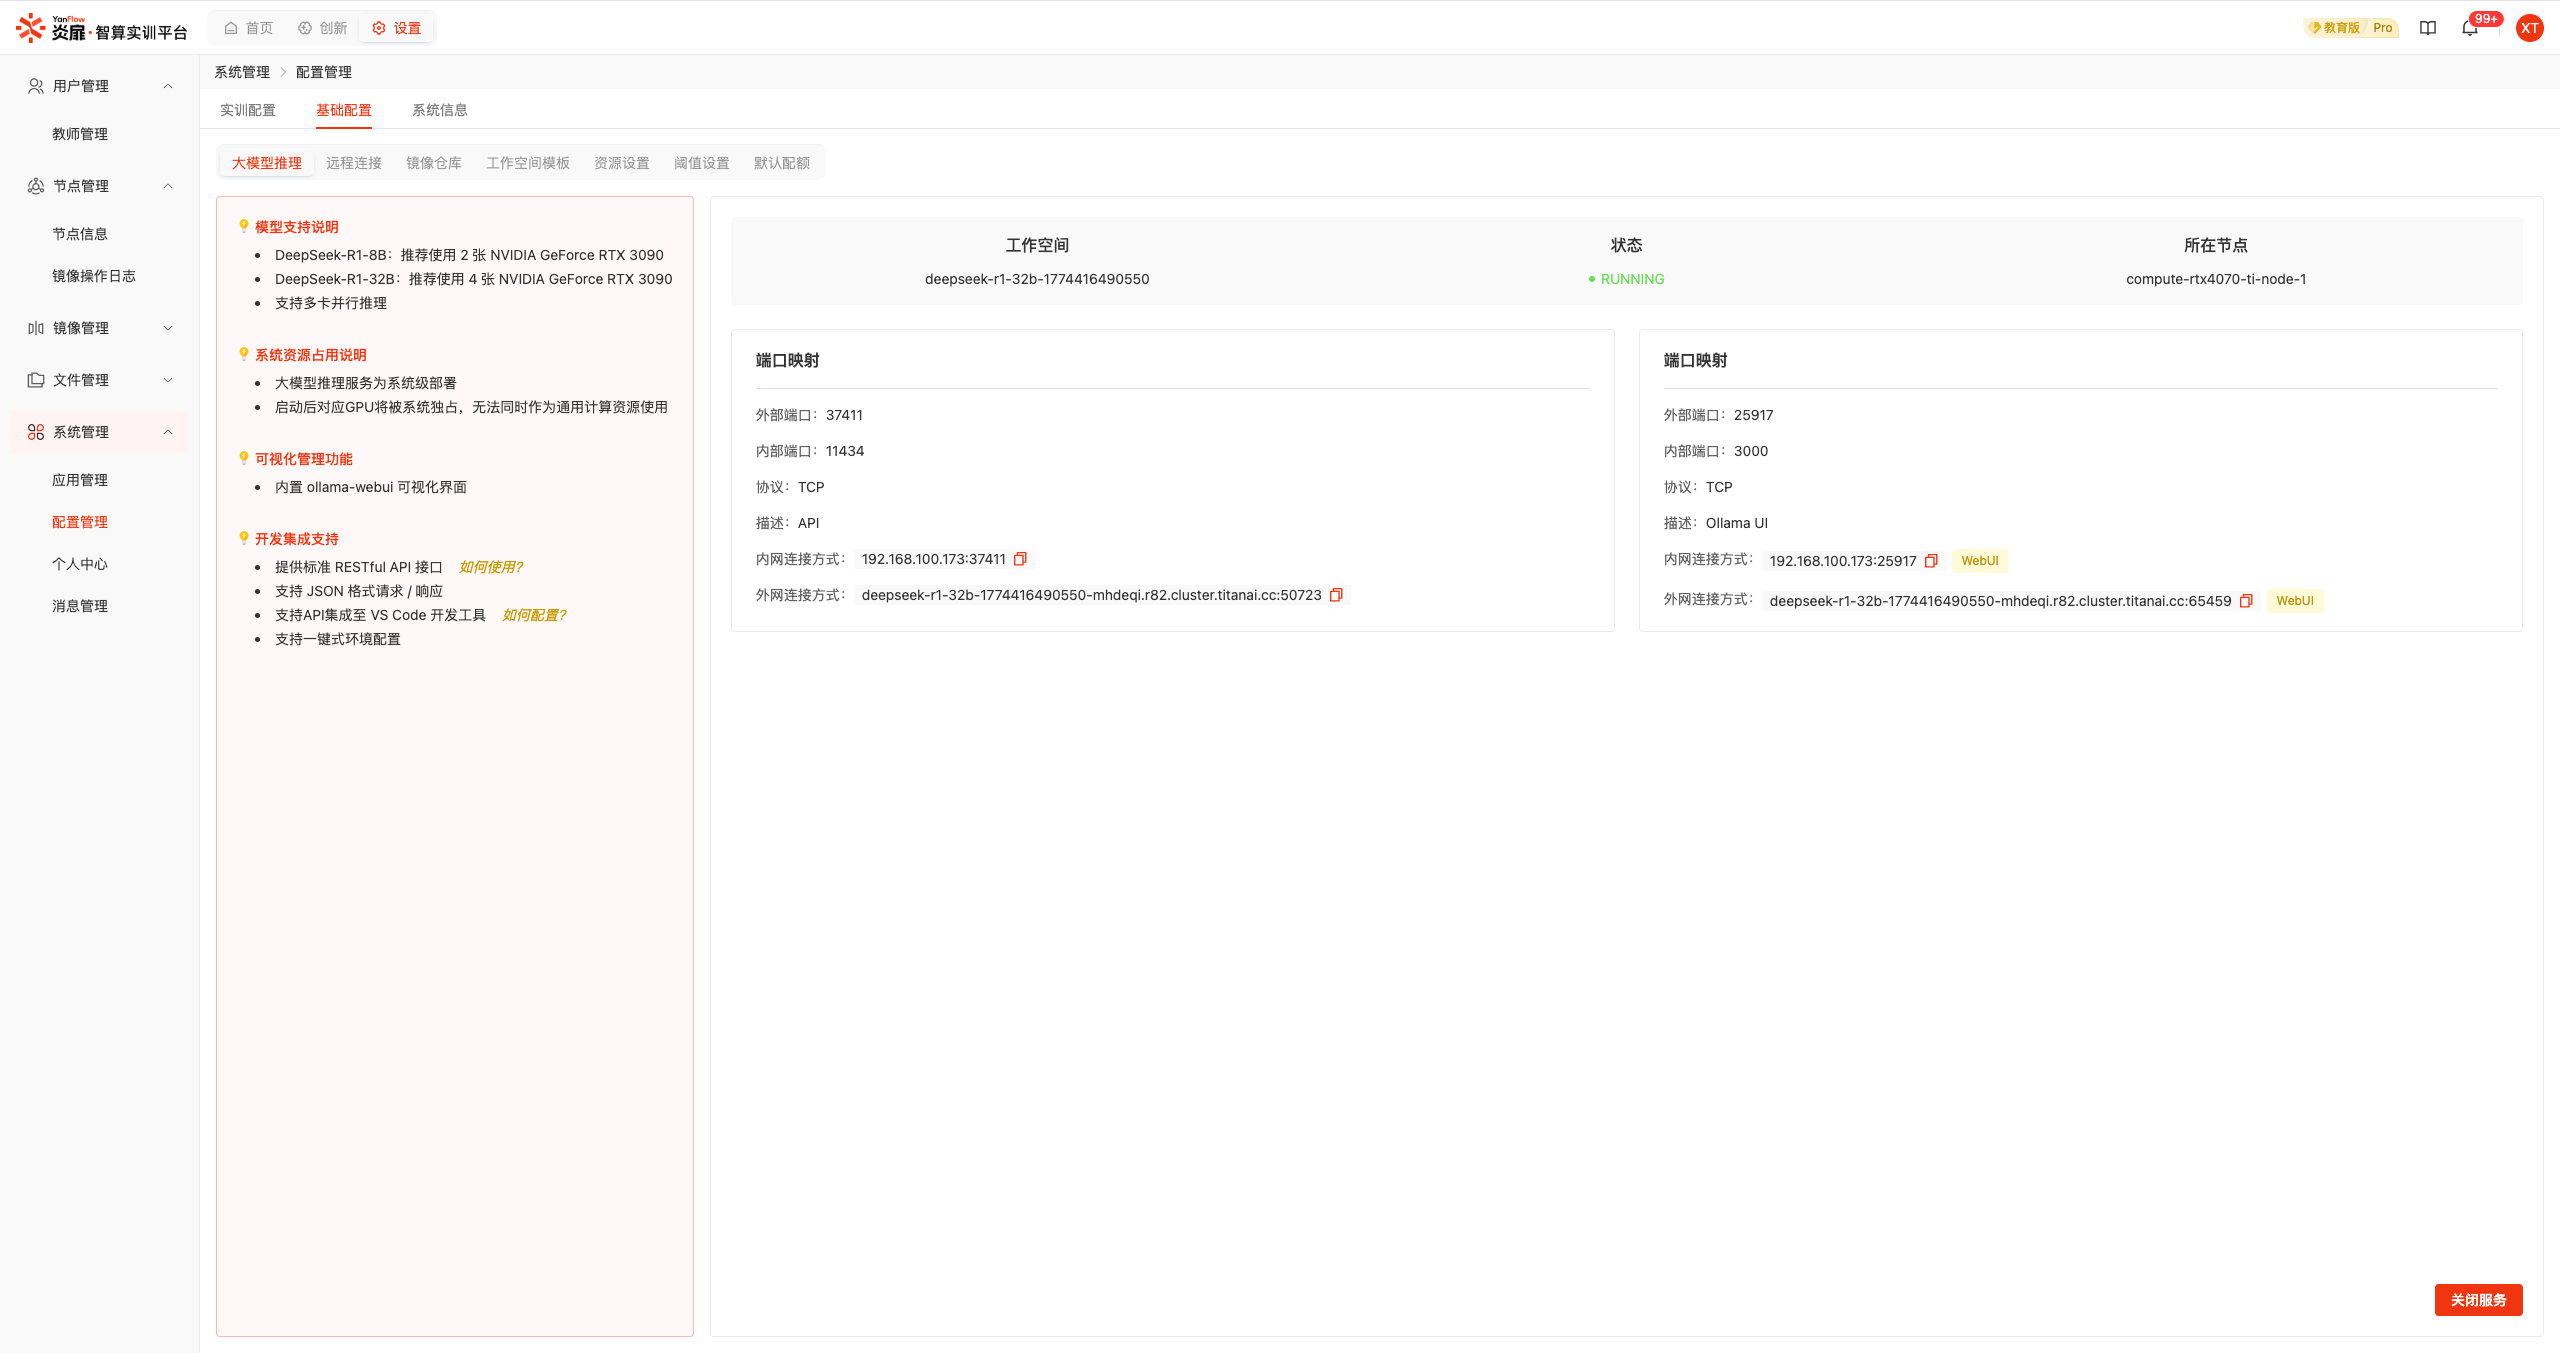
Use Service: After the service is enabled, port mapping information for the service will be displayed. The service can be accessed via Internal Network or External Network connection methods. Web type ports can be accessed through the WebUI entry.
Disable Service: Click the Disable Service button to display a confirmation dialog. Click the Confirm button to disable the large model inference service.
Note:
- The large model inference service only has an External Network Connection Method after the system enables the Remote Connection service.
Remote Connection
Click the Enable button to display the enable dialog. Select the region and enter the redemption code to enable the remote connection service.
After remote connection is enabled, relevant enable information will be displayed. Click the Access Address to access the cluster system via domain name. Hover over the package to view package details.
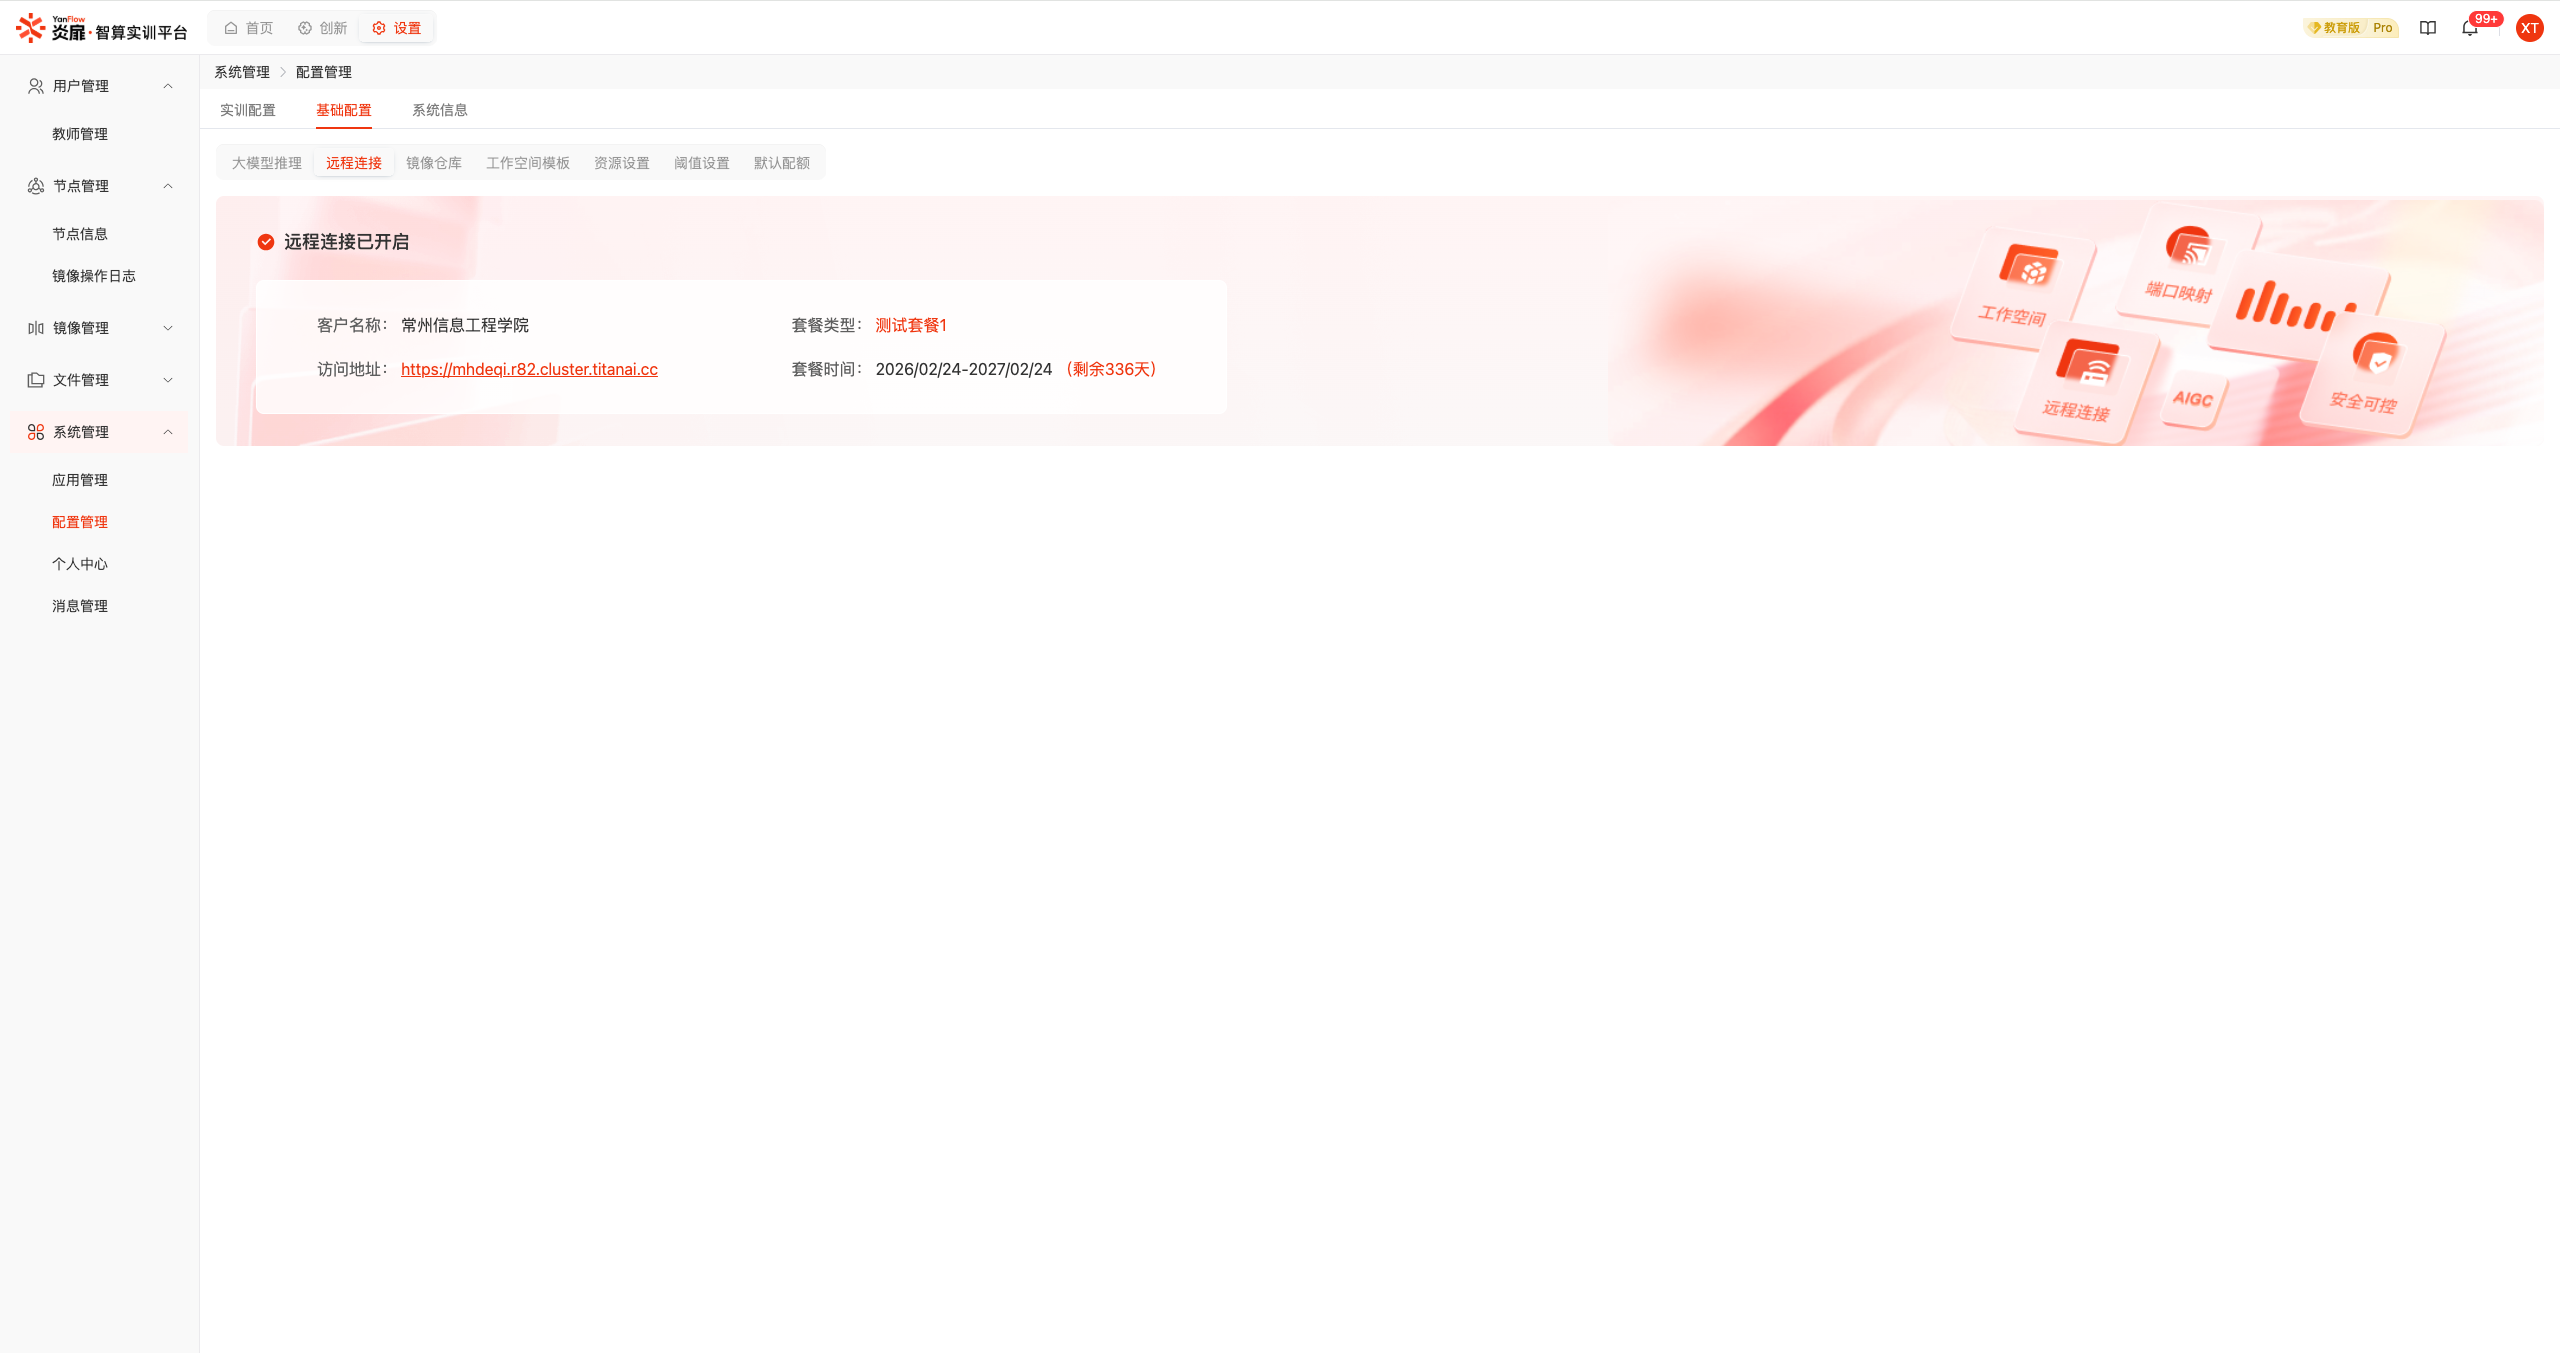
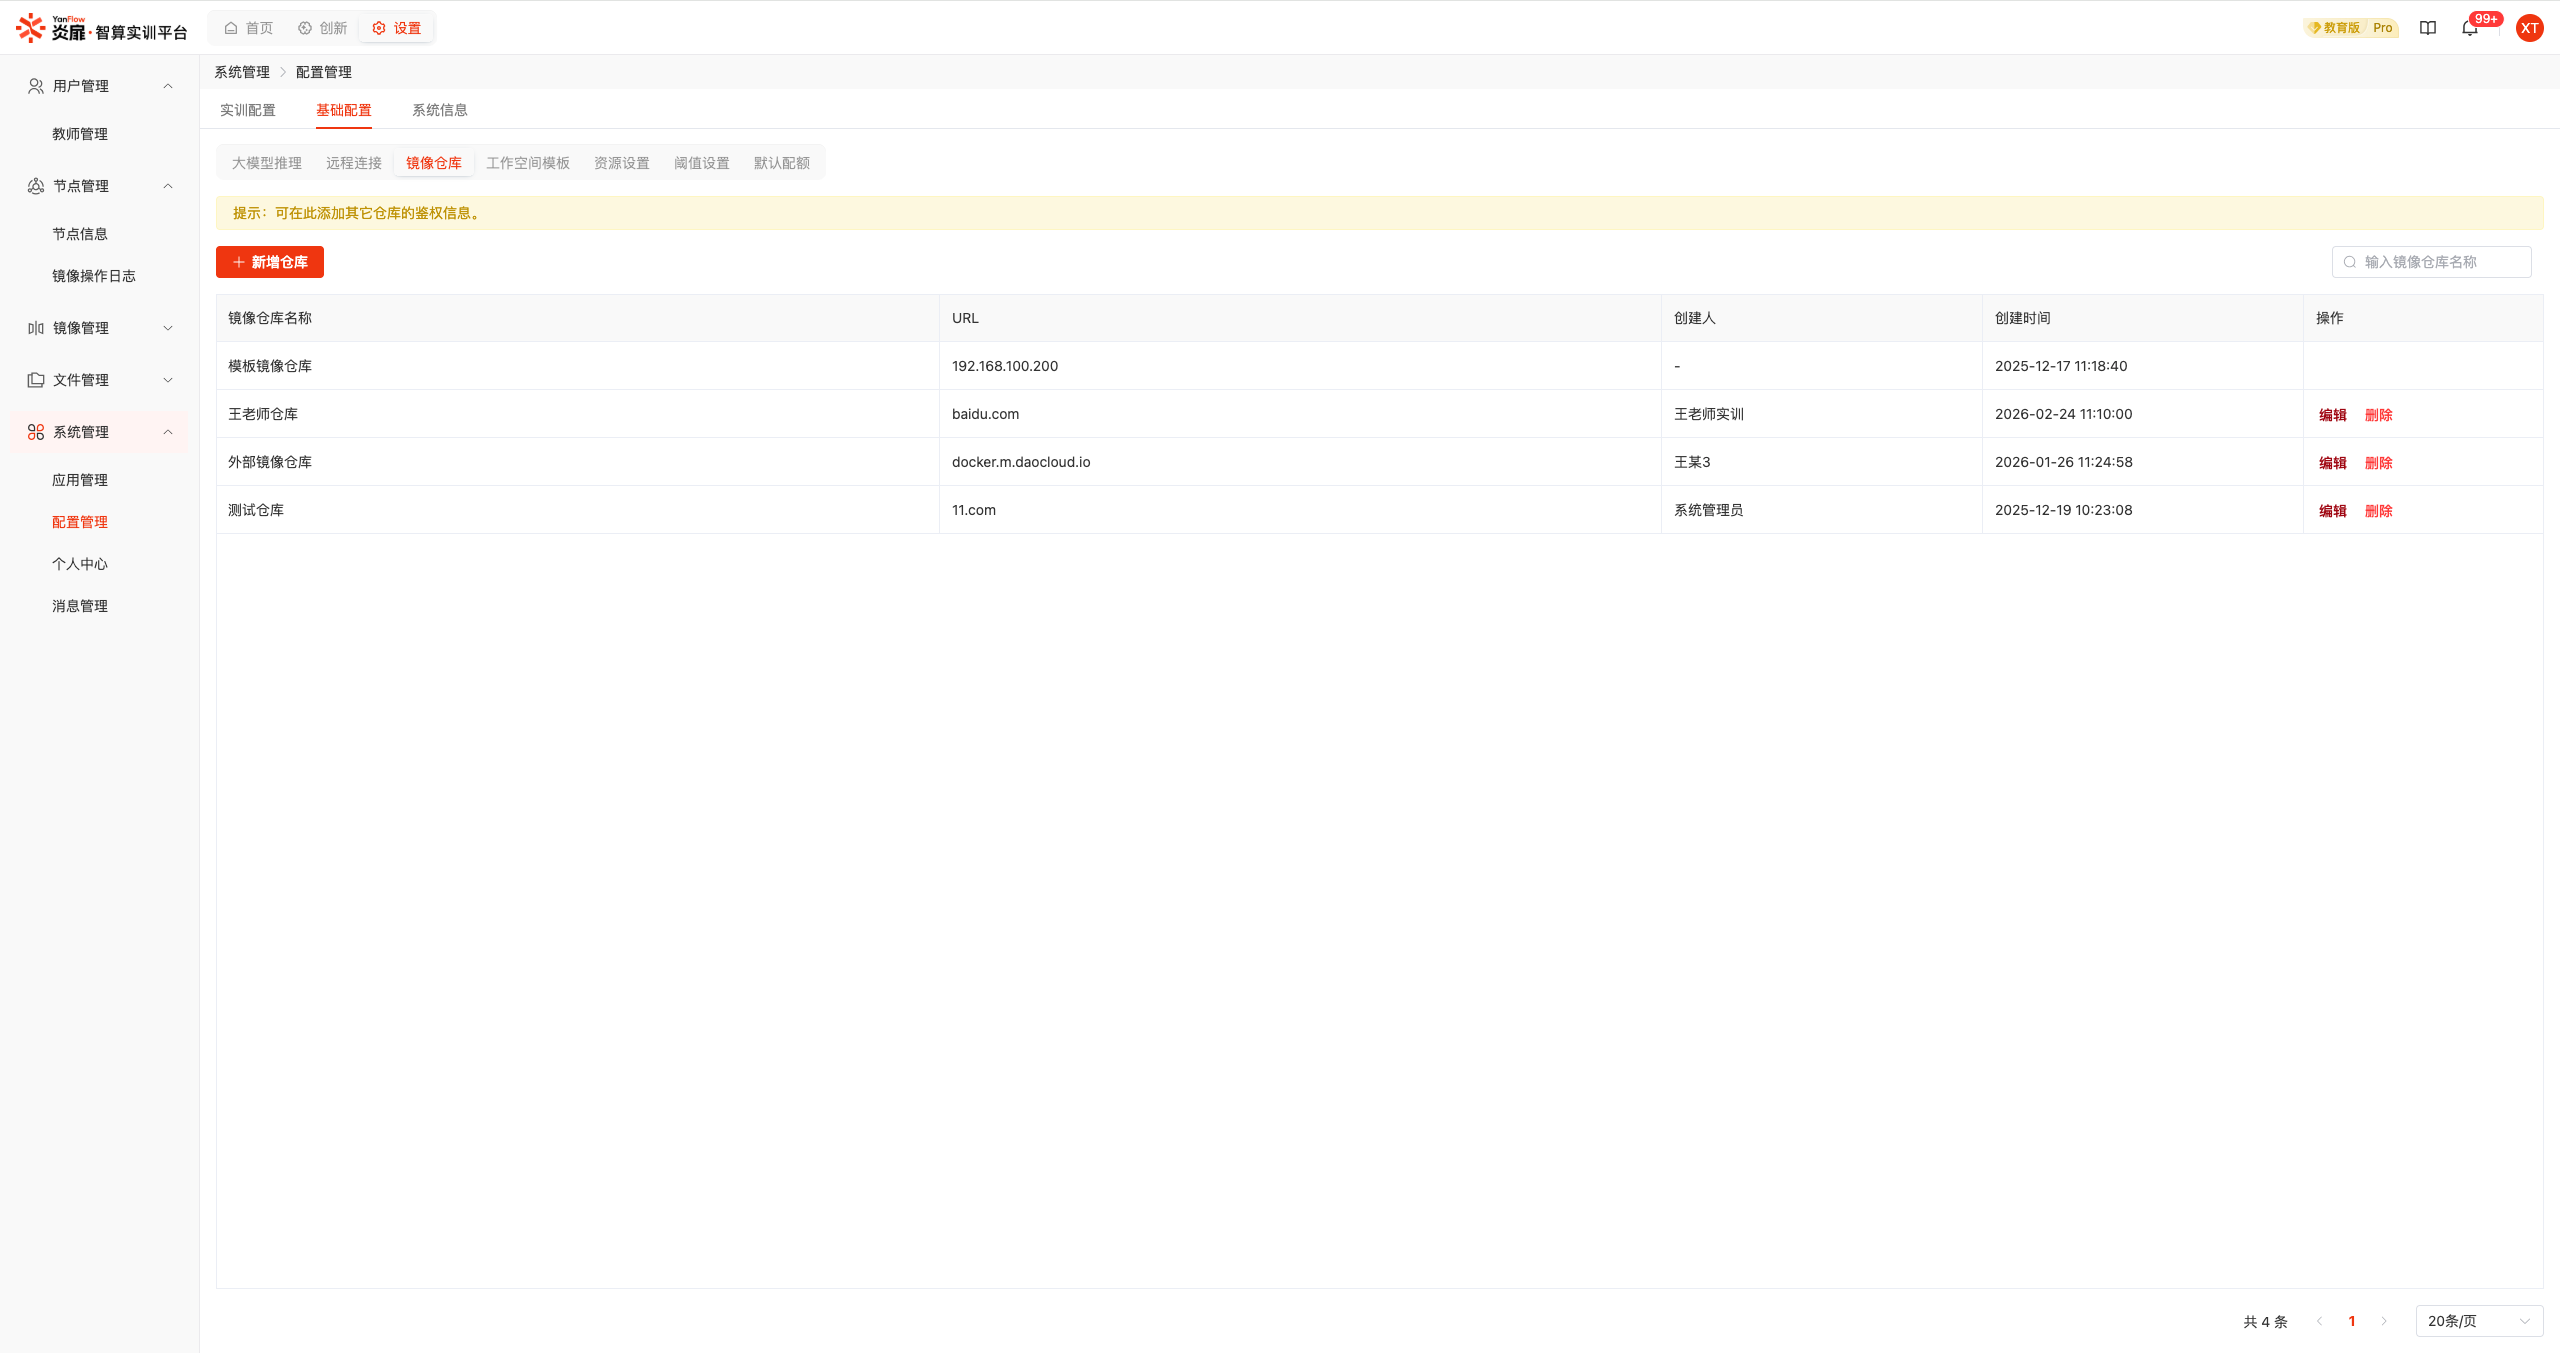
Image Repository
Displays all image repositories in the system, including system-preconfigured template image repositories and newly created private repositories. Supports keyword search by Repository Name. Repositories can be Added, Edited, and Deleted.
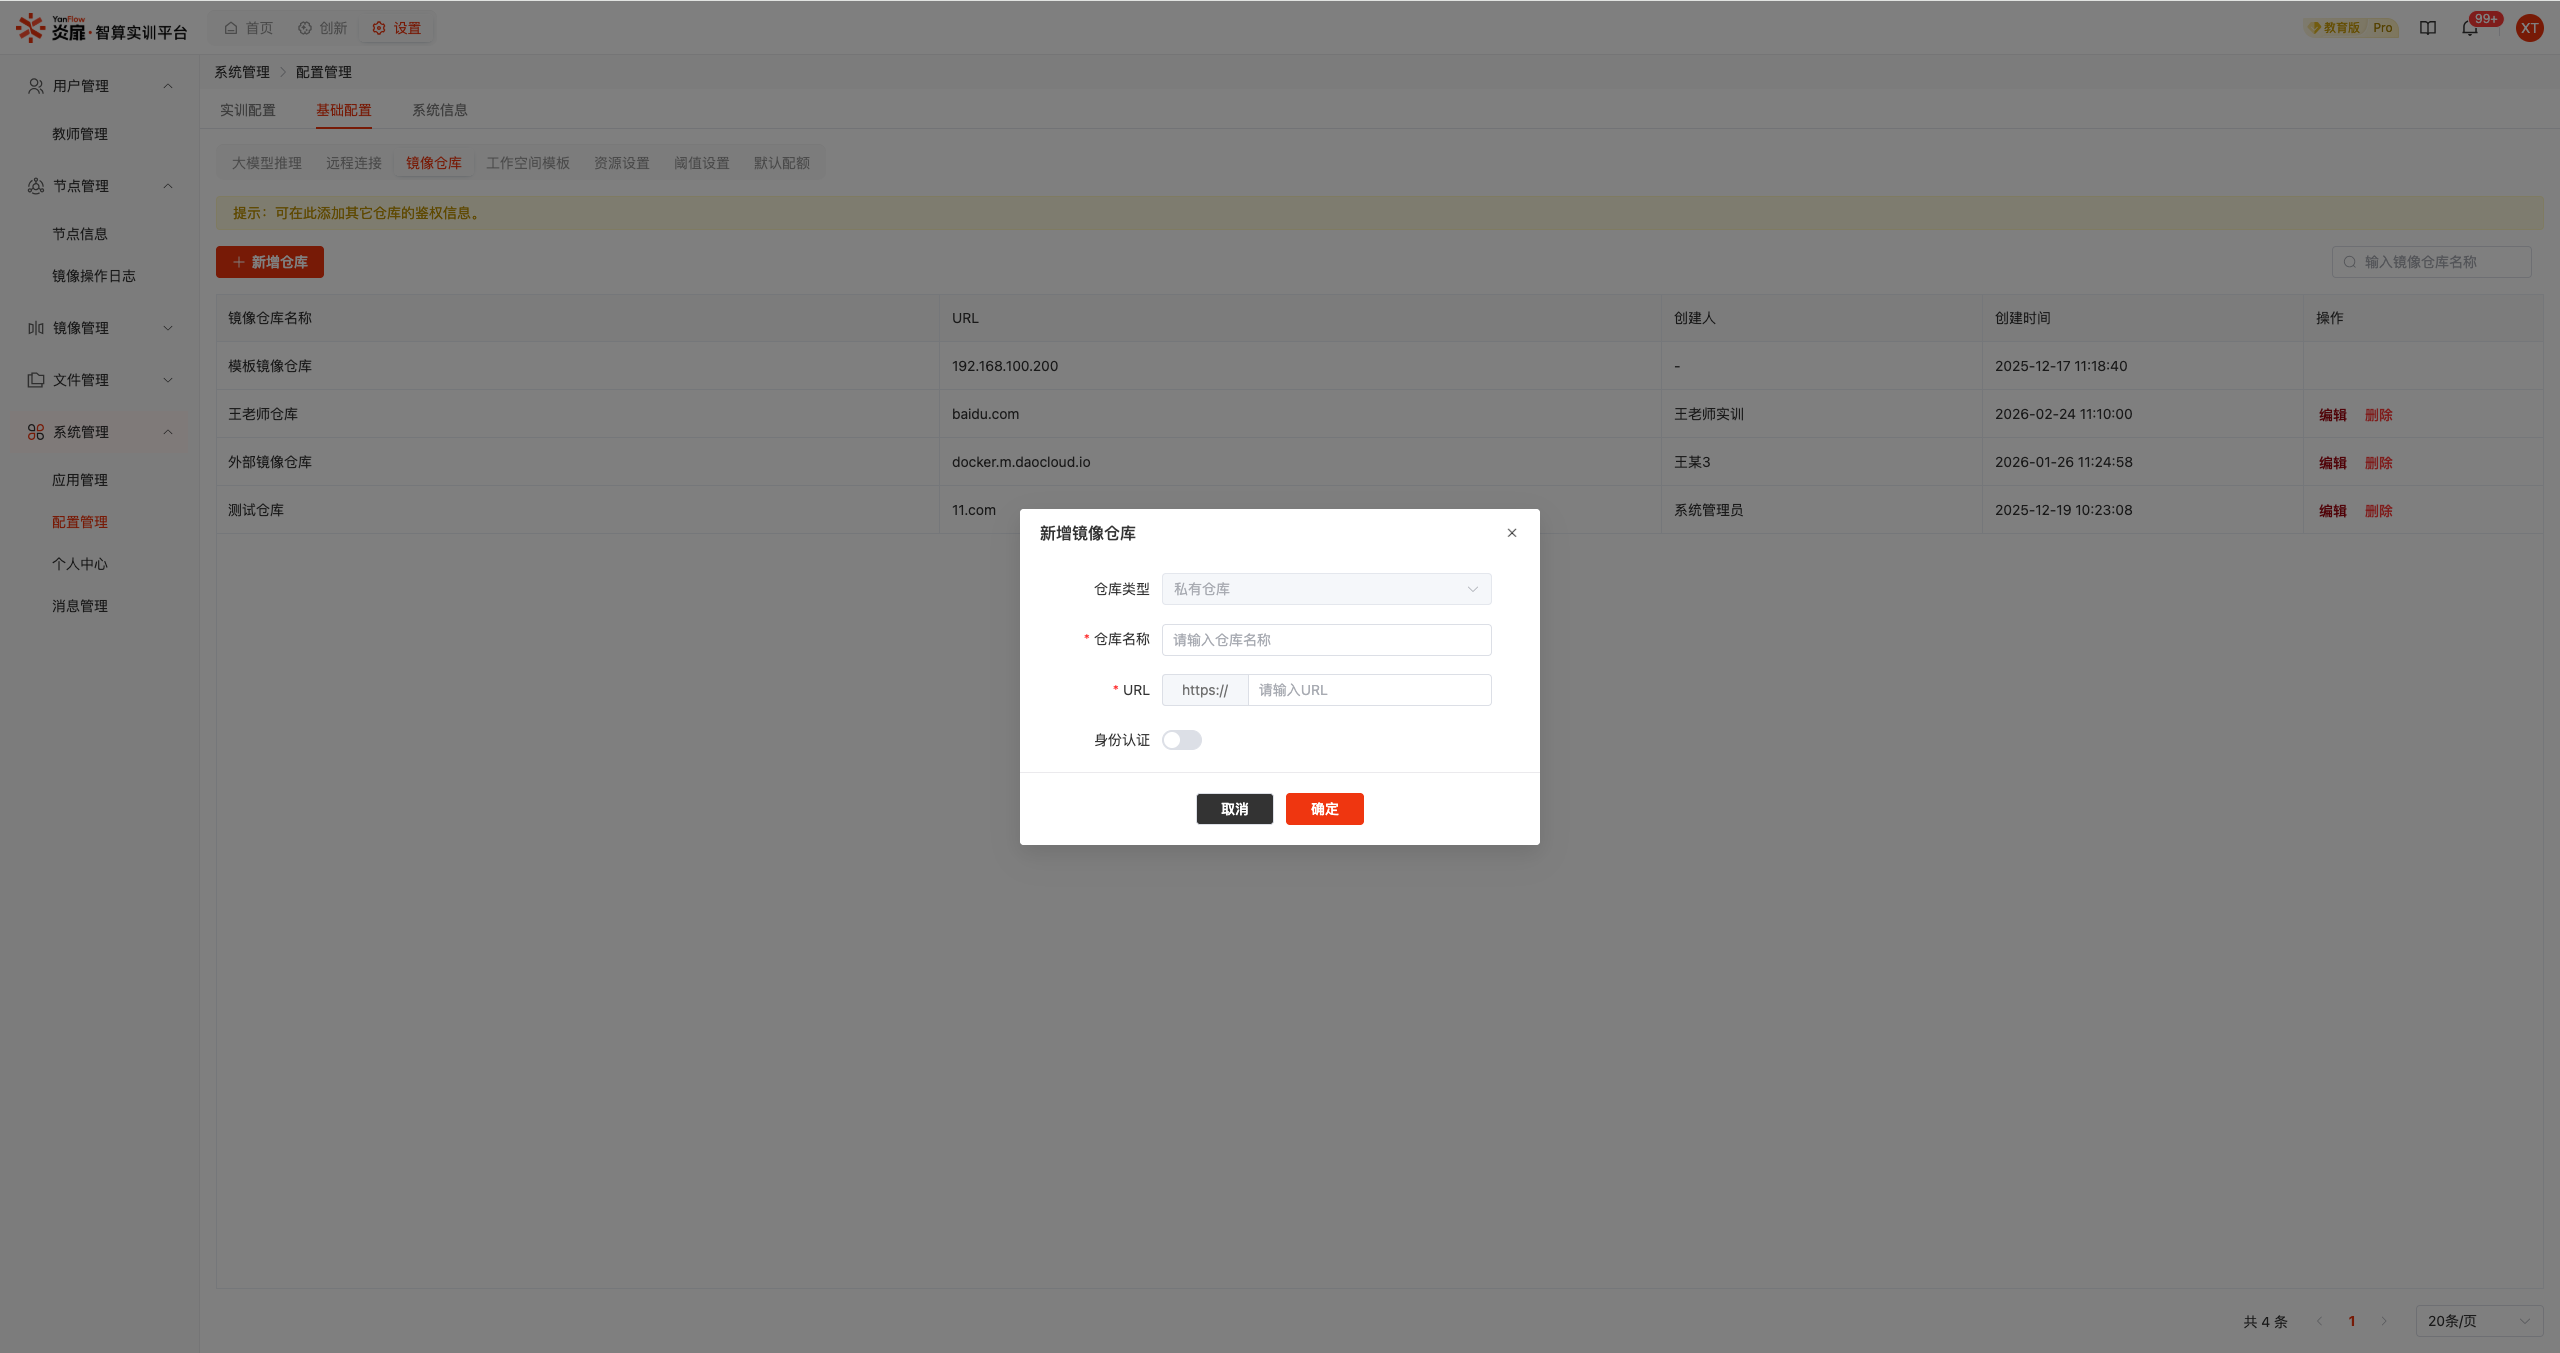
Add Repository: Click the Add Repository button to display the add dialog. Set relevant information and click the Confirm button to create authentication information for a new private repository after validation.
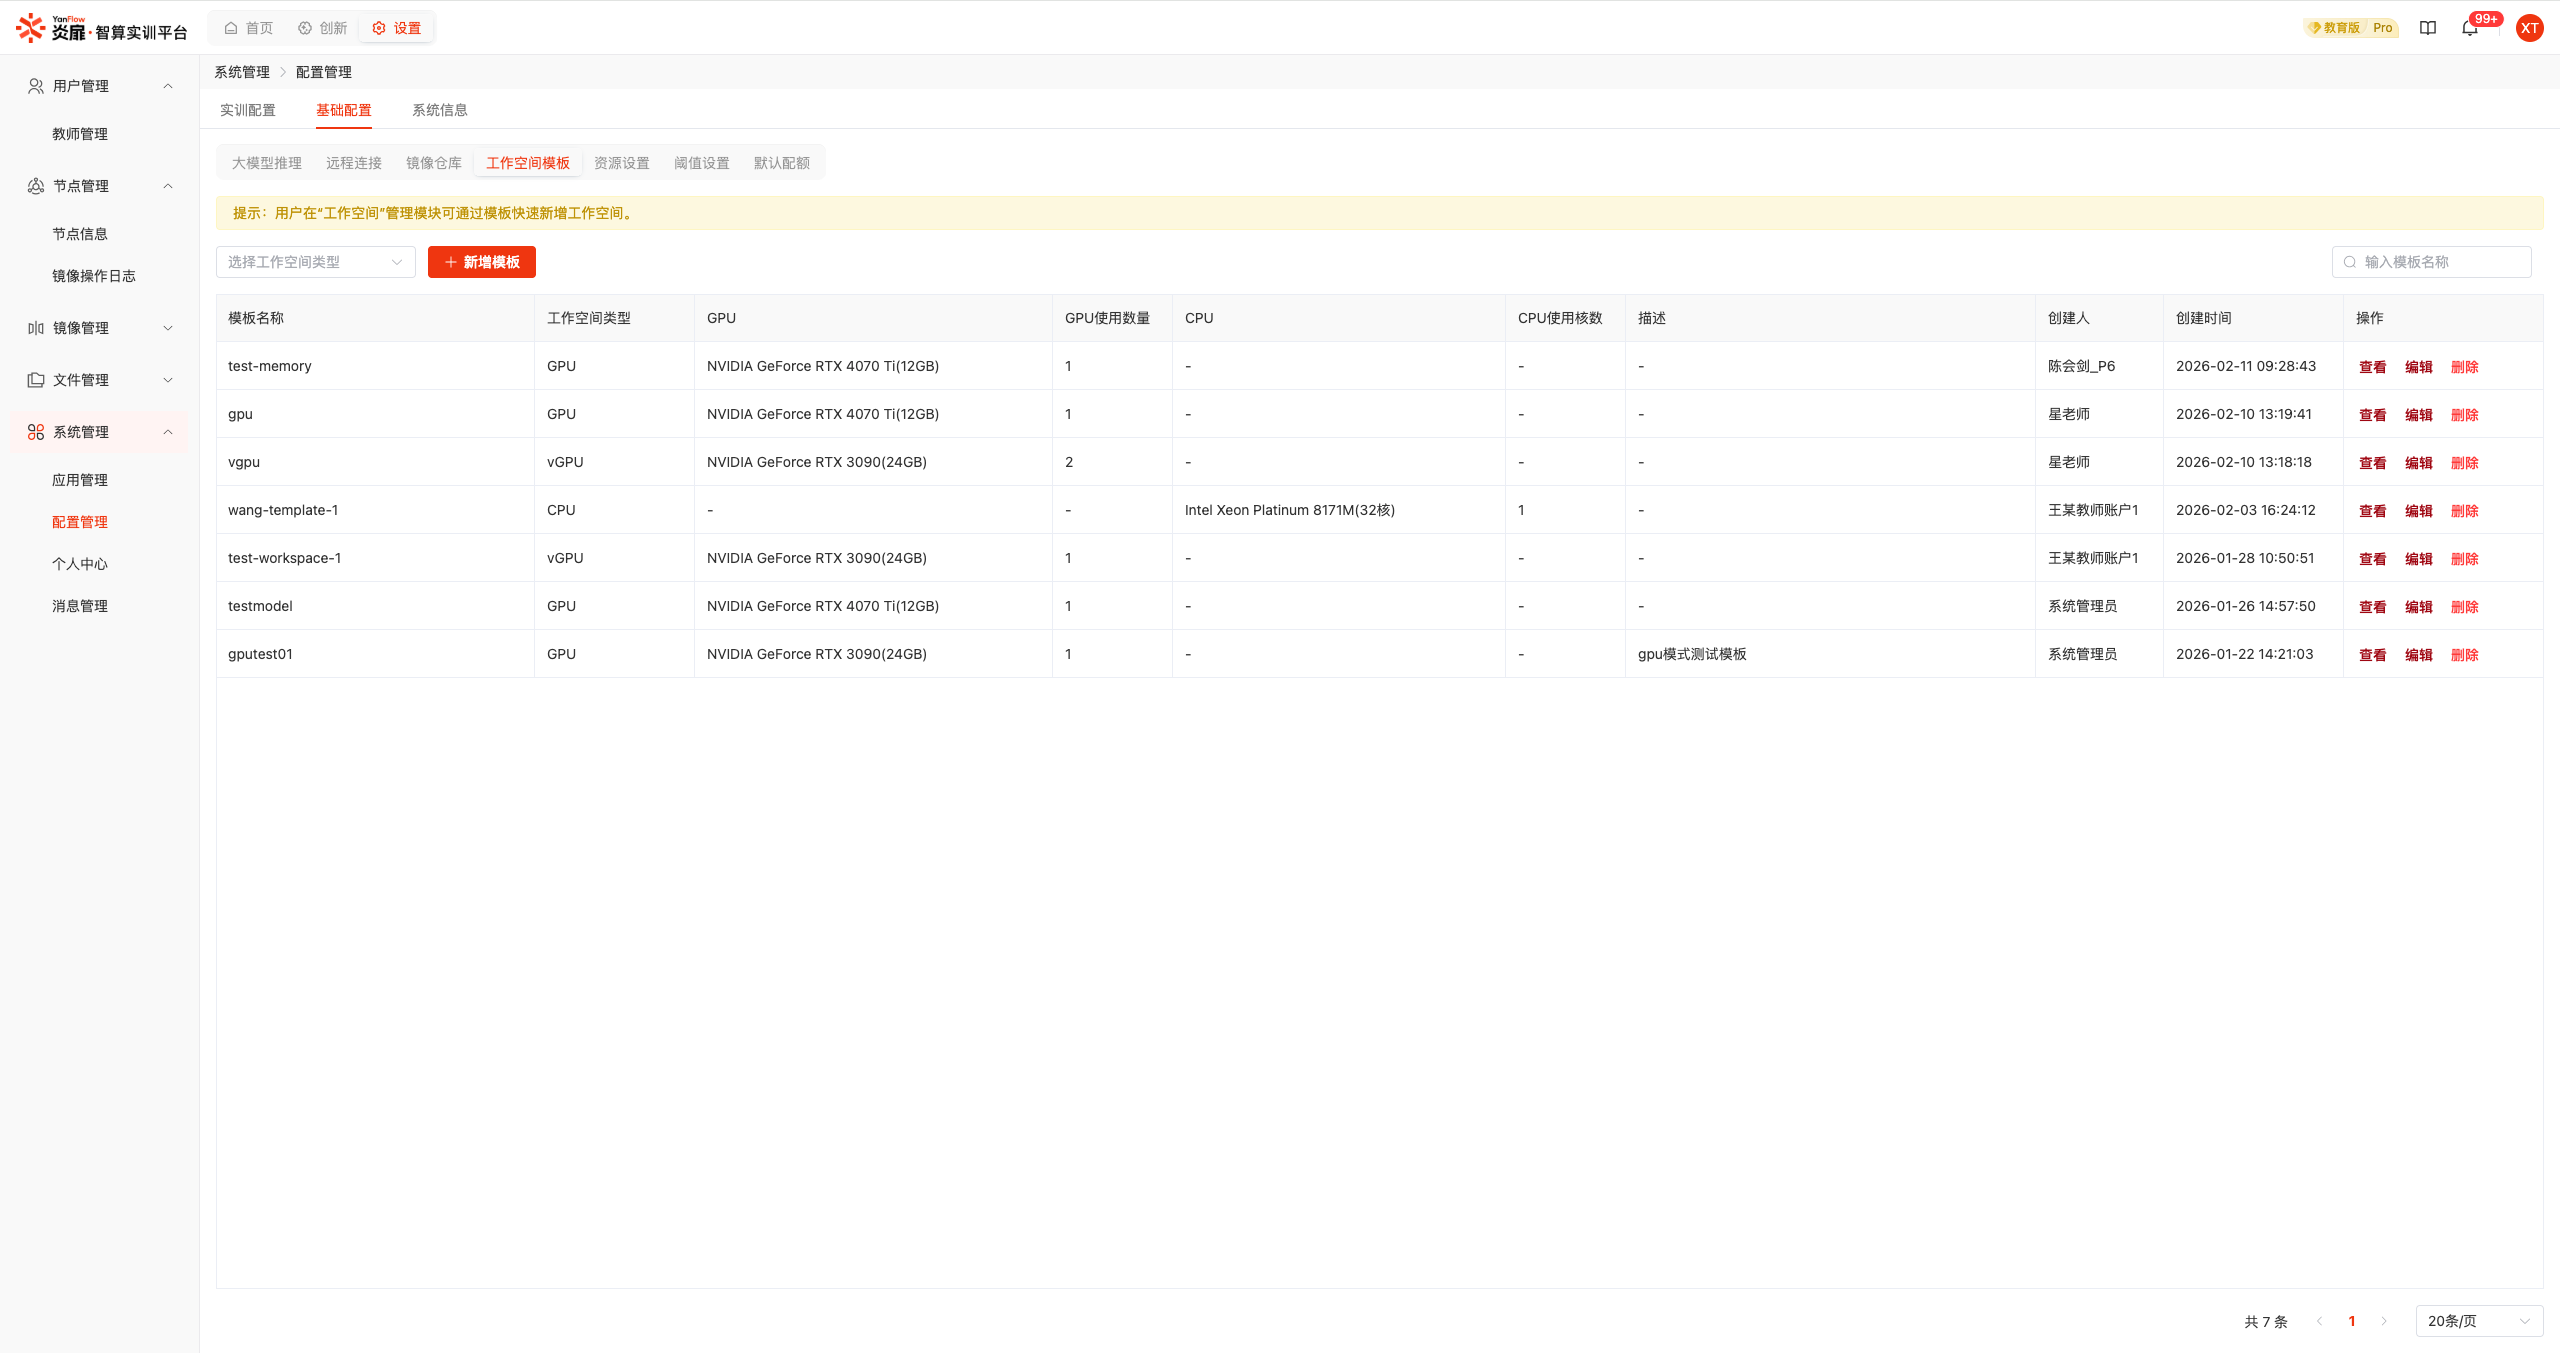
Workspace Templates
Displays all workspace templates in the system. Supports keyword search by Workspace Type and Template Name. Templates can be Added, Viewed, Edited, and Deleted. Users can use workspace templates to quickly create workspaces.
Add Workspace Template: Click the Add Template button to display the add dialog. Set relevant information and click the Confirm button to create a new workspace template after validation.
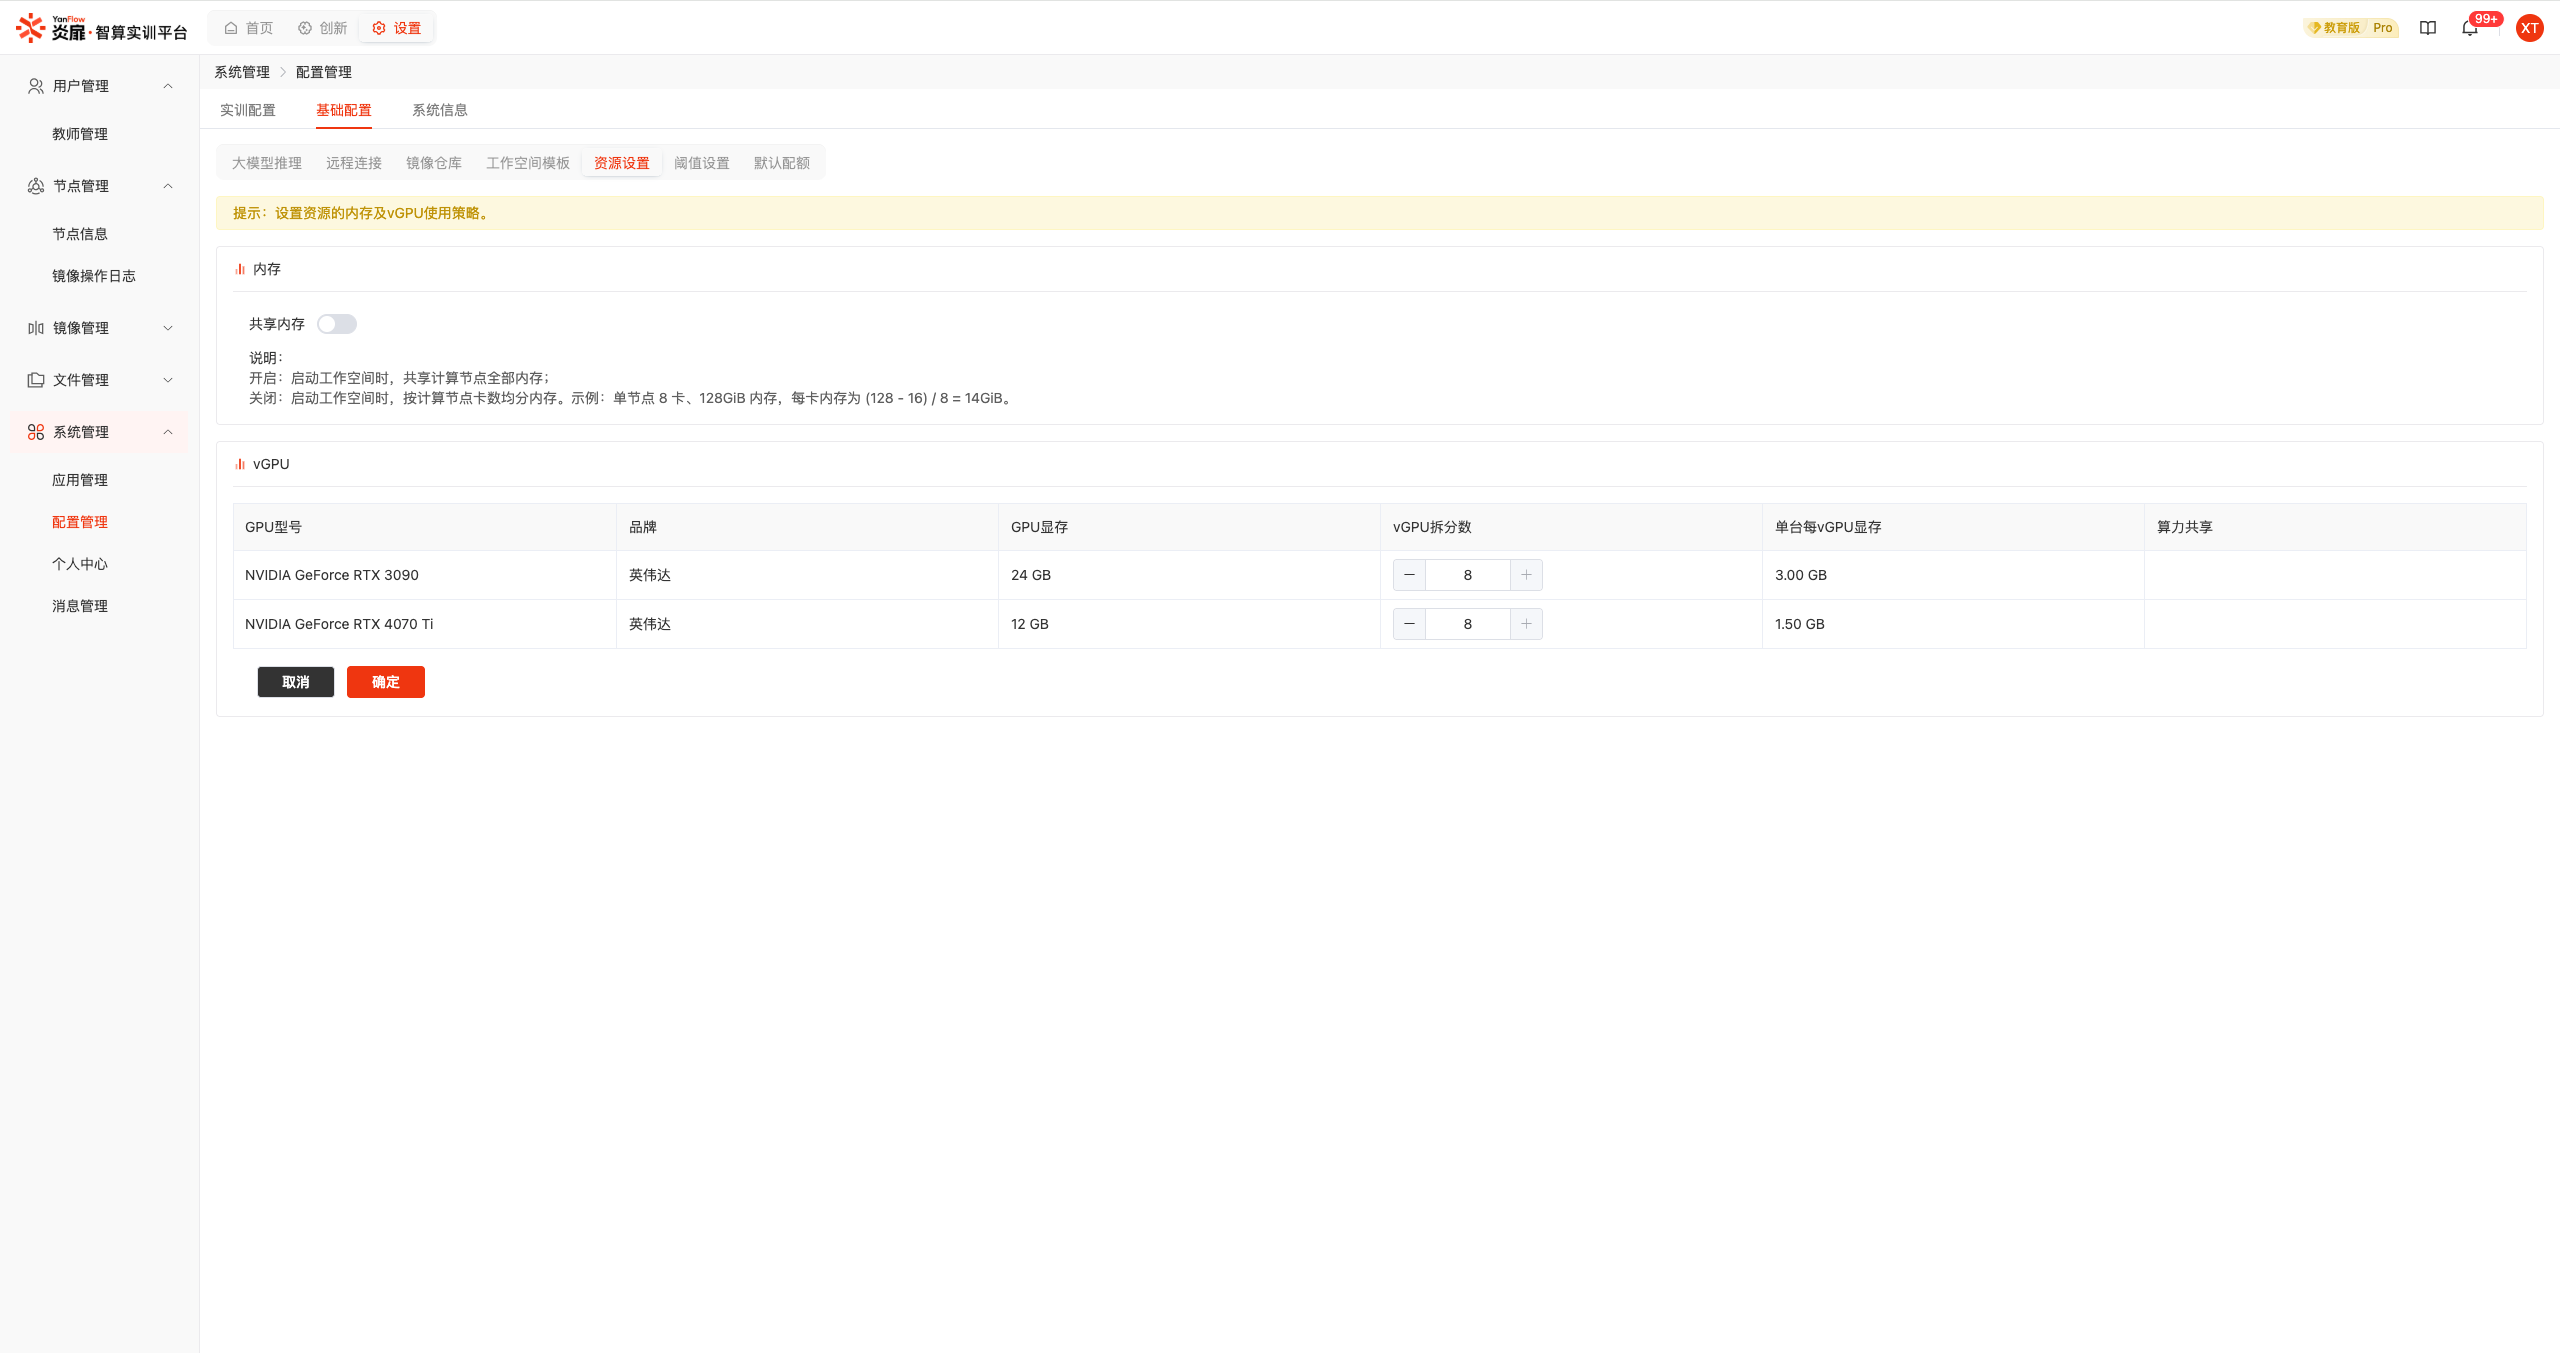
Resource Settings
Memory Settings: Provides memory sharing enable and disable services.
Enabled: To maximize memory utilization, workspaces use a on-demand preemption mechanism to dynamically share all node memory.
Disabled: When workspaces start, they follow an equal distribution mechanism, allocating based on the number of GPU cards on compute nodes.
vGPU Settings: Set the vGPU split count for each GPU card and enable compute sharing.
Note:
- The minimum vGPU split count is 1, and the maximum is 8.
- If vGPU workspaces are already running on a node with a certain GPU model, adjusting the vGPU split count for that node is not supported.
- Compute sharing can only be set for MXGPU brand GPU cards.
Threshold Settings
Supports setting relevant system thresholds. Click the Confirm button to save the settings.
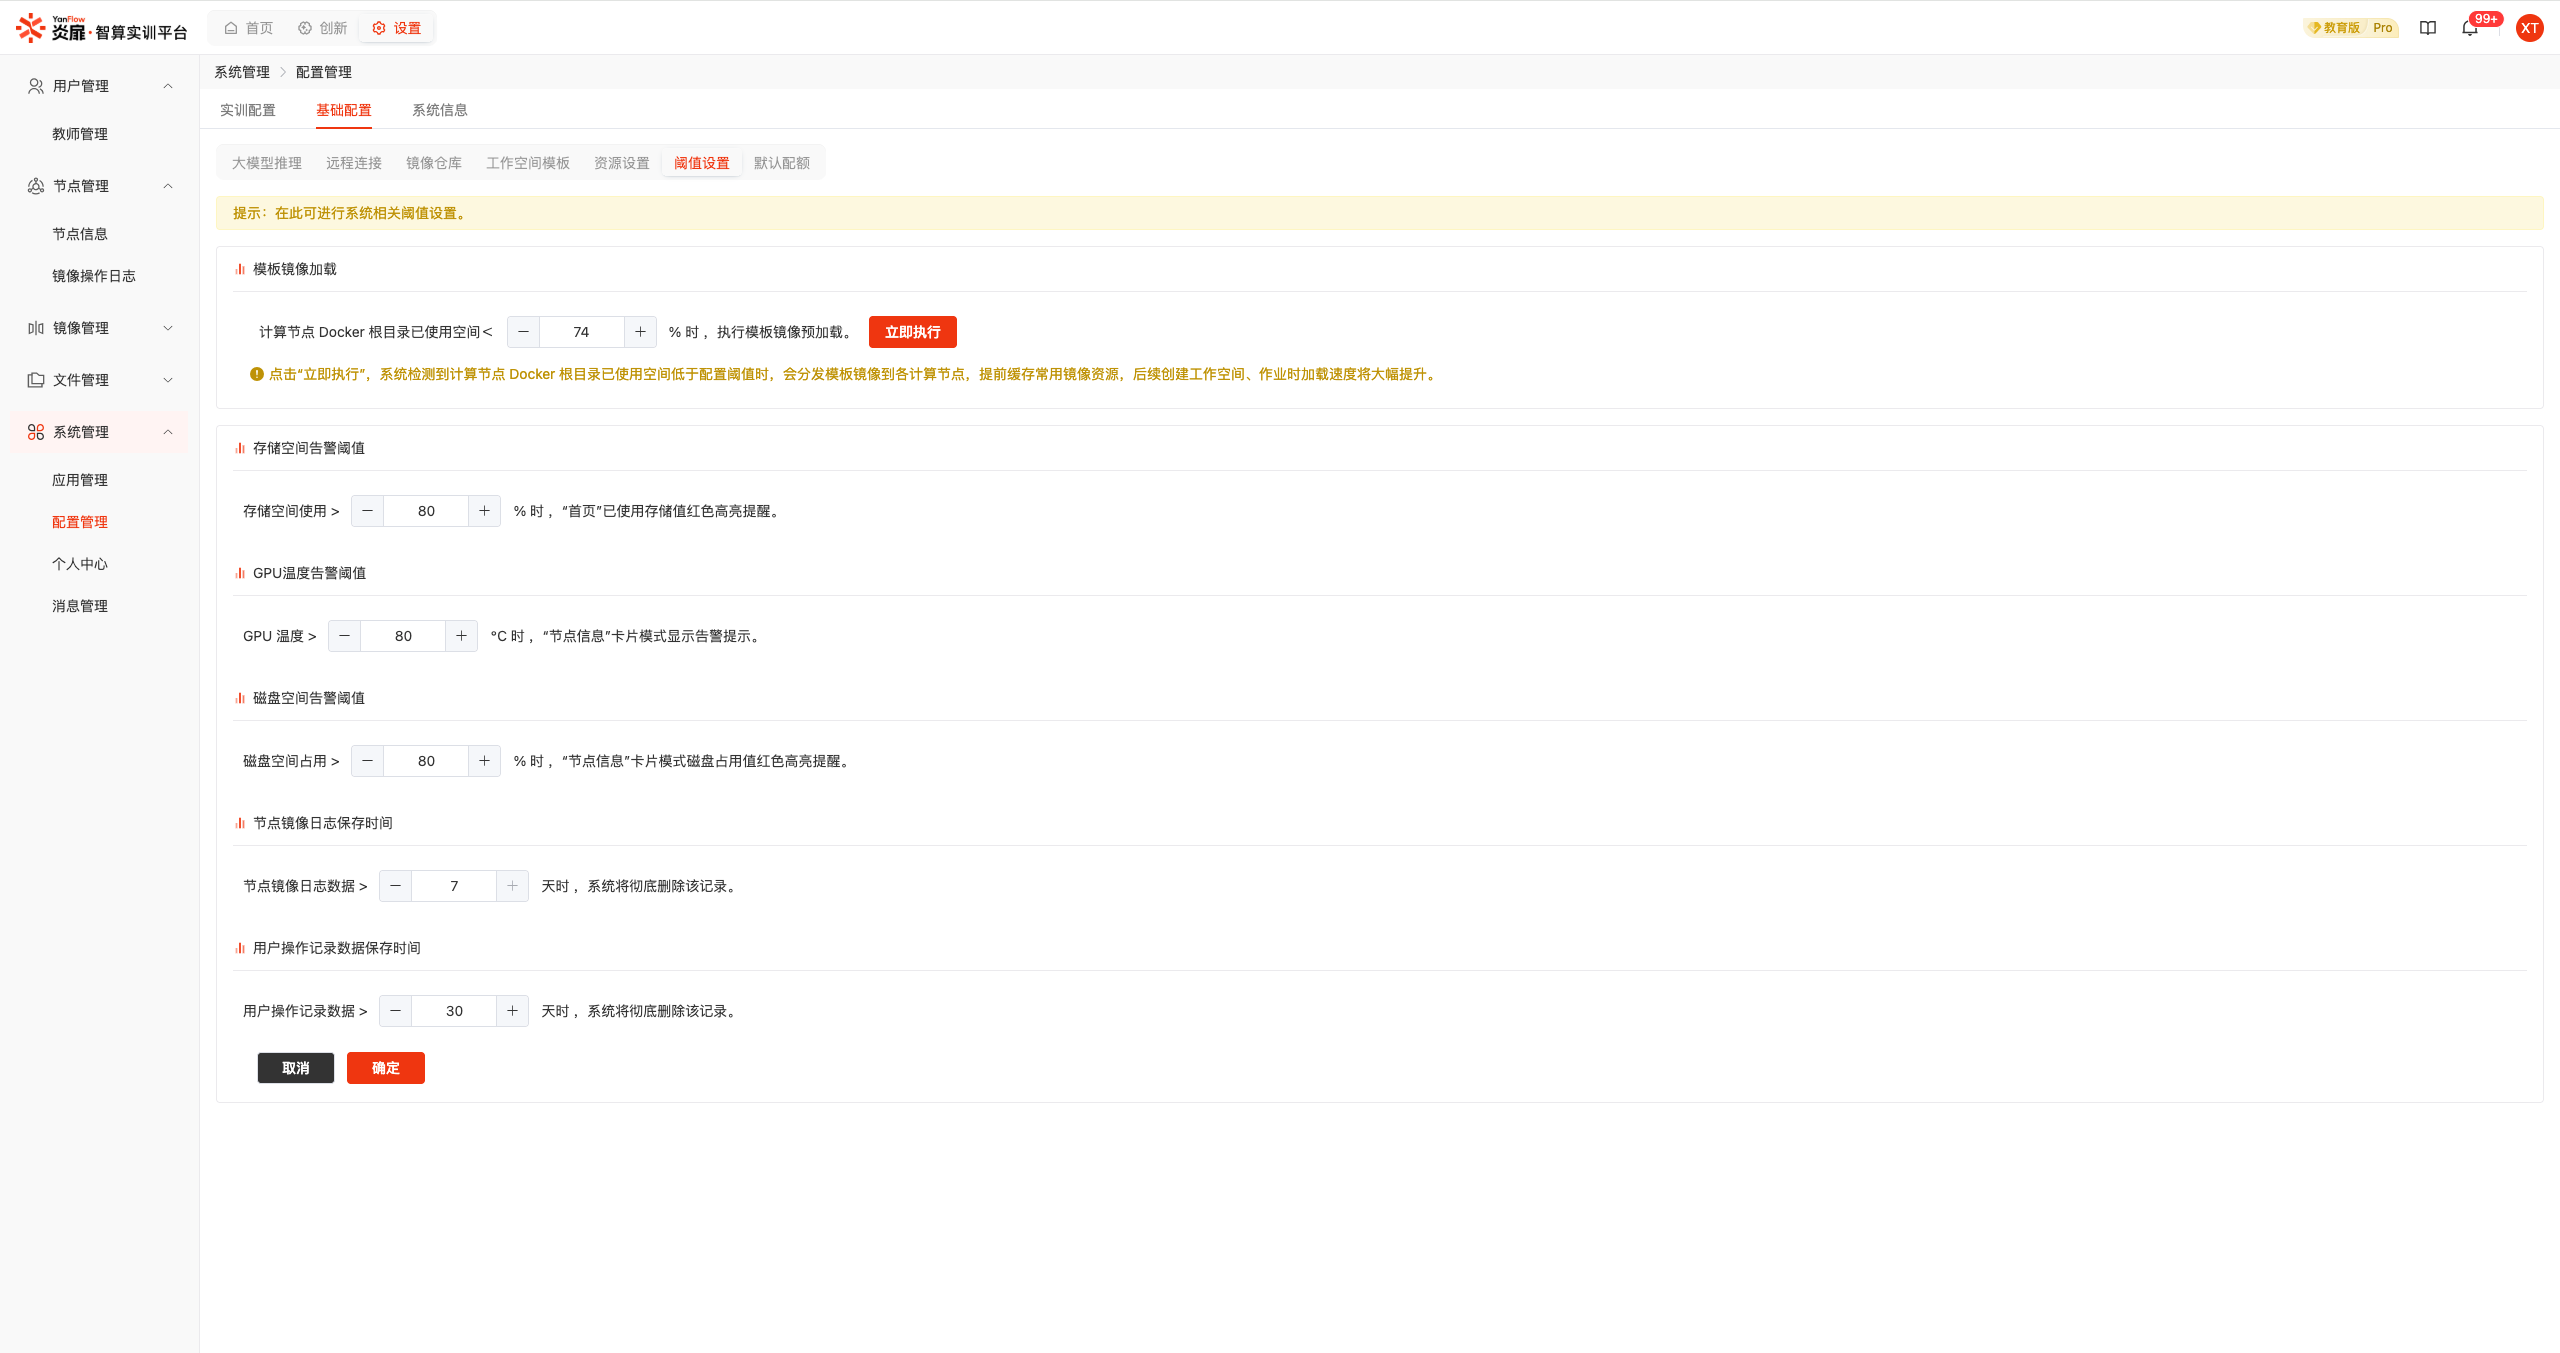
Note: The Template Image Loading Threshold requires clicking the
Execute Immediatelybutton for the settings to take effect and trigger the image loading process.
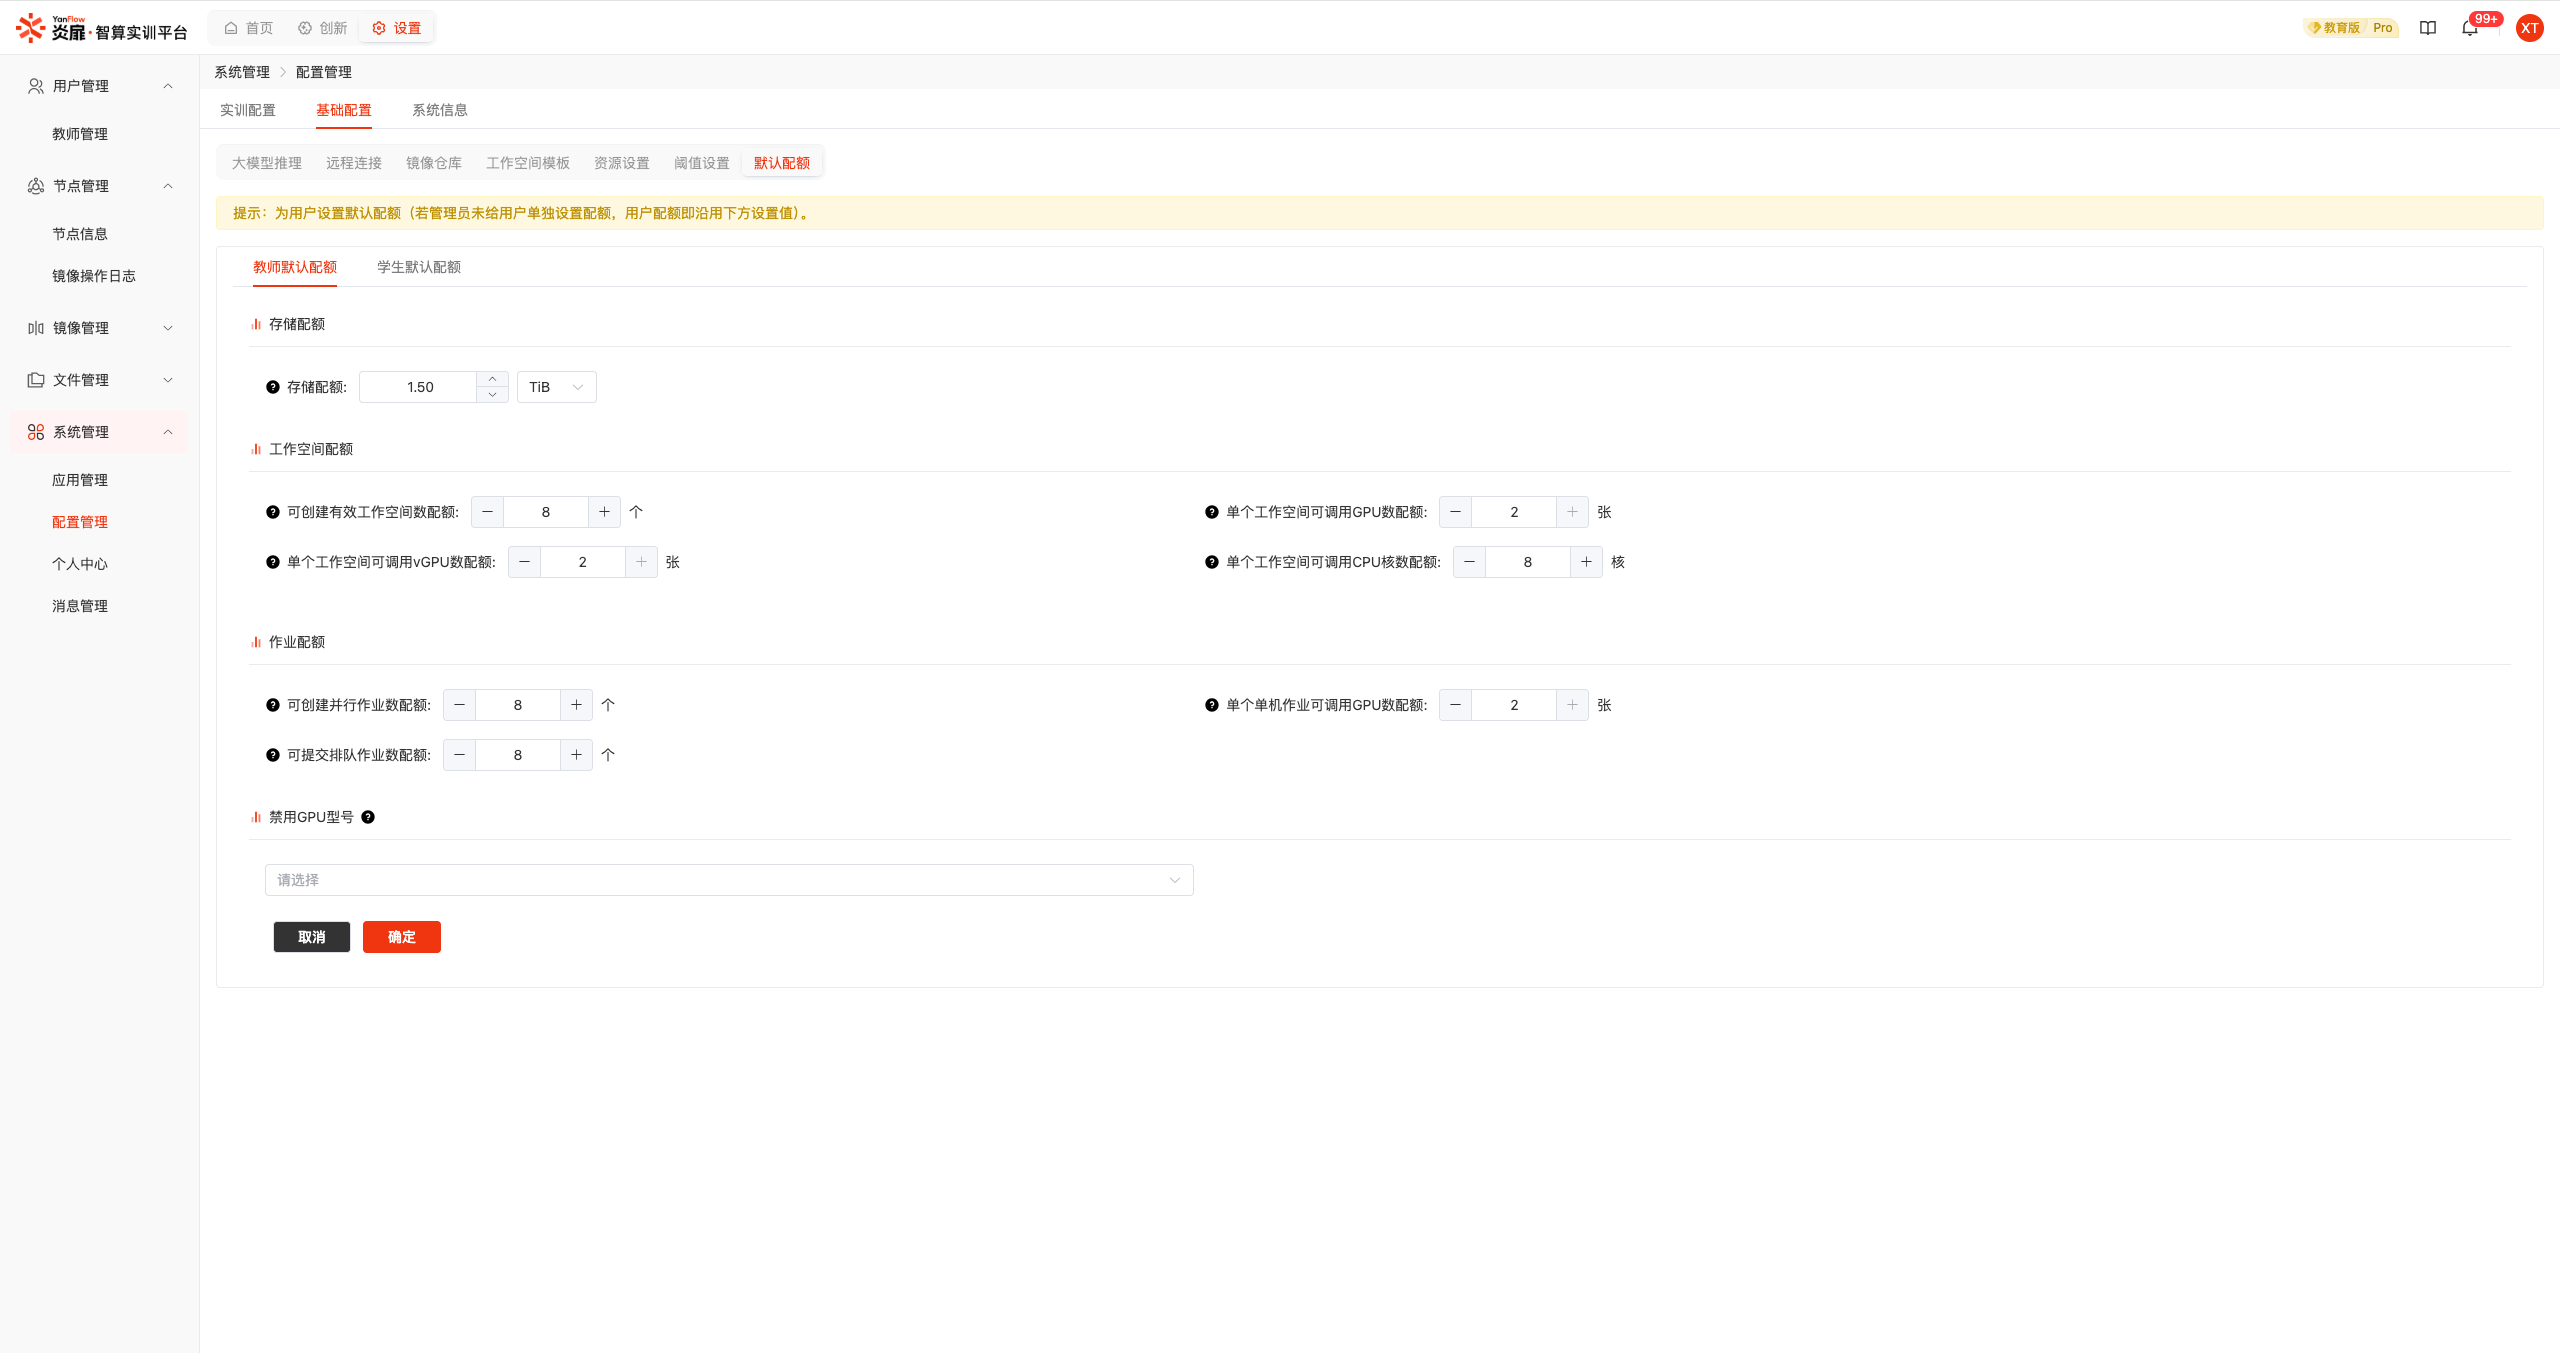
Default Quotas
Set default quota values for teachers and students.
Teacher Default Quotas: Supports setting default quotas for teachers, including storage quota, workspace quota, job quota, and disabled GPU models. Teacher quotas use the "Training and Innovation Sharing" mechanism, allowing flexible allocation between training and innovation activities with the total quota remaining unchanged.
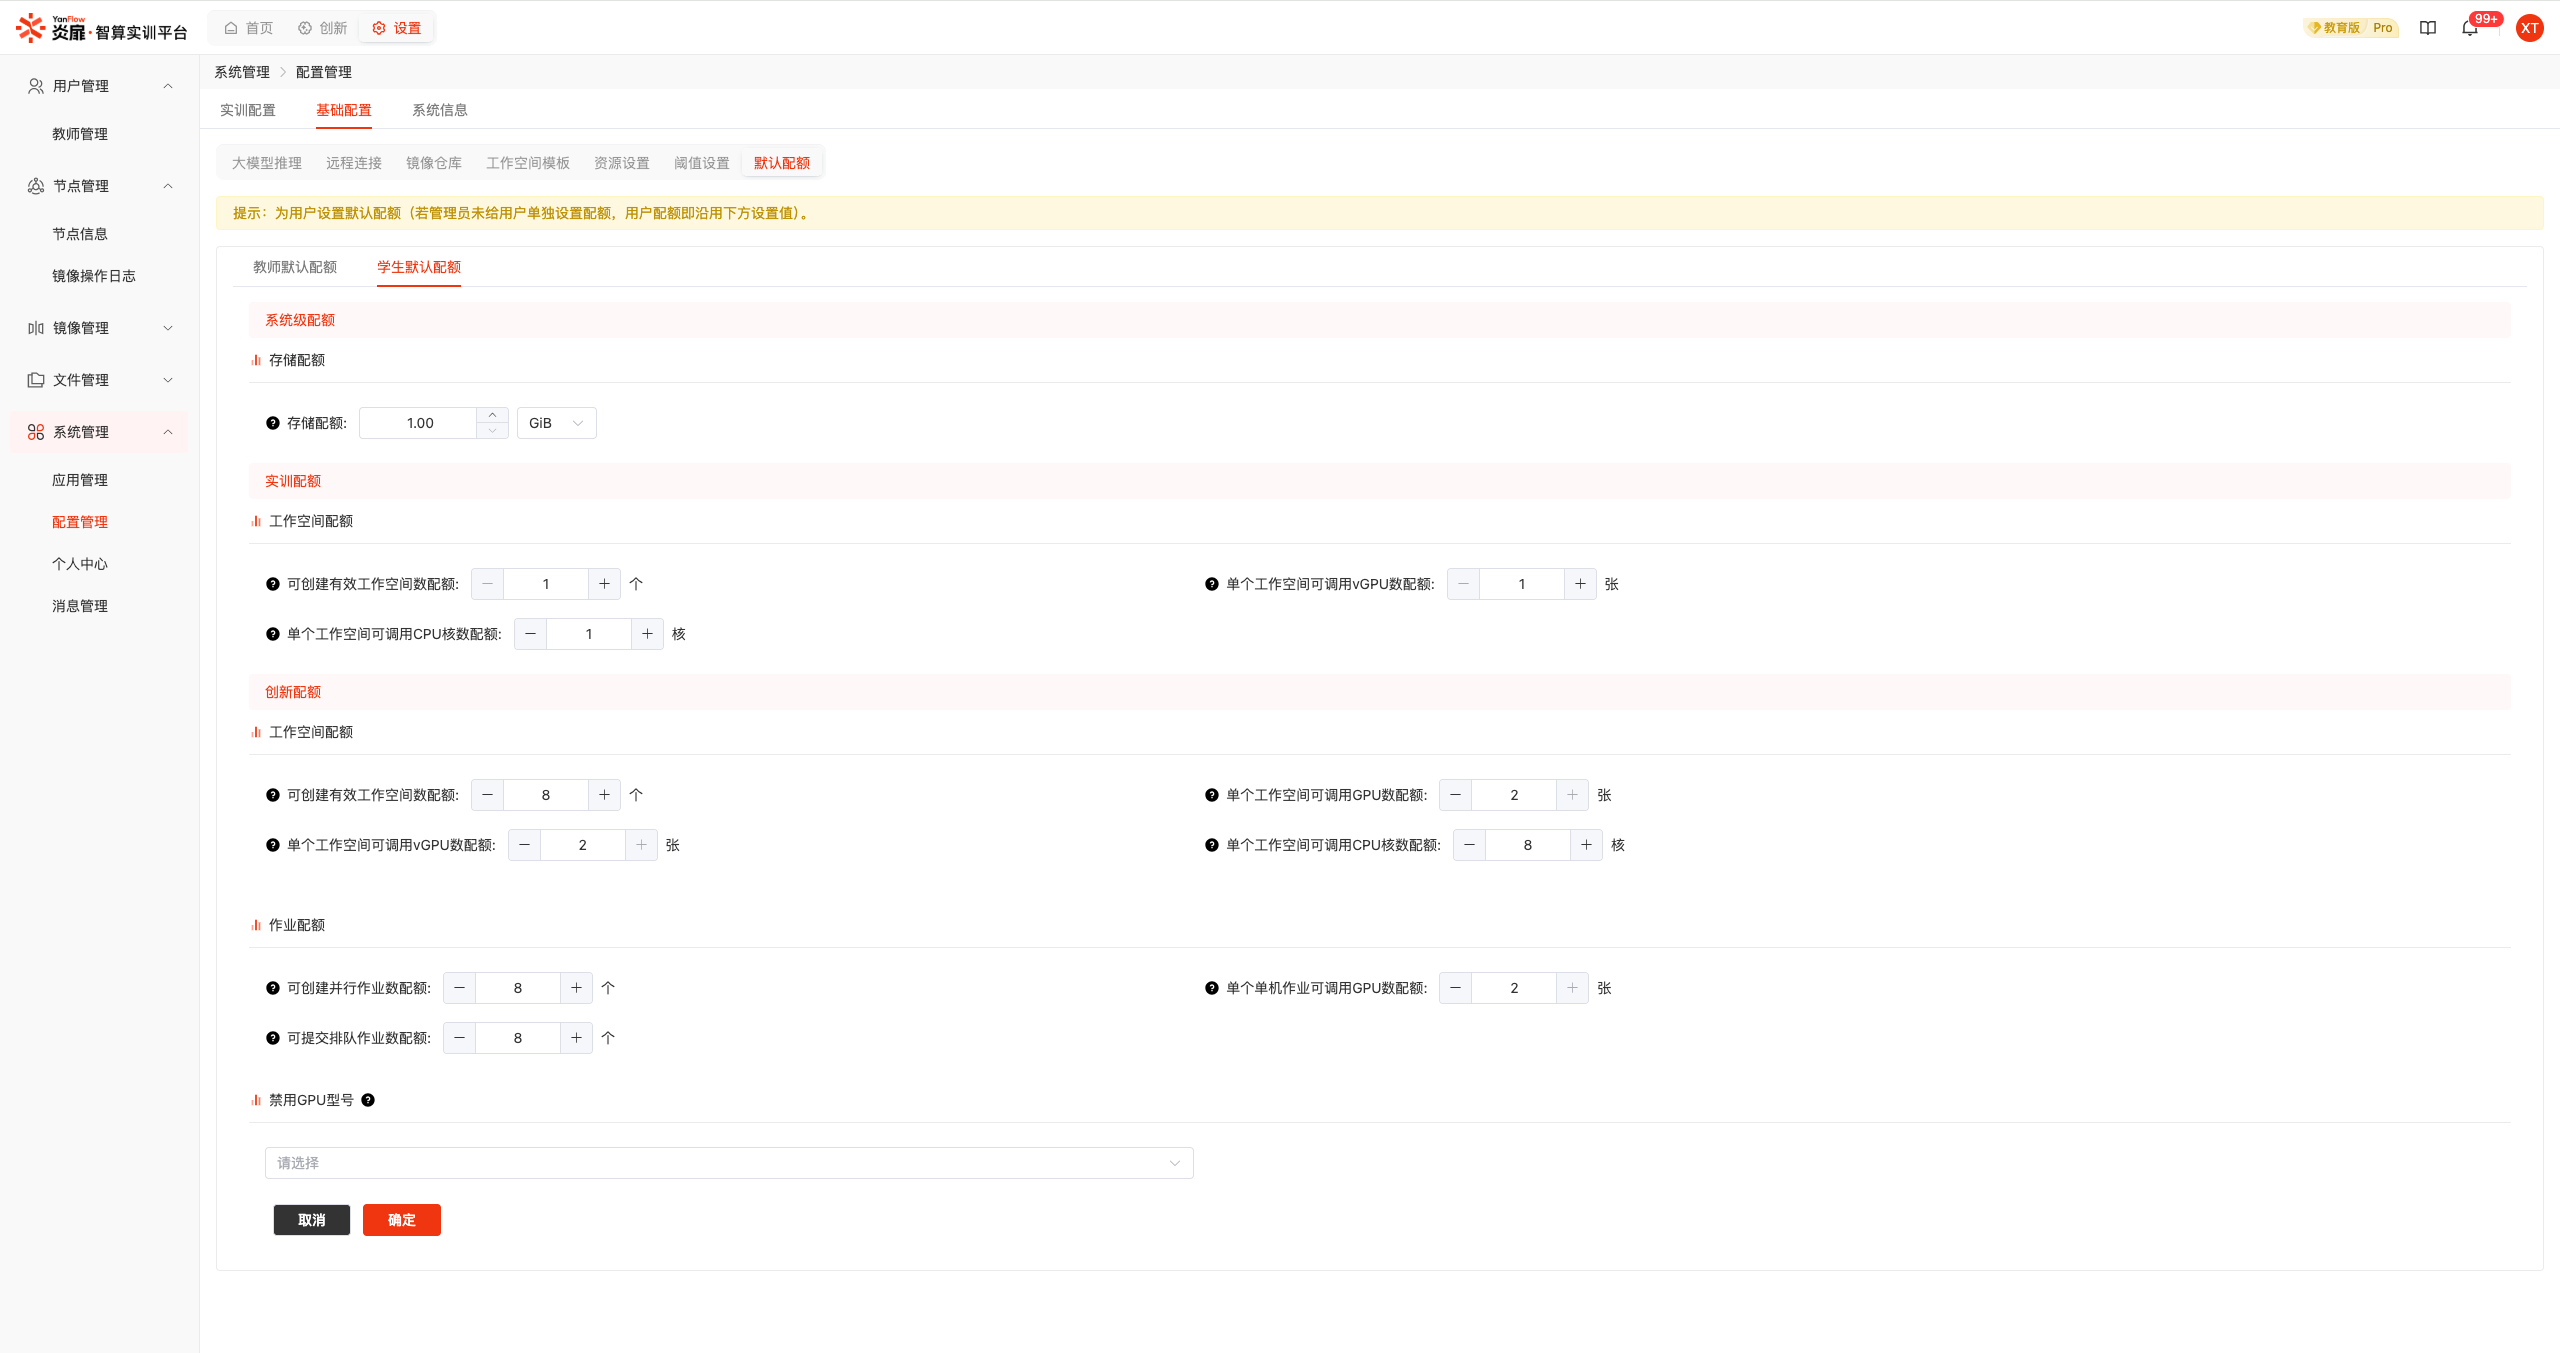
Student Default Quotas: Supports setting default quotas for students. Student storage quotas use the "Training and Innovation Sharing" mechanism, with the total storage quota in the system remaining unchanged; other quotas (such as workspace quota, job quota, disabled GPU models, etc.) use the "Training and Innovation Independent" mechanism, with no interference between them.
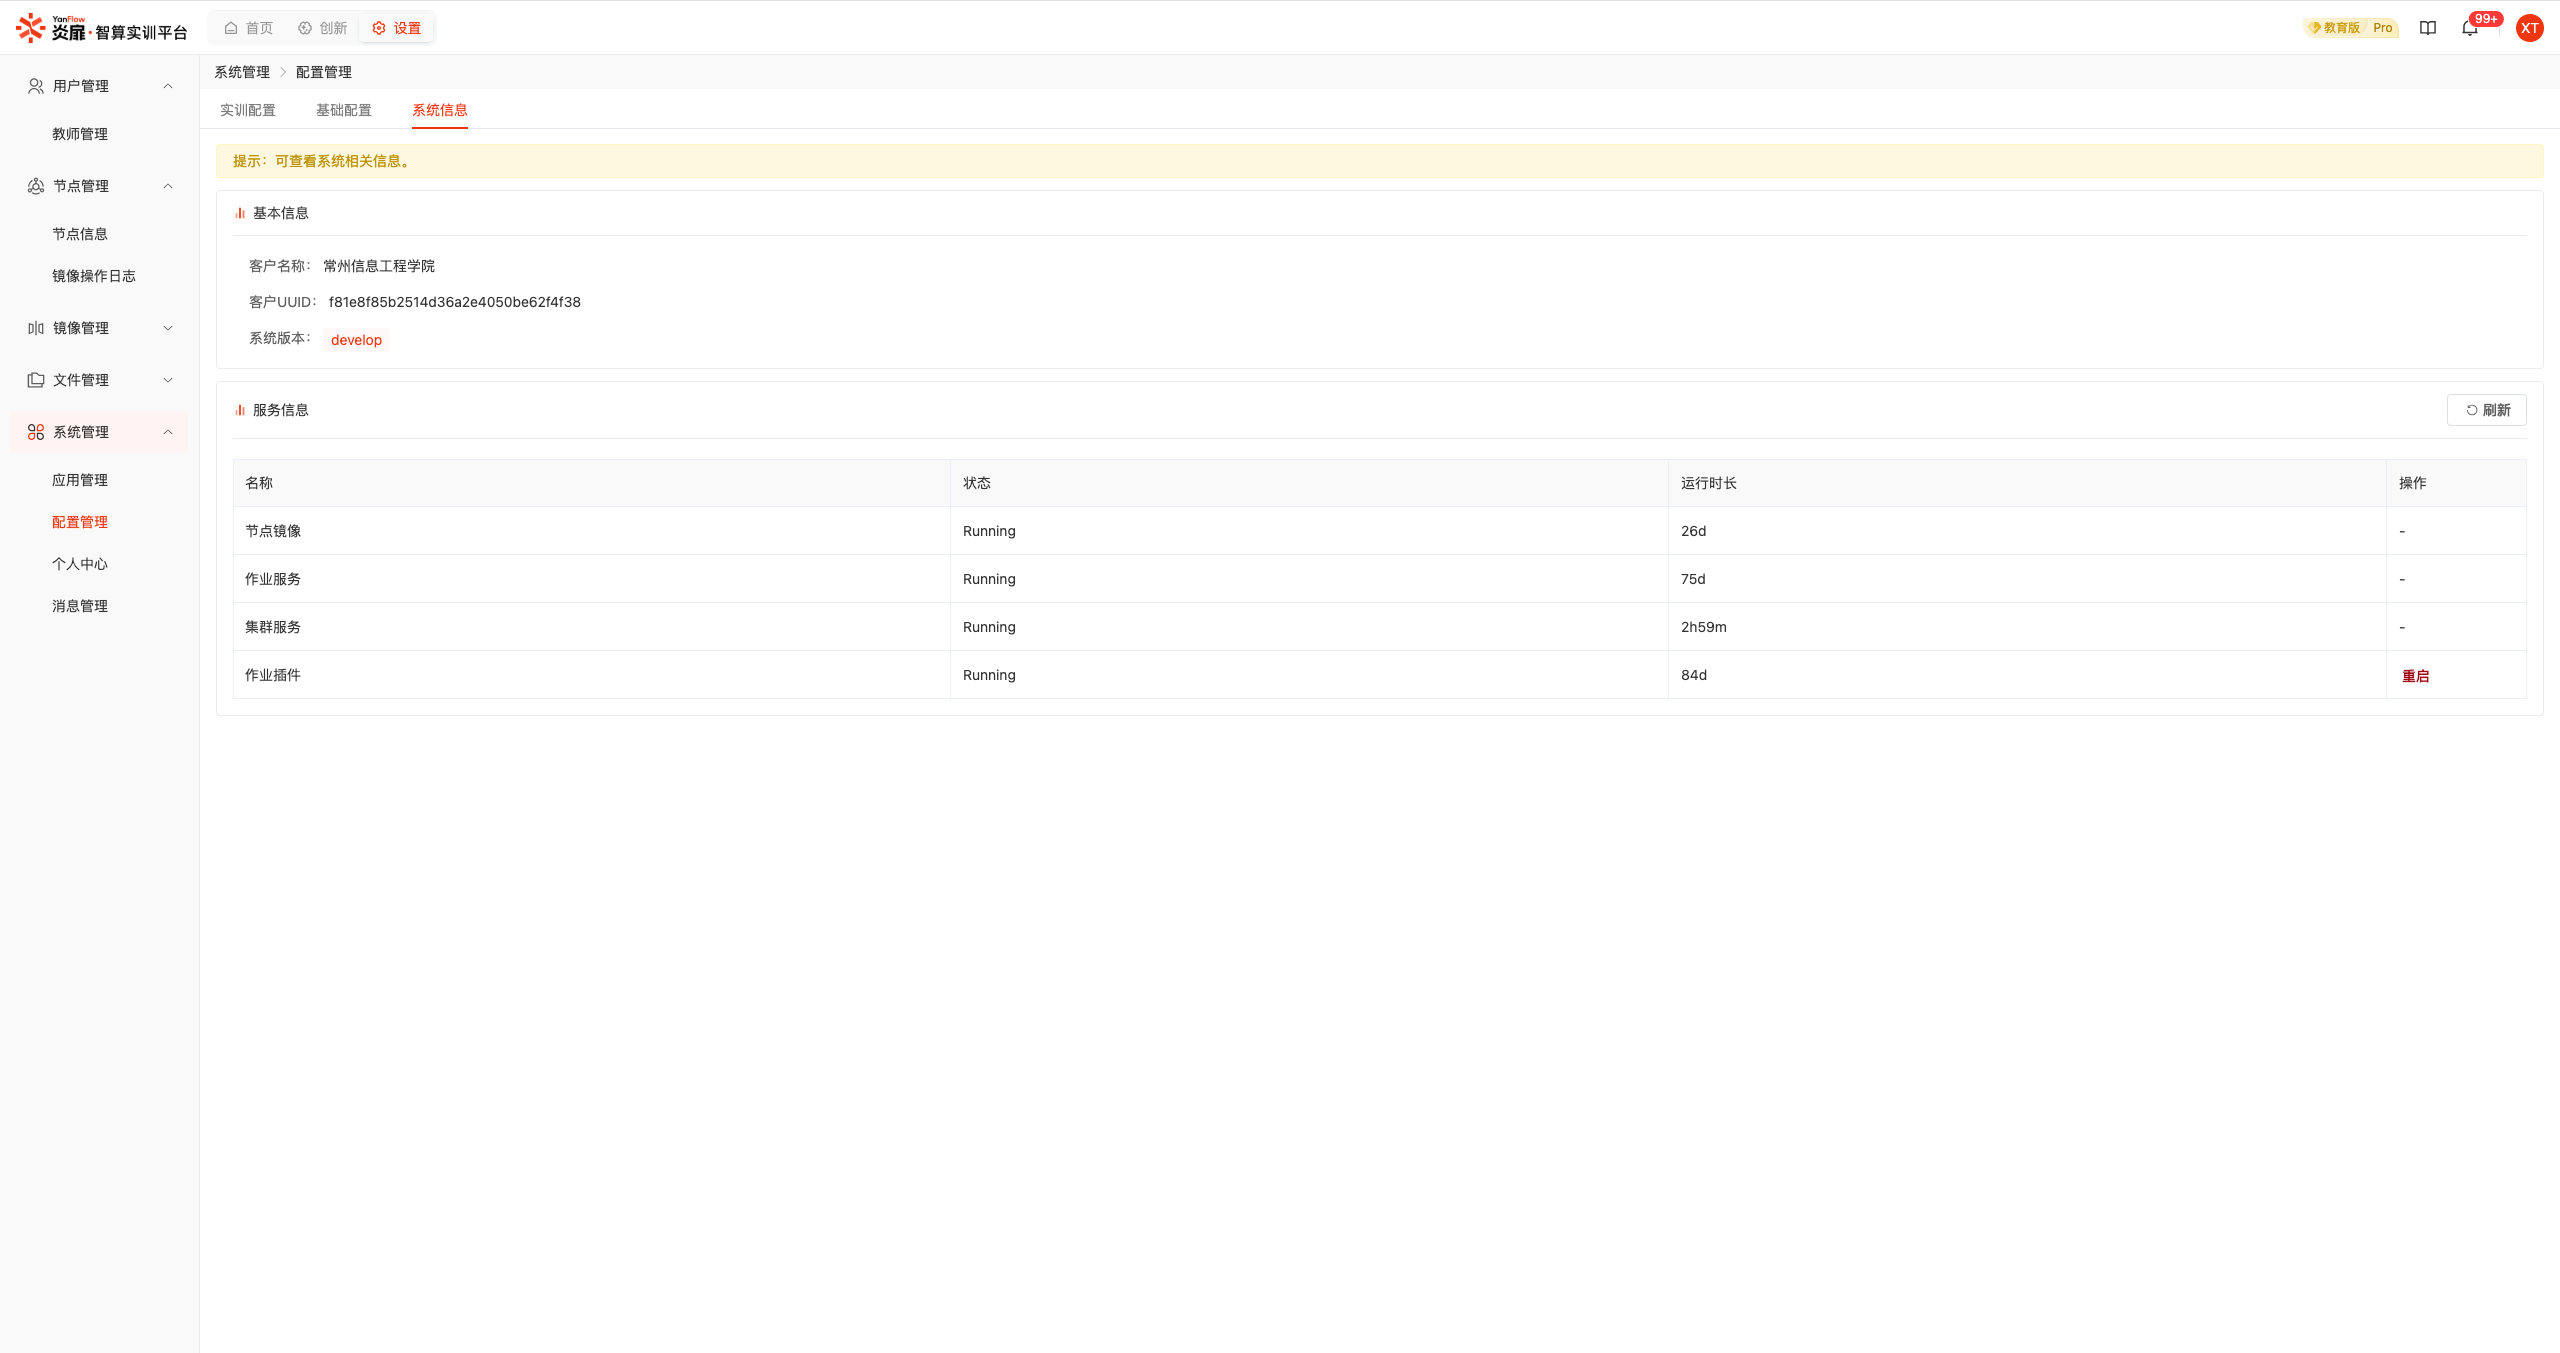
System Information
Displays basic system information and service information. Click the Restart button in the service information to restart the corresponding service.
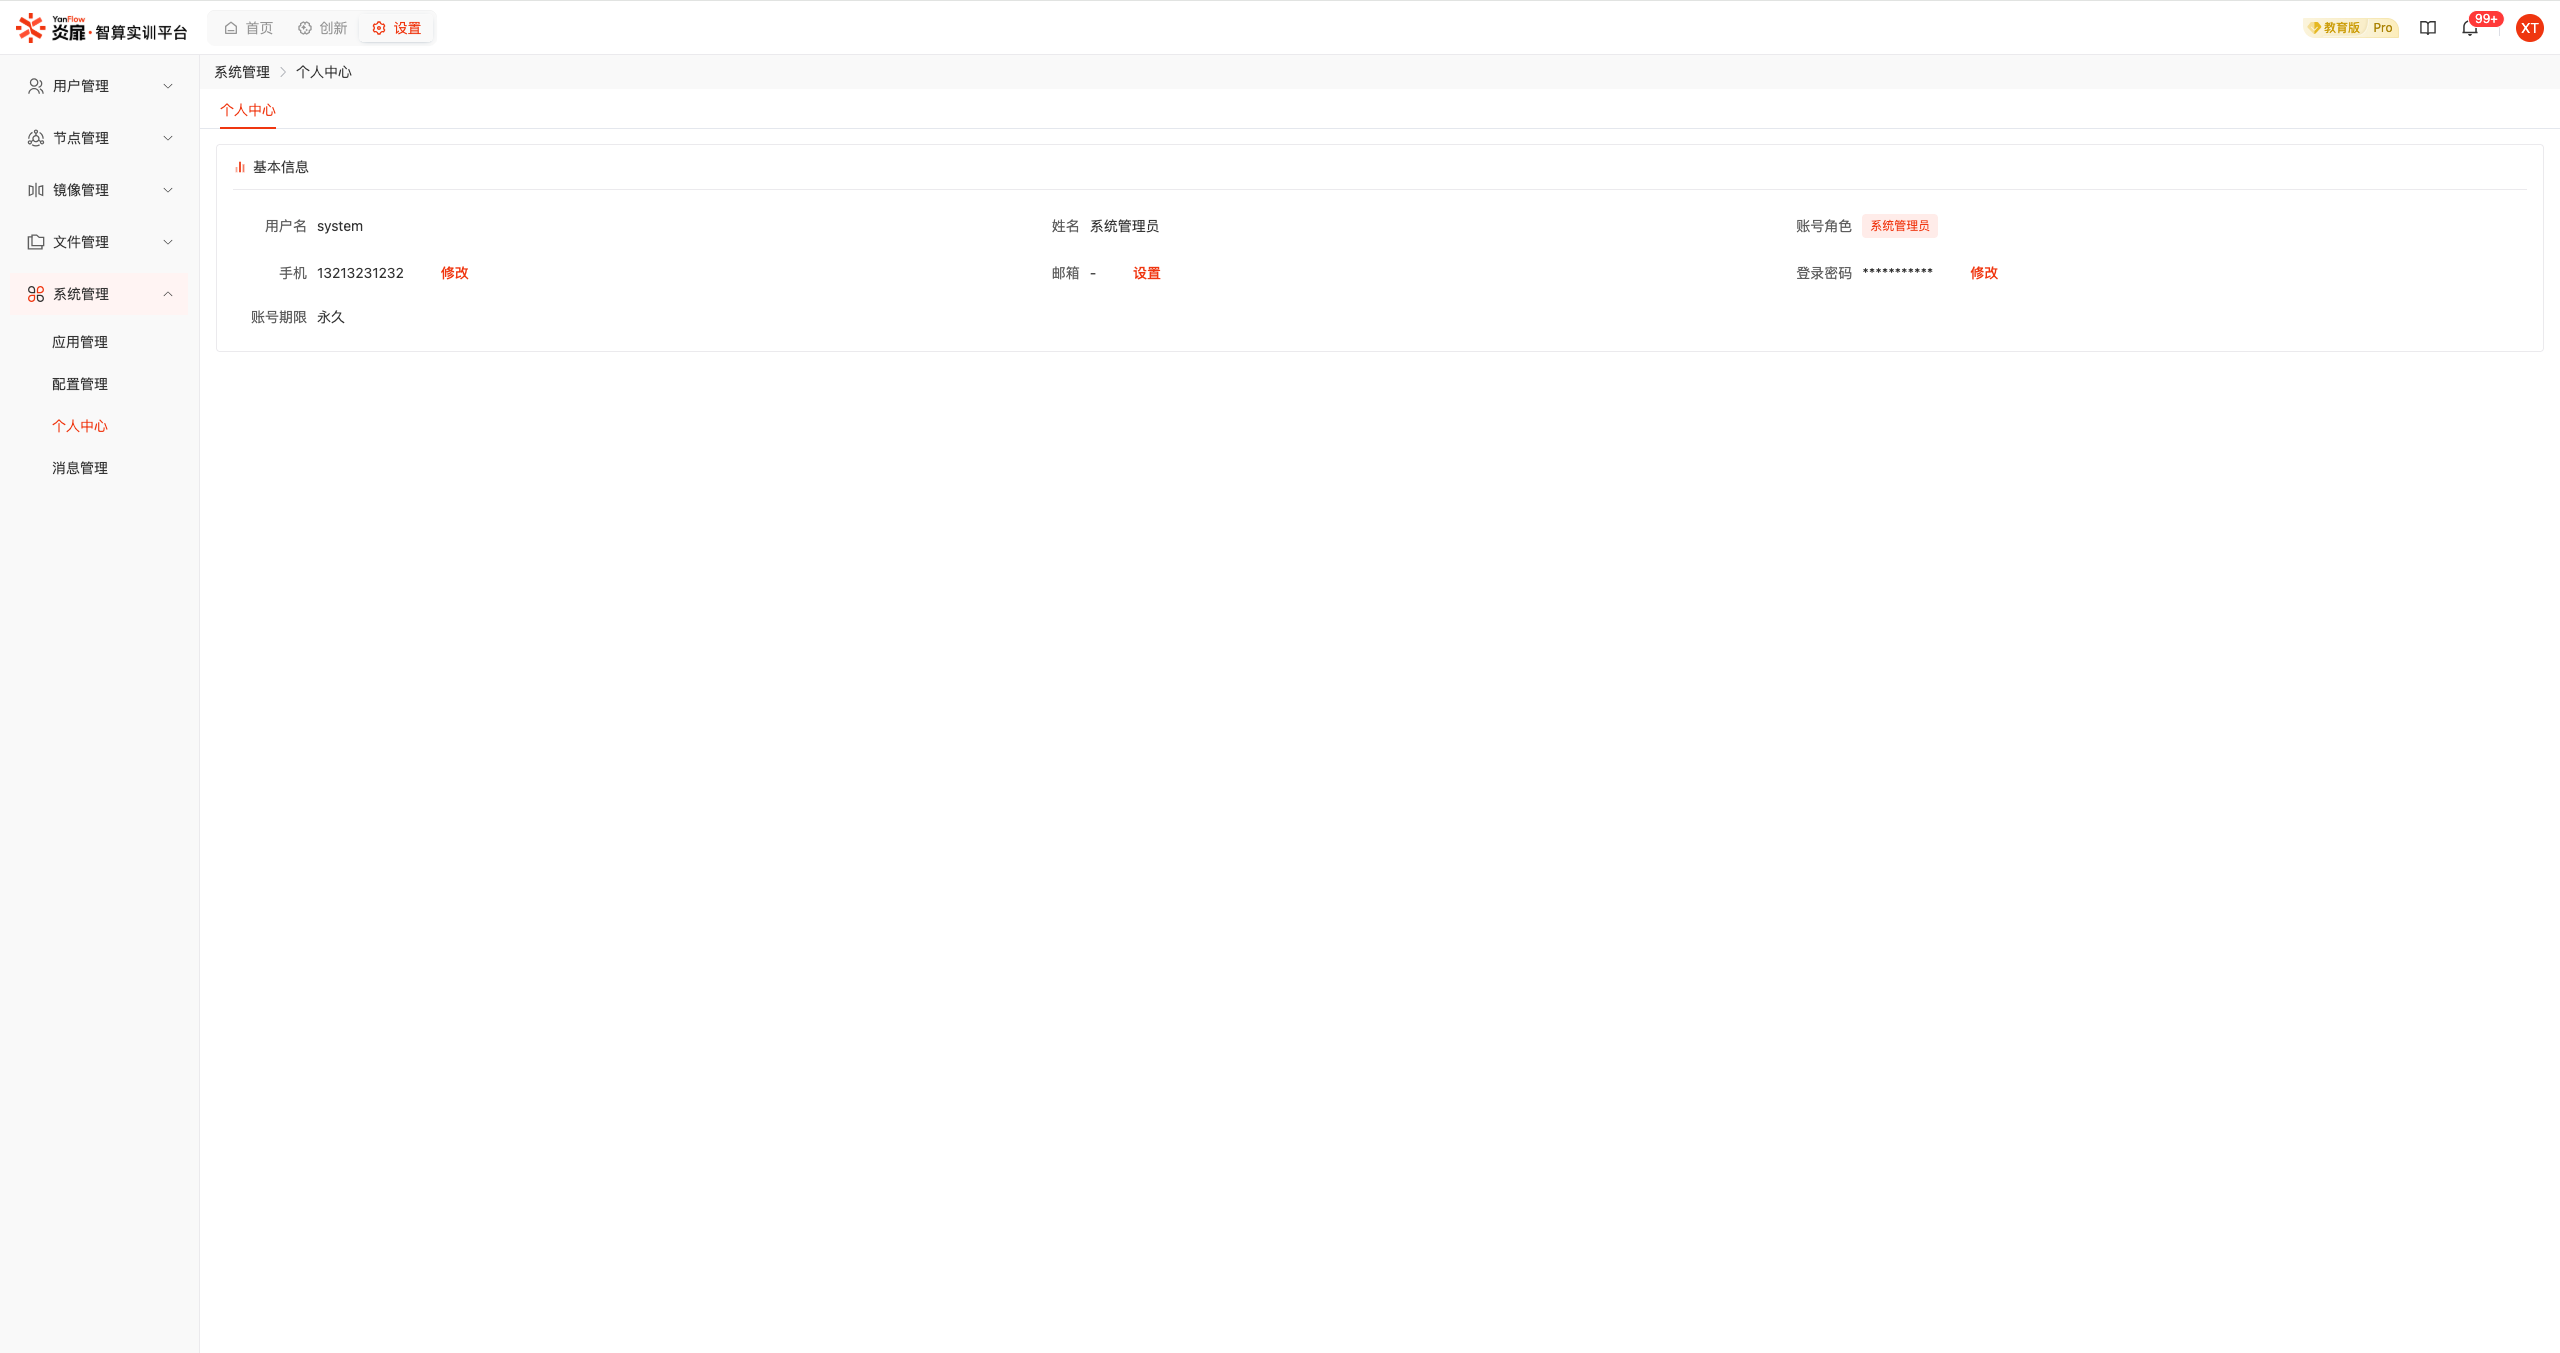
Personal Center
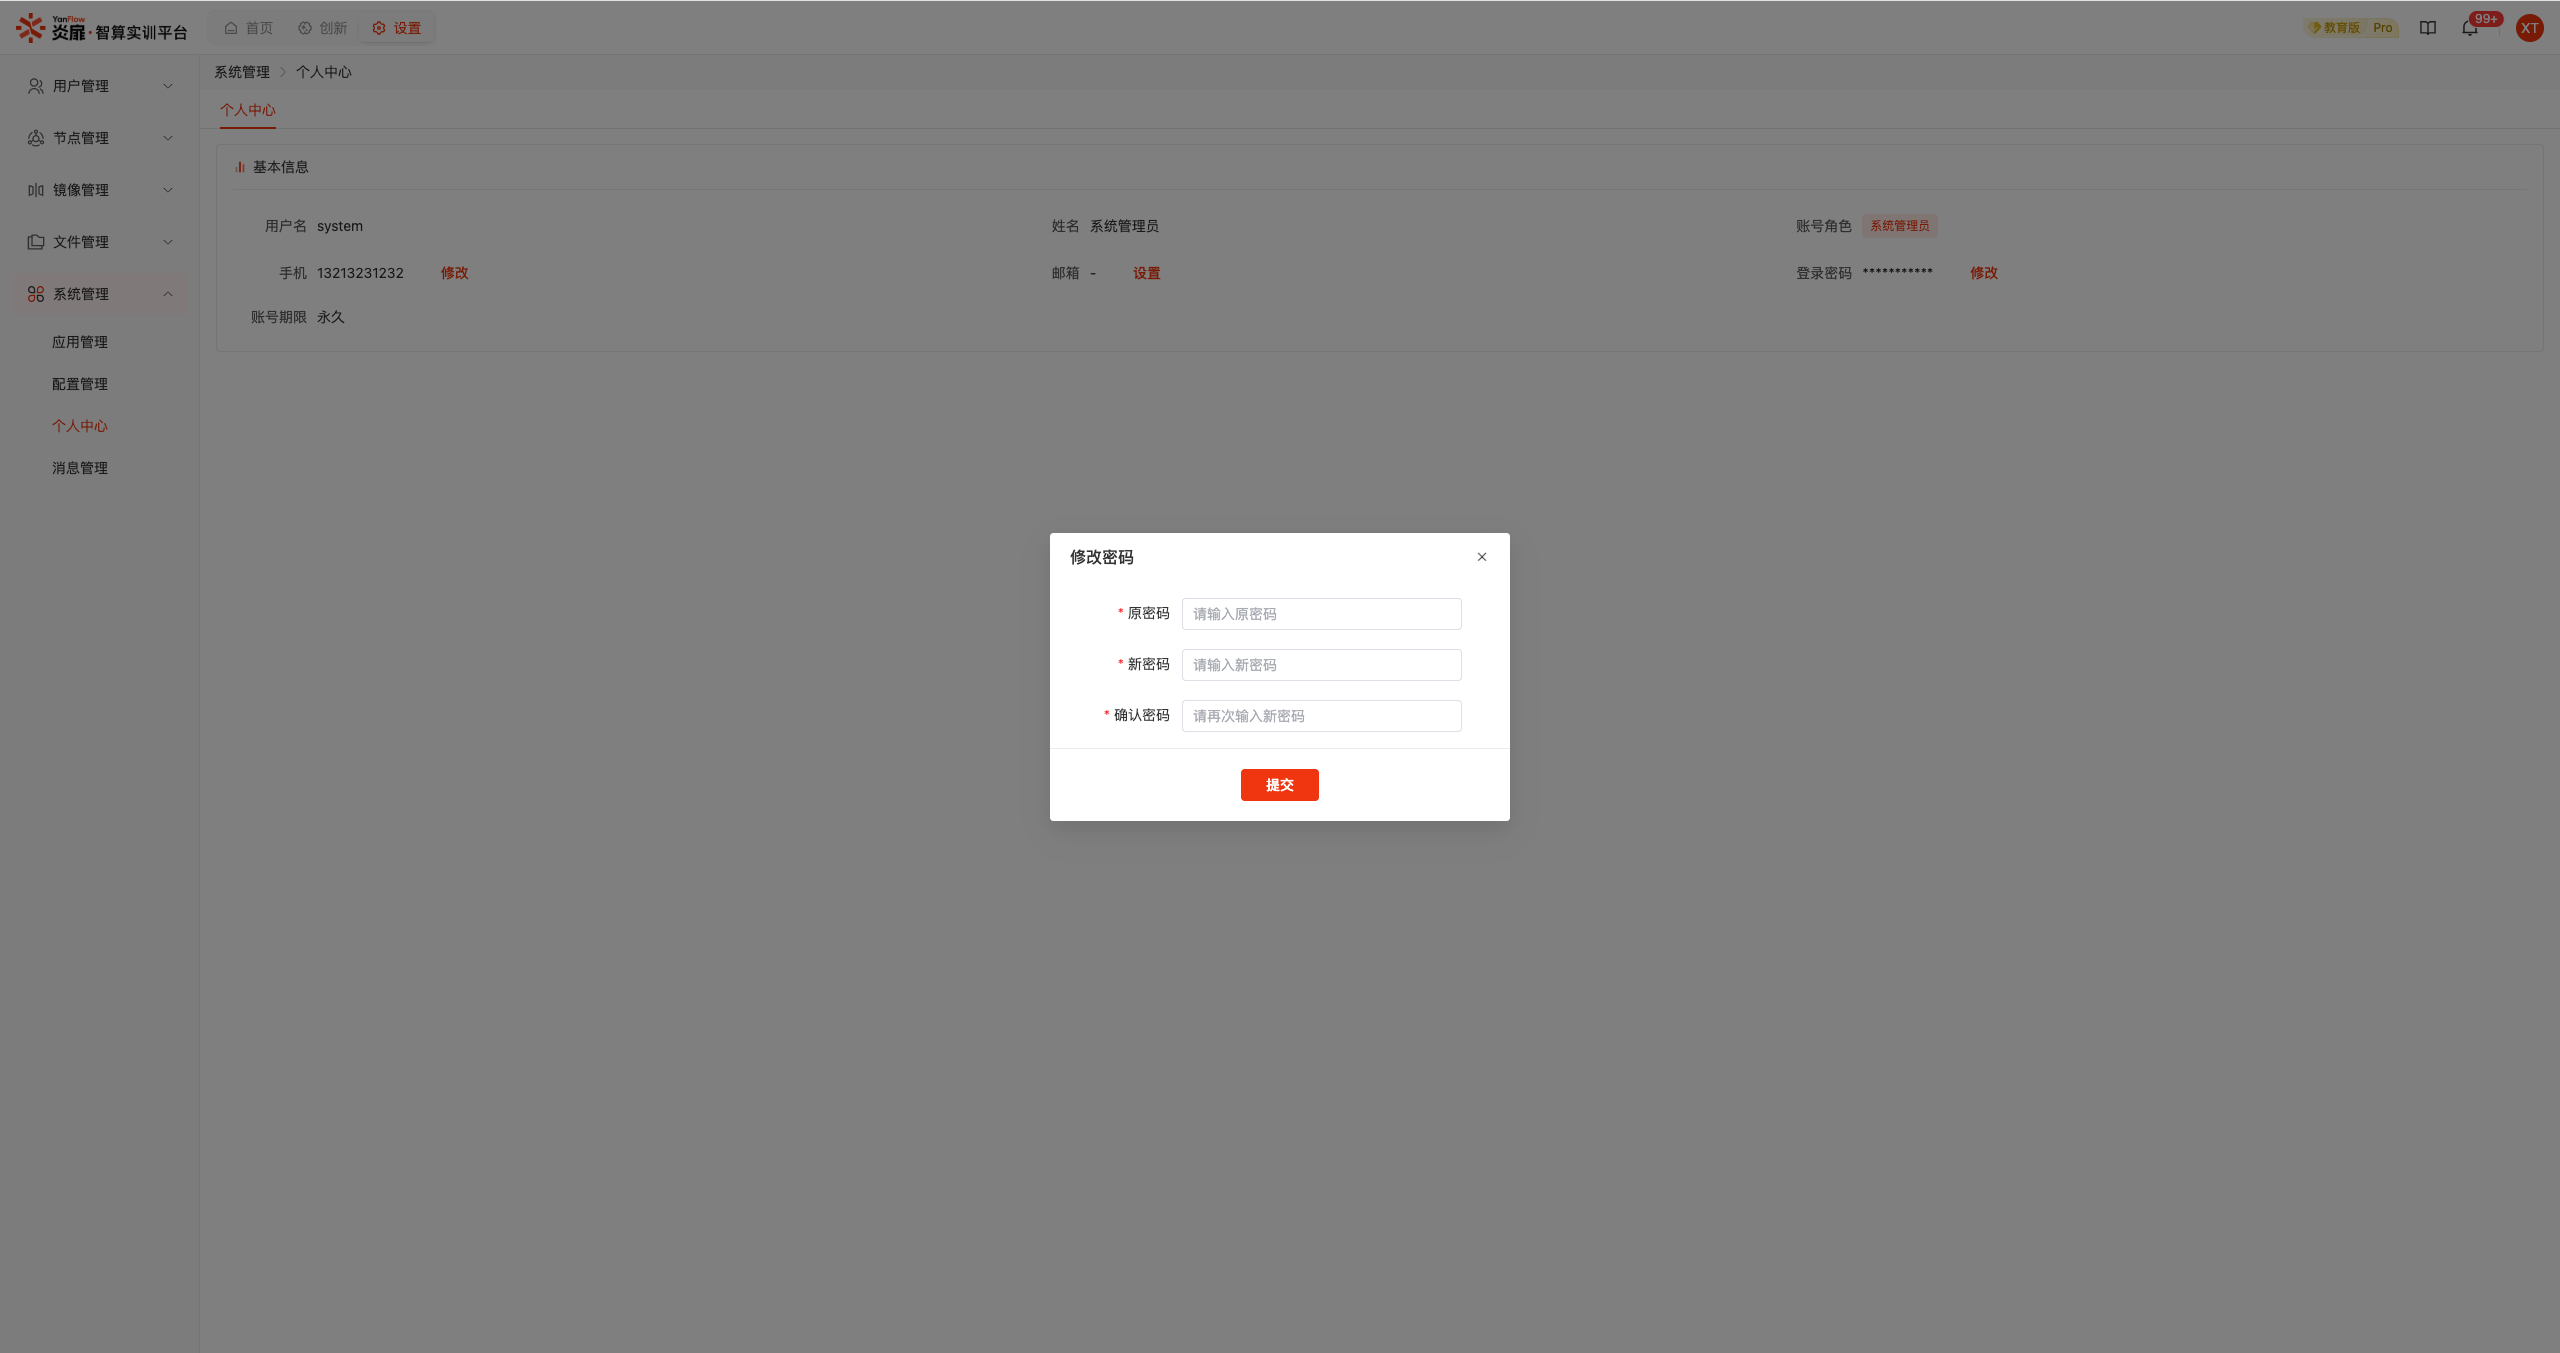
Click Settings - Personal Center or Personal Center in the top-right username to enter the Personal Center page, where you can view and maintain your basic information.
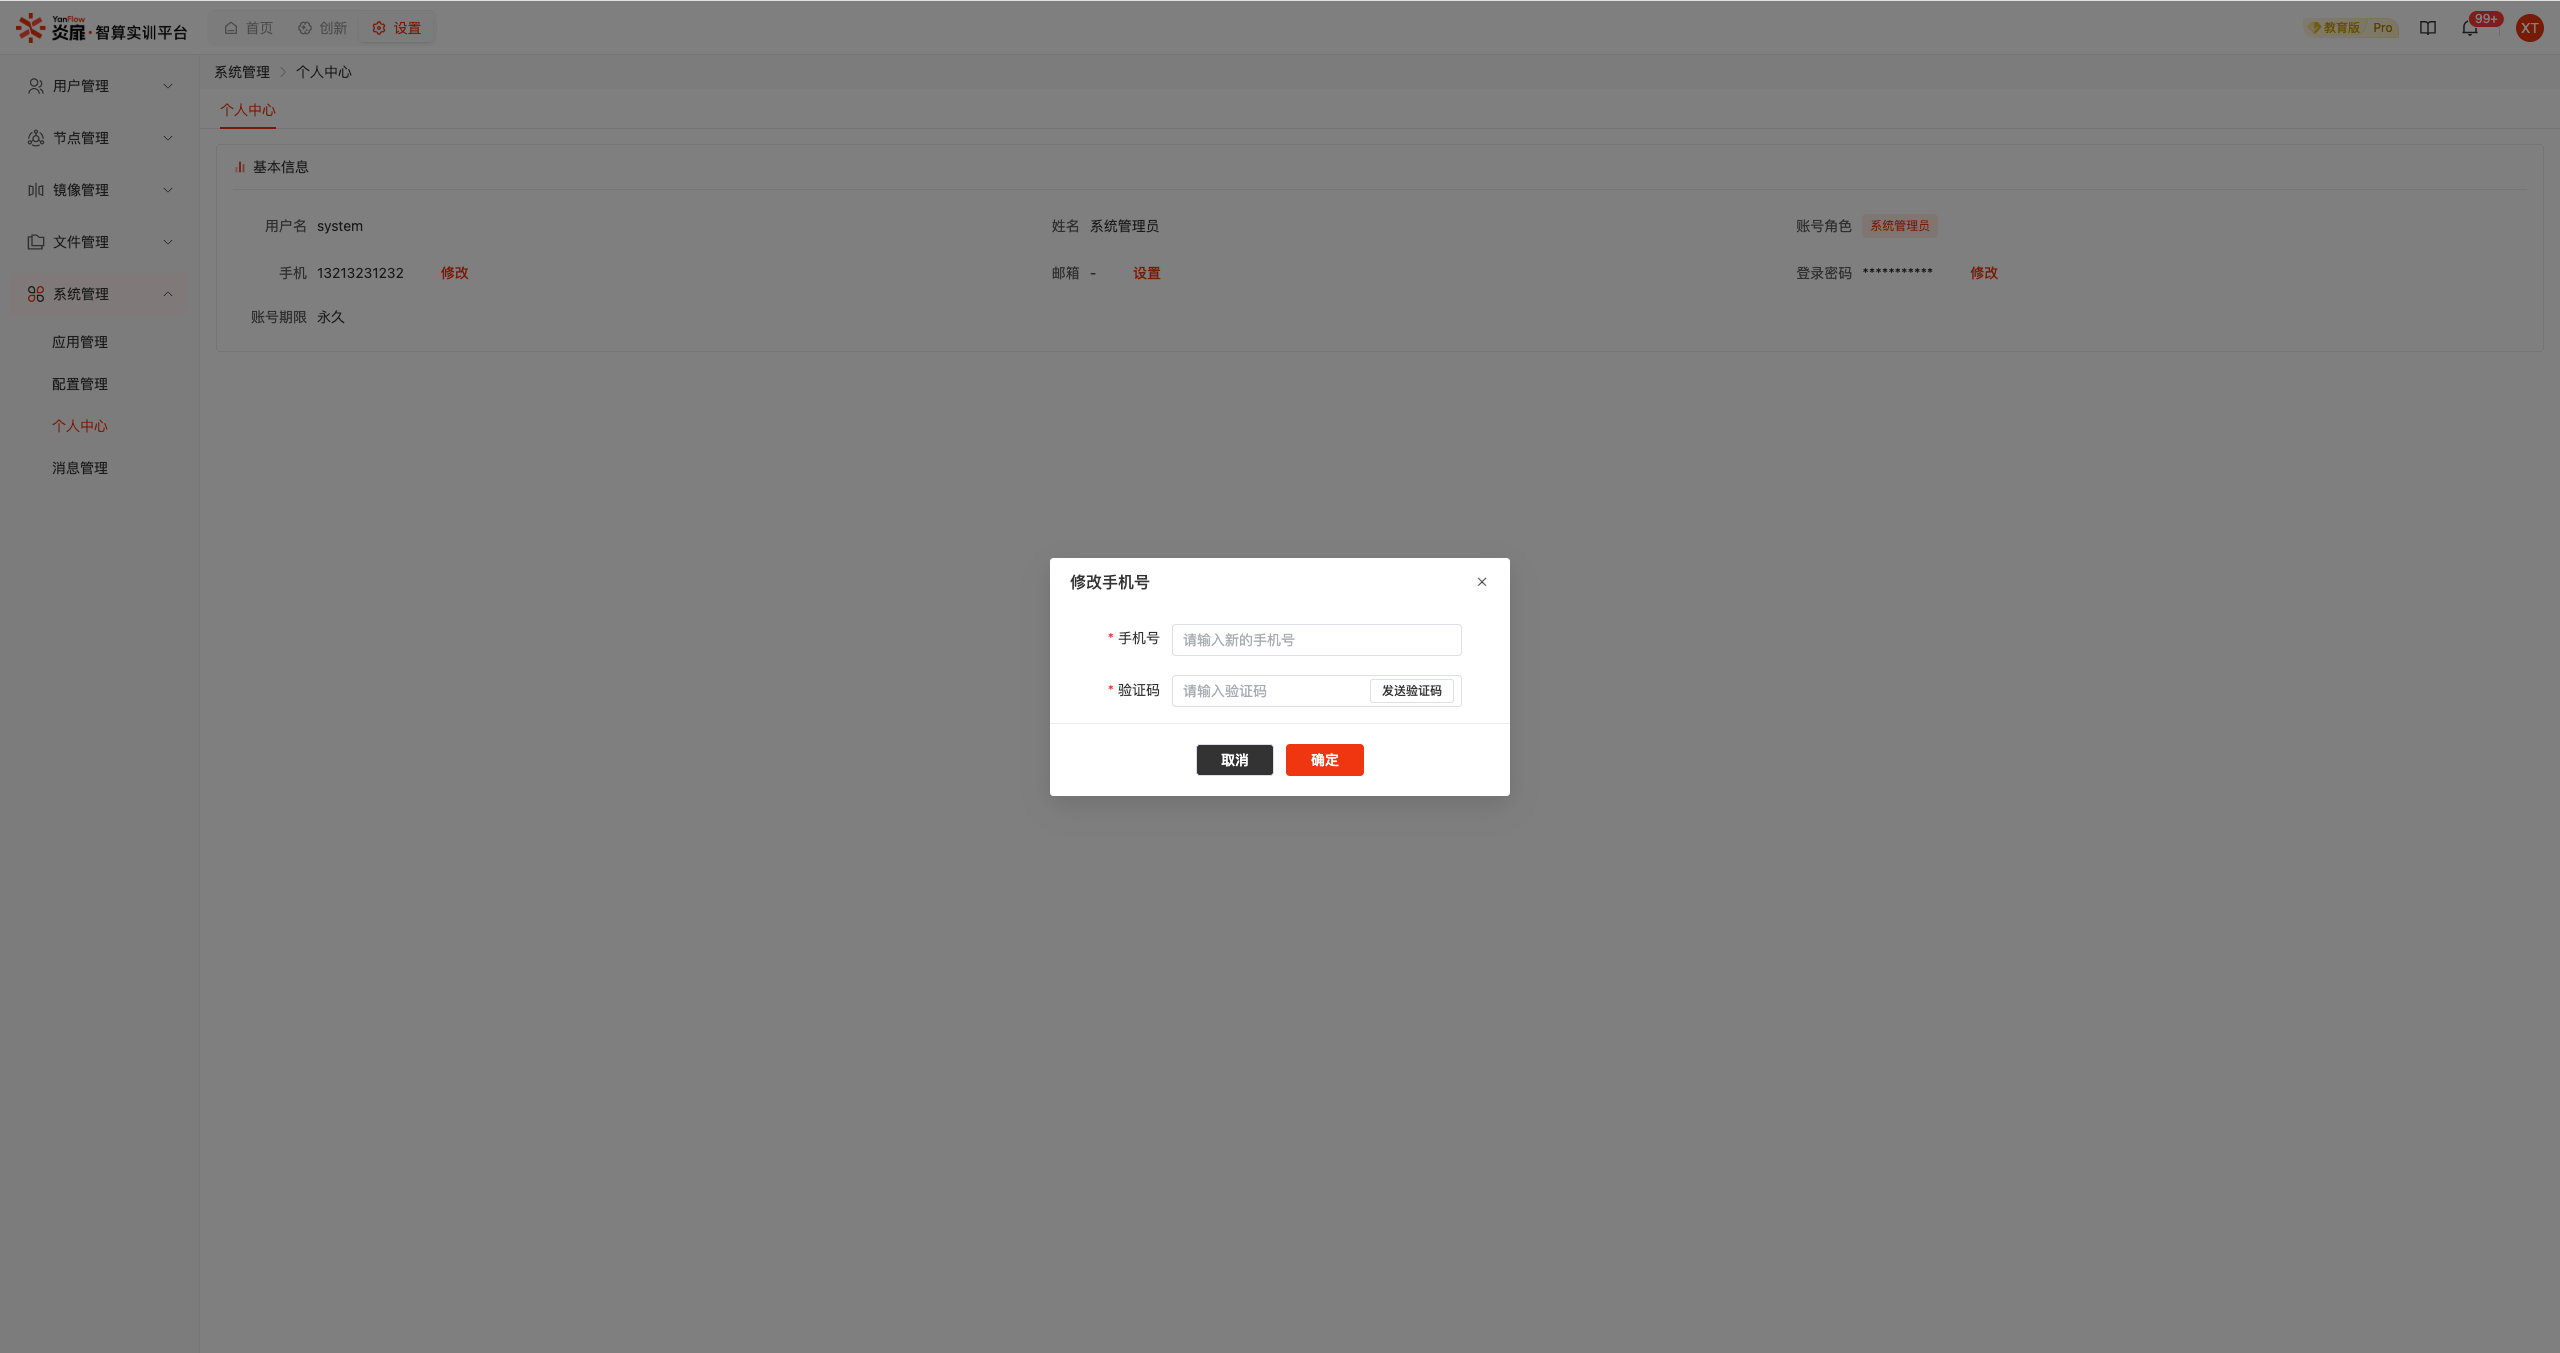
Modify Phone Number: Click the Modify button for the phone number, enter the new phone number and verification code, and click the Confirm button to modify the phone number.
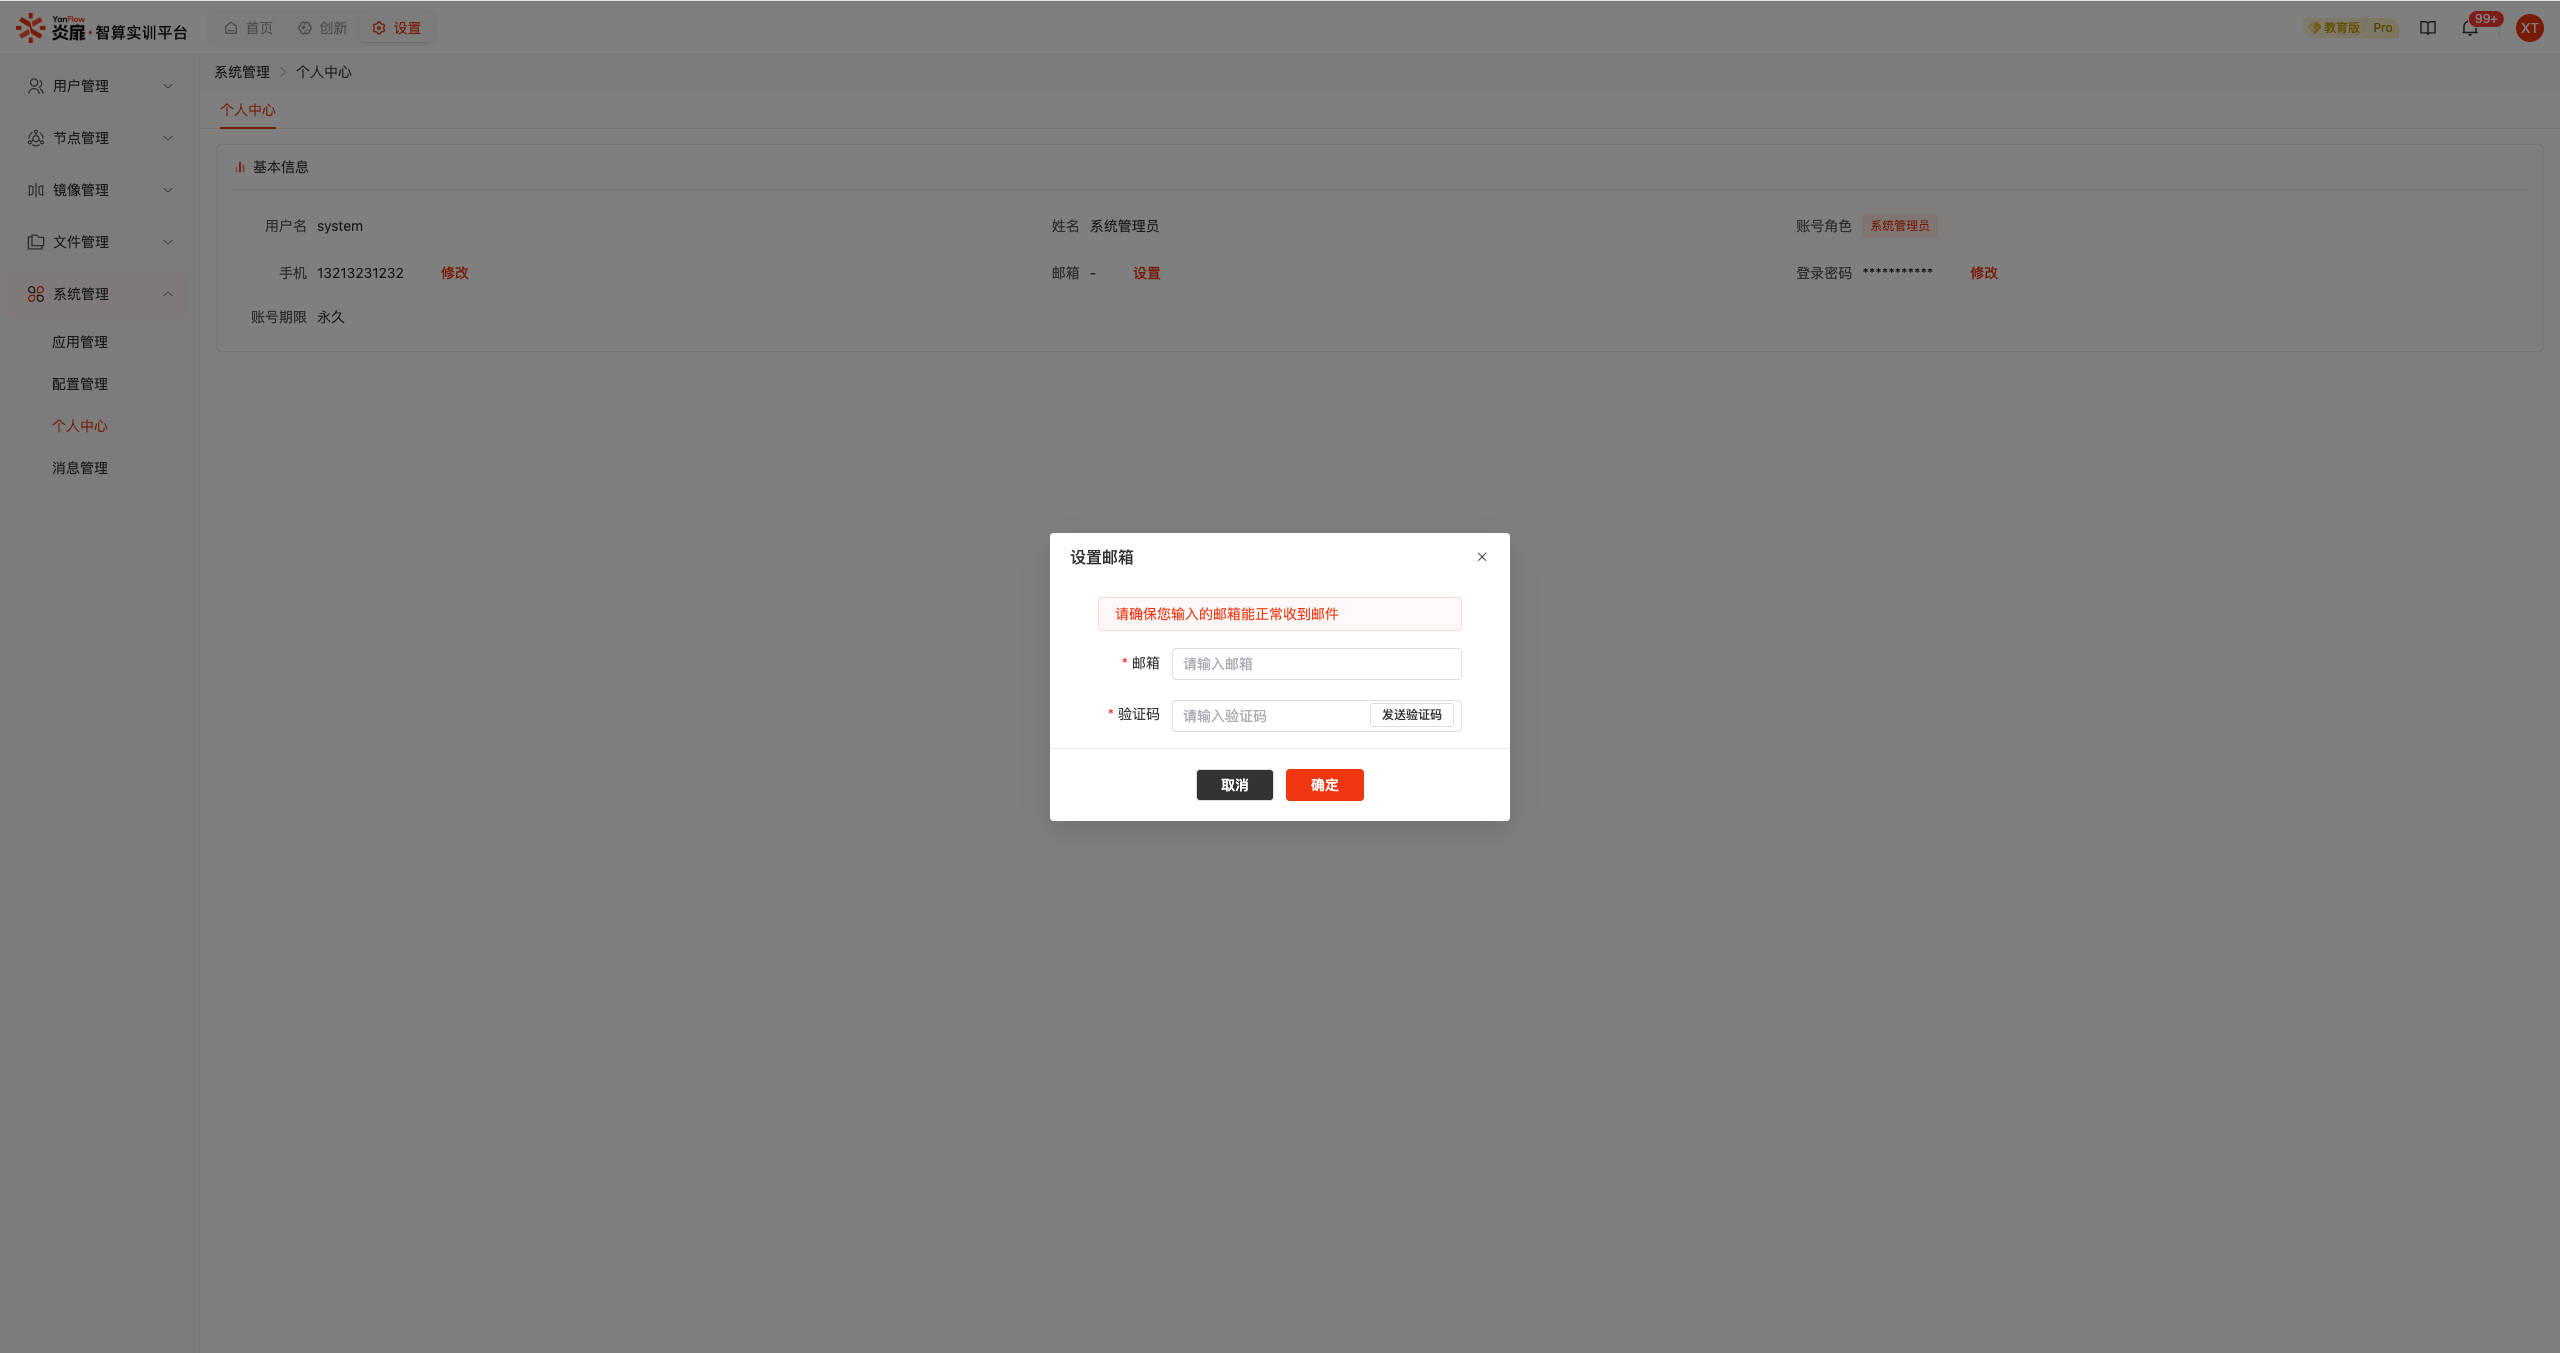
Set/Modify Email: Click the Set or Modify button for the email, enter the email address and verification code, and click the Confirm button to set the email.
Modify Login Password: Click the Modify button for the password, enter Original Password, New Password, Confirm New Password, and click the Submit button to successfully modify the login password. After successful password modification, you will be logged out and need to log in again.
Message Management
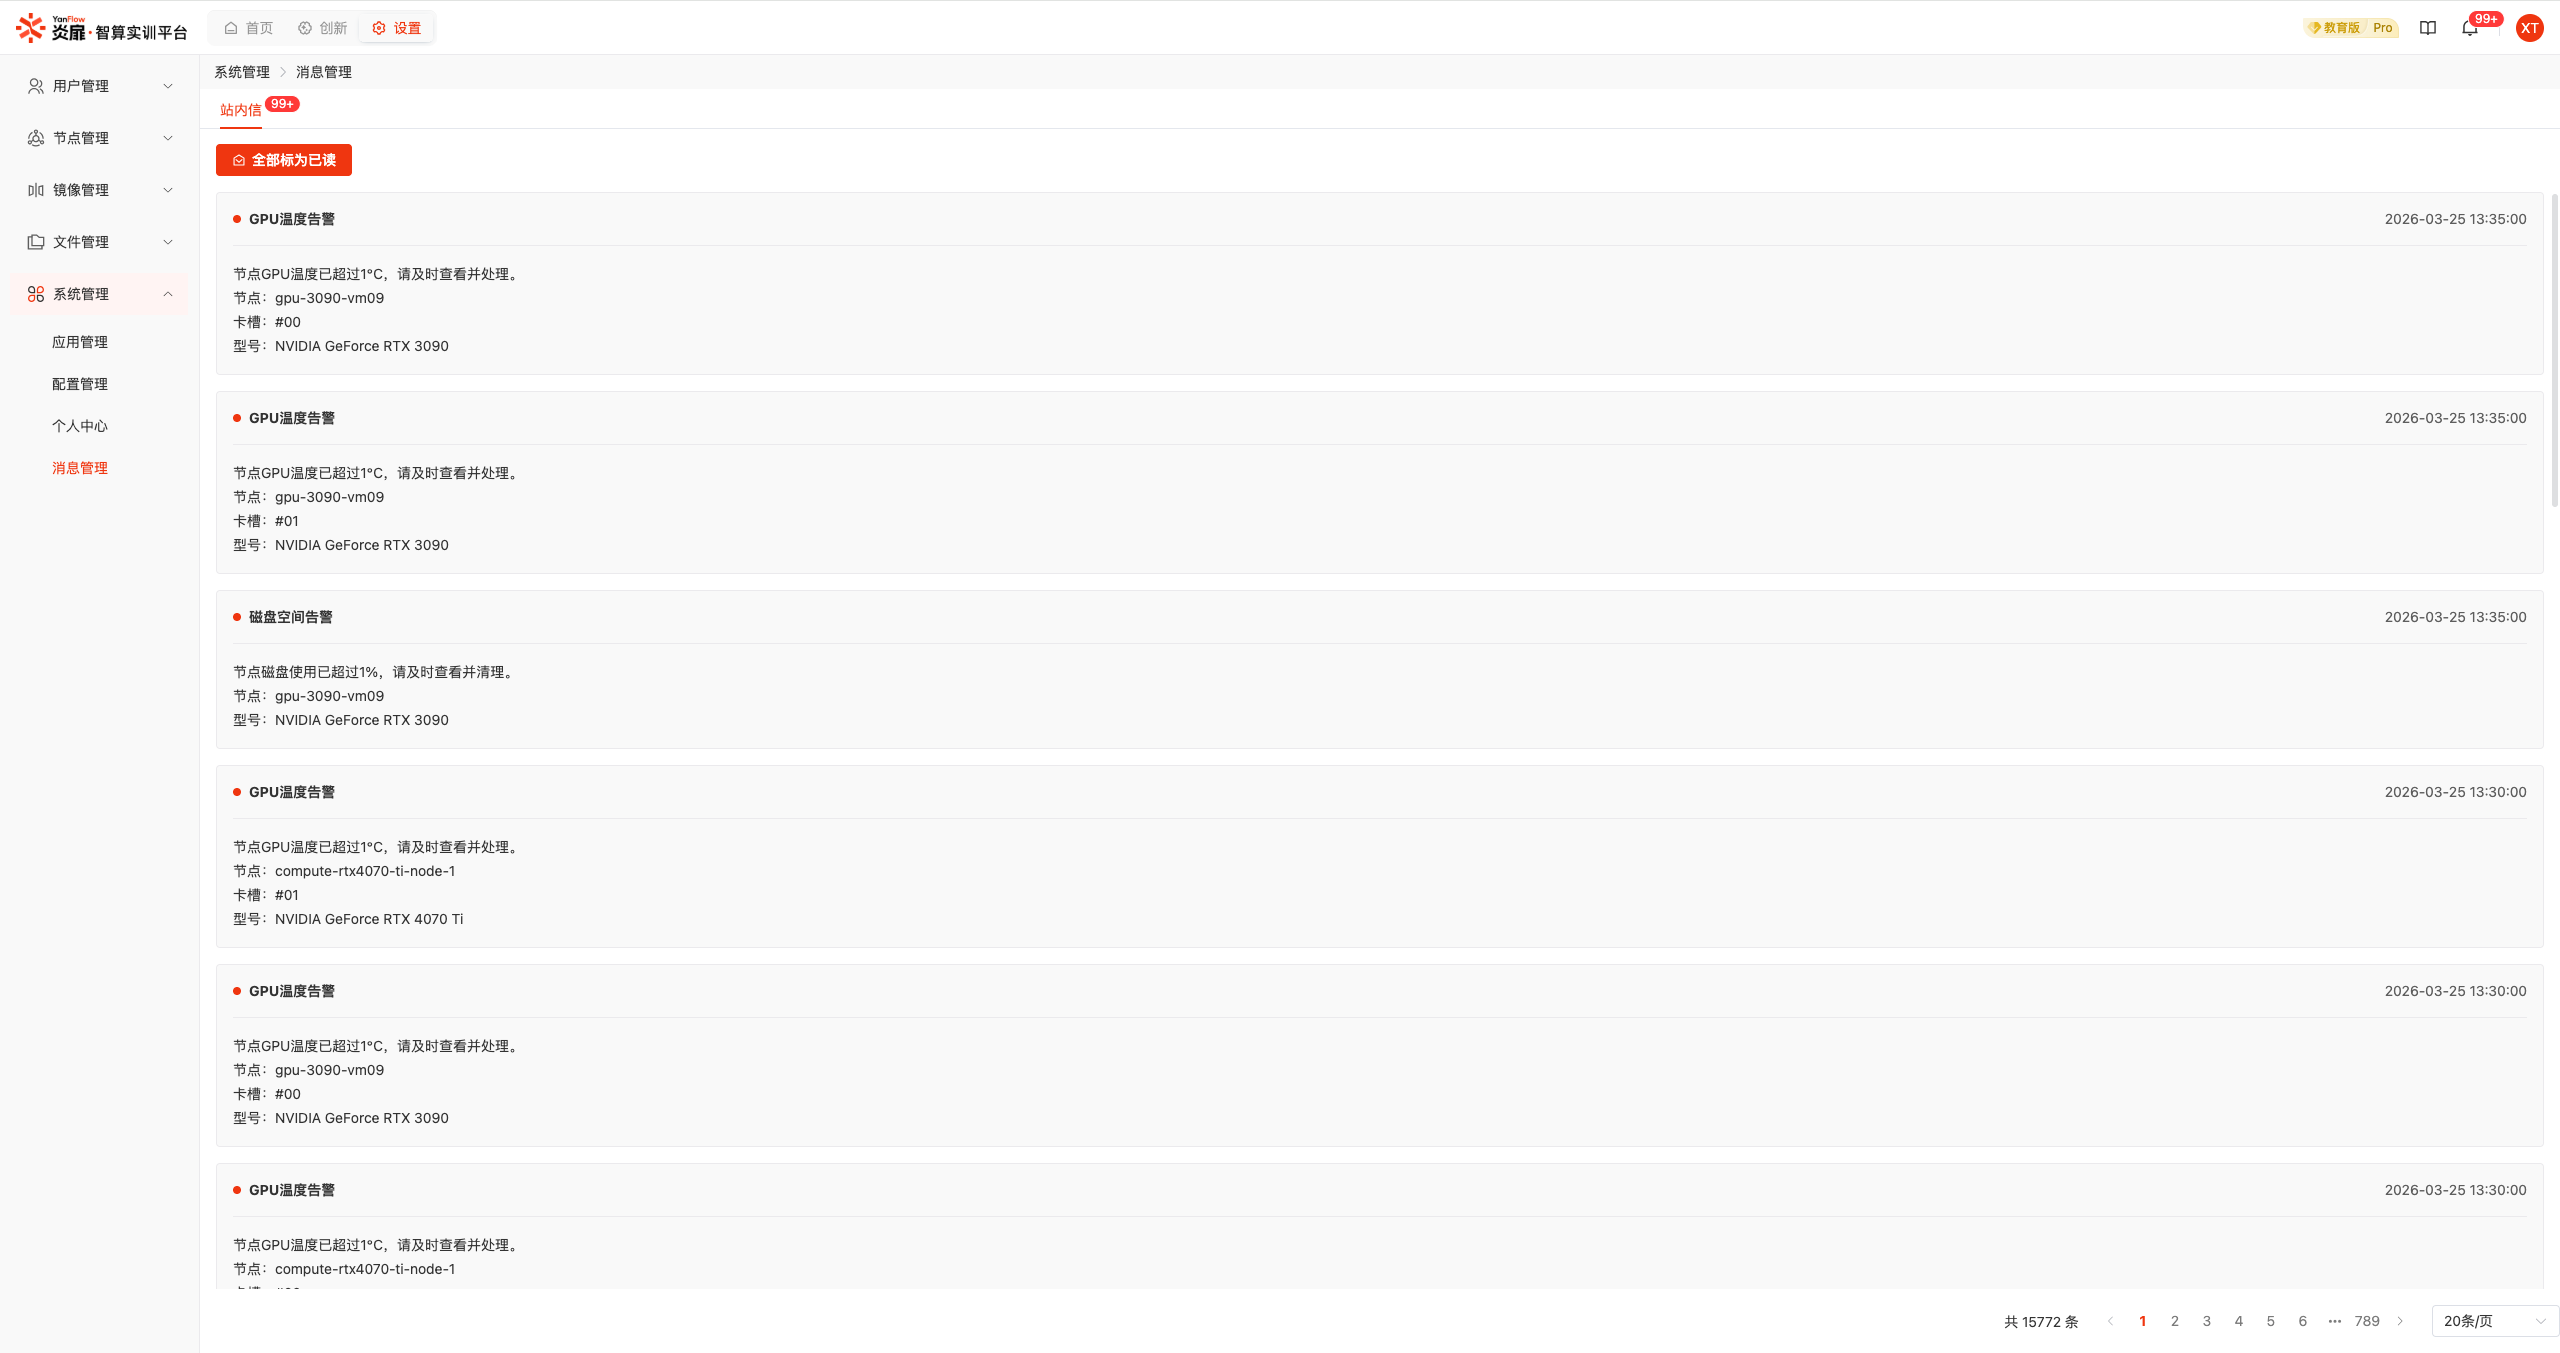
Click Settings - Message Management or the Message Icon in the top-right corner to enter the Message Management page, where you can view all messages pushed to you by the system. If there are unread messages, click the Mark All as Read button to mark all unread messages as read.